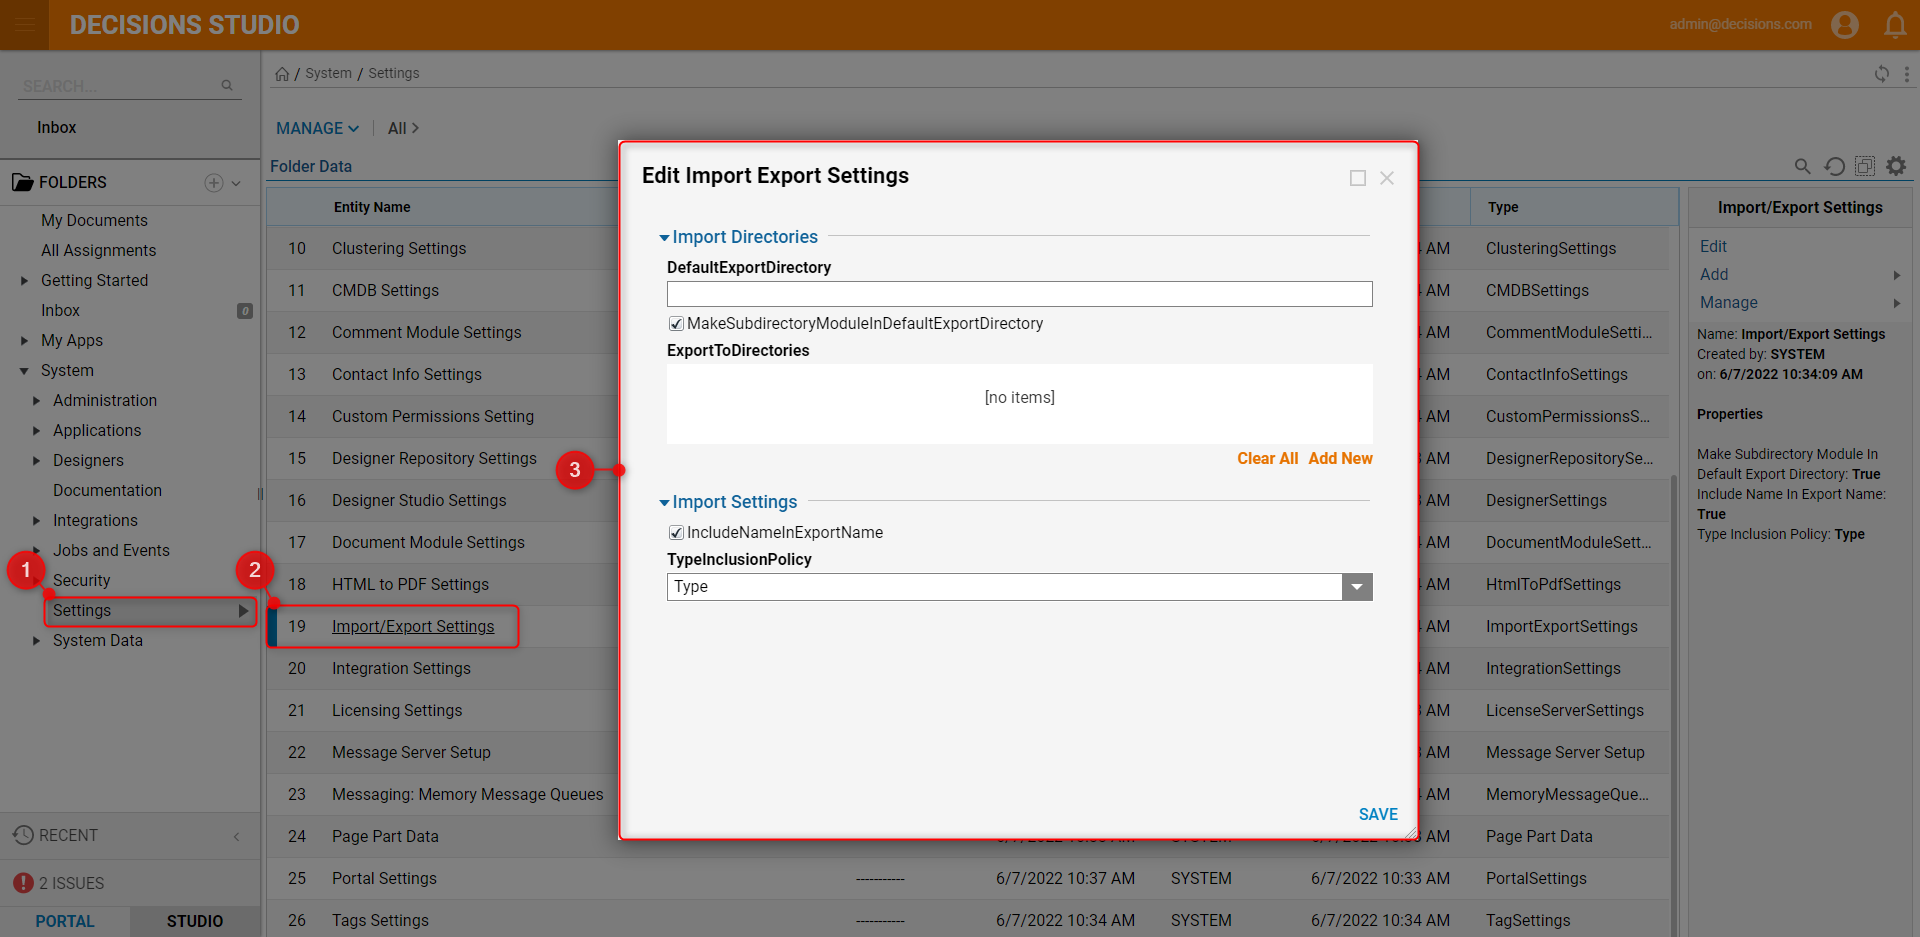
In the event that the Import or Export wizard appears to be running slower than usual upon exporting larger Projects, or that the wizard is exporting too many elements or unwanted elements, users may utilize the Import/Export Settings to adjust which items are included or excluded from Import/Export.
The Import/Export Settings can be found by navigating to System > Settings in the Studio and selecting Import/Export Settings.
| Setting Location | Setting Name | Default | Description |
|---|---|---|---|
| Import Directories | Default Export Directory | Blank | Enter the file path on the local file system where exported .decobj files will be stored for the instance e.g. "C:\Users\decisionsuser\Desktop". |
| Make Subdirectory Module In Default Export Directory | True | Toggles automatic creation of a Sub Folder for each exported Project within the Default Export Directory. | |
| Export To Directories | Blank | Allows selection of which modules to add via the ModuleName to the Default Export Directory with its file path in the Server via the ServerDirectory. | |
| Import Settings | Include Name In Export Name | True | Toggles ability to include a defined Name value in the Export Name. |
| Type Inclusion Policy | Type | Allows selection of which Name to include in the Export Name between Type, ShortType, or None. |
For further information on Settings, visit the Decisions Forum.