Overview
To aid in version control and to view Comments, Documents, External Links, Saves, and Checkpoints associated with a specific Designer Element, Designers are given a variety of History/Documentation Actions and Settings. The following document discusses and demonstrates how to use these features to catalog Designer Elements in Decisions.
History/Documentation Actions
The History/Documentation Actions can be accessed by right-clicking the name of a Designer Element and hovering over the History/Documentation Actions menu.
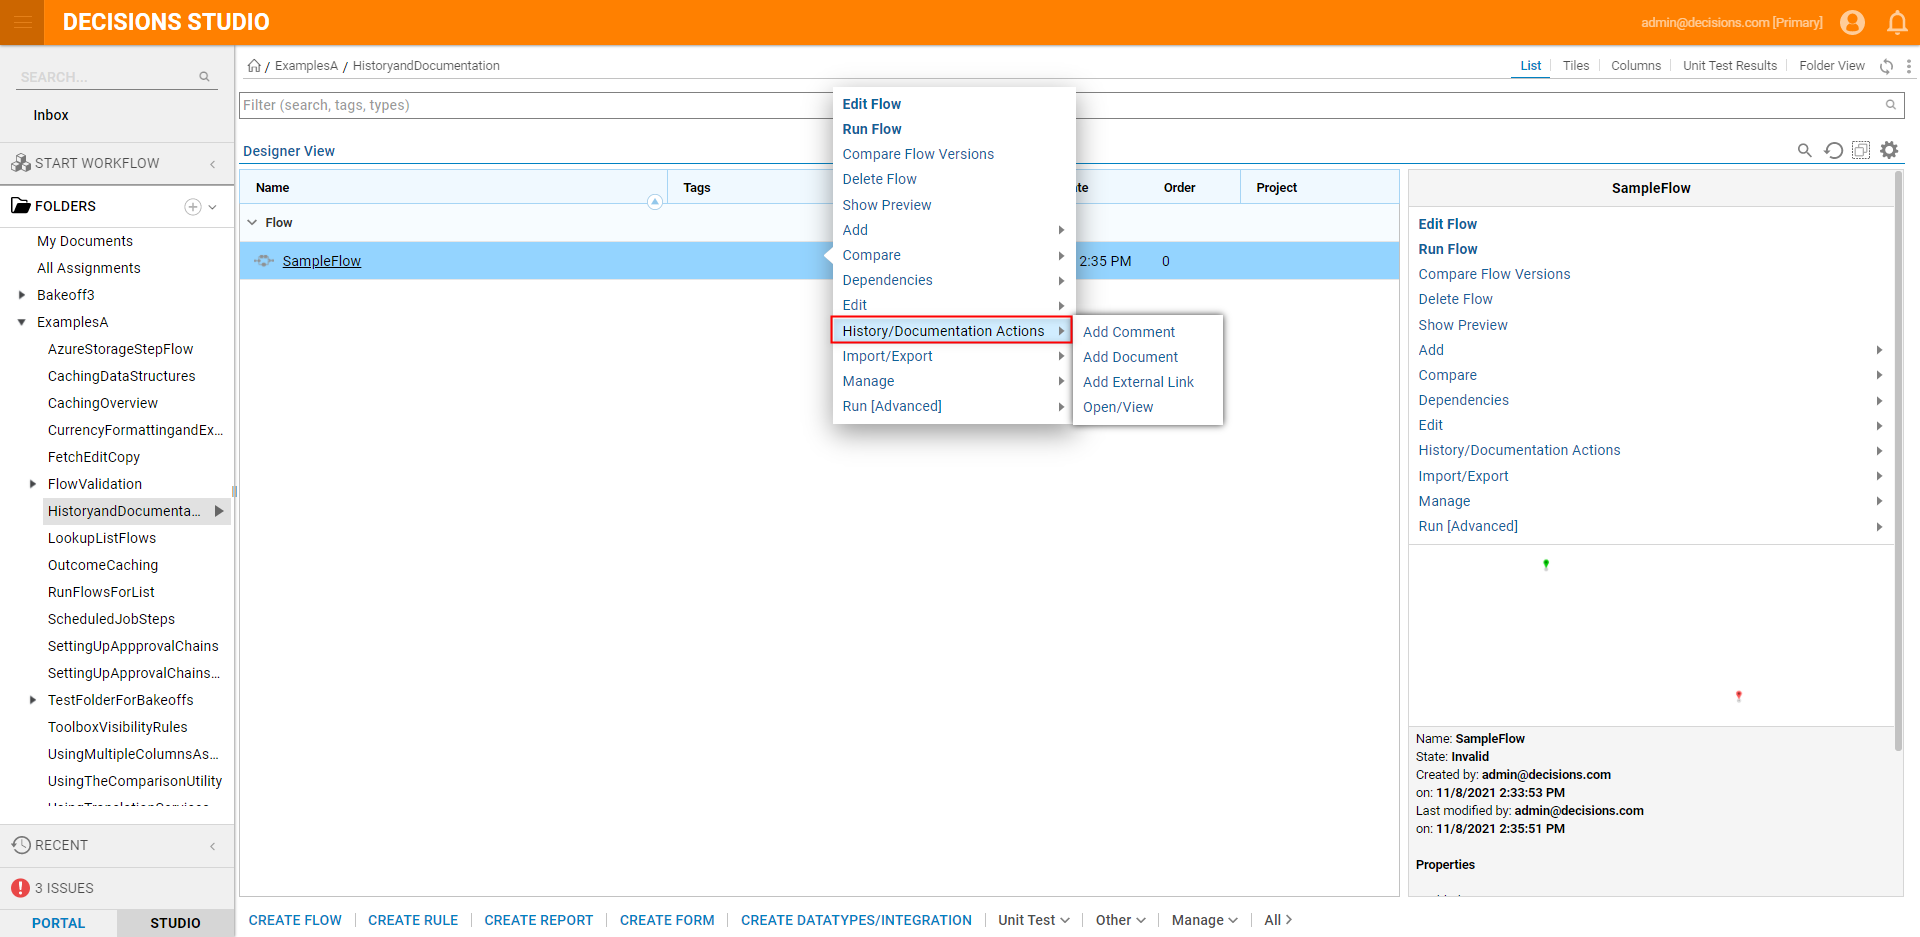
Expanding the History/Documentation menu provides access to the following actions:
| Action Name | Description | Screenshot |
|---|---|---|
| Add Comment | Allows the user to enter a Comment that will appear in the Recent Comments section of the History/Documentation Page. | 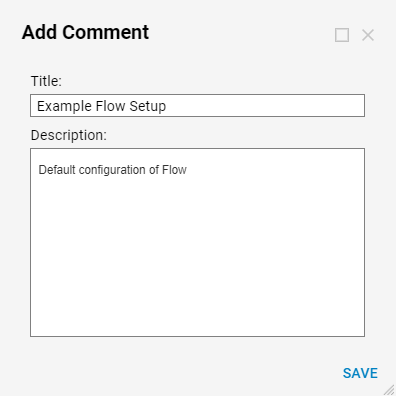 |
| Add Document | Allows the user to add a Document that will be associated with the element and be available for View/Download in the Recent Comments section. | 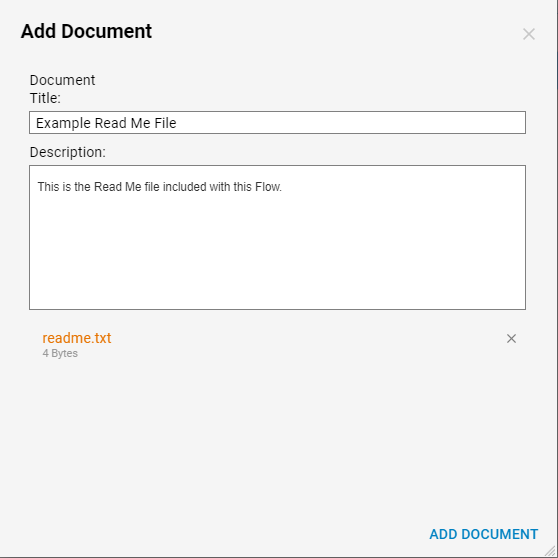 |
| Add External Link | Allows the user to associate an external URL with the element that is available from the Recent Comments section. | 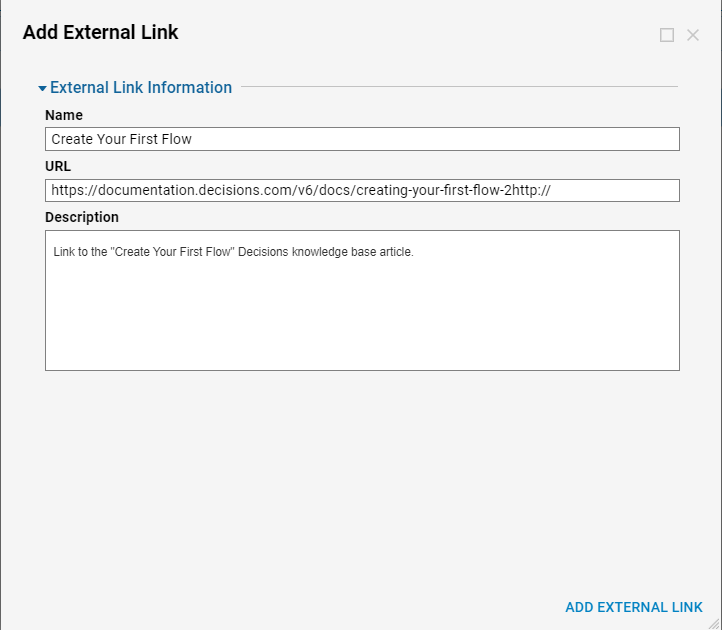 |
History Folder
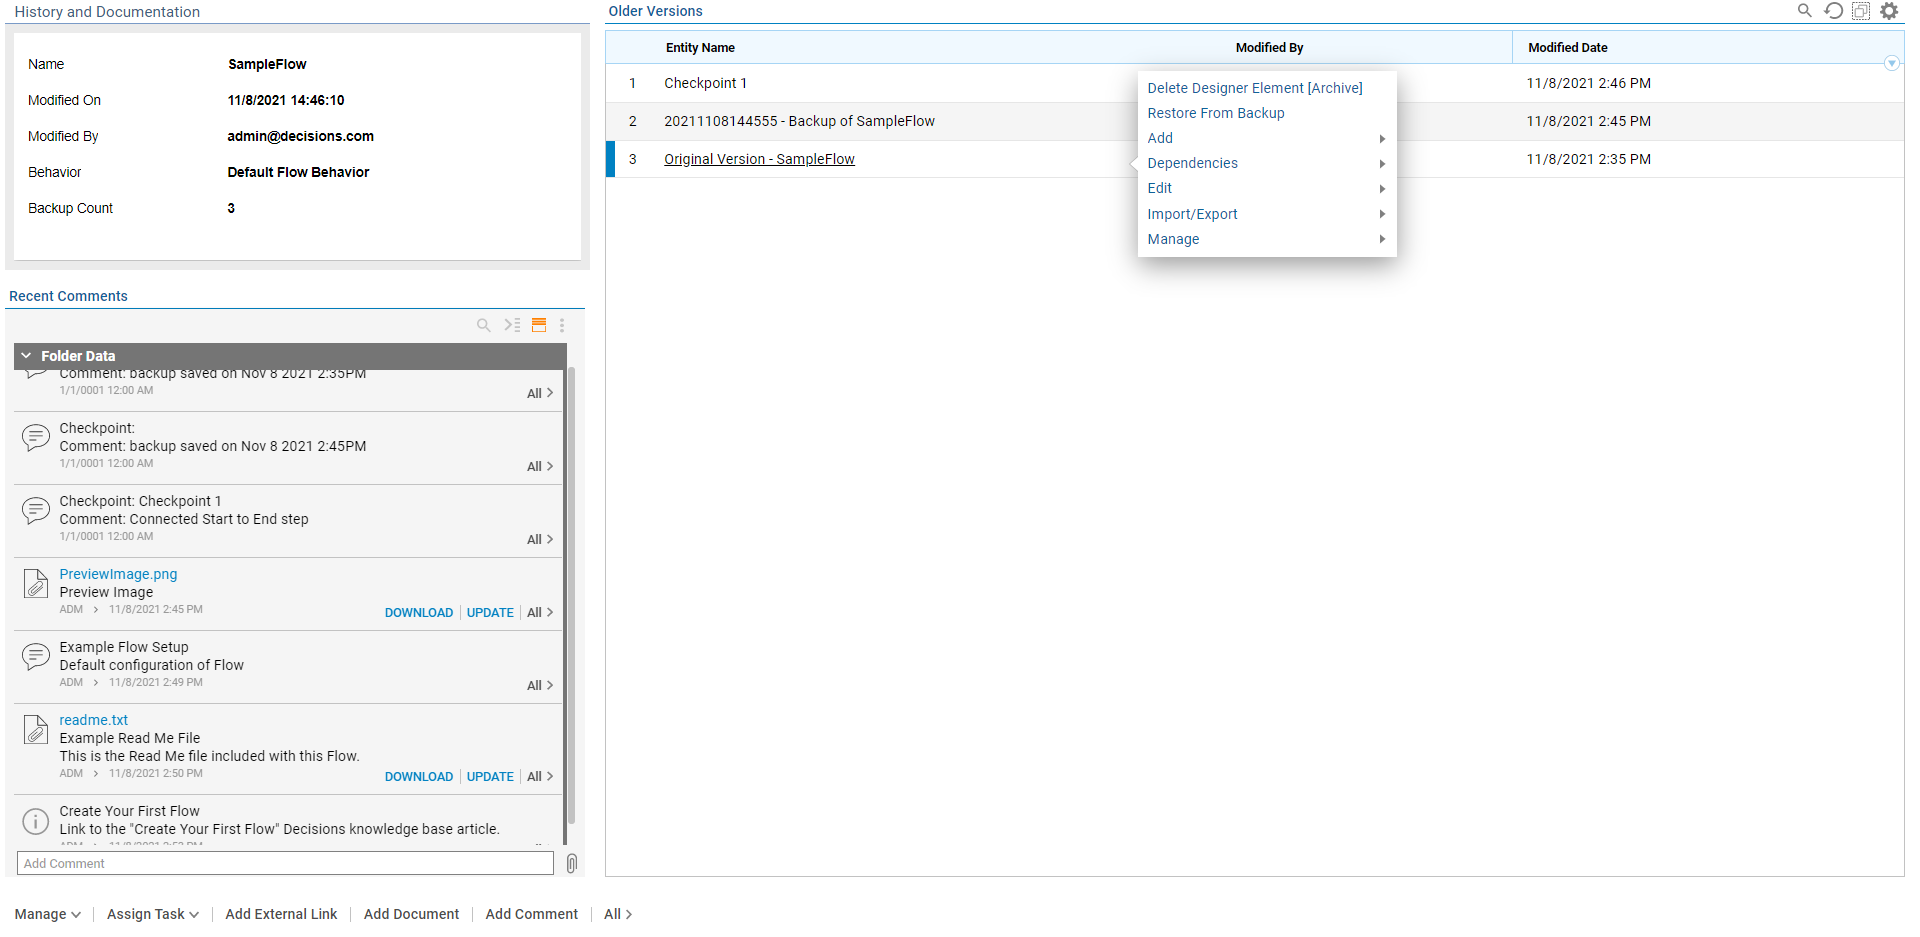
The History Folder of a Designer Element provides information based on the version and history of that specific element. This Folder can be accessed by right-clicking a Designer Element and selecting History/Documentation Actions > Open/View.
The Folder's Page displays the following three sections:
| Section Name | Description |
|---|---|
| History and Documentation | Shows the element's Name, Modified On date, the Modified By email, the Behavior type, and the amount of Backups that are available for the item (Backup Count). |
| Older Versions | Displays all Backups or Saves/Checkpoints for the element. Right-clicking one of the backups exposes a new Action menu with options for utilizing the Backup. This includes the ability to Restore From Backup, management options, and more. |
| Recent Comments | Displays all added Comments, Documents (with Download/Update options), External Links, and Preview Images associated with the element. |
Archive Settings
As a way of storing and removing different versions of a Designer Element, Decisions archives older versions of an element before marking them for permanent deletion. To control the time taken and the type of objects that will be archived, users may adjust both the Archive Settings and the Archive Settings within the Designer Studio Settings, within the System Folder.
To access the Archive Settings:
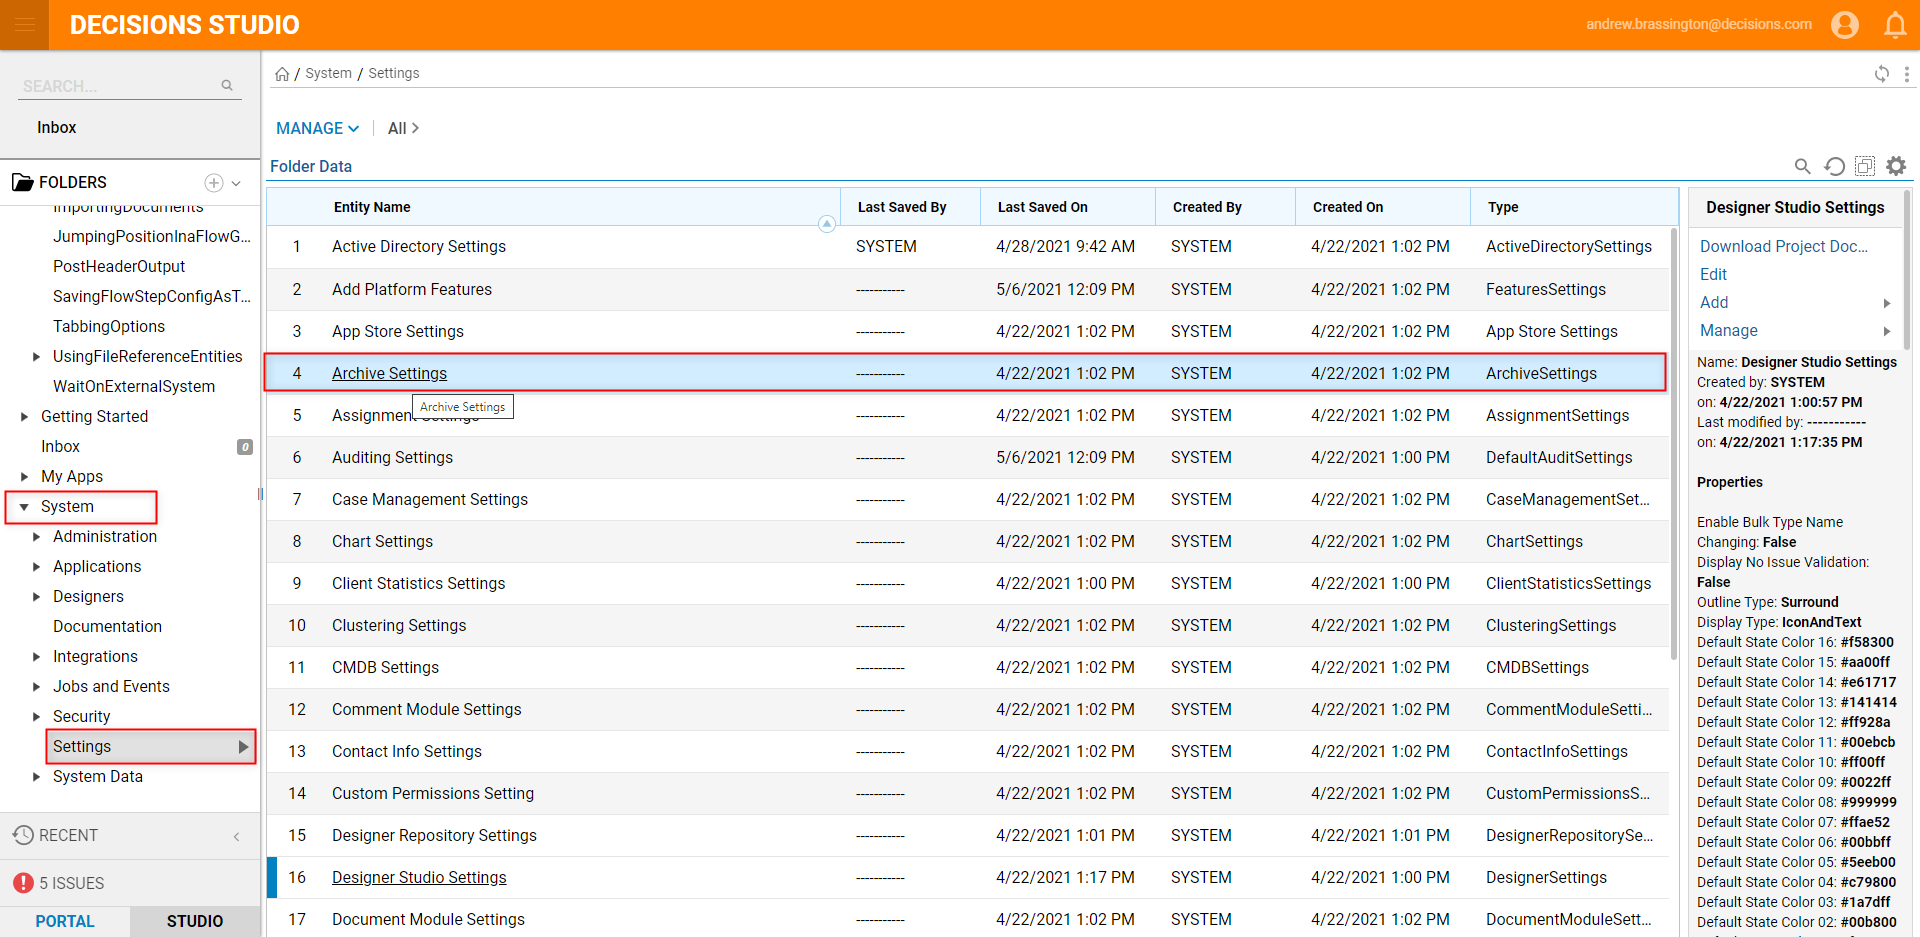
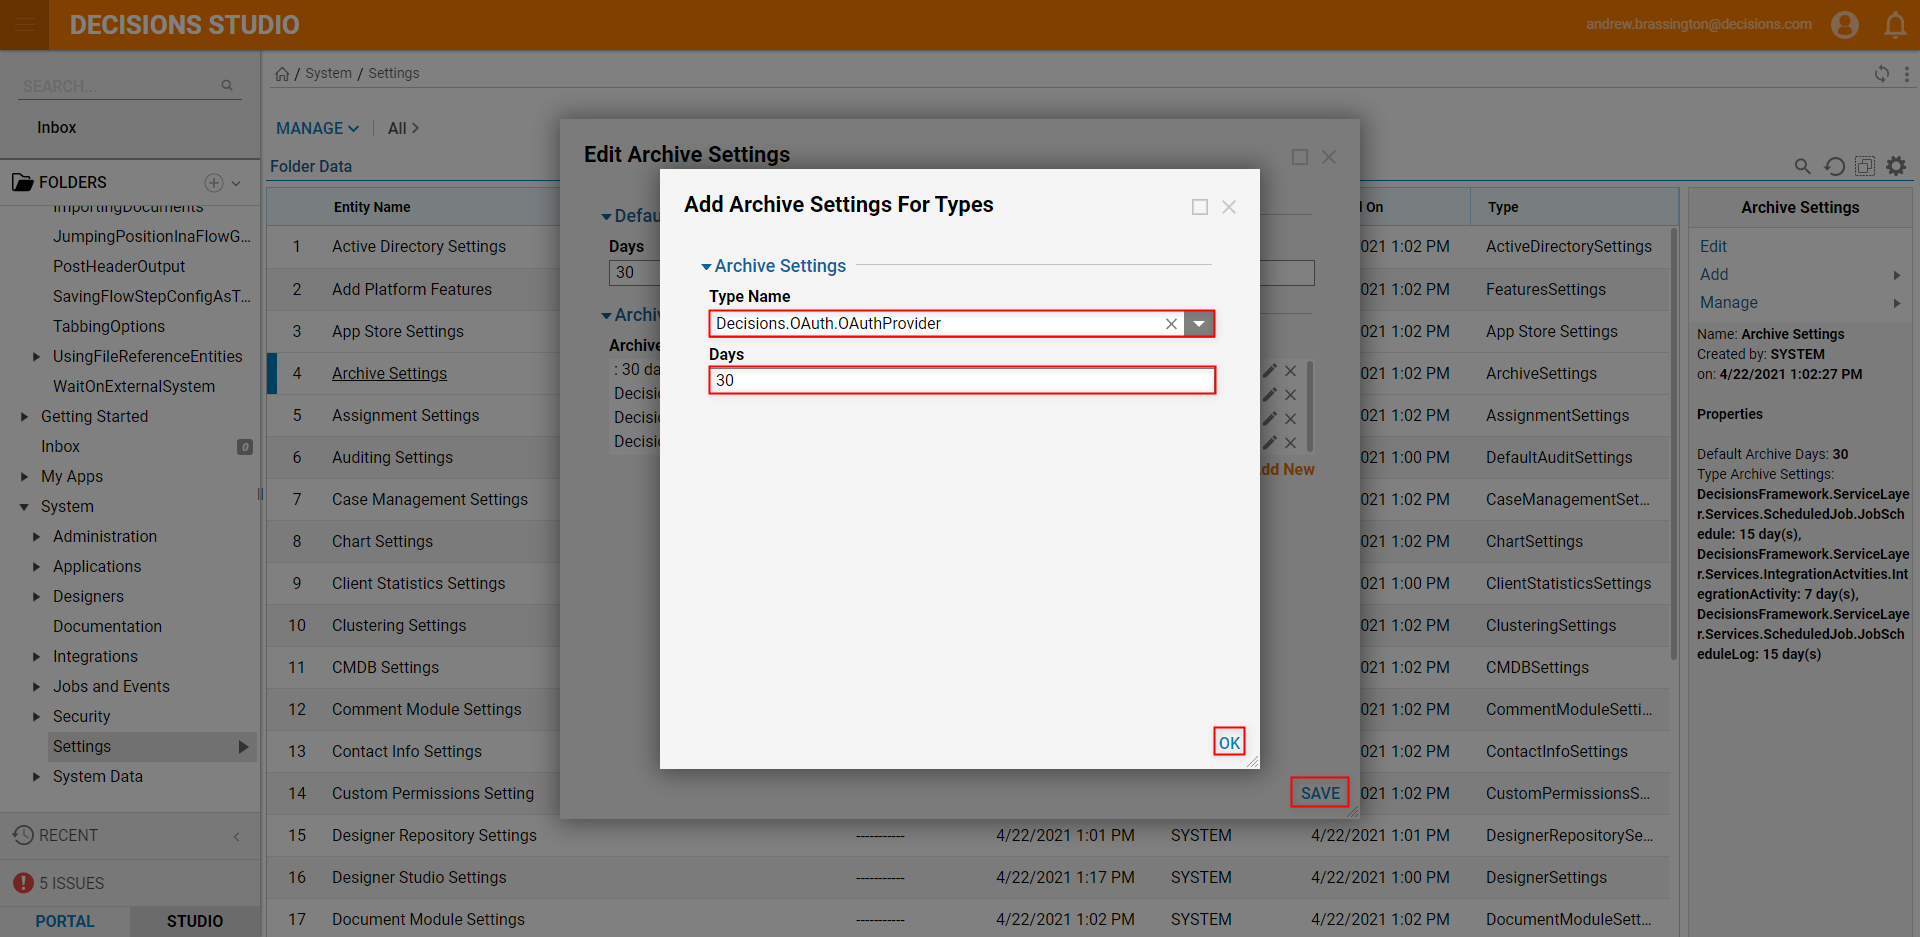
- From the Decisions Studio, navigate to System > Settings, then right-click Archive Settings and select Edit.
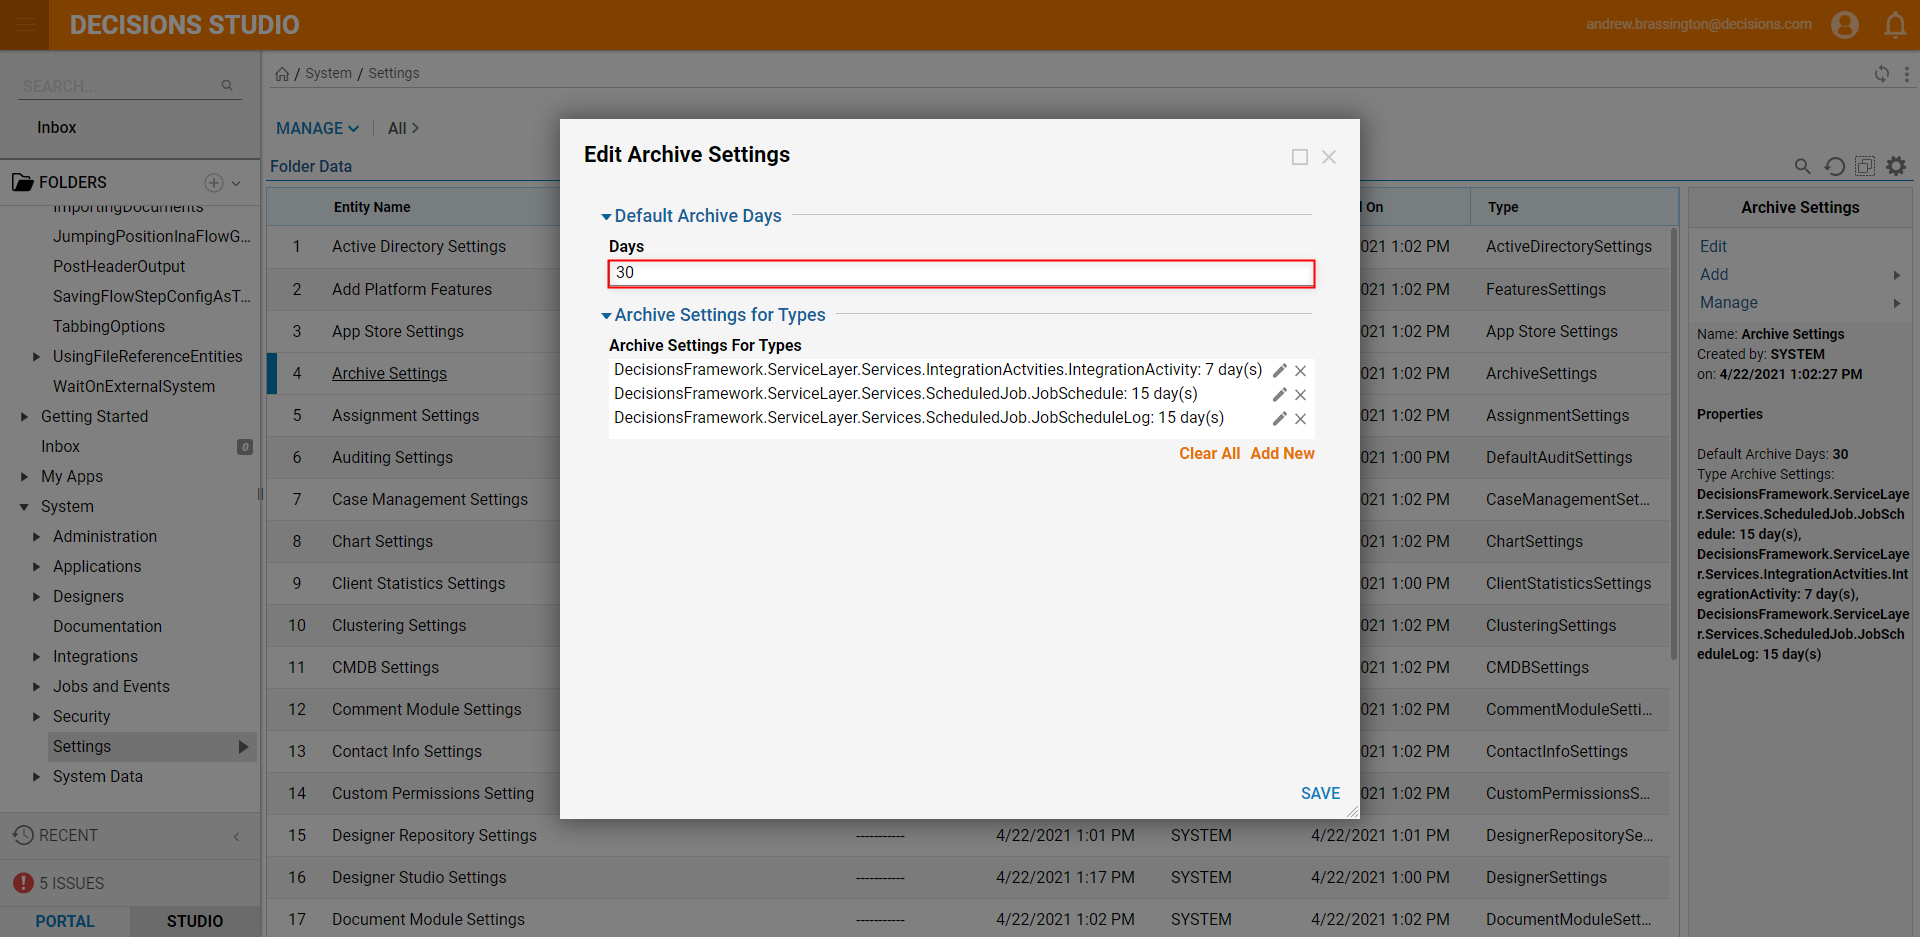
- Under Default Archive Days > Days, define the desired amount number of days. Note on Default Archive DaysThis setting is used to establish how many days any archived item remains before it is permanently removed from the Database.
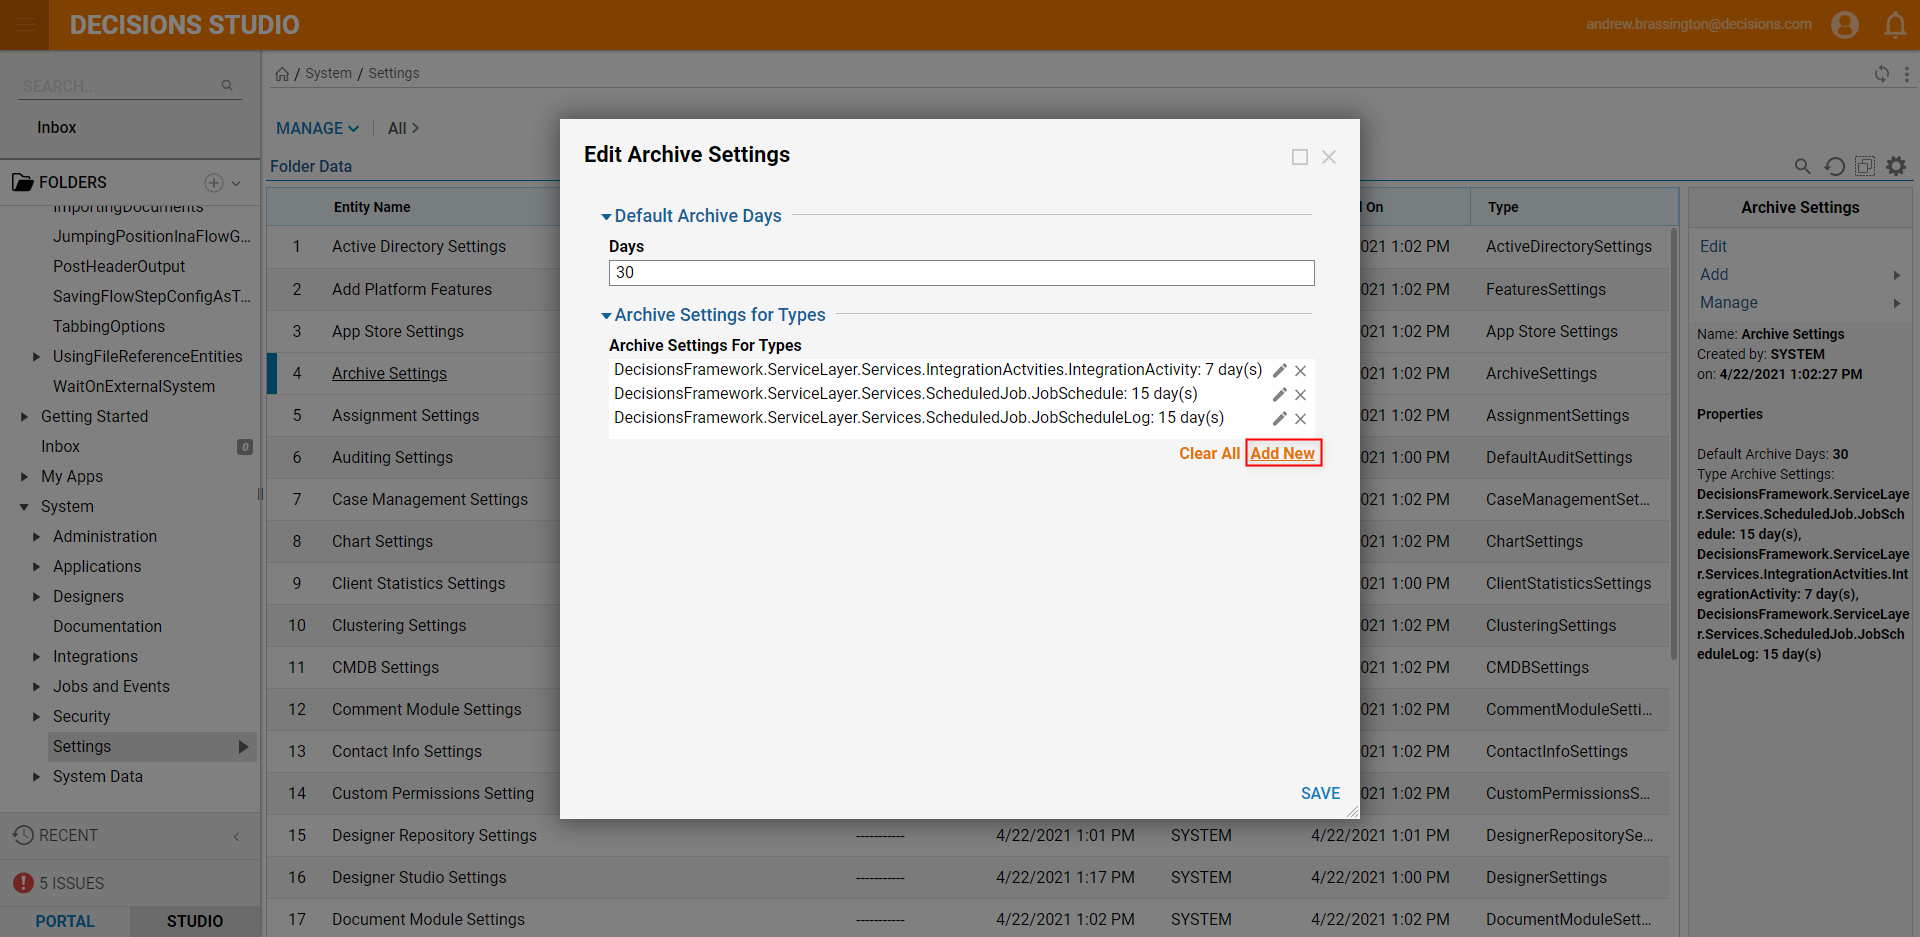
- To define settings for a specific Type of Designer Element, under Archive Settings For Types, click Add New,
- From the Add Archive Settings For Types window, select or search for the desired Type Name then define the desired number of Days. Click OK and then SAVE to apply changes.
Designer Studio Settings: Archive
To adjust additional Archive Settings:
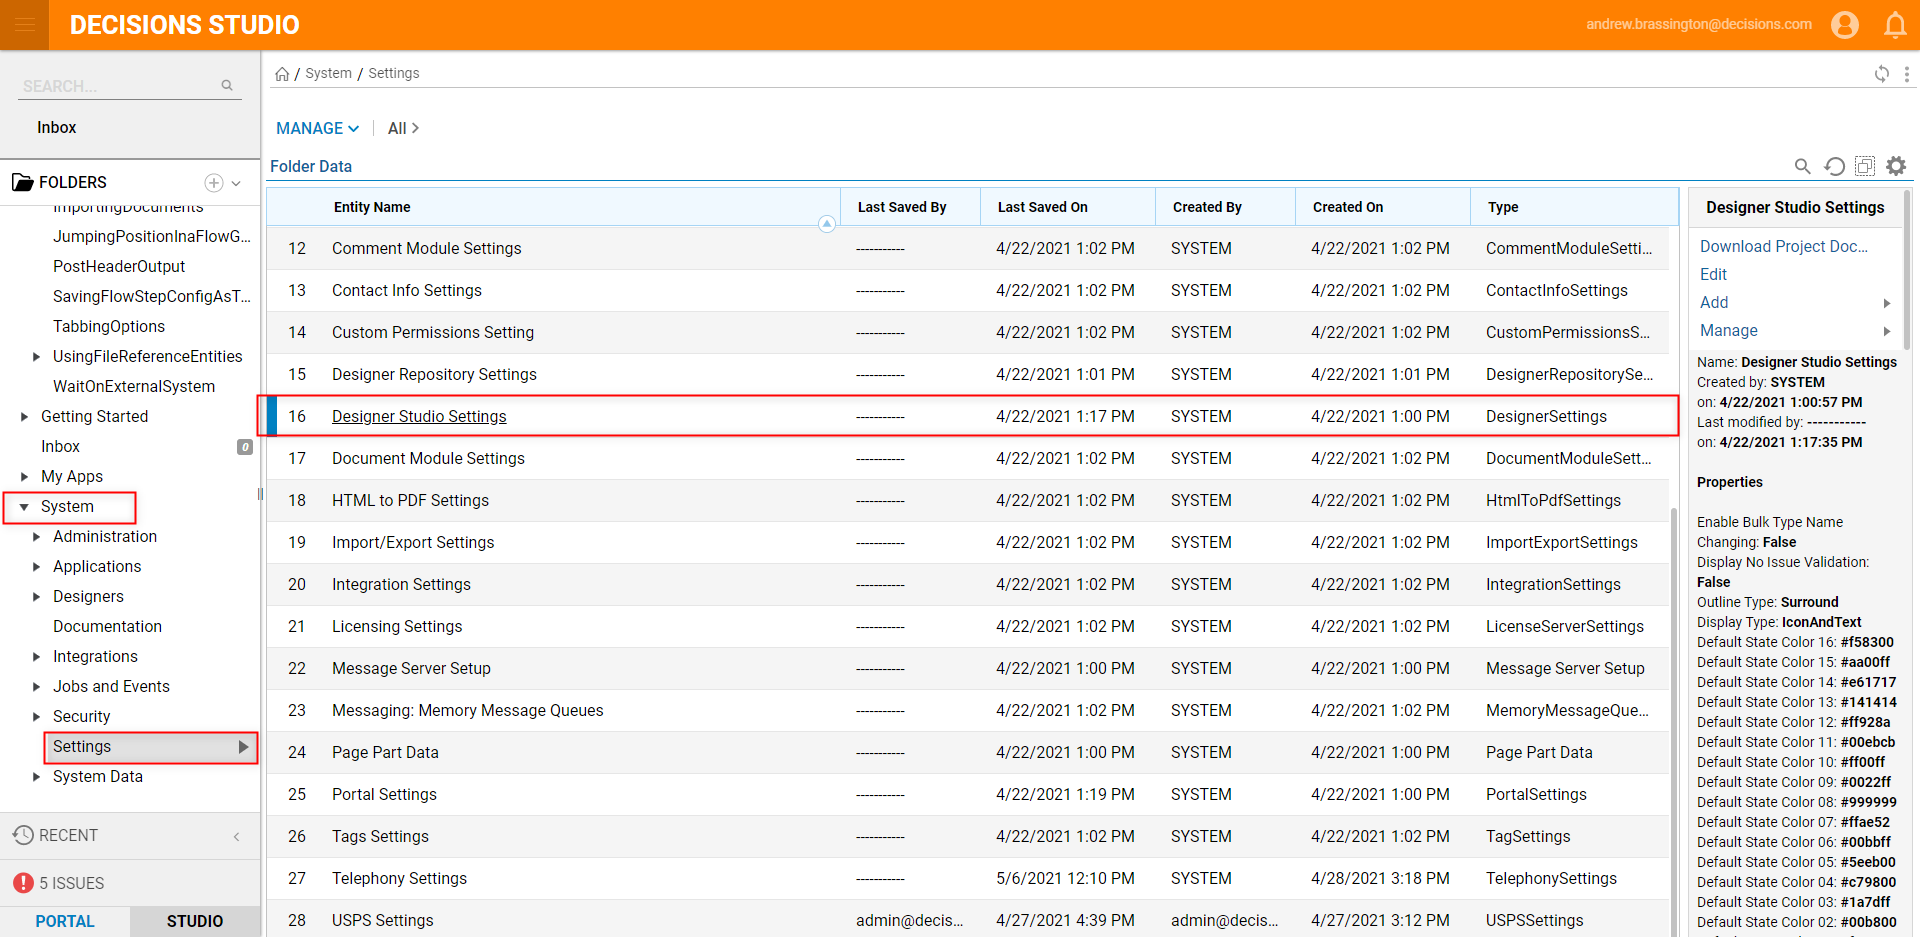
- Navigate to System > Settings > Designer Studio Settings.
- Under Archive check Archive Old Versions on Save. Then set the desired timespan under Ignore Versions Less Than Age.About Designer Studio Archive SettingsThe Ignore Versions Less Than Age setting will archive any versions older than the established Age.
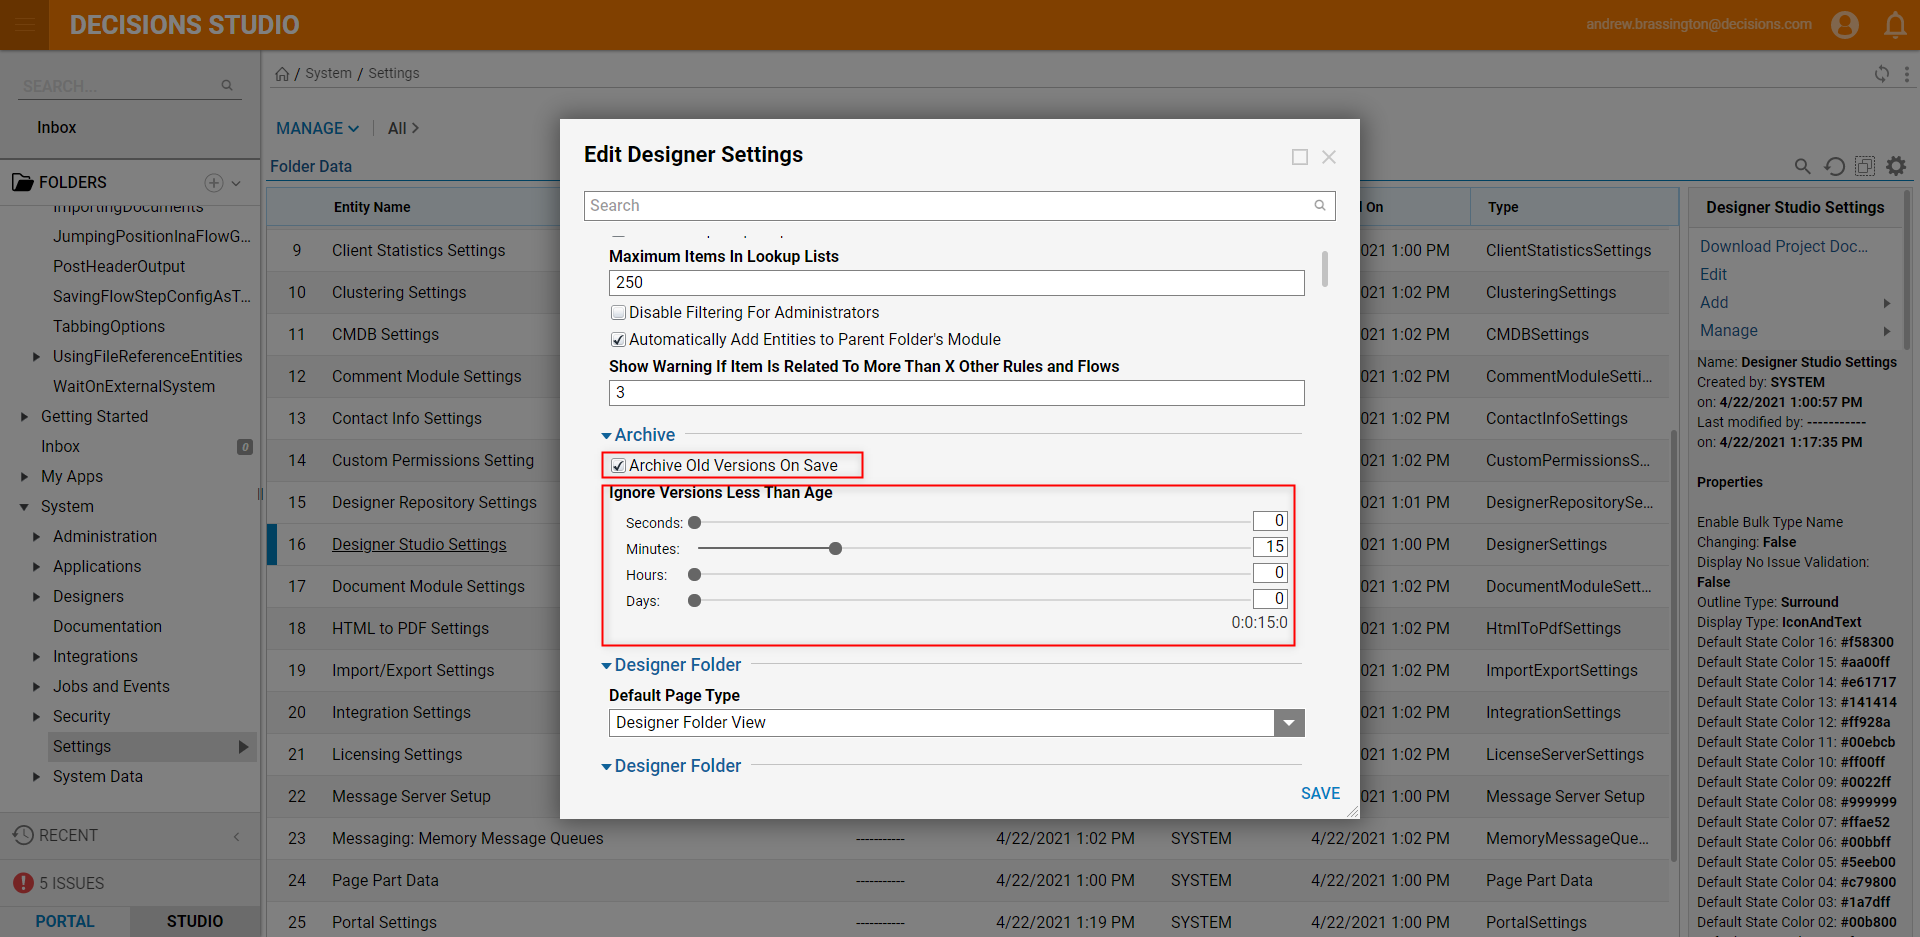
Click SAVE to apply any changes.