Overview
Assigned Forms can process responses directly via email through a user replying to an email with an answer, from a user clicking a link in an email, or offering both options. This means that to respond, users don’t need to open the assigned Form in the Portal and click a button to respond. The user can instead reply directly via one of these two email-based options and the Form will take the path specified by the response.
Example
In this example, a comment will come back from the assigned user in an email.
In addition, a basic assignment Form will be needed. Create one for this use case or import the attached Form to the Decisions environment. Note that all buttons in this example Form can be changed, may not be used, or may be different from the example.
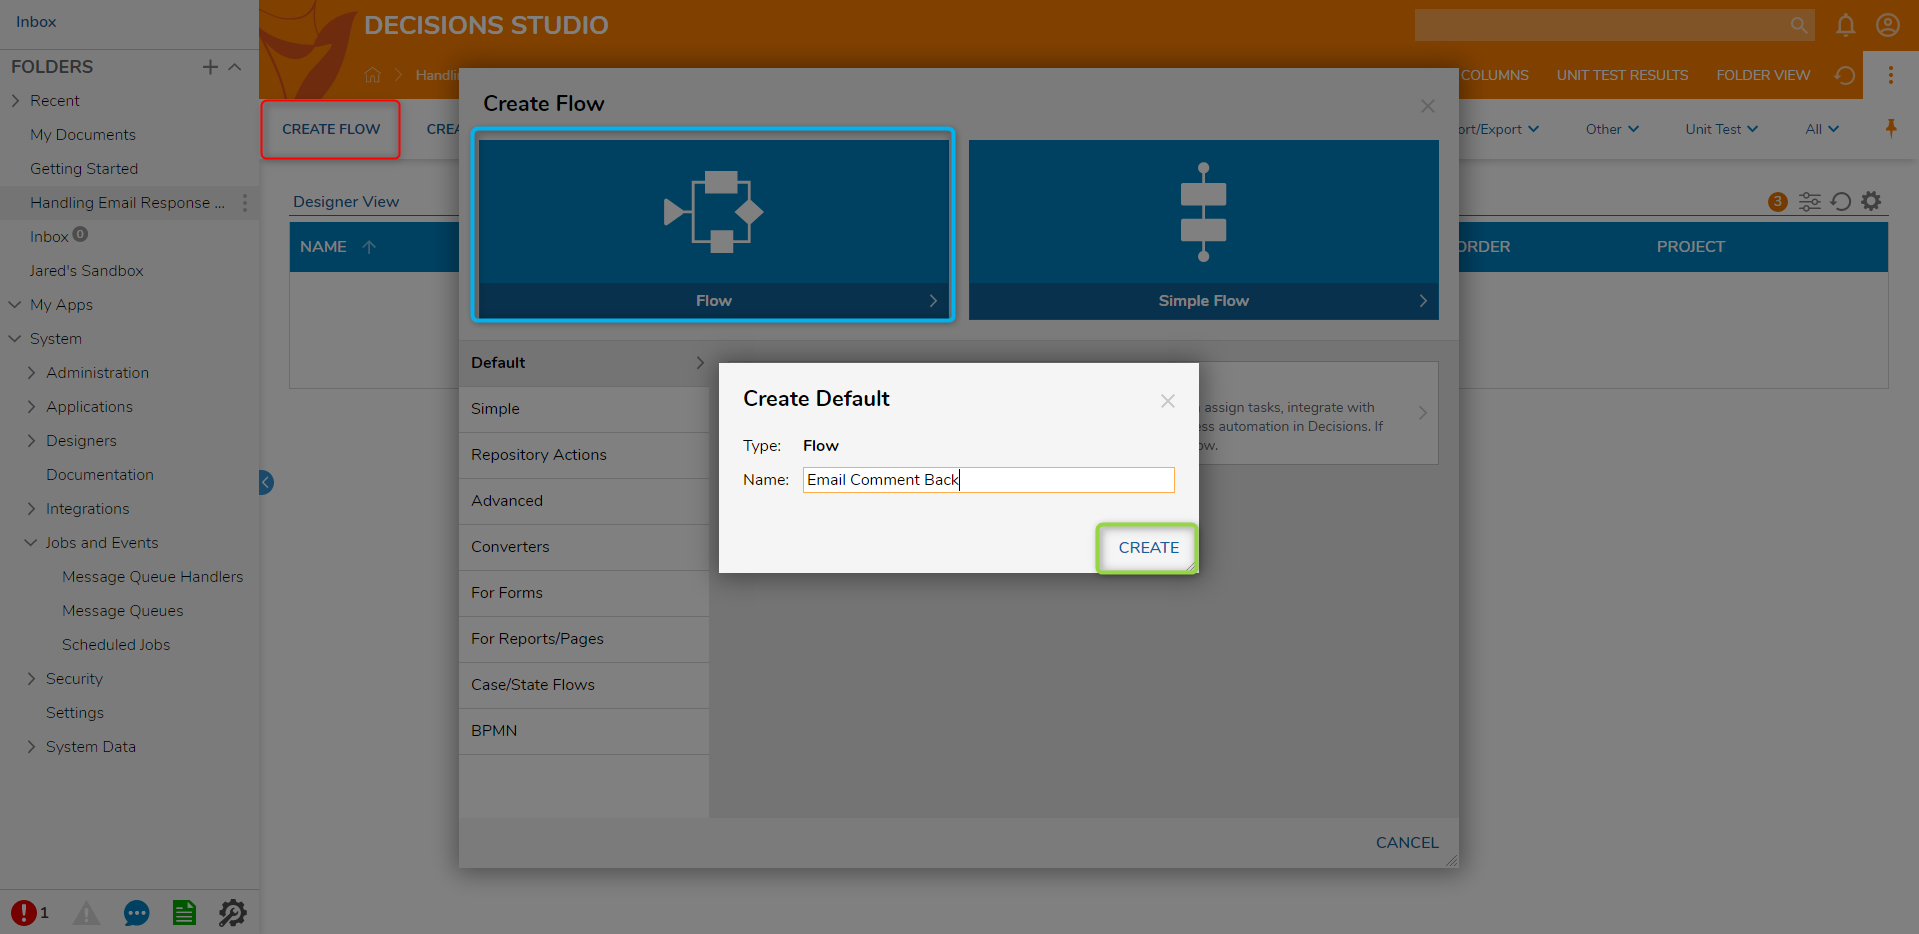
Now that the response job is configured, a new Flow will be created with an Assigned Form. Begin in a Designer Folder and click the CREATE FLOW button located on the Action Bar at the bottom of the screen.
- Select CREATE for the default Flow template, name the Flow on the next screen, then select CREATE again. The Flow Designer will open.
- In the Flow Designer, drag the Show Form step on to the Flow canvas and change the Assignment Type to Assigned.
- Click the Form icon in the Flow Designer to populate the properties for this Step on the right side. Locate the Assignment section of the properties and expand it.
- Locate the Assignment Type drop down list and pick the Assigned option.
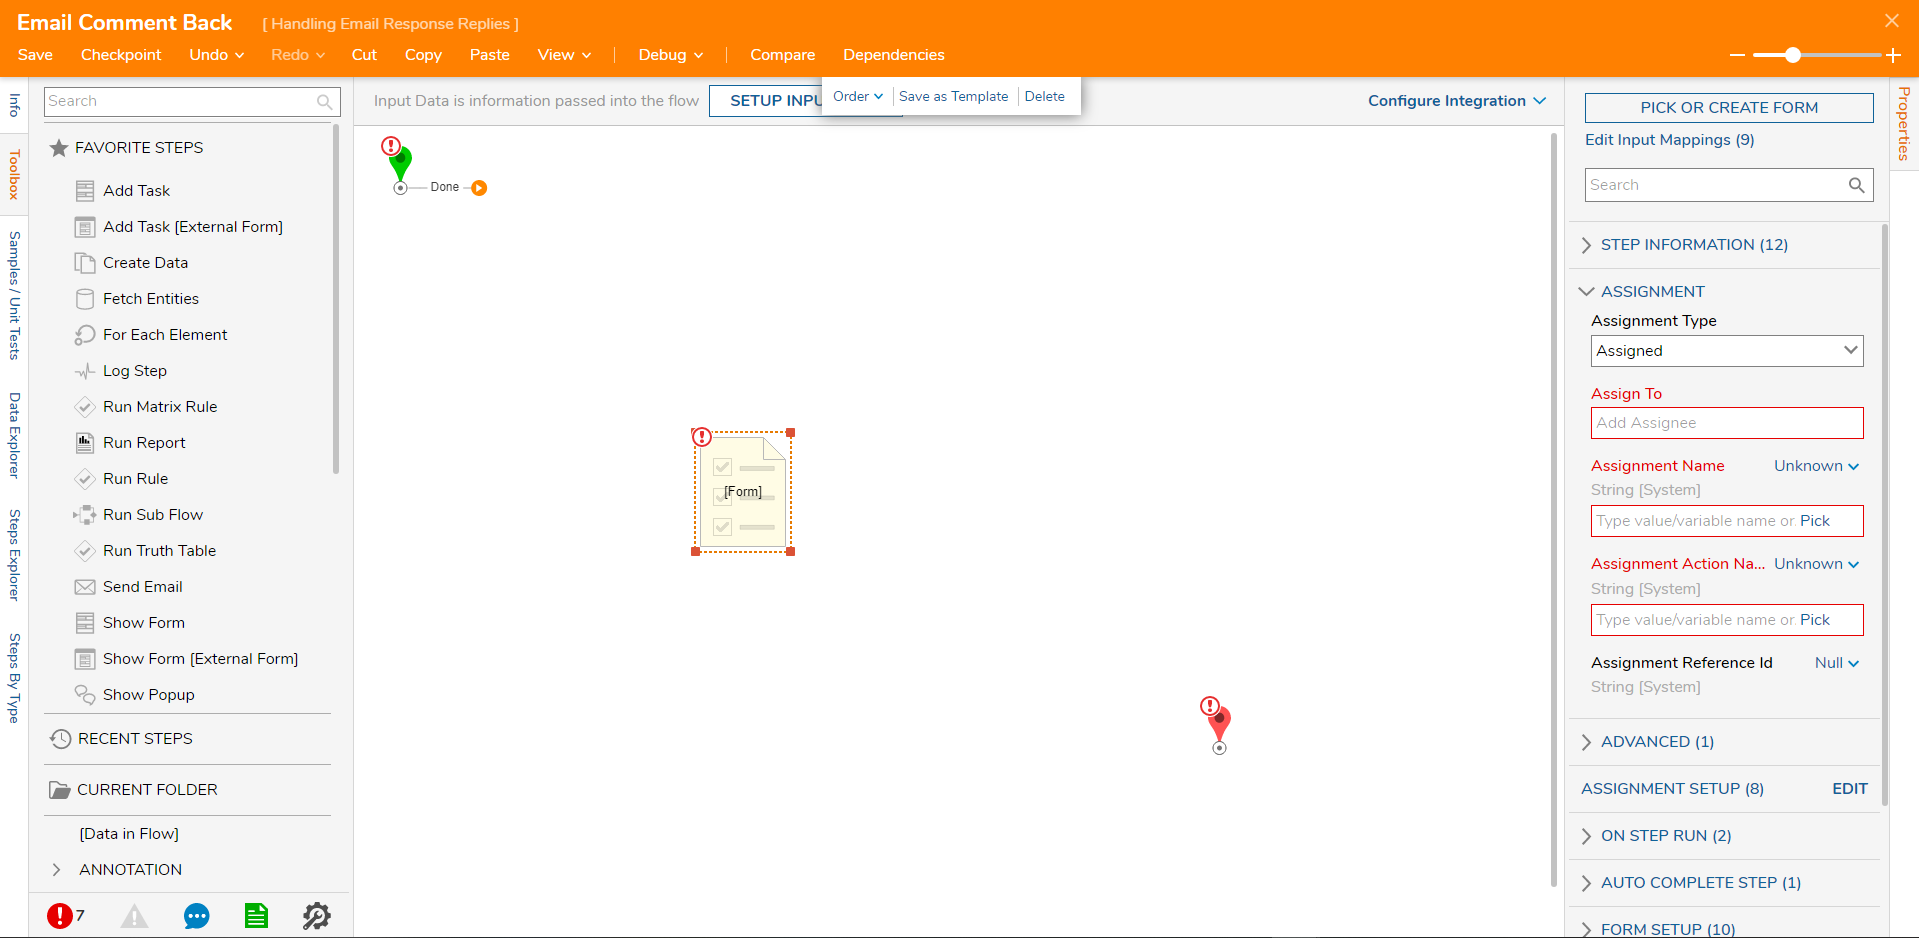
- Since responses will be handled from outside the context of the Form (where normally responses would be handled via buttons on the Form), the alternate paths that will be allowed out of the Form need to be defined.
- Locate the Assignment Setup section with the EDIT button that has appeared in the properties, then click EDIT.
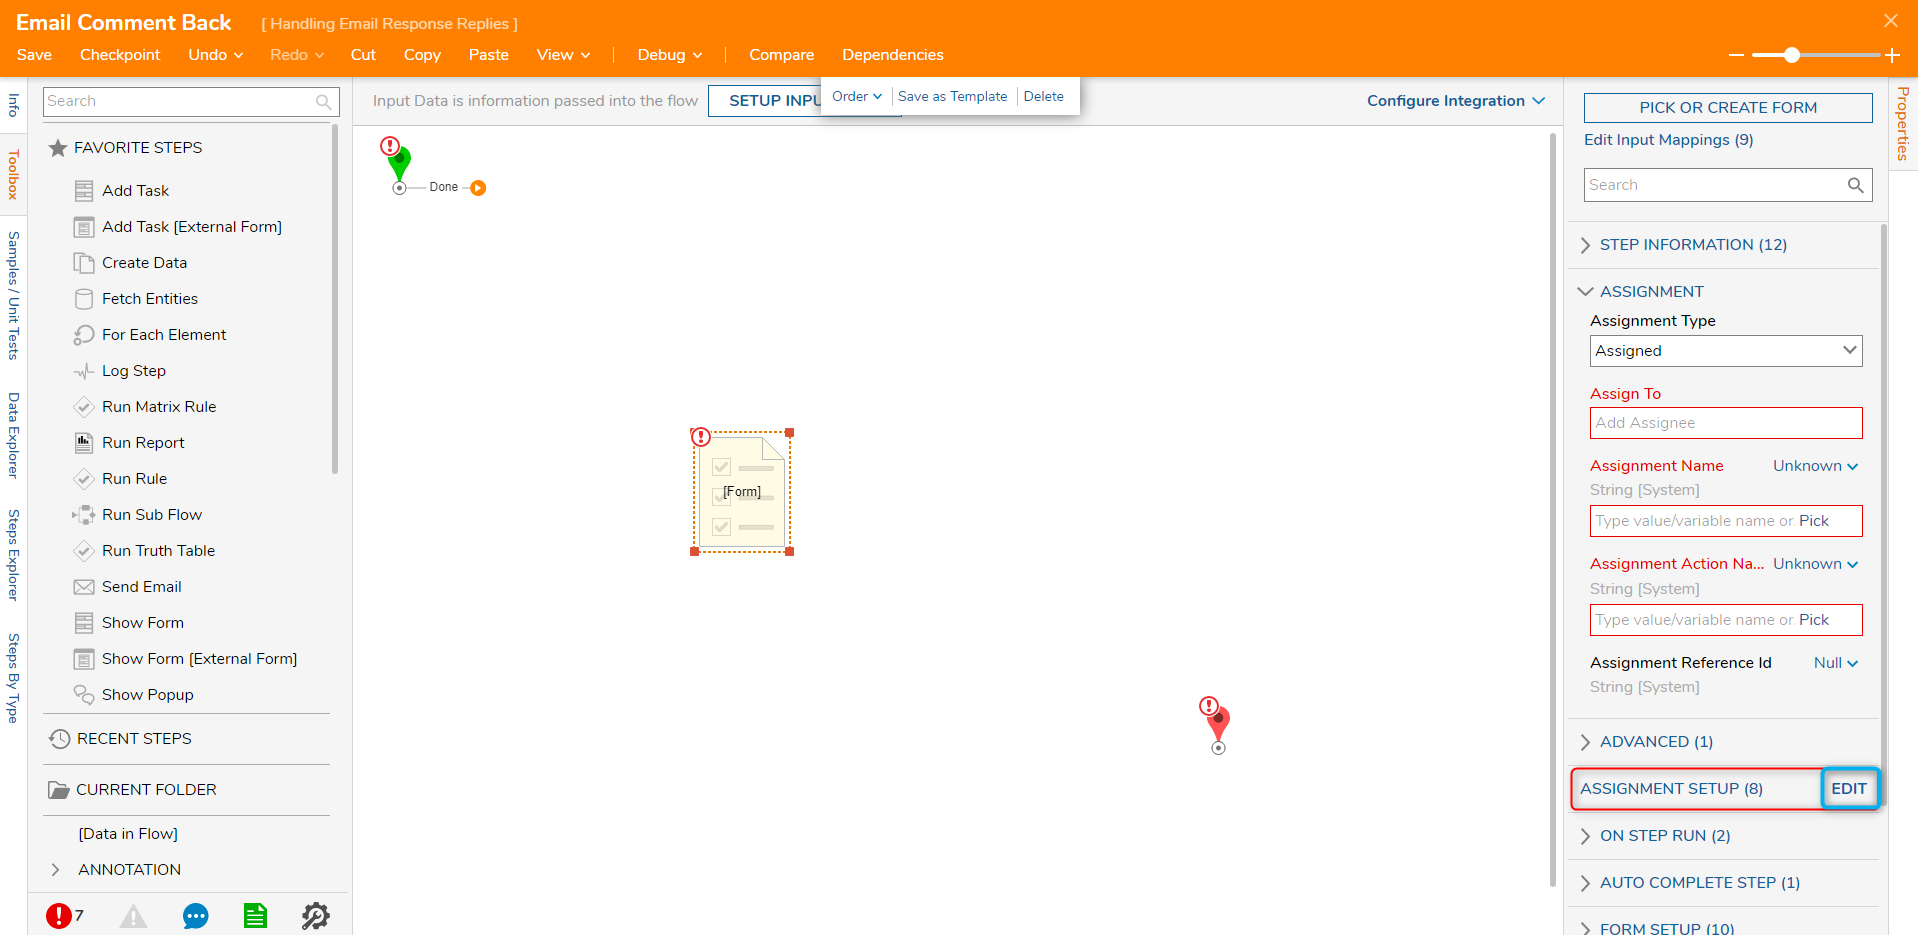
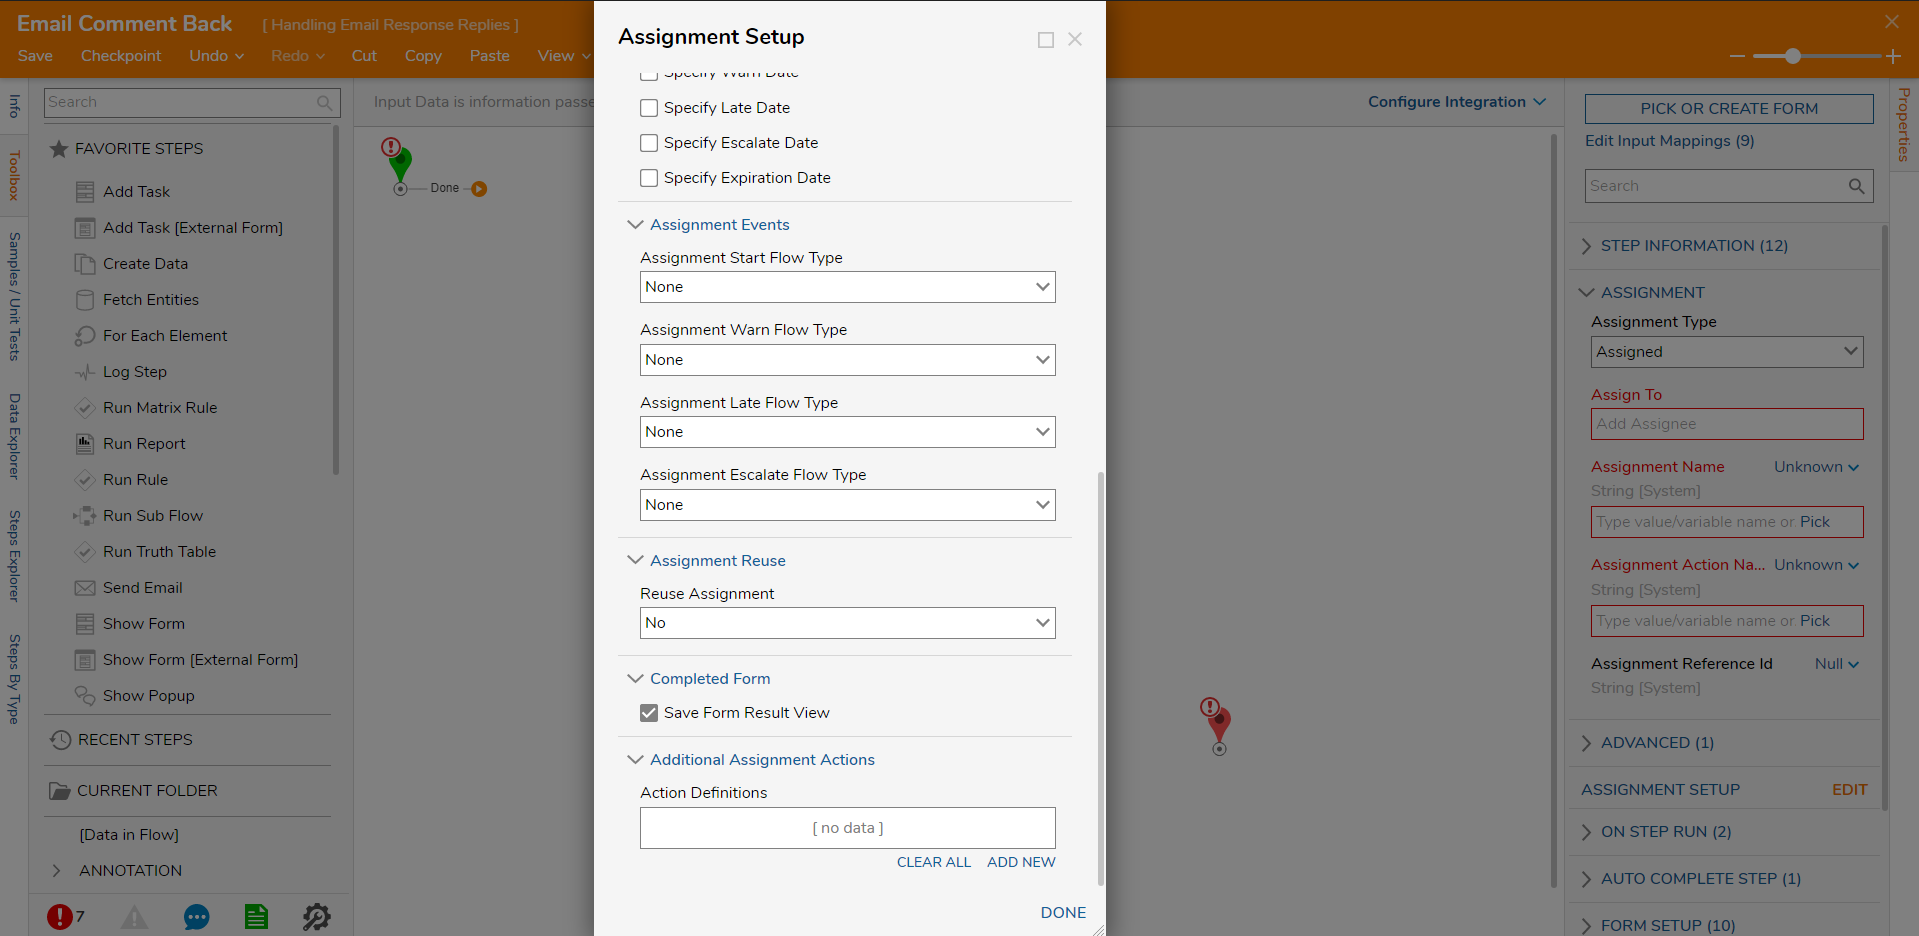
- When the 'Assignment Setup' window appears, scroll down to the Additional Assignment Actions section and click Add New under the Action Definitions box.
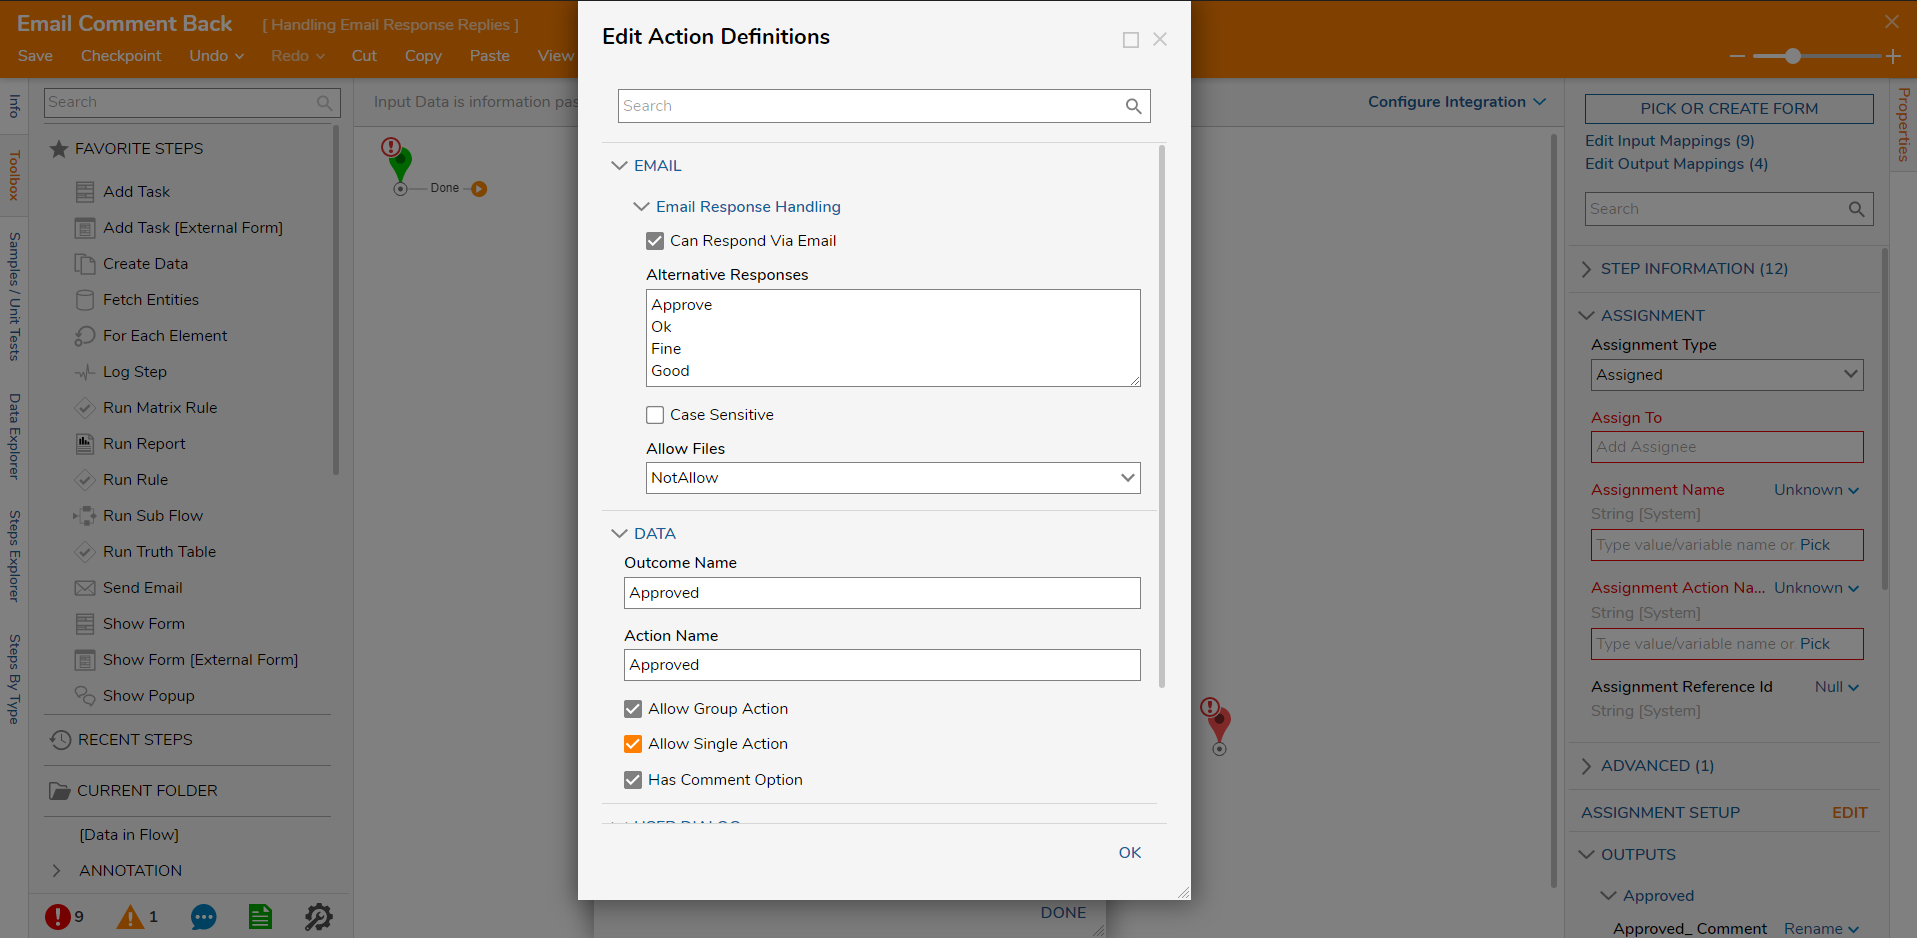
 For an 'Approve' Action DefinitionIn the Add Action Definitions window, please configure the options as shown in the screenshot below:
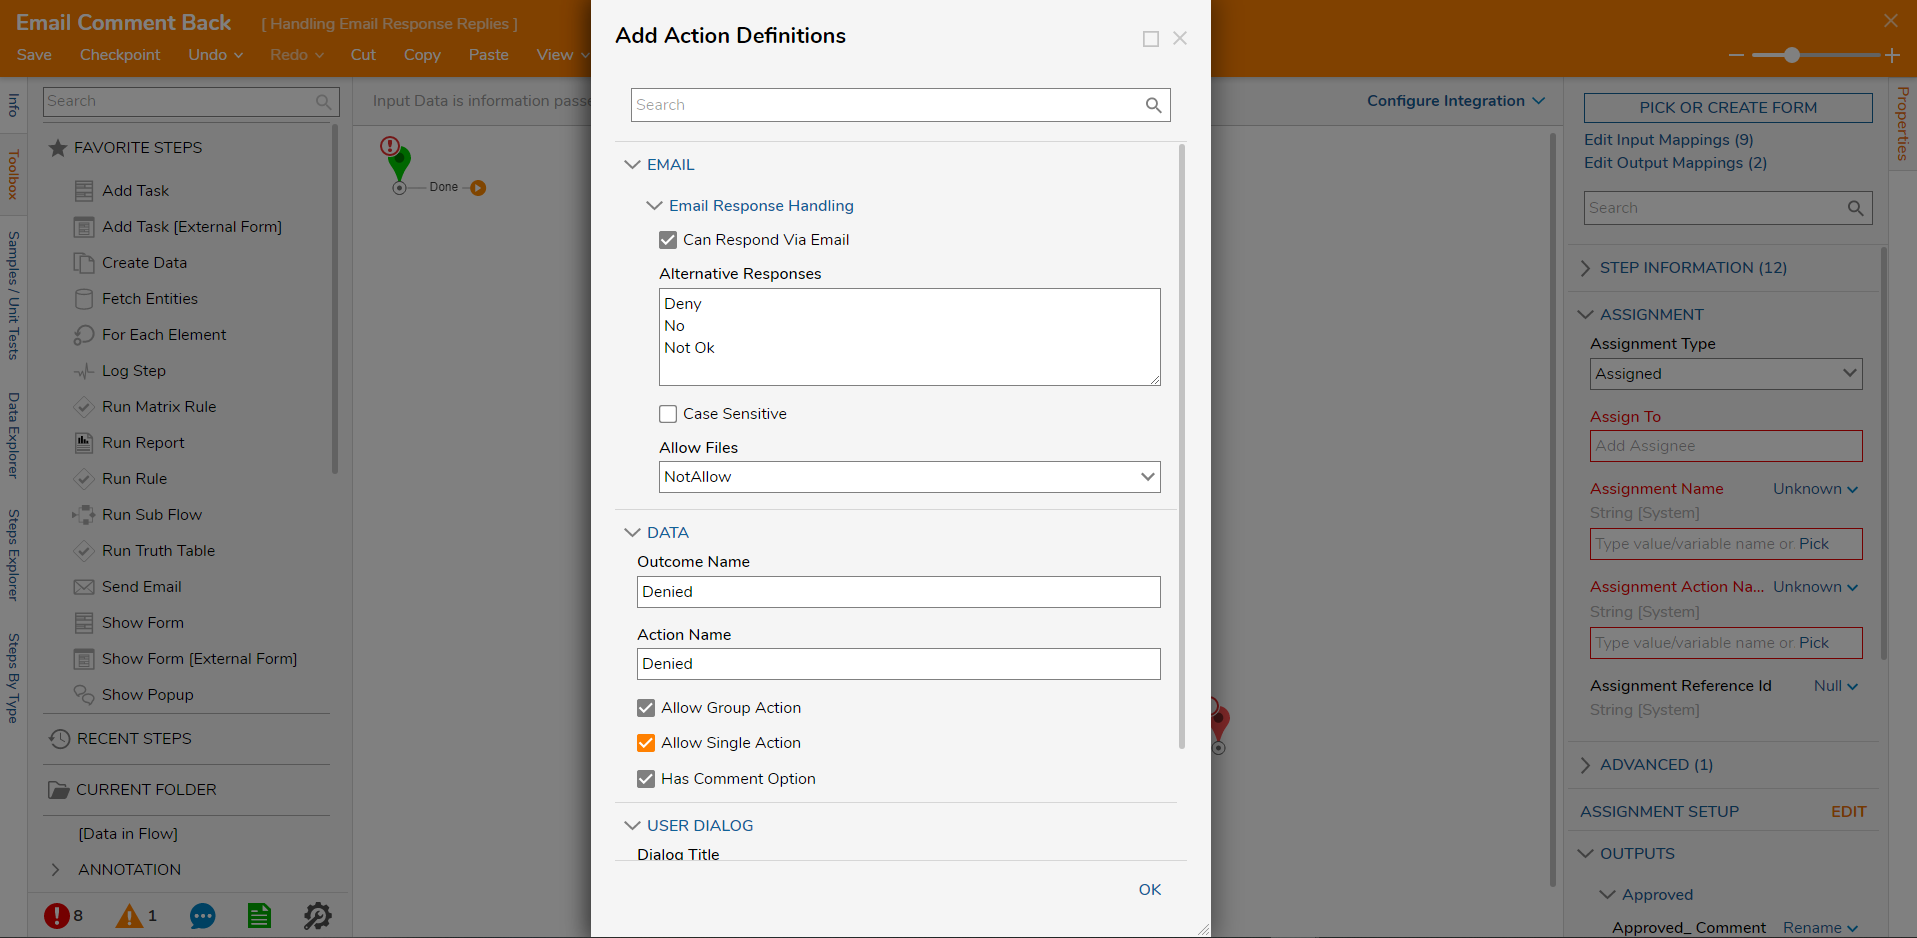
 For a 'Denied' Action DefinitionIn the Add Action Definitions window, please configure the options as shown in the screenshot below:
- Click DONE in the Assignment Setup window when both Action Definitions are added.
- Back in the Flow Designer, navigate to the properties of the Form step again and locate the Email section, then expand the section.
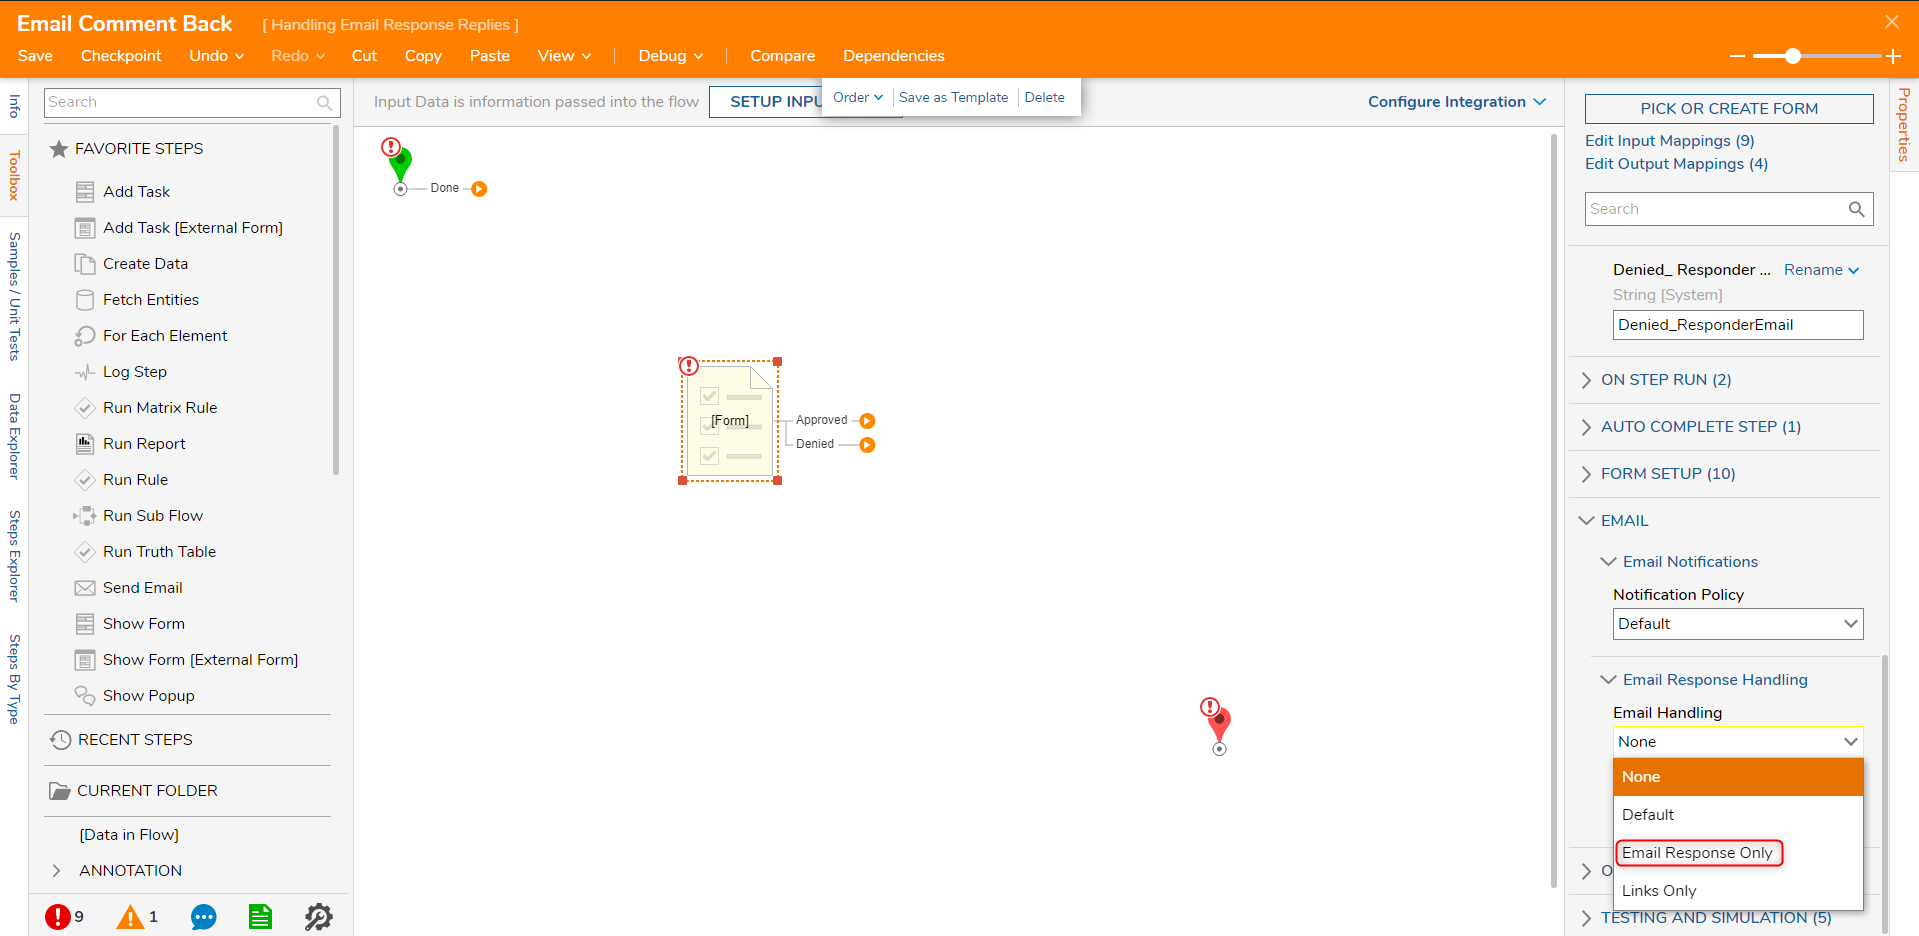
- For the Email Response Handling sub-section, use the drop down list for Email Handling to select Email Response Only.
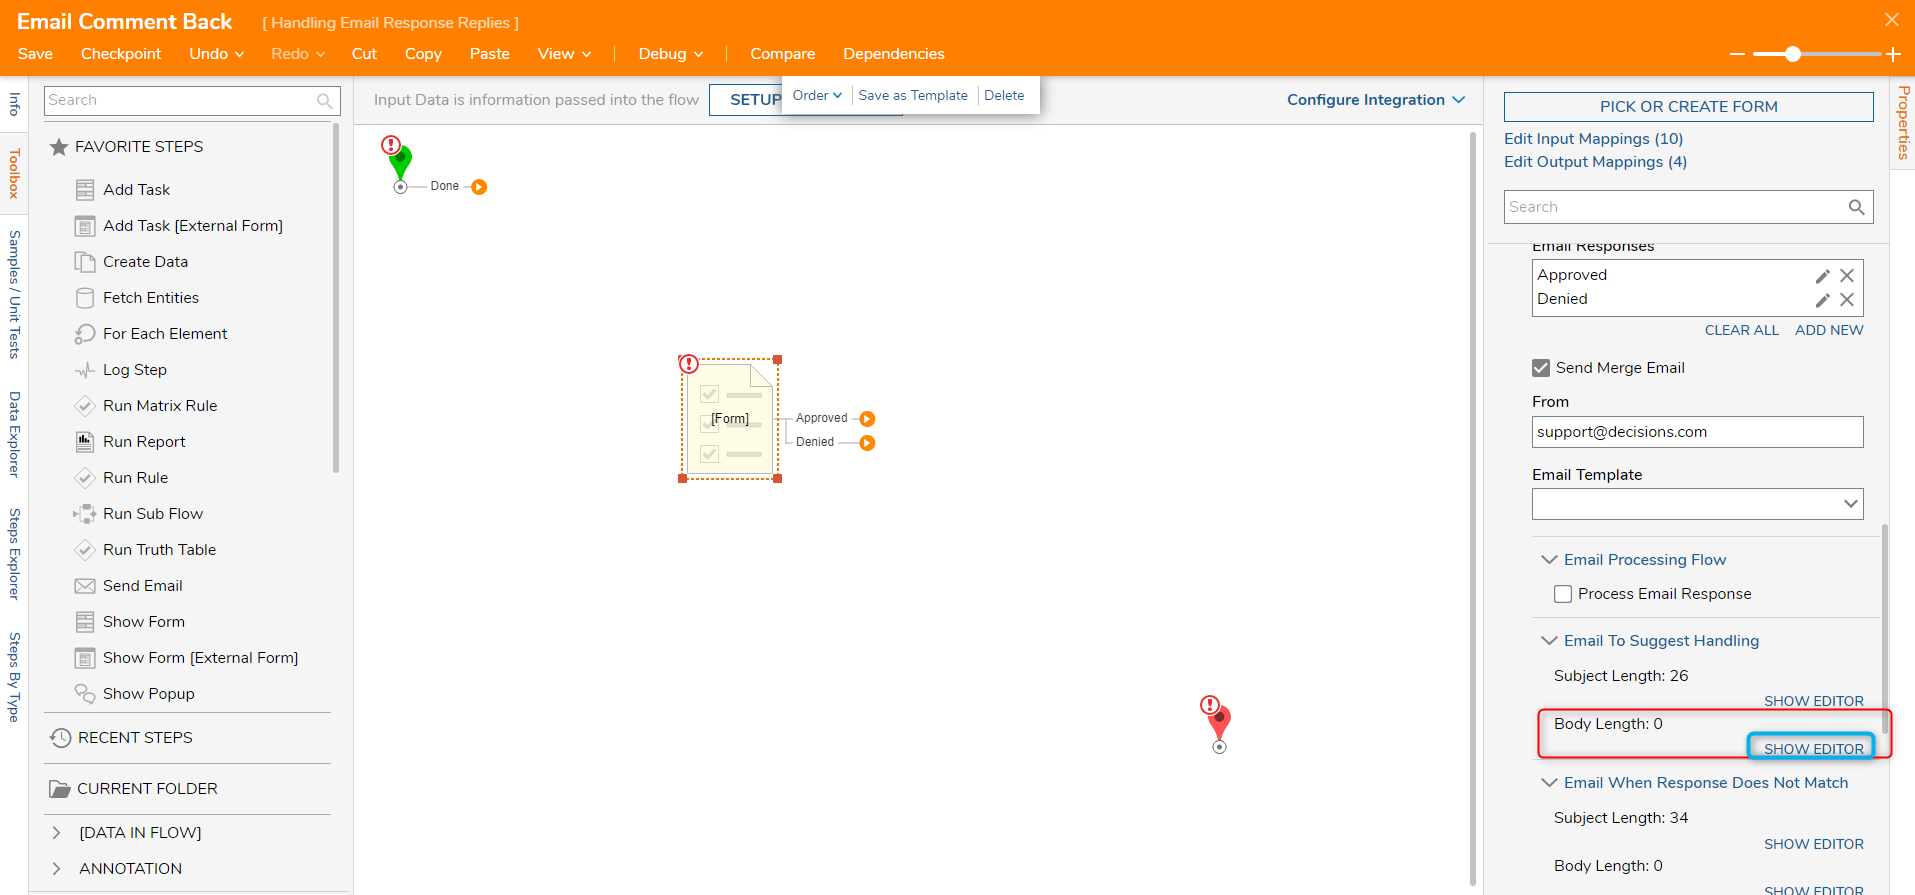
- The Email section now shows new options once the drop own selection has been made. Under the Email To Suggest Handling section, click Show Editor for the Body to configure the email body.
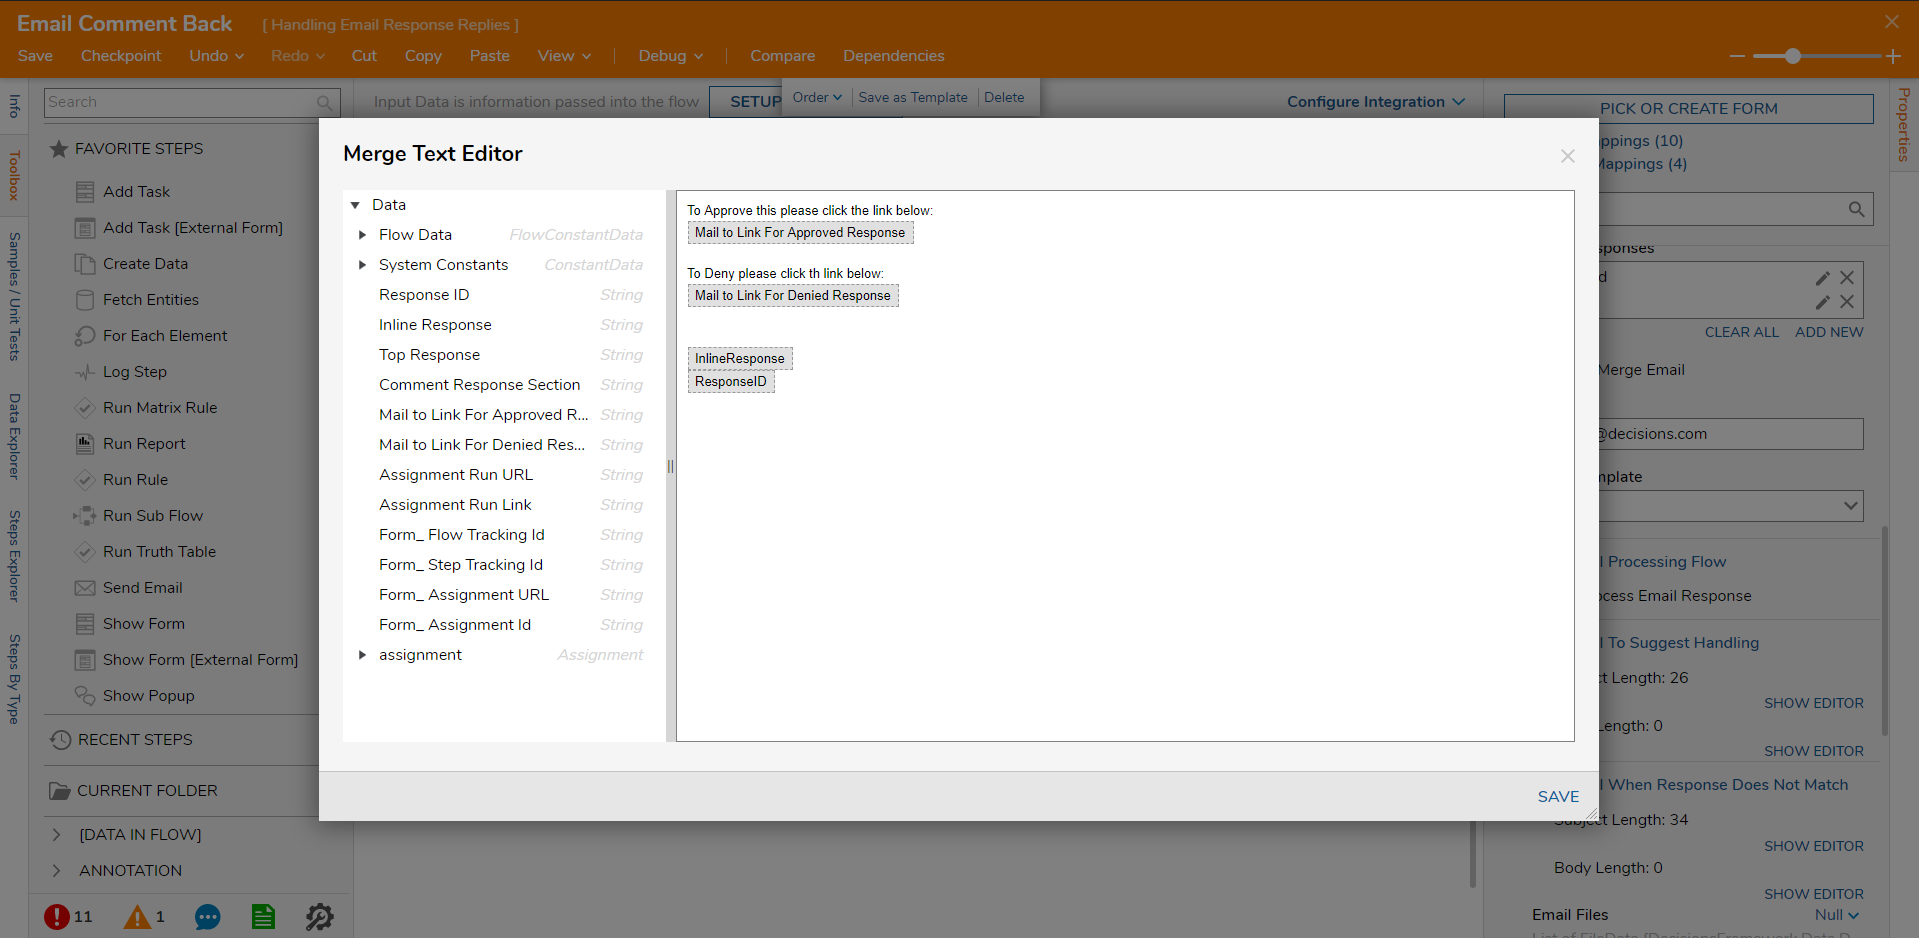
- In the Merge Text Editor that has appeared, follow the same configuration as the screenshot below.
- To get the items in gray with a dotted box around them in the editor, hover the mouse over the desired piece on the right side and click the + that appears.
- Once the configuration is complete, click SAVE.ResponseIDThe ResponseID variable needs to be present in both the 'Email To Suggest Handling' Body Length Merge Text Editor and the 'Email When Response Does Not Match' Body Length Merge Text Editor. If this ID is left out, then the Assignment Form will throw an error.
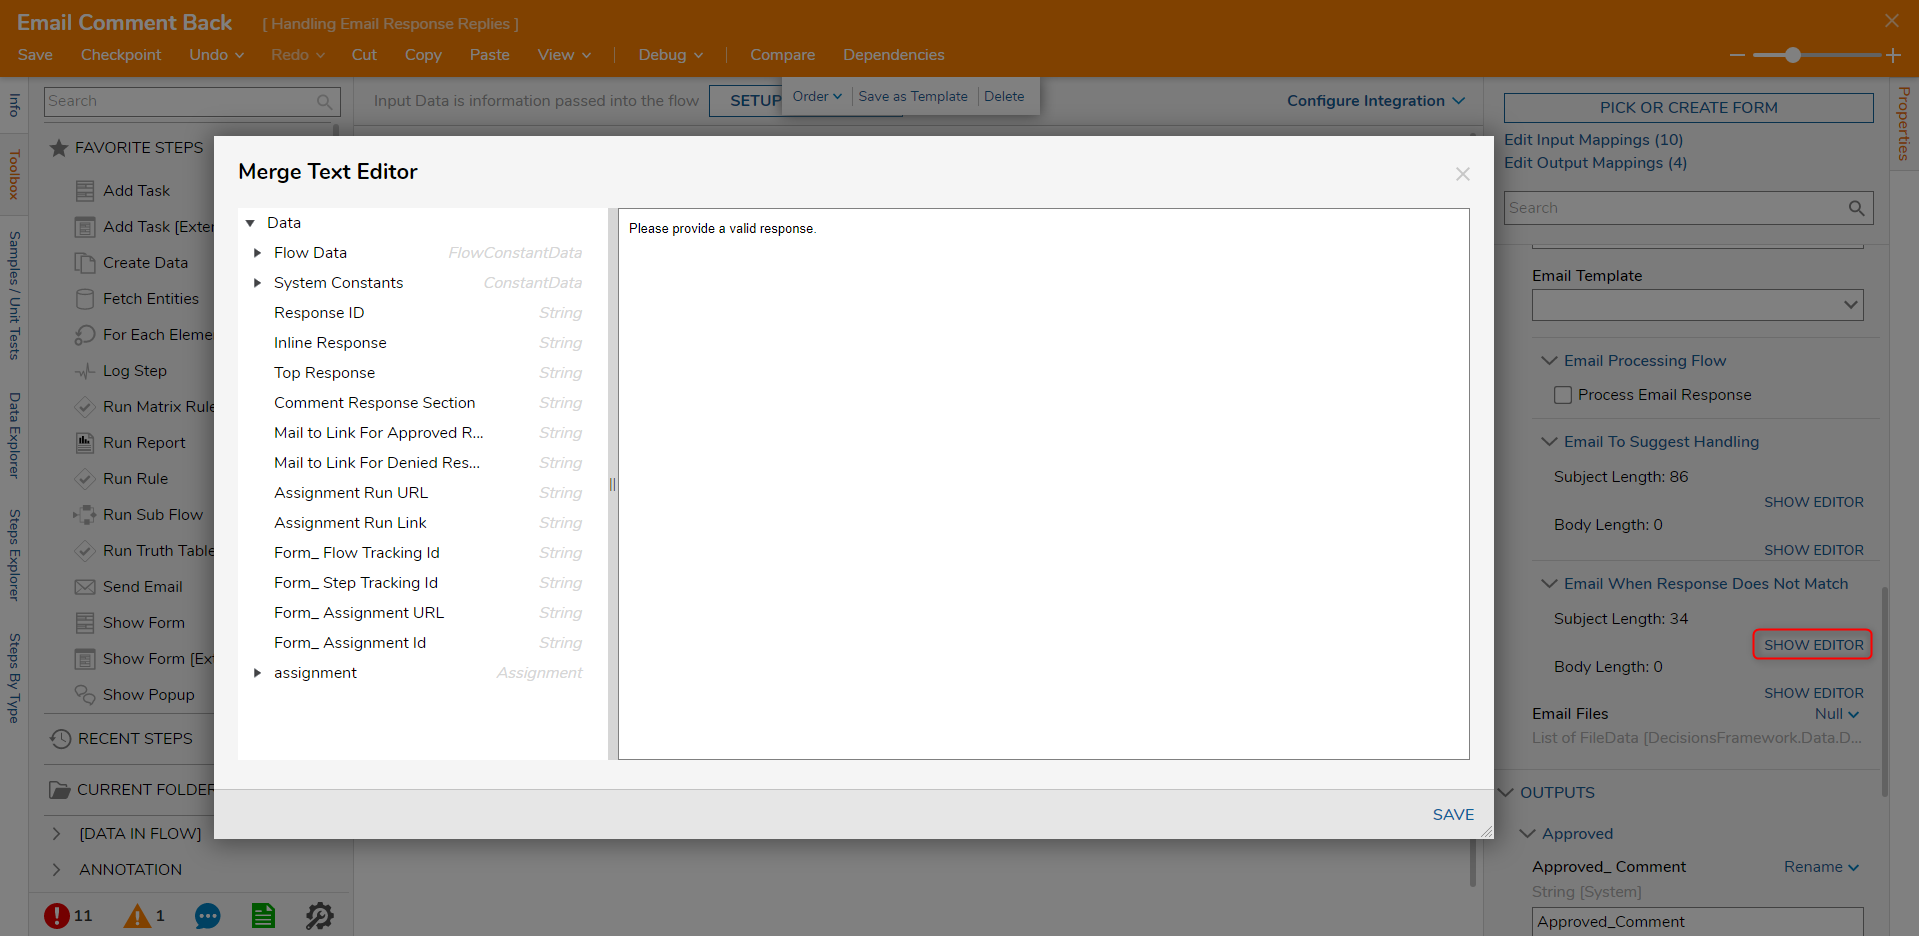
- Now, the same process must be completed for the Email When Response Does Not Match section.
- Repeat the two previous steps for the same configuration as the screenshot below.
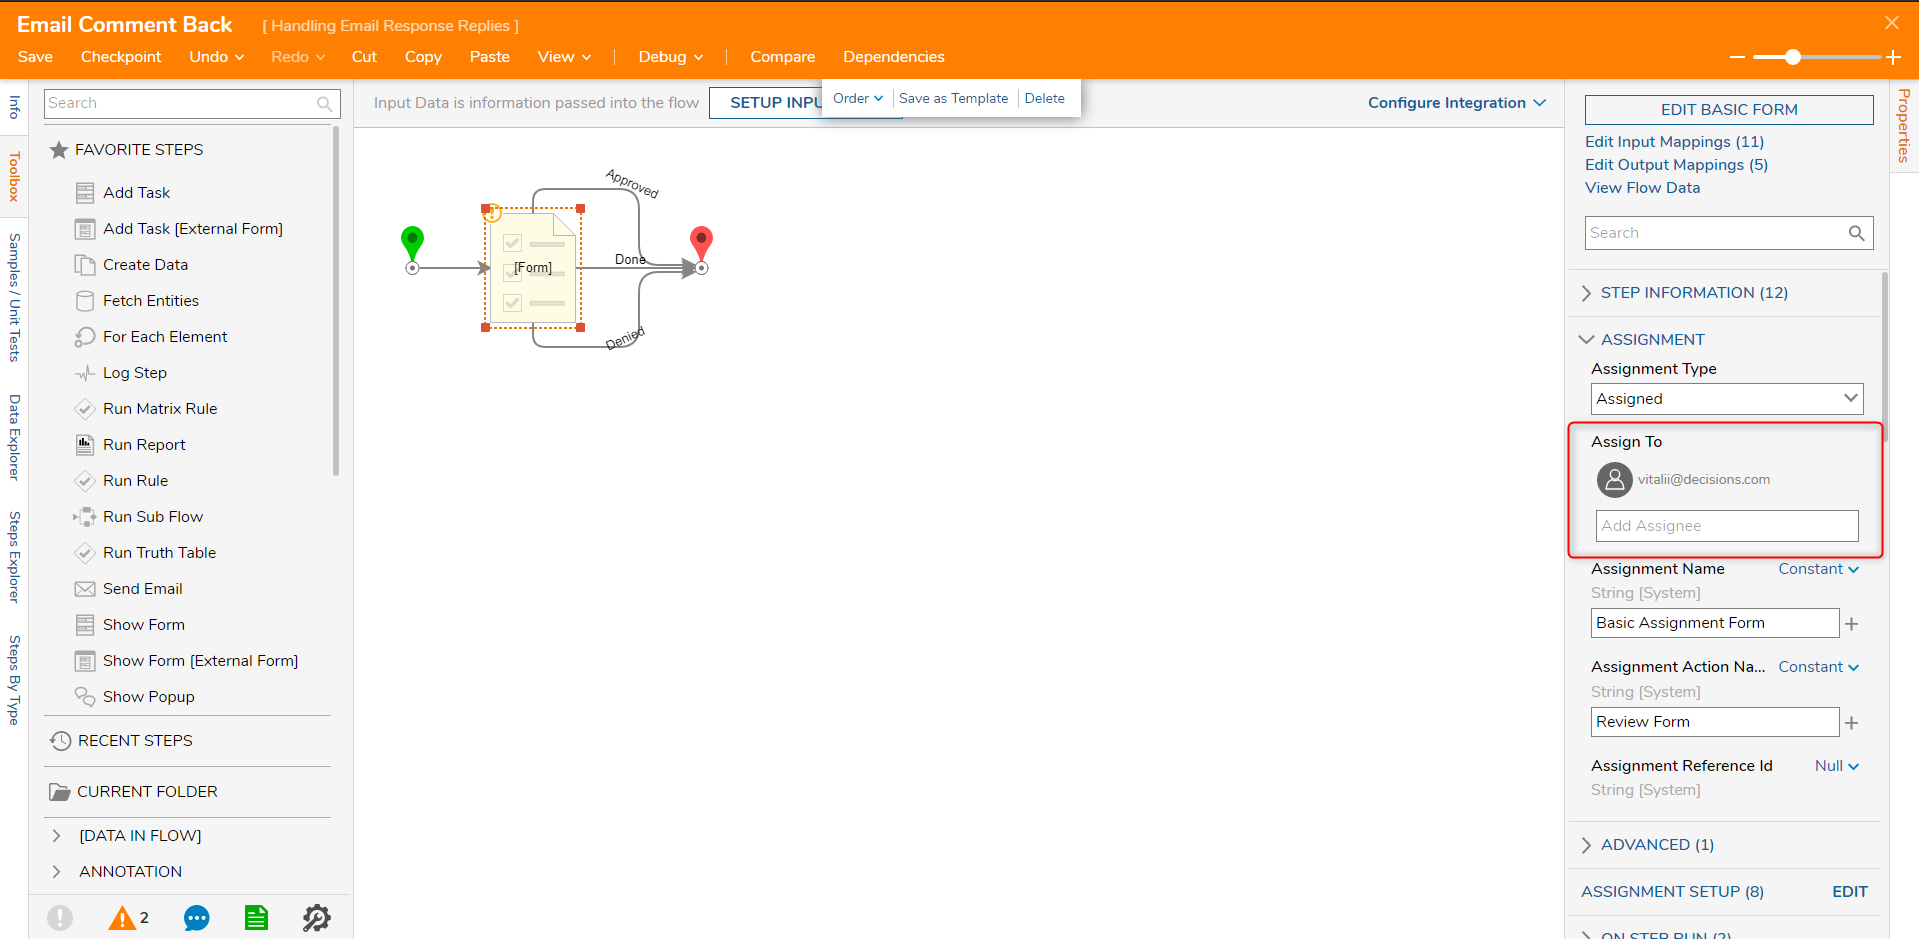
- Return to the Assignment section and in the Assign To section, designate a test account for the environment that is accessible.
- Assignment Name can be changed to an input mapping of Constant using the Unknown drop down.
- In the provided text box, type in a name for the assignment. The Assignment Action Name can be ignored using the drop down.
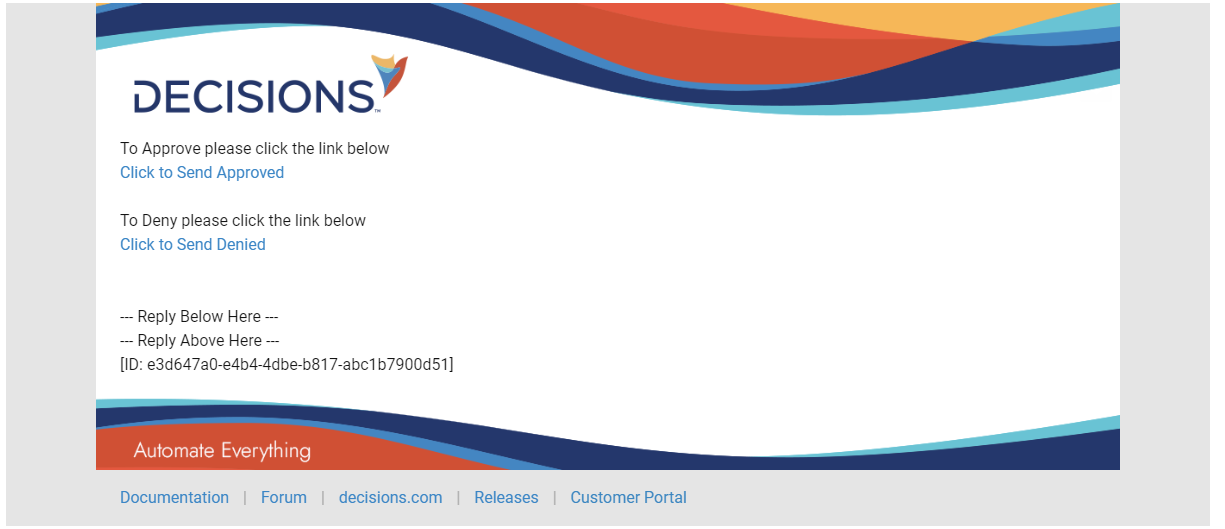
- Once the Flow is executed, the assignee will receive an email that looks as it does in the screenshot below.
- When the assignee clicks on the 'Approve' or 'Denied' link, the assignee will be provided with a template where they can leave a comment.
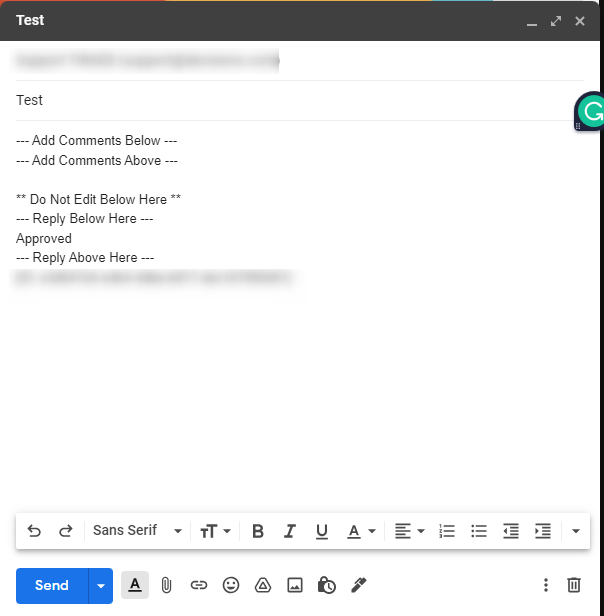
- After the assignee is finished adding comments, the response can then be sent back.
Process Email Response Flow
After selecting an Email Handling selection for an Assignment, the Process Email Response checkbox appears within Properties > Email > Email Response Handling > Email Processing Flow.
When enabled, the Process Email Response Flow allows the Designer to define custom email handling for the Assignment instead of just completing the Assignment. The custom flow will run after the scheduled job runs; therefore, a Email Workflow Response Scheduled Job monitoring the email server is required for this Flow to run.