Overview
Form Tiles are Page components in the Page Designer that are utilized to leverage Decisions Forms onto a dashboard. There are a multiplicity of uses for this component. Users can use this Tile to create an interactive landing page. Visitors that navigate to that Page can utilize the Form to submit requests, the Form Tile can be used as a filter on a Report on the same Page, or can be used to display data that needs user input.
When configuring a Form Tile there are three possible inputs that will be available:
| Input Name | Function |
| Tile Form | This input is where the user can select or create the Form that will be displayed on the tile. |
| Input Data Flow | If the Form has variable data input declared, a data Flow will be made available for the user to configure the Flow input data to the form. |
| Output Data Flow | If the Form has a button, there will be an Output Data Flow option to configure a Flow to run when the outcome button is clicked. |
Example
The following example will accomplish creating a Form Tile in a Page, configuring the Form Tile to dynamically populate data, and previewing the customized Form Tile Page.
- In a Designer Folder, select CREATE FORM from the bottom action panel.
- In the resulting window, navigate to Page/Dashboard and select and name the default Page [Profile Page]. Click CREATE.
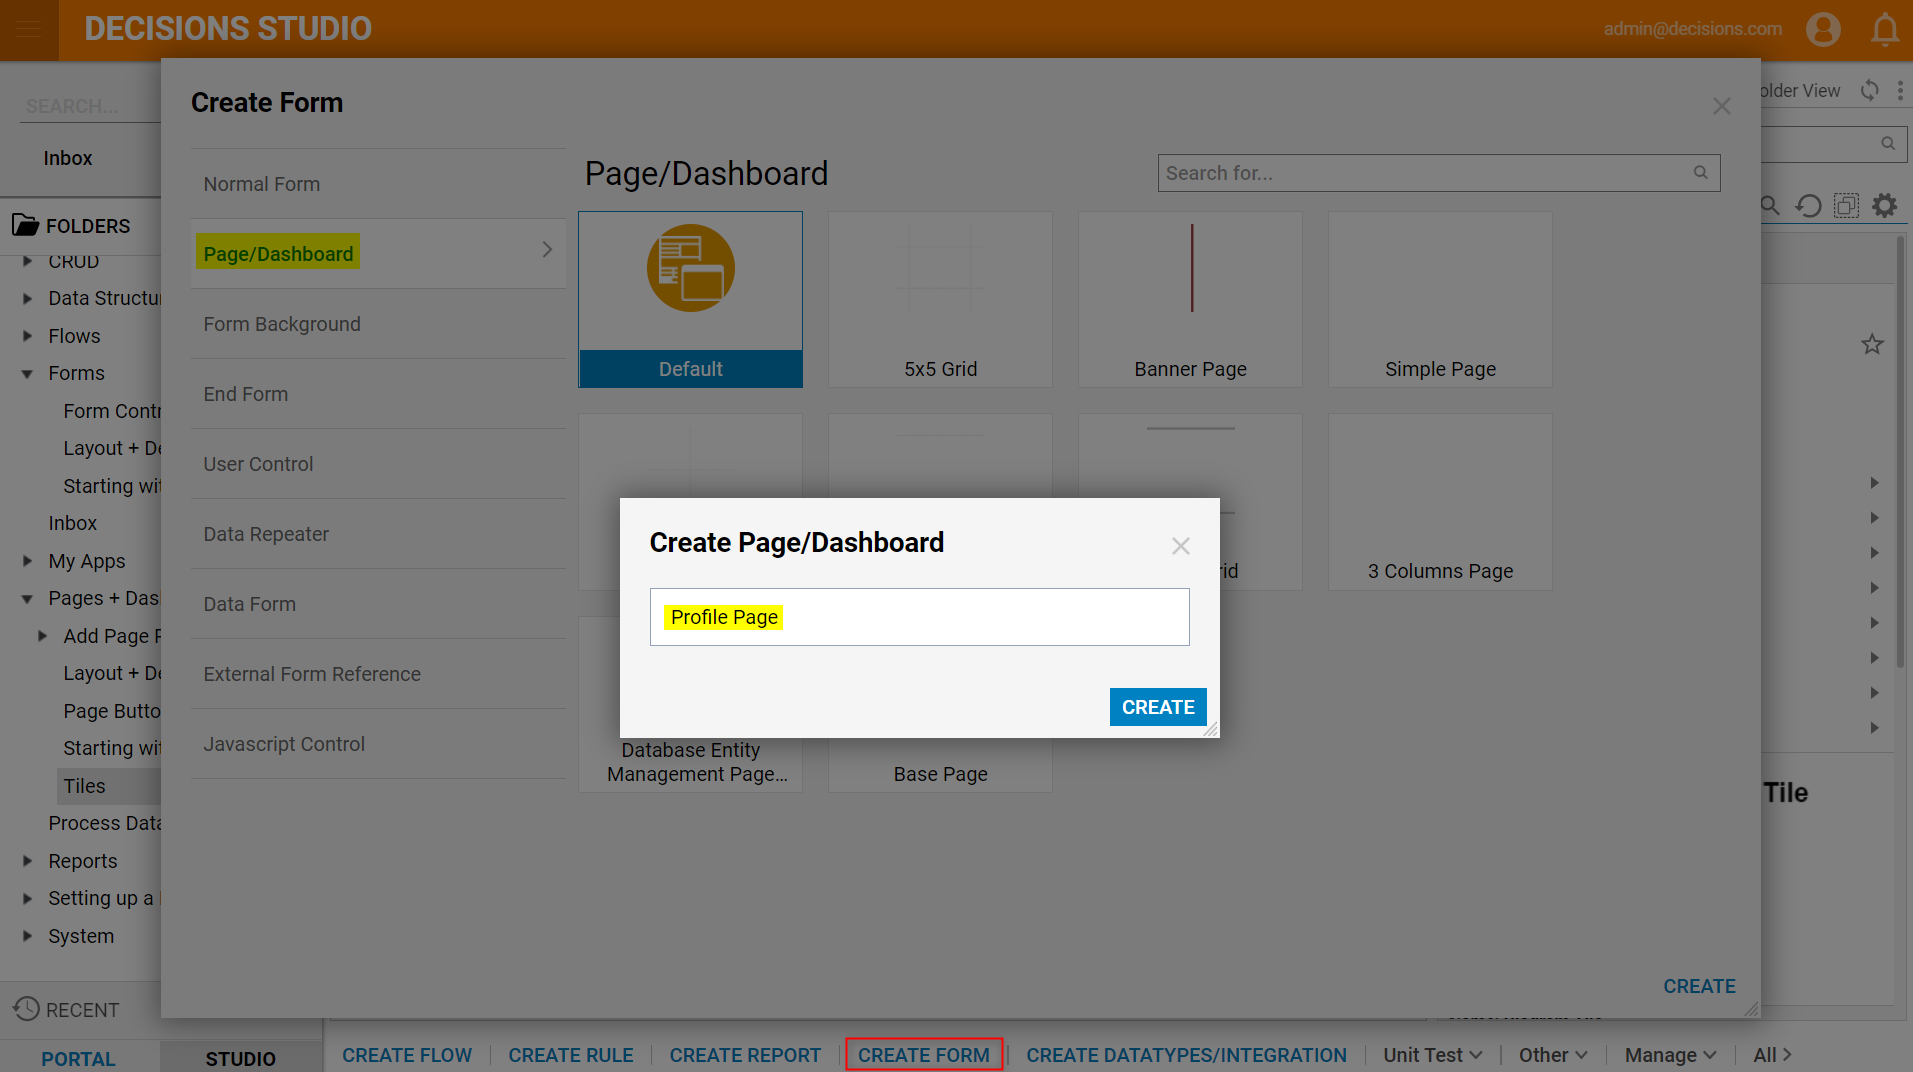
- In the resulting window, navigate to Page/Dashboard and select and name the default Page [Profile Page]. Click CREATE.
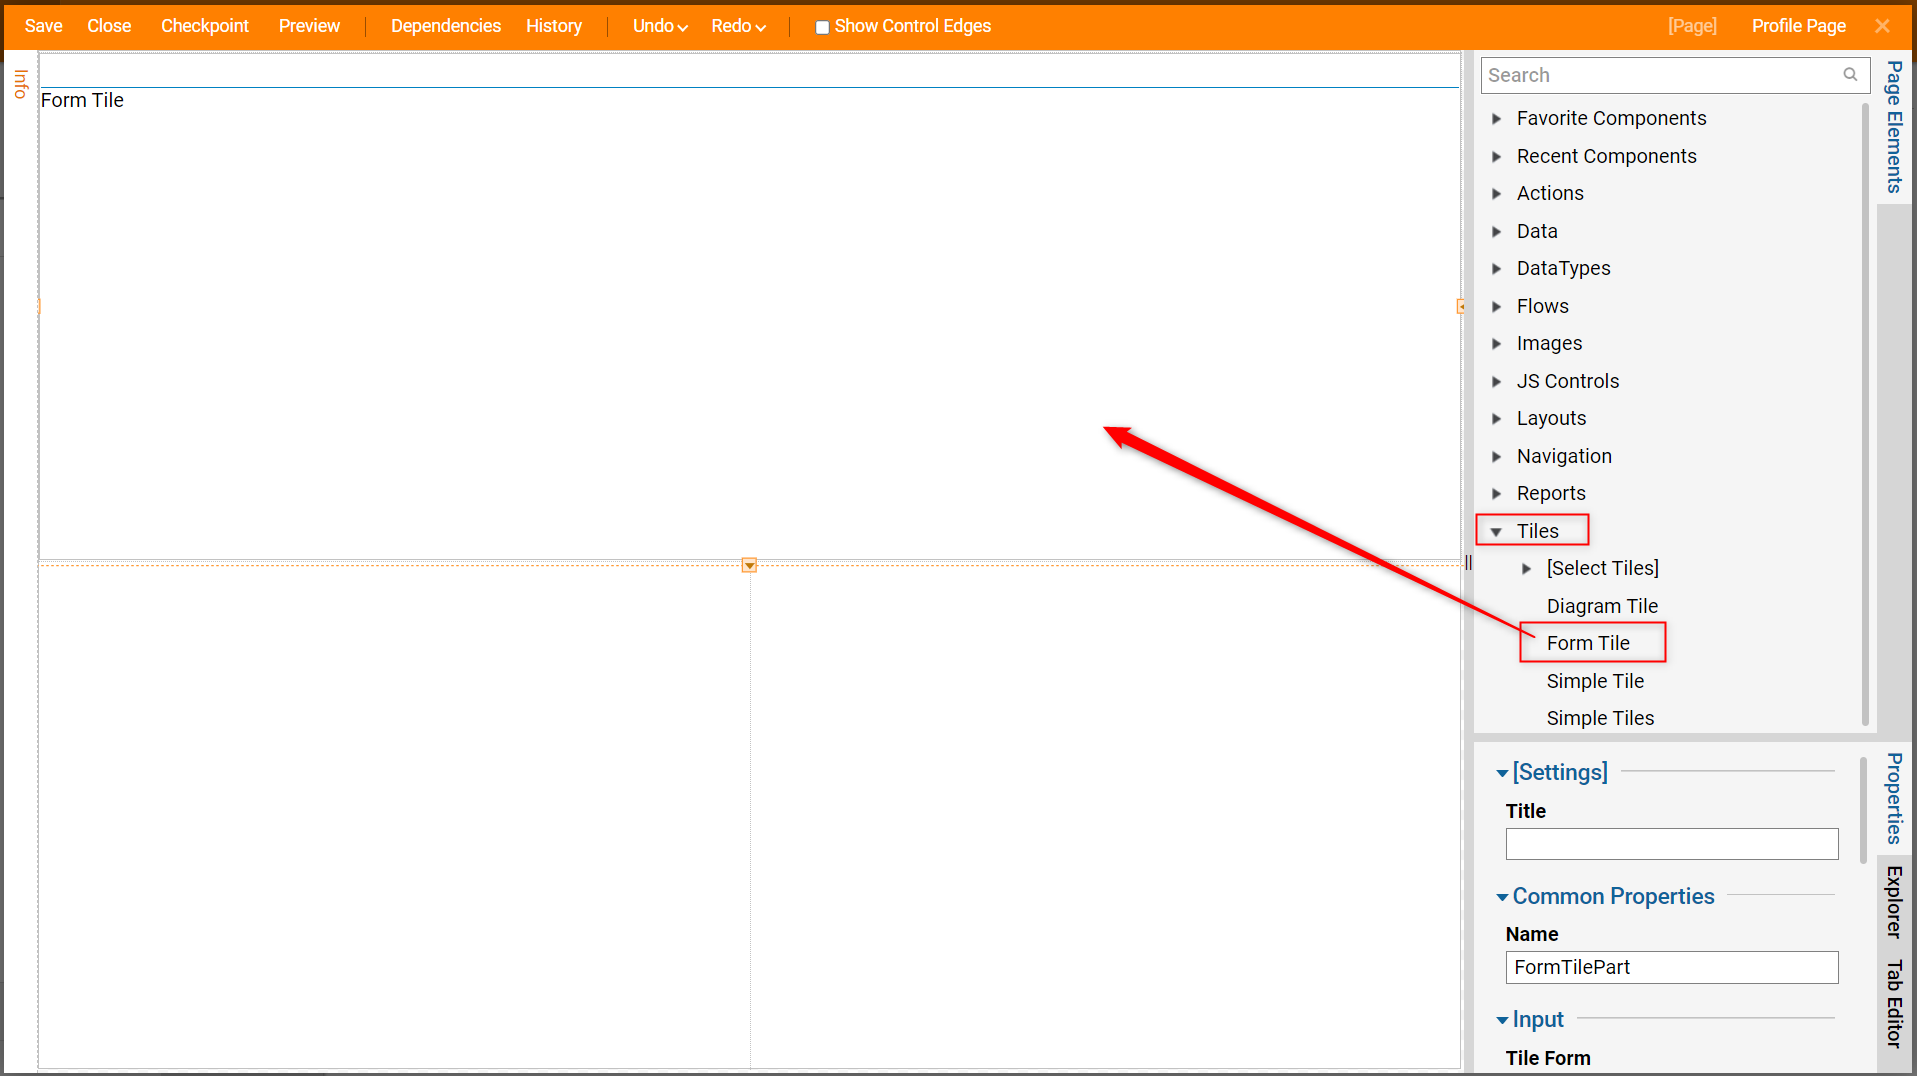
- In the Page Designer, from Page Elements > Tiles, drag a Form Tile component into the workspace.
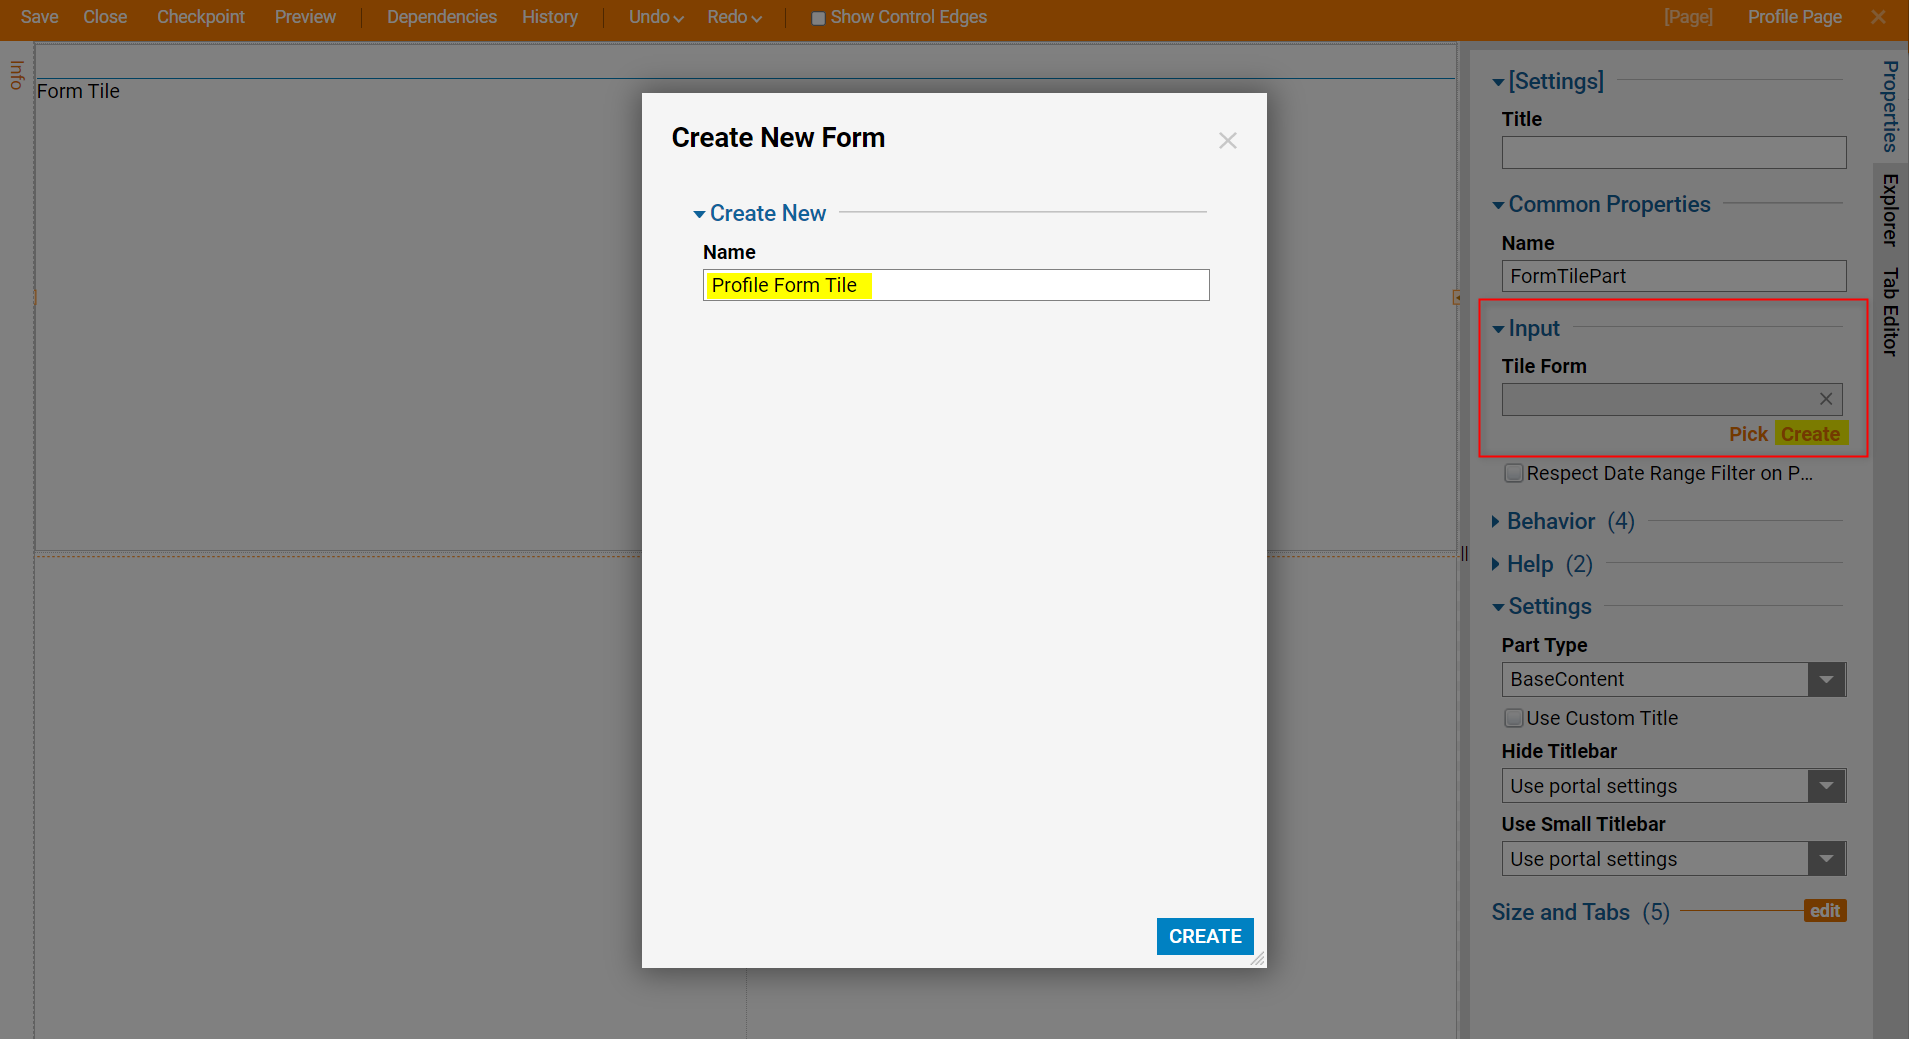
- Navigate to the Properties panel > Input > Tile Form and select Create.
- Select CREATE and this will result in a Create New Form window, name the Form [Profile Form Tile]. Click CREATE.
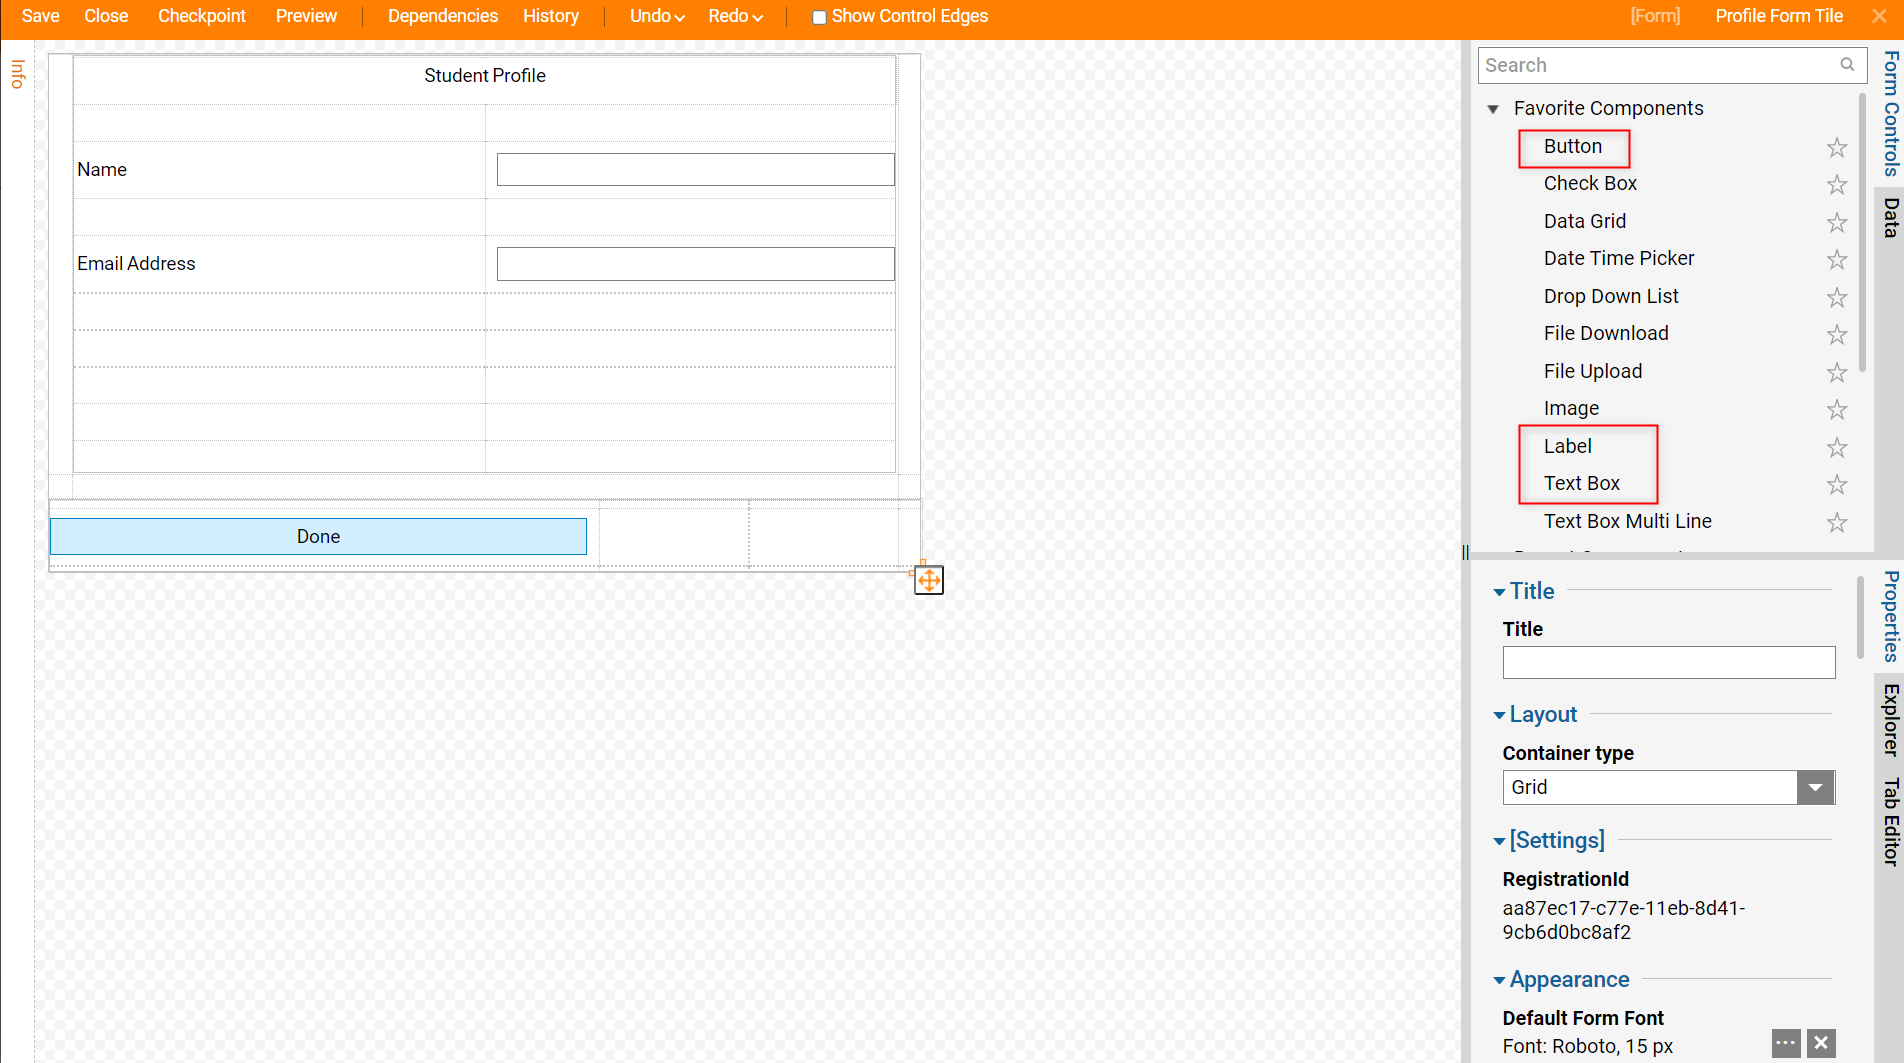
- In the Form Designer, drag three Labels [Student Profile, Name, and Email Address], two Text Boxes, and a Button [Done] from the Form Controls > Favorite Components section onto the workspace.
- Save and Close the Form Designer.
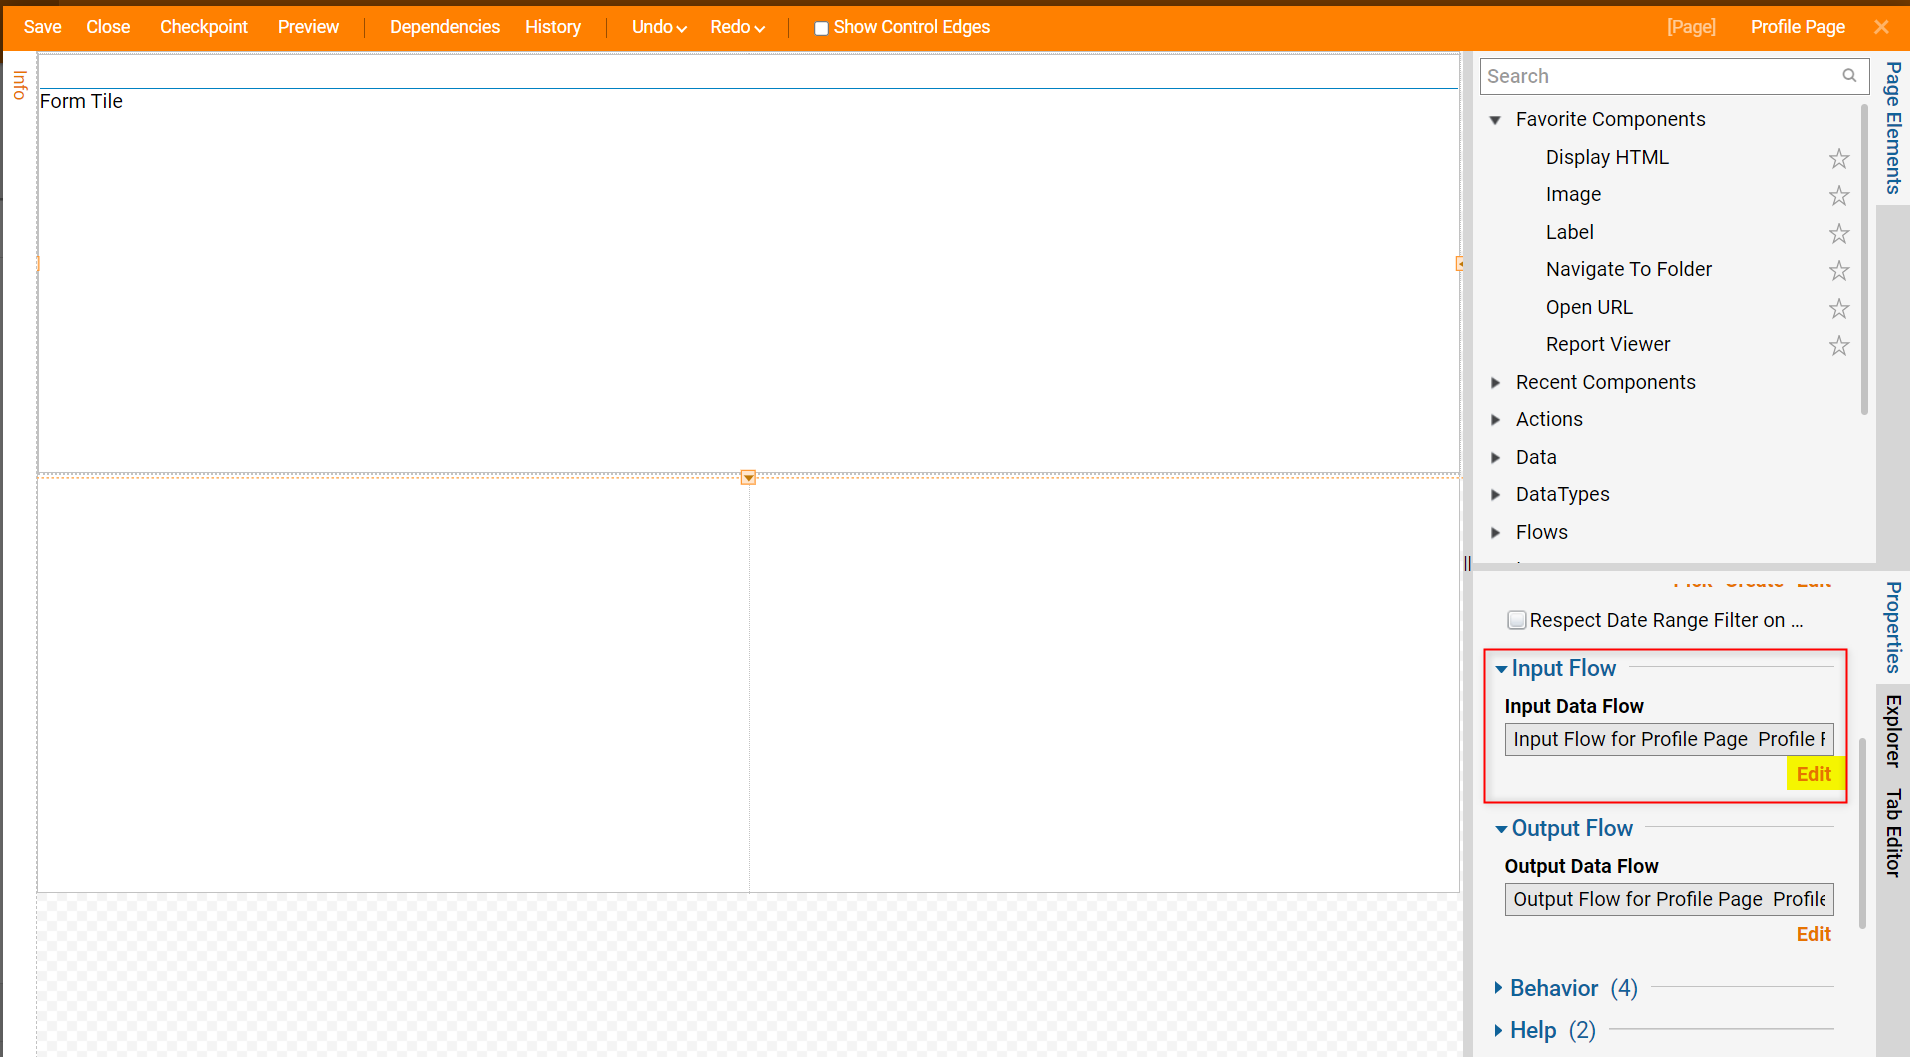
- In the Page Designer, with the Form Tile element selected, within the Properties panel under Input Flow > Input Data Flow, select Edit.
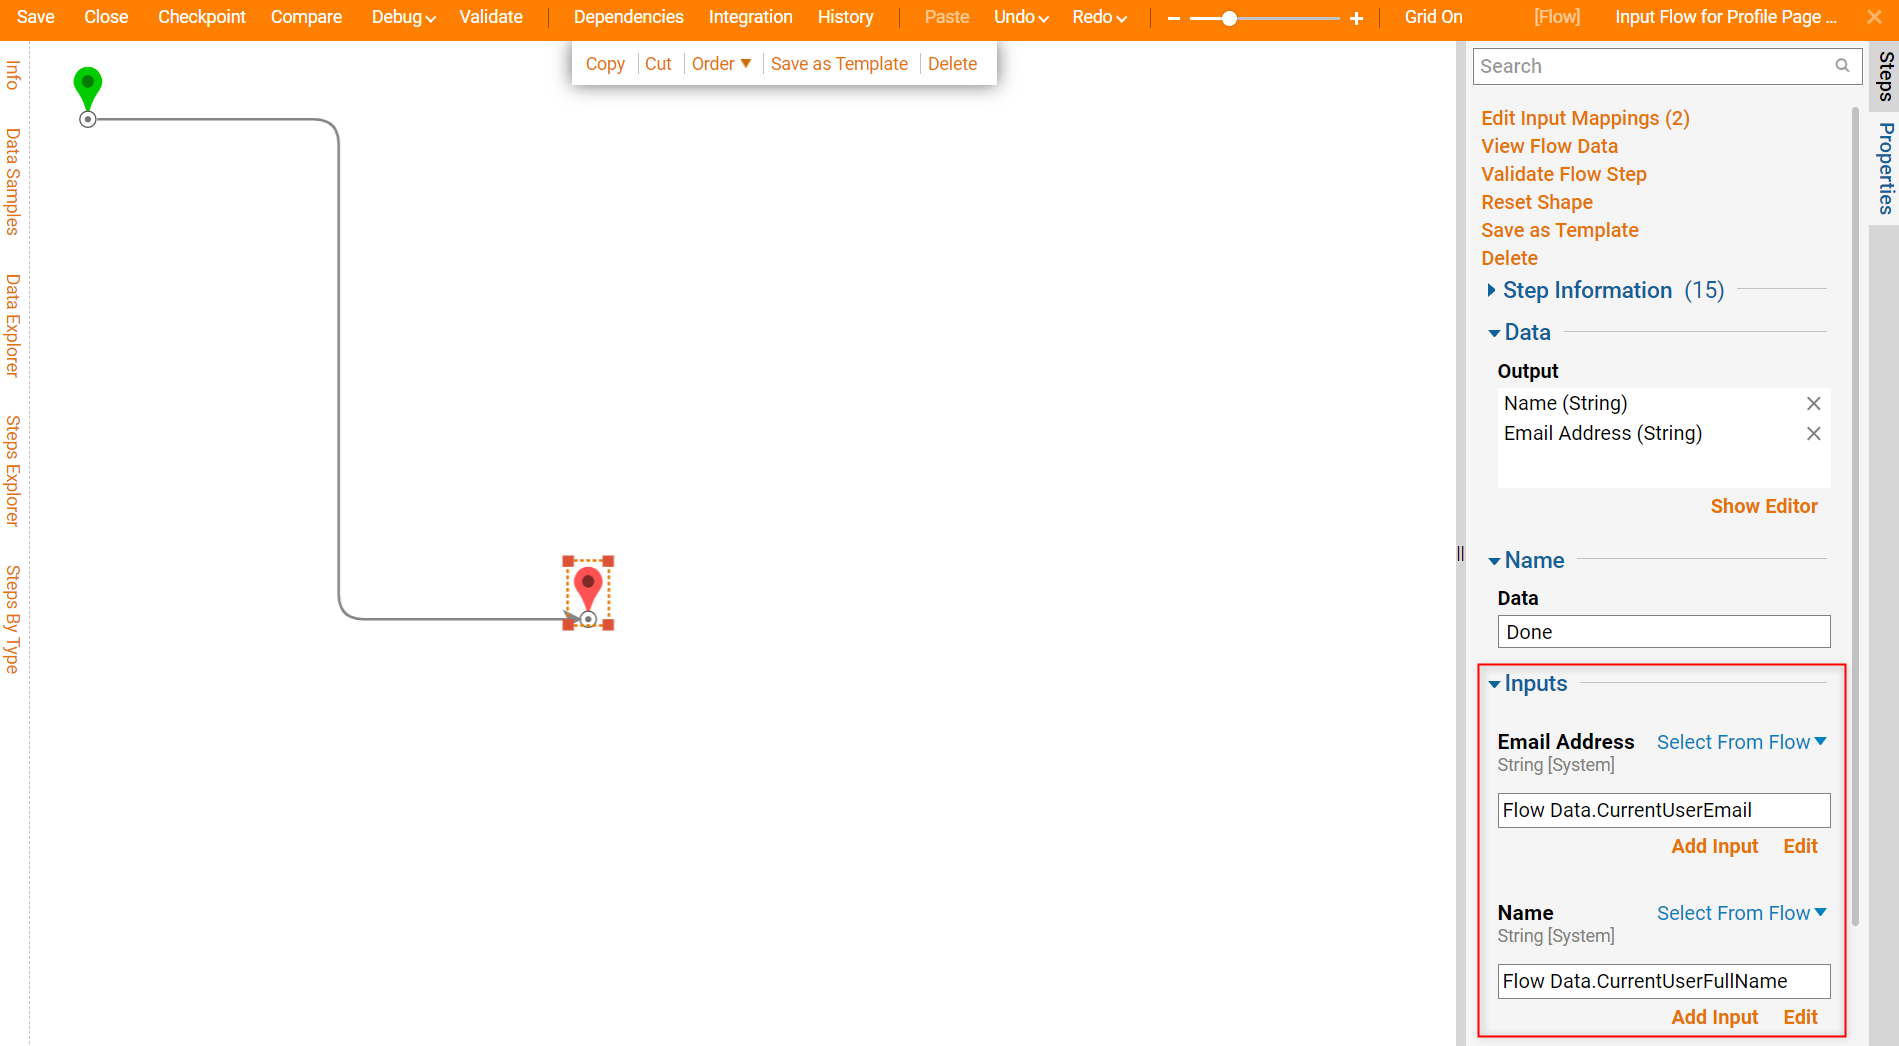
- In the Flow Designer, open the Properties panel, and navigate to Inputs > Email Address and Name and change the input mappings from Unknown to Select From Flow.In this example, the dynamically populated data will be pre-existing system data; this information will be selected from Flow Data to populate relevant fields. The input for Inputs > Email Address is Flow Data.CurrentUserEmail and the input for Inputs > Name is Flow Data.CurrentUserFullName.
- Save and Close the Flow Designer.
- Save and Close the Page Designer.
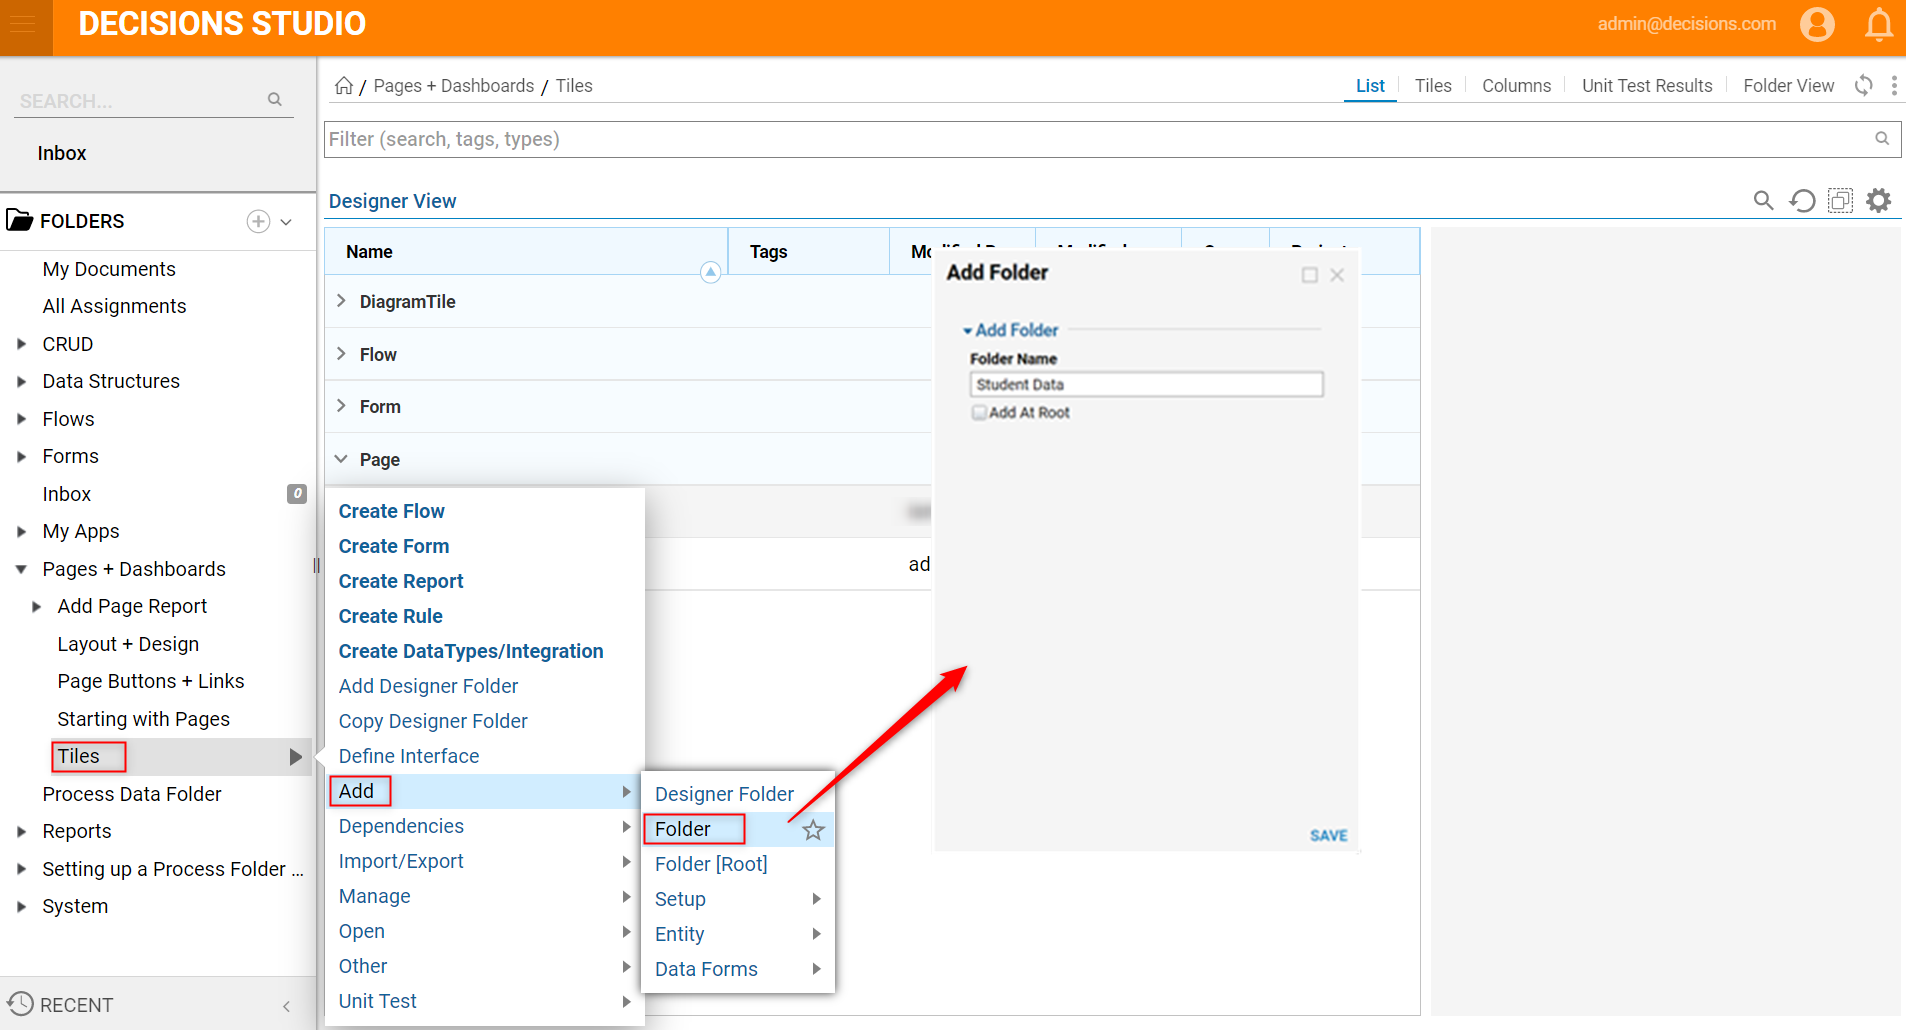
- Right-click on a Designer Folder and navigate to Add > Folder.
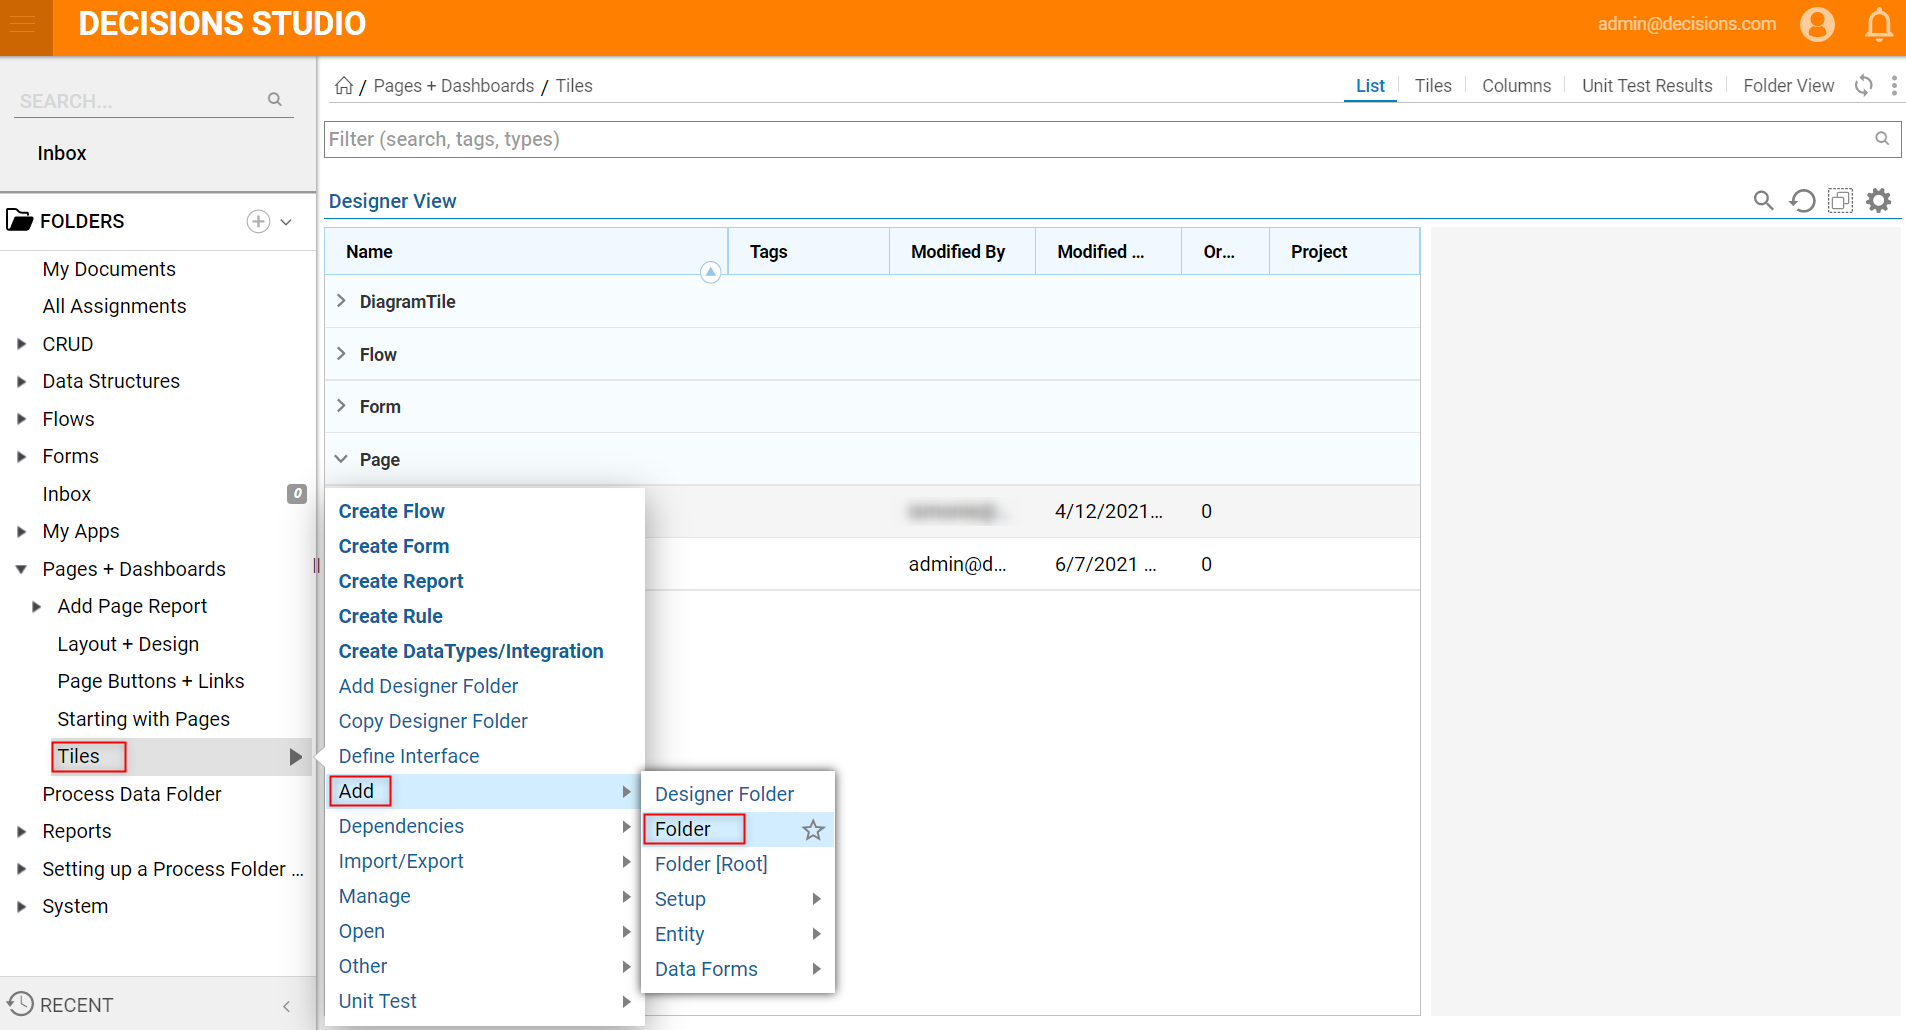
- In the resulting Add Folder dialog, select and name the desired Folder [Student Data]. Click SAVE.
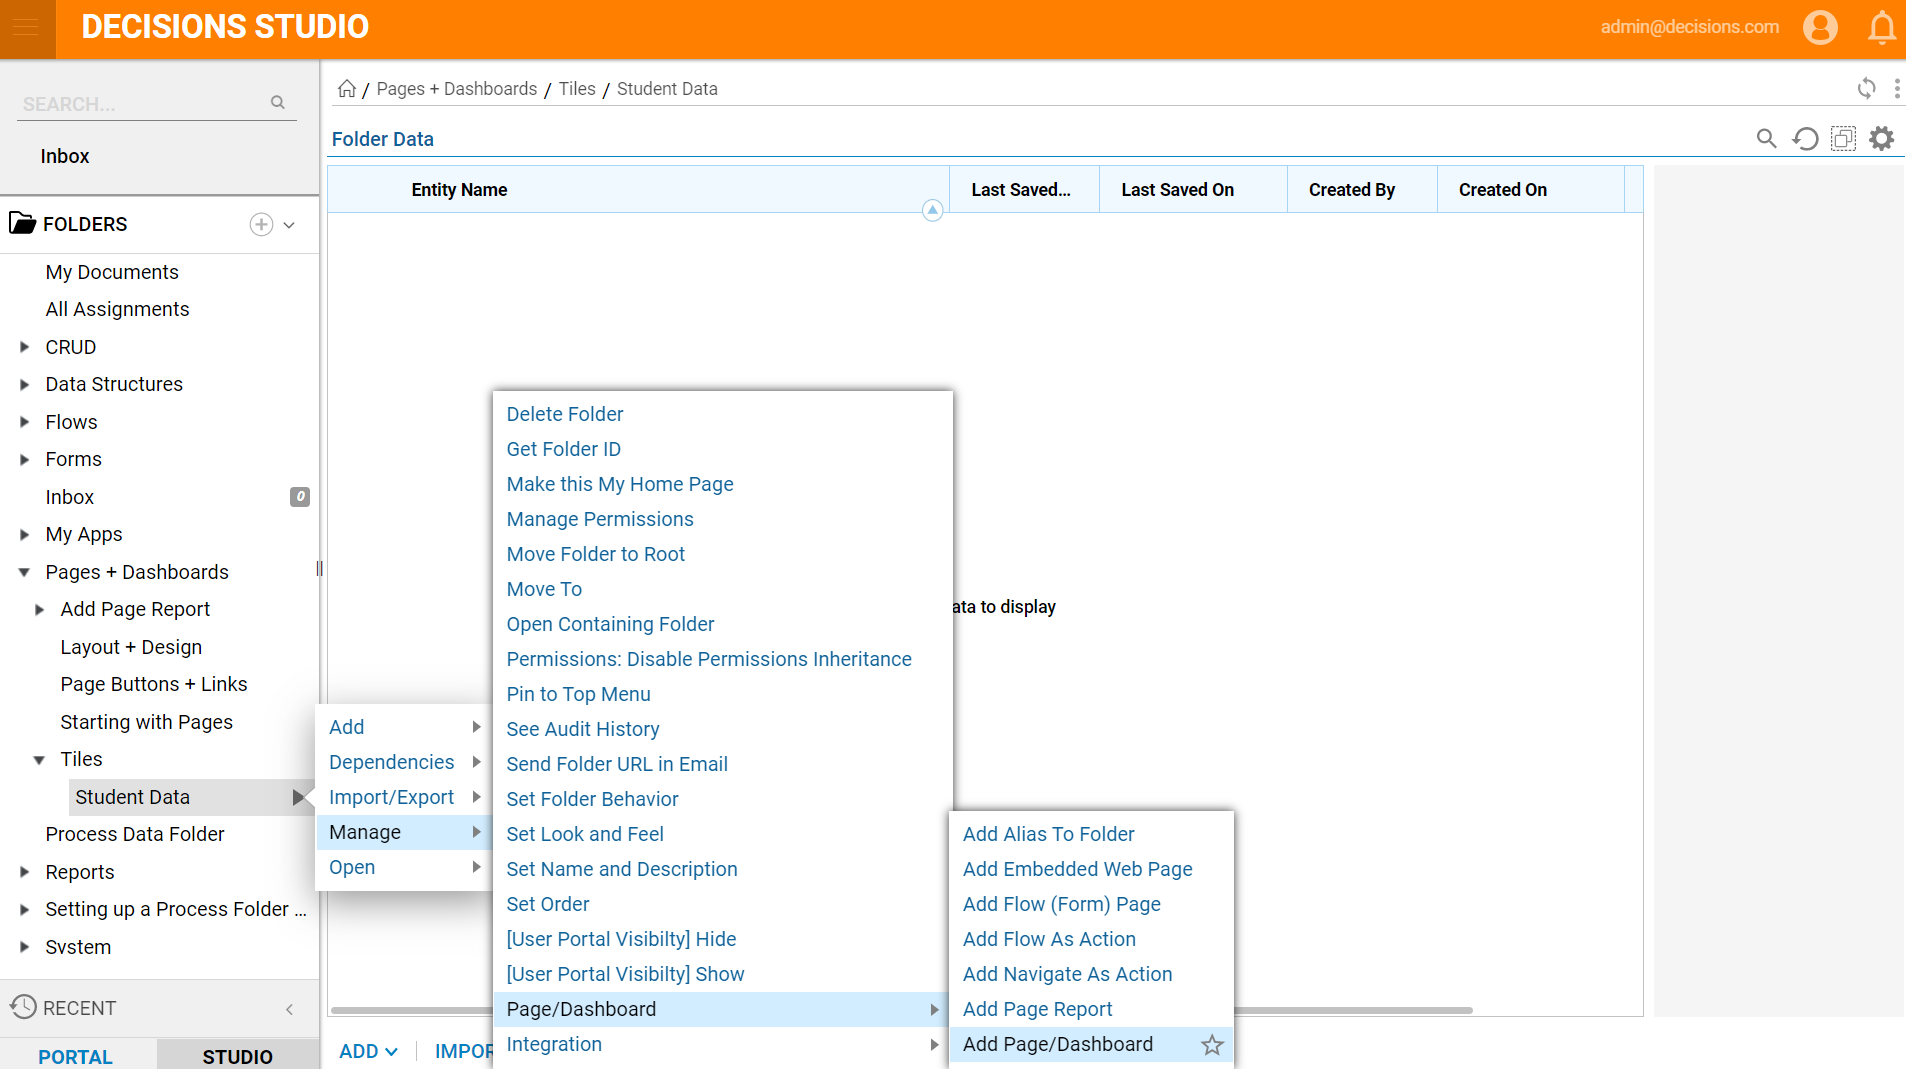
- In the new Folder [Student Data], right-click again and navigate to Manage > Page/Dashboard > Add Page/Dashboard.
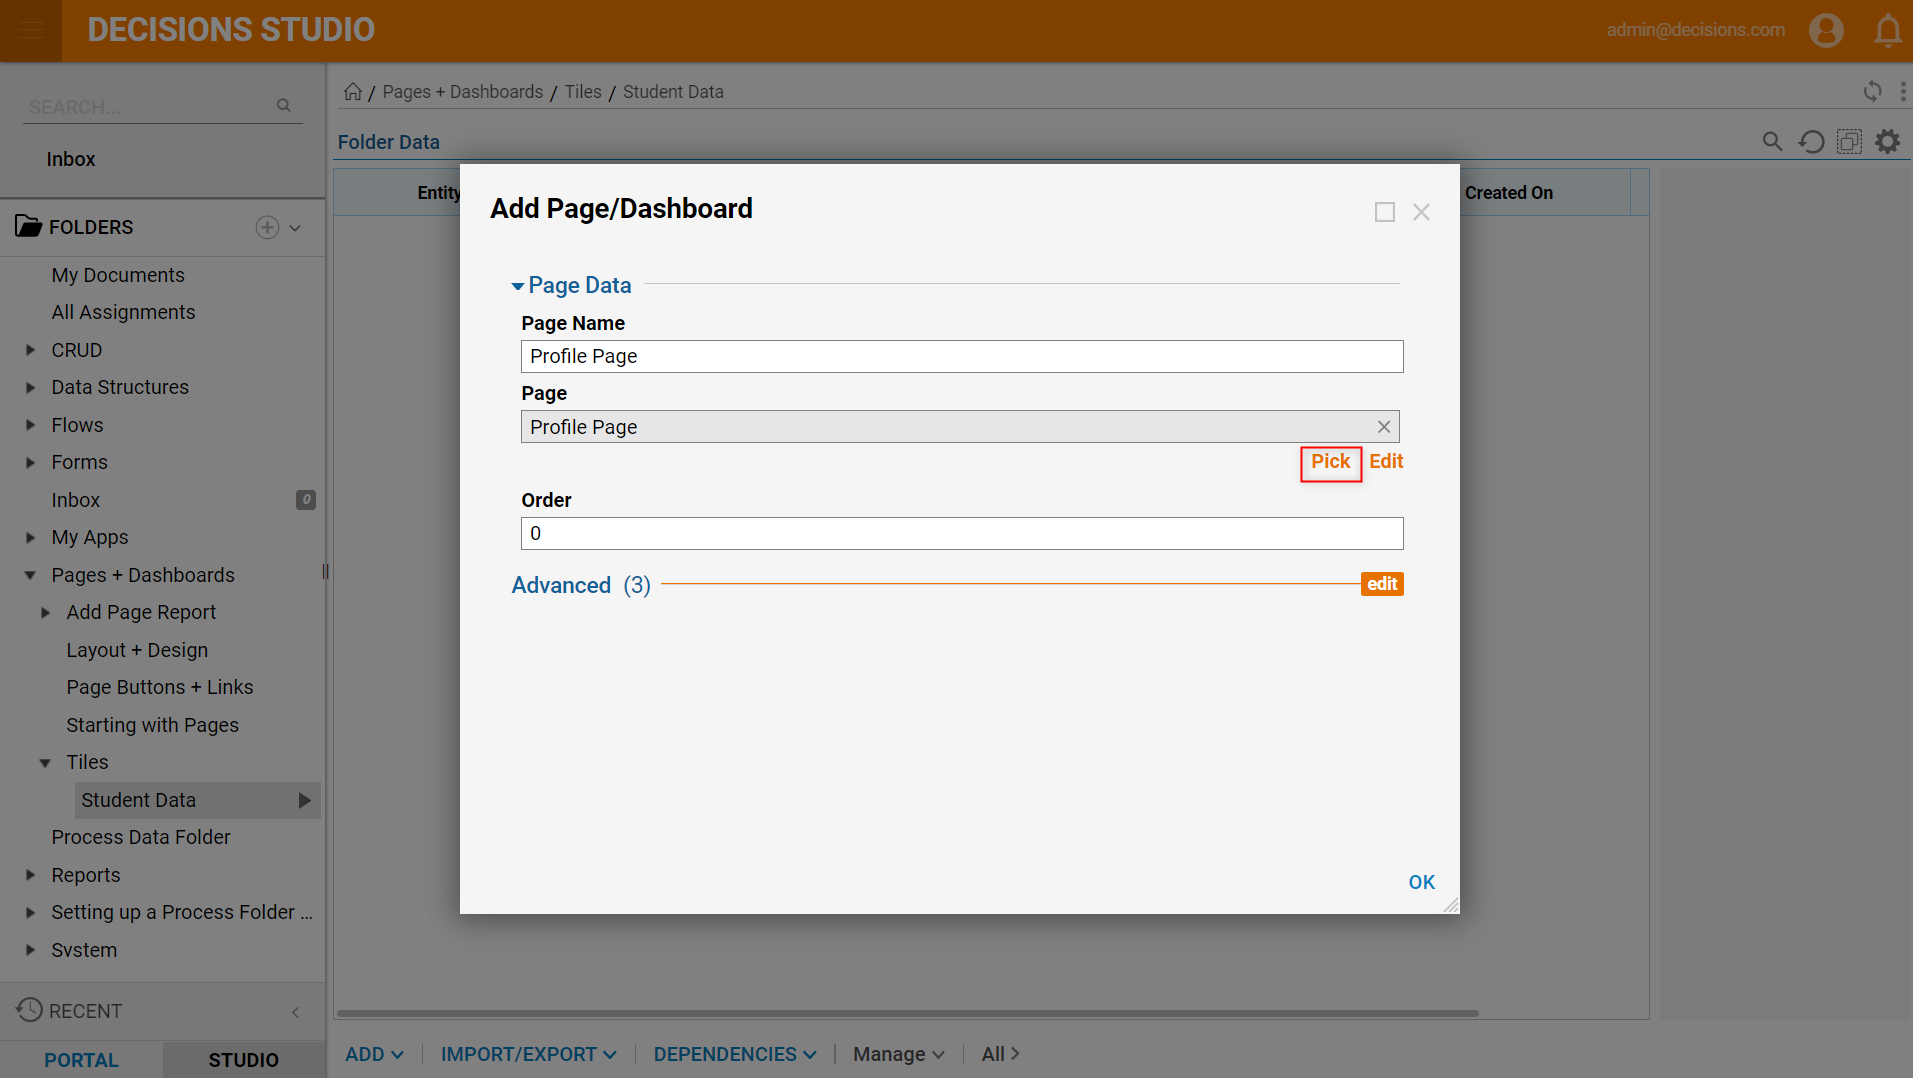
- In the resulting Add Page/Dashboard dialog, select Pick under Page Data > Page.
- In the Pick Entity window, navigate to the Page [Profile Page] created previously in this tutorial, PICK and click OK.
- In the Pick Entity window, navigate to the Page [Profile Page] created previously in this tutorial, PICK and click OK.
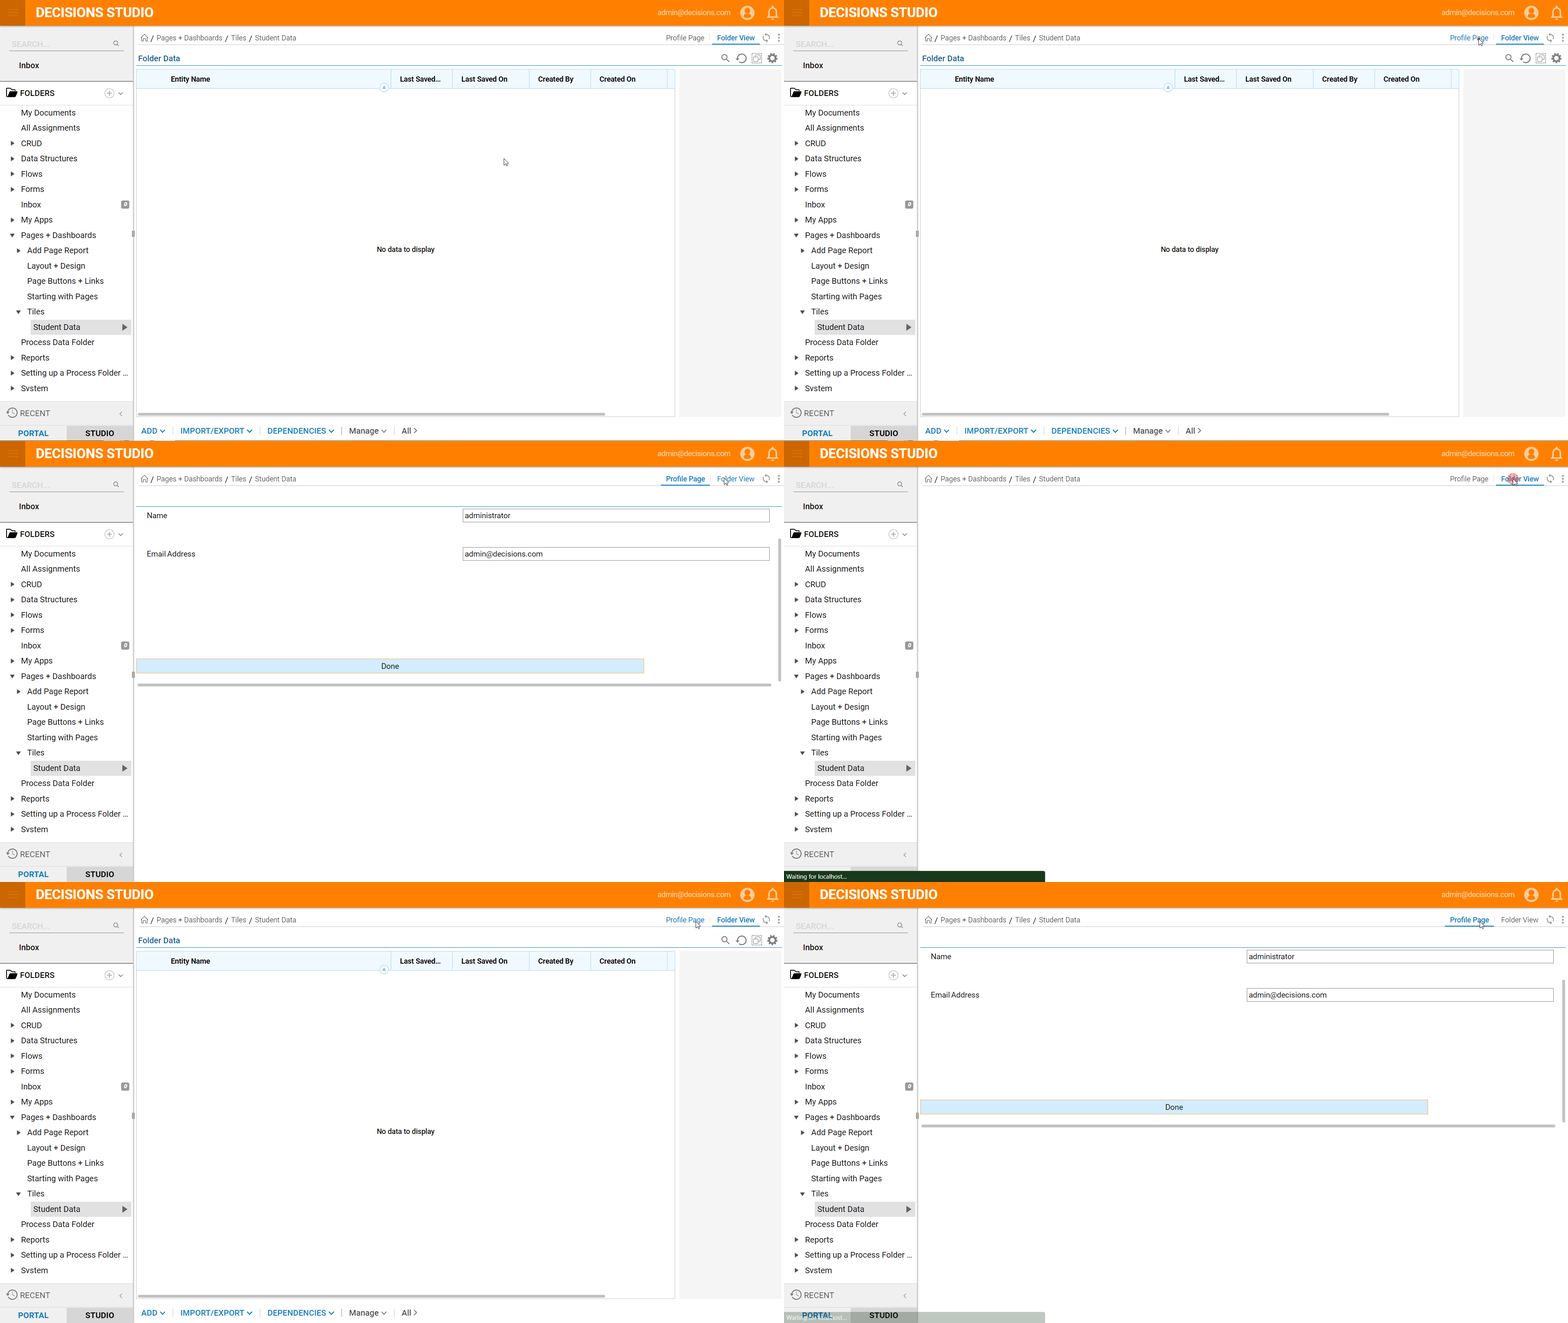
- In the Folder [Student Data], notice the appearance of the Profile Page beside Folder View above the Top Bar. Select it and the previously created Page will appear, dynamically populated.
