Overview
Developers can use the Decisions Software Development Kit (SDK) to create new data types that are usable in a Decisions environment. This is done by creating classes for the type in a class file project, which is covered in the example below.
Below is an attached data type that will be used in the example below that can be downloaded.
Example
This example is a continuation of the simple code built in the Flow Steps (Basic) article.
- In a .NET project, add a class and paste the code from the invoice.cs file.
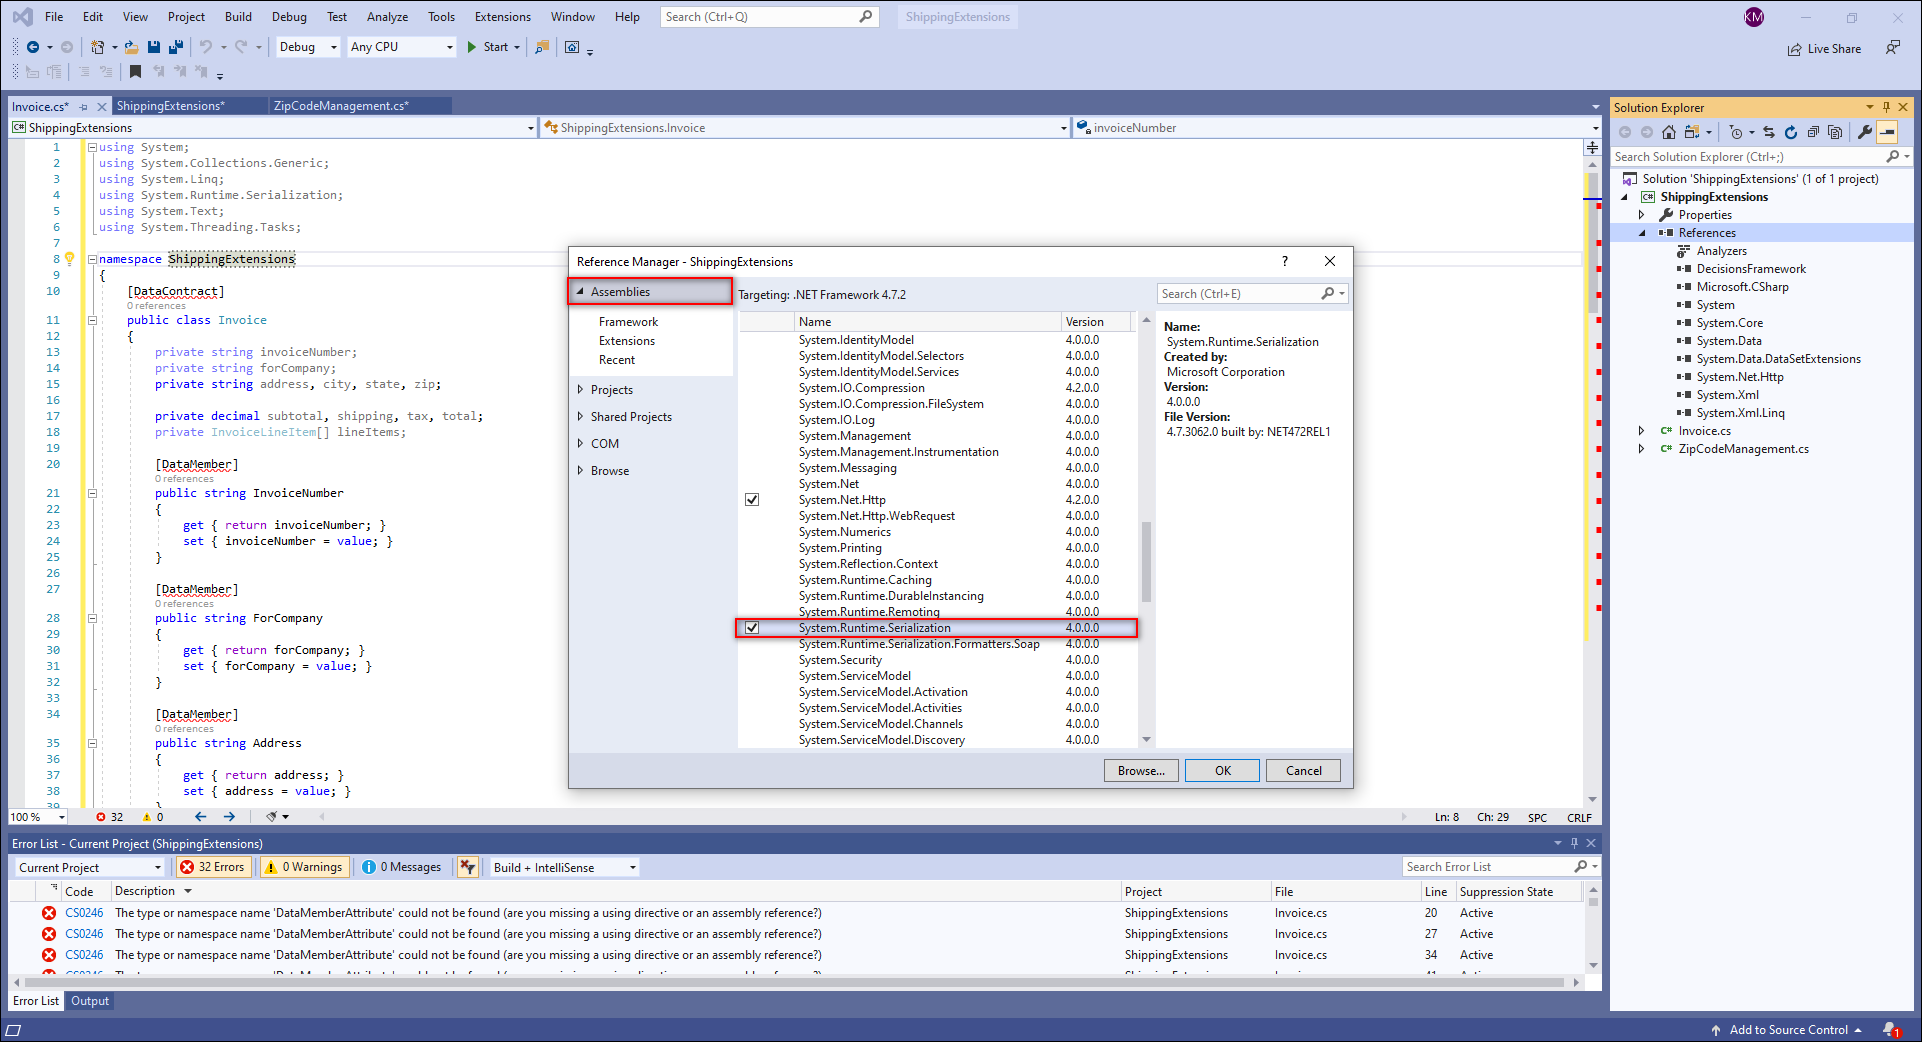
- To serialize data, add a new reference, System.Runtime.Serialization. Decisions respects all different serialization mechanisms.
The Invoice data type has an InvoiceNumber, a Company, and an Address which are all simple types. It also has an array of LineItems. There is no code in this data type exclusive to the Decisions SDK, other than the DataMember attributes which are standard .NET serialization This example code is simply a class with properties. Developers can use default parameters on properties within the code to enhance the experience for the user, for example, defaulting the ZipCode property to "23322".
Now that the data type is built there are two ways to get it to show up in Decisions:
- Use the data type as an input or output on a step. Decisions will recognize that is a type that should be exposed to the user.
- When not using the data type on a step but the data type needs to be readily available, use the [AutoRegisterNativeType] attribute.
Using Data Type as an Input on a Step
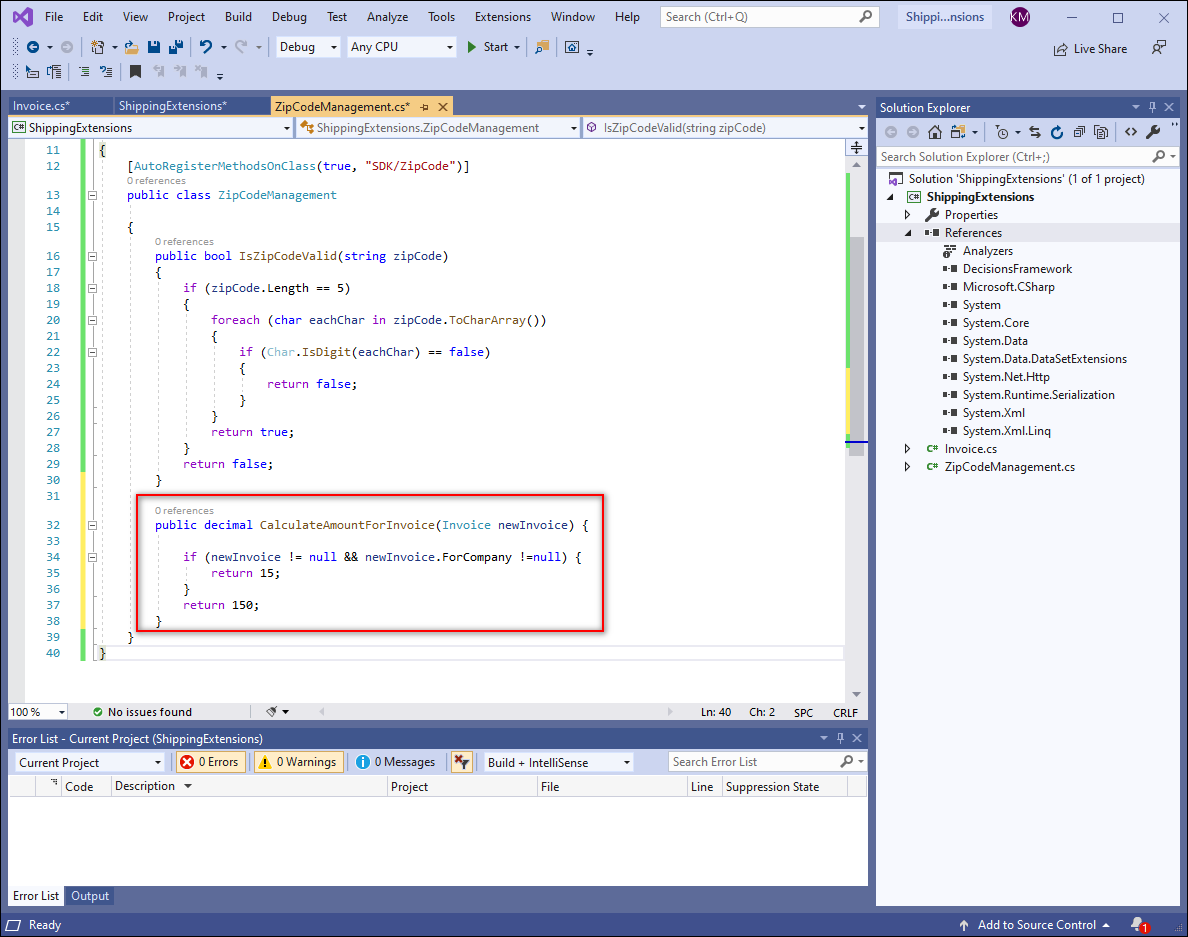
- In the ZipCodeManagement.cs project created in the Flow Steps (Basic) article, add the code below. This method is a Flow step named "CalculateAmountForInvoice" with the input being Invoice (the data type created above) and the name of the input being newInvoice. This Flow step will return the number 15 if newInvoice and newInvoice.ForCompany is NOT null. If both properties are null then the Flow step will return 150.C#
public decimal CalculateAmountForInvoice(Invoice newInvoice) { if (newInvoice != null && newInvoice.ForCompany != null) { return 15; } return 150; } - Build the .dll and deploy it into Decisions.To learn more, see Getting Started in Visual Studio.
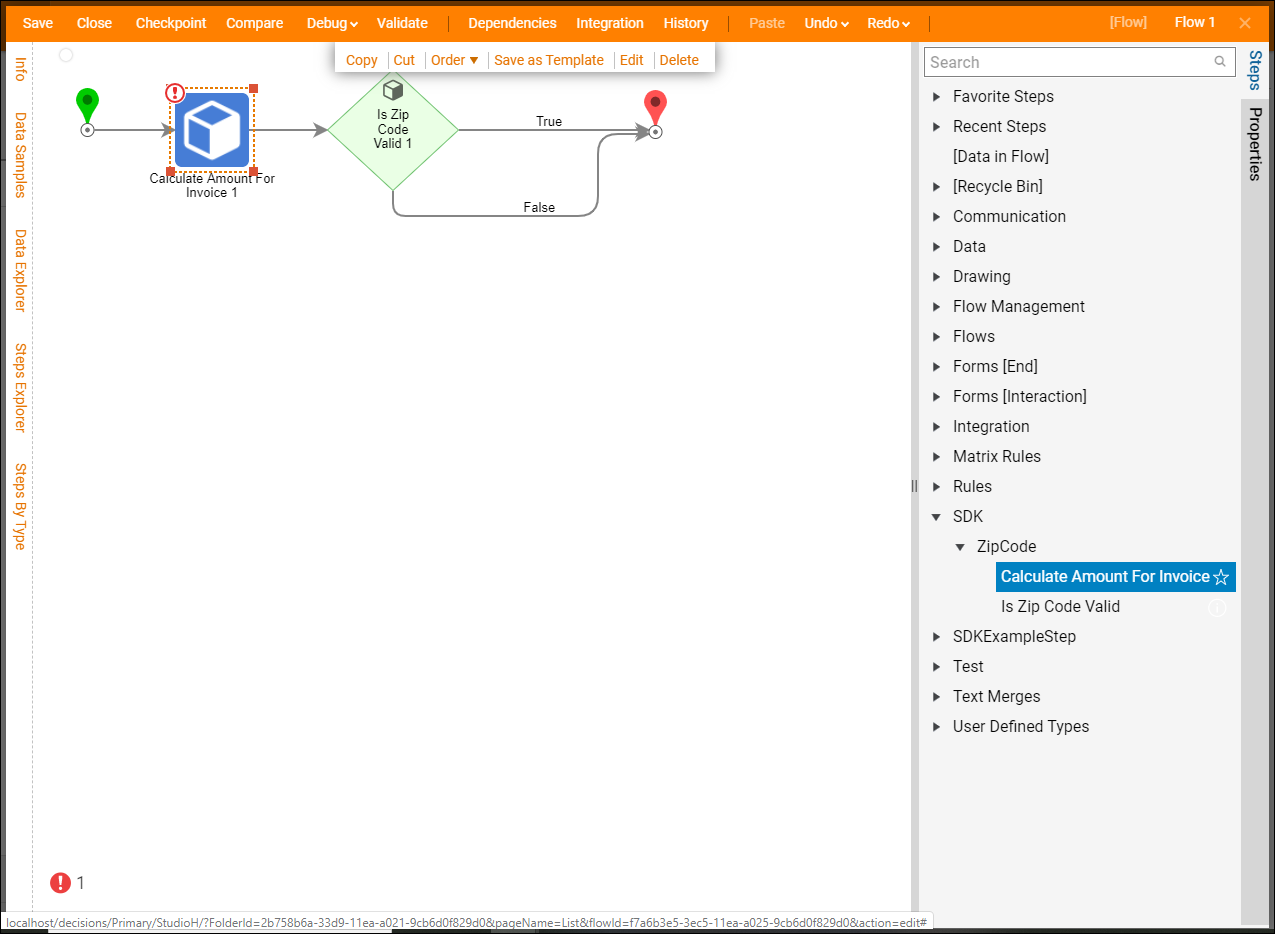
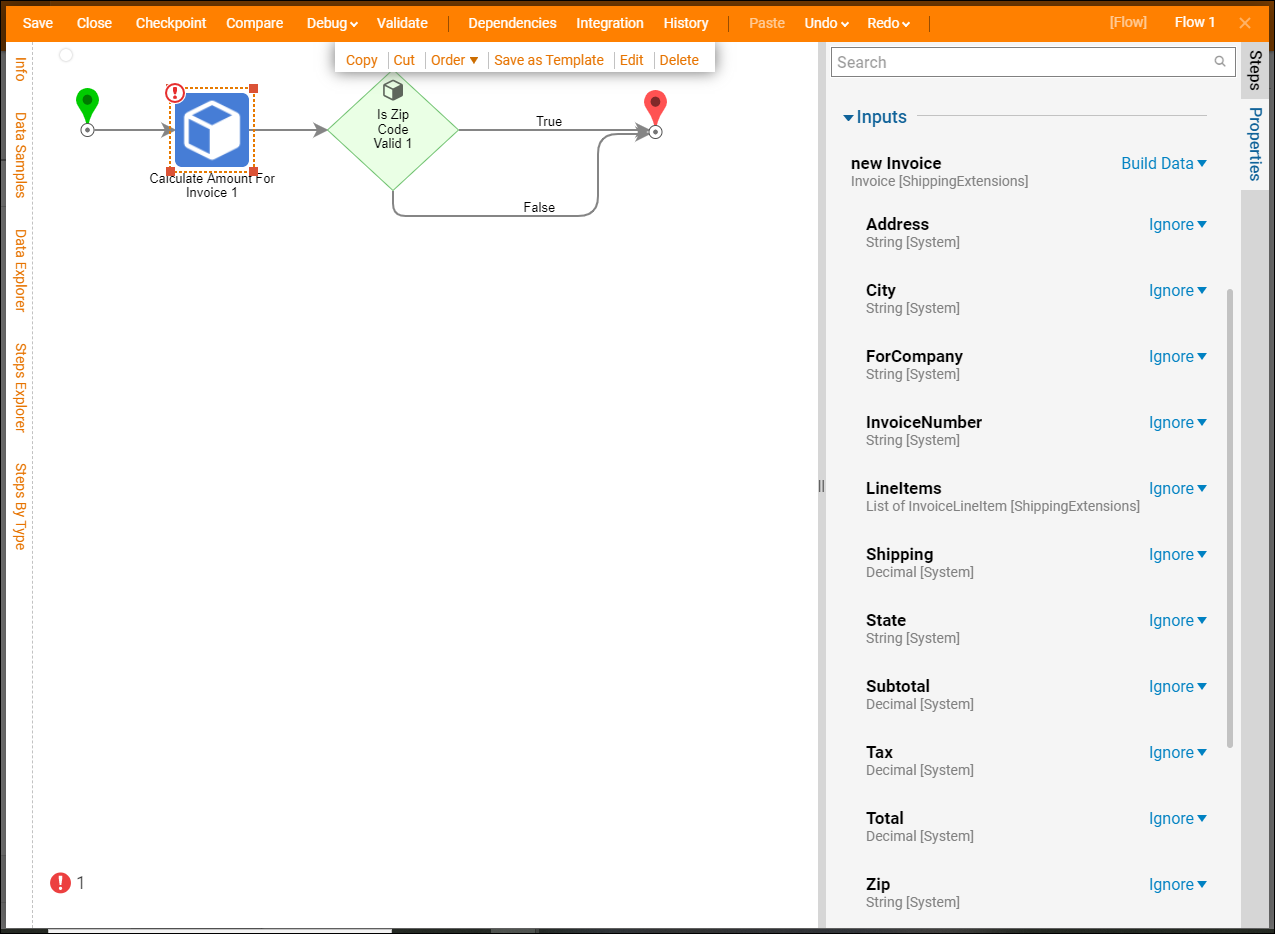
- Create or edit a Flow to open the Flow Designer and in the Steps panel navigate to SDK > ZipCode. Drag and drop the Calculate Amount For Invoice step onto the workspace.
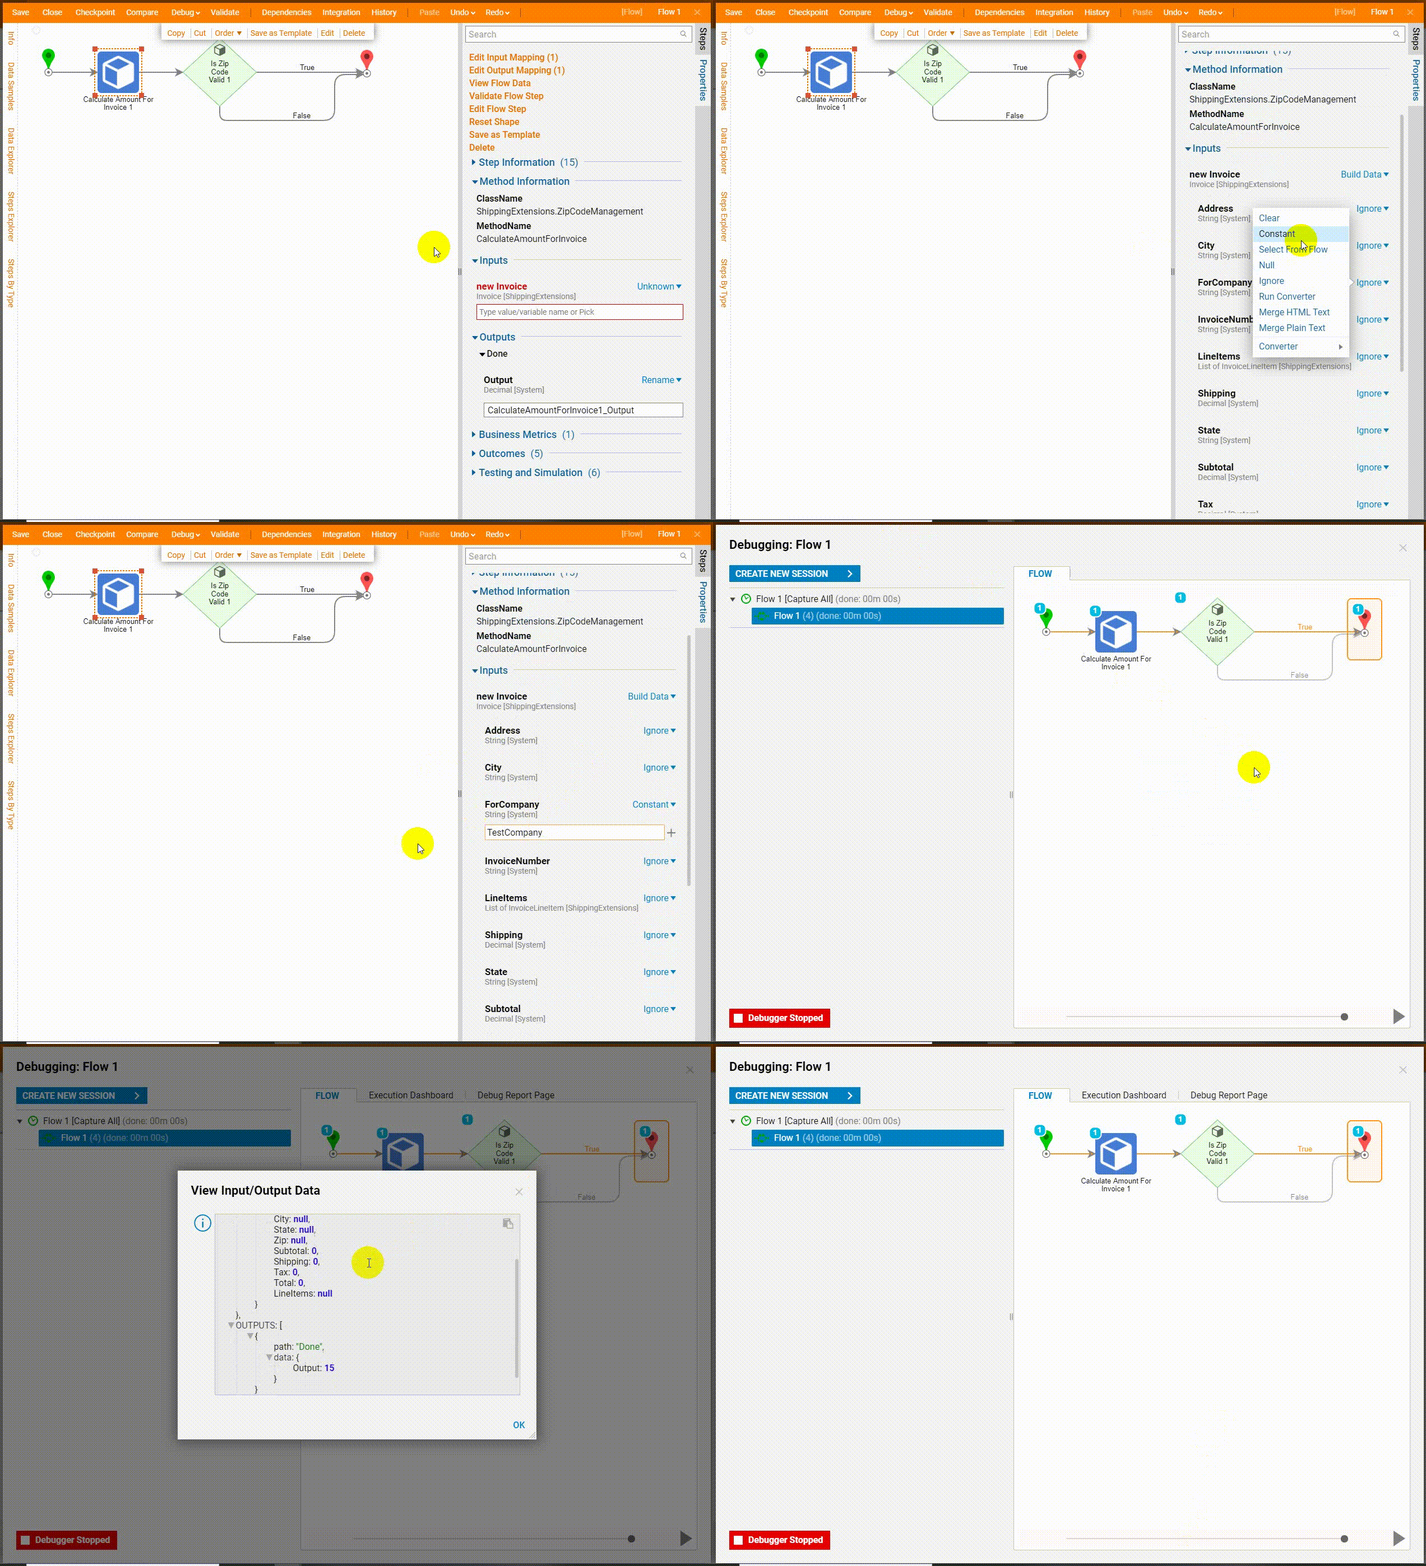
- With the step selected, choose Build Data as the mapping type for new Invoice. This shows all of the properties available within the data type that was referenced in the Calculate Amount For Invoice method.
Debug
This step's purpose is to evaluate: If new Invoice is not null and newInvoice.ForCompany is not null, the output should be 15. Keep 'Build Array' as the mapping type for new Invoice and choose 'Constant' and type "TestCompany" as the mapping type of For Company. Select Debug in the top action panel. While debugging, notice the output of the step is 15 as expected.
