Overview
This tutorial demonstrates how to set required fields on the Form dynamically. With this feature, the Flow automatically decides which data is/is not optional based on data evaluation before loading the Form without the need for Designer input for each field.
Example
In this example, build a simple Flow with a Form. The Form will have a text-box control that may be set to be either required or optional. This will be set as a Form input.
- In the Flow Designer, add a Show Form step.
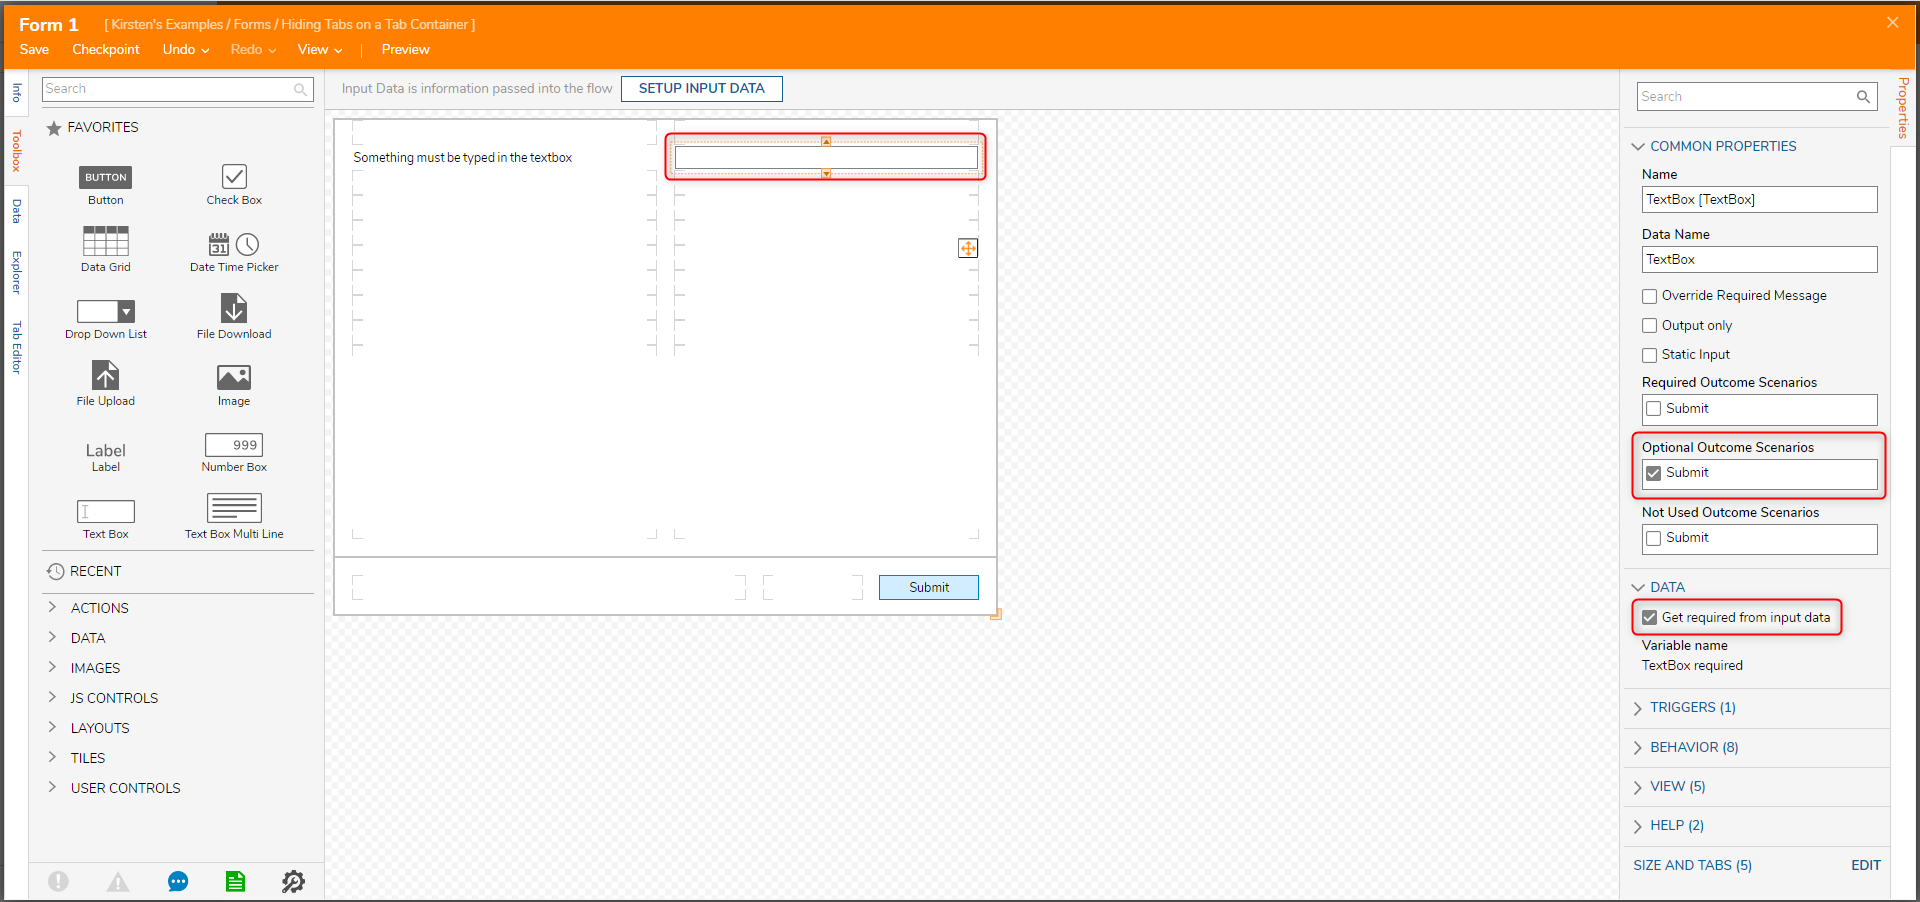
- In the Form Designer, design the Form with the following controls: Button, Label, and a Text Box.
- Navigate to the Text Box Properties.
- Define the Outcome Scenarios as Outcome Scenario.
- Required Outcome Scenario: the user will not be able to submit the Form without providing input.
- Optional OutCome Scenario: the user may leave an input empty and be able to submit the Form
- Not Used: the data provided in the input will not be available in the next steps in the Flow
- Navigate to the Data section.
- Set the Get required from input data check-box to true.
- Save the Form and close Form Designer.

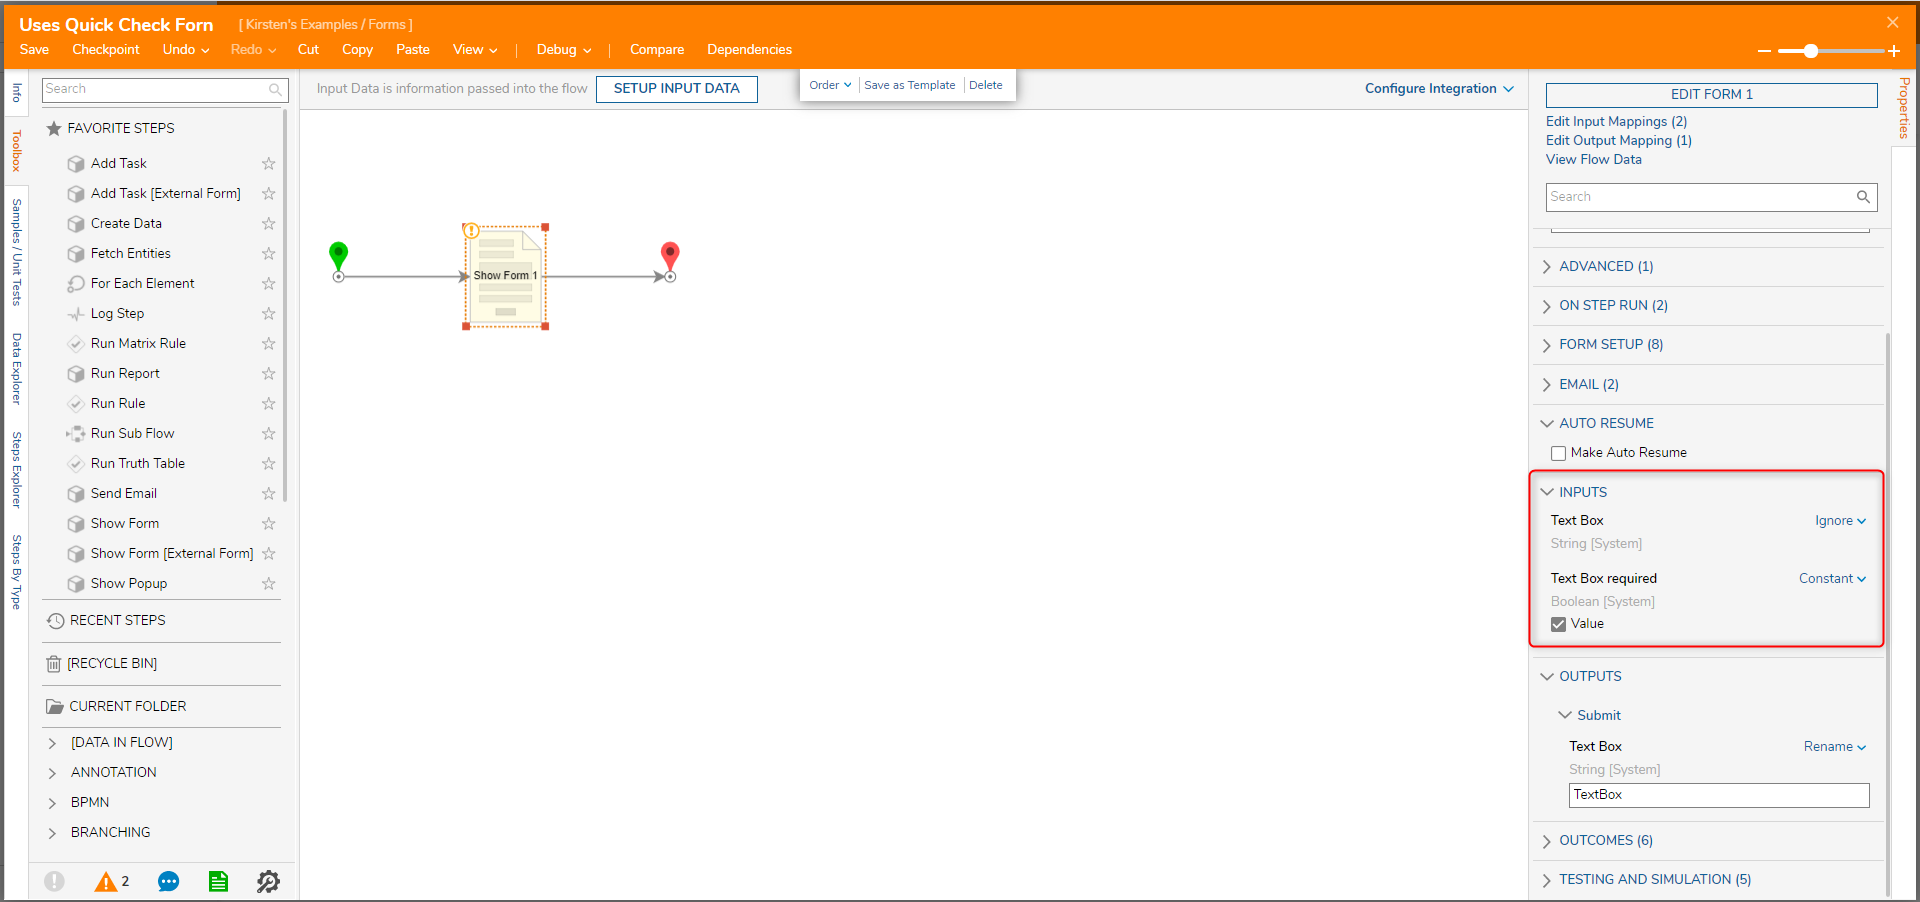
- In the Flow Designer, select the Show Form step.
- In the Properties panel, the Form has two Inputs. The first one is for the Text Box; set the mapping type to Ignore.
- The second one is a Boolean variable that defines if the Text-Box input as required or optional. Set the mapping type to Constant and set the Value to ‘True’. This selection makes the input required.
- Connect the outcome of the Show Form step to the End step.

Debug
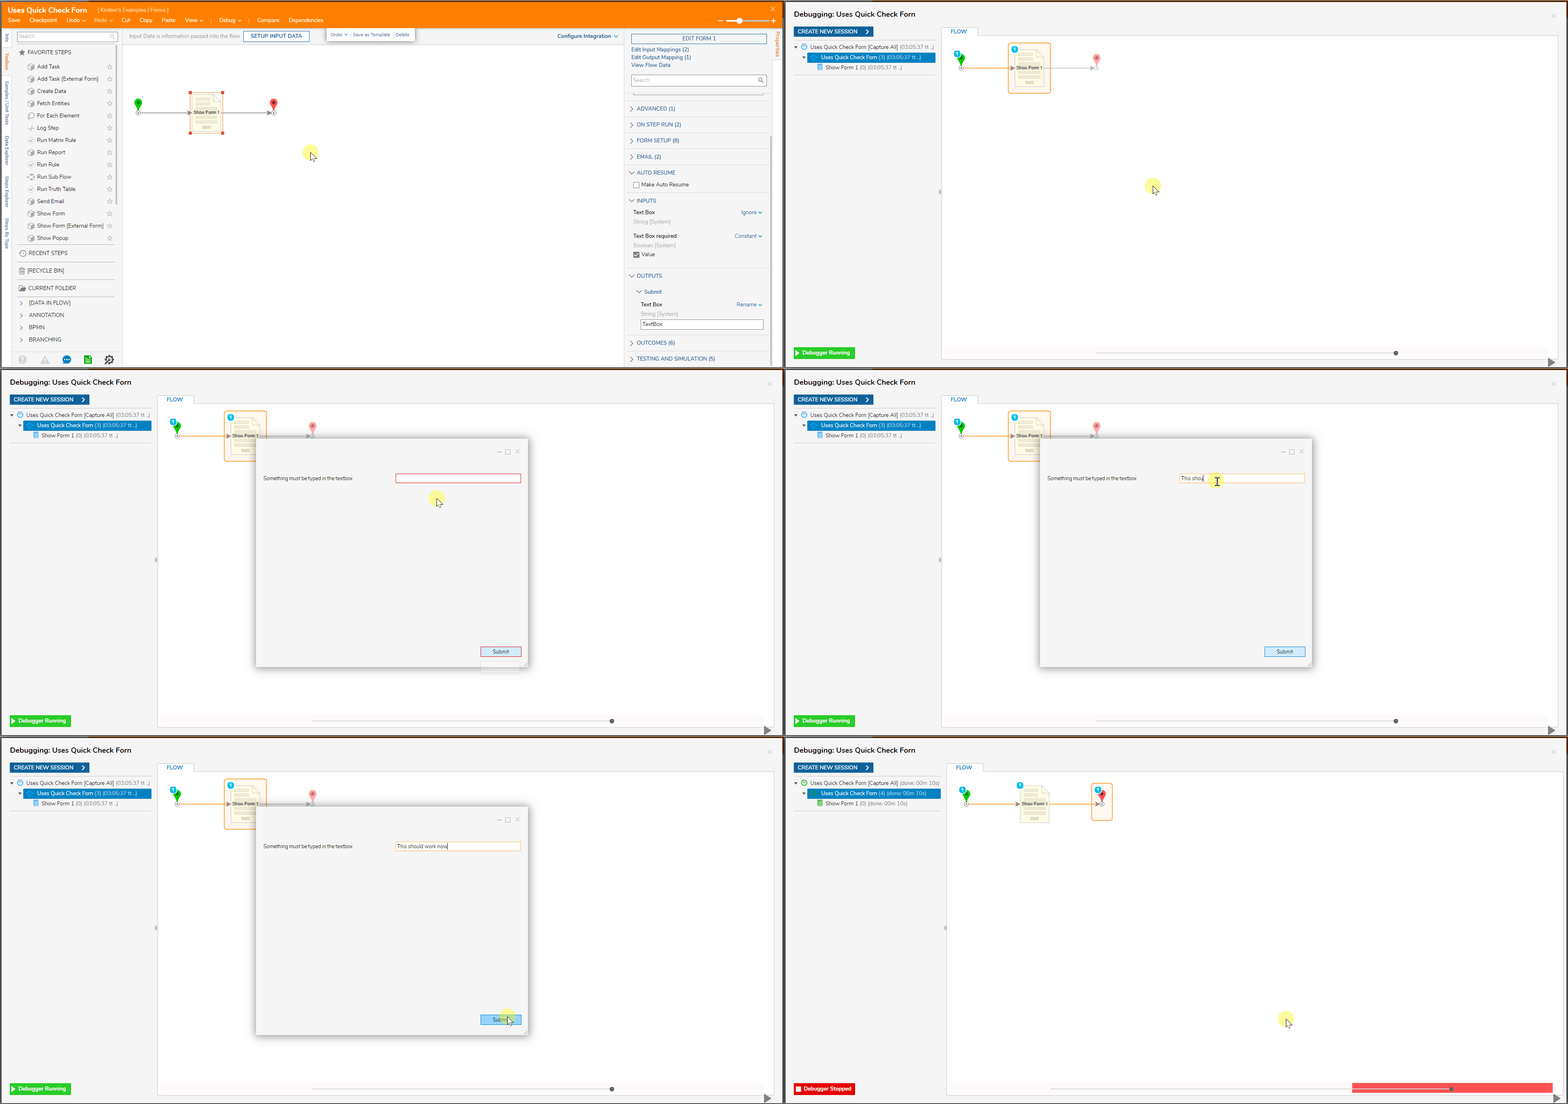
- Select Debug on the top panel in the Flow Designer
- Attempt to Submit the Form without providing input in the Text-Box. Notice a validation issue, and the Form will not be submitted.
- Add text to the Text Box, and the Form will be submitted successfully.
