Overview
This tutorial demonstrates how to use specific Steps in the Flow Designer to get values from an Excel Document, and how to Update values in the Excel Document (Set Values, Replace Values, Delete Row, etc.) These steps can be found in the Data > List > Excel and CSV category in the Steps panel.
Example
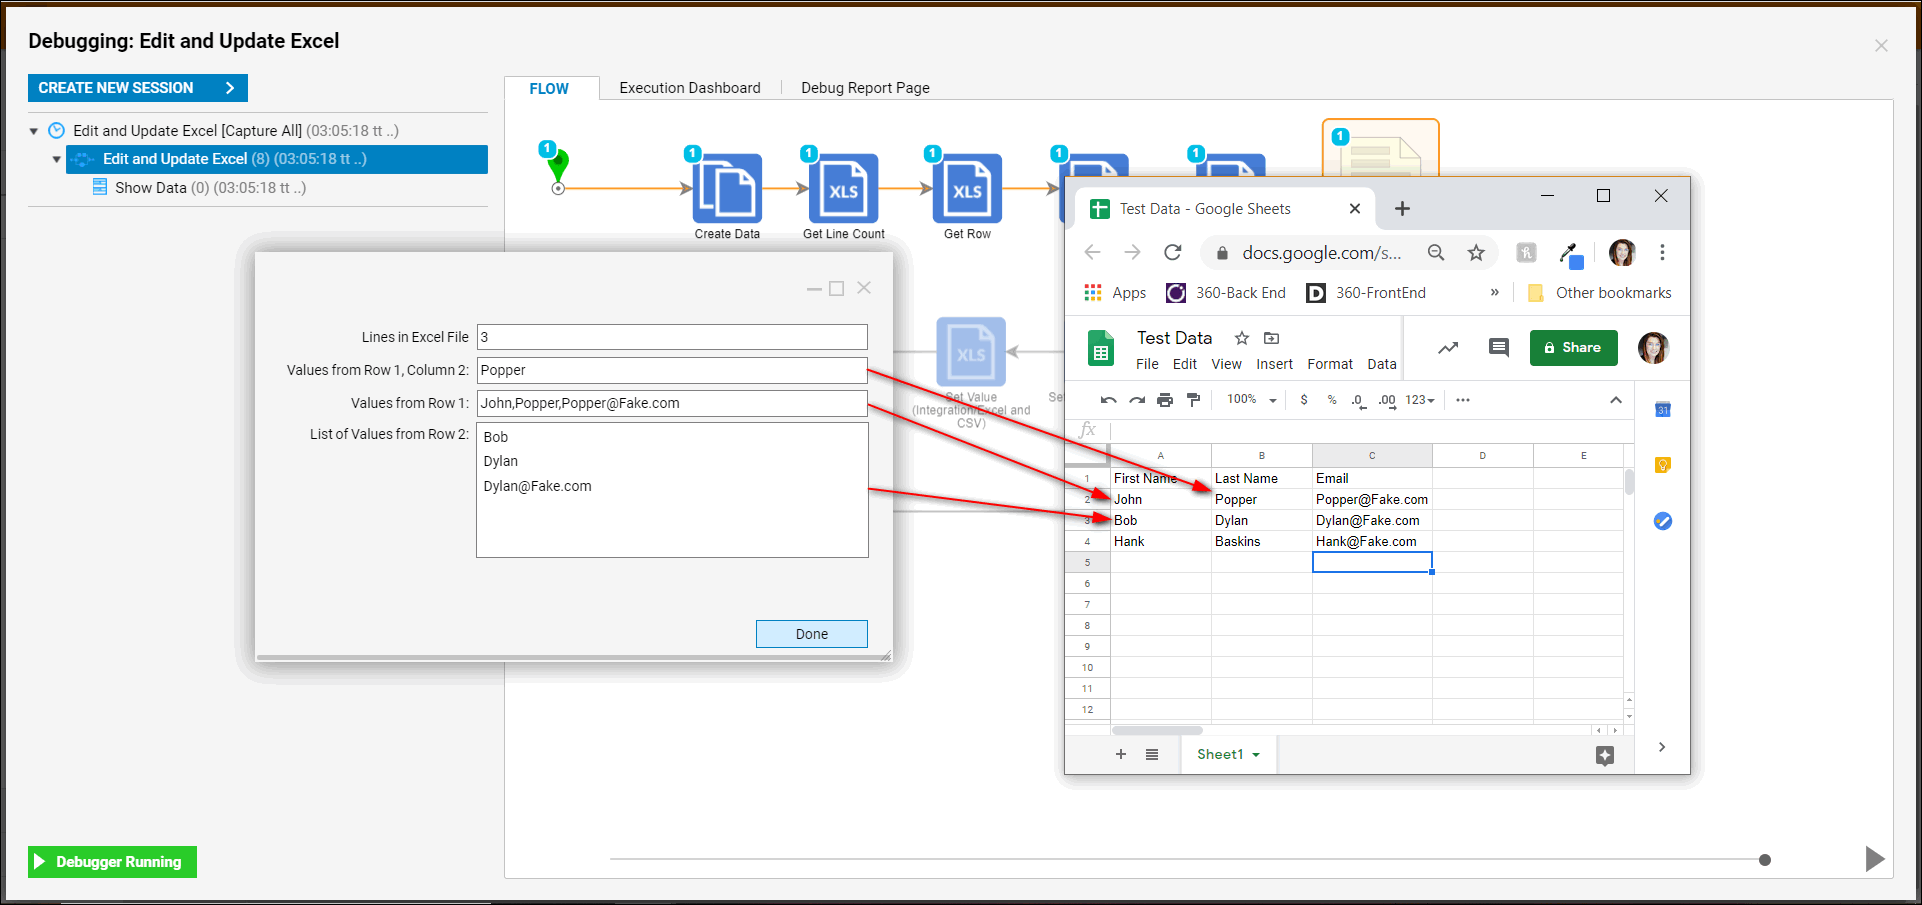
This example will get the values of an existing Excel file and display them on a Form. After the values are displayed the remainder of the Flow will edit and then update that Excel file. The file will then be available for download.
Display Data in Form
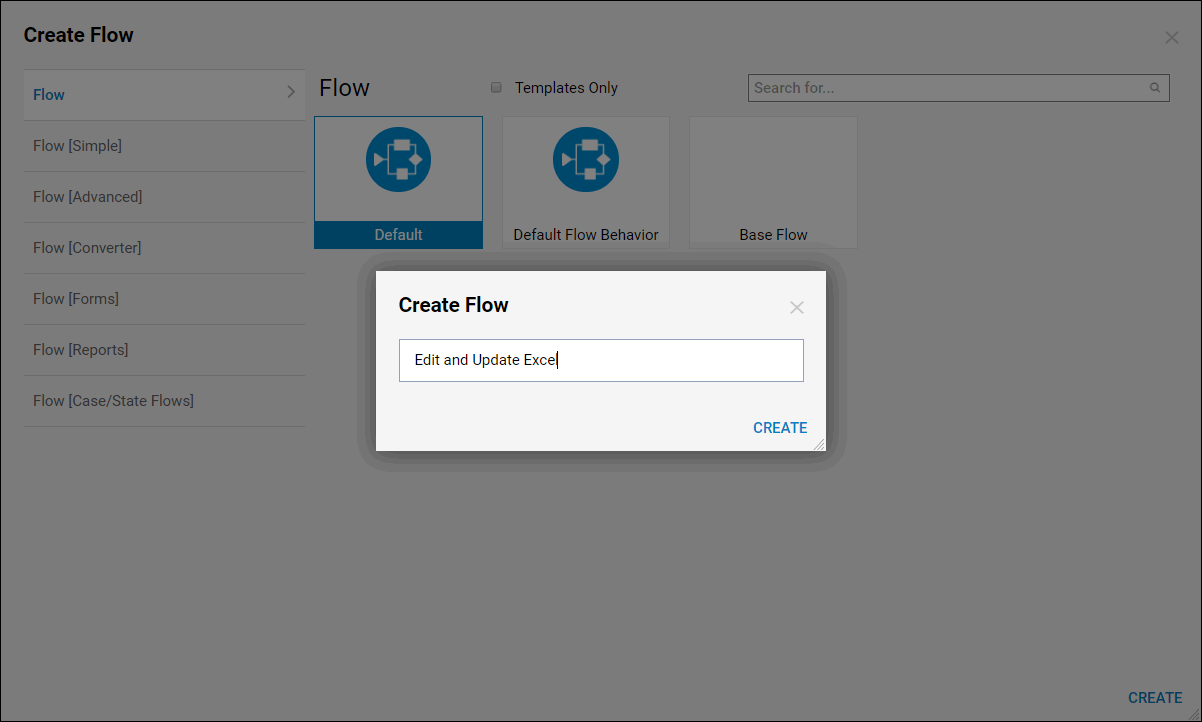
Begin in the Designer Folder, select 'Create Flow' from the bottom action panel. Name the Flow and select 'Create' to proceed to the Flow Designer.
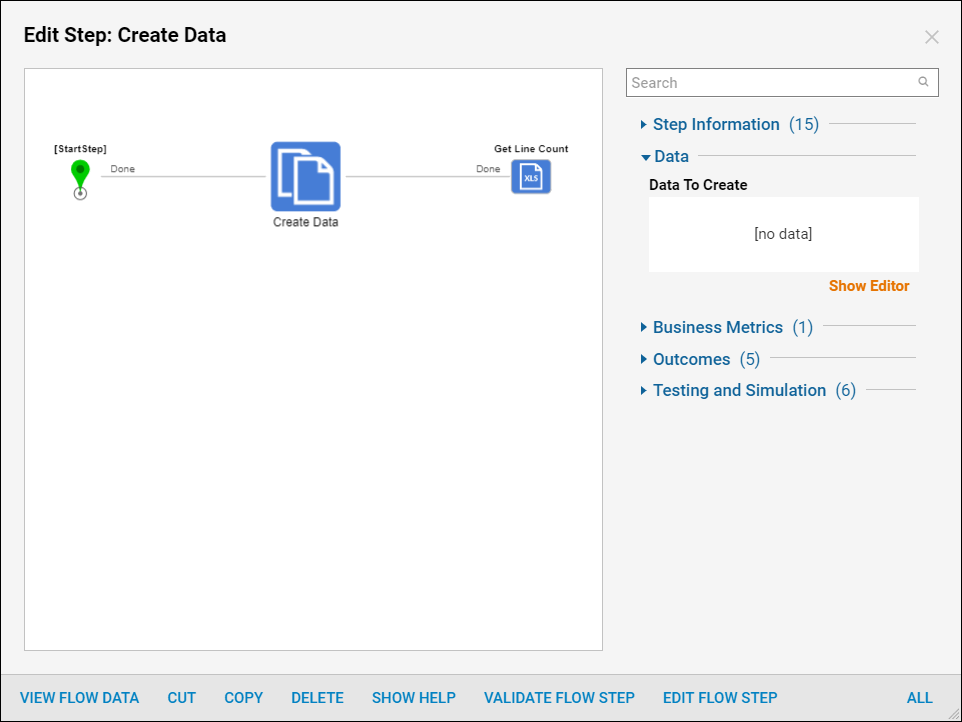
In the Flow Designer, add a Create Data step from the Favorite Steps category in the Steps panel to make an Excel file available. With the Create Data step selected, under Data > Data To Create select 'Show Editor'.
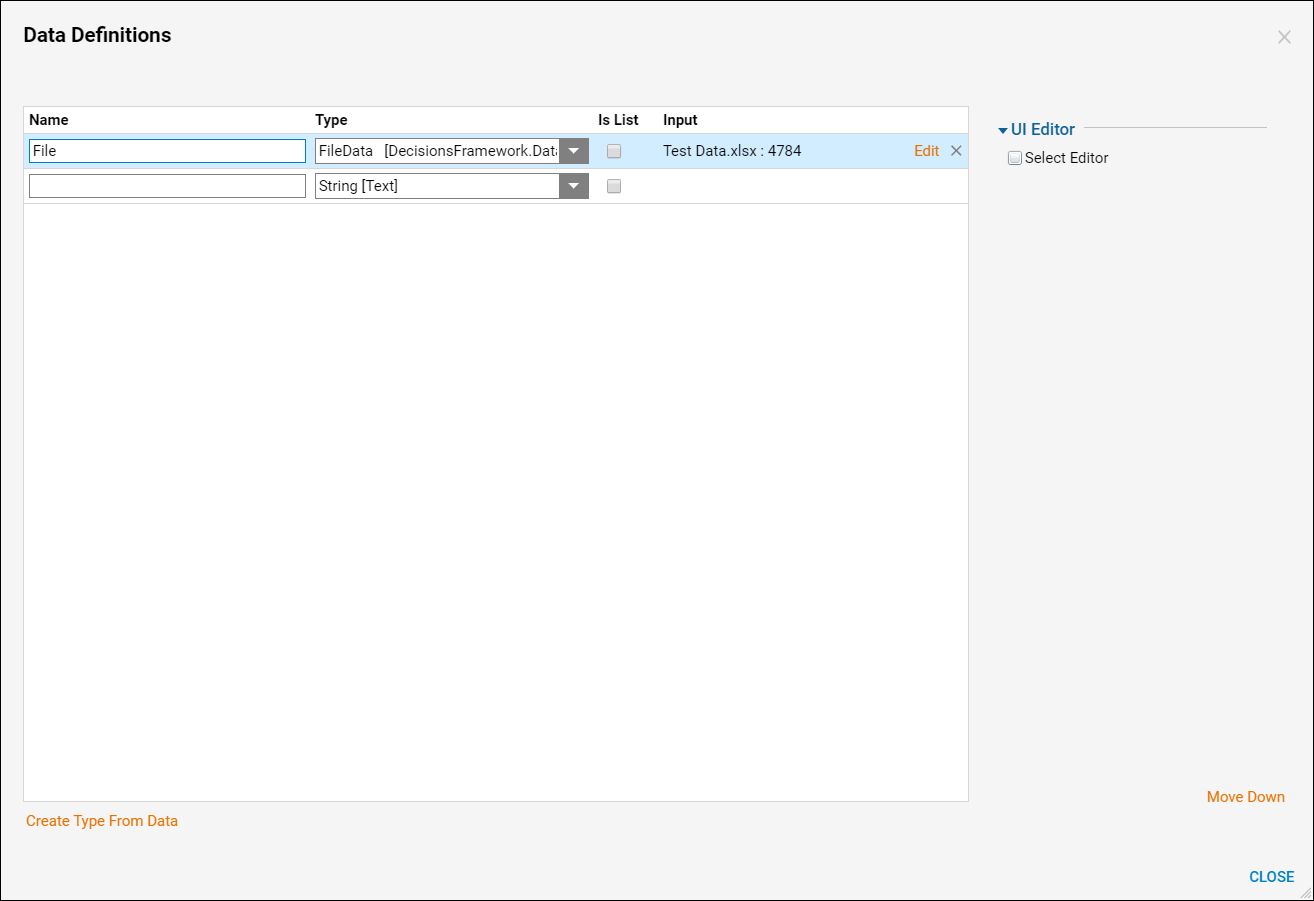
In the Data Definitions dialog, type "File" for the name and define its Type as FileData. Under Input define the mapping type for File as a Constant. Use the value picker to pick the file to use. When the file is chosen, the file name appears under Input.
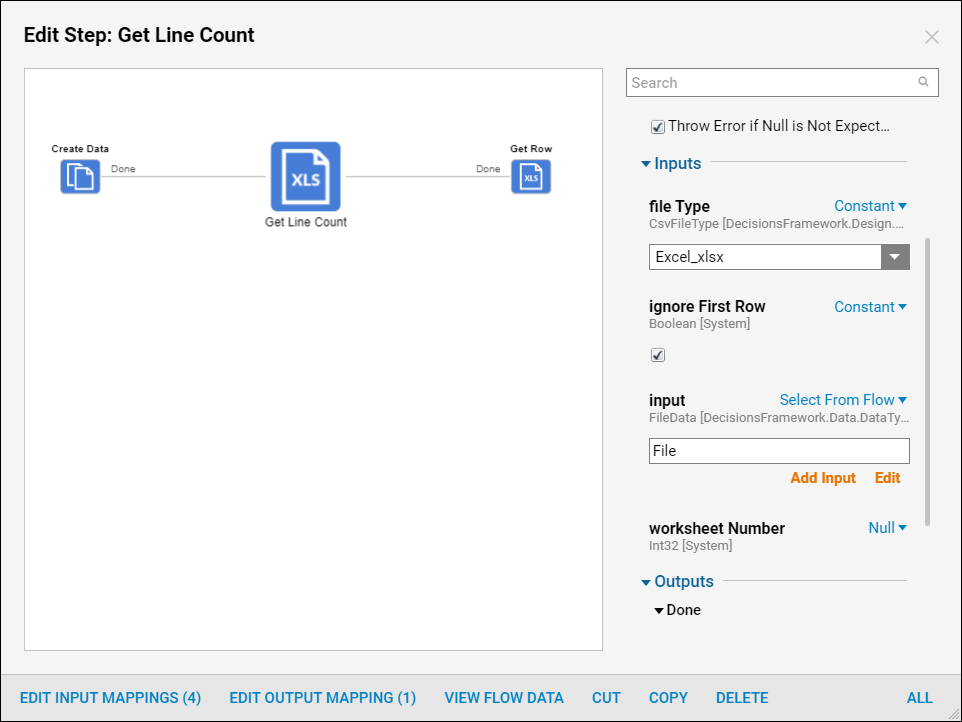
Next, add a Get Line Count step from All Steps [Catalog] > Integration > Excel and CSV category. This step returns the number of rows in the Excel Document.
For Inputs > file Type select Constant as the mapping type and choose Excel_xlsx from the drop-down menu. For ignore First Row choose Constant as the mapping type and set this value to true as the Excel file that is being uploaded uses the first row of the spreadsheet as a header row. For Inputs > input select the File from the Create Data step.
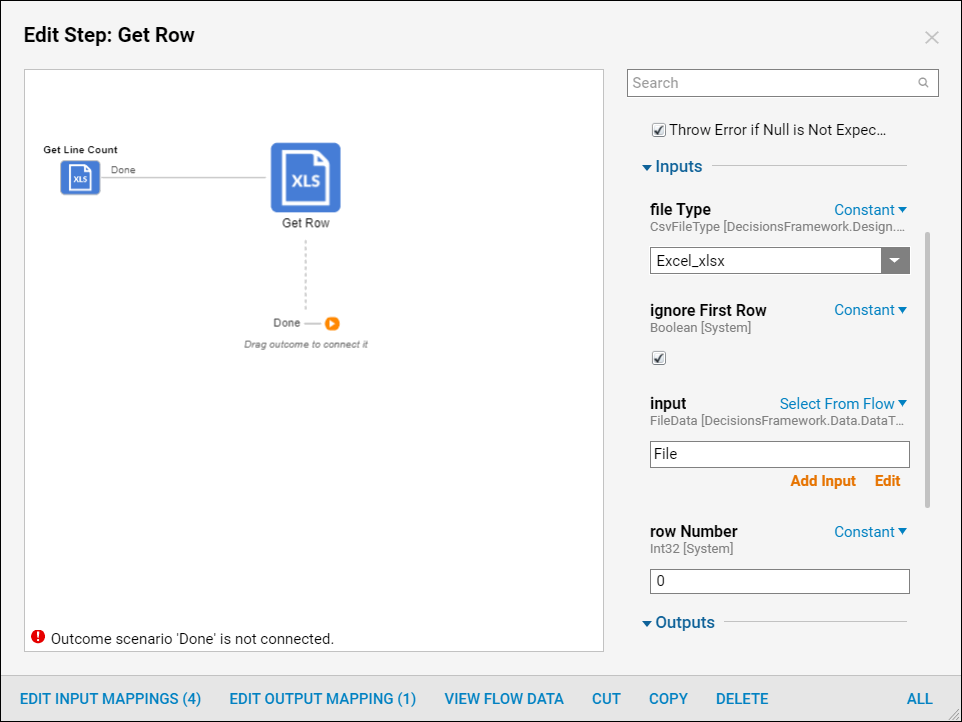
Next, add a Get Row step from All Steps [Catalog] > Integration > Excel and CSV category. This step returns data in the chosen Row. Rows in this step are zero-indexed. In this example, return the first row from the Excel Document so input 0 as the value for the Constant row Number field. For Inputs > file Type select Constant as the mapping type and choose Excel_xlsx from the drop-down menu. For ignore First Row choose Constant as the mapping type and set this value to true as the Excel file that is being uploaded uses the first row of the spreadsheet as a header row. For Inputs > input select the File from the Create Data step.
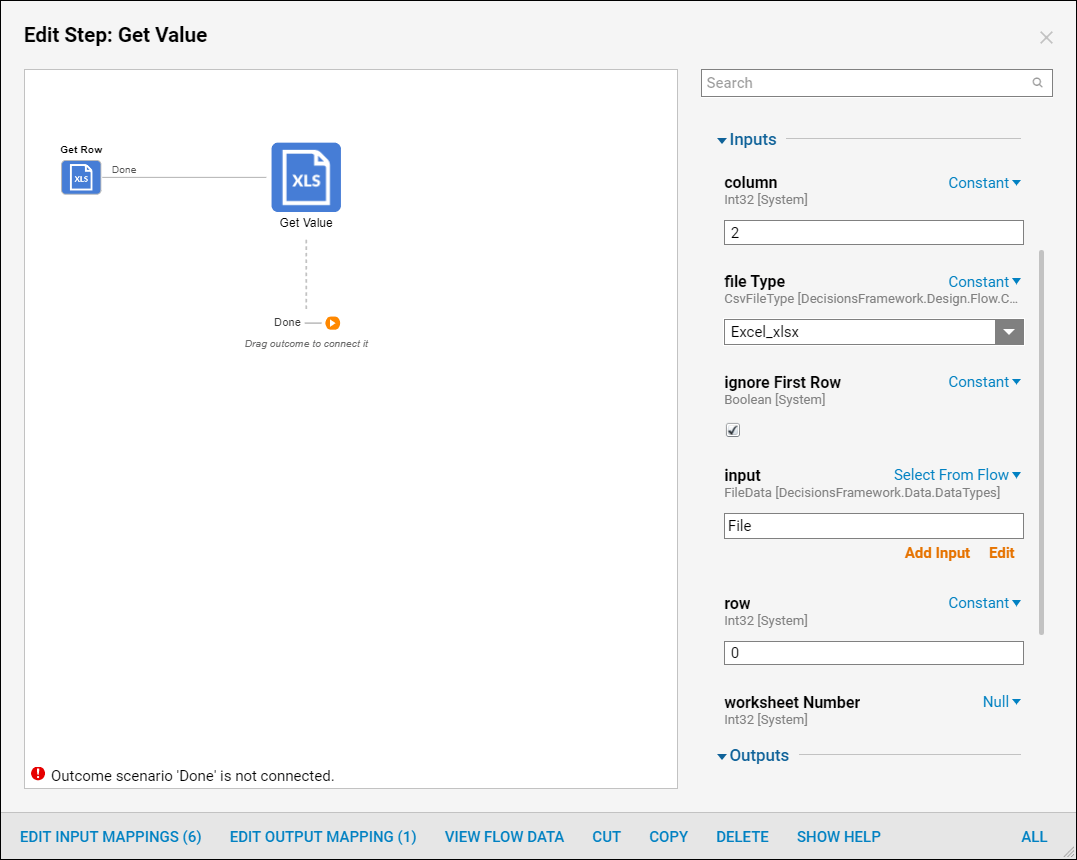
Add a Get Value step from All Steps [Catalog] > Integration > Excel and CSV category. This step gets data from the desirable cell in the Excel File. Define the row and column number to point to the desired cell in the Excel Document, in this example use "2" for the column and "0" for the row. Keep in mind these steps are zero-indexed. For Inputs > file Type select Constant as the mapping type and choose Excel_xlsx from the drop-down menu. For ignore First Row choose Constant as the mapping type and set this value to true as the Excel file that is being uploaded uses the first row of the spreadsheet as a header row. For Inputs > input select the File from the Create Data step.
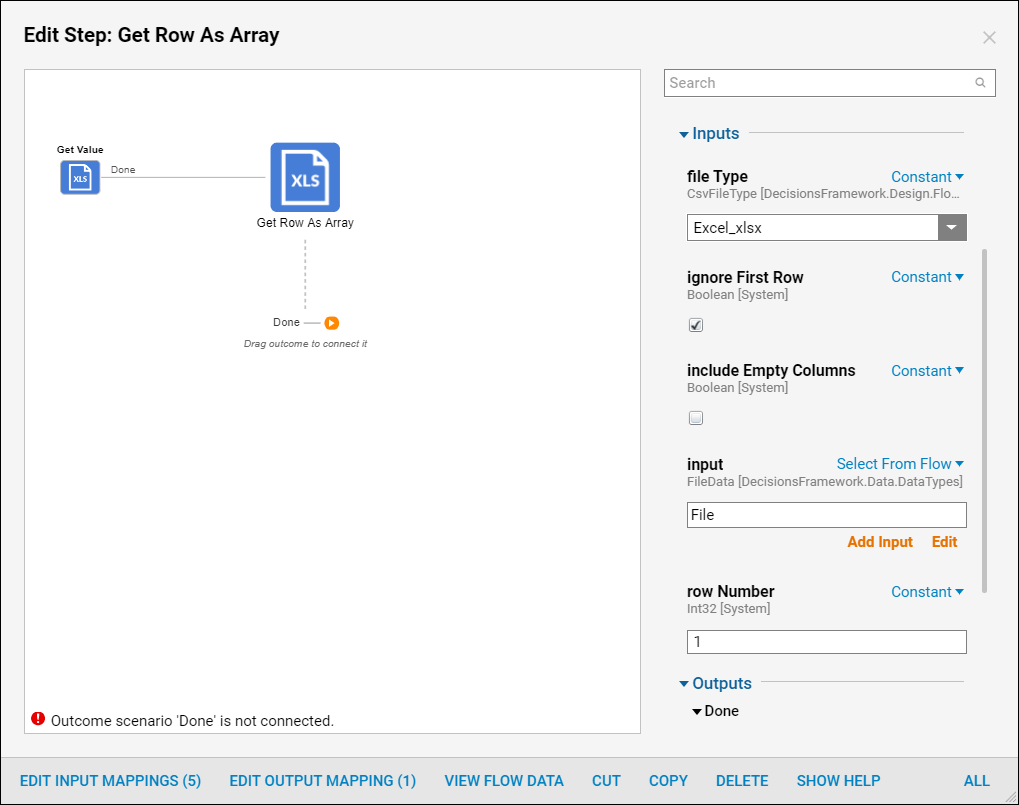
Next, add a Get Row As Array step from All Steps [Catalog] > Integration> Excel and CSV category. This is another way to get data from a specific row in the Excel File. In this case, the step returns an Array of Strings. Each String in this Array is a single value from each column in the Row. In this example, return the second Row so input "1" for the row Number field. For Inputs > file Type select Constant as the mapping type and choose Excel_xlsx from the drop-down menu. For ignore First Row choose Constant as the mapping type and set this value to true as the Excel file that is being uploaded uses the first row of the spreadsheet as a header row. For Inputs > input select the File from the Create Data step.
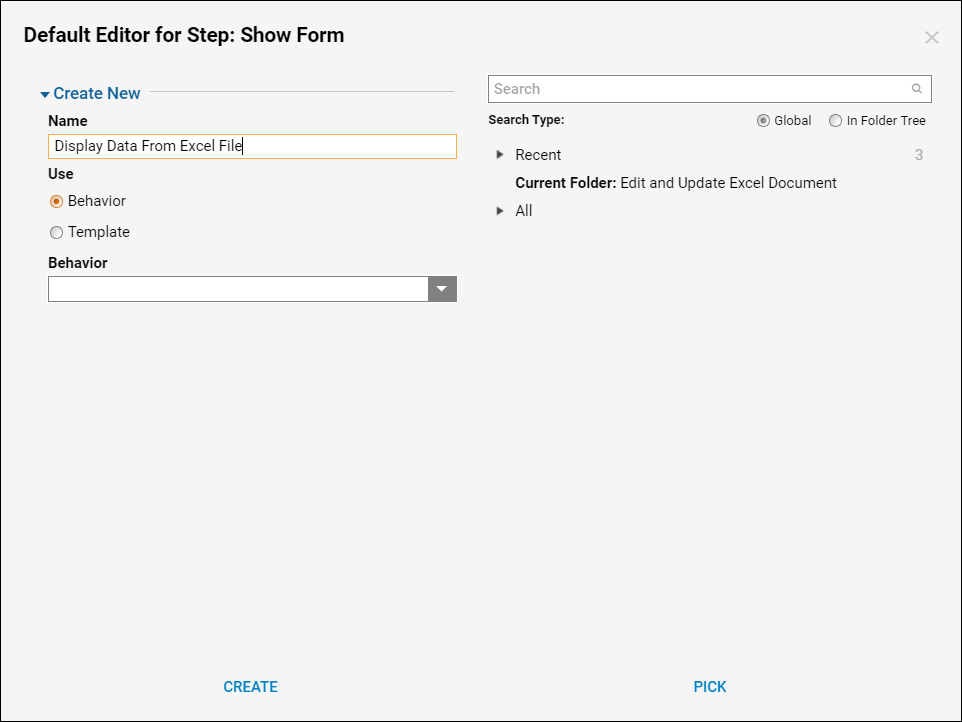
Next, create a Form for the Flow to display the information that these steps return from the Excel Document. Add a Show Form step from the Favorite Steps category in the Steps panel. In the resulting window, name the Form and select 'Create' to proceed to the Form Designer.
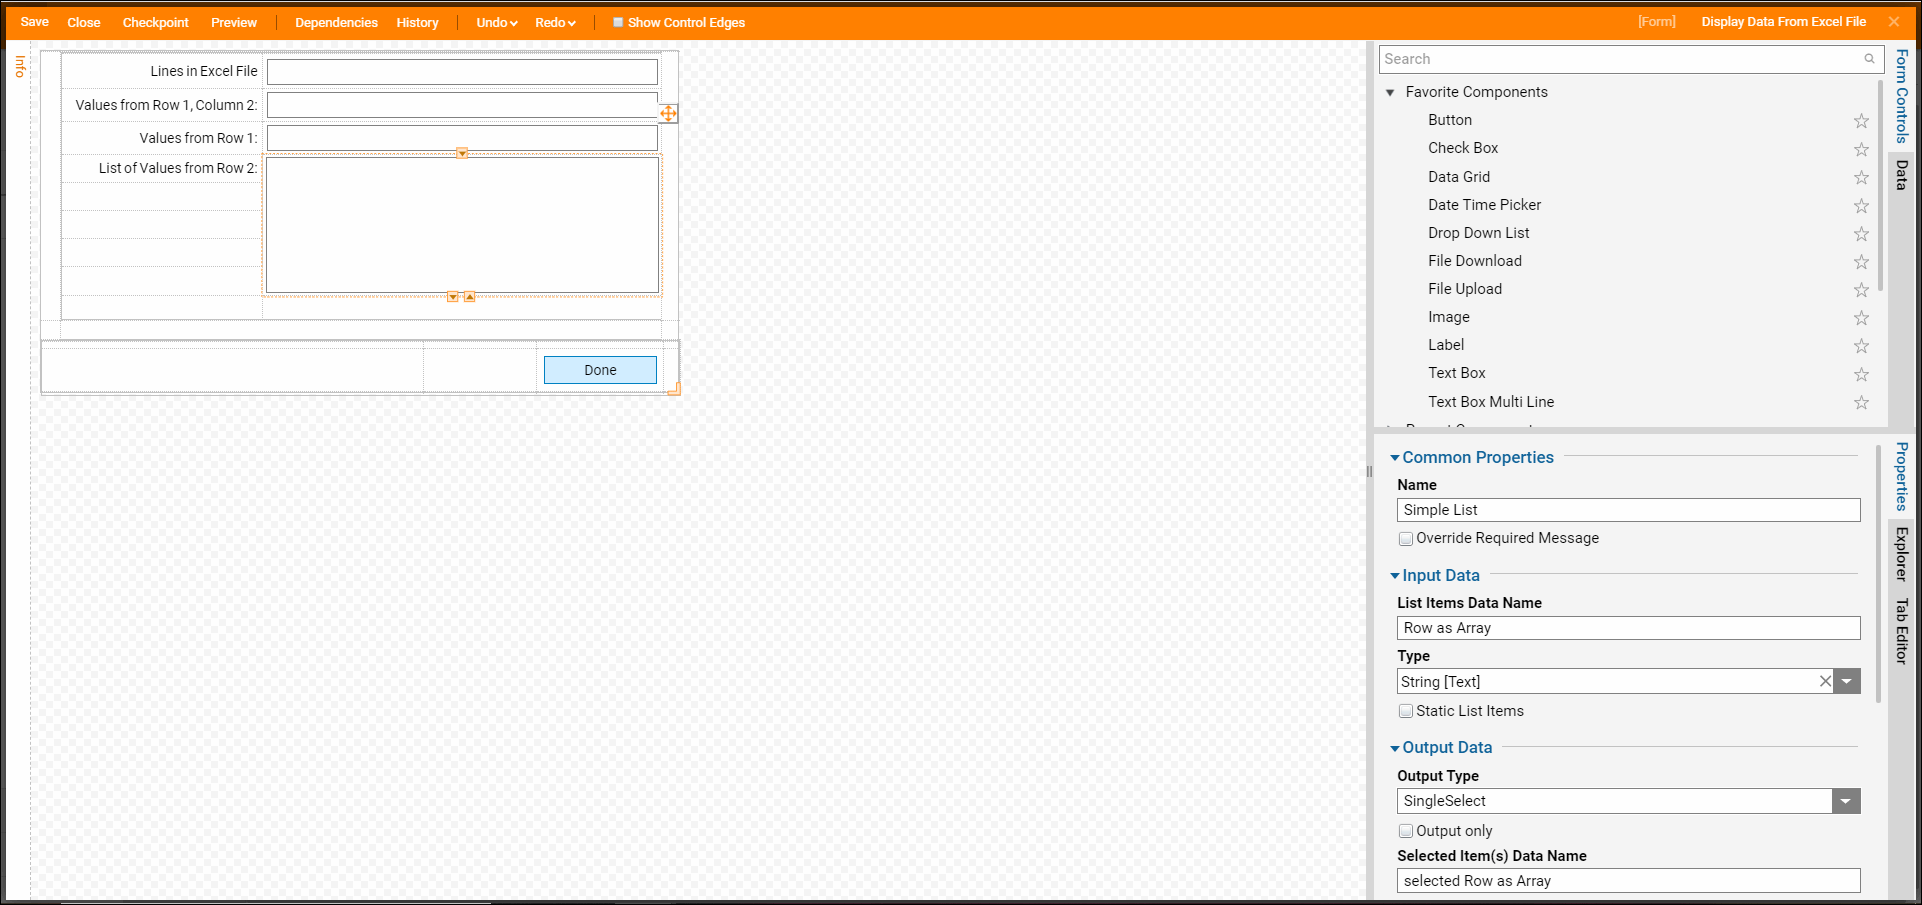
The Form Design is simple. Add a Button component from the Actions category as an outcome from the Form. Add Label components from the Data category to indicate what Data is being displayed. To display the values, use Text Box components.
To display the Array of Strings that the Get Row As Array step returns, use a List Box component from Data > List category in the ToolBox. Define the List Box Type as a String and provide the required field values.
Save and close the Form Designer.
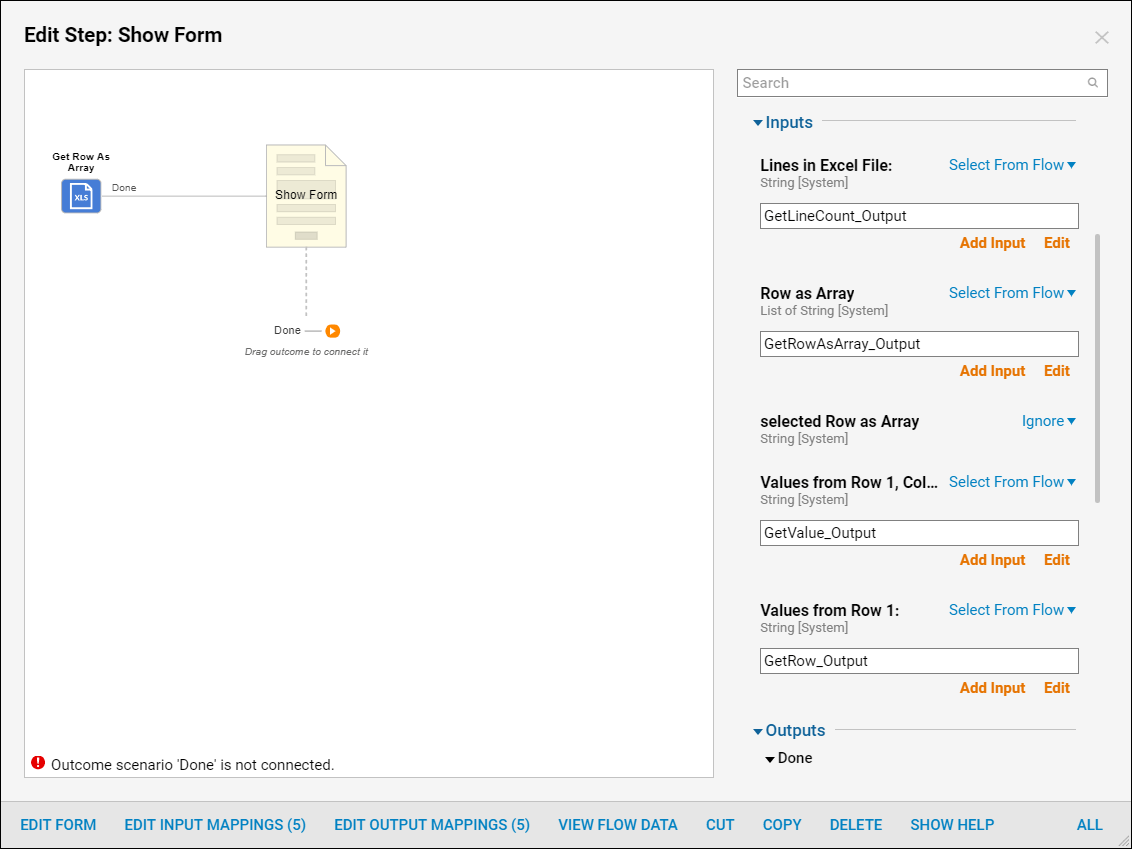
Back in the Flow Designer, under Inputs > Lines in Excel File choose Select From Flow as the mapping type and choose GetLineCount_Output. For Row As Array choose Select From Flow as the mapping type and set this value GetRowAsArray_Output. For Values from Row 1, Column 2 choose Select From Flow as the mapping type and set this value GetValue_Output. For Values from Row 1 choose Select From Flow as the mapping type and set this value GetRow_Output.
Edit Data in Excel File
The next section of this tutorial demonstrates how to edit data in the Excel Document.
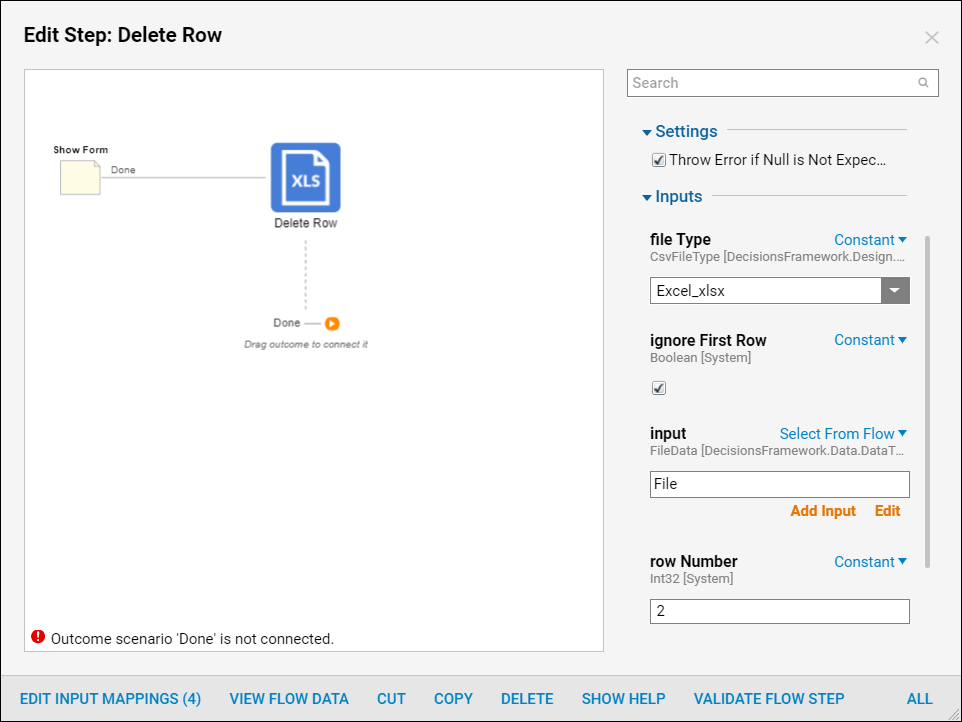
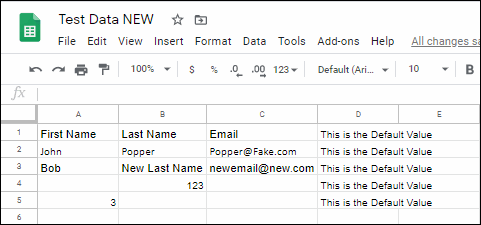
First, add a Delete Row step from Integrations > All Integrations > Excel and CSV category. This step deletes a desirable Row from the Excel File. In this example, delete the third row so input "2" for the row Number field. For Inputs > file Type select Constant as the mapping type and choose Excel_xlsx from the drop-down menu. For ignore First Row choose Constant as the mapping type and set this value to true as the Excel file that is being uploaded uses the first row of the spreadsheet as a header row. For Inputs > input select the File from the Create Data step.
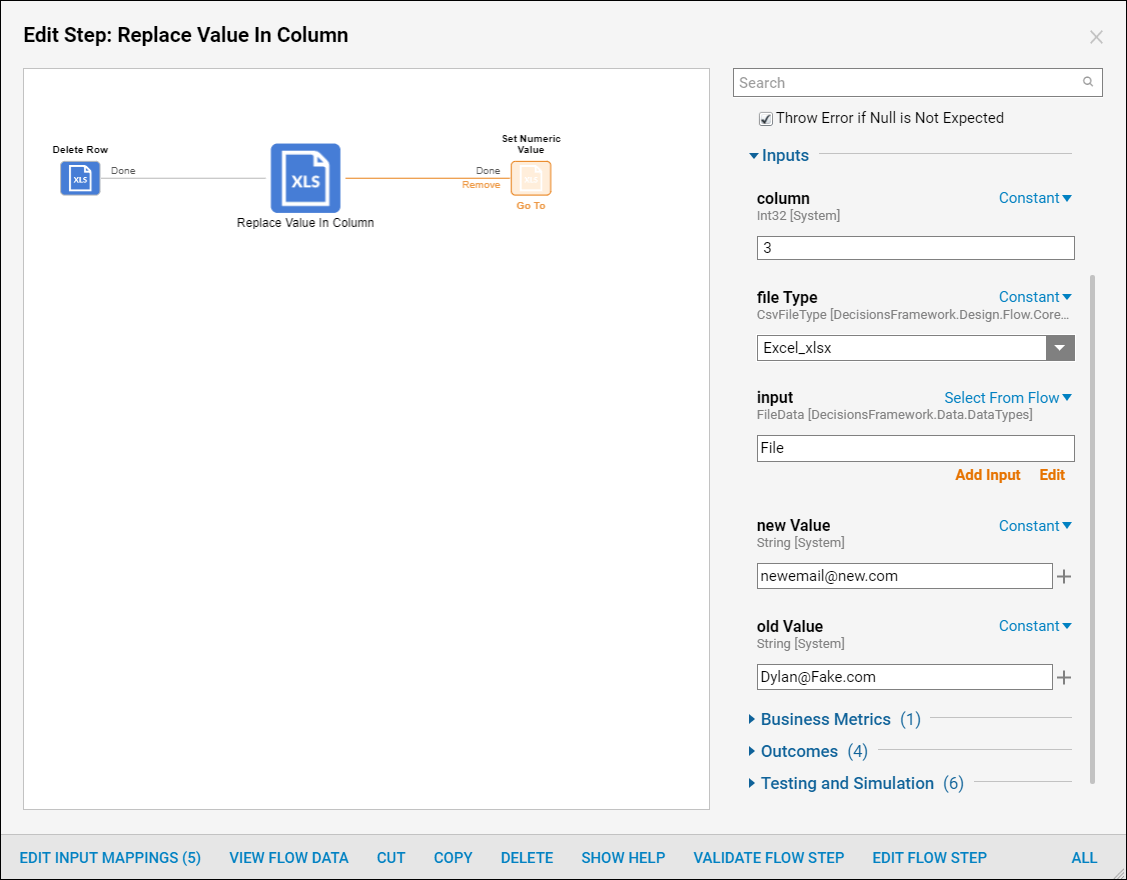
Now add a Replace Value In Column step from Integrations > All Integrations > Excel and CSV. This step replaces the value in the specified column in the Excel Document. This step needs an oldValue and newValue to be defined as it iterates through the values in the defined column and if oldValue is found, it's replaced with newValue. In this example, replace the values in the fourth column so input "3" for the column field. For Inputs > file Type select Constant as the mapping type and choose Excel_xlsx from the drop-down menu. For Inputs > input select the File from the Create Data step.
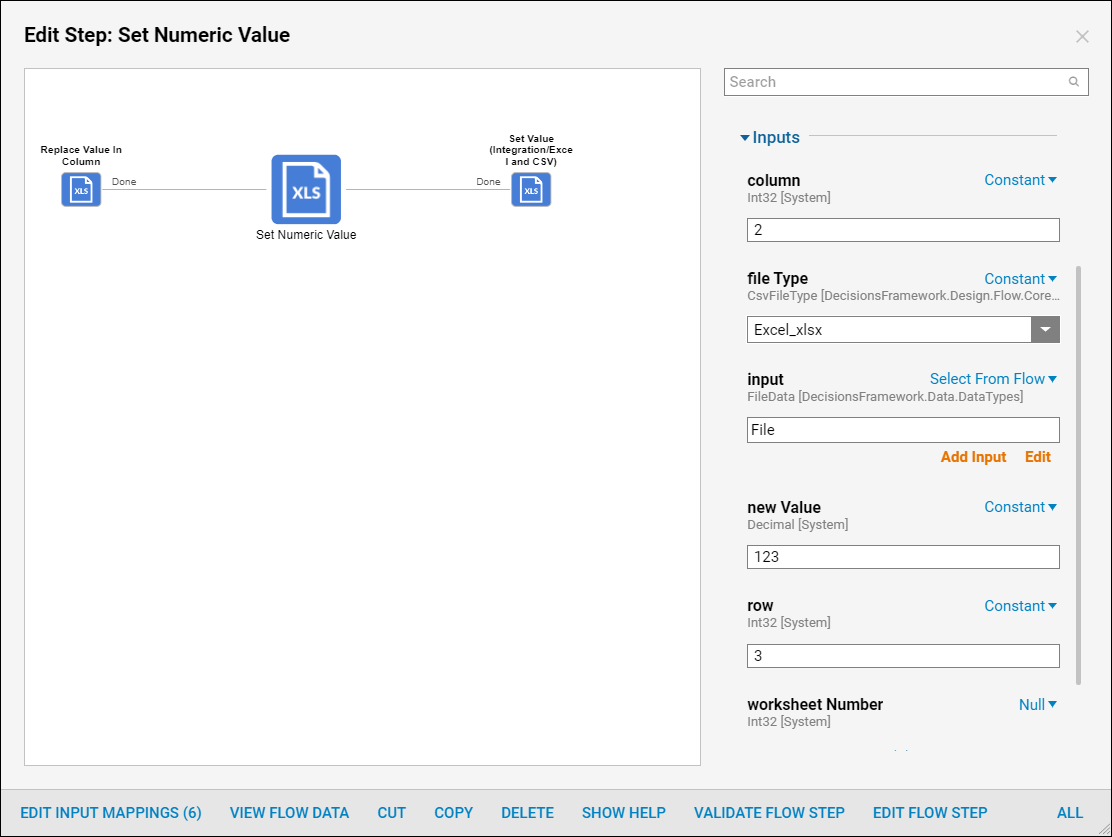
Next, add Set Numeric Value step from Integrations > All Integrations > Excel and CSV category in the Quick Add Step dialog. This step is designed to set a desirable numeric value for the specific cell in the Excel Document. This value will be treated in the Excel File as a number. In this example, set a numeric value in the second column and fourth row, input "2" for the column field, and "3" for the row field. For Inputs > file Type select Constant as the mapping type and choose Excel_xlsx from the drop-down menu. For Inputs > input select the File from the Create Data step.
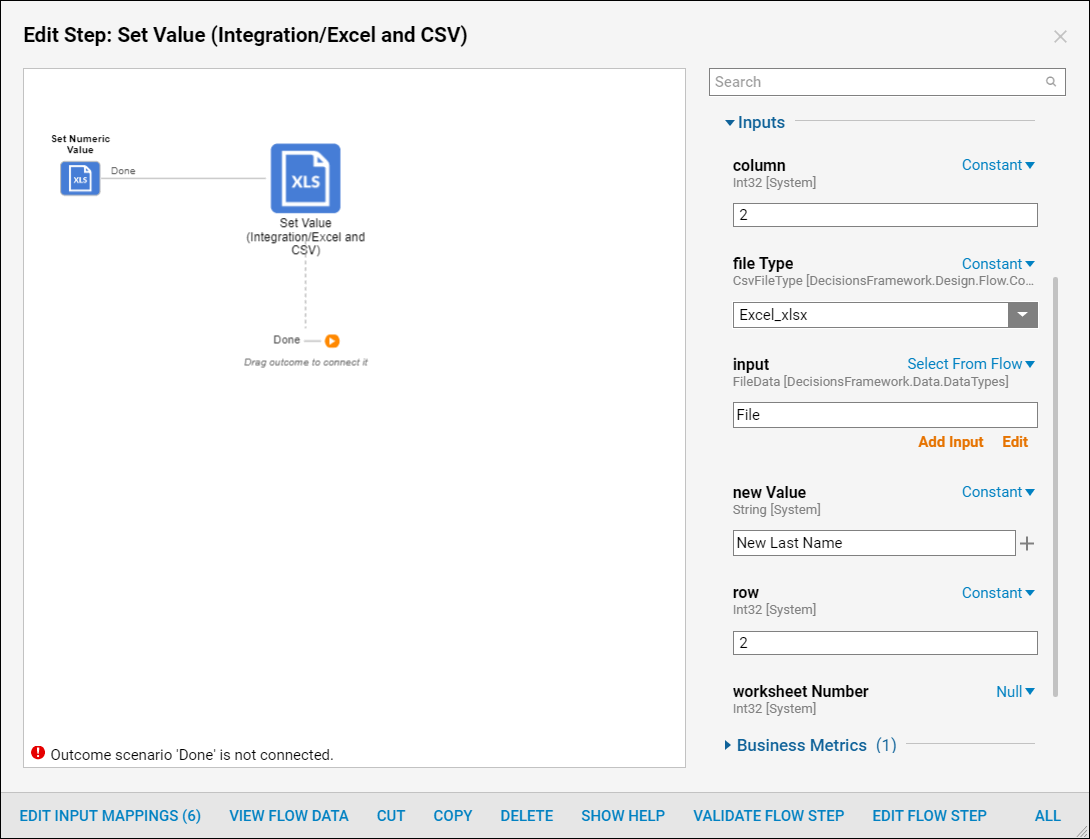
If the value we want to set for the cell in the Excel Document does not have to be numeric, we can use the Set Value step. Add this step from Integrations > All Integrations > Excel and CSV category.
Set a value in the third column and third row, input "2" for the column field, and "2" for the row field. For Inputs > file Type select Constant as the mapping type and choose Excel_xlsx from the drop-down menu. For Inputs > input select the File from the Create Data step. Type "New Last Name" as a Constant value for new Value.
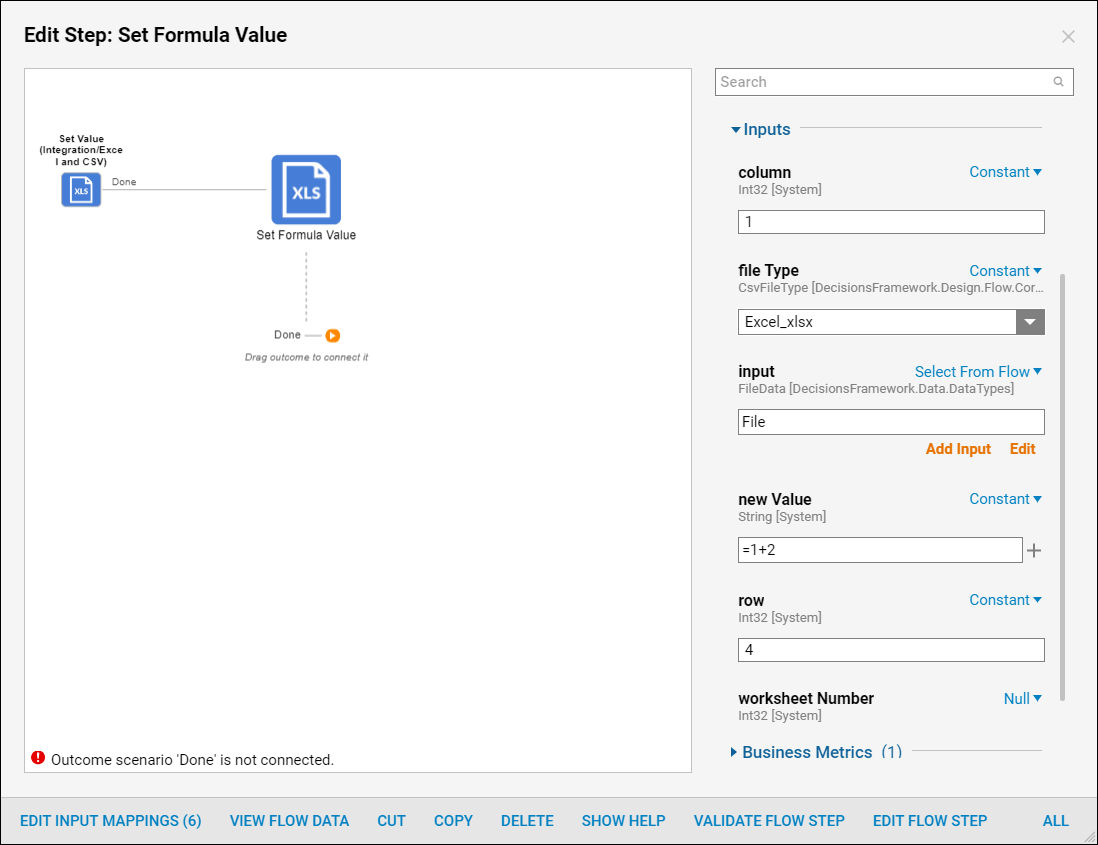
To set a calculated value in the Excel Document, use the Set Formula Value step from Integrations > All Integrations > Excel and CSV category. Add a formula value in the second column and fifth row, input "1" for the column field, and "4" for the row field. For Inputs > file Type select Constant as the mapping type and choose Excel_xlsx from the drop-down menu. For Inputs > input select the File from the Create Data step. Type "=1+2" as a Constant value for new Value.
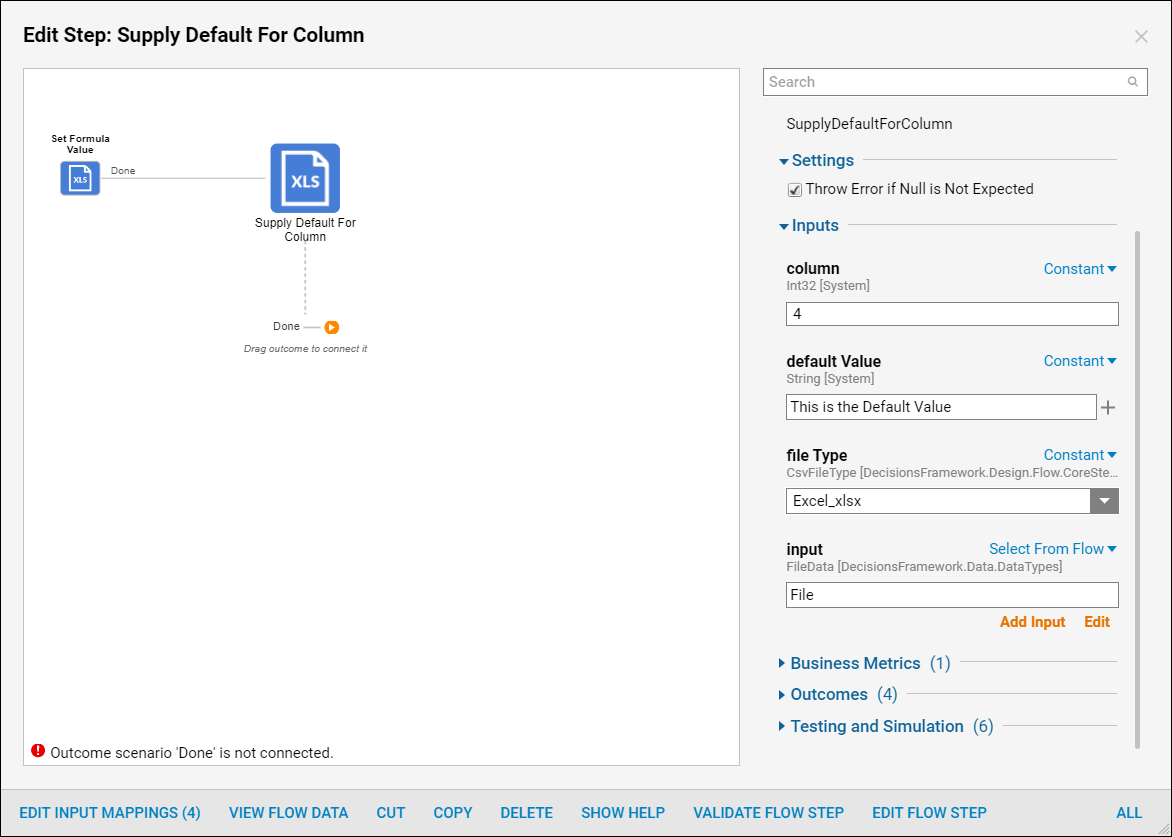
Next, add a Supply Default For Column step from Integrations > All Integrations> Excel and CSV category. This step is designed to set desirable Default values in the column for empty fields.
Set a default value in the fifth column, input "4" for the column field. For Inputs > file Type select Constant as the mapping type and choose Excel_xlsx from the drop-down menu. For Inputs > input select the File from the Create Data step. Type "This is the Default Value" as a Constant value for default Value.
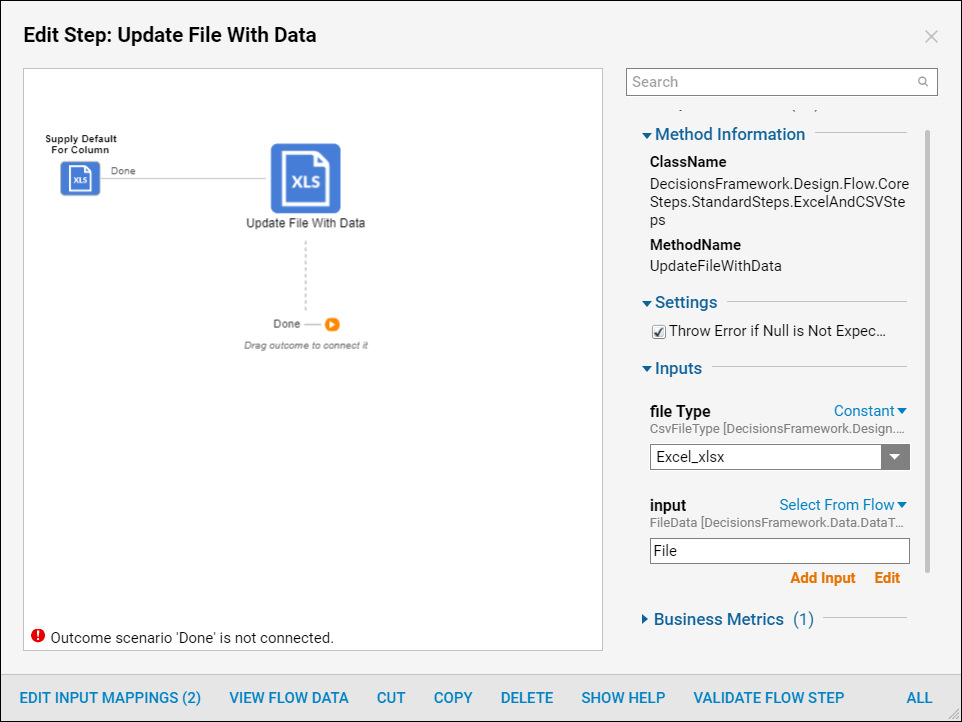
With the Excel file edited the File needs to be updated with the new values. Add Update File With Data step from Integrations > All Integrations > Excel and CSV category.
For Inputs > file Type select Constant as the mapping type and choose Excel_xlsx from the drop-down menu. For Inputs > input select the File from the Create Data step.
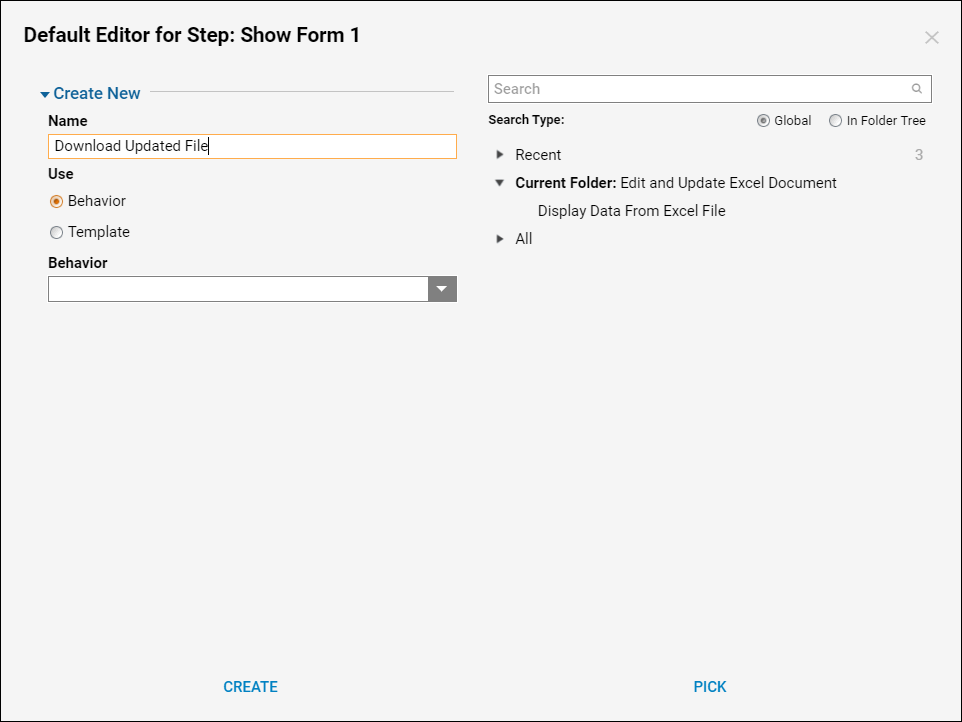
Lastly, add a Form to the Flow for the user to be able to download the updated Excel Document. Add a Show Form step from the Favorite Steps category in the Steps panel. In the resulting window, name the Form and select 'Create' to proceed to the Form Designer.
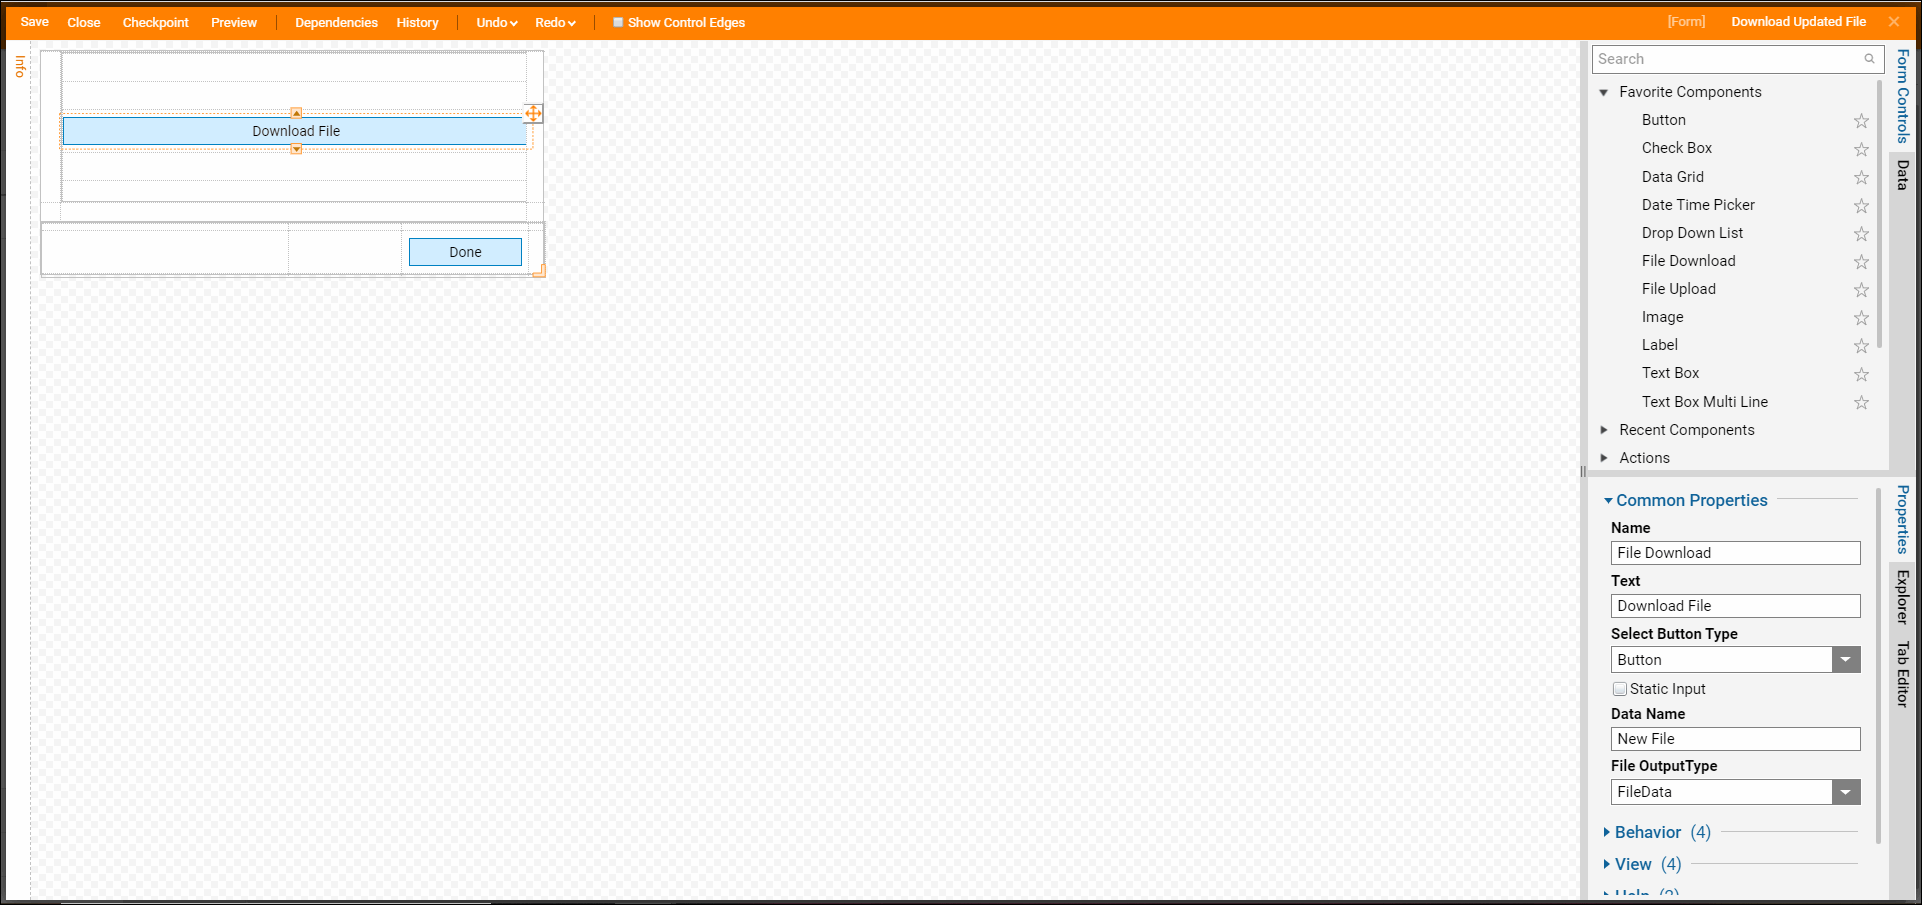
This Form has two controls on it. First, add a Button control from the Actions category. Then add a File Download component from the File Handling category. File Download component configured as follows.
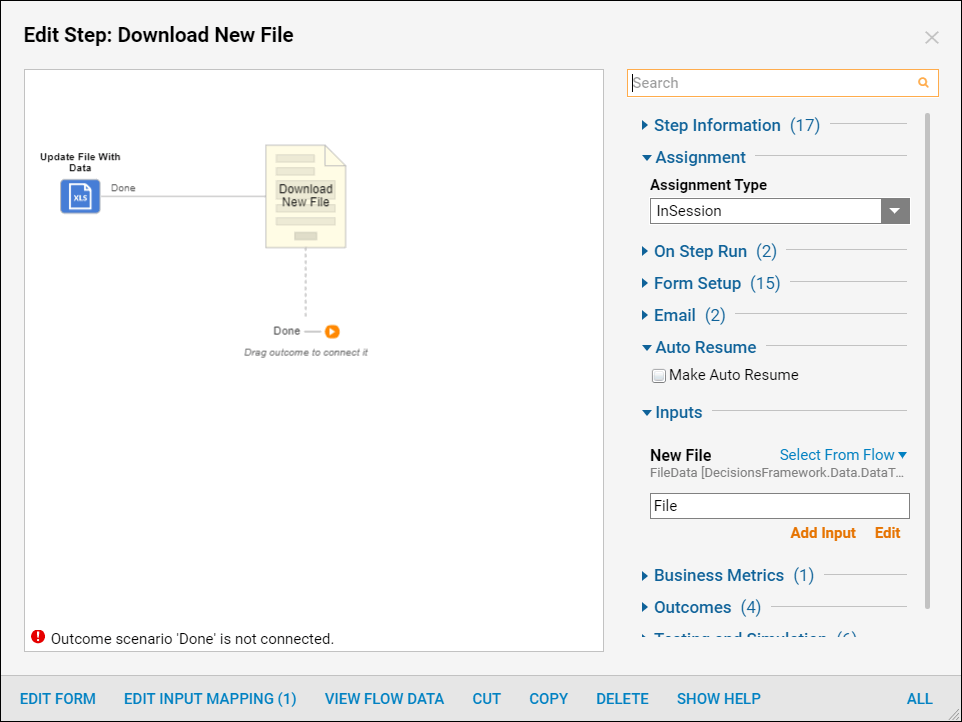
Back in the Flow Designer, map Data for the Form step. In the Inputs section, select File from the Update File with Data step.
Debug
Select Debug on the Top Panel in the Flow Designer to test the Flow.
The First Form opens in the Debugger. See that it displays information from the Excel Document as designed. Select Done to close the Form and continue Flow execution.
Next, the Download File Form opens in the Debugger. Select Download File then, name and save the updated Excel File. Next, close the Download File Form by selecting the Done button. Locate and open the new Excel Document to observe all the changes that were made in the Flow.
