Overview
This tutorial demonstrates how to create an Excel Document in the Flow Designer and apply different styling to the Excel Document.
The following example is available for download:
Example
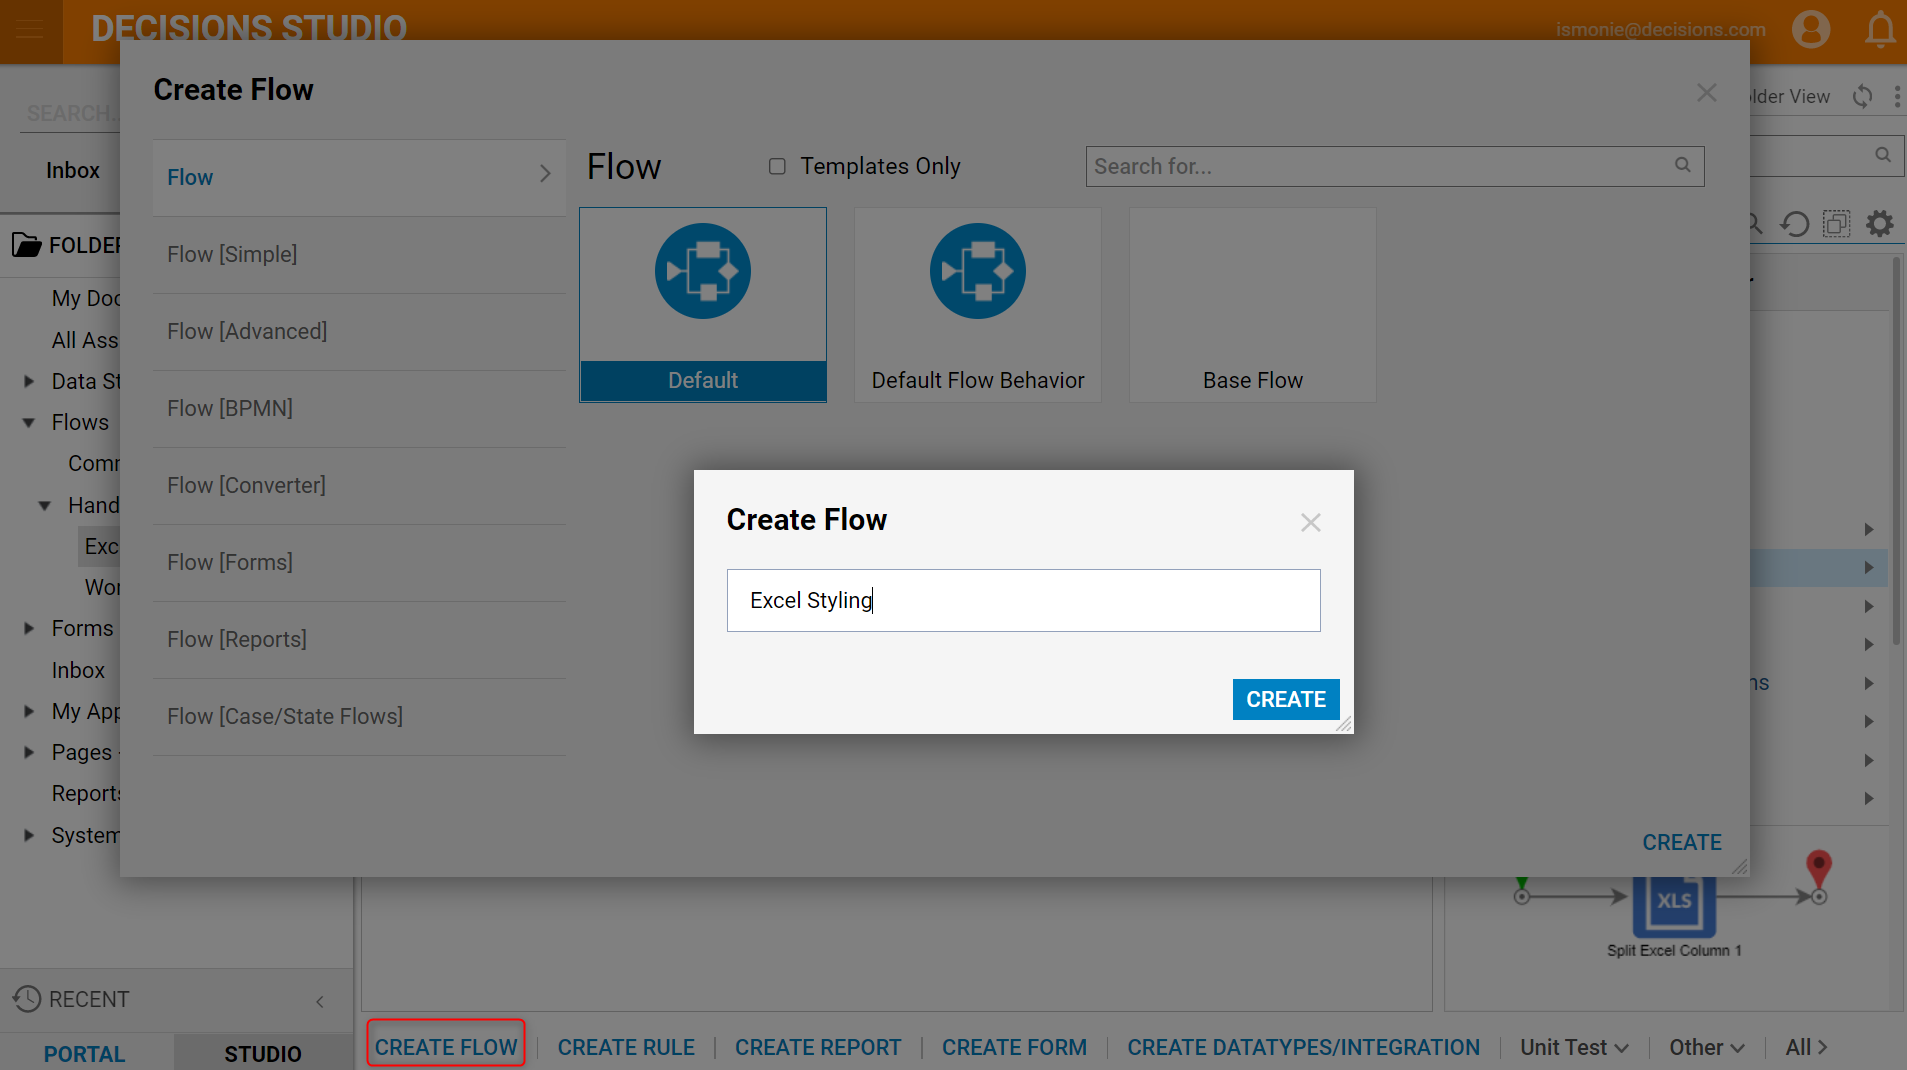
- Begin in a Designer Folder, select CREATE FLOW from the bottom action panel.
- Next, select and name the default Flow [Excel Styling] and select CREATE to proceed to the Flow Designer.
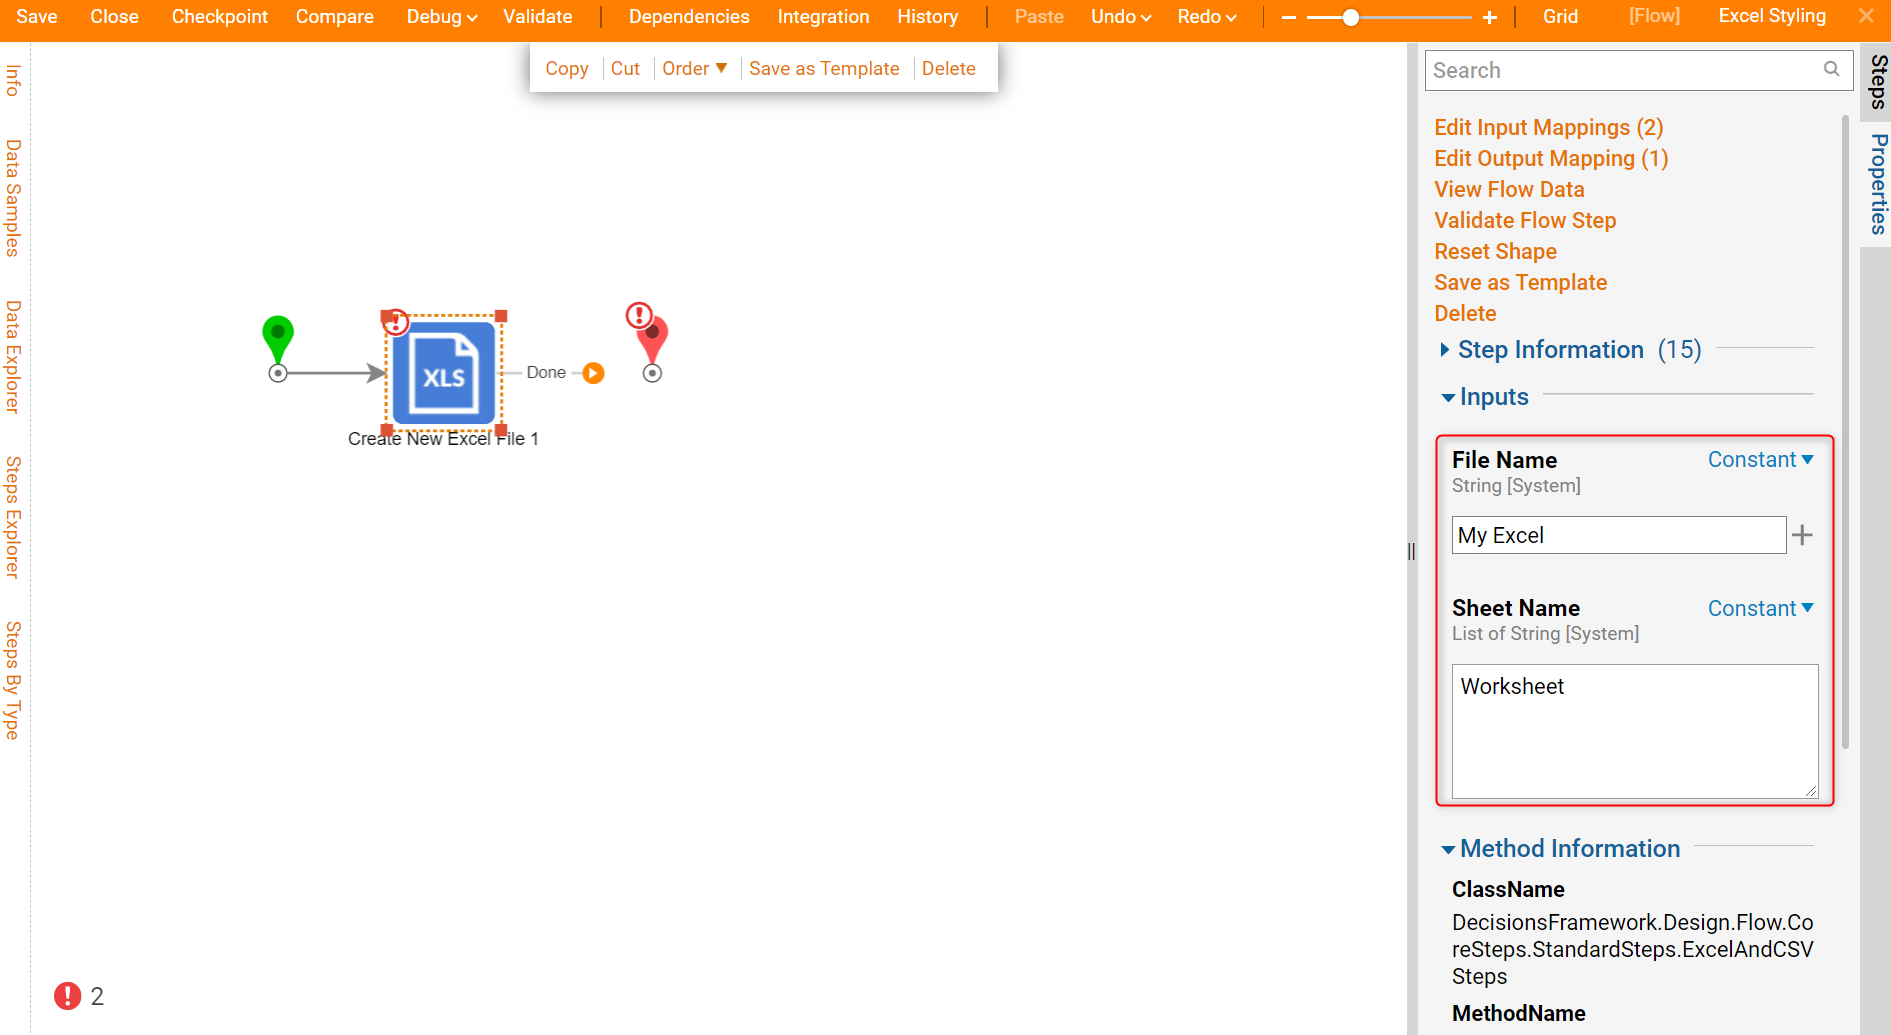
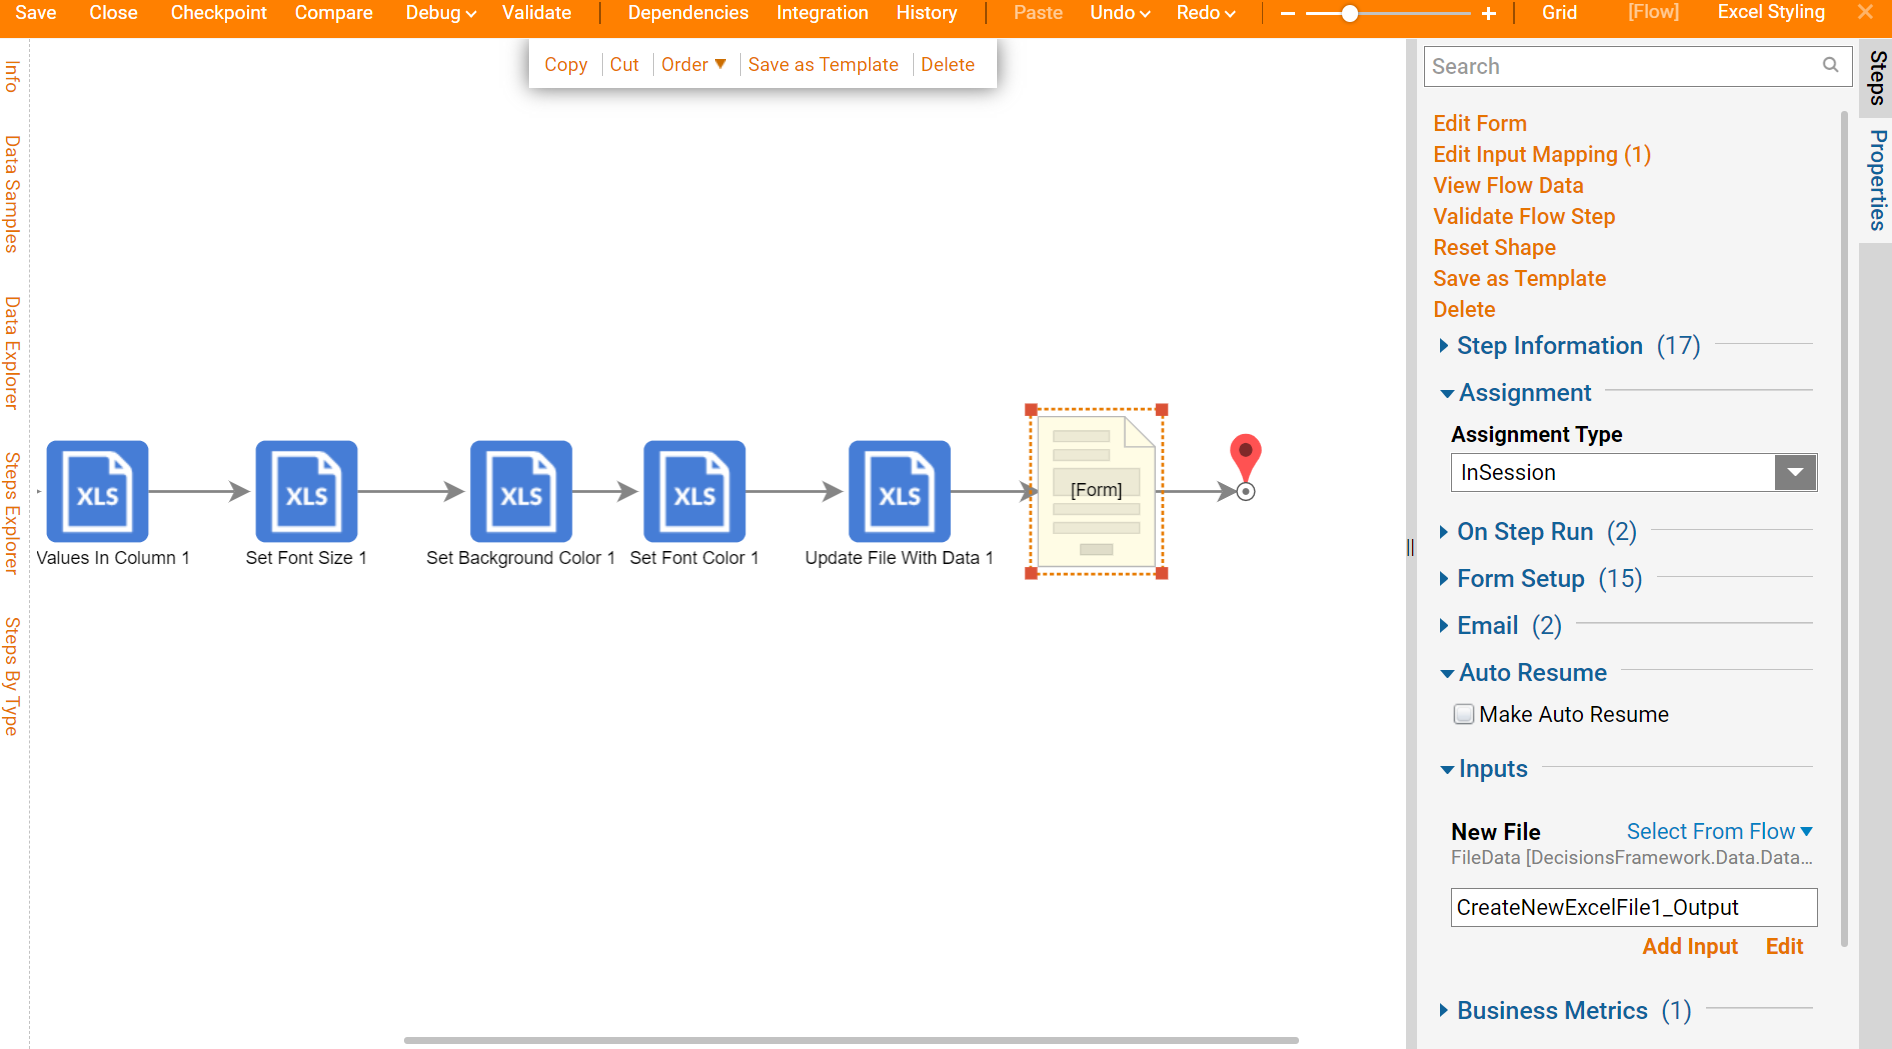
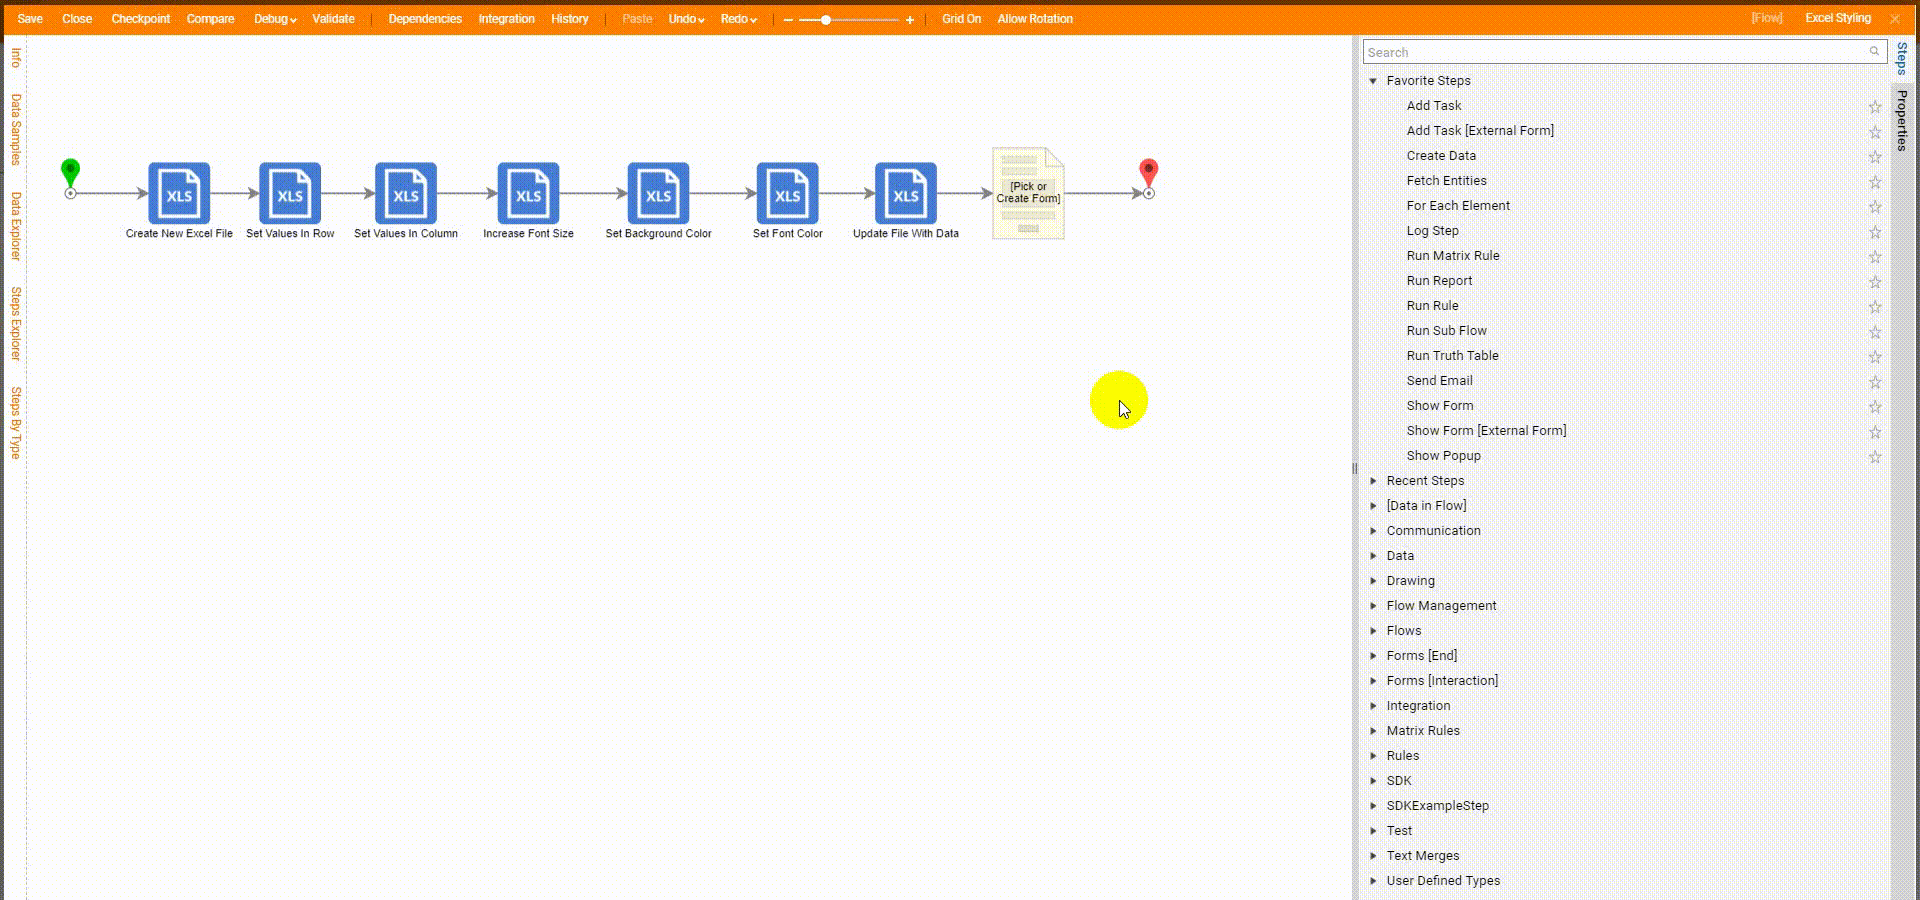
- In the Flow Designer, add a Create New Excel File step from the All Steps [Catalog] > Integration > Excel and CSV category.
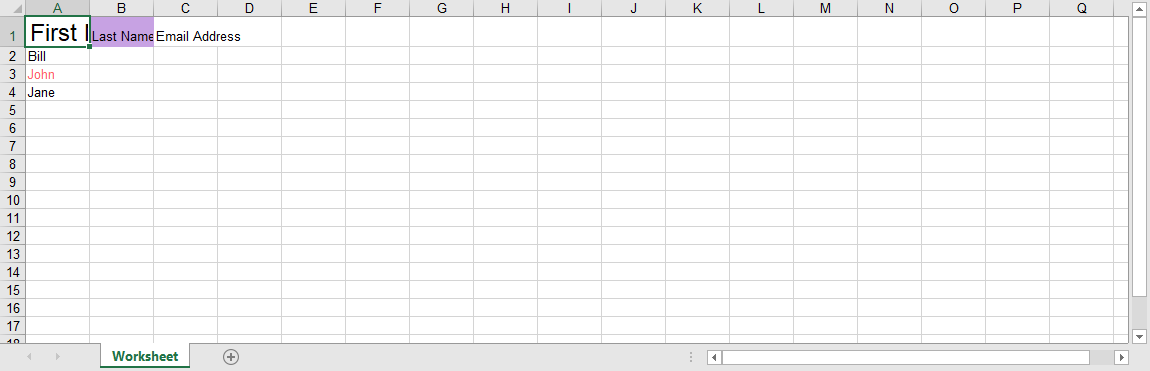
- Select the Create New Excel File step, under Inputs, give the new excel file a Constant File Name and Sheet Name.
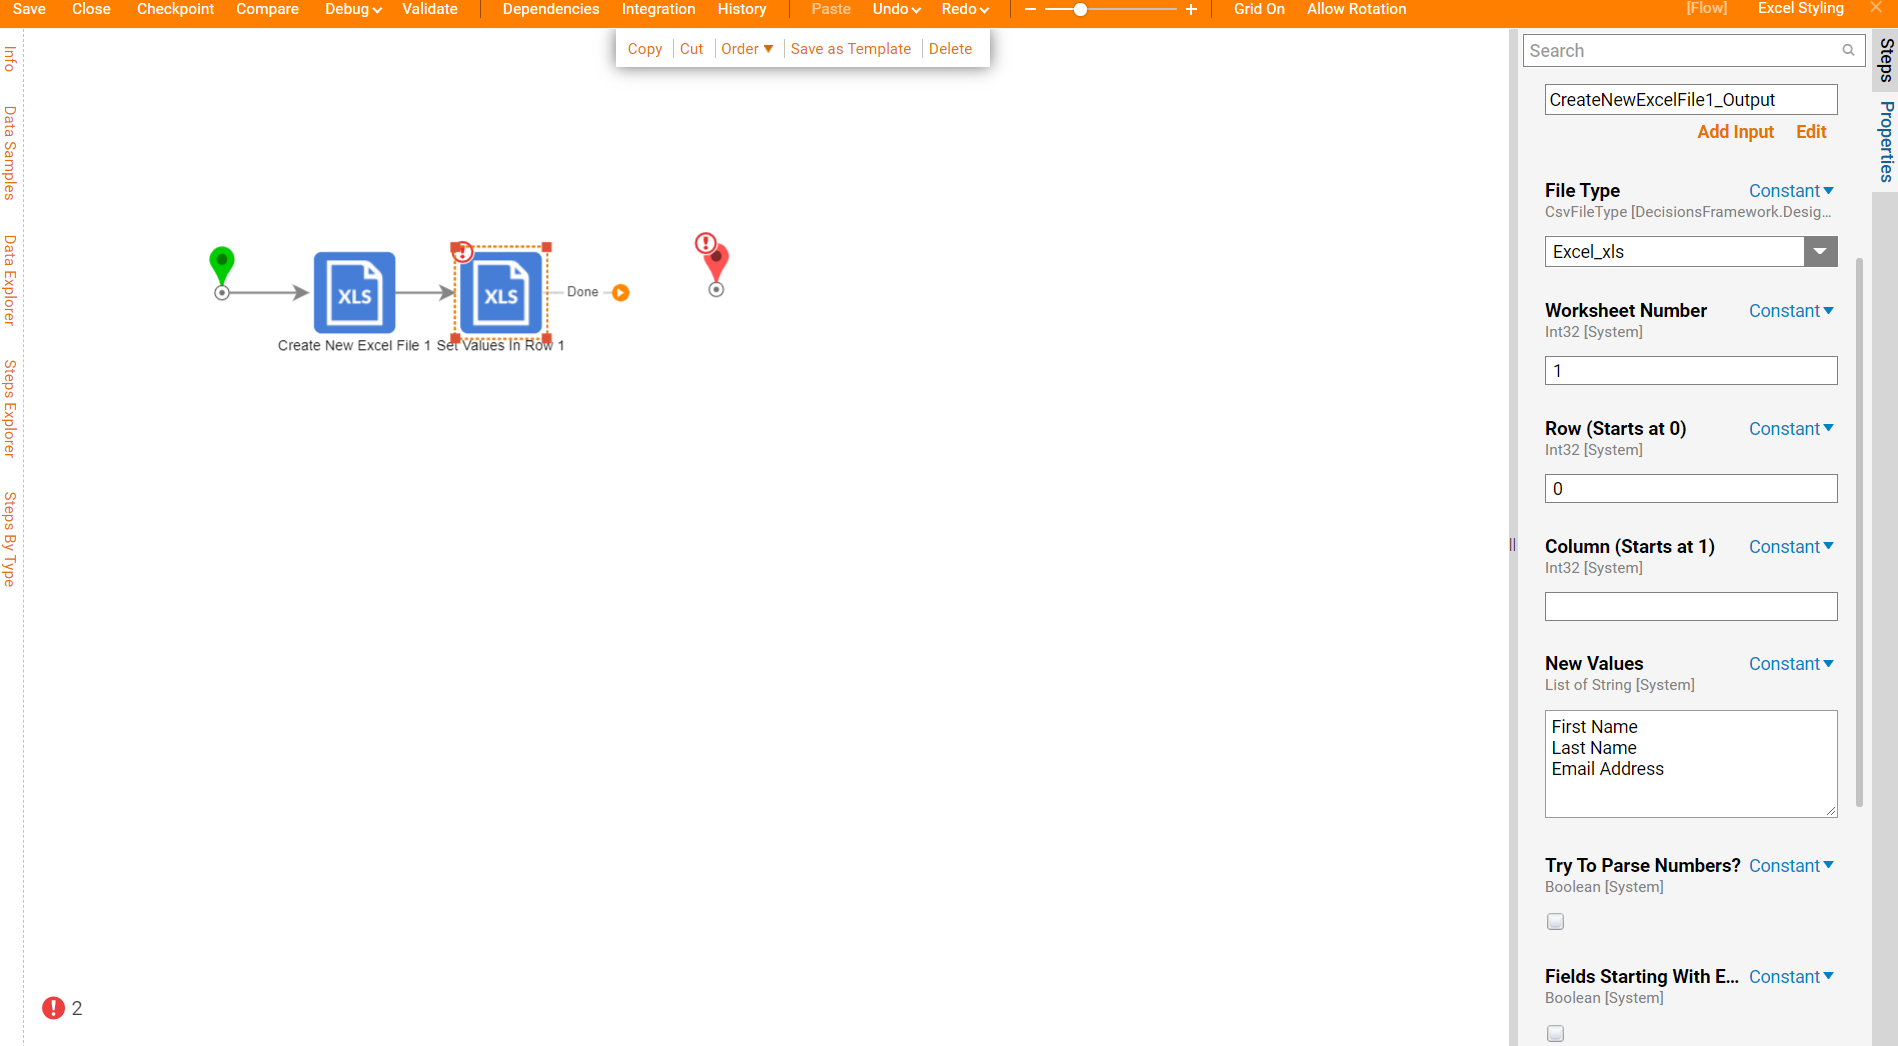
- Add a Set Values In Row step from the All Steps [Catalog] > Integration > Excel and CSV category in the Steps panel.
- For File Type, select Constant as the mapping type and choose Excel_xlsx from the drop-down menu. Rows in this step are zero-indexed.In this example, set the values for the first row and first column of the Excel Document, so input "0" as the value for the column and row field.
- For Fields Start With Equals Are Formulae choose Constant as the mapping type and set this value to True.
- For New Values, set the input mapping to Constant and input First Name, Last Name, and Email Address.
- For Input File, set the input mapping to Select From Flow and select the output from Create New Excel File step.
- For Worksheet Number, set the input mapping to Constant and enter a relevant worksheet number, if working with a document that has multiple worksheets.
- For Inputs > Input File, select the file from the Create New Excel File step.
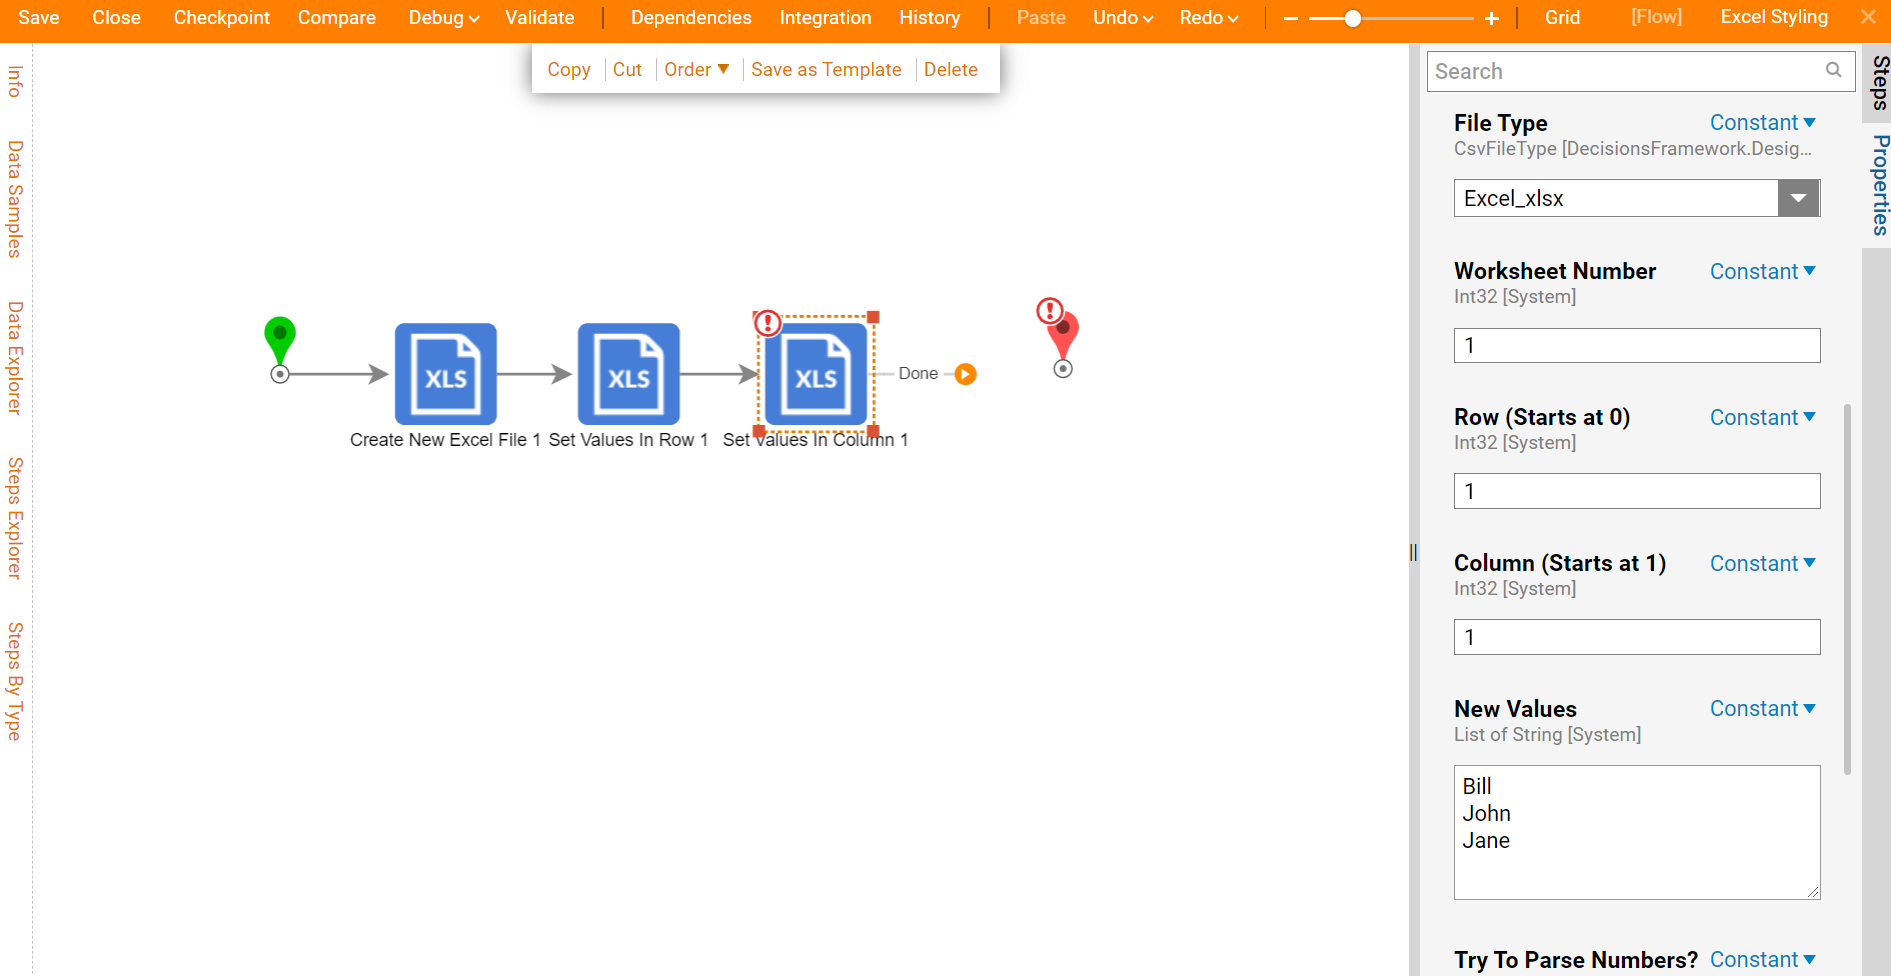
- Add a Set Values In Column step from the All Steps [Catalog] > Integration > Excel and CSV category in the Steps panel.
- For Inputs > file Type, select Constant as the mapping type and choose Excel_xlsx from the drop-down menu. Rows in this step are zero-indexed.
- For Worksheet Number, input a relevant worksheet number if working with a document with more than one worksheet.
- Set the values for the first column and second row of the Excel Document, so input "1" as the Column and Row field value.
- For Fields Start With Equals Are Formulae choose Constant as the mapping type and set this value to True.
- For Inputs > input, select the file from the Create New Excel File step.
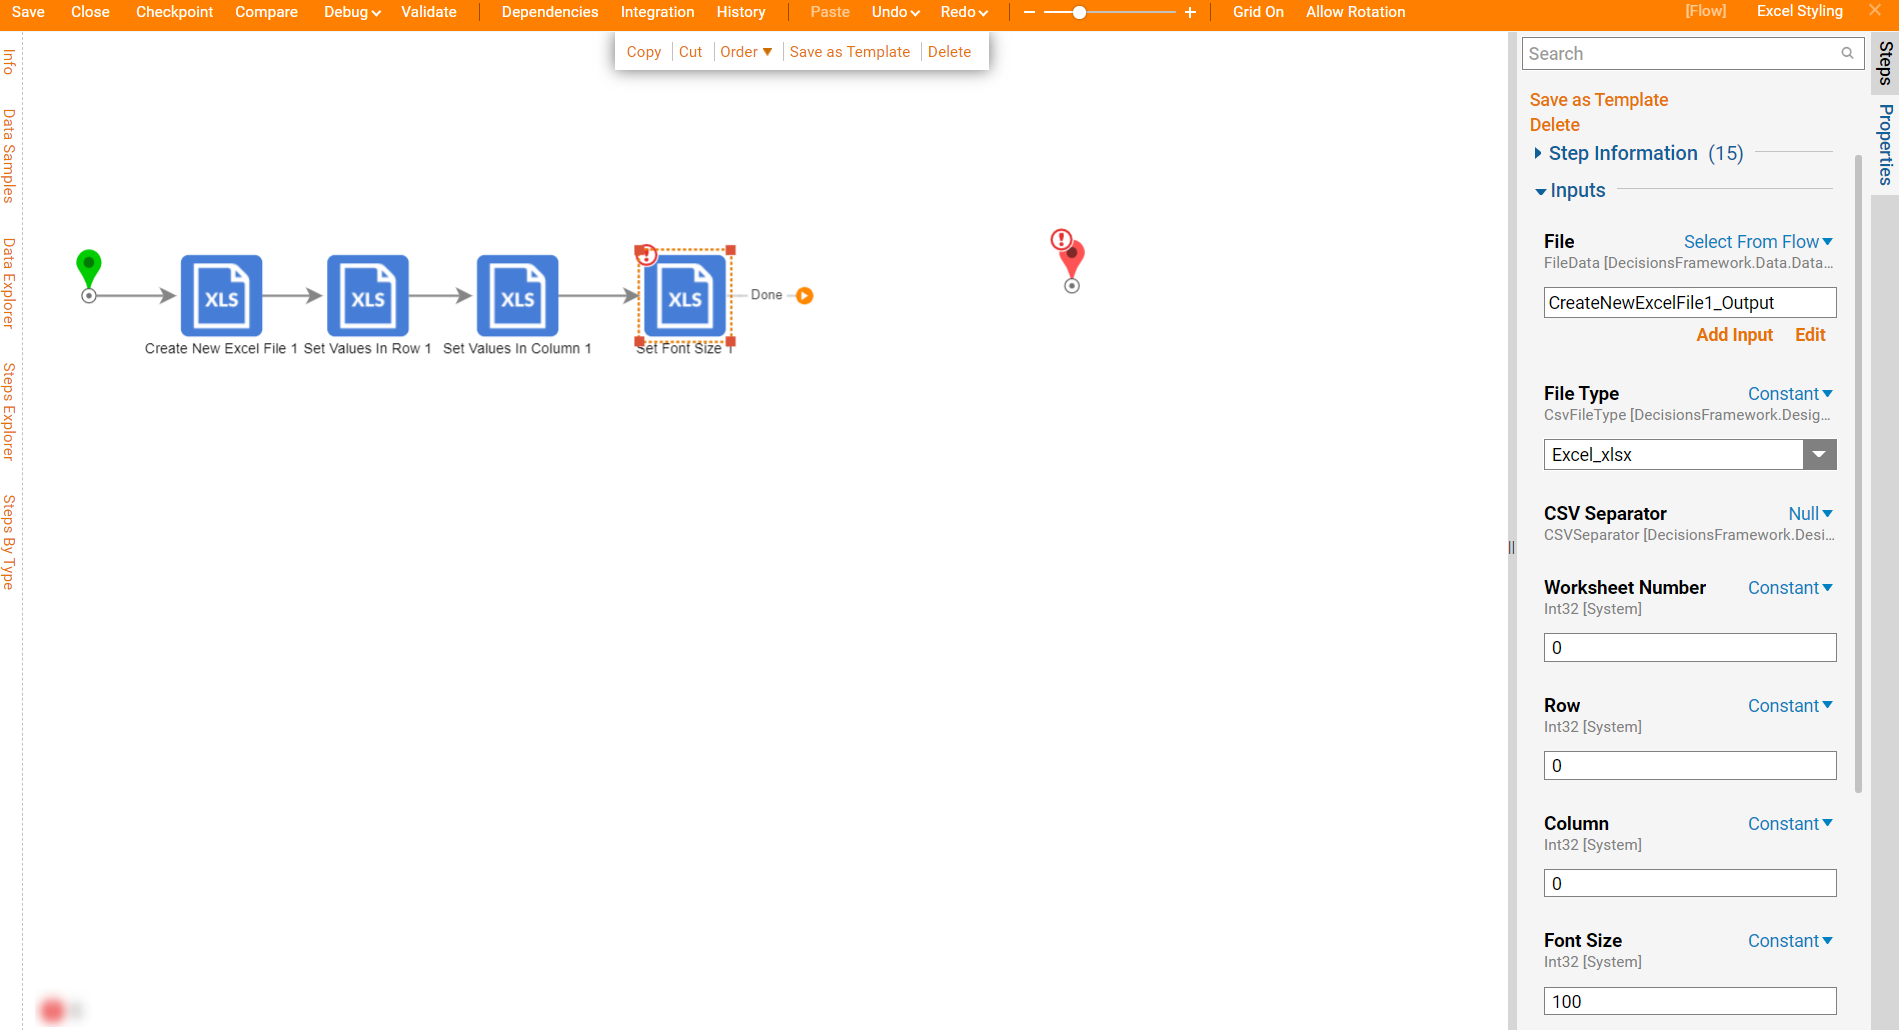
- Next, apply some styles for the Excel Document. Expand All Steps [Catalog] > Integration > Excel and CSV > Styling category and add Set Font Size step to the Flow.
- Under Settings, set Throw Error if Null is Not Expected to False (uncheck the checkbox).
- Under Inputs > File Type, select Constant as the mapping type and choose Excel_xlsx from the drop-down menu. Rows in this step are zero-indexed.
- Increase the font size of the first row in the first column. Input "0" as the value for the column and row field.
- For Font Size, choose Constant as the mapping type and set this value to "100".
- For Inputs > File, select the file from the Create New Excel File step.
- Set CSV Separator to Null.
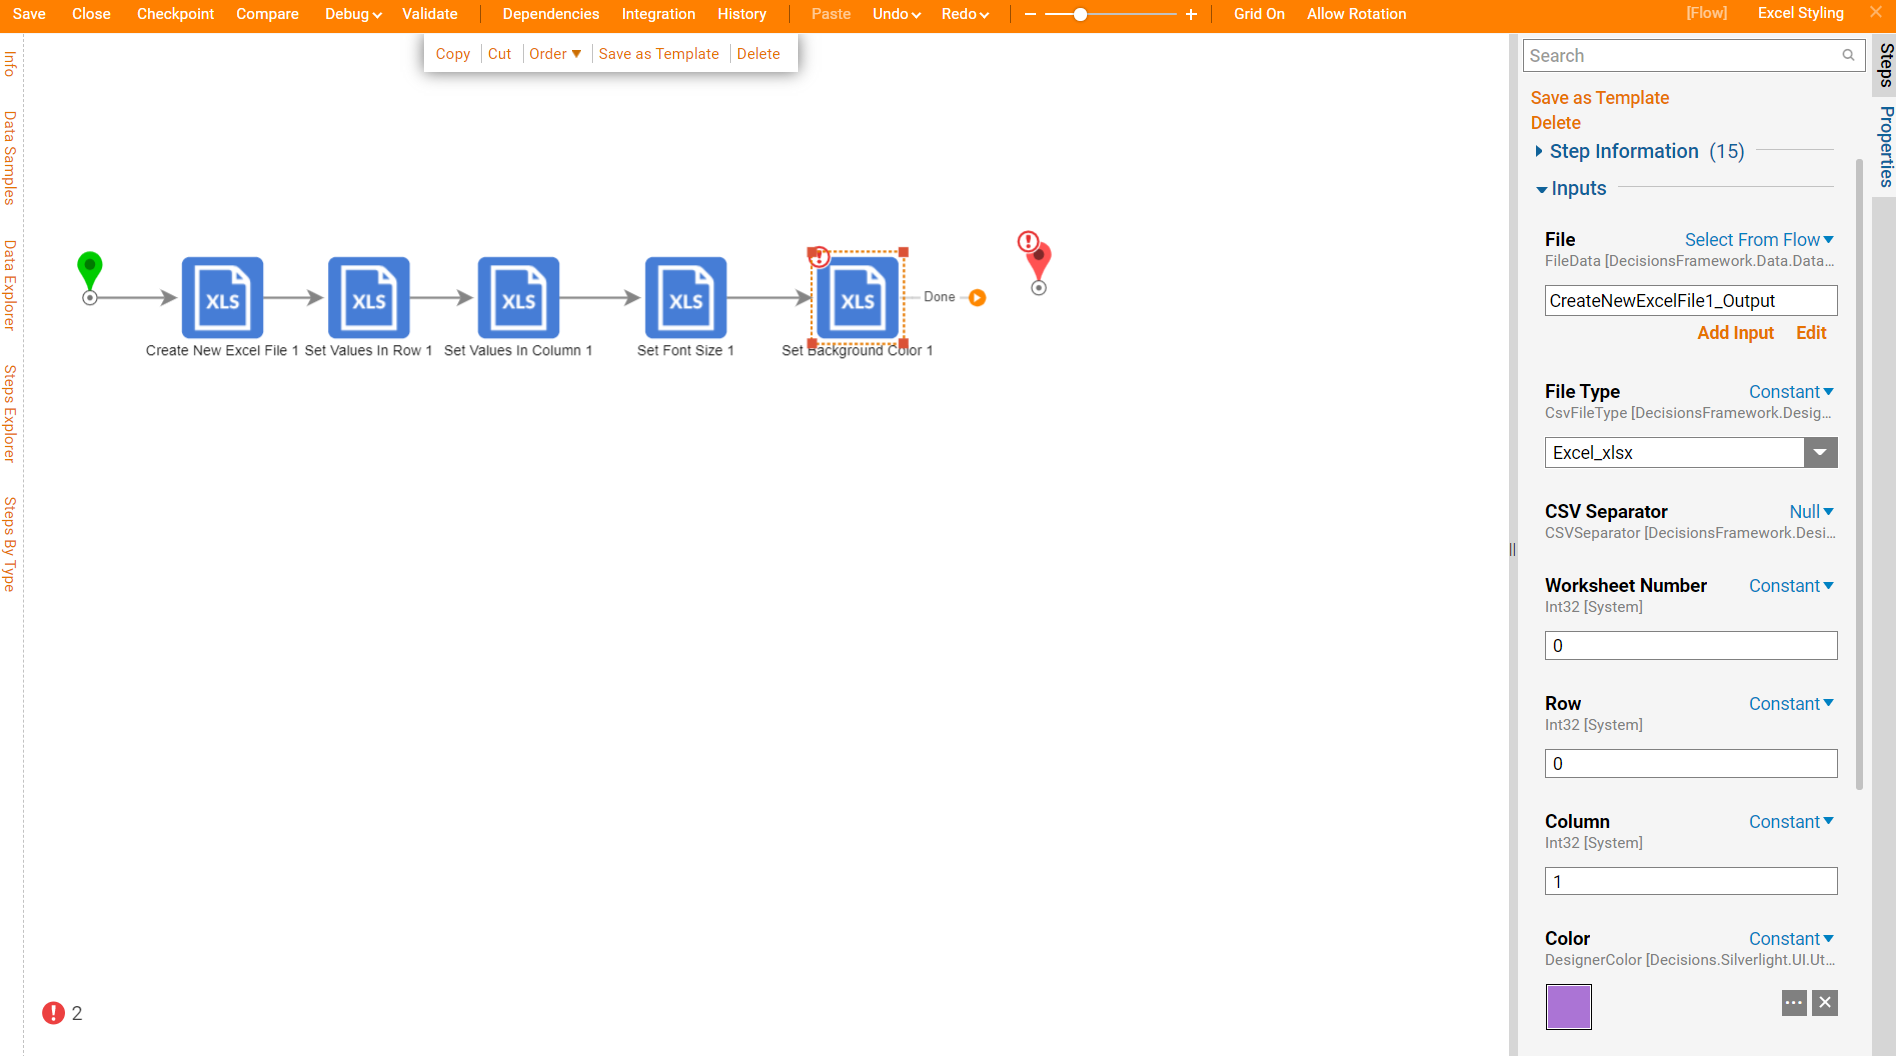
- Next, add a Set Background Color step from All Steps [Catalog] > Data > List > Excel and CSV > Styling category.
- Under Settings, set Throw Error if Null is Not Expected to false (uncheck the checkbox).
- Under Inputs > file Type, select Constant as the mapping type and choose Excel_xlsx from the drop-down menu. Rows in this step are zero-indexed.
- Change the background of the cell in the first row, second column.
- Input "1" as the value for the Constant column and input "0" as the row field's value.
- For Color, choose Constant as the mapping type and choose a color to change the background.
- For Inputs > File, select the file from the Create New Excel File step.
- Set CSV Separator to Null.
- Add a Set Font Color step from All Steps [Catalog] > Data > List > Excel and CSV > Styling category.
- Under Settings, set Throw Error if Null is Not Expected to false (uncheck the checkbox).
- Under Inputs > File Type, select Constant as the mapping type and choose Excel_xlsx from the drop-down menu. Rows in this step are zero-indexed.
- Change the font color of the cell in the first row, third column.
- Input "2" as the value for the Constant column and input "0" as the row field's value.
- For Color, choose Constant as the mapping type and choose a font color.
- For Inputs > File, select the file from the Create New Excel File step.
- Set CSV Separator to Null.

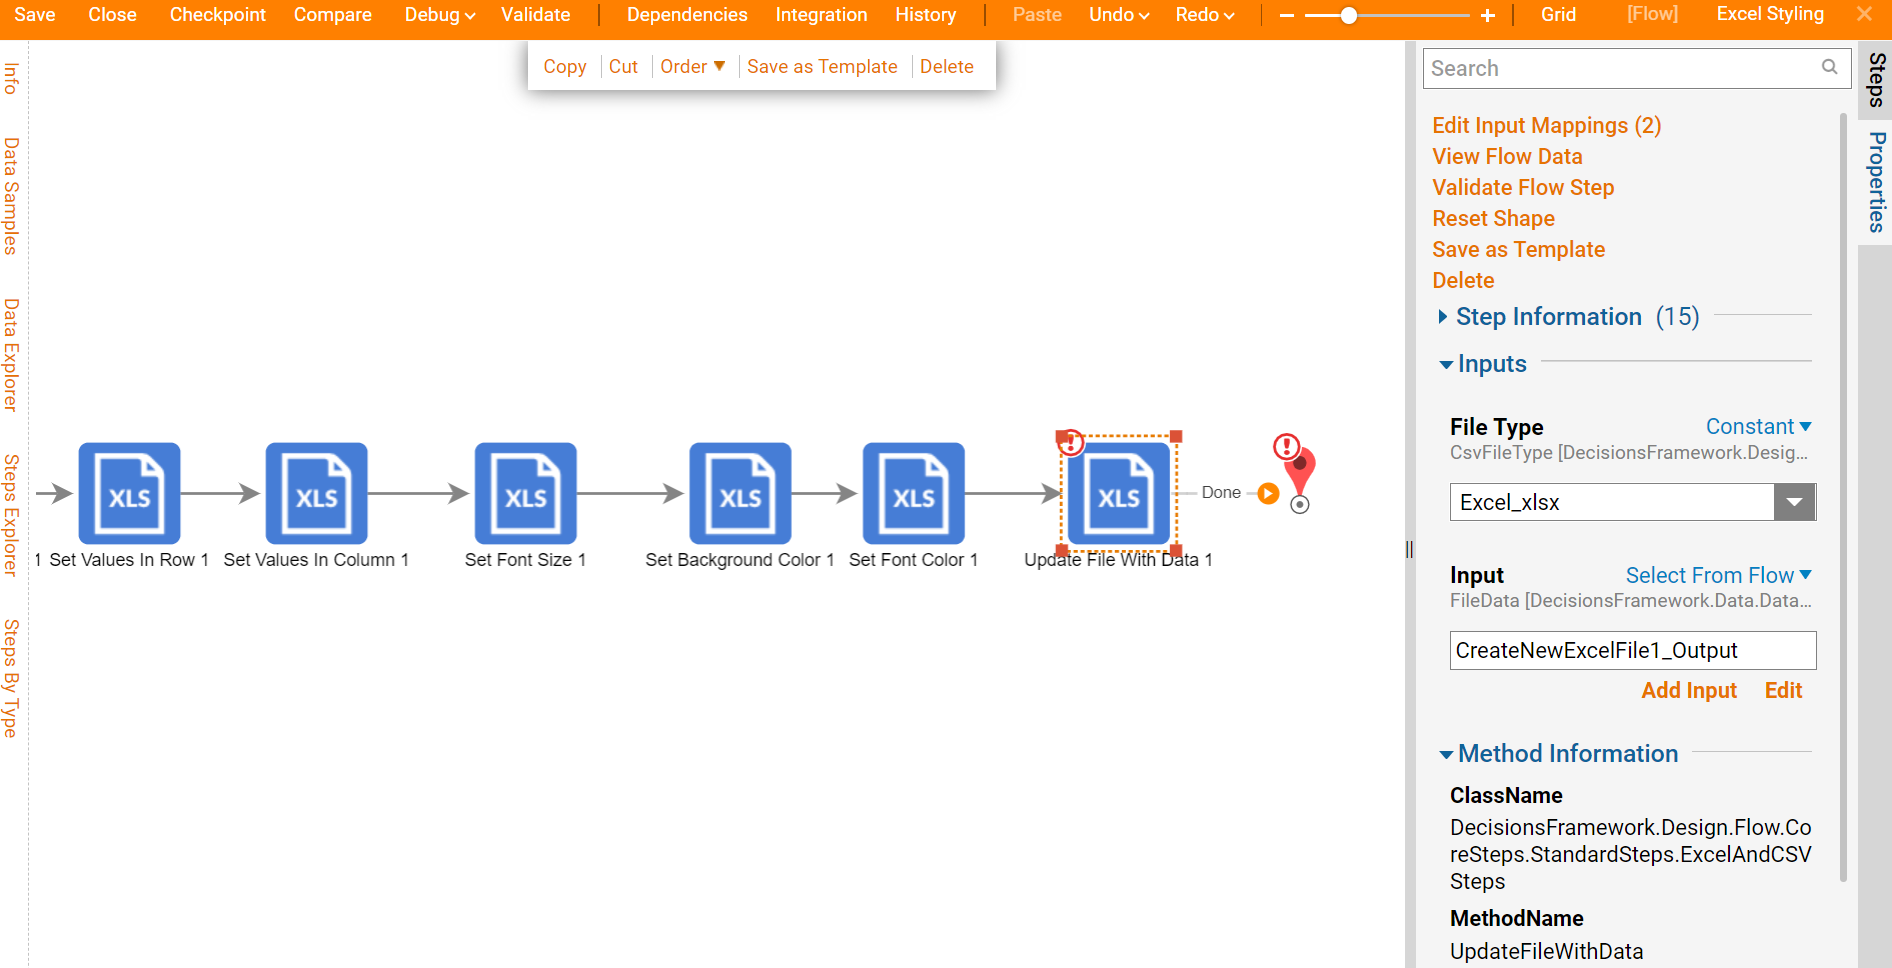
- Add an Update File With Data step from All Steps [Catalog] > Integrations > Excel and CSV category in the Steps panel. Every time changes are made to the Excel File in the Flow, it will need to be updated.
- For Inputs > File Type, select Constant as the mapping type and choose Excel_xlsx from the drop-down menu.
- For Inputs > Input, select the file from the Create New Excel File step.
- Lastly, add a Form component to the Flow for the user to download the updated Excel Document.
- Add a Show Form step from the Favorite Steps category in the Steps panel.
- In the resulting window, name the Form and select CREATE to proceed to the Form Designer.
- This Form has two controls on it. First, a Button control from the Actions category. Then, a File Download component from the File Handling category.
- File Download components Data Name is "New File" and the File OutputType is FileData.

- Back in the Flow Designer, map data for the Show Form step.
- Under Inputs > New Files, select the output from the Update File with Data step.
Debug
- From the Flow Designer, select Debug on the top action bar.
- Click FULL.
- When the Flow reaches the Form step, click File Download.
- Open the downloaded Excel file to verify that all configured styles were applied to the Excel file.