Overview
The Checkpoint action is available in any Studio Designer on the top Action Bar. This feature allows the user to create a snapshot of the Flow logic with a customized Name and Comment. Similar to the Save action, a Checkpoint renders a backup of the element with the additional details. These backups are saved in the History folder generated for this element. This feature is best utilized to create backups before changing Flow logic so that the Checkpoint can be restored if needed. The example below uses a basic Flow to showcase how the Checkpoint feature works.
Example
- In a Designer Project, select the CREATE FLOW button from the top Action Bar.
- Select the Flow tile in the top left when the window appears.
- Name the Flow, then select CREATE again.
- In the Flow Designer, connect the Start step to the End step.
- Select the Save button on the top Action Bar of the designer.
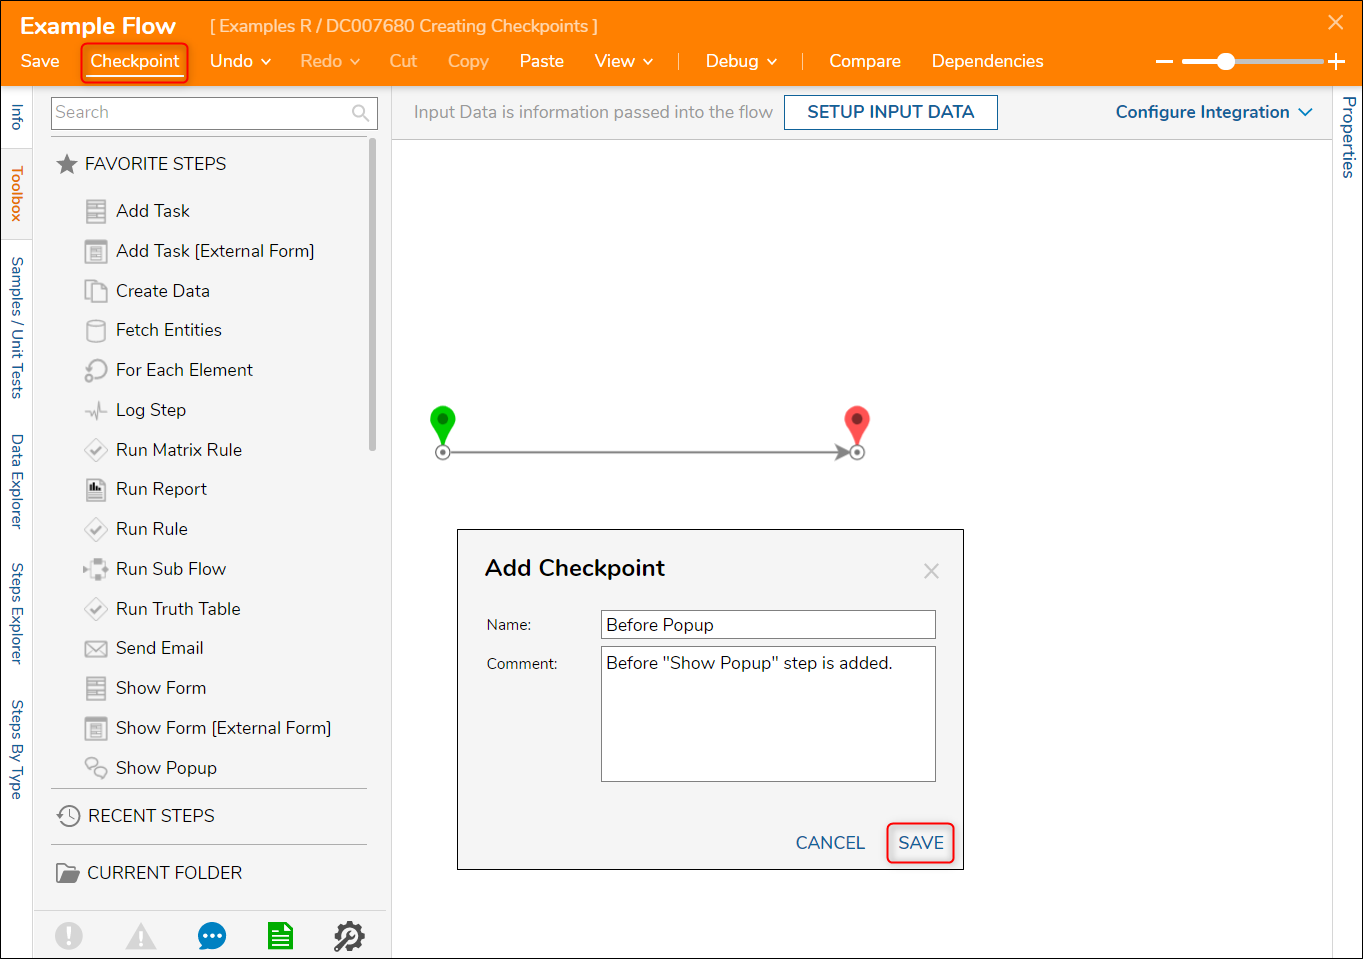
- After the save is complete, select the Checkpoint button on the top Action Bar.
- Provide a Name and Comment for this Checkpoint, then select SAVE.

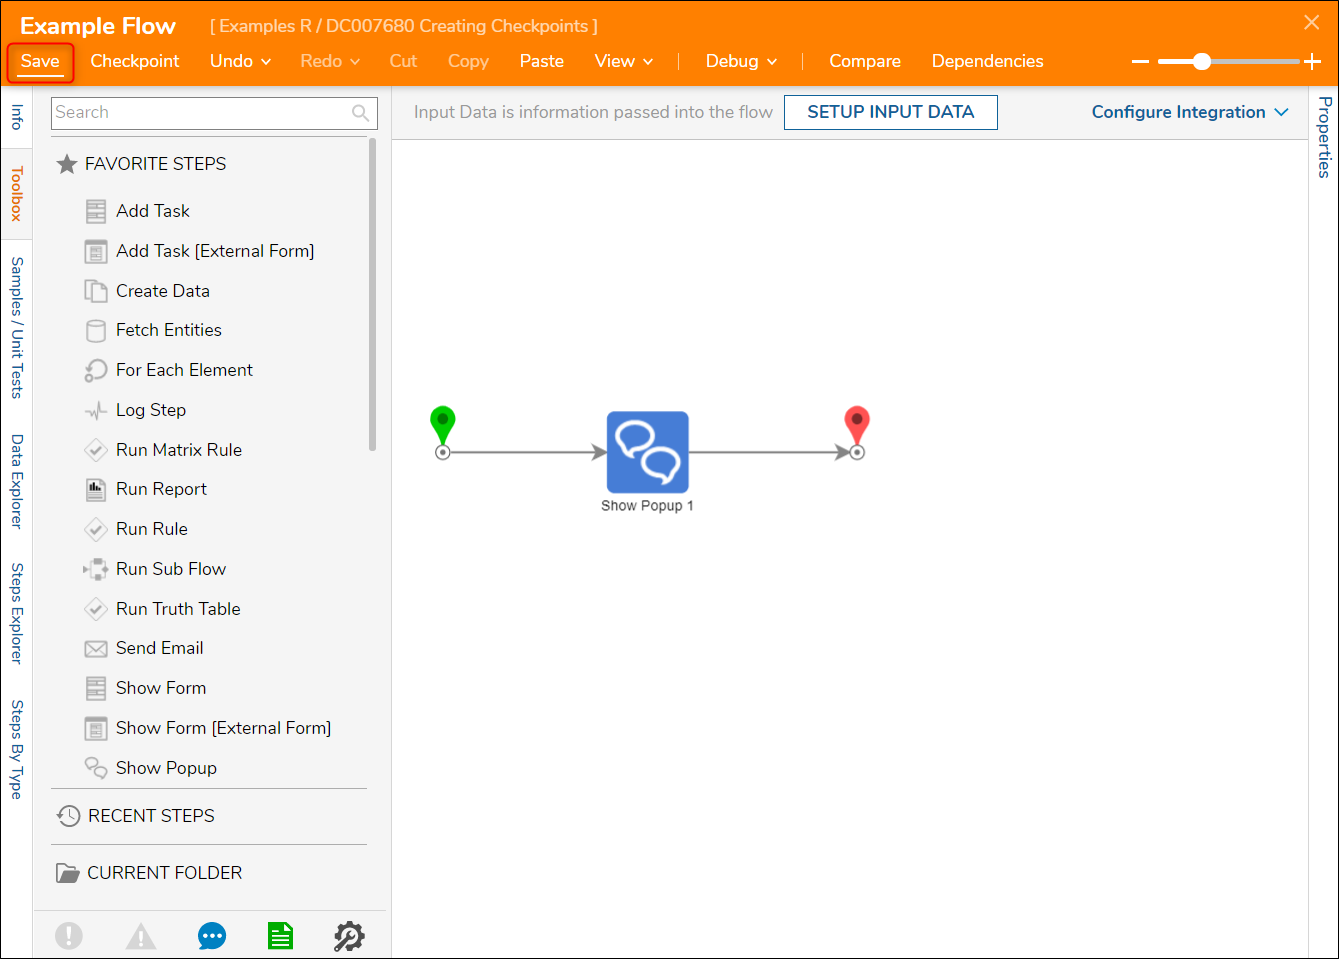
- Add any step to the Flow so the logic is different from when the Checkpoint was saved. This example uses a Show Popup step where TEST is configured as the subject and message of the popup.
- Once a step has been added, use the Save button again and exit the Flow Designer.

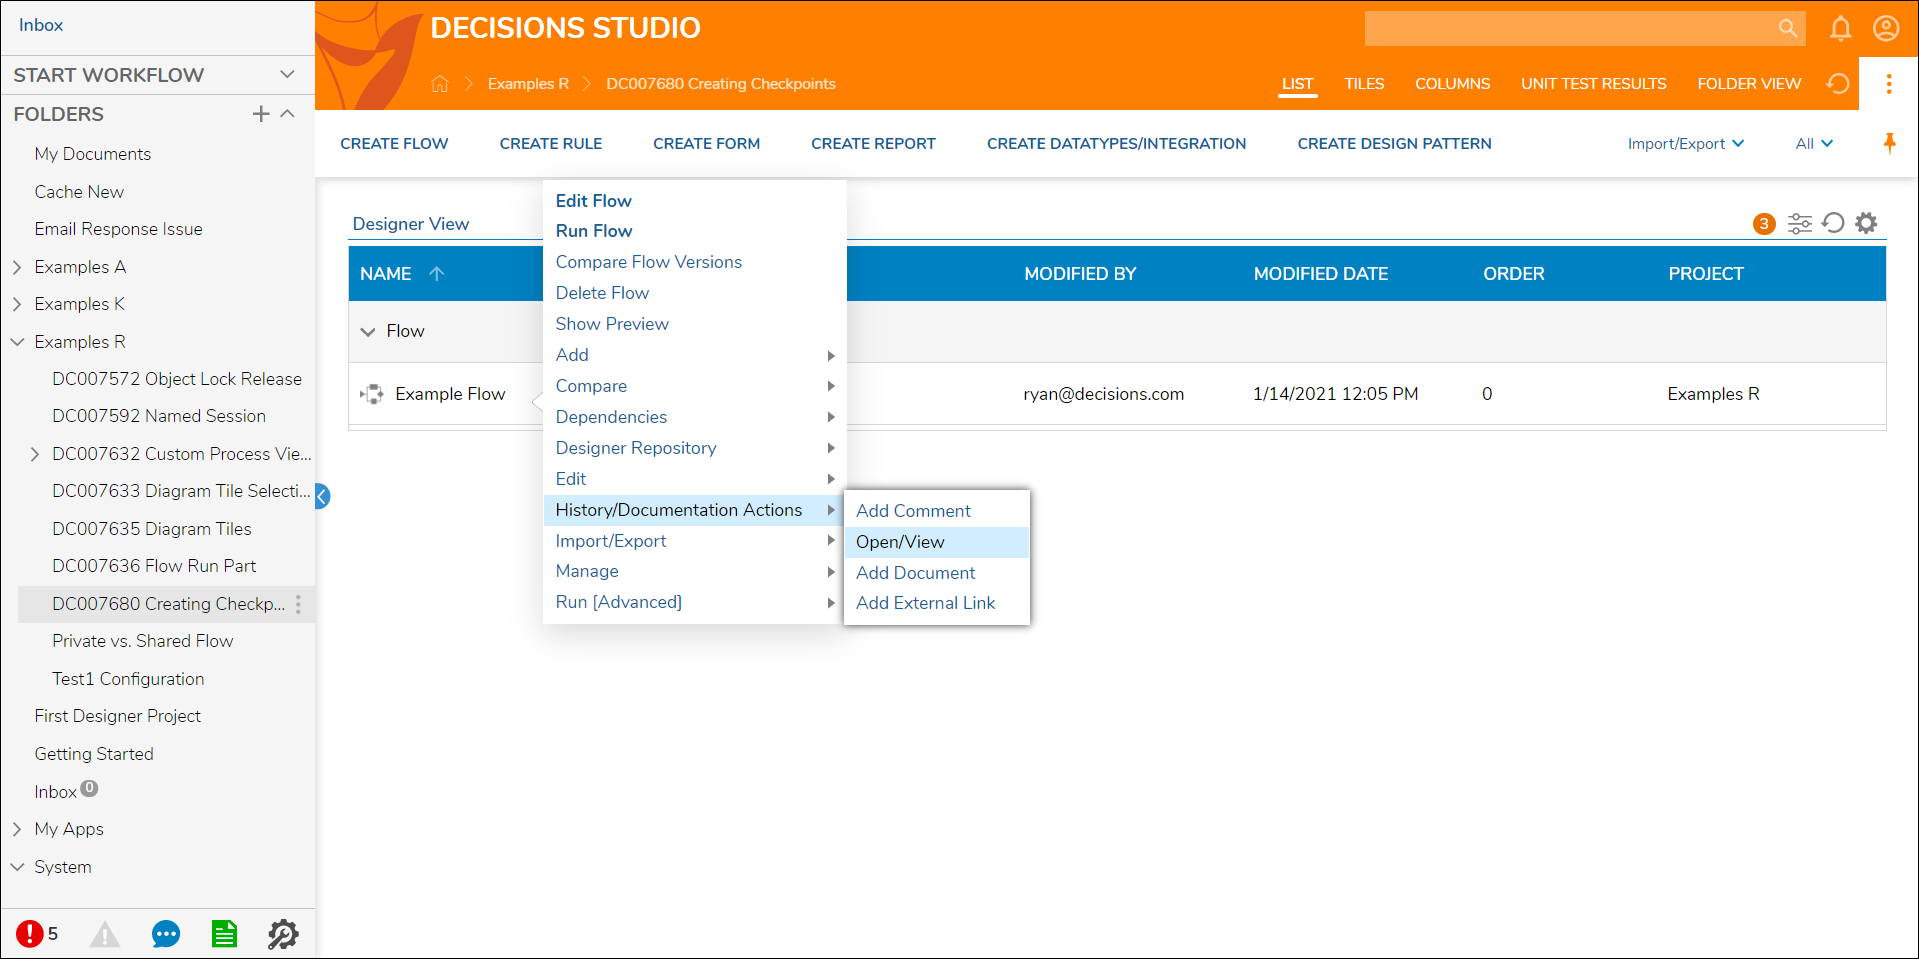
In the Designer Project containing the element, right-click the name and navigate to History/Documentation Actions > Open/View. This will open the History and Documentation page in a separate tab.
For more information on the History and Documentation page, including additional places this page can be accessed from, please visit the History of a Designer Element article. 
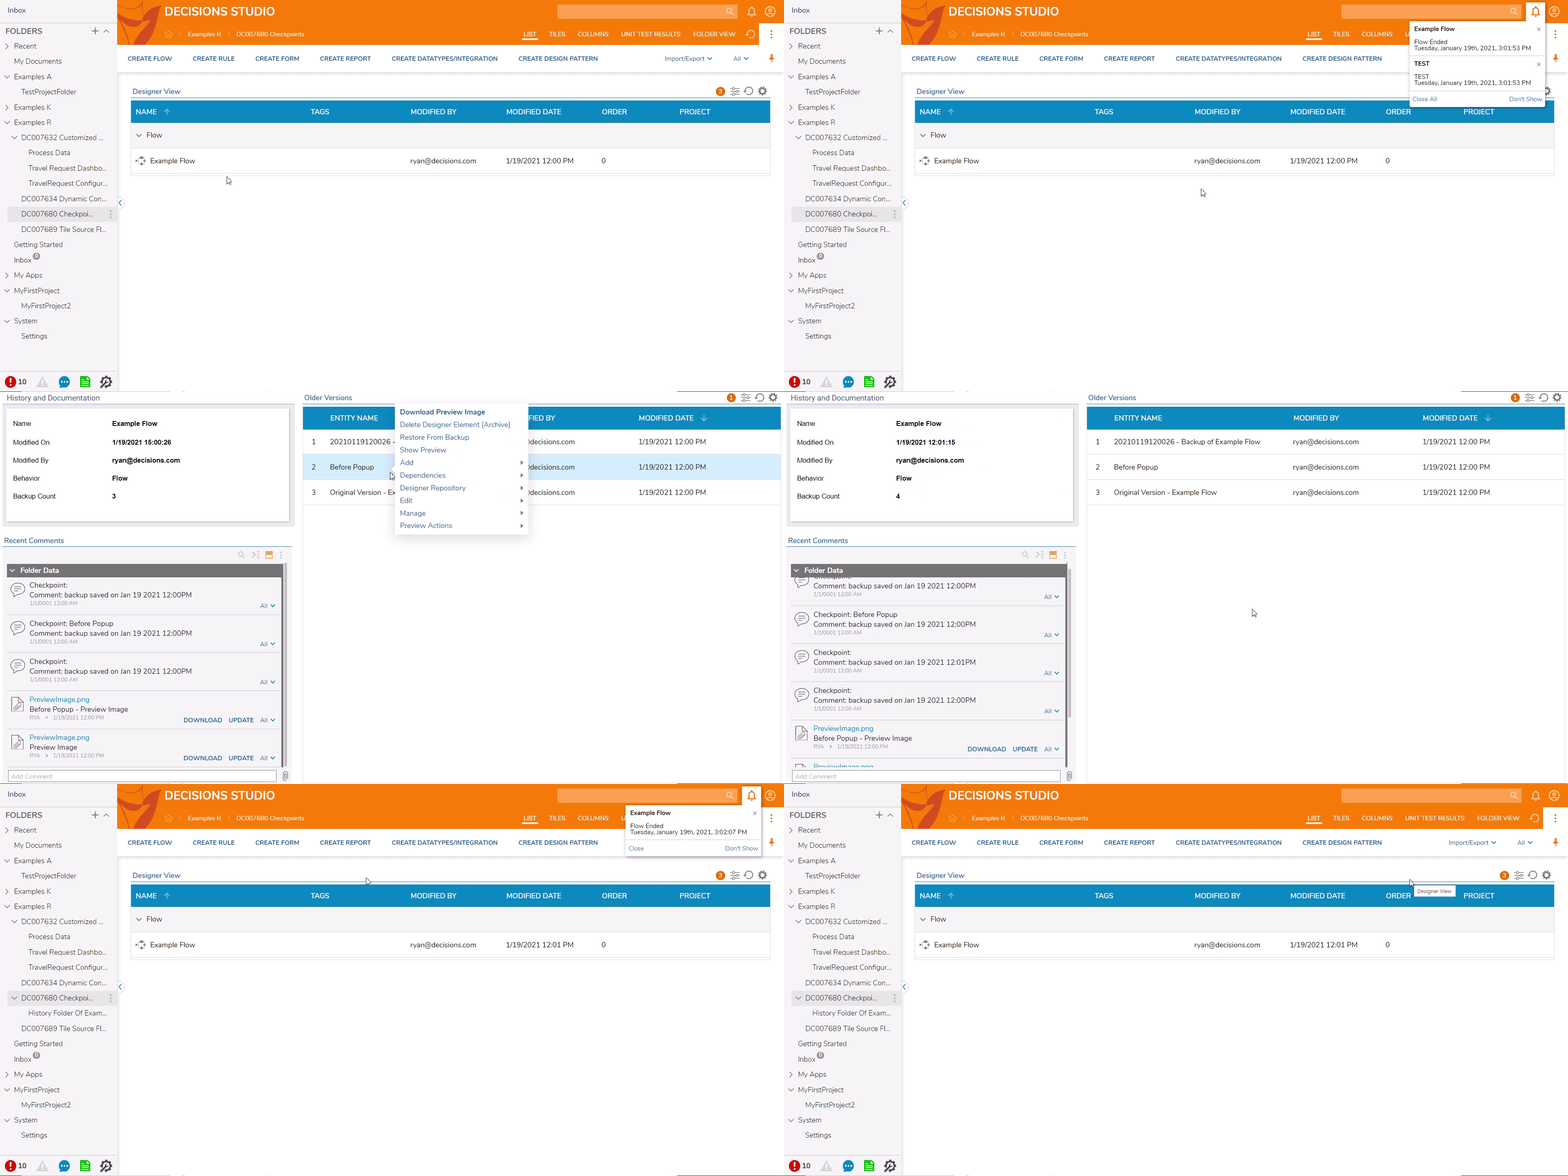
- Right-click the name of the Checkpoint from the Older Versions list on the right, then select Restore From Backup.
- When the confirmation popup appears, select YES. This will revert the Flow back to the logic at the time of the Checkpoint before the additional step was saved.
- The example below shows the TEST popup appearing in the environment until the blank checkpoint Flow was restored.
