Overview
The CSV Editor Form Control allows editing CSV-formatted tabular data, such as a spreadsheet. A CSV Editor can use Flow data as its Input and then Output the edited values back into the Flow.
Example
From a Designer Project, select the CREATE FLOW button from the Global Action Bar; select Flow, provide a Name and click CREATE.
From the Flow Designer, click the SETUP INPUT DATA button. Then, click DEFINE.
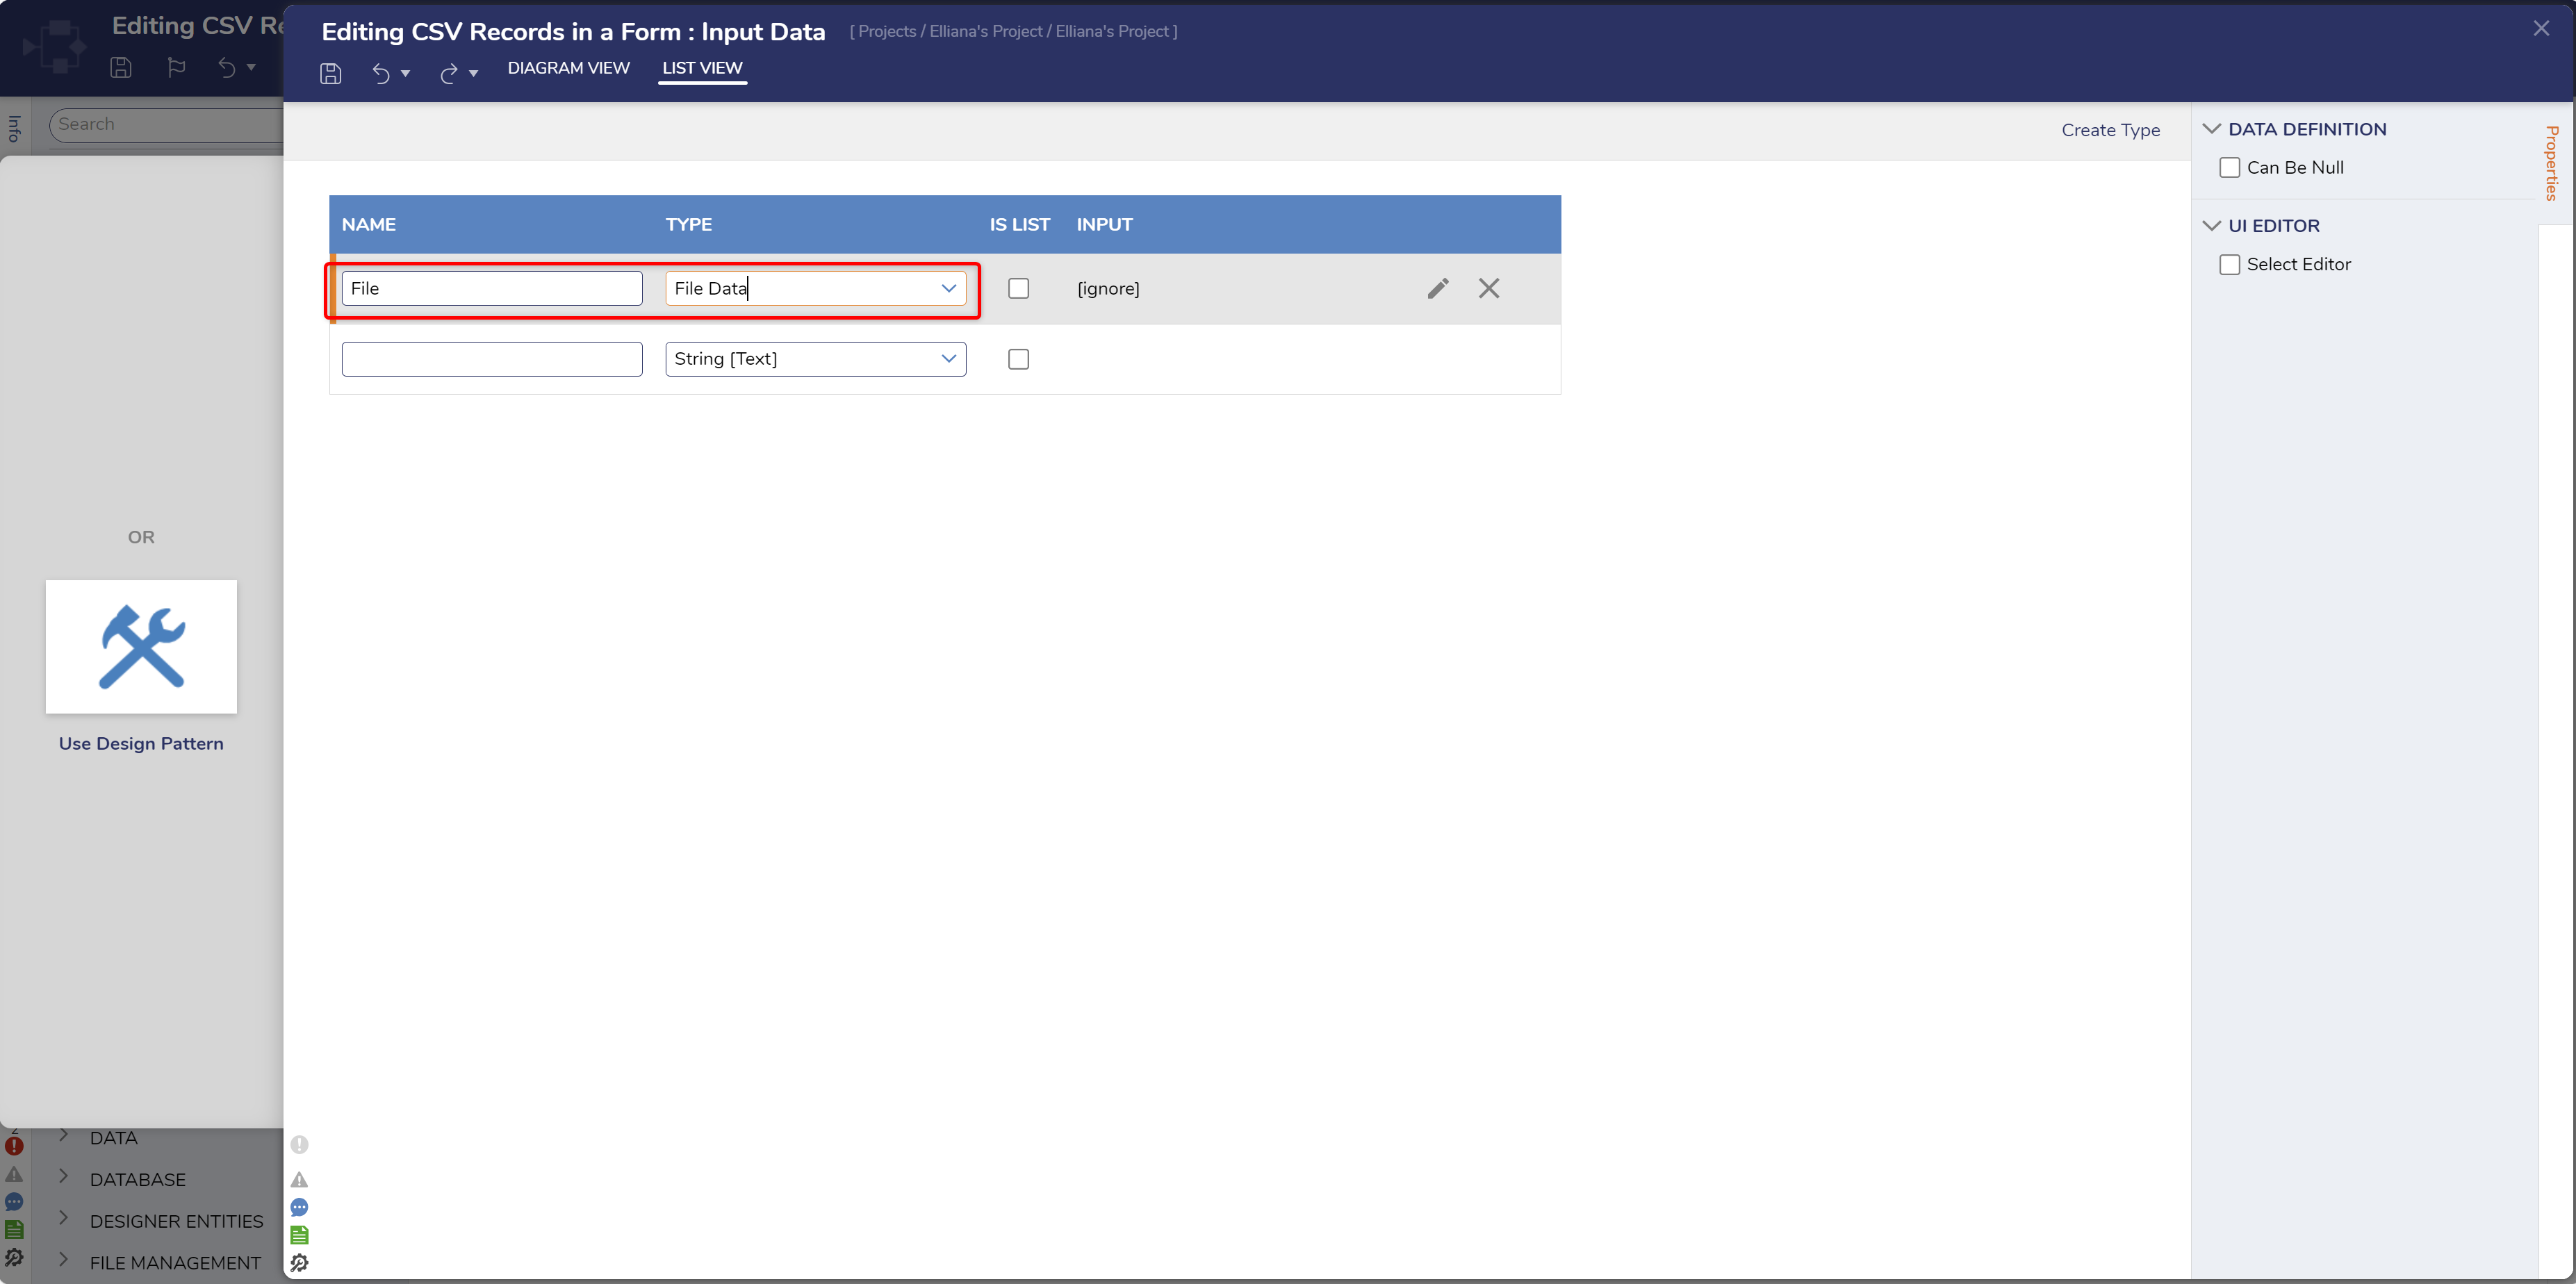
In the Data Definitions screen, NAME the Data "File", and select File Data from the TYPE drop-down. Save the Data Definition, then close the window.
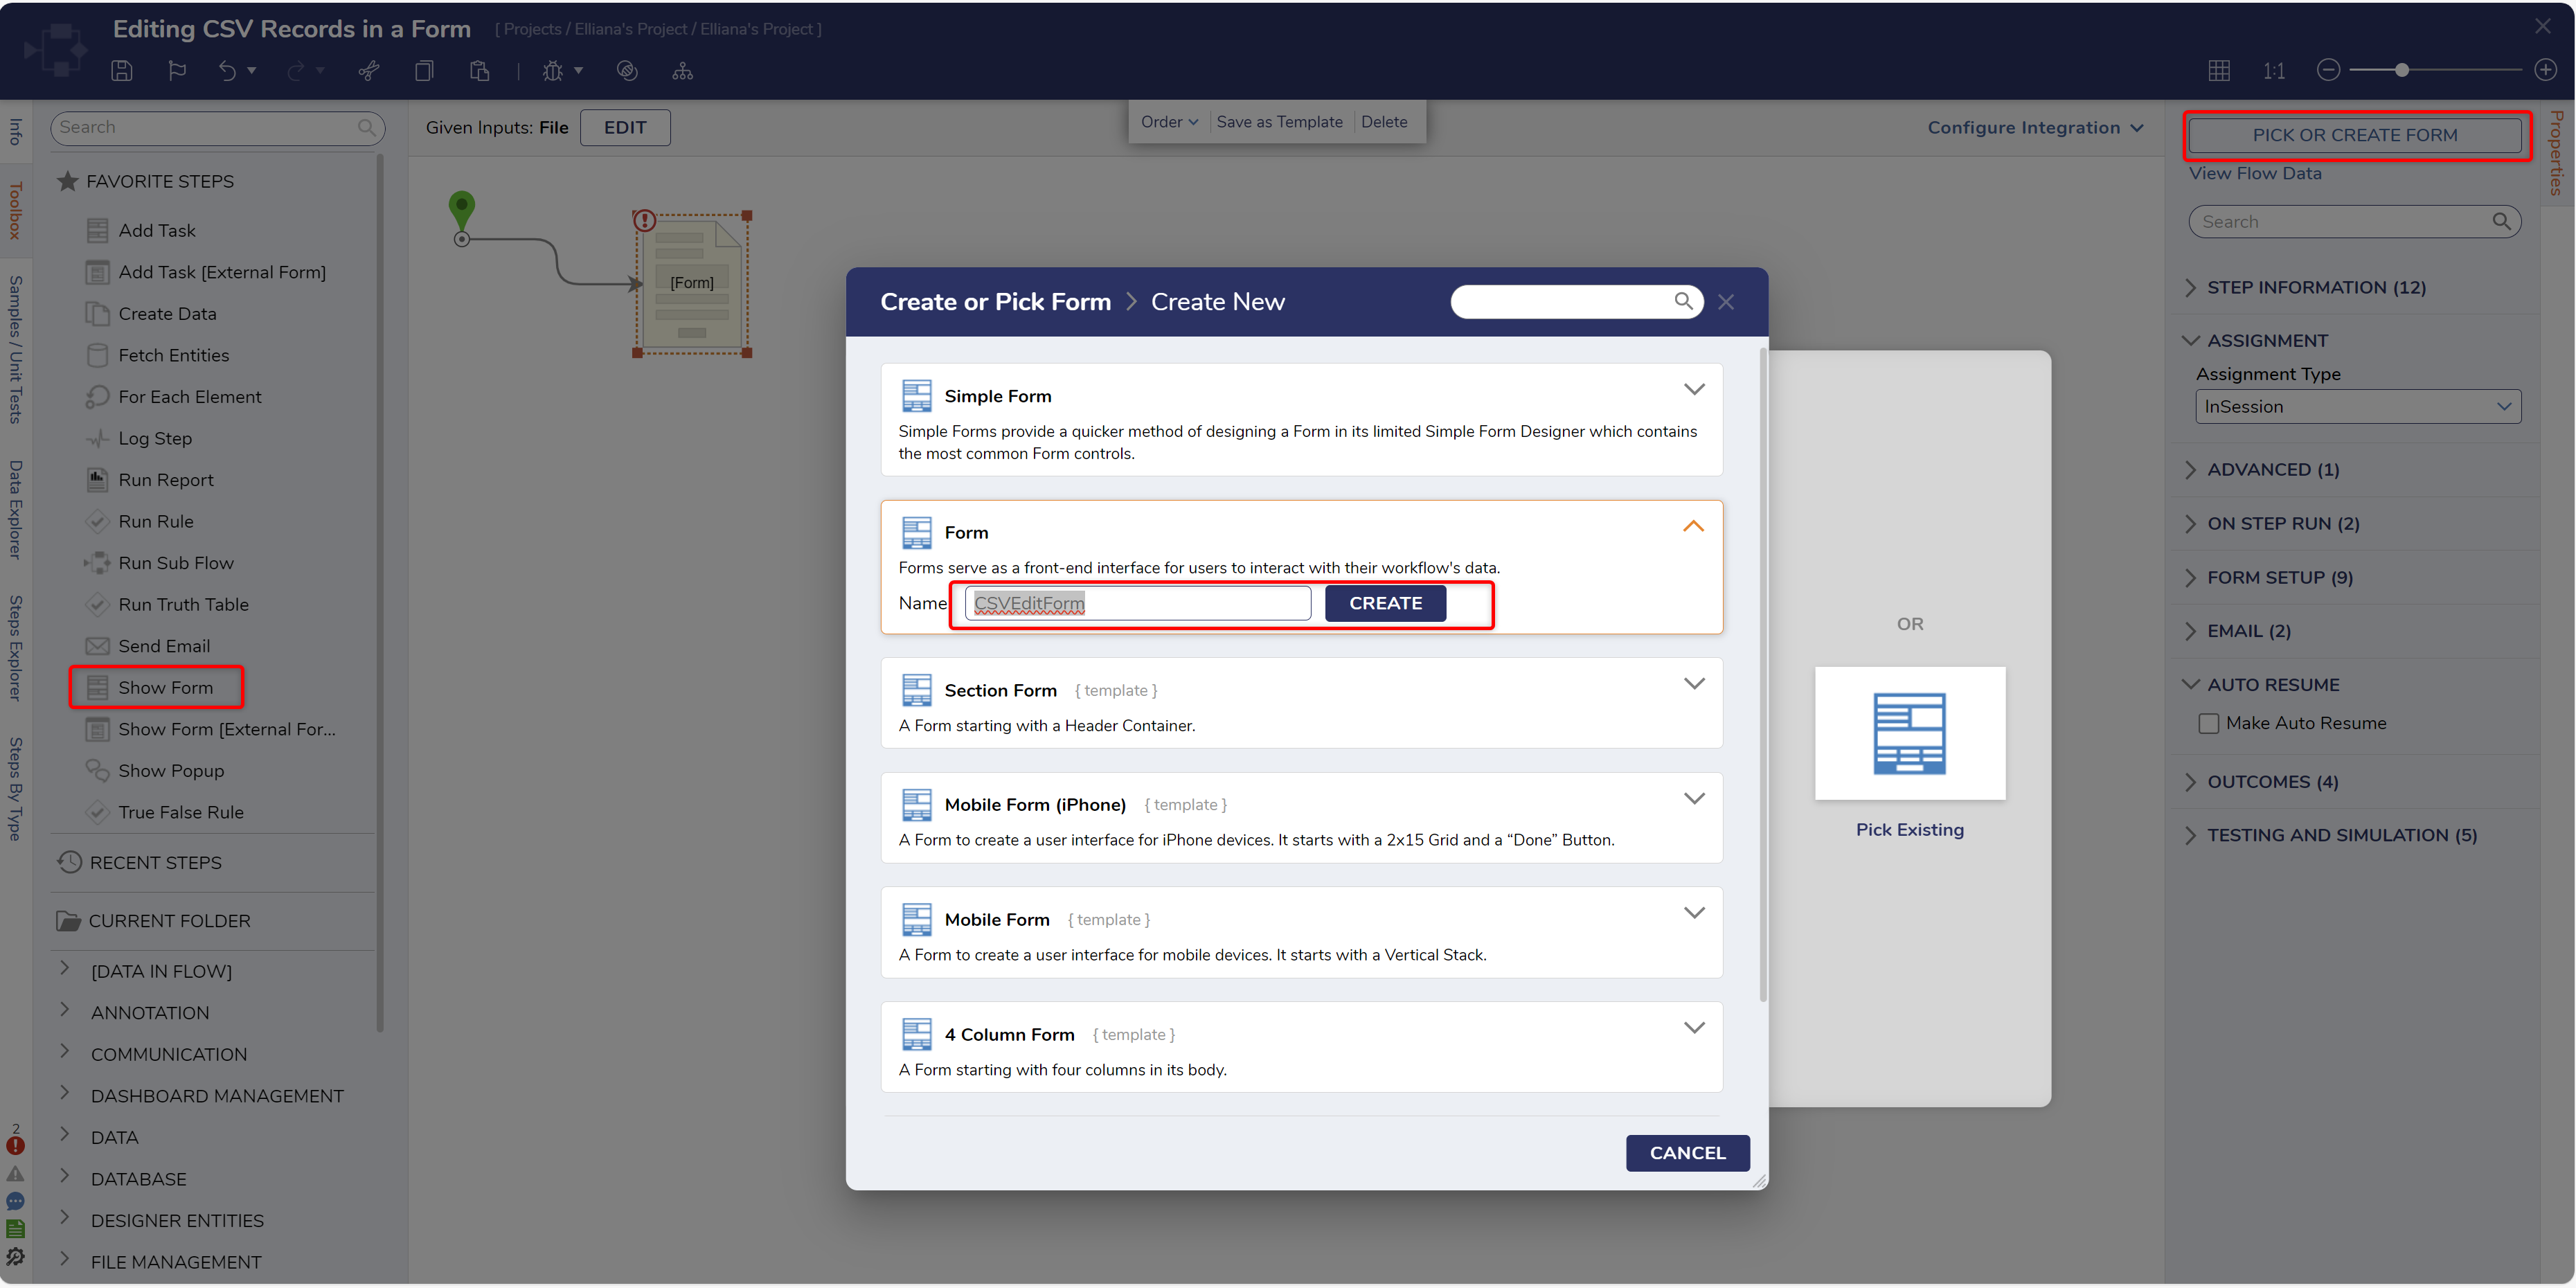
Attach a Show Form step from the FAVORITE STEPS category of the Toolbox tab to the Start step.
From the Show Form step's Properties tab, click PICK OR CREATE FORM, select CREATE, choose Form, provide a Name, then click CREATE.
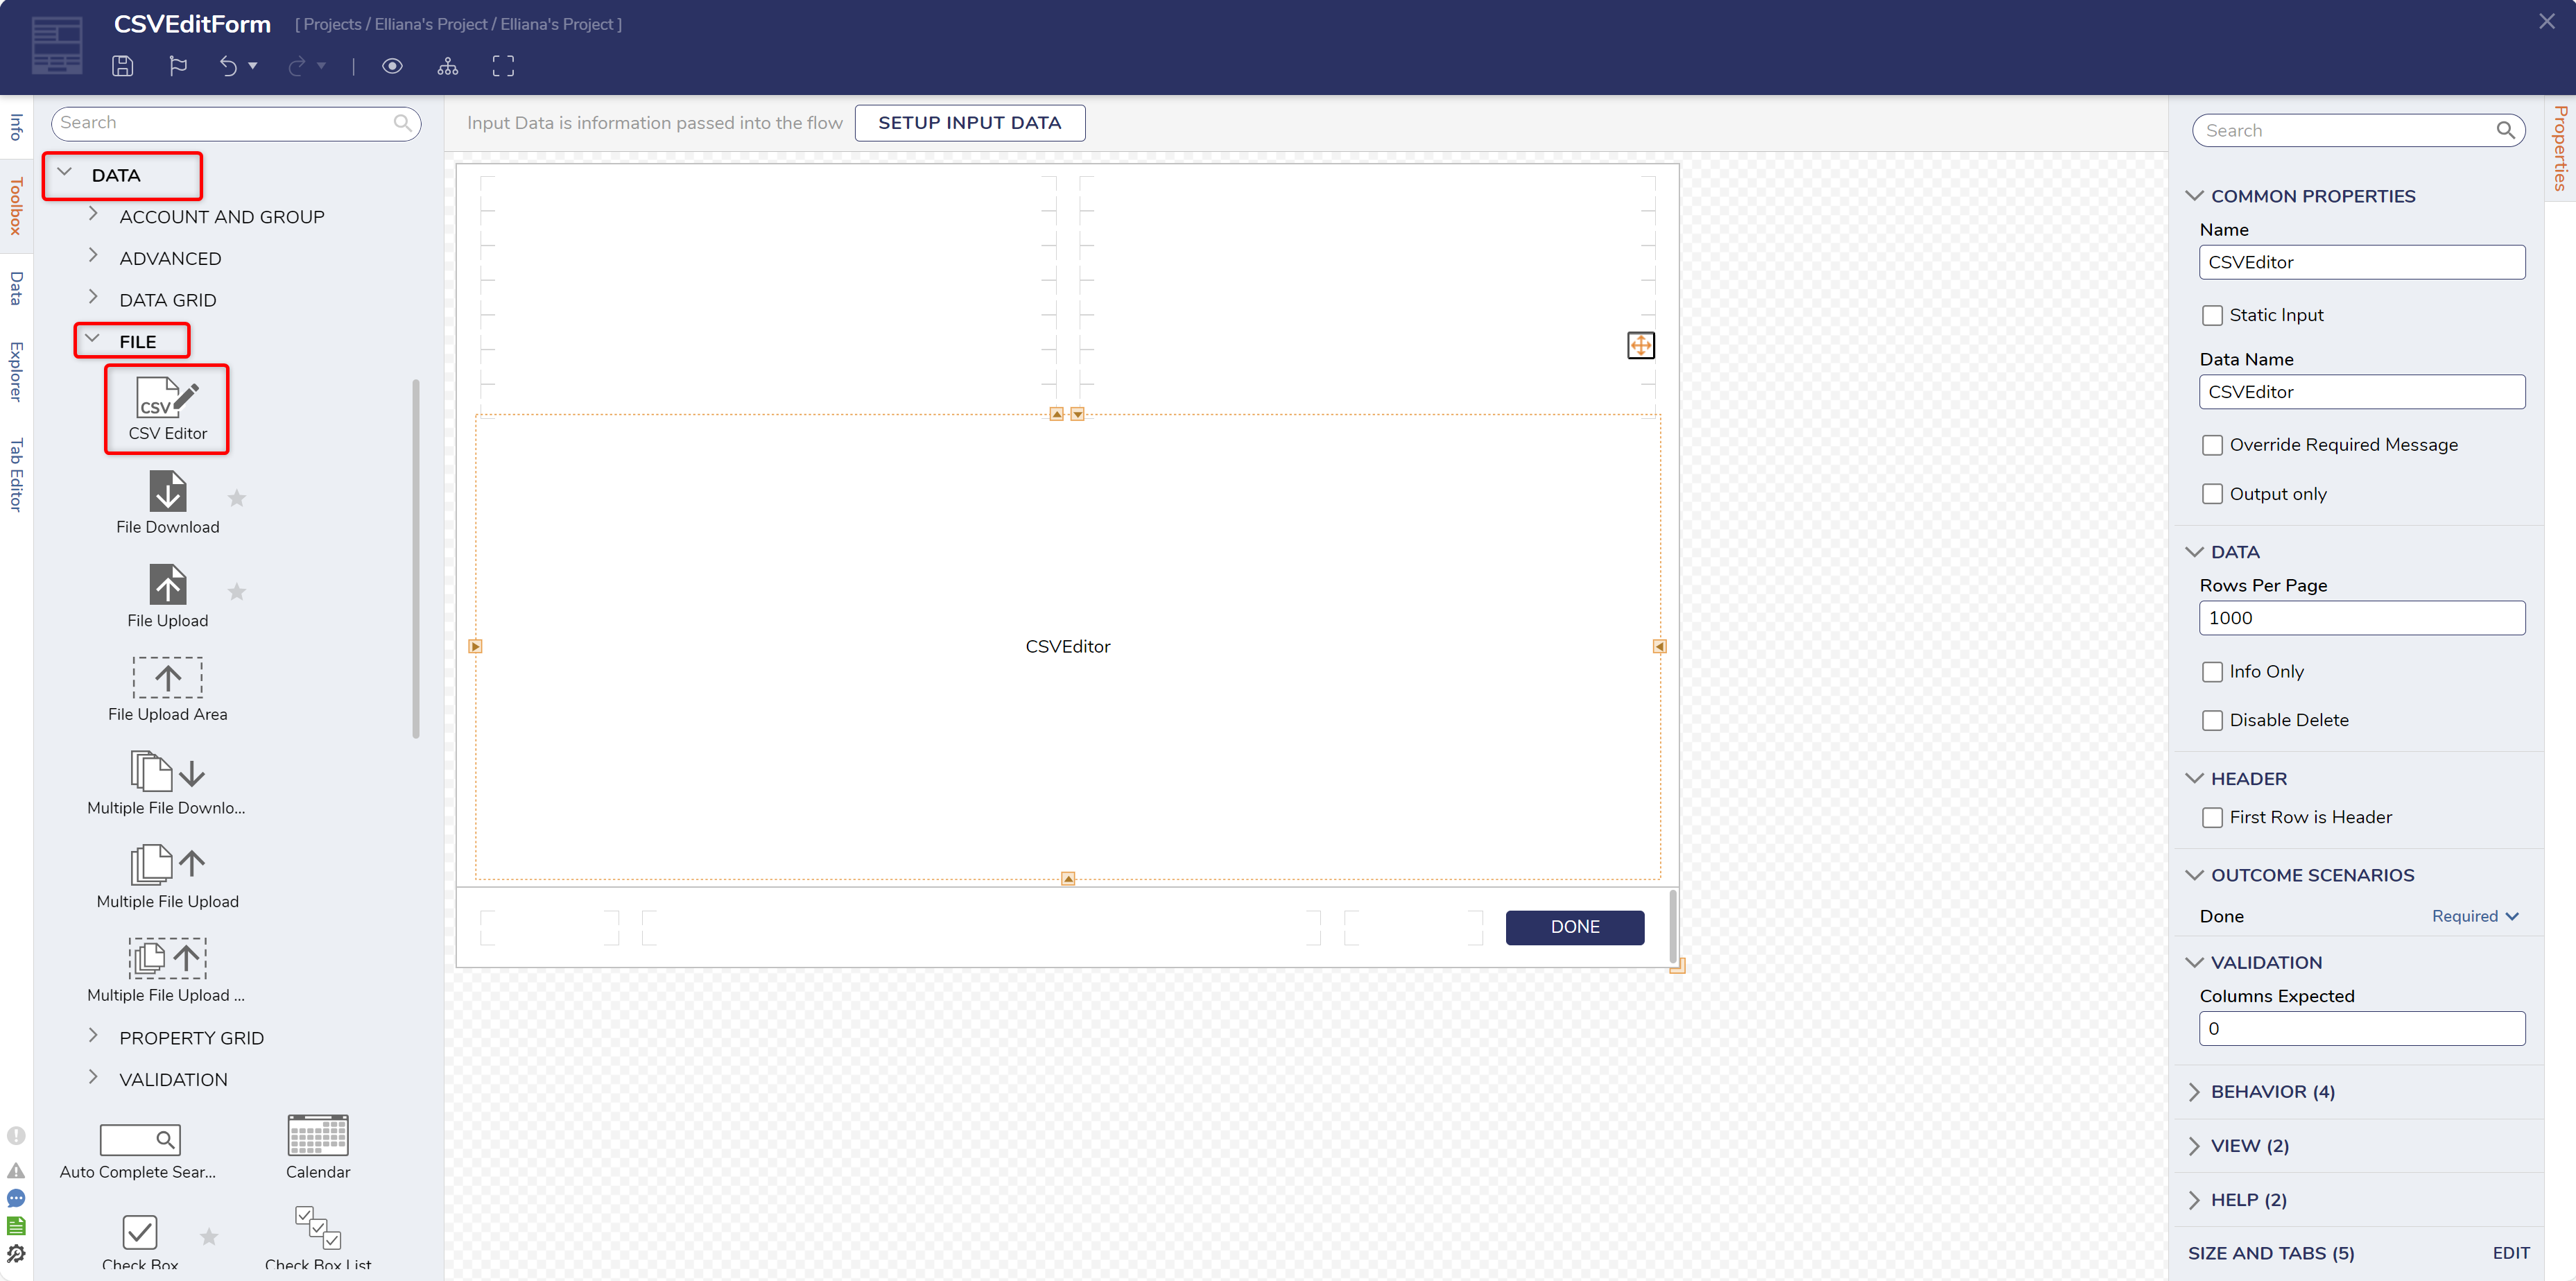
From the Form Designer, create a Form containing a Button component from the FAVORITES category of the Toolbox tab and a CSV Editor from Toolbox > DATA > FILE.
Save the Form, then close the Form Designer via X.
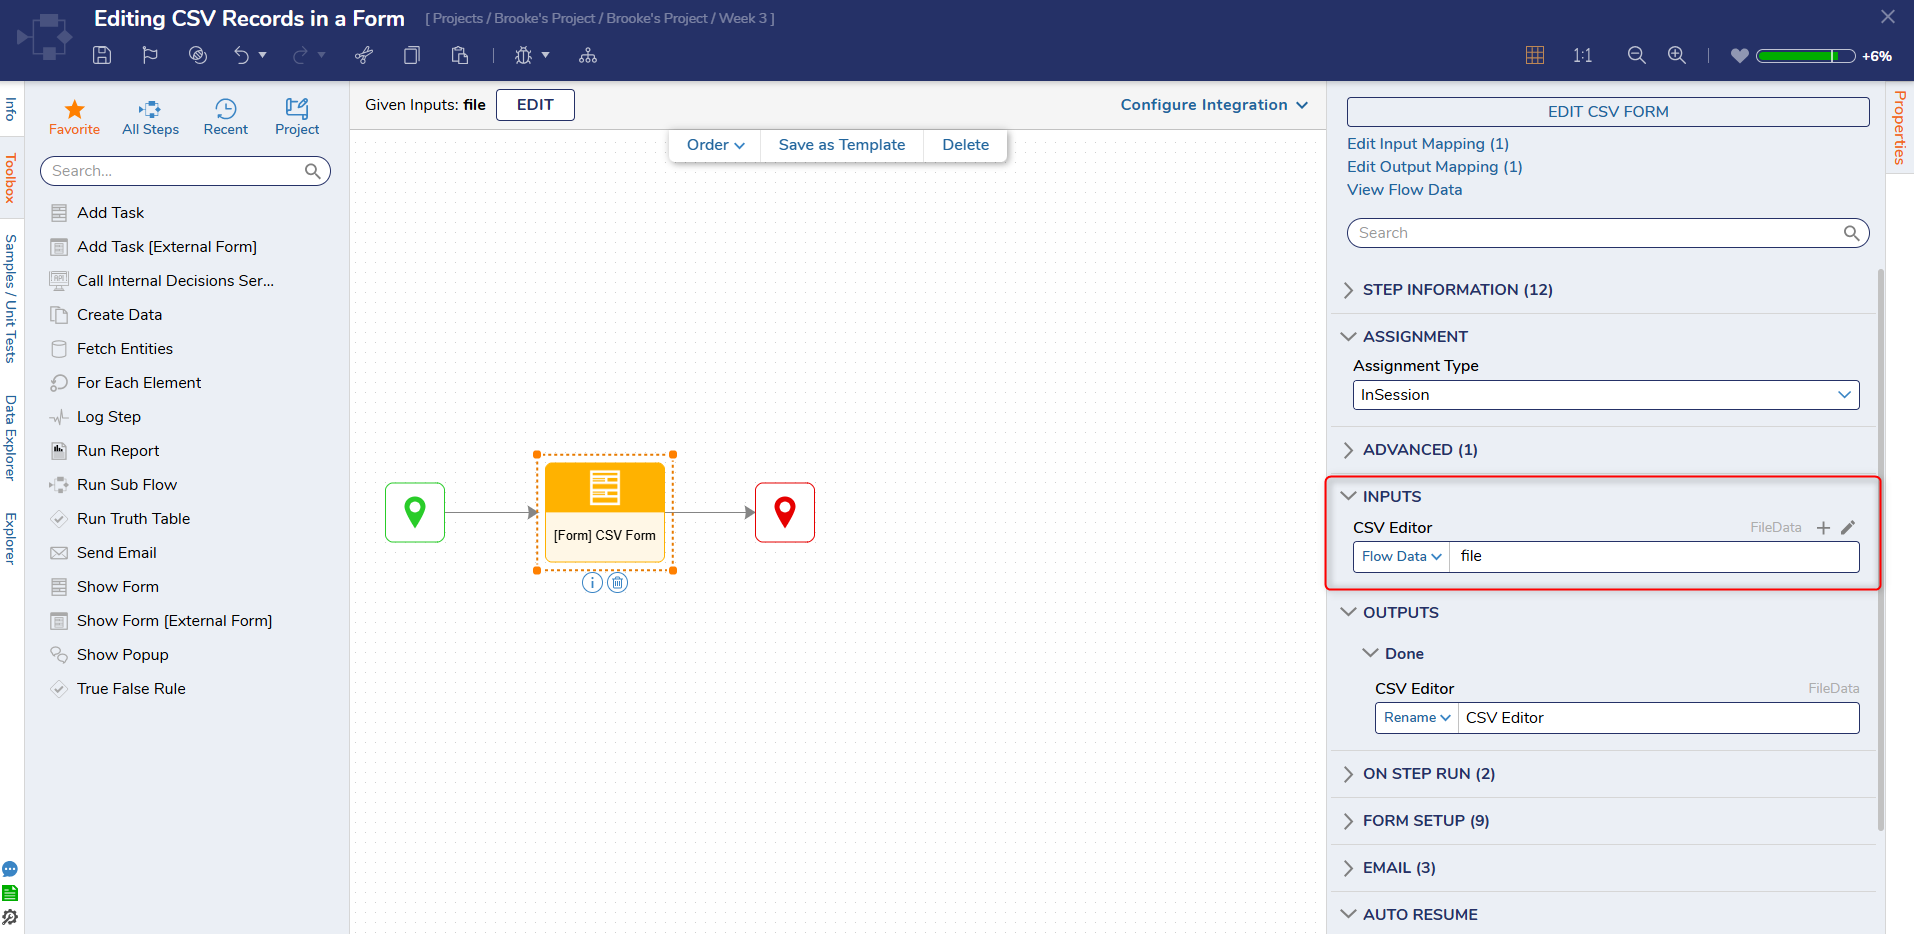
Back in the Flow Designer, connect the Done path to the End step, then navigate to the Show Form step's Properties. Under INPUTS, map the File to CSVEditor.
Save the Flow, then if desired, close with X.
Debug
From the Flow Designer, select the Debug link from the top action bar.
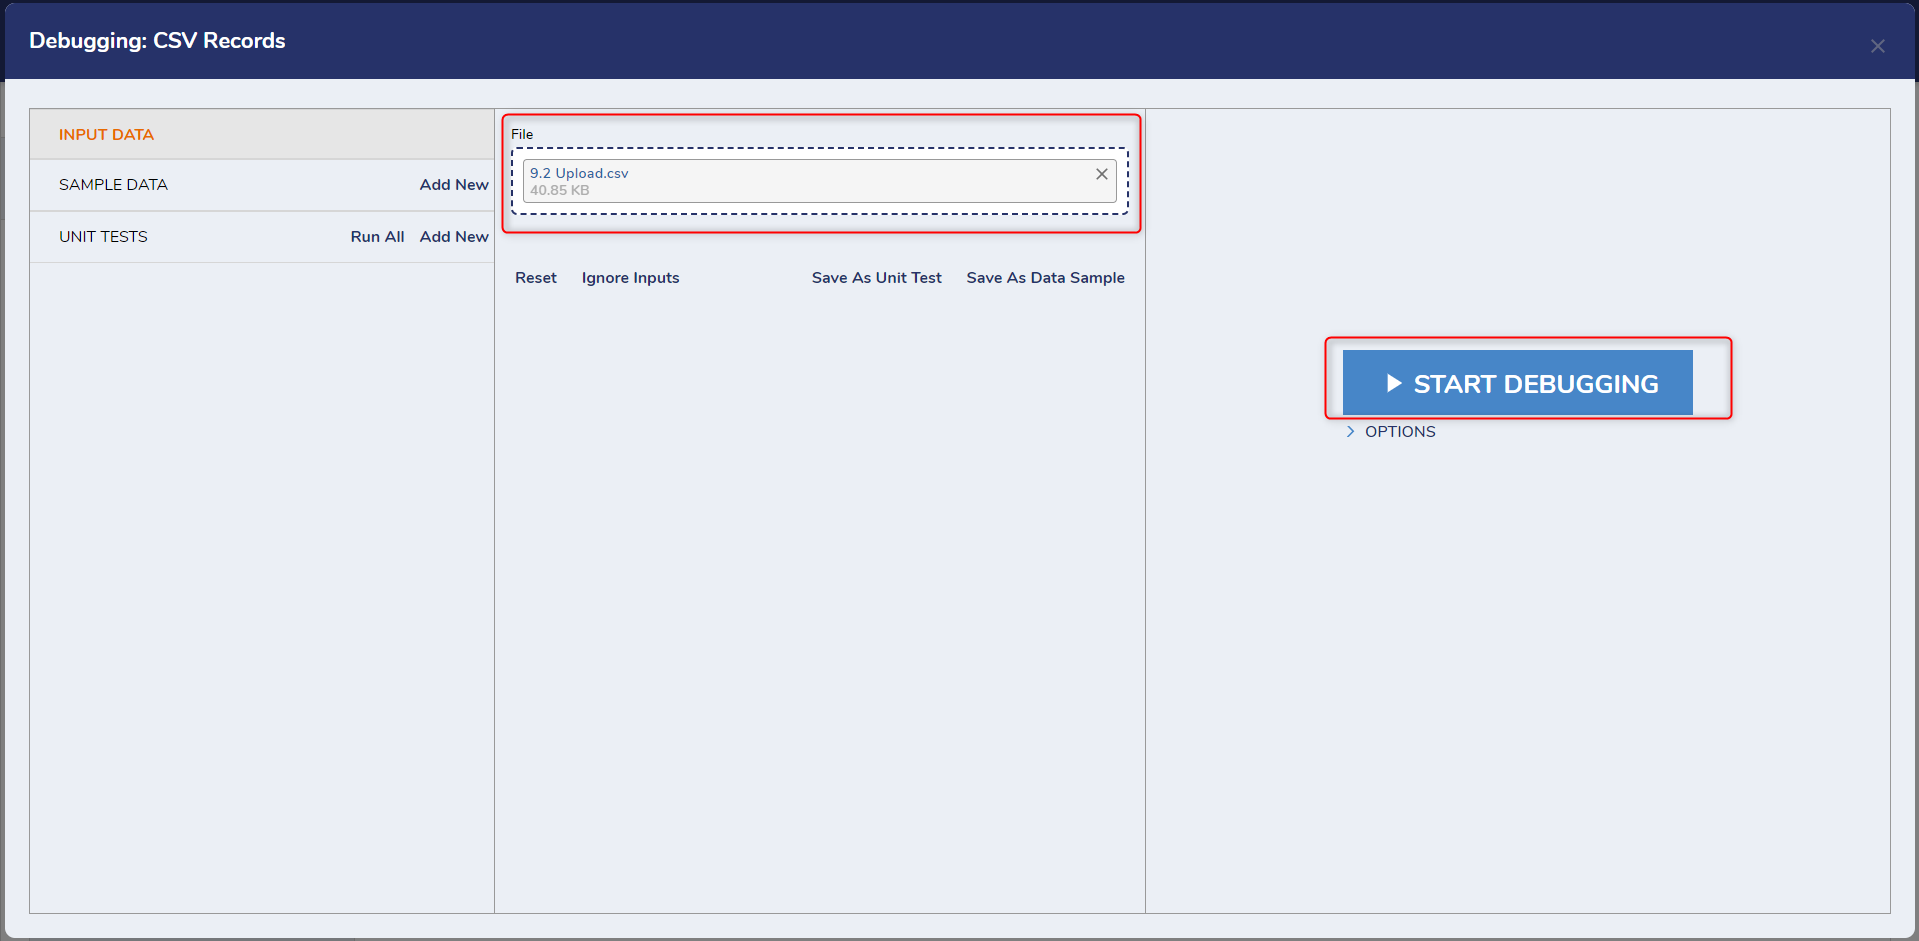
In the Debugger, use the Drag file here field or the CHOOSE FILE button to select the desired CSV file.
Click START DEBUGGING.
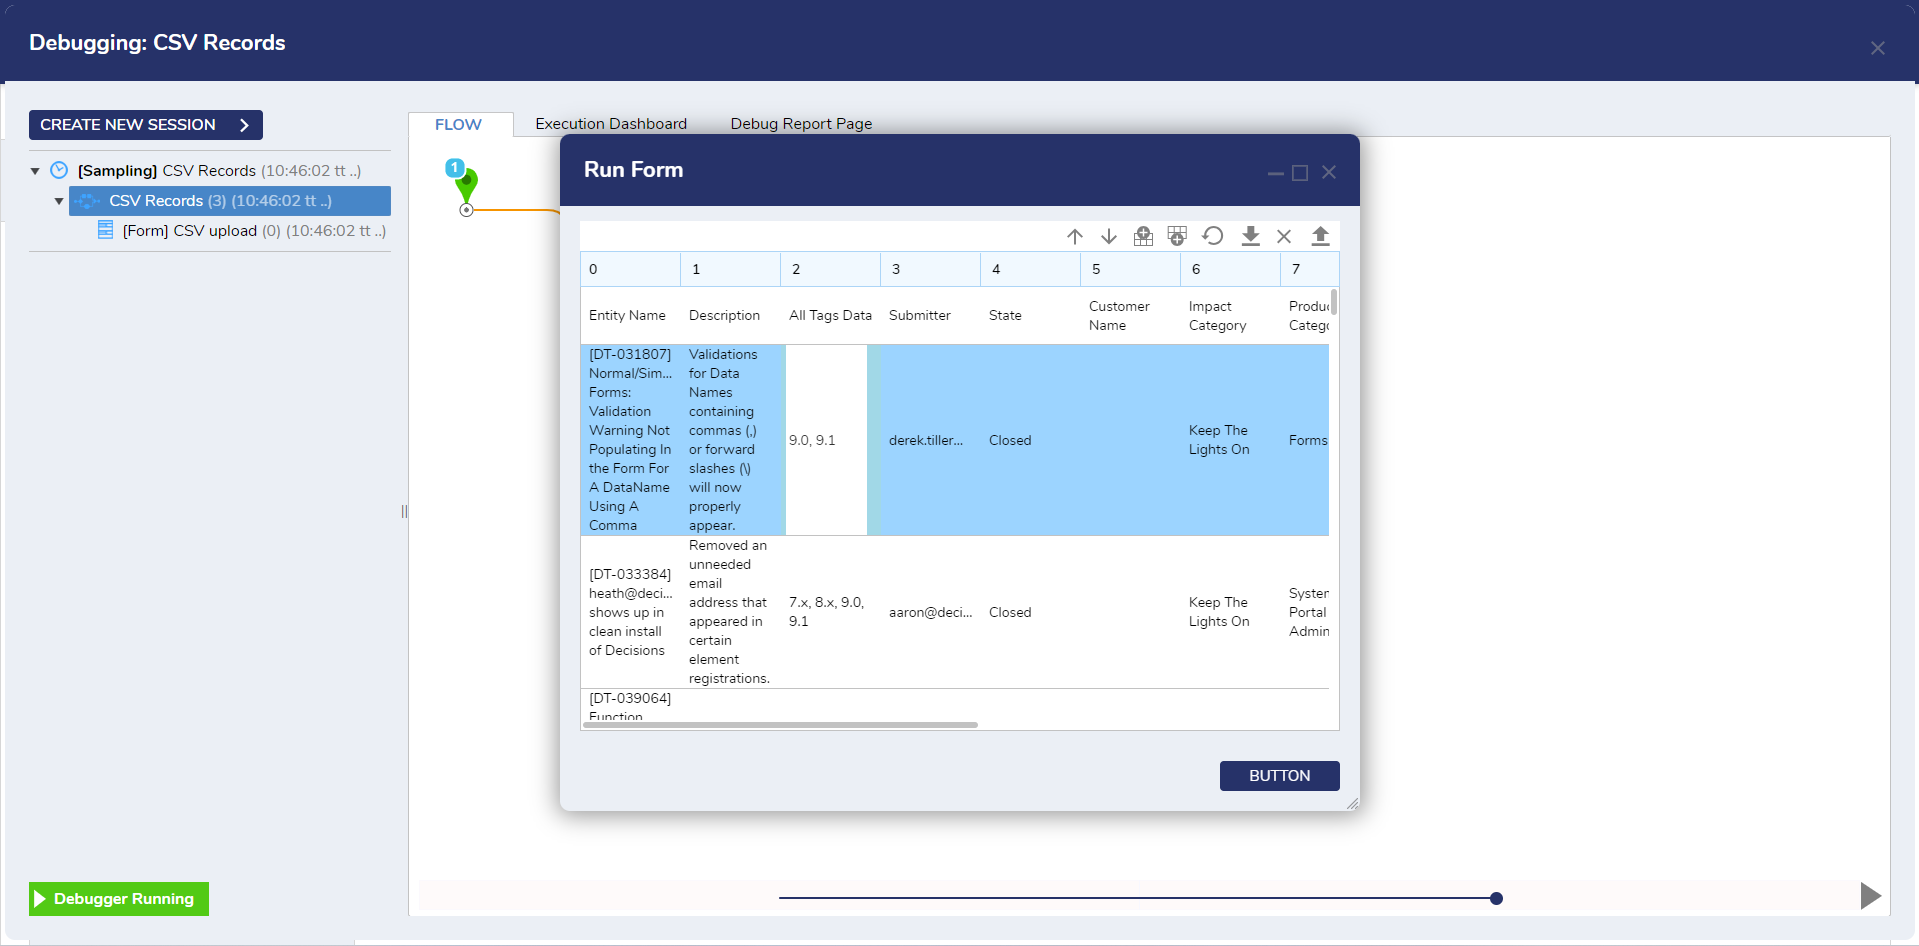
Make any desired edits to the CSV file.
To edit any cell, select the cell, then adjust the value and either press the enter key or click out of it.
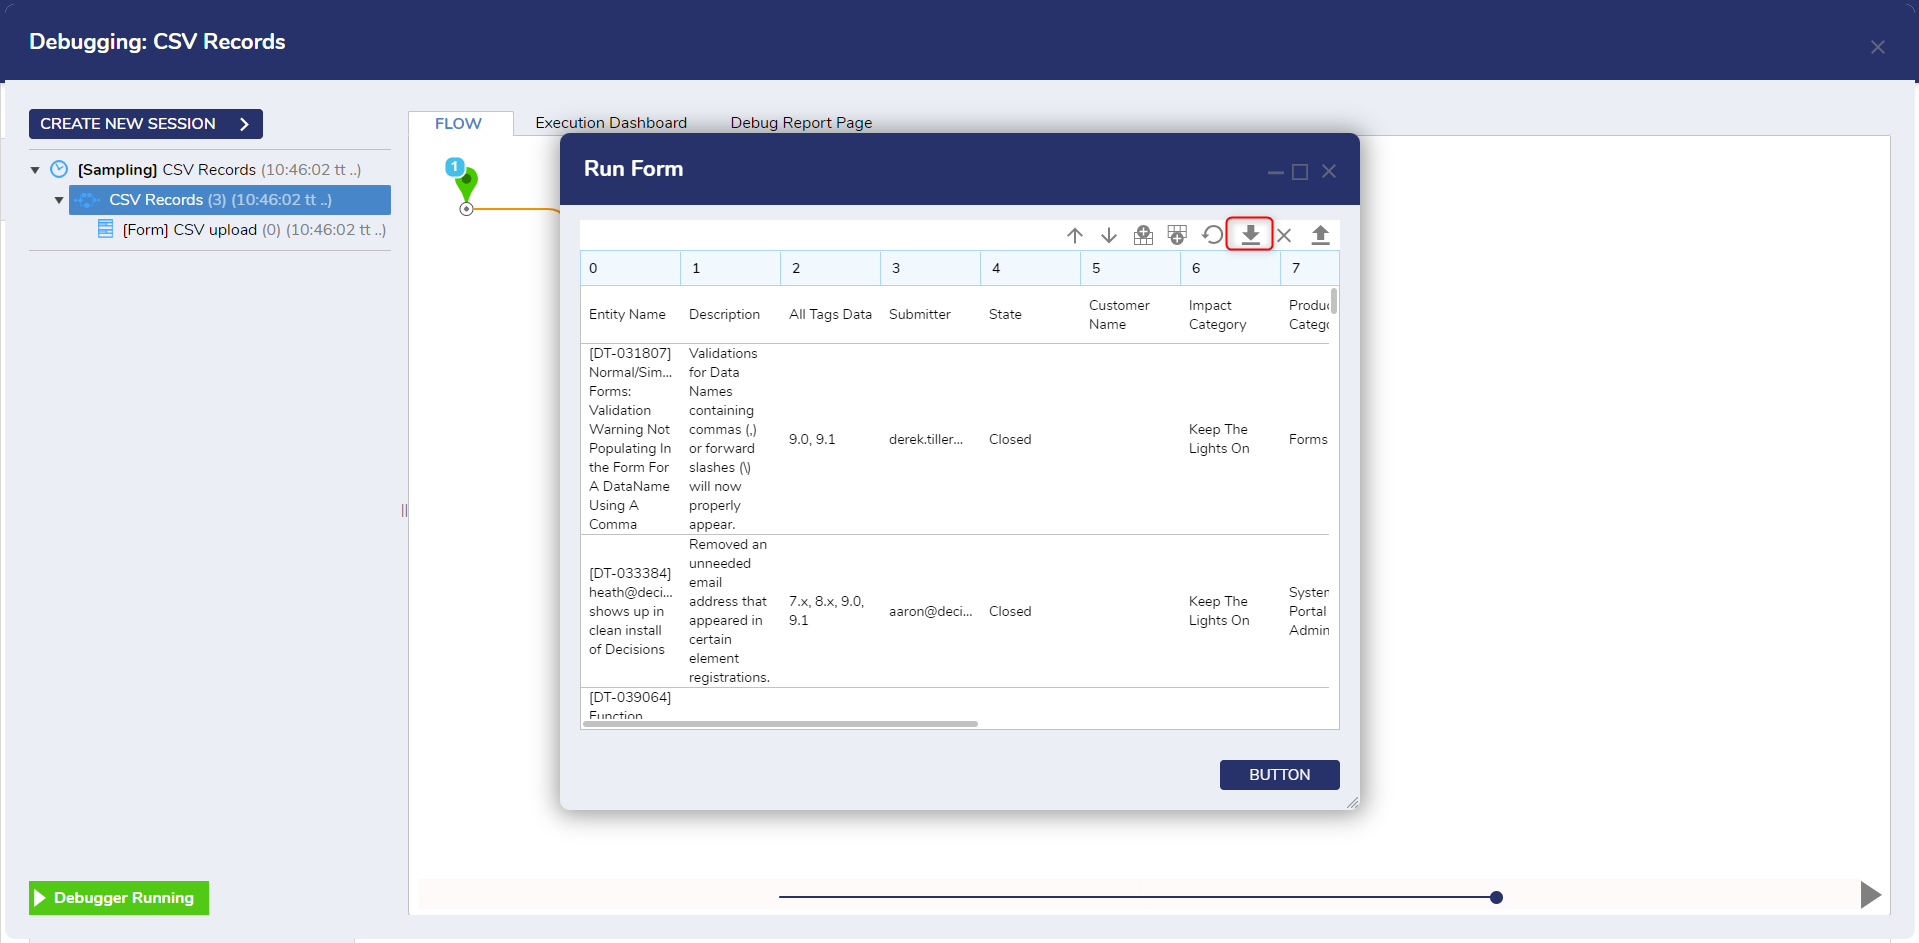
Click the Download button and verify the contents of the spreadsheet.
Additional Line Separators
Starting in v9.9, users have access to the Additional Line Separators property.
There are two options, Line Feed and Carriage Return. In CSV files, especially on Windows, carriage return (\r) and line feed (\n) characters, often combined as \r\n, are used to separate rows (or records). However, within data cells, particularly in text fields, a carriage return can cause issues when parsed, as it can be misinterpreted as the end of a row.
When property is set to true, the CSV Editor displays linefeed values as separate rows. When property is set to false, the CSV Editor displays linefeed values as separate lines within the same cell.
There is also an 'All' option that will enable or disable both options at the same time.
Feature Changes
| Description | Version | Release Date | Developer Task |
|---|---|---|---|
| Added the "Additional Line Separator" property. | 9.9 | April 2025 | [DT-044174] |
| Additional Line Separator property is now set to false by default. This will only impact new controls. | 9.16 | October 2025 | [DT-045286] |