Overview
Interfaces provide a template for inputs and outputs on Flows and Rules within a Designer Folder.
Example
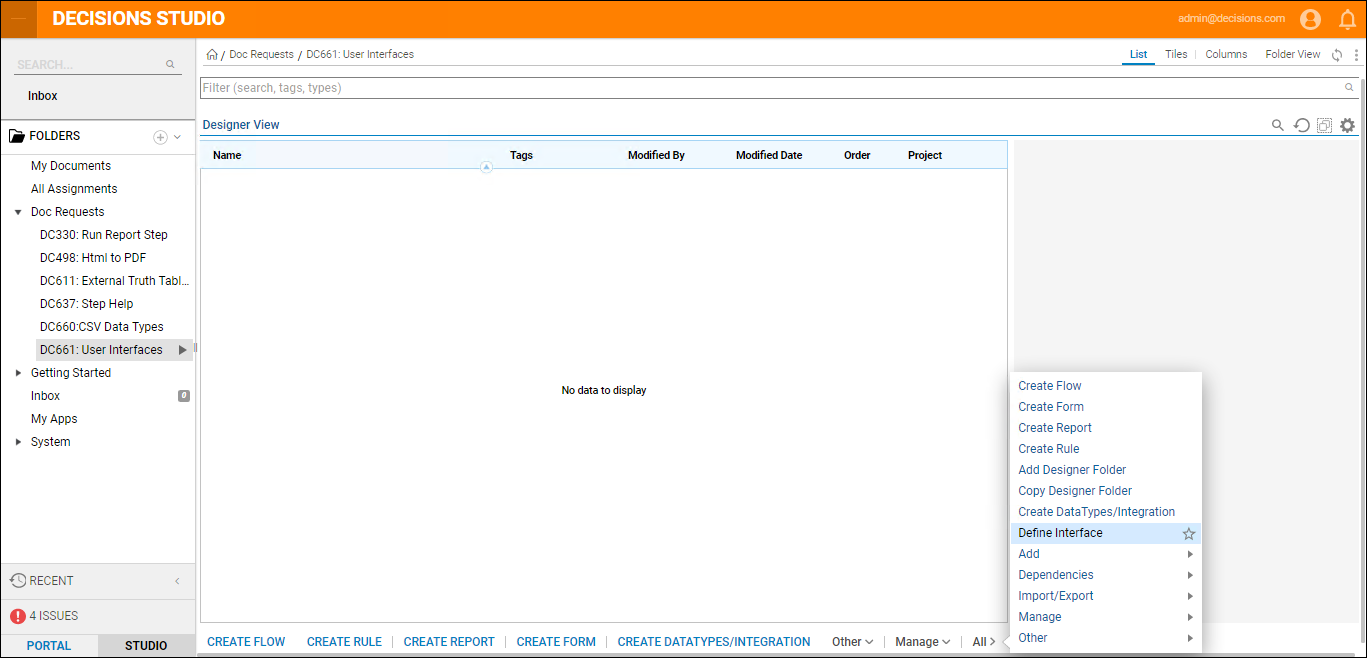
Begin in a Designer Folder, in the bottom action panel select All > Define Interface.
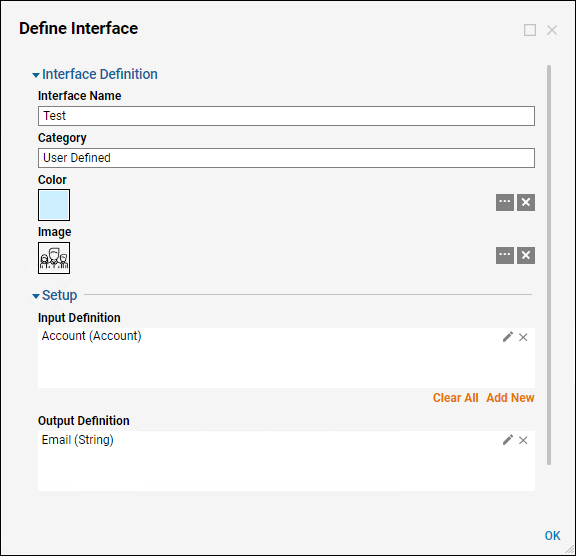
The Define Interface dialog opens. Define the Interface Name, in the example leave the Category as User Defined. Give the Interface a color and image.
Under Setup > Input Definition select Add New.
In the Add Input Definition, name the Data Definition and select the Type. In this example, the Data Definition is named Account and the Type is Account [DecisionsFramework.ServiceLayer.Services.Accounts]. Select Ok to save.
Next under Output Definition, select Add New.
In the Add Output Definition, name the Data Definition and select the Type. In this example, the Data Definition is named Email and the Type is String.
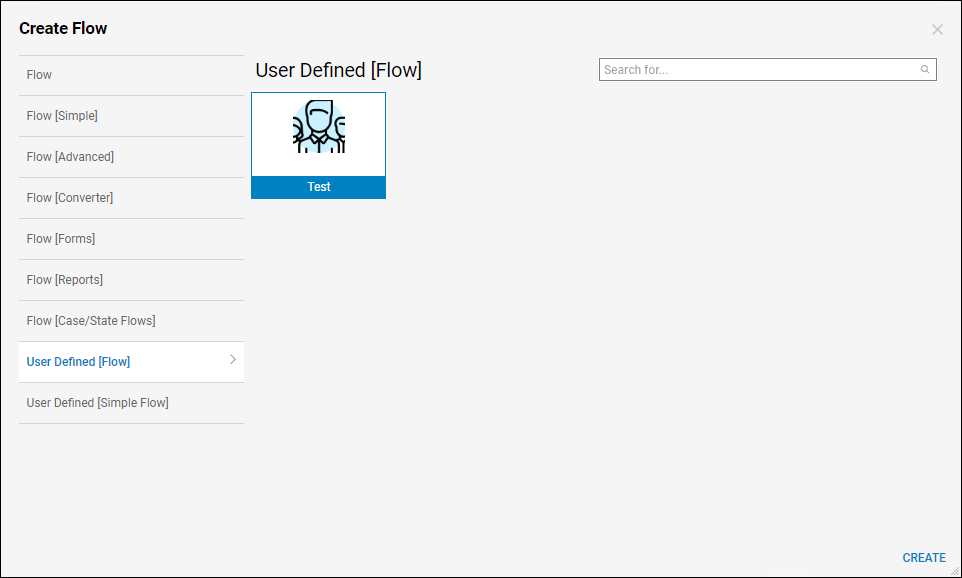
In the Designer Folder select Create Flow. On the left-hand side select User Defined [Flow], then choose Test, select Create. Name the flow then select Create.
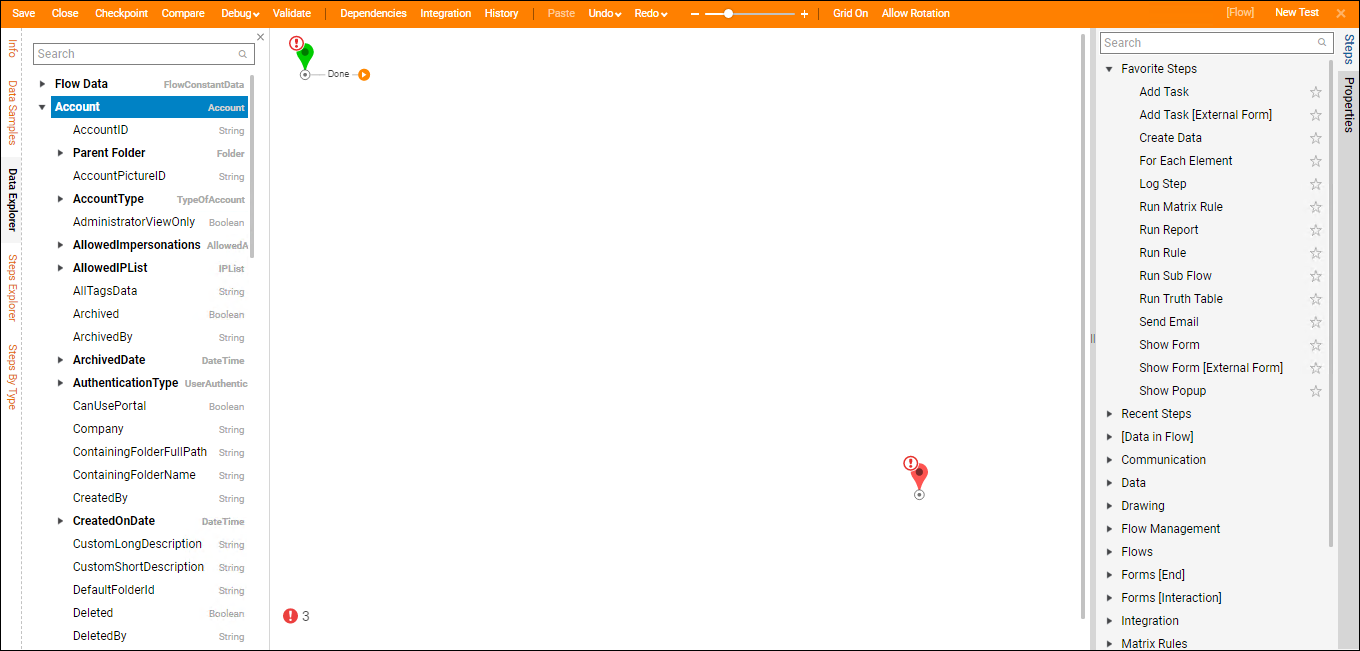
In the Flow Designer expand the Data Explorer tab on the left side, notice the pre-set Input, Account, is available.
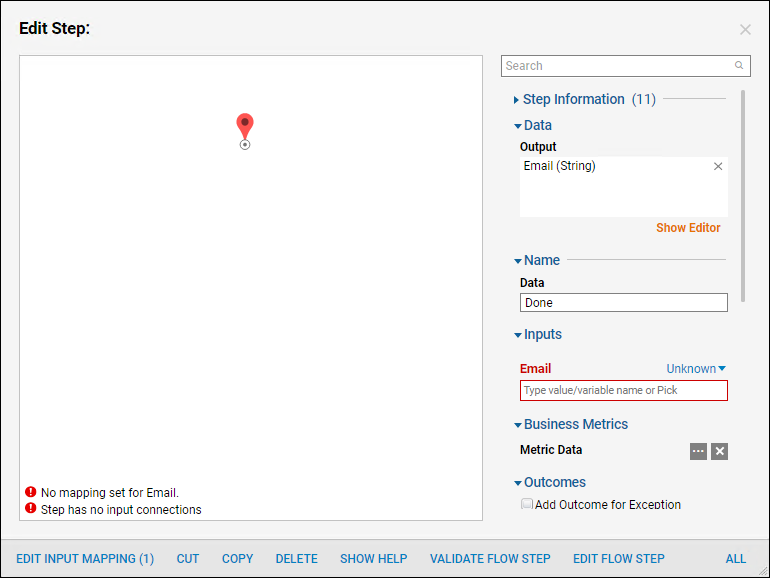
Next, on the End step, notice the pre-set output, Email, is available.
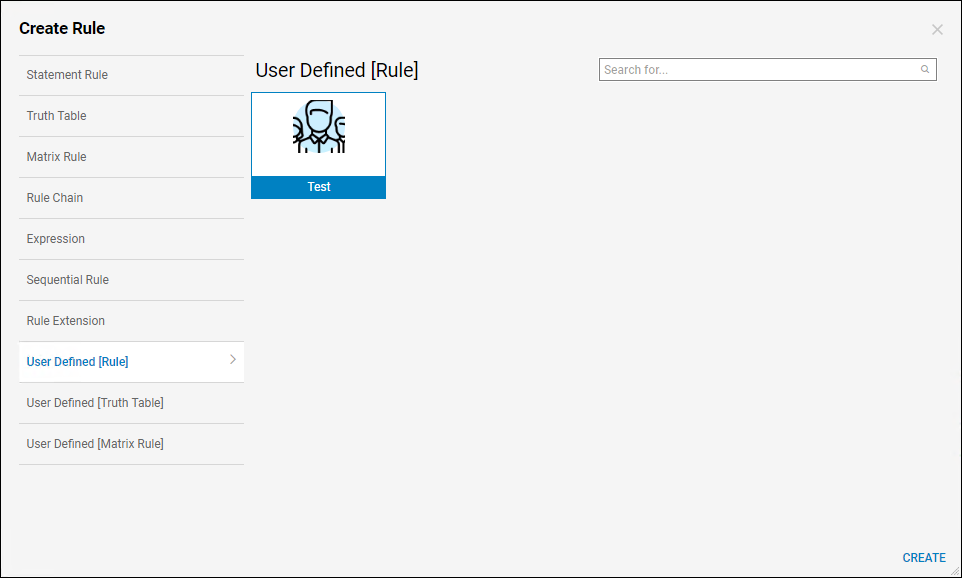
Back in the Designer Folder select Create Rule. On the left-hand side select User Defined [Rule], then choose Test, select Create. Name the rule then select Create.
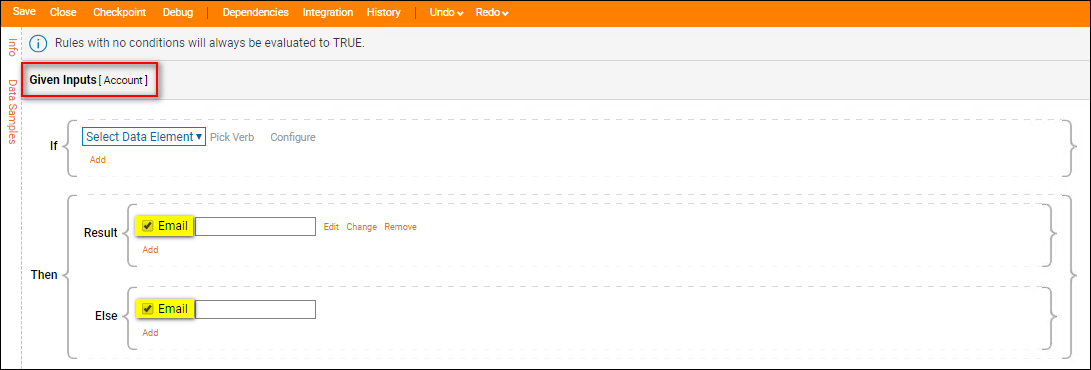
Notice in Given Inputs, Account, is already available and Email is already set in the Result/Else statement.
