Overview
This article will simulate the lookup of a customer's account balance. The NVelocity step uses conditional statements to evaluate the account balance dollar amount and produces a custom message to communicate the account holder's "status" with the company based on the evaluation (either Standard, Classic Plus, or Premium). The string message output is used to populate an email body sent to the customer.
NVelocity Step
For more information on the NVelocity step, please reference the Advanced Merge Using NVelocity article.

Example
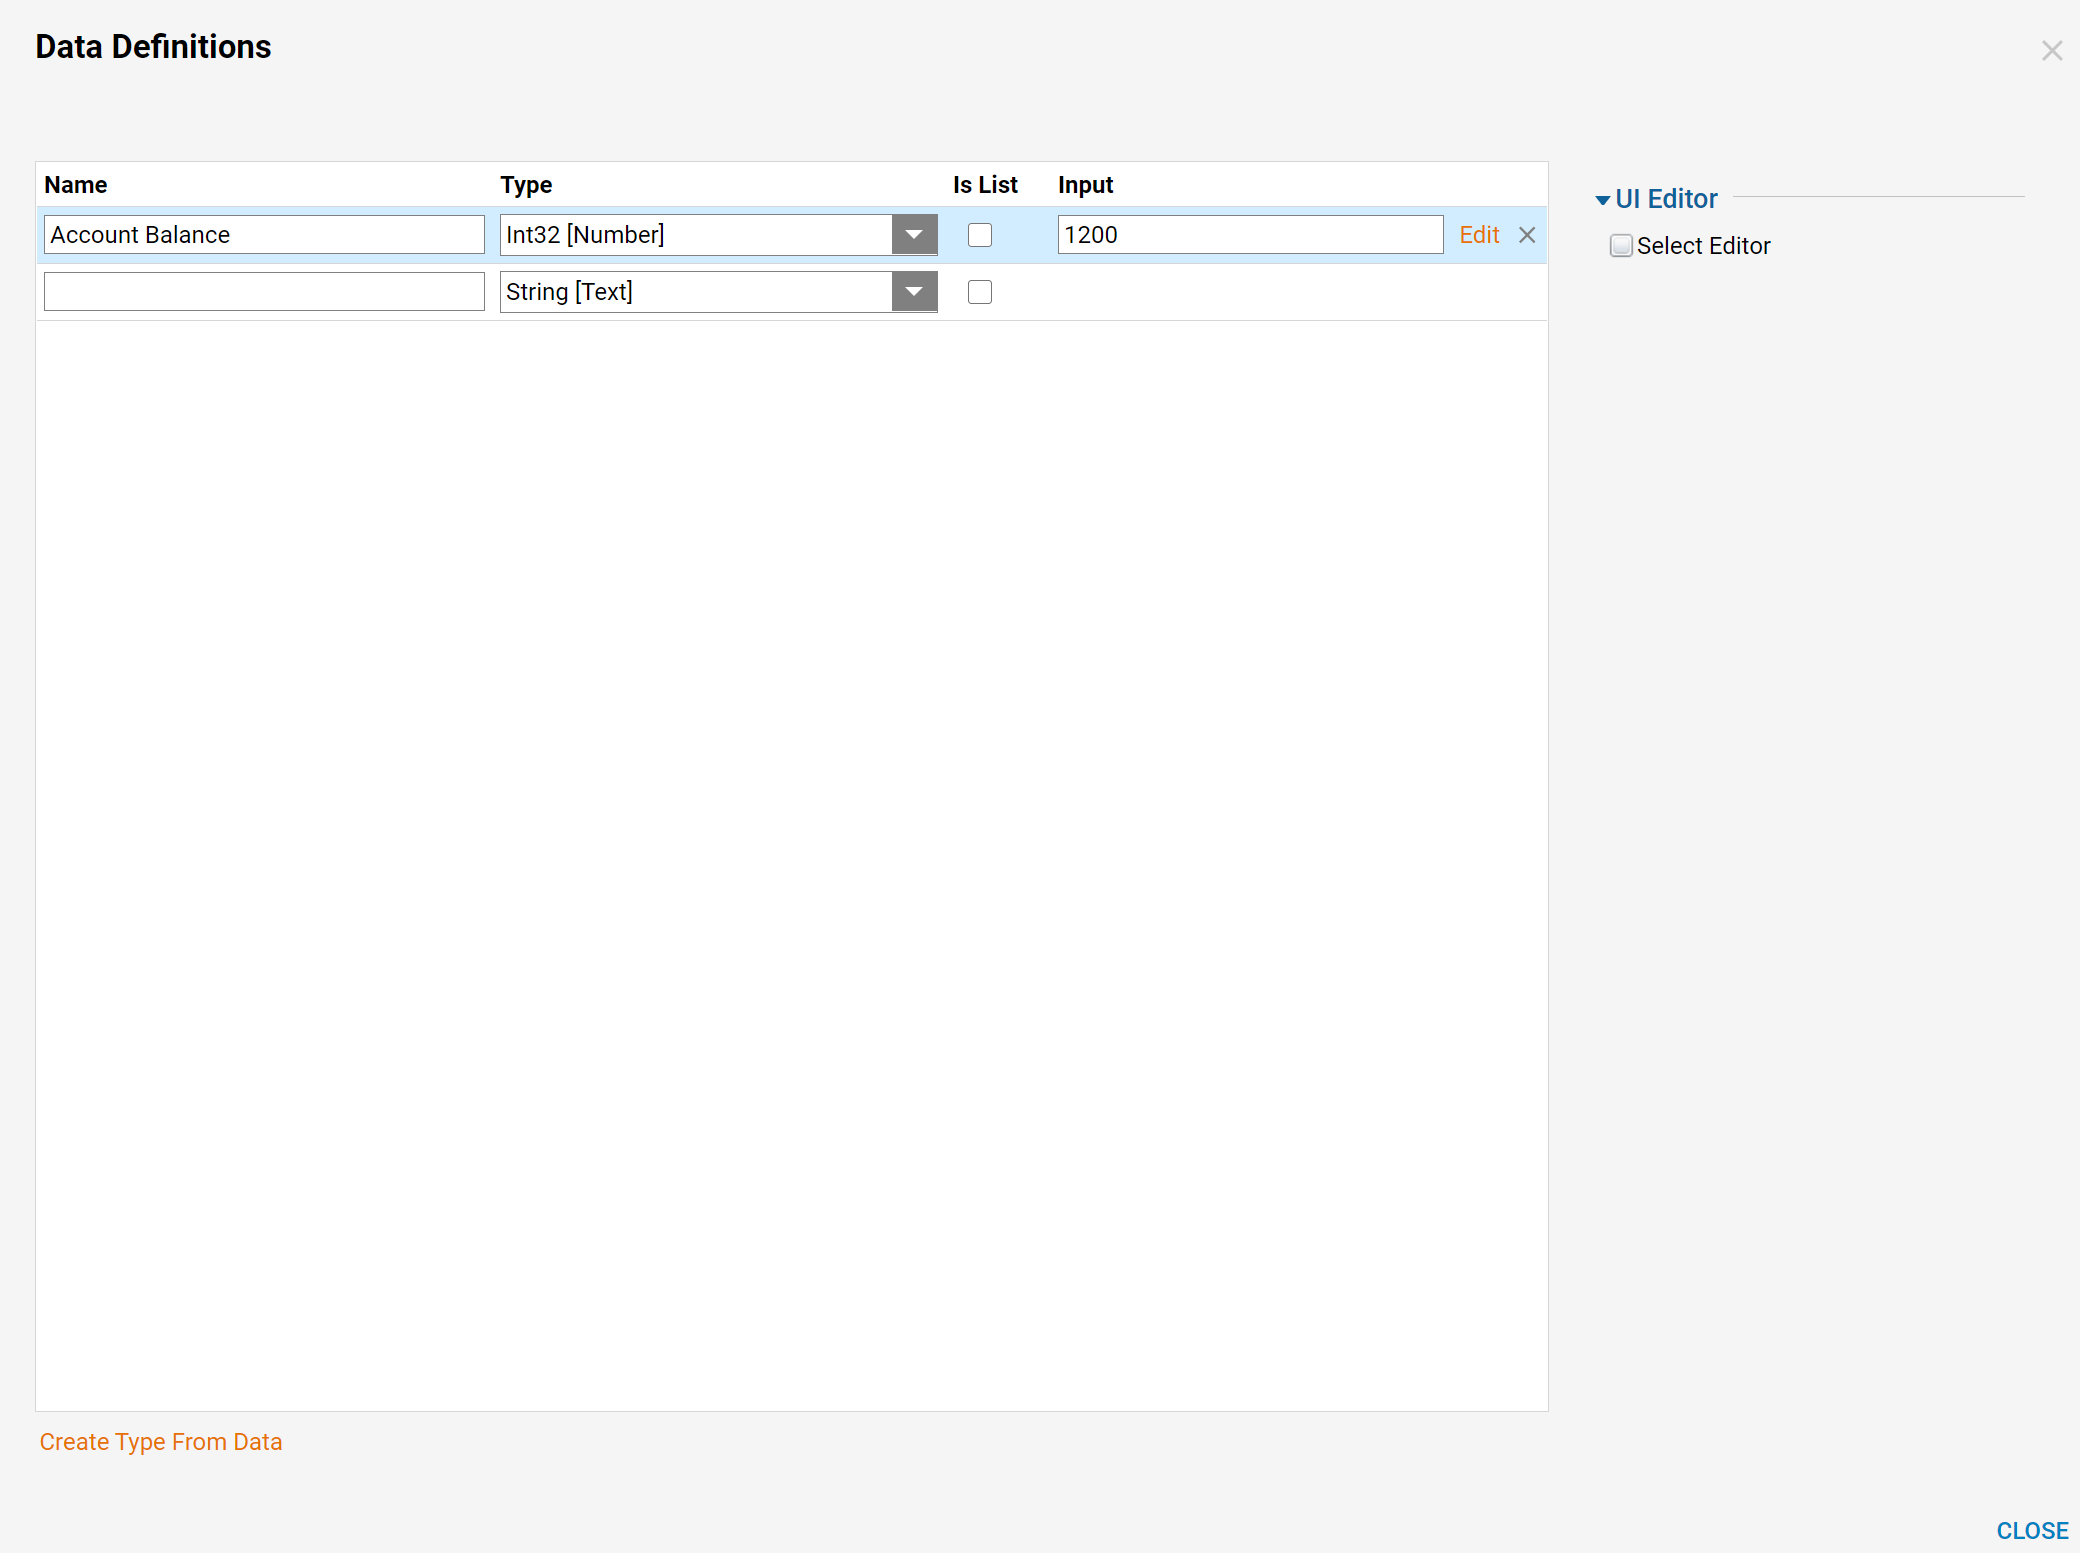
- In this example, a Create Data component is used to provide constant, numeric value that simulates an account balance. In a production environment, this could be a database lookup of an account balance.
- Create a new Flow in a Designer Folder and locate the Create Data step in the Steps tab under the Data category. Drag and drop this component into the workspace.
- Connect the Start step to the Create Data step. Click on the Create Data step and use the Show Editor button in the Properties panel to configure the data in the screenshot below.

- In the Steps tab, navigate to Data > Text and add the Custom Merge [NVelocity] step to the Flow following the Create Data step. Connect the Create Data step to the Custom Merge [NVelocity] step.
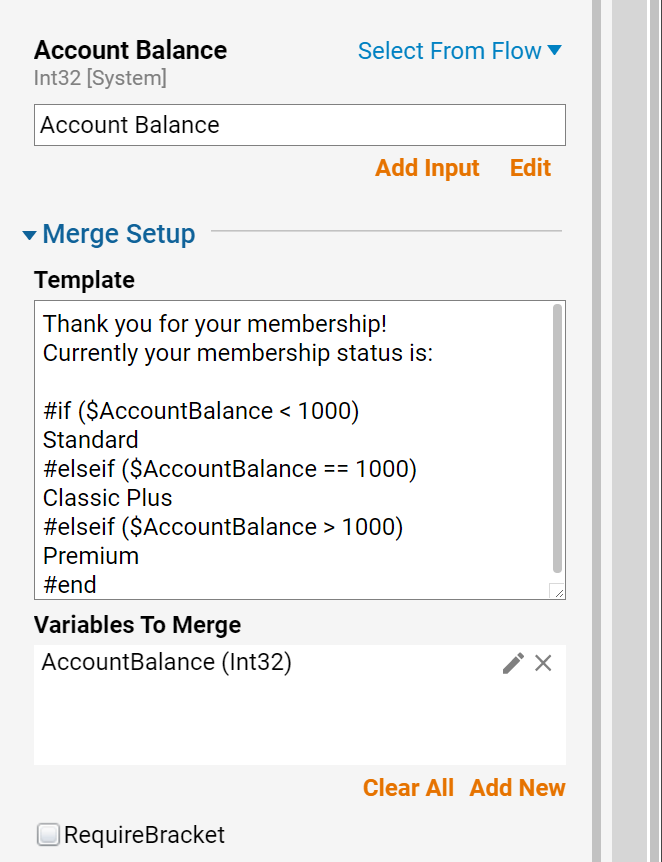
- Select the Custom Merge [NVelocity] step to populate the Properties tab, then locate the Merge Setup section and enter the message that will be shown to account holders, as shown in the screenshot below.

- The conditional statements use the following syntax:
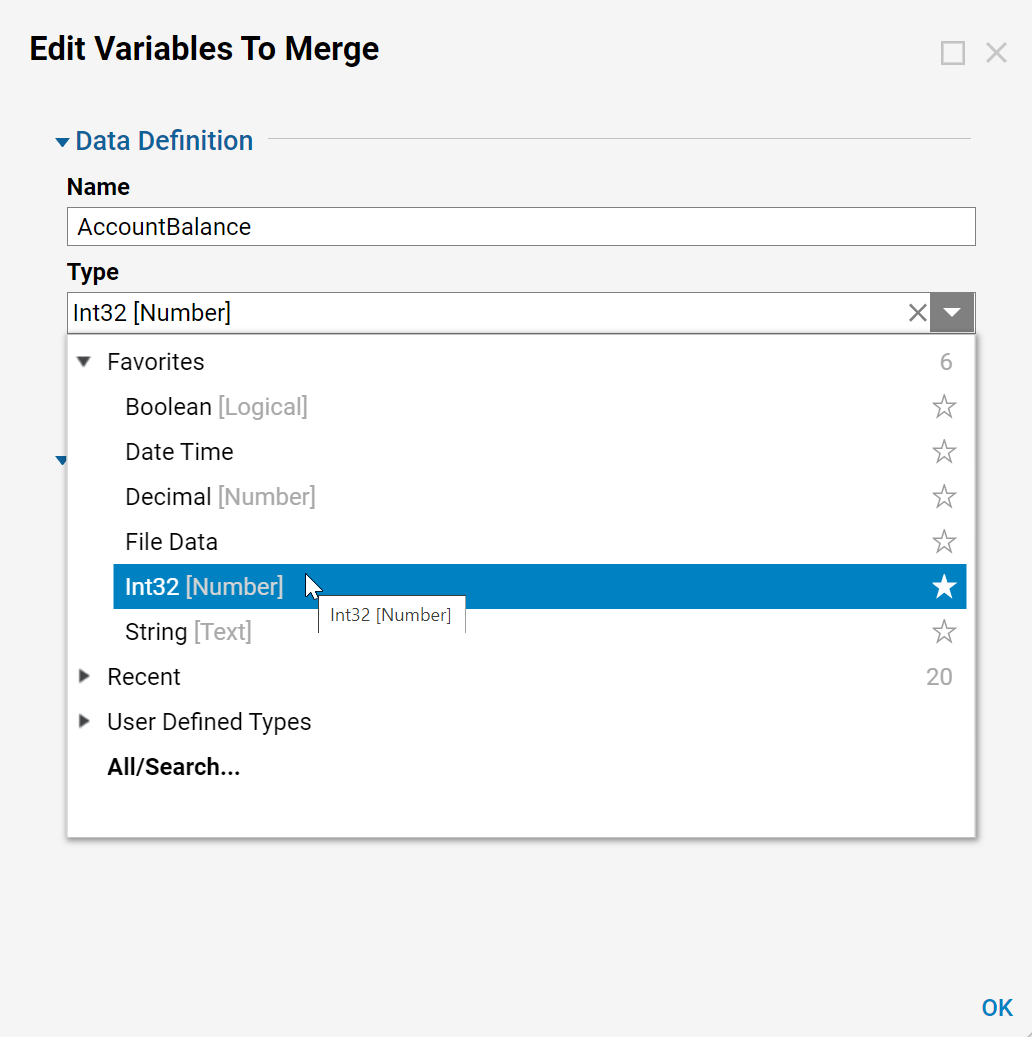
#if($User.IsAnonymous) You can register now to get the great benefits of membership! #else Welcome back $User.UserName! #end - As variables (i.e. $accountbalance) are entered in the Template field, the MergeInputData field populates. Set the appropriate data type for each variable defined in the MergeInputData field by selecting the Edit button and picking the corresponding type.

- To complete the configuration of the Custom Merge [NVelocity] step, select the account balance input data (which is the output of the Create Data step). This is the integer that will be evaluated by the Custom Merge [NVelocity] step.

- To complete the logic, the Flow will send an email containing the membership status message represented by the output string of the Custom Merge [NVelocity] step -- MergedString.
- From the Steps tab, expand the Communication category and add a Send Email step to the workspace. Confirm that the steps are connected as shown in the screenshot below.

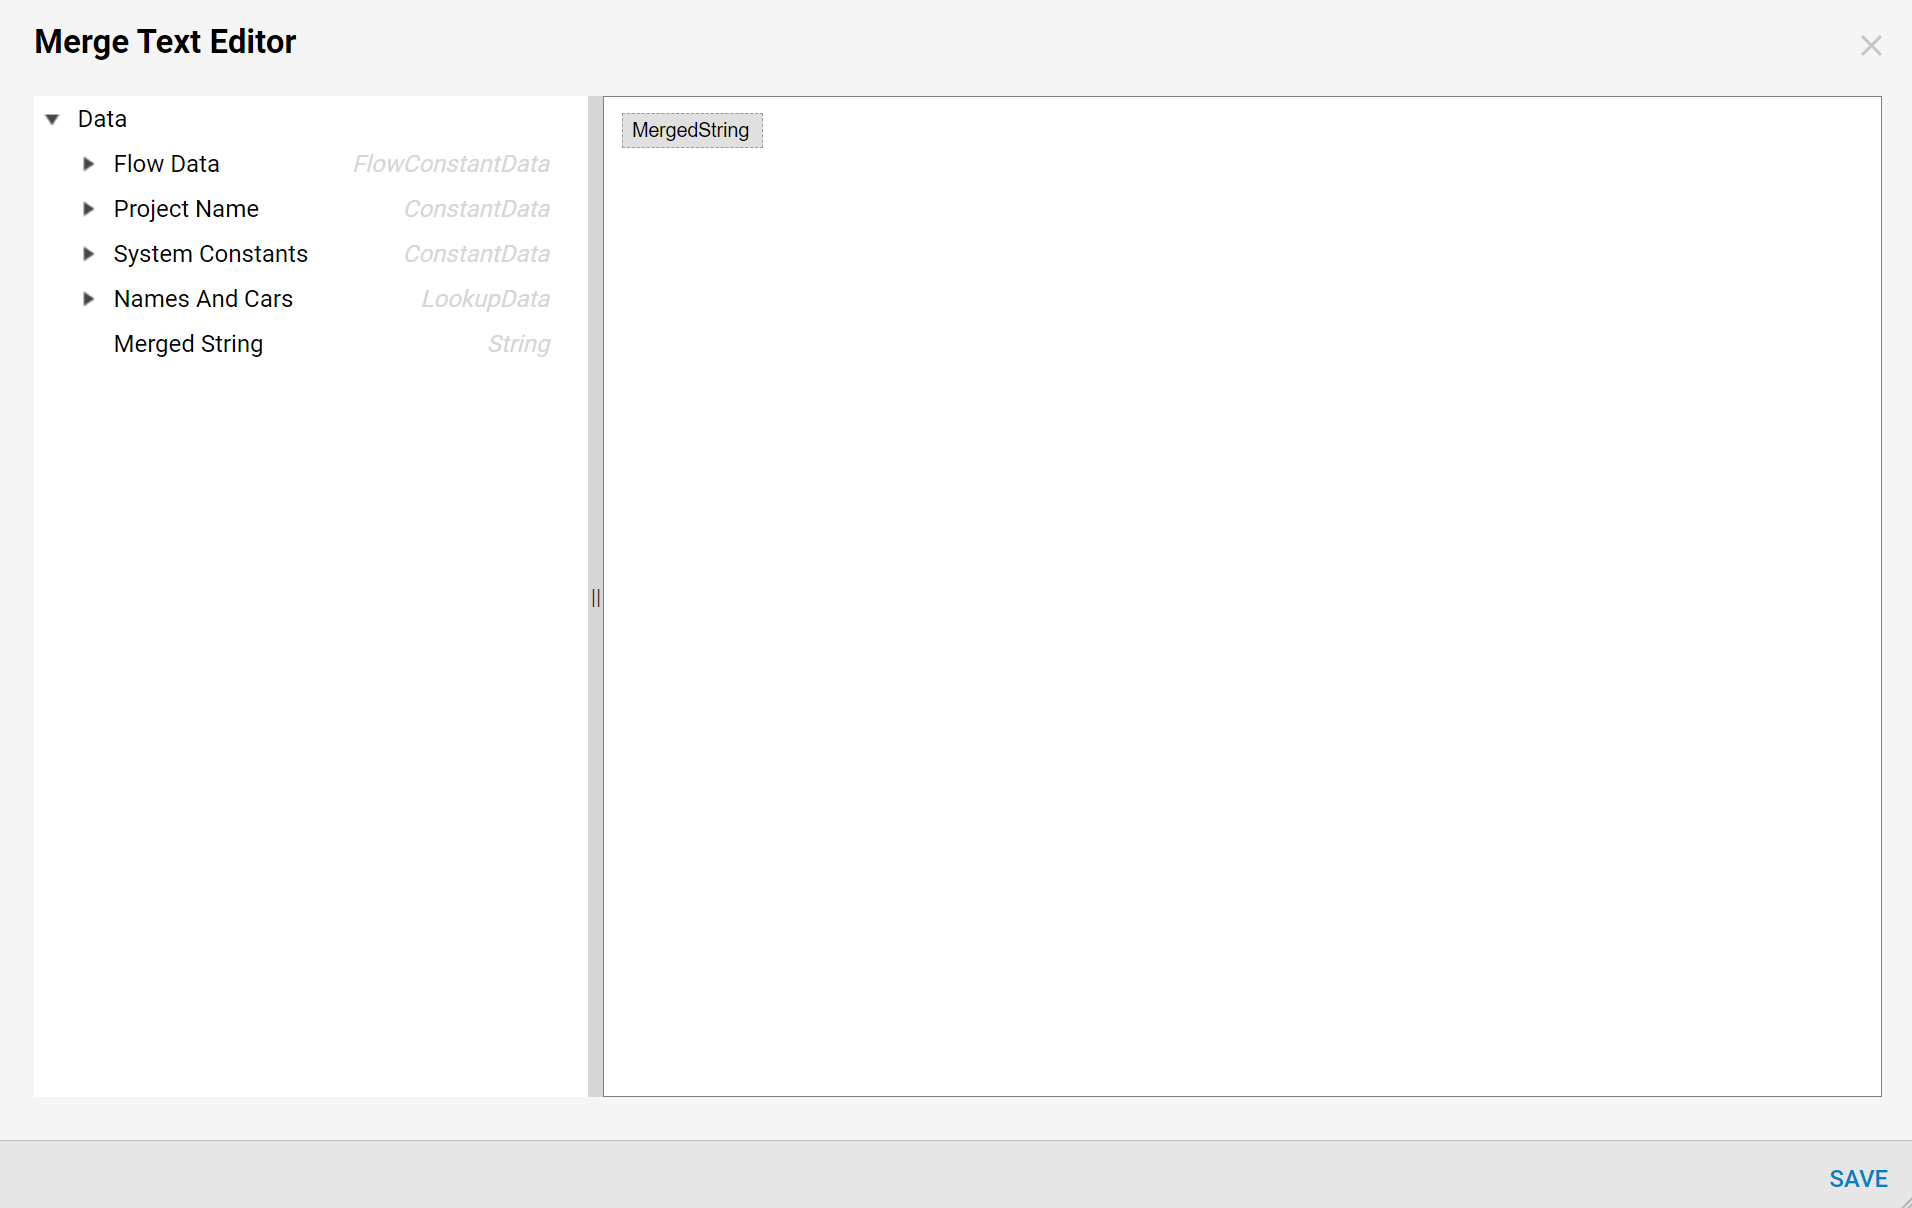
- Select the Send Email step to populate the Properties tab. Configure the To, From, and Subject line using constant values. Select the Merge Plain Text mapping type for Body, then select the Show Editor button when it appears. Hover over Merged String on the left and select the plus icon when it appears to add it to the editor. Save the editor once complete.

- Now when the Flow executes, an email is sent showing the membership status as "Classic Plus" since the account balance amount is set to $1,000. Change the value of the Create Data step to different numeric values to see the other if statements of the NVelocity step applied.