Overview
This tutorial demonstrates how to use Cache Steps in Decisions. With Cache Steps, we can store and retrieve some Data values in memory for a defined time. In Decisions there is the ability to define different types of Cache.
While trying to store some value in Cache, define an Instance of the Cache, its type and a Key to access current Value.
Example A Put in Cache and Get From Cache
In this example use Cache steps to store and receive an email.
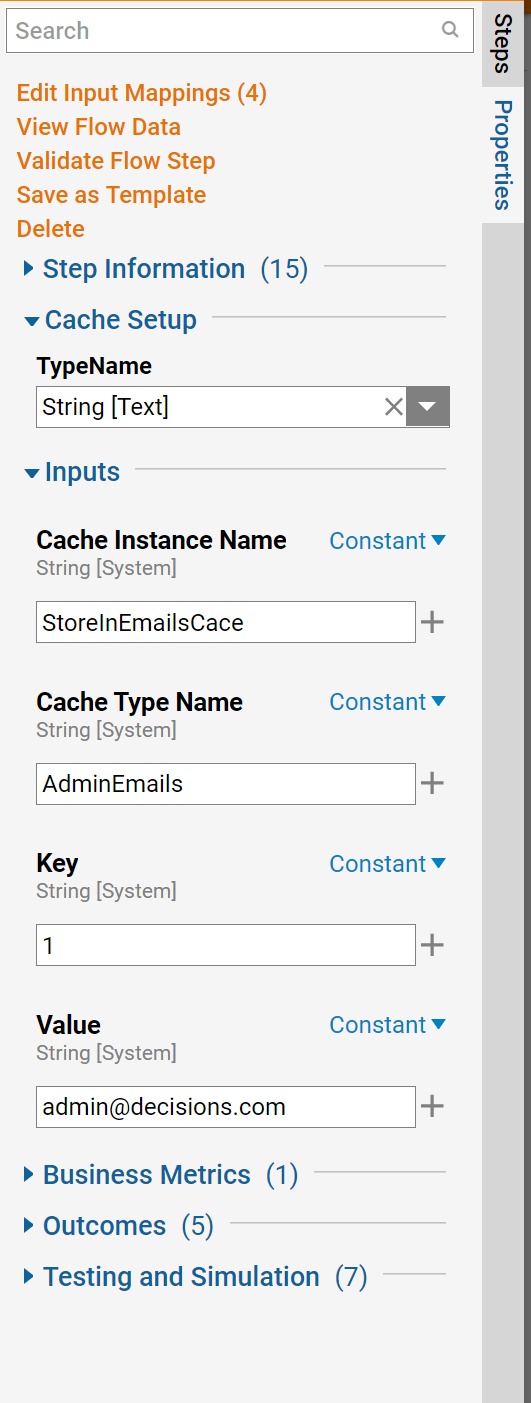
Configure data for this Step as following. Define Constant Cache Instance Name(this can be any name to associate with this cache).
Constant Cache Type Name: this can be either default Decisions cache or the custom cache that is defined in the System > Administration > Cache Folder in the Portal.

Next, create a Flow for the Selected Row. In the Designer Folder select Create Flow on the Folder Actions Panel.
.png)
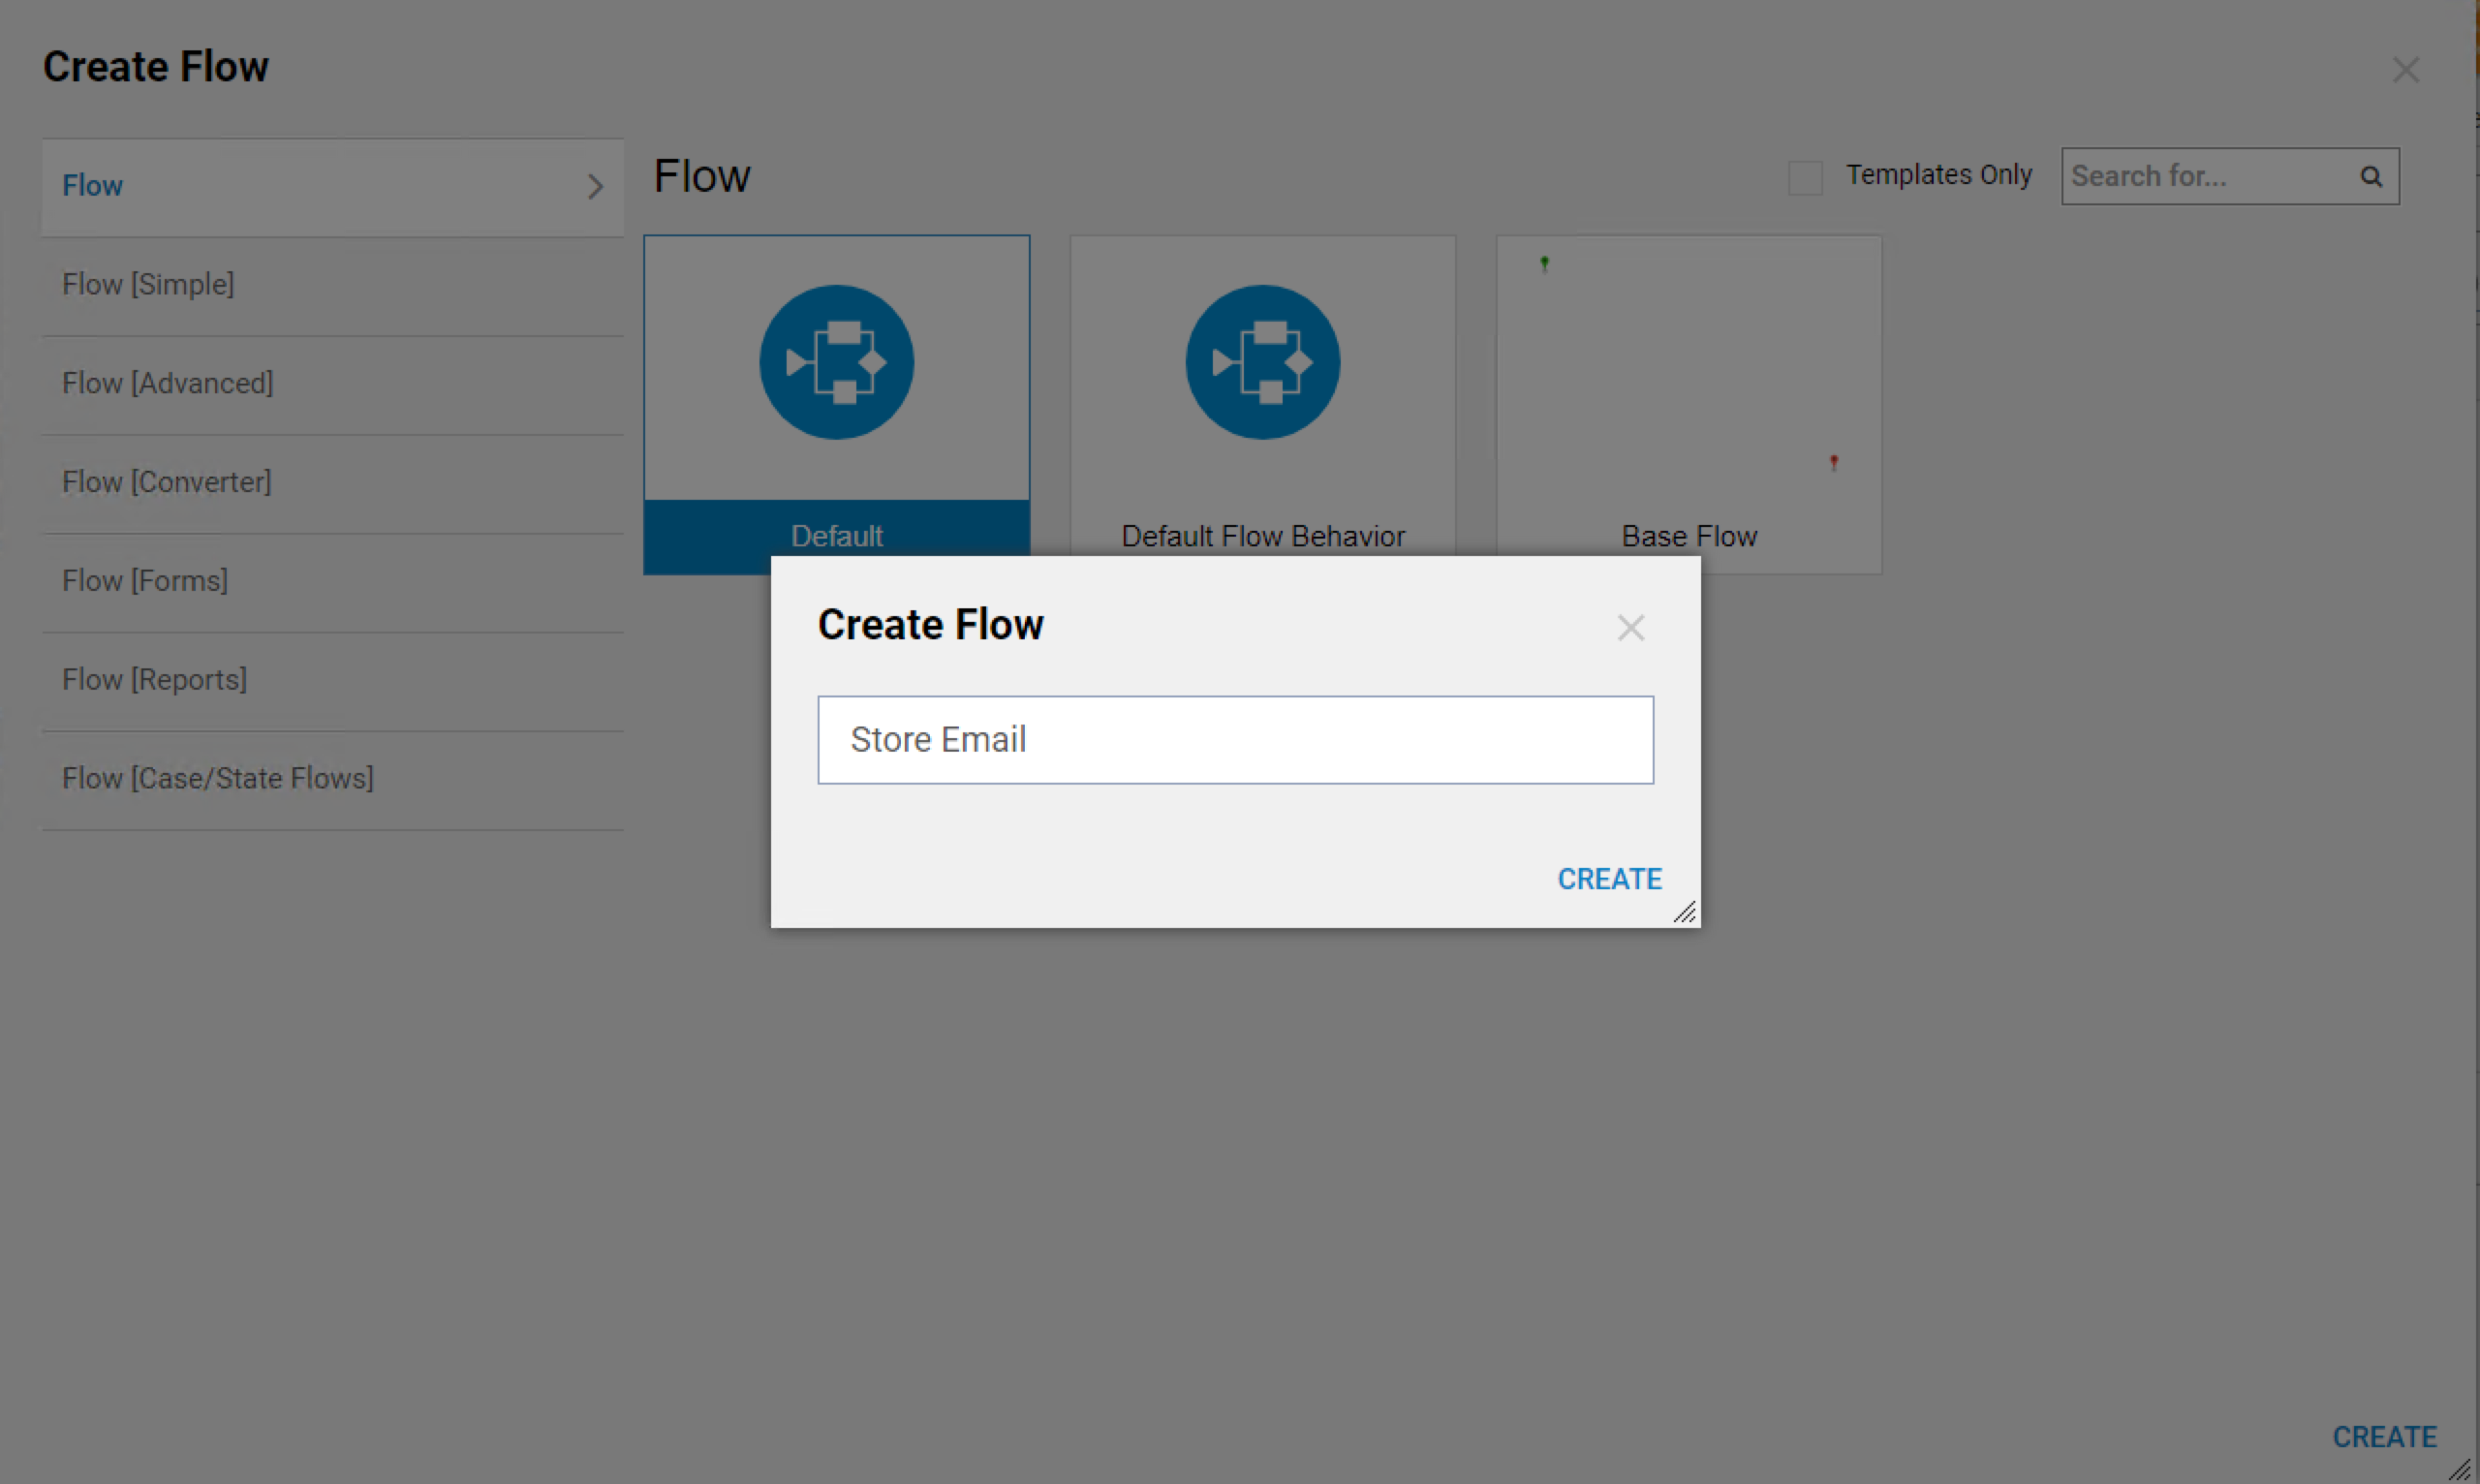
In the resulting window select Default flow, name the Flow, and select Create to proceed to the Flow Designer.
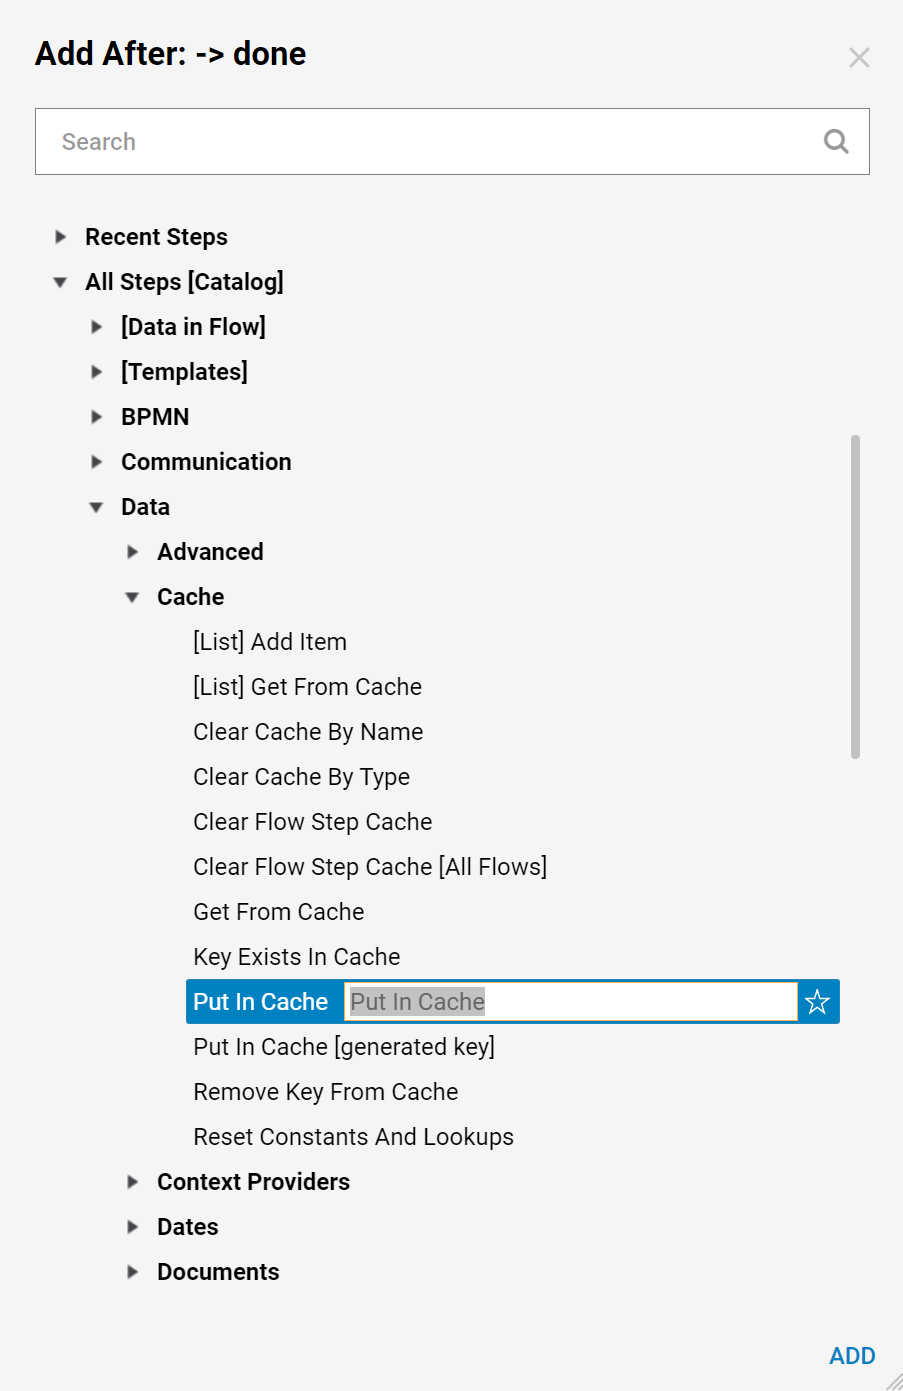
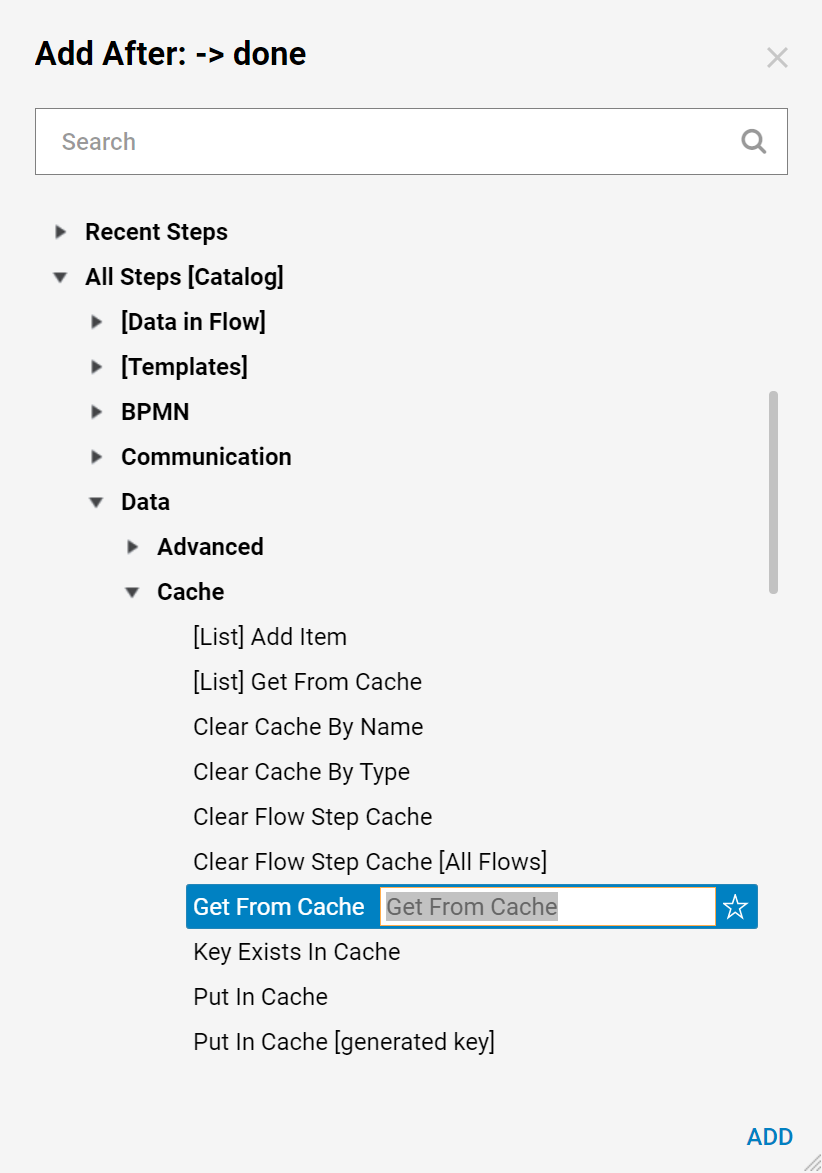
In the Flow Designer add Put In Cache step from the All Steps [Catalog] > Data > Cache category.
We will enter Constant Data on the Cache Instance Name, Cache Type Name, Key, and Value.
Finally, connect steps in the Flow as following. This completes the Cache Flow. Save the Flow and close Flow Designer.
Select Debug in the top action panel  to show that the cache successfully "Got From Cache".

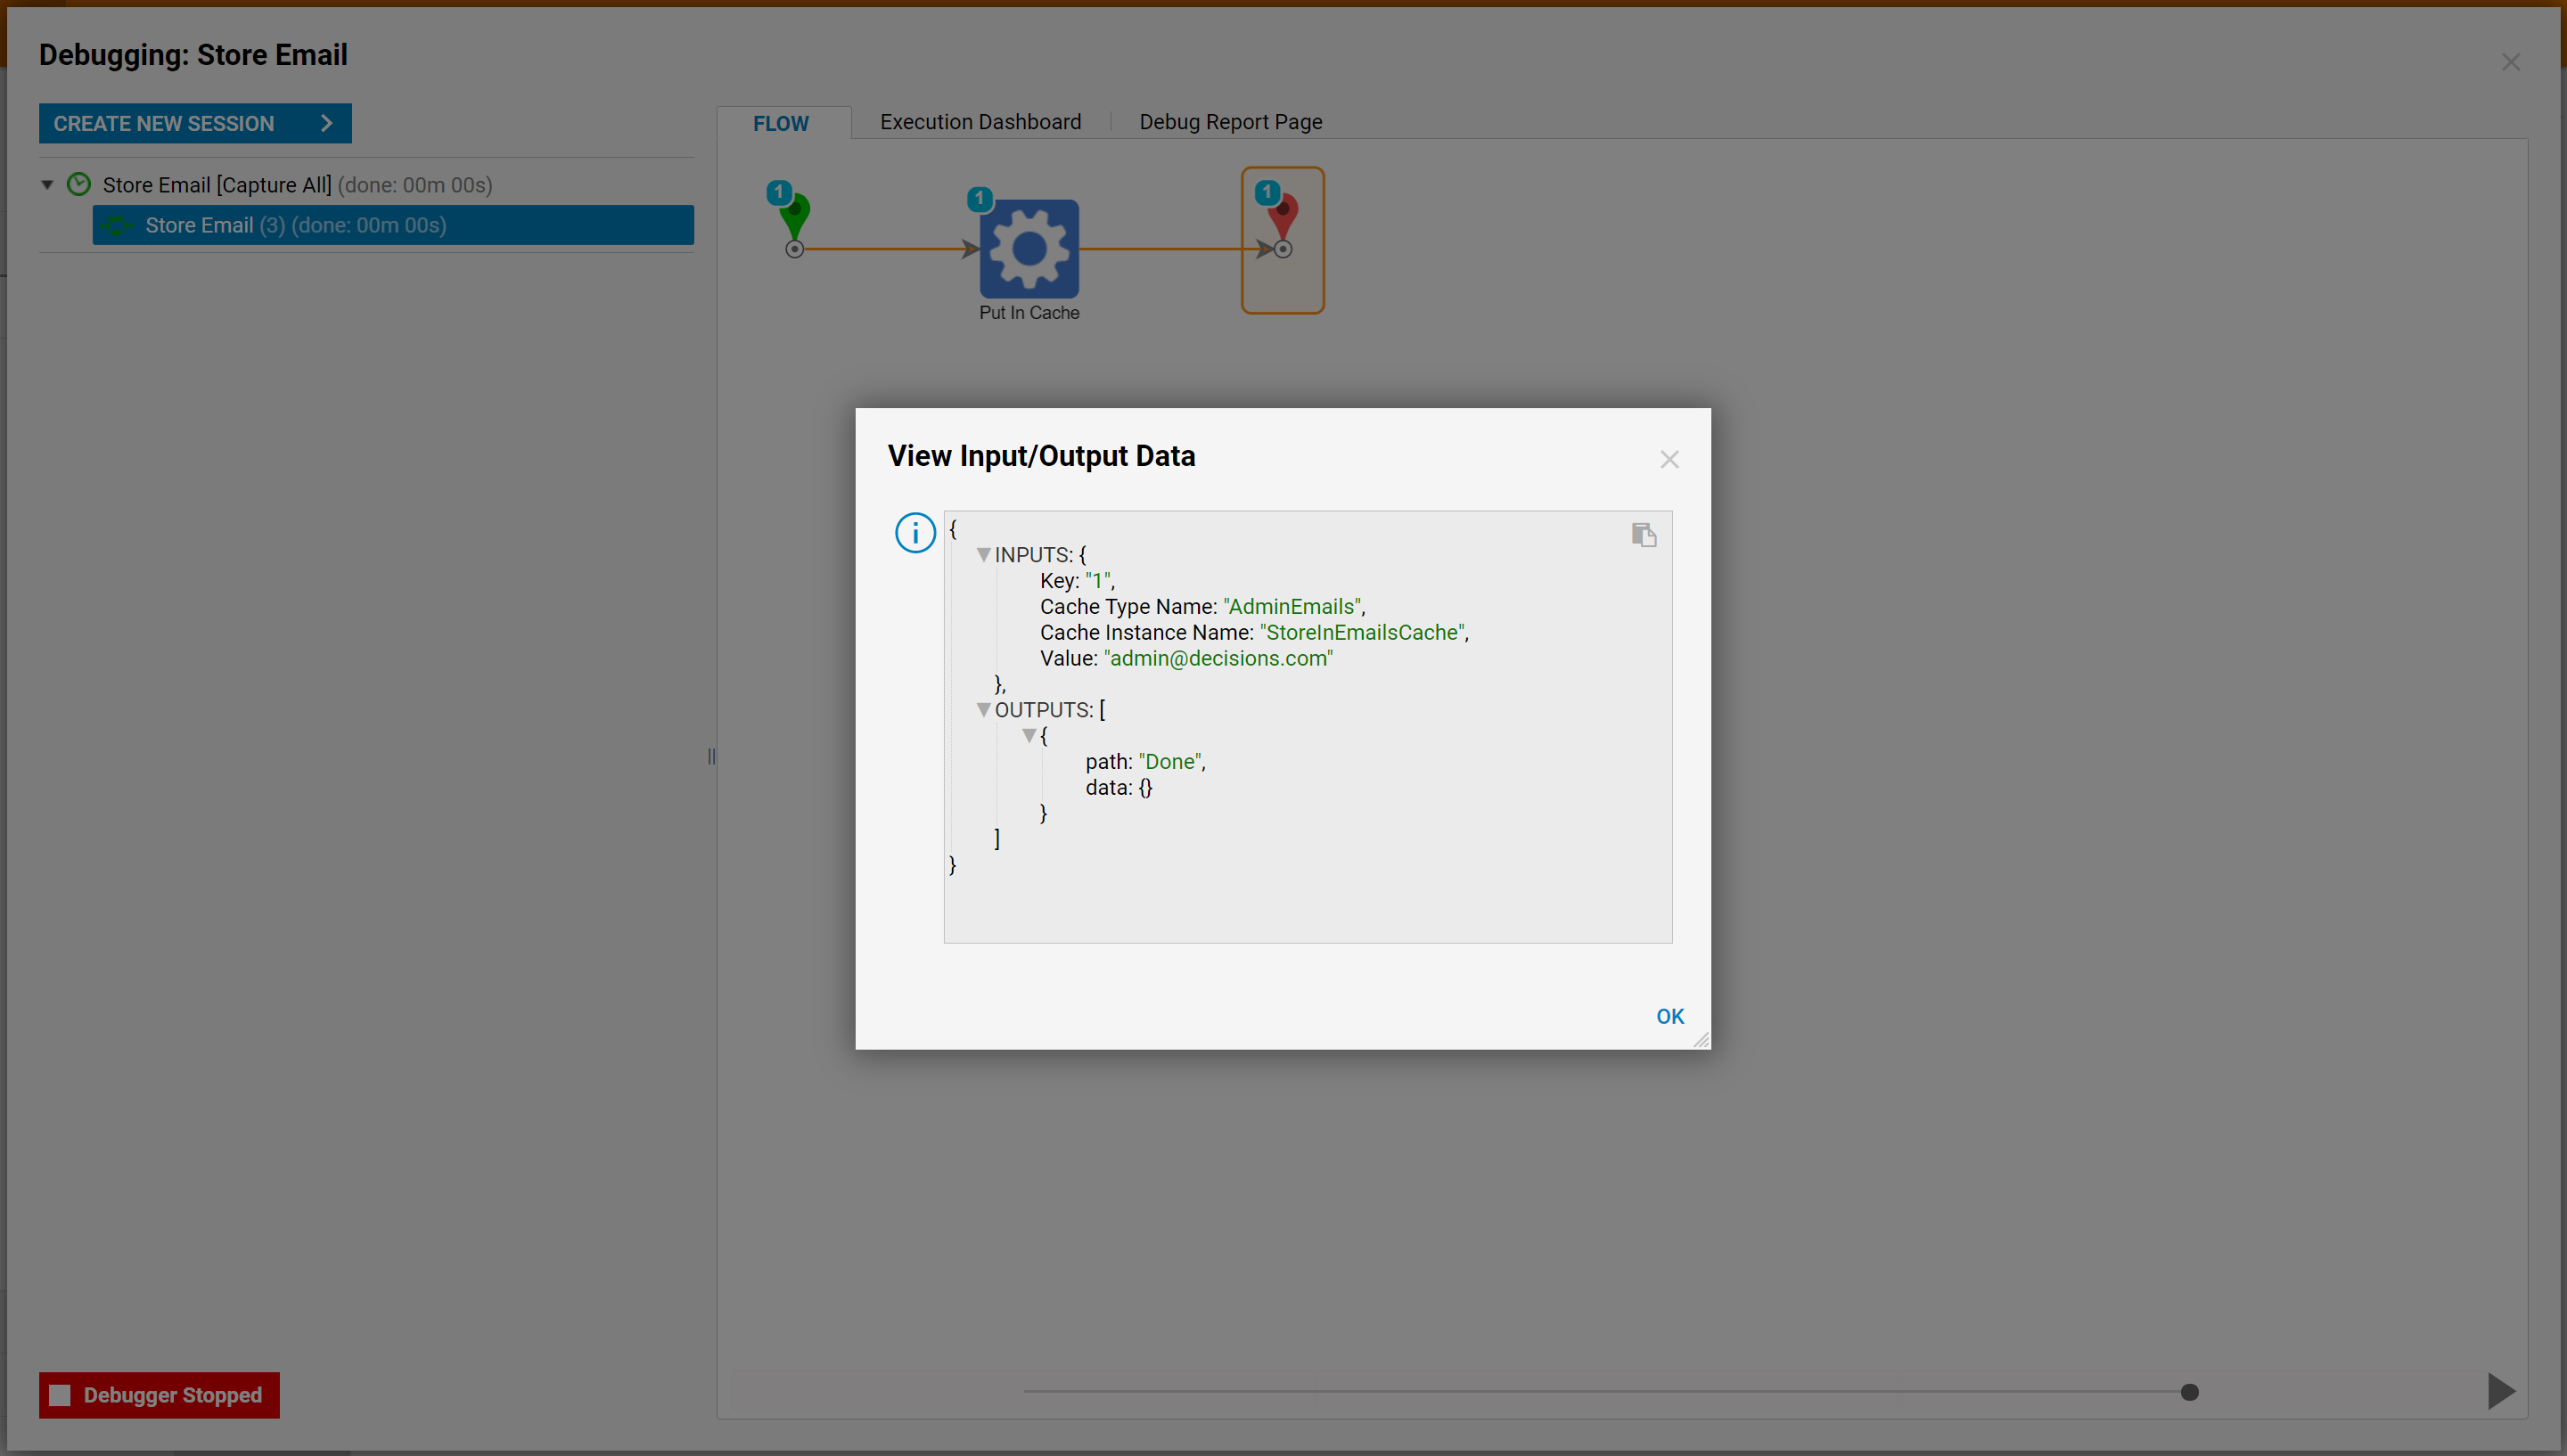
While debugging the flow, check and make sure the input/output data looks like this. Check by clicking on the Put In Cache icon, select the triangle by Execution 1, then selecting View Input / Output Data
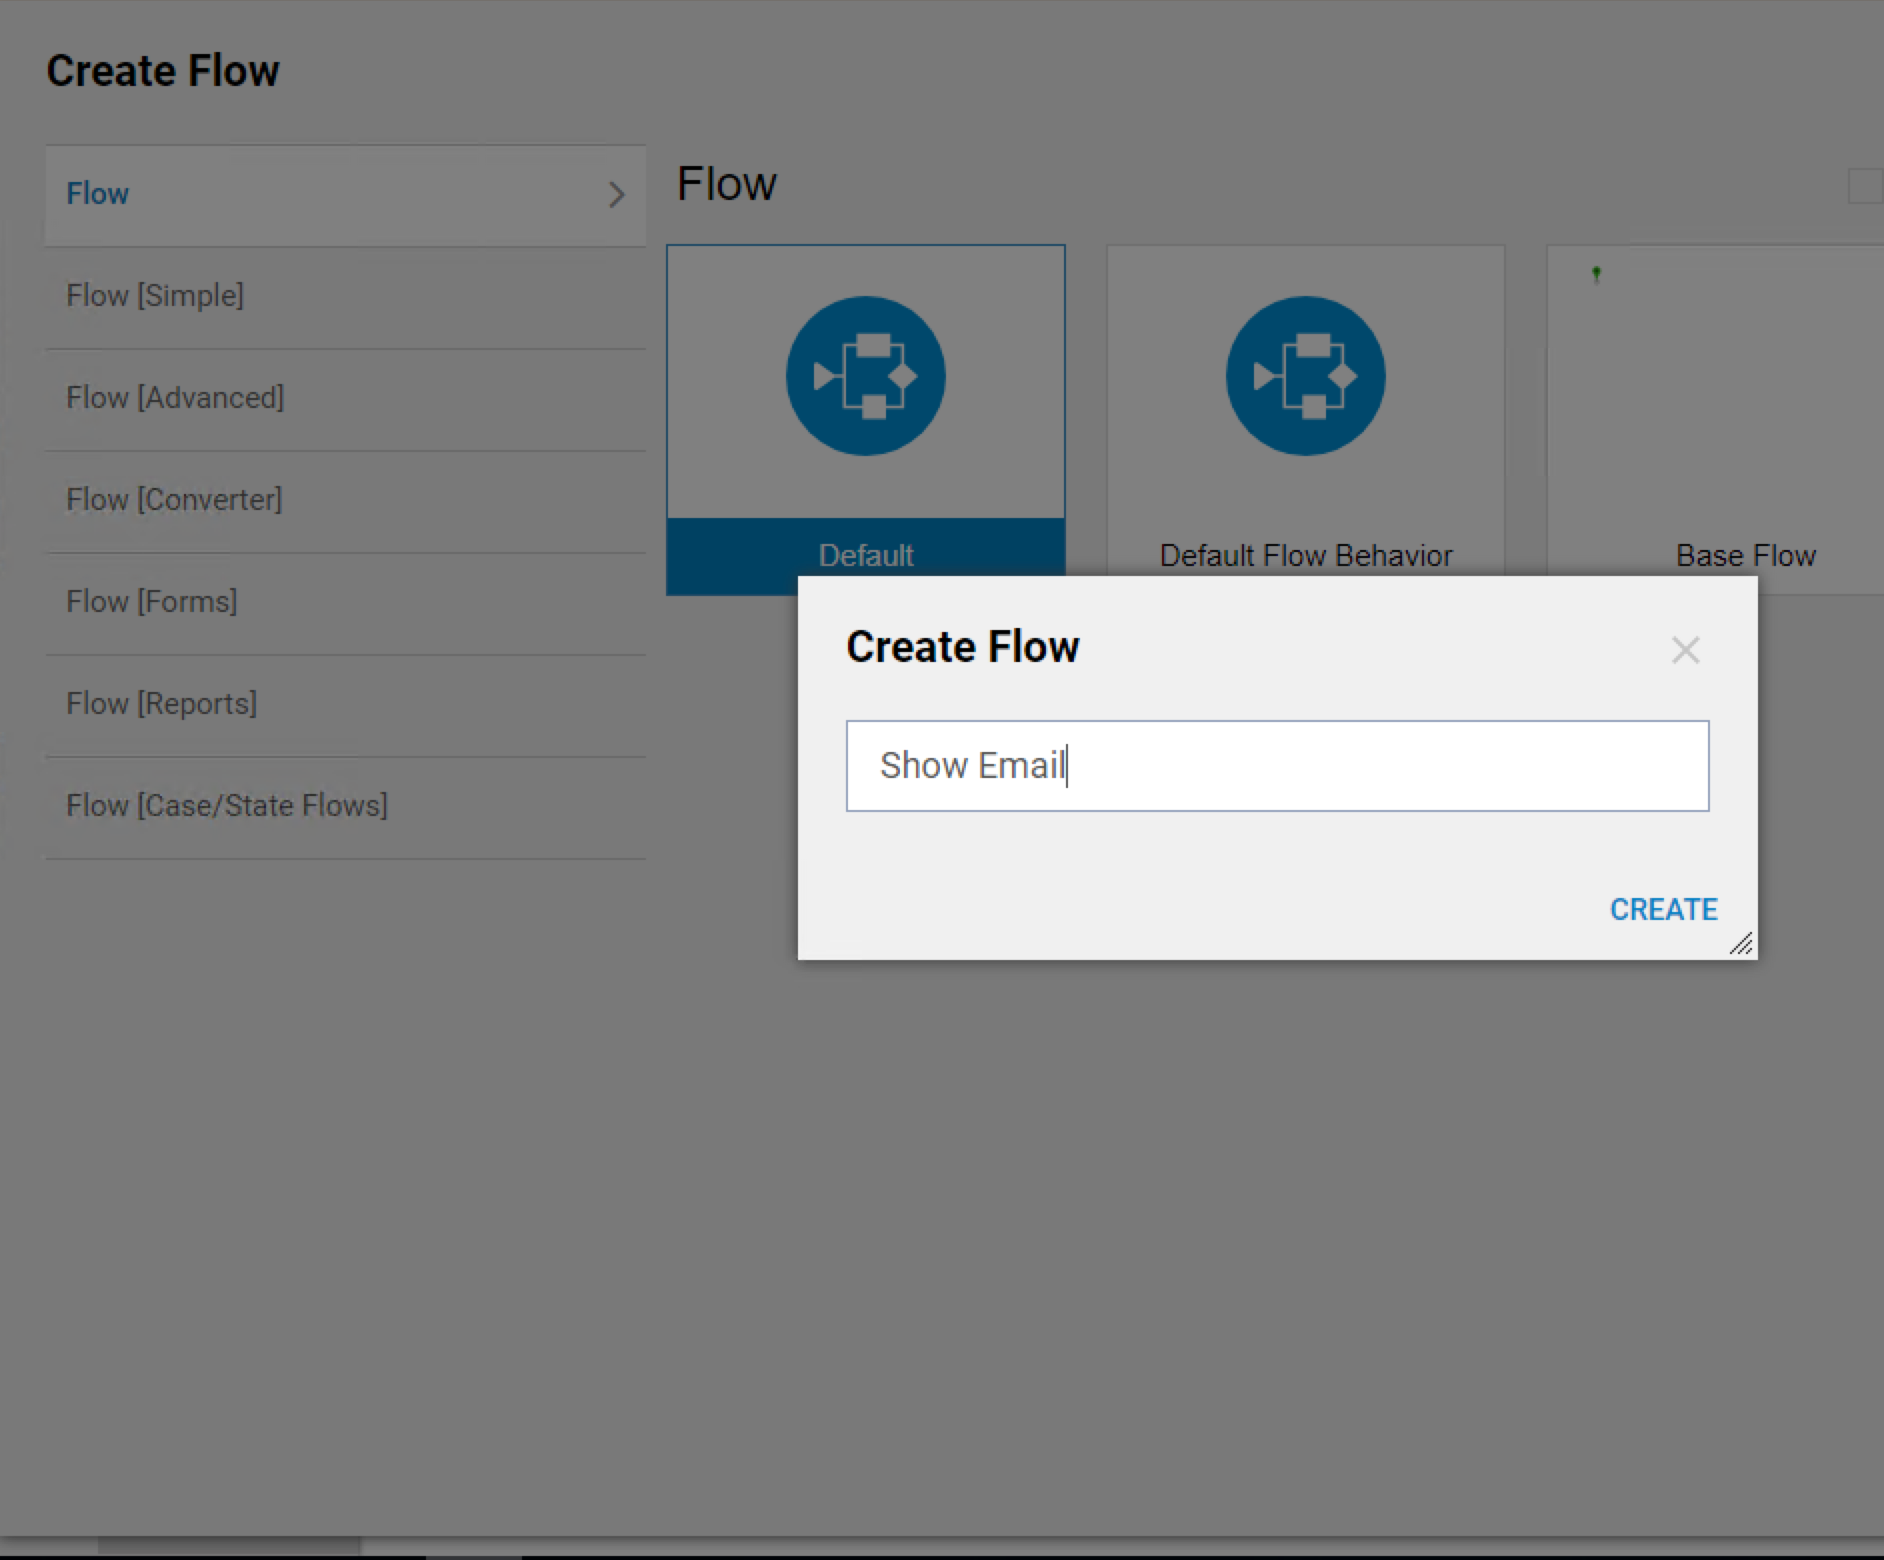
Then, create a Flow that will be using Cached values. In the Designer Folder select Create Flow on the Folder Actions Panel.

In the resulting window name the Flow and select Create to proceed to the Flow Designer.
In the Flow Designer add Get From Cache step from the All Steps [Catalog] > Data > Cache category. With this step, we can access the cached values.
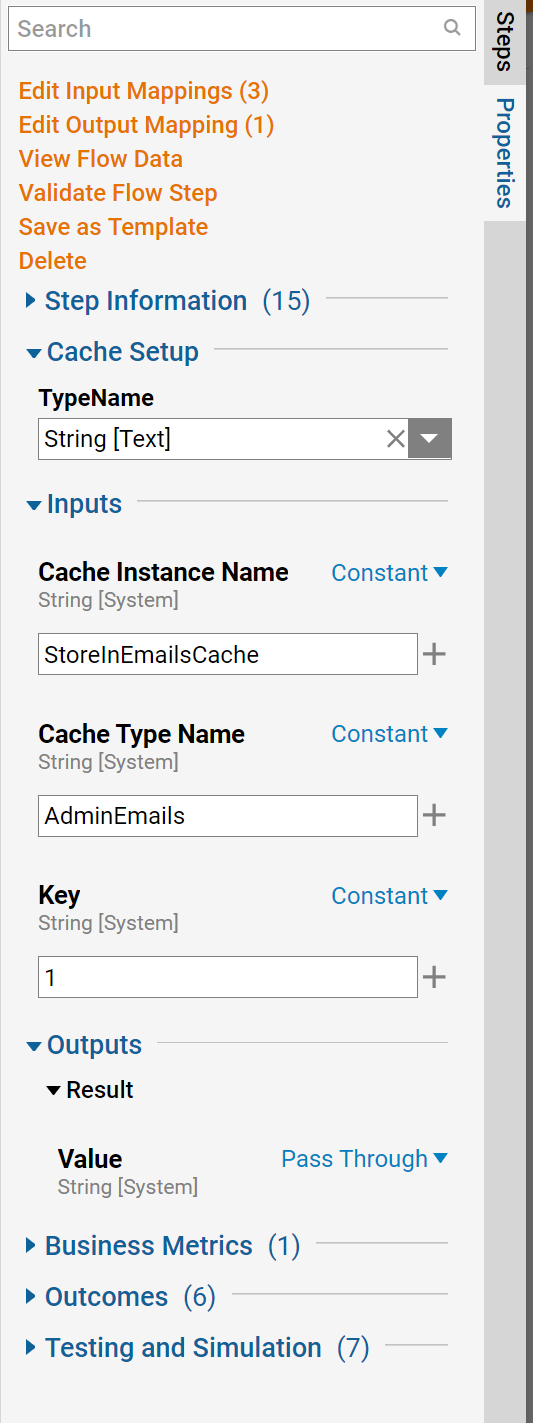
Configure this step as following.
Define Constant Cache Instance and Type that was created in the first Flow in this tutorial. Then, define Constant Key of the Value that needs to be retrieved from the Cache (in this case it is ID, which is a Key for CustomerID value in SelectedCustomer instance of the Default.MemoryCache).
Also, Rename the Result Value output.
Back in the Flow Designer the connect the outcome from the Form Step to the End step. This completes the Display Flow. Save the Flow and close Flow Designer.

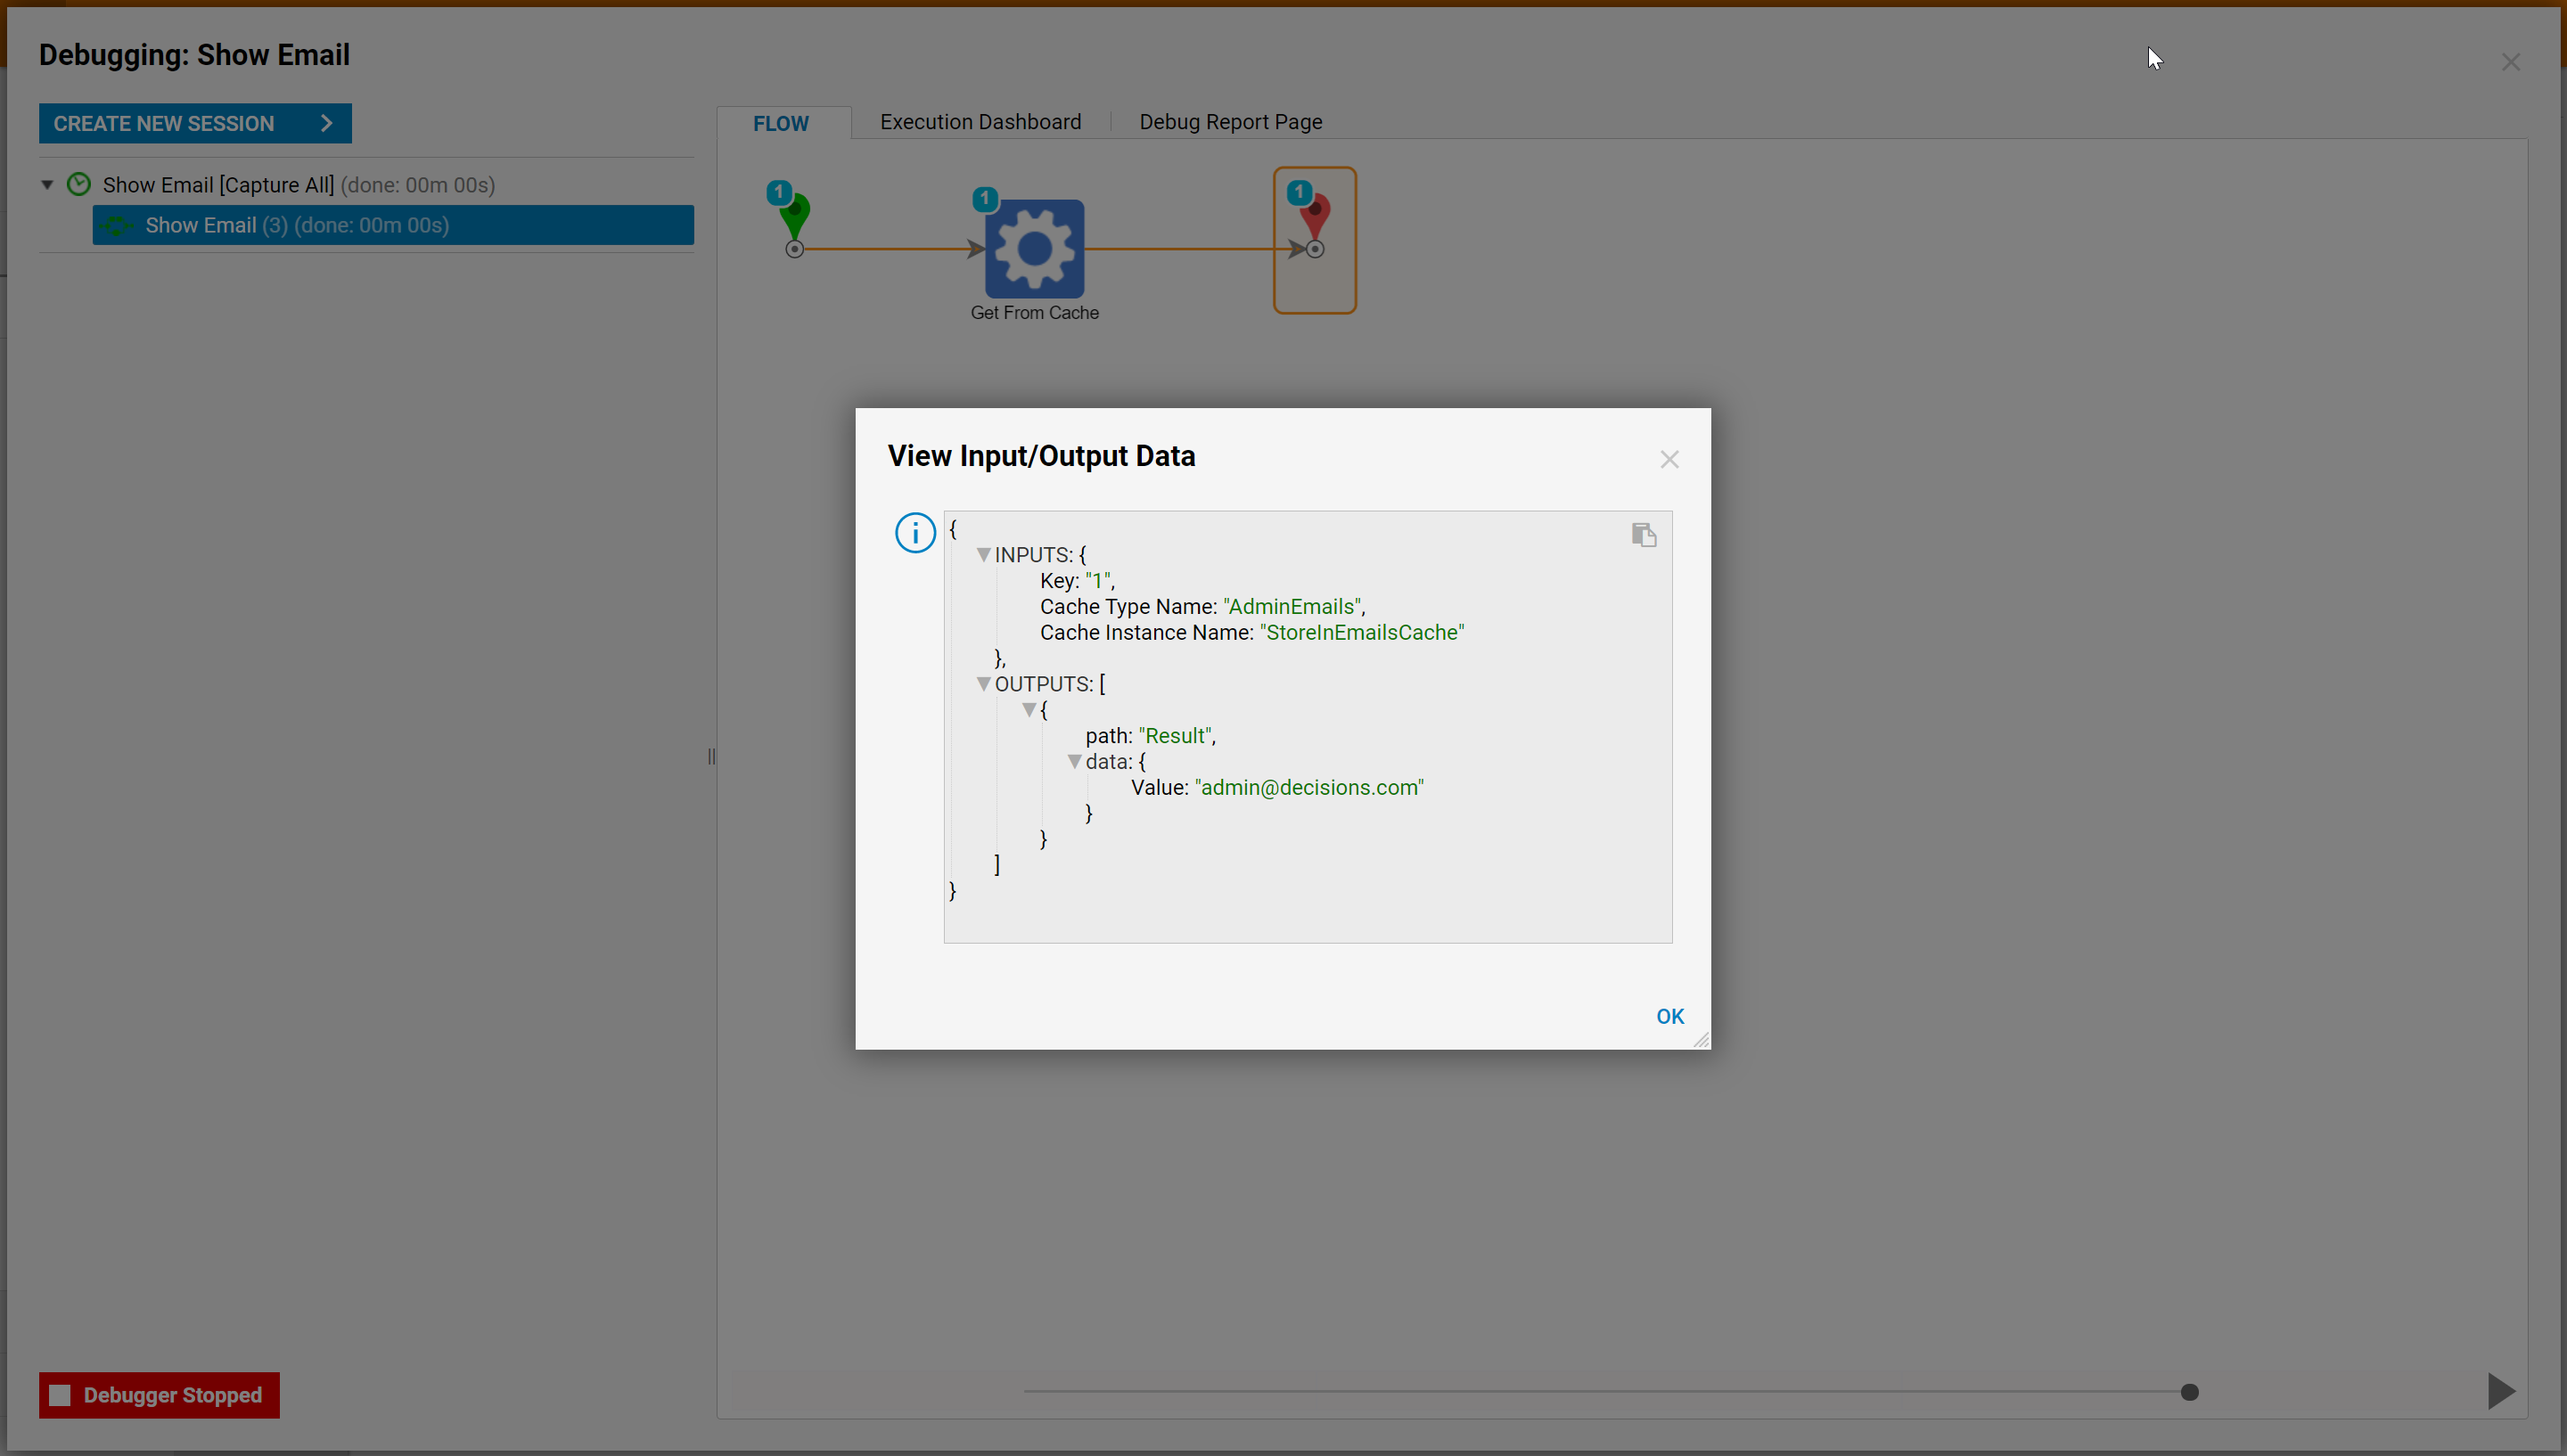
Then run the Debugger option on the top of the window to show that the cache successfully "Got From Cache"

While debugging the flow, check and make sure the input/output data looks like this. Check by selecting on the Put In Cache icon, select the triangle by Execution 1, then select View Input/Output Data.
Example B: Adding Multiple Items to Cache
The following example demonstrates how to add multiple items to a Cache compiling Admin Emails, via Flow.
- From a Designer Folder, select the CREATE FLOW button a CREATE a new Flow.
- From the Flow Designer, attach a Create Data step from the Favorite Steps category of the Steps tab, to the Start step.
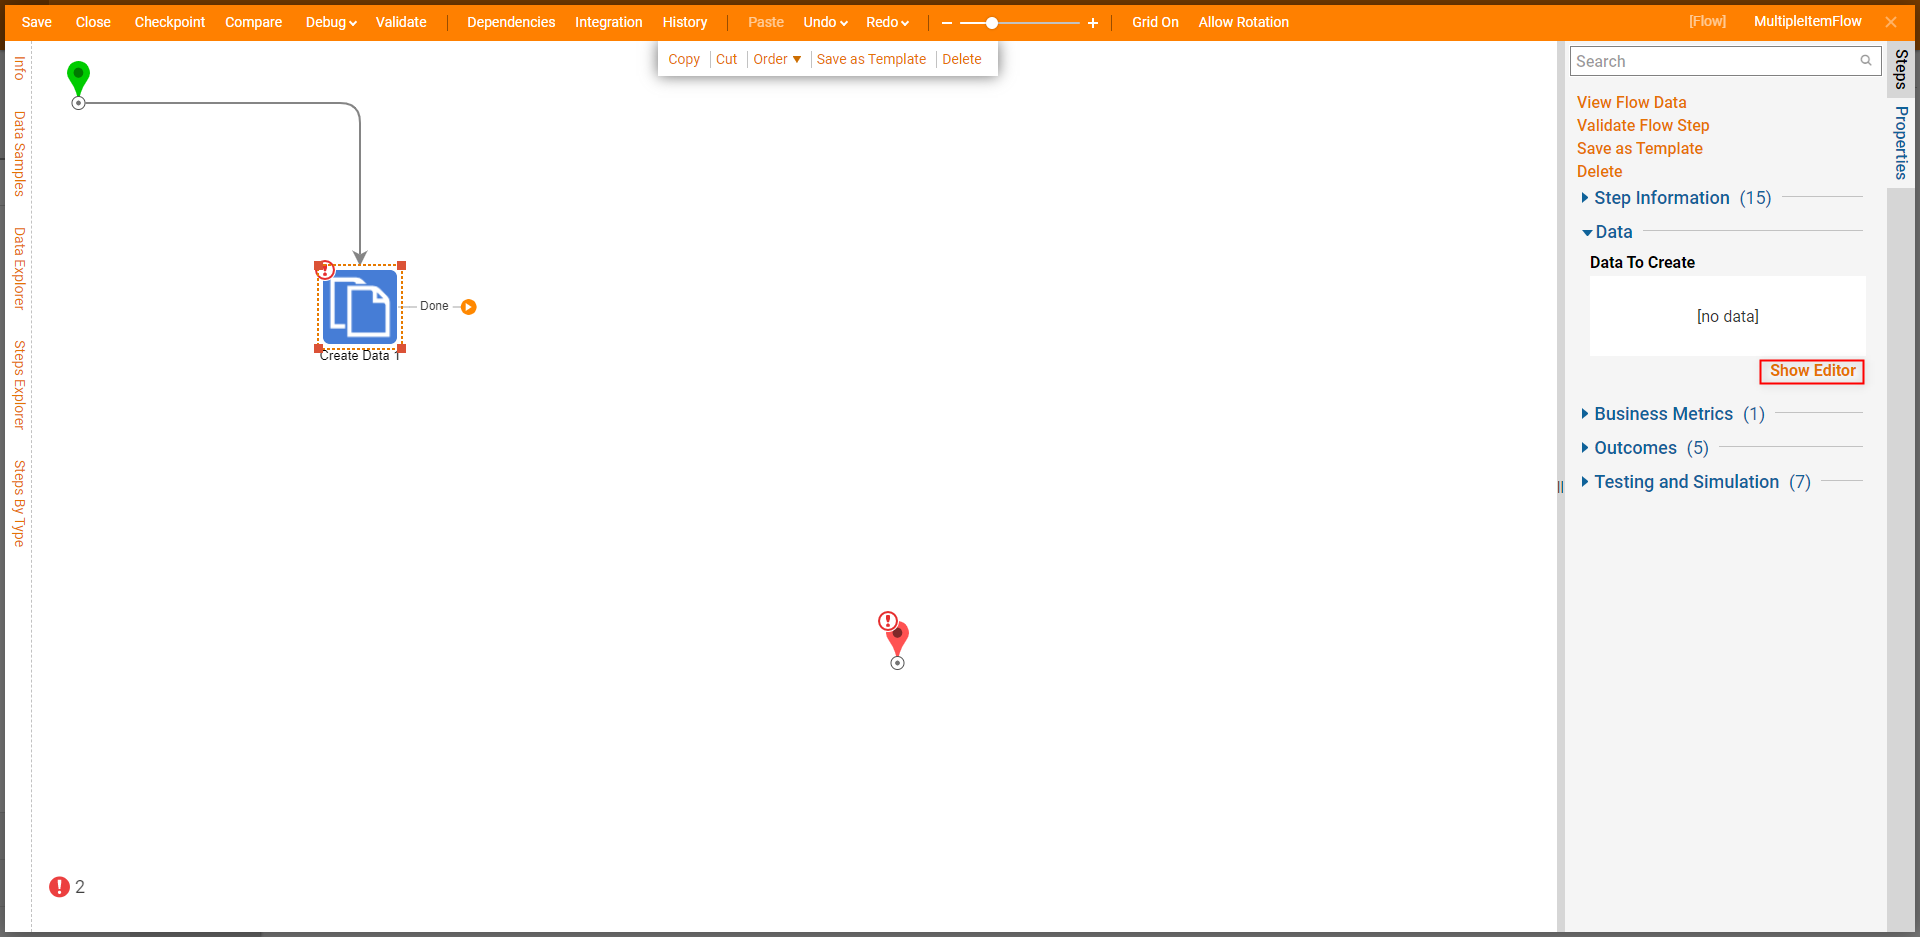
- From the Properties tab of the Create Data step select Show Editor.
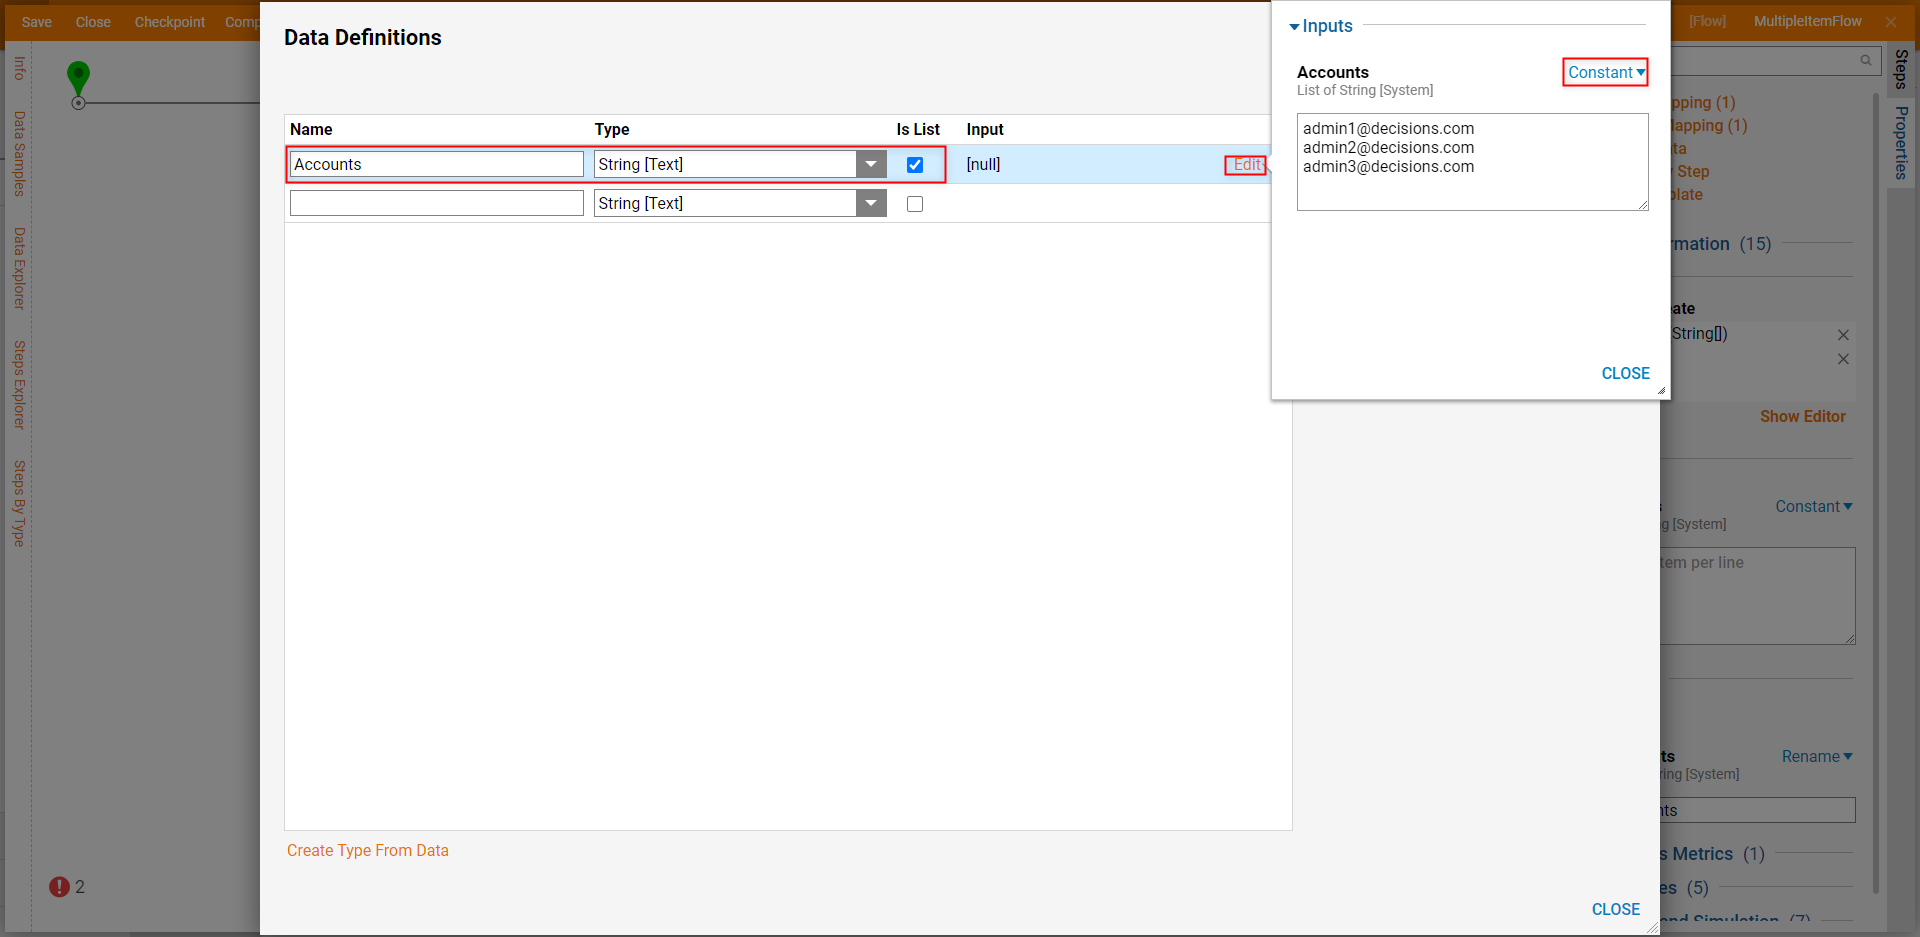
- From the Data Definitions window, provide a Name and select the corresponding Type from the drop-down menu (in this case String). Then, check the Is List box.
- Set Input to Constant, then map the desired Emails. Click CLOSE, Save, then close the window via X.
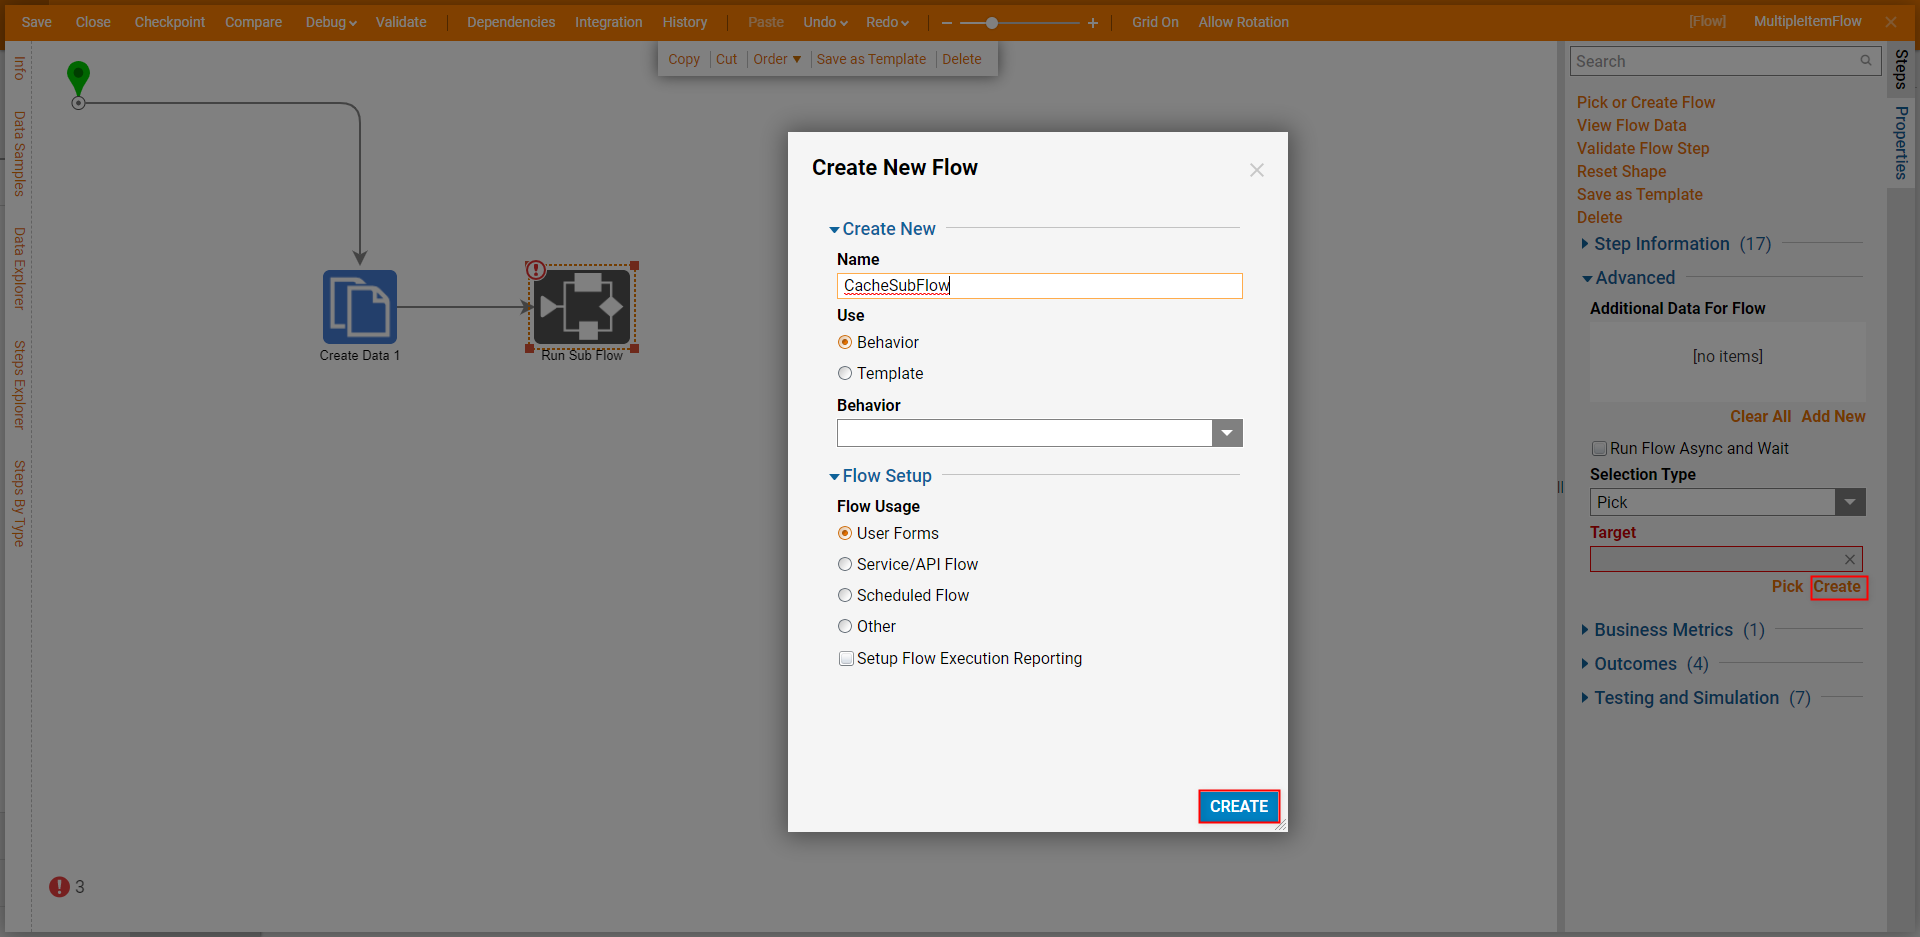
- From Favorite Steps, attach a Run Sub Flow step to the Create Data step. Then, navigate to the Run Sub Flow steps Properties; under Target, select Create, and CREATE a new Flow.
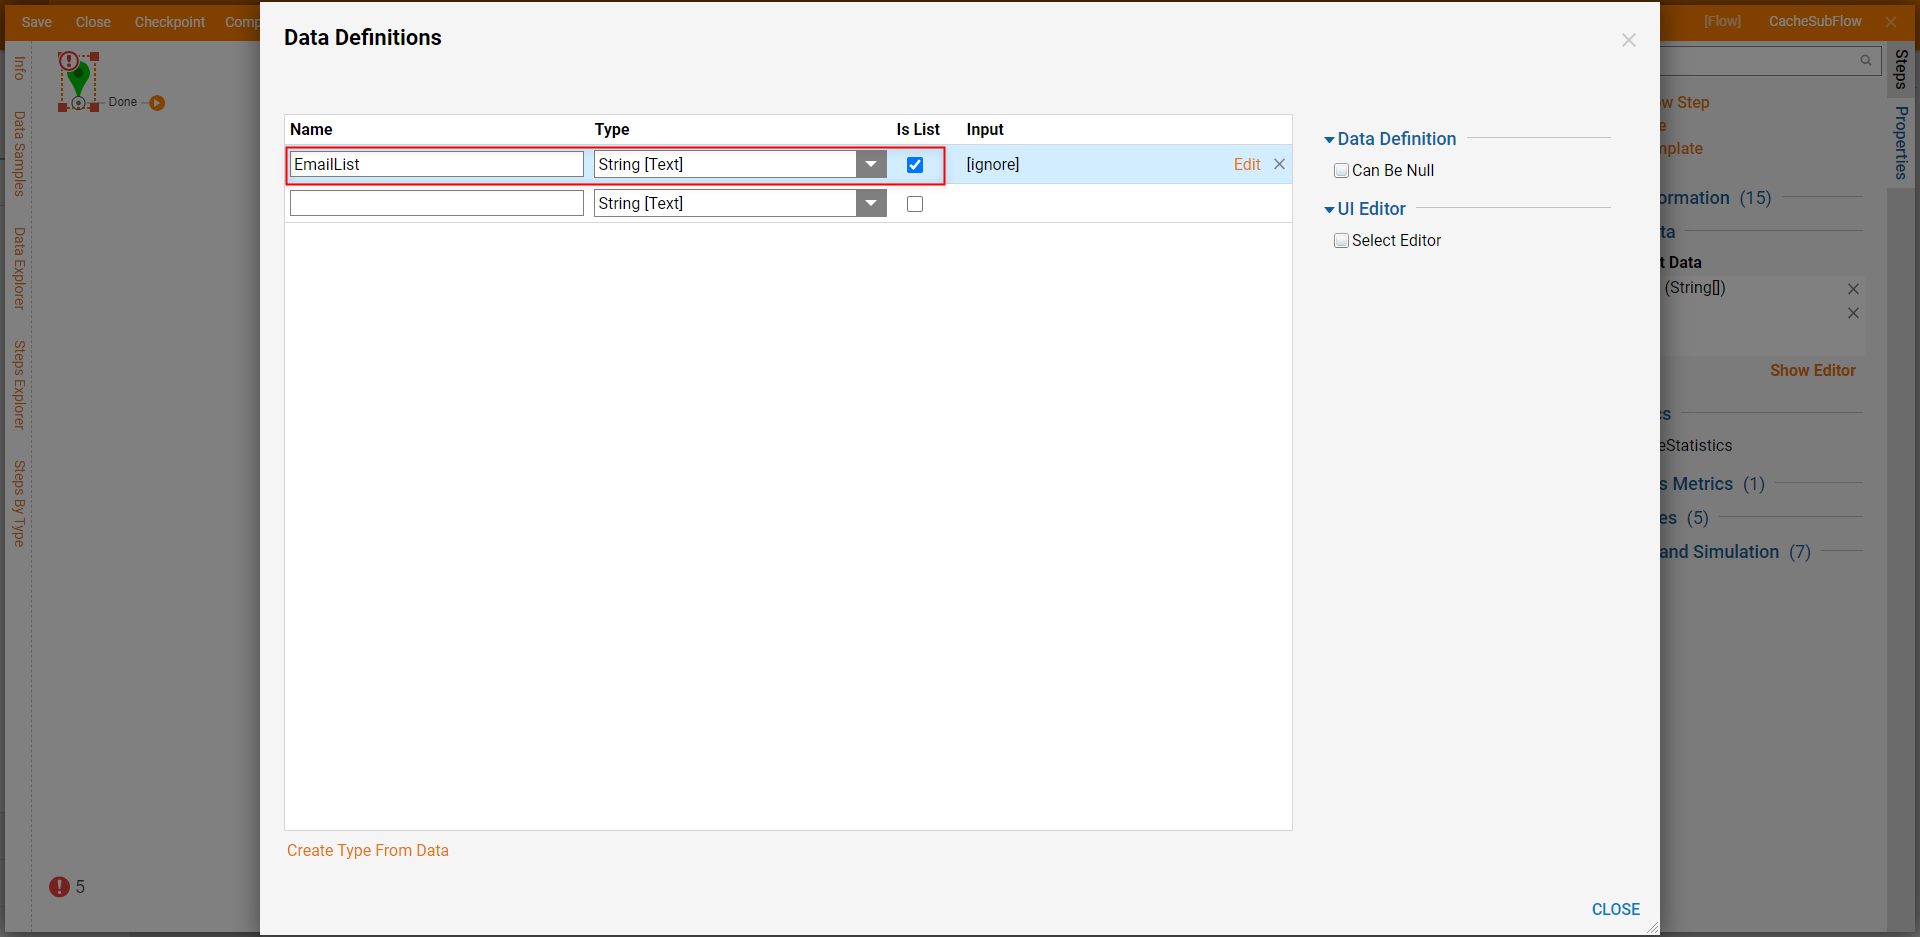
- From the Flow Designer of the new Sub Flow, select the Start step then under Flow Data > Flow Input Data, click Show Editor.
- From the Input Data window, provide a Name, select the corresponding Type (in this example, String), and check Is List. Then, CLOSE the window.
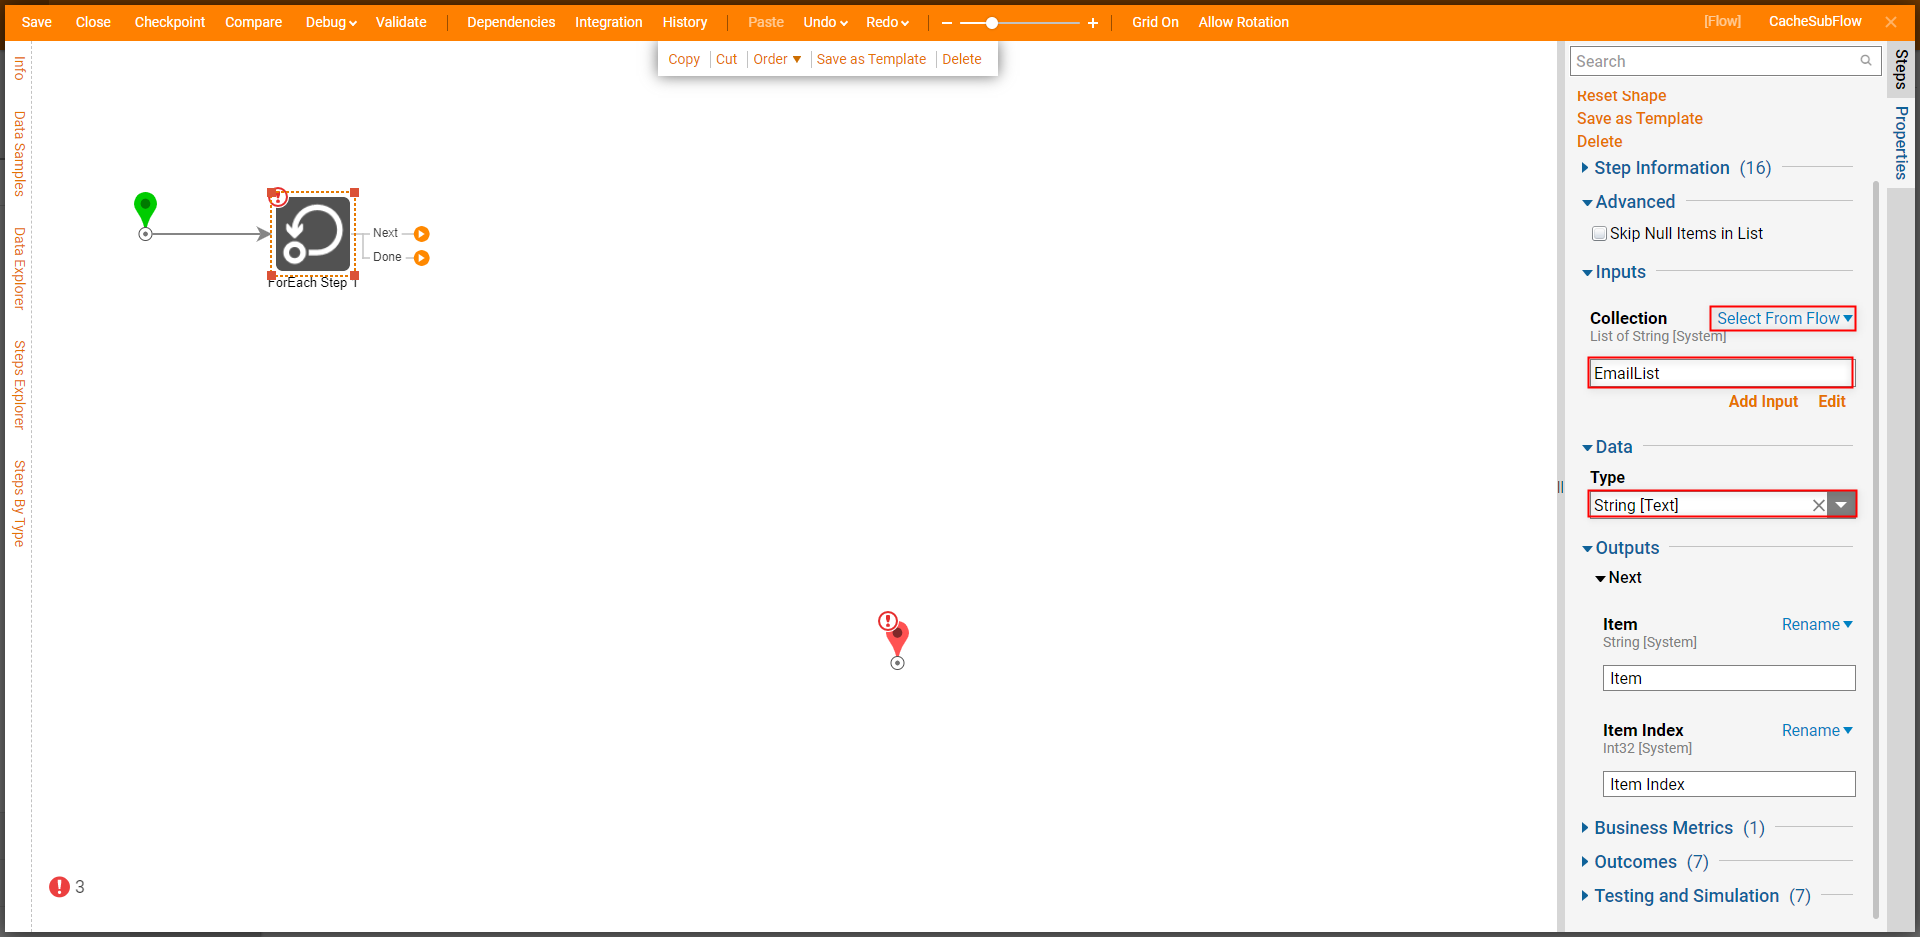
- From Steps > Flow Management, attach a ForEach Step to the Done path of the Start step. From the ForEach Step's Properties tab, Select From Flow map the Input Data. Then, under Data > Type, select the corresponding DataType.
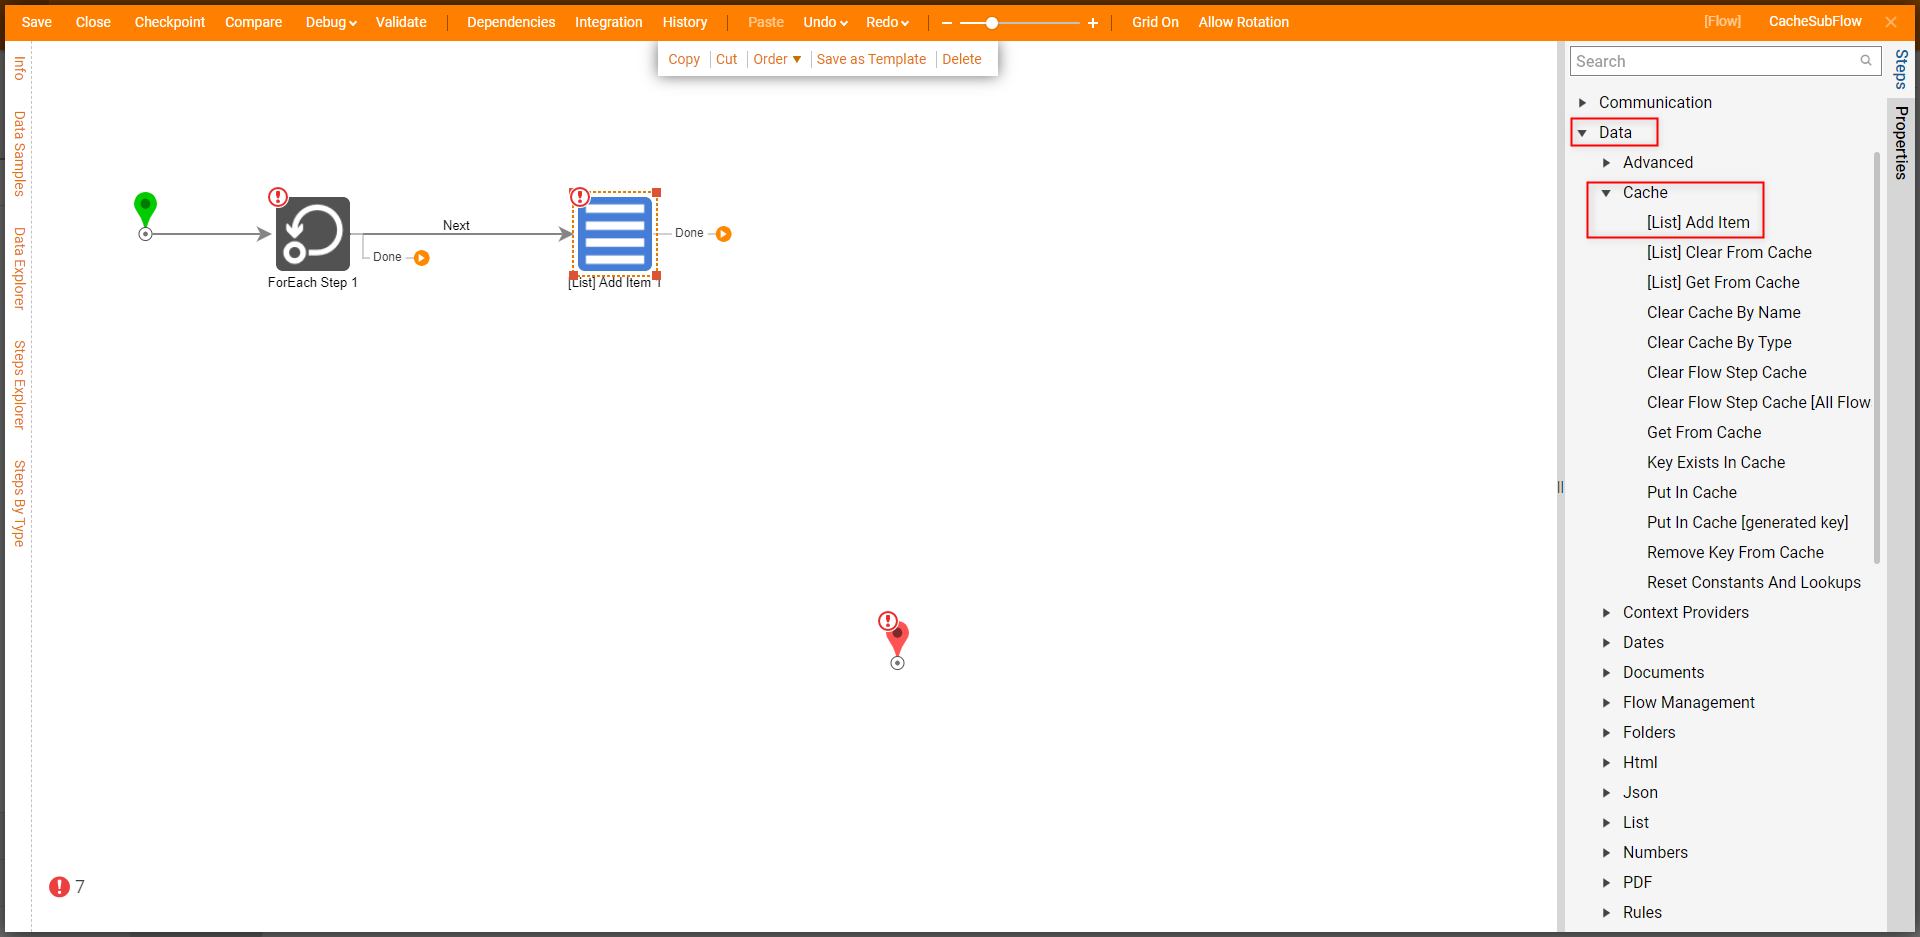
- Under Steps > Data > Cache, attach a [List] Add Item step to the Next path of the ForEach Step.
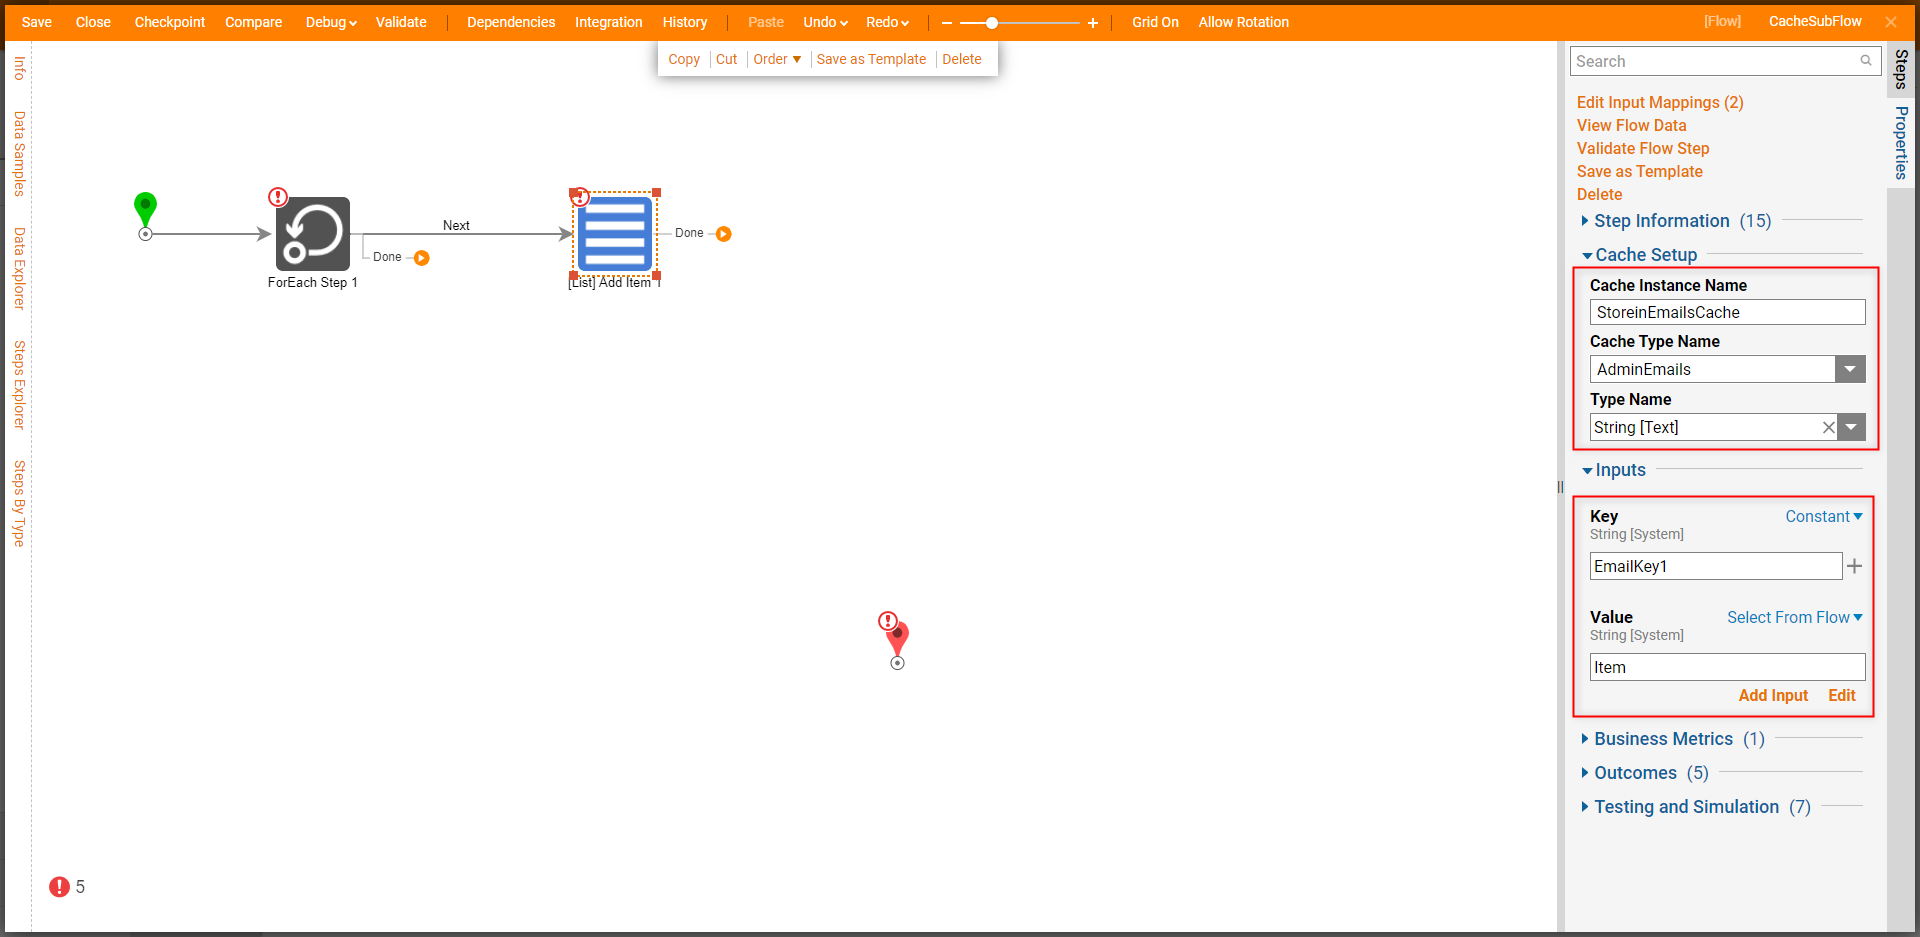
- From the Properties of the Add Item step under Cache Setup, provide a Cache Instance Name and select the desired Cache Type Name.
- Under Inputs, Constant map the desired Key value. Then, Select From Flow map Item to Value. Additional Information on KeyNote that, utilizing the same Key should allow the ability to recover all the added Values at once.
Connect the Done path of the [List] Add Item step to the ForEach Step, then connect the ForEach Step's Done path to the End step.
Additional Information on ConfigurationThe ForEach Step is used to split the input List of Emails into individual items, then send each item to the [List] Add Item step to be added to the Cache.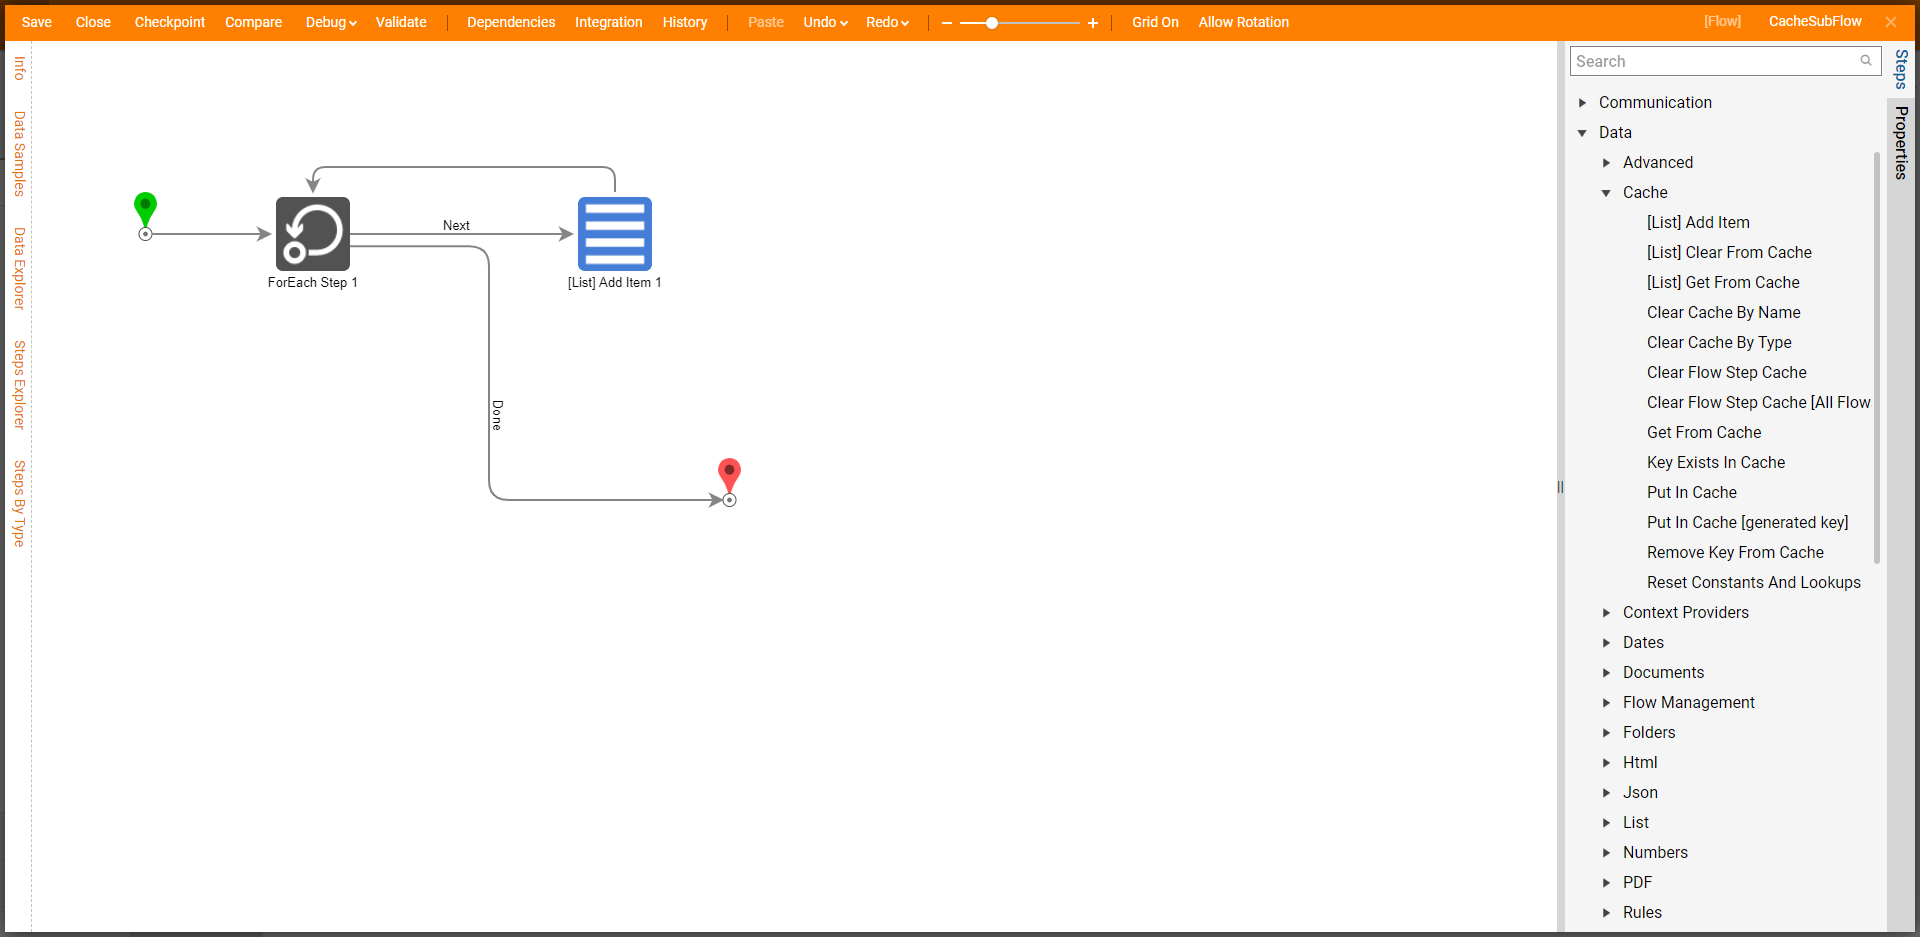
Save then Close the Sub Flow.
From the Parent Flow, select the Sub Flow step to navigate to its Properties tab and map the Output of the Create Data step, to the Email List Input of the Sub Flow.
Connect the Done path of the Sub Flow to the End step. Then, Save and if desired, Close the Flow.
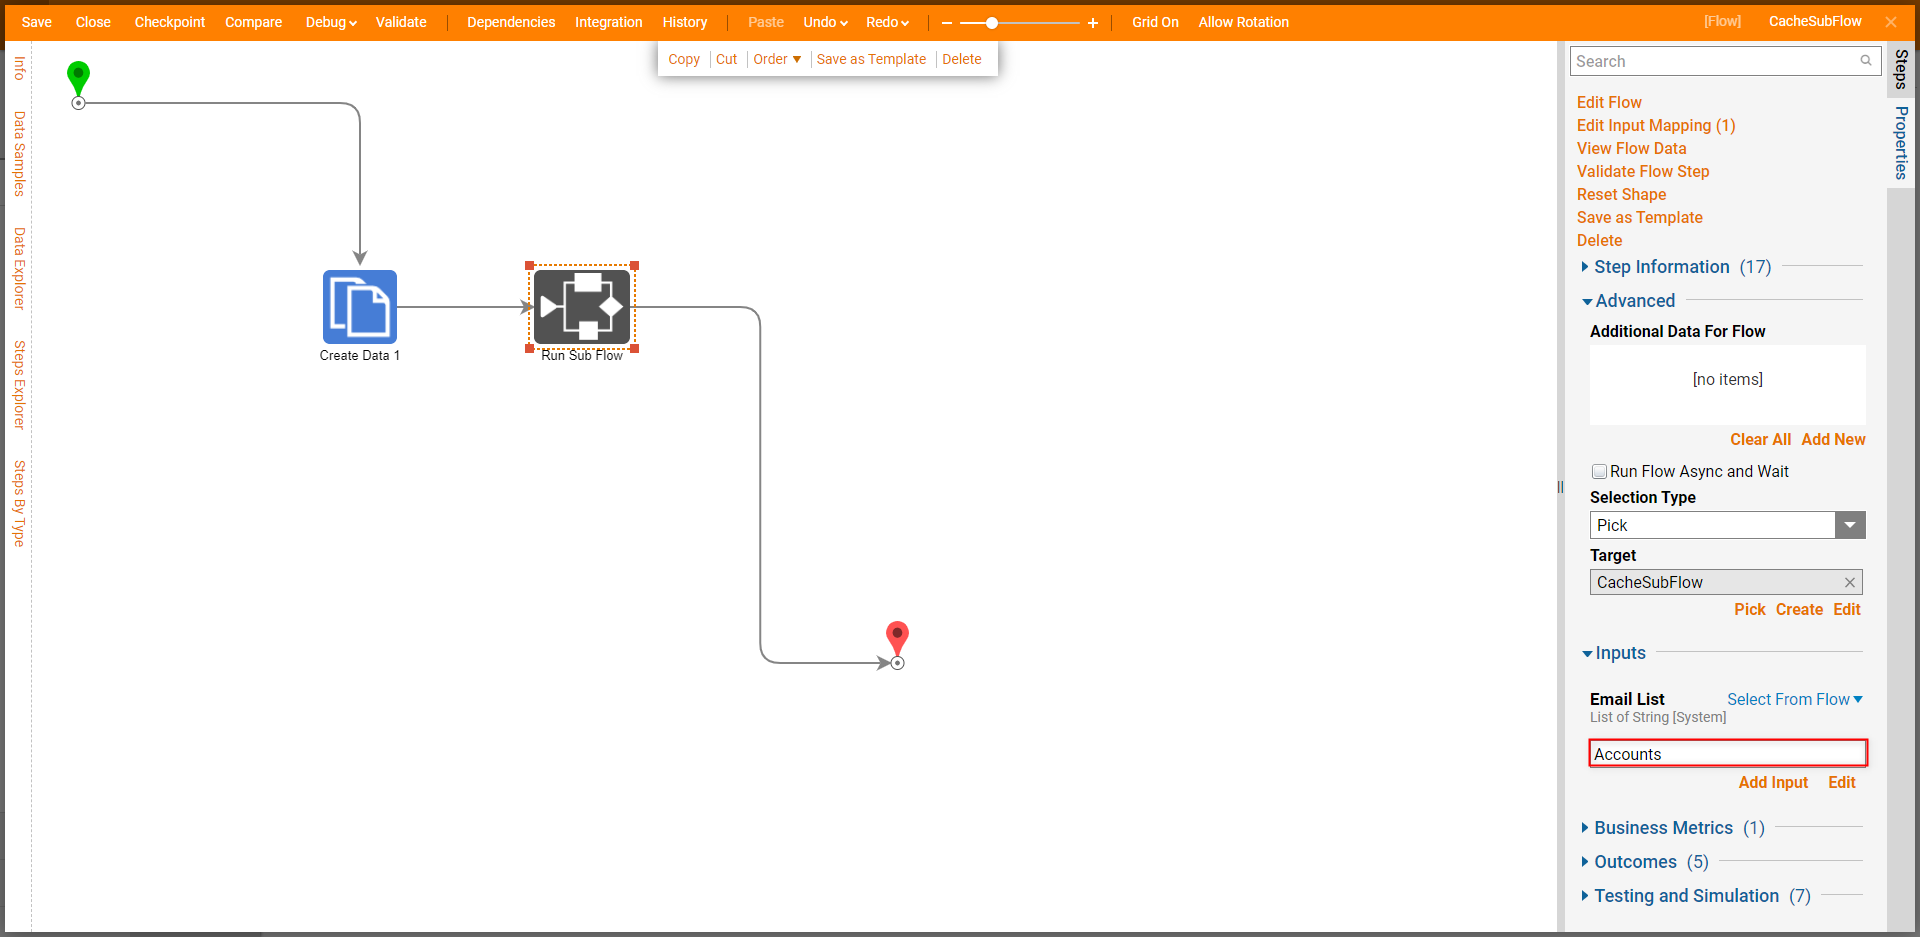
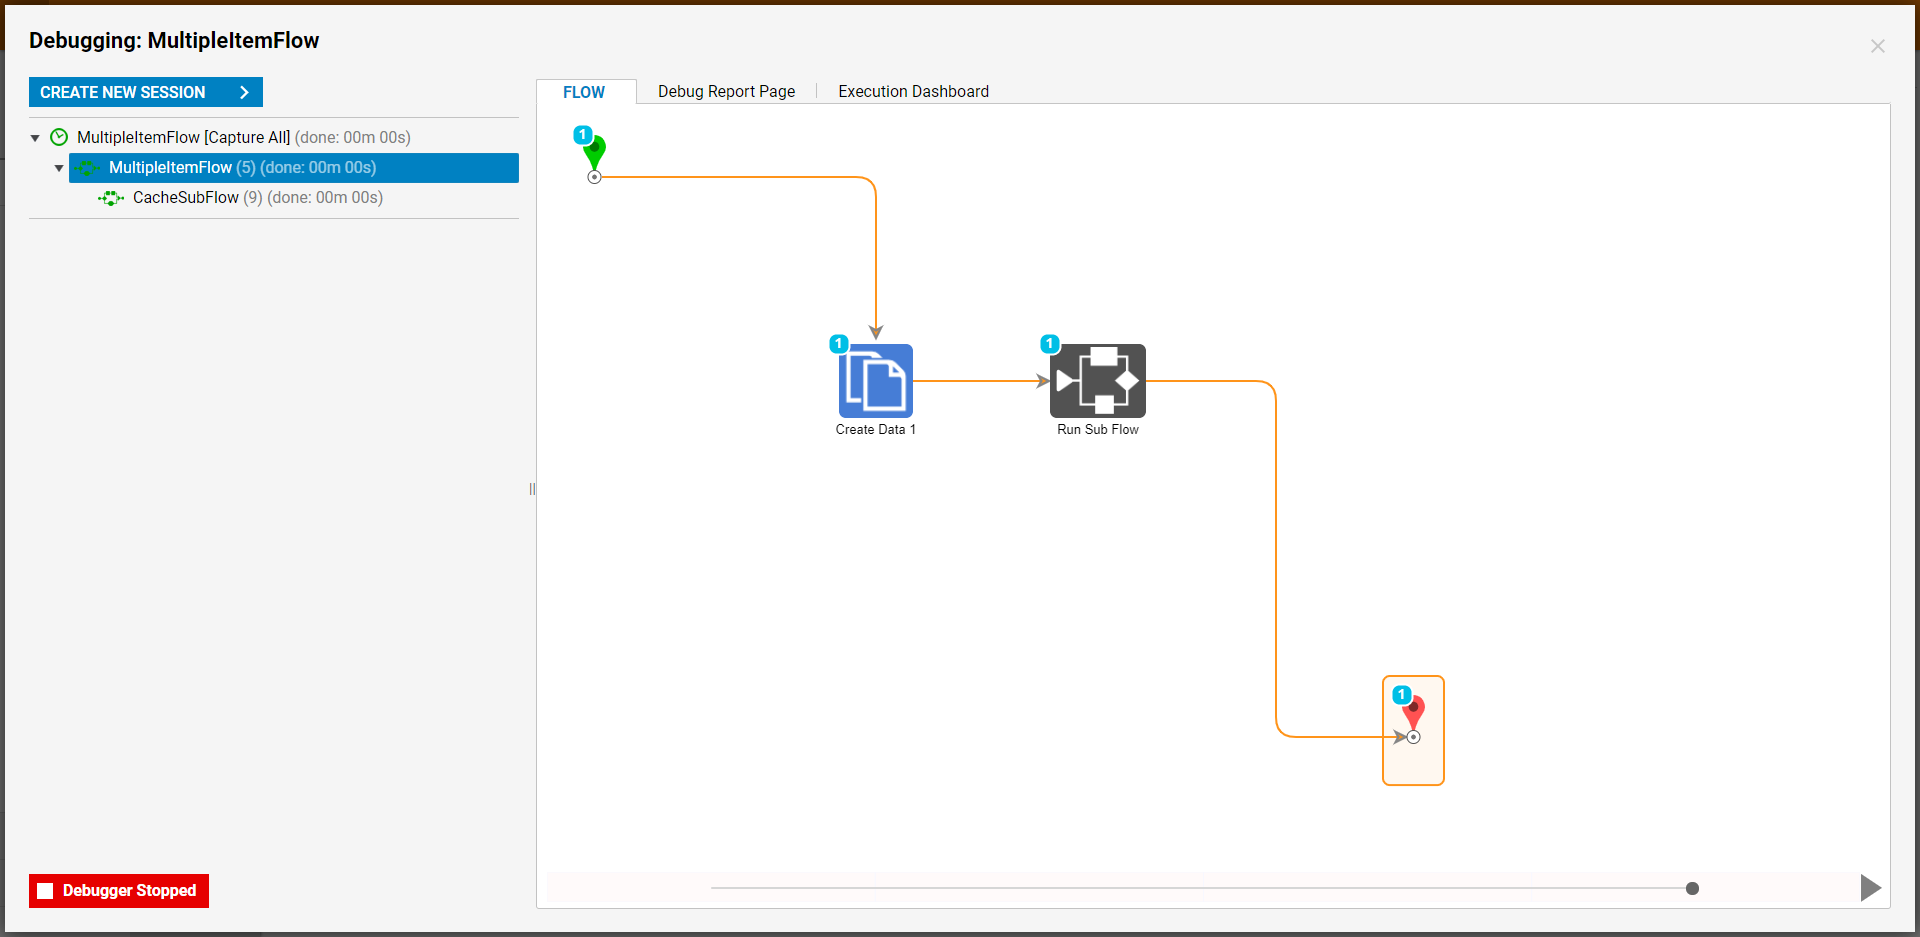
From the Flow Designer, select the Debug link from the top Action bar. Once the Flow runs successfully, close the Debugger.
Open an additional Flow Designer instance; from Steps > Data > Cache, attach a [List] Get From Cache step to the Start step. Then connect the Result path to the End path.
From the Properties tab of the [List] Get From Cache step, Constant map the respective Cache Instance Name, select the Cache Type Name, and map the corresponding Key INPUTS.
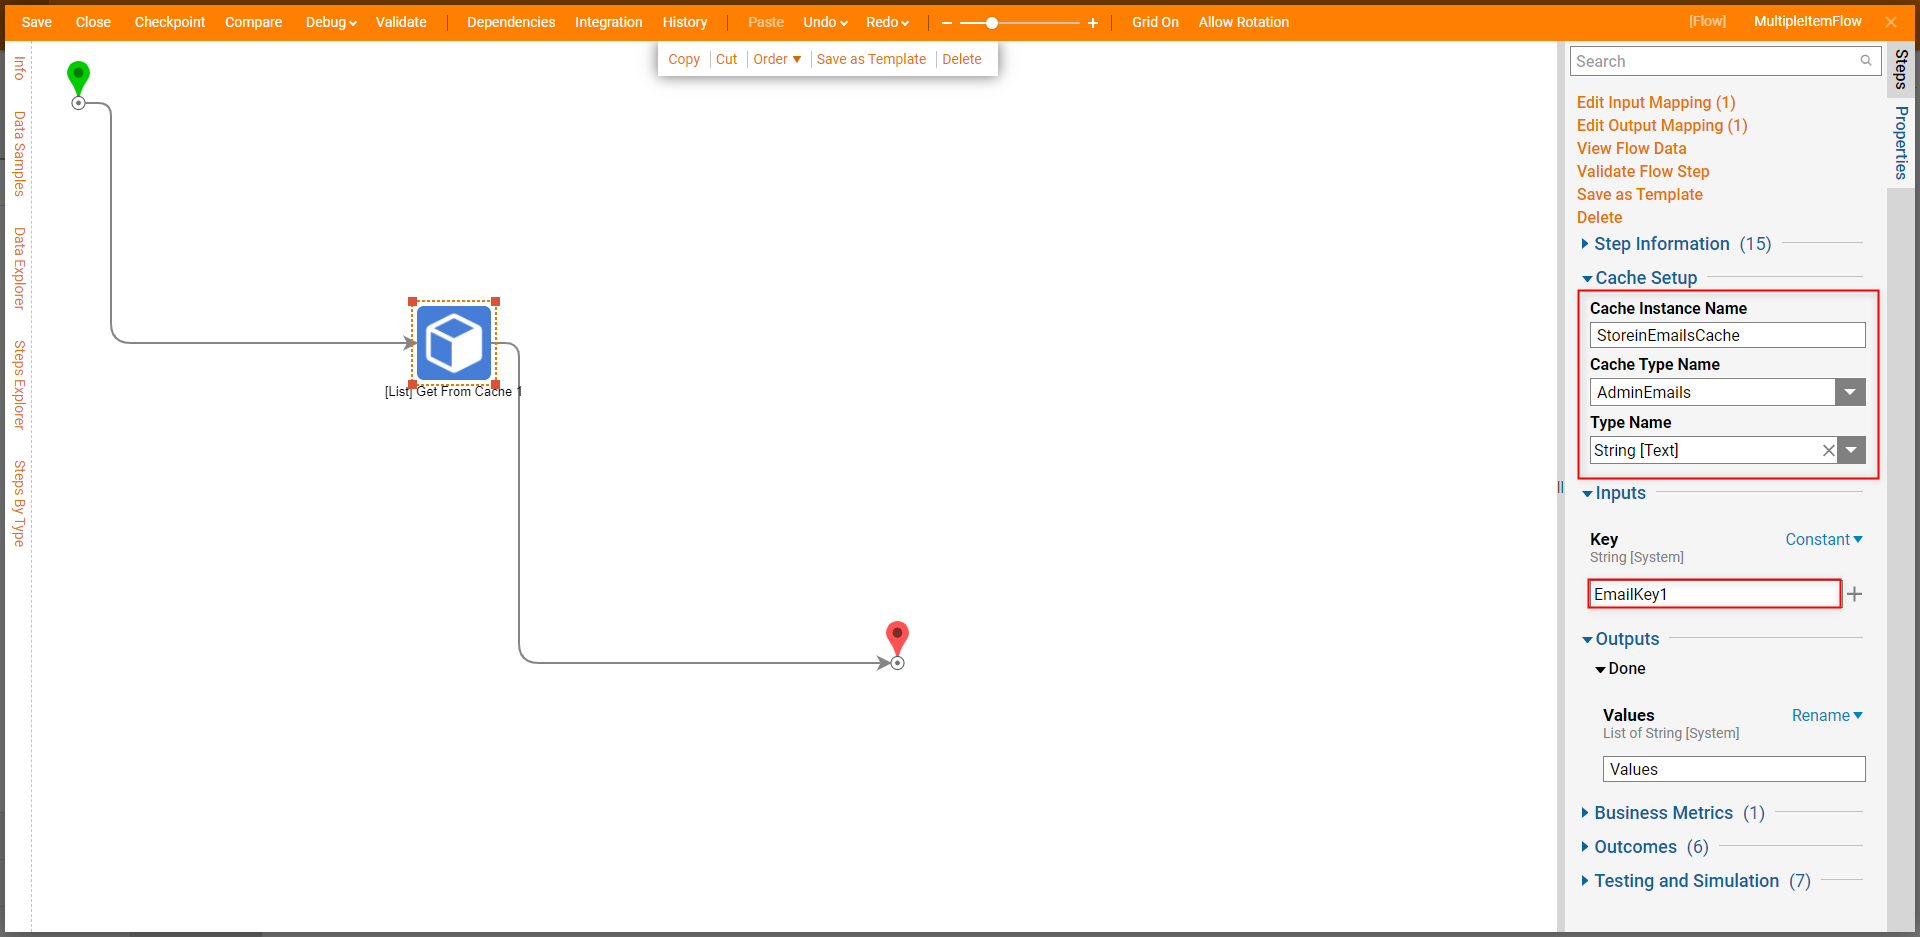
Save the Flow, then select Debug from the top Action bar.
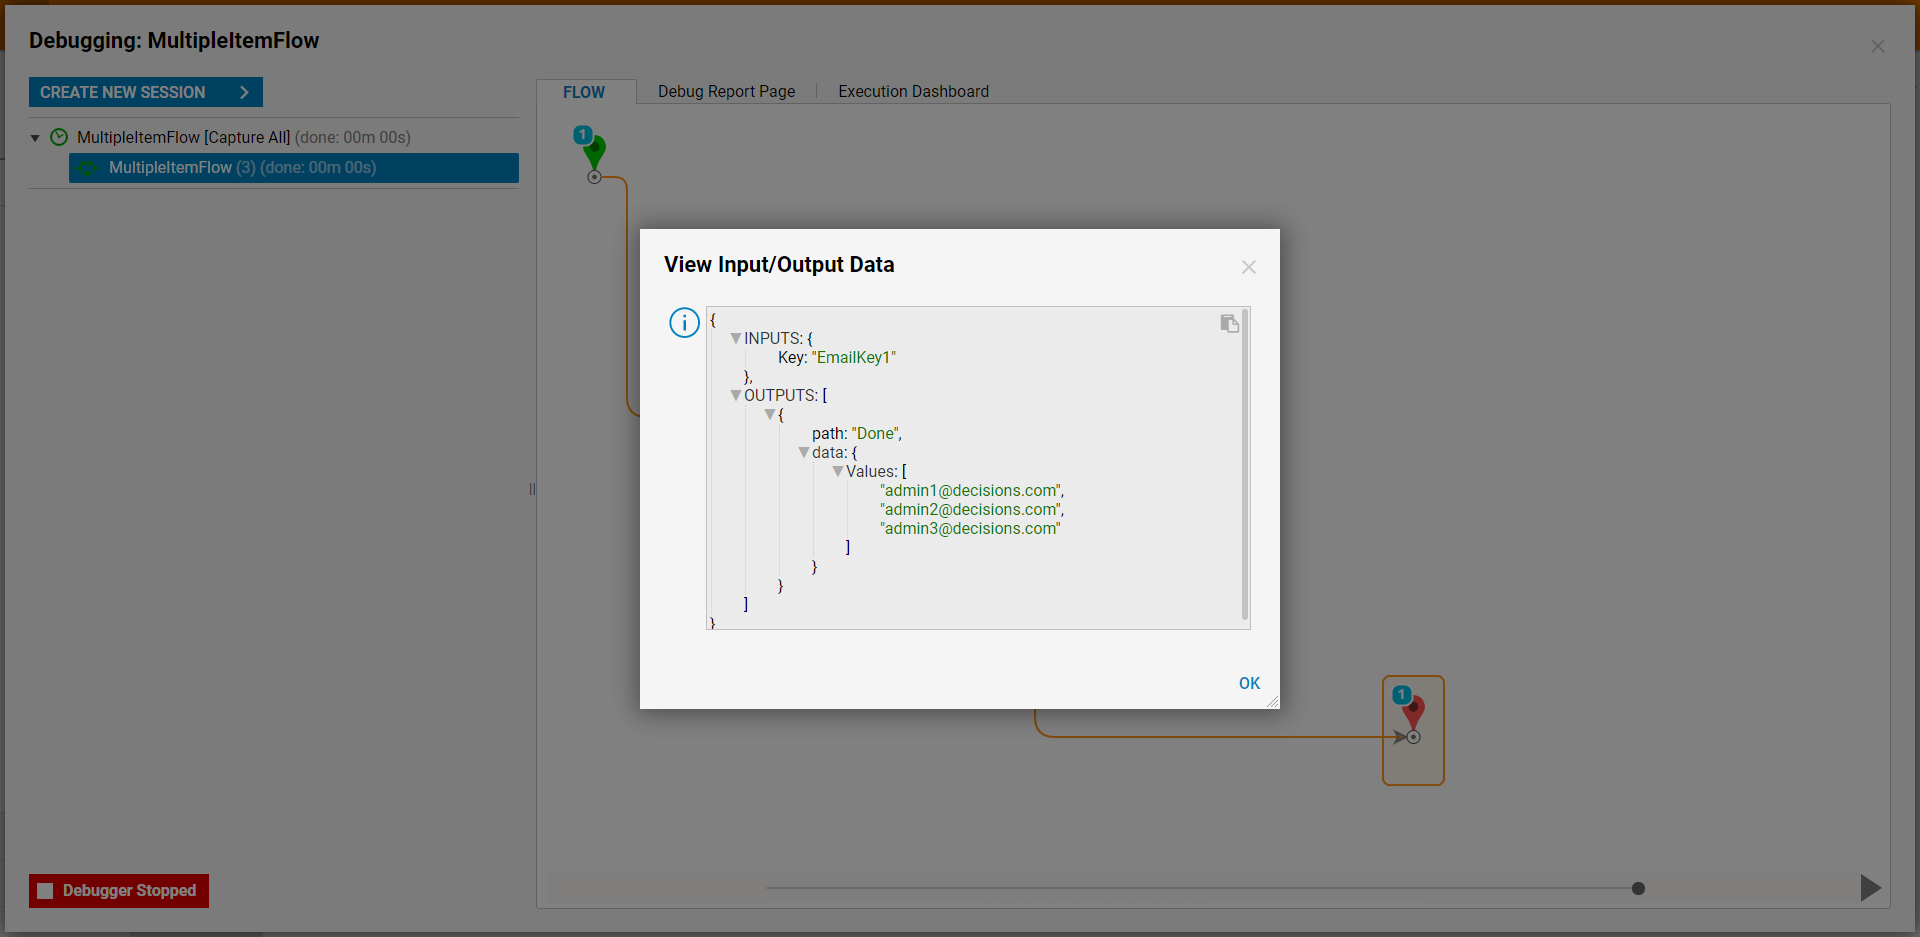
Once the Flow runs, select [List] Get From Cache > Execution 1 > View Input/Output Data to view the Values added to Cache in List format.
Additional Cache Steps
| Cache Steps that are not covered in these tutorials | |
|---|---|
| Clear Cache | Clear desired Instance in Cache (in this tutorial it would be SelectedCustomer instance of the Default.MemoryCache) |
| Key Exist In Cache | check if the Instance of the Cache contains the Key (in this tutorial we had ID, CONTACTNAME, and COMPANYNAME keys) |
| Put In Cache [generated key] | With this step, we can put the Value in our Cache and the step generates and outputs a Key to access this value. |
| Remove Key From Cache | Removes the Value from our Cache instance by Key. |