Overview
This feature allows the user to implement a button component linked to a Flow that, when selected by the end-user, will initiate a specified Flow on the backend. The function of this button can be as broad as the Flow logic itself. This function is typically applied to use cases where a Page/Dashboard is kicking off a process with an interface that the end-user interacts with.
Example
This example uses the Run Flow component on a Page to initiate a simple Flow on the backend that shows a popup message.
- In a Designer Project, select the CREATE FORM button on the top Action Bar.
- Select the large PAGE tile in the top right and provide a name, then select CREATE.
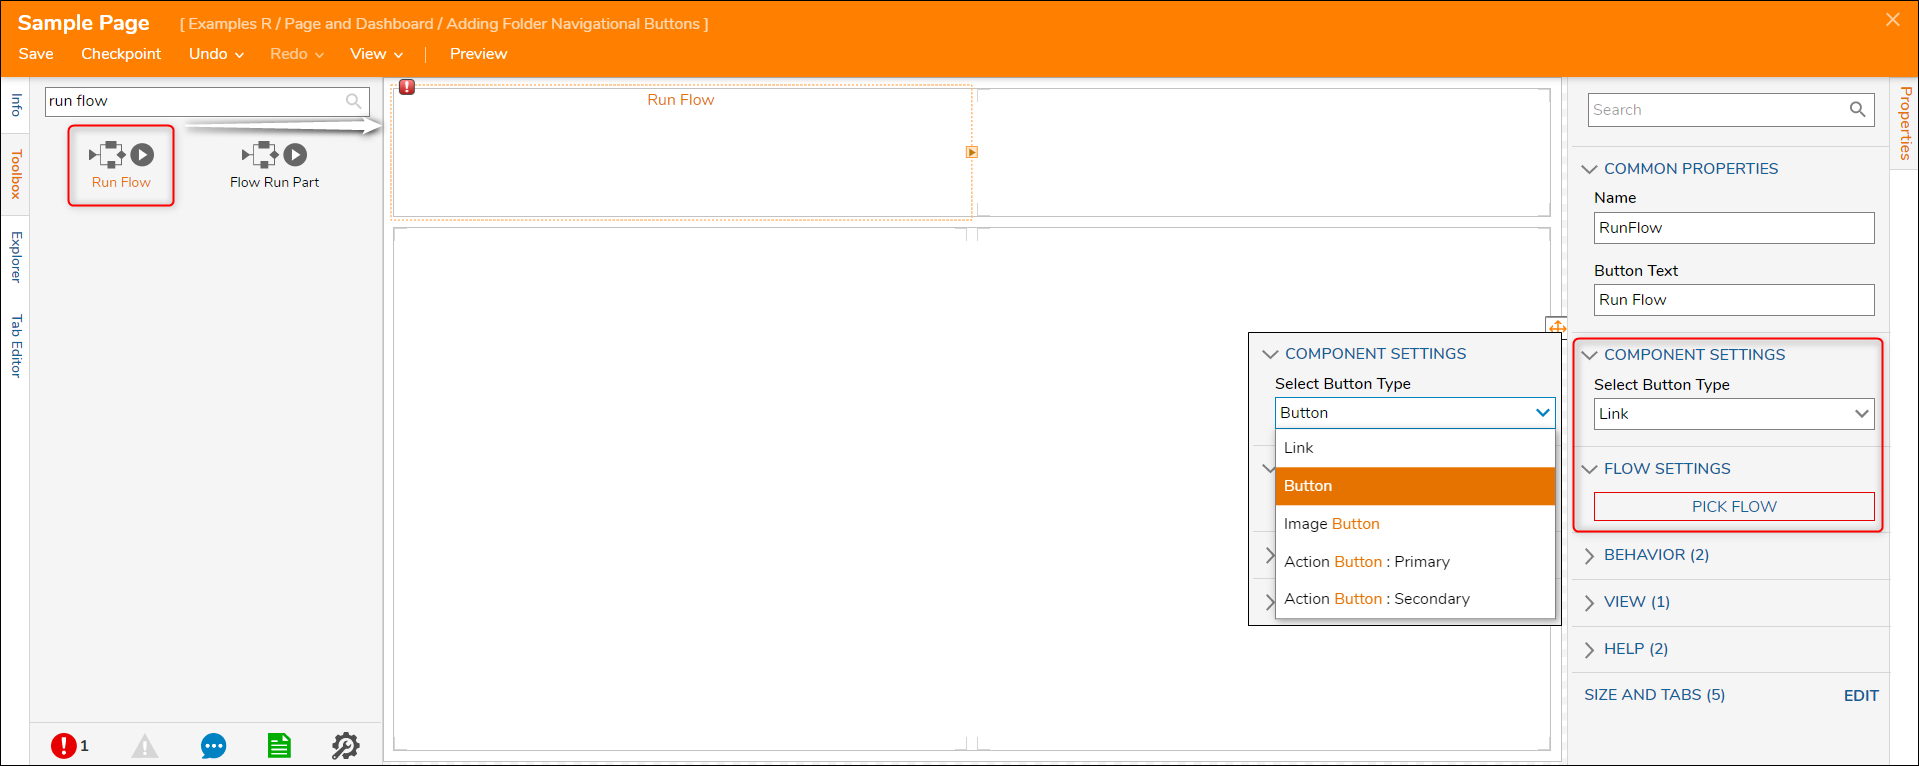
- In the Page Designer, use the Toolbox search bar to find the Run Flow component and add it to the workspace.
- With this component selected, navigate to the Properties panel.
- Select the PICK FLOW button to either pick an existing Flow or create a new one. This is the Flow that will initiate when the button is selected. For this example, a simple Flow with the Show Popup step was used to display a message when the button is selected.
- Save and close the Page Designer once complete.

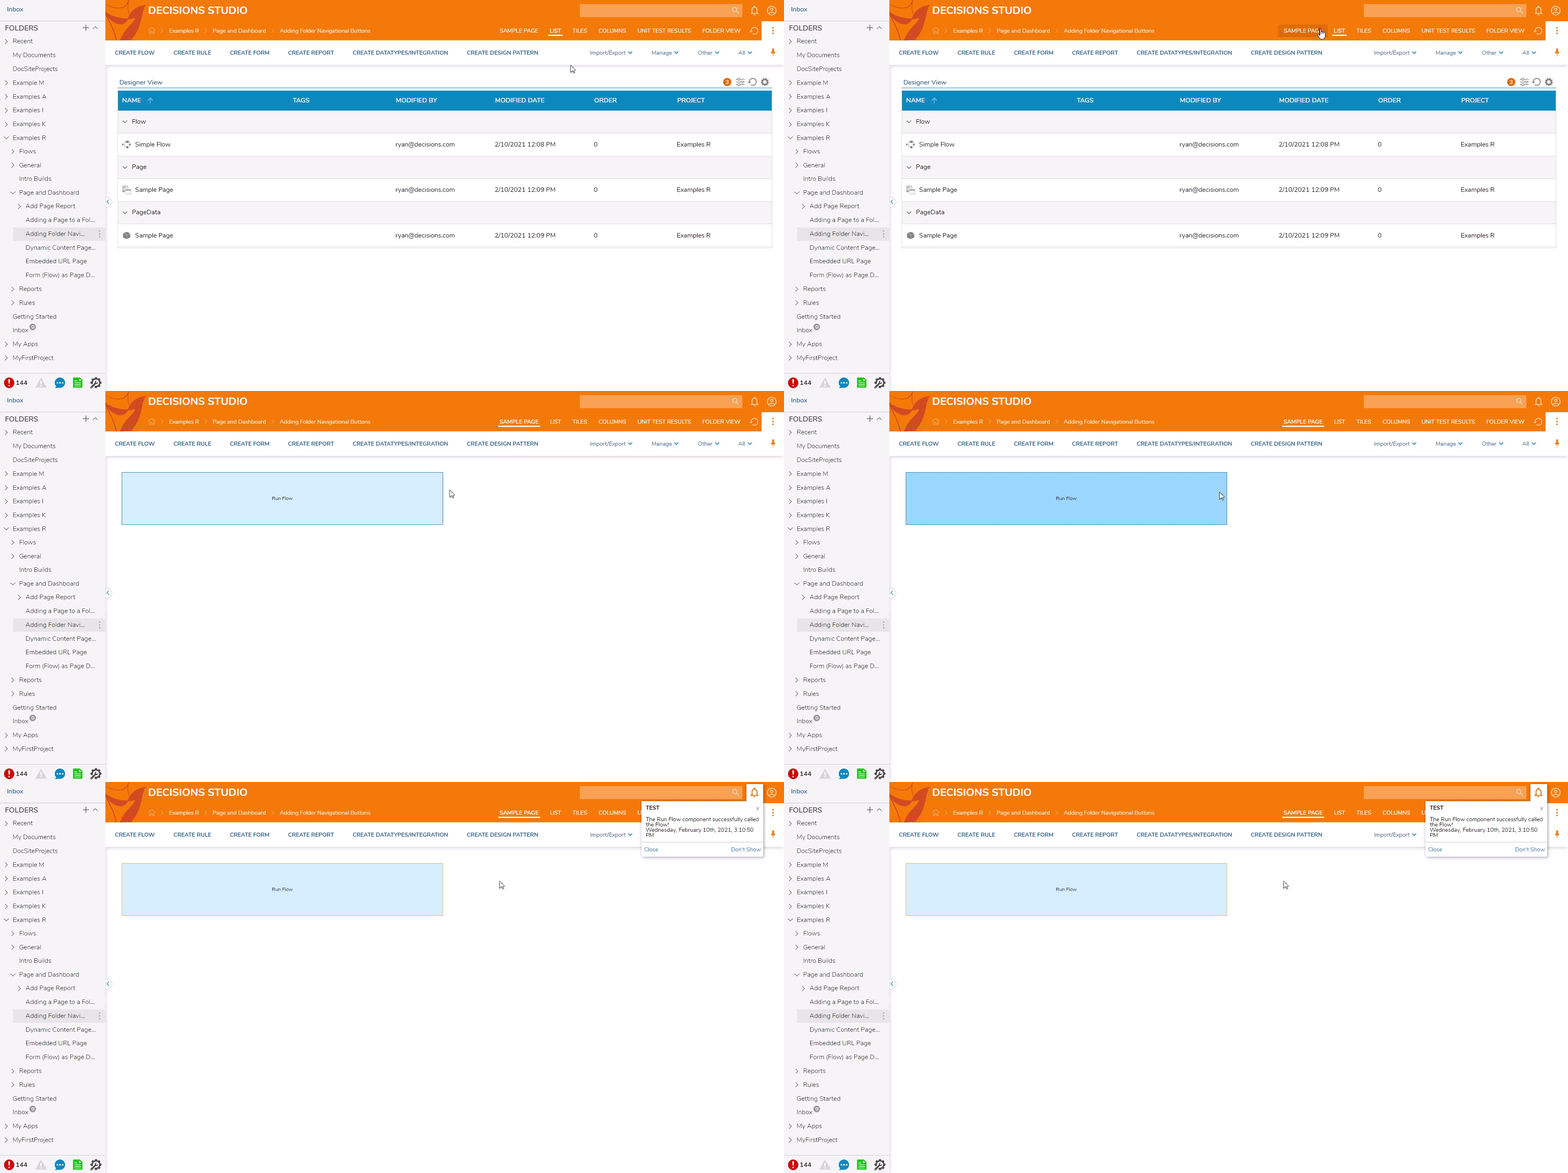
- In order to see the full functionality of this feature, the Page where the component was added will need to be applied to a folder. For information on how to apply a Page/Dashboard to a folder, please visit the Adding a Page/Dashboard to a Folder article.
- Open the added Page tab in the folder and select the button action to see that the Flow is initiated on the backend. The Show Popup appears in the example, where this could otherwise contain a Form to fill out for a process, etc.
