Overview
Charts represent Report results in a graphical form. To create a Chart from a Report, a column in the Report must have its results grouped. To add a Chart to a Report, select the column to be charted, and in its Action menu, select Group. The charts of the Components Panel will expand to display a component for each type of chart usable for that specific column. To add a Chart of the selected column’s results, drag a Chart component into the workspace.
This example covers one of the advanced features available for a Report. Please visit the Create a Report article for more information on how to create a Report.
Example
The goal of this example is to create a Report, group the Report results by a column, add a Chart to the Report, and run the Report to view the Chart.
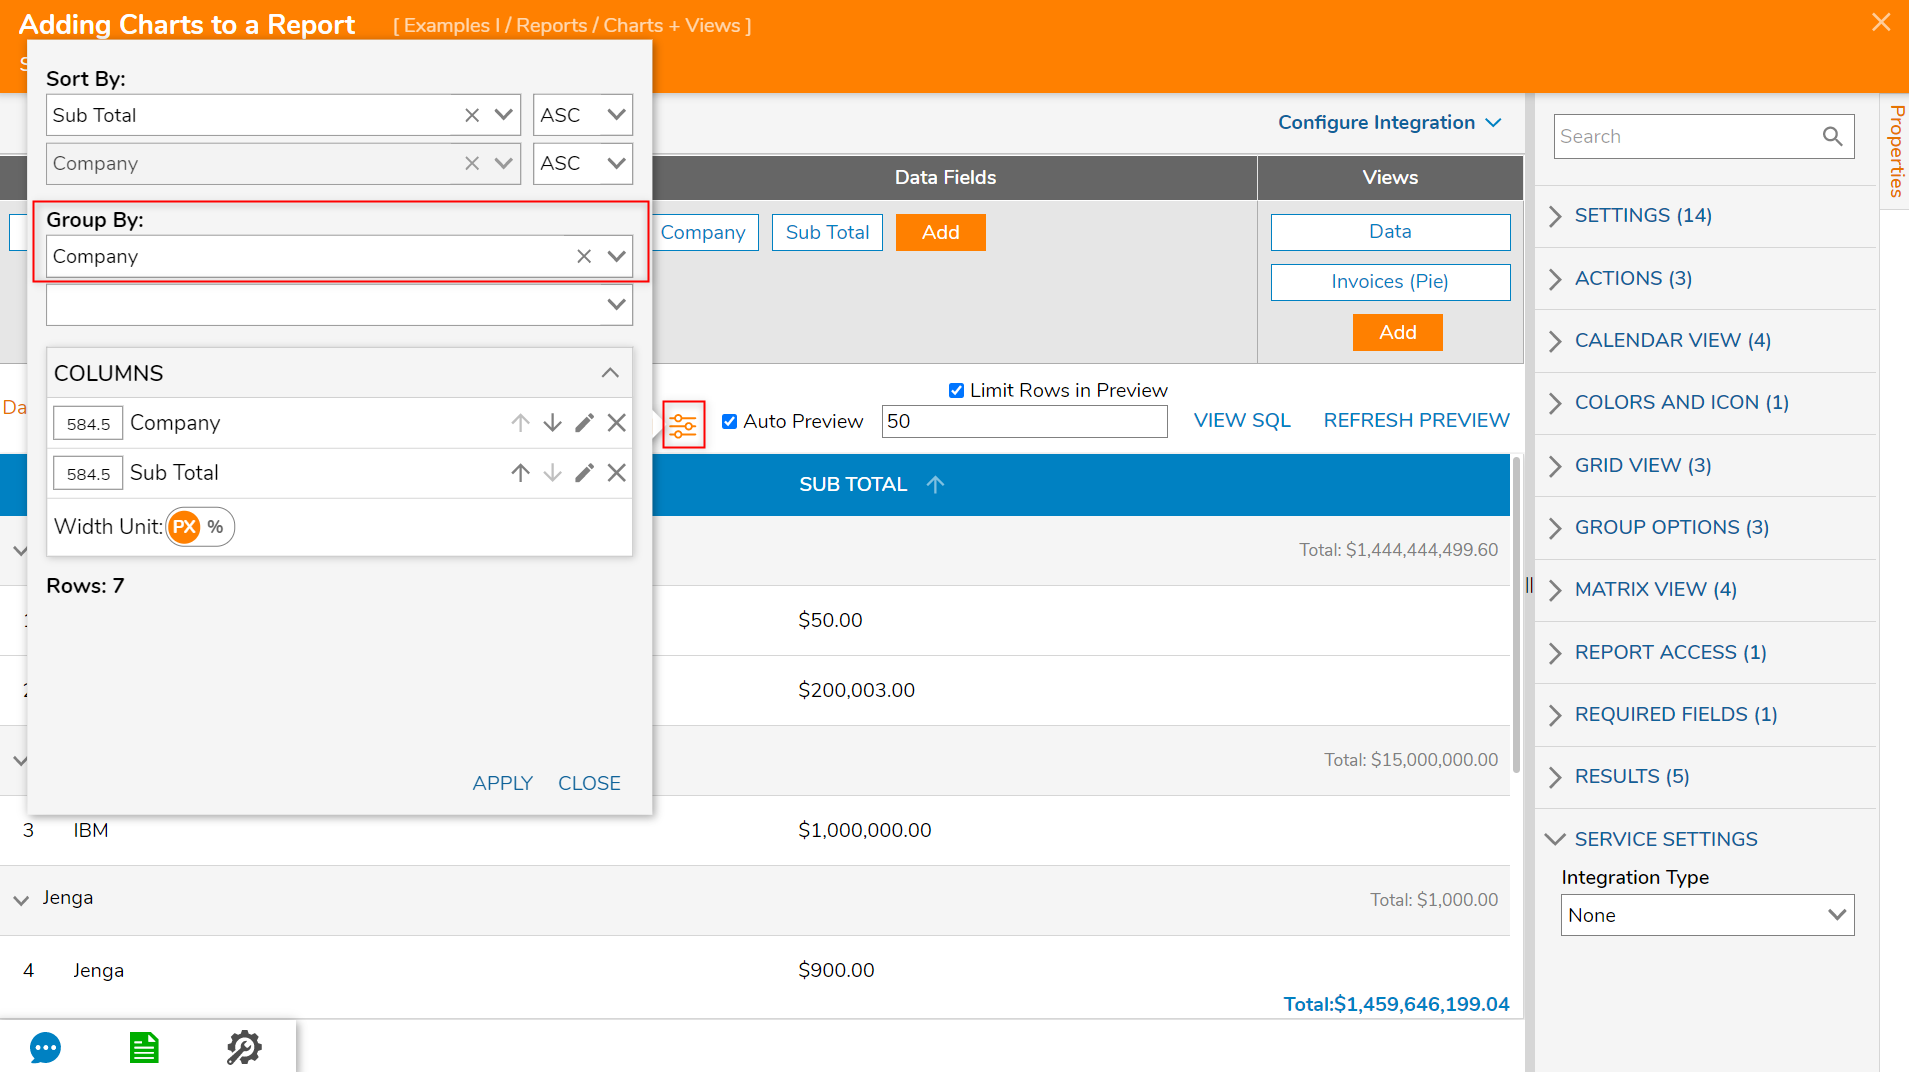
- Select the abacus beside the Auto Preview boolean. Group the data by Company.
- Next, navigate to Views and click Add. Select Pie.
- In the Add Pies Chart window, leave the CHART DATA > Series 1 as Count(company).
- Next, in the CHART SETTINGS > Title field, add Invoices (Pie). Enable the Show Title boolean.
- In the Chart, Labels drop-down, select Name, and Value.
- Next, enable the Show Tooltips boolean. For Tooltip Type, select a value from the drop-down.
Name and Value This setting will display the name and value of the corresponding data when the user hovers over a Chart component Name This setting will display the name of the corresponding data when the user hovers over a Chart component Value This setting will display the value of the corresponding data when the user hovers over a Chart component When the boolean is disabled, only the Number and the color of the data will be displayed.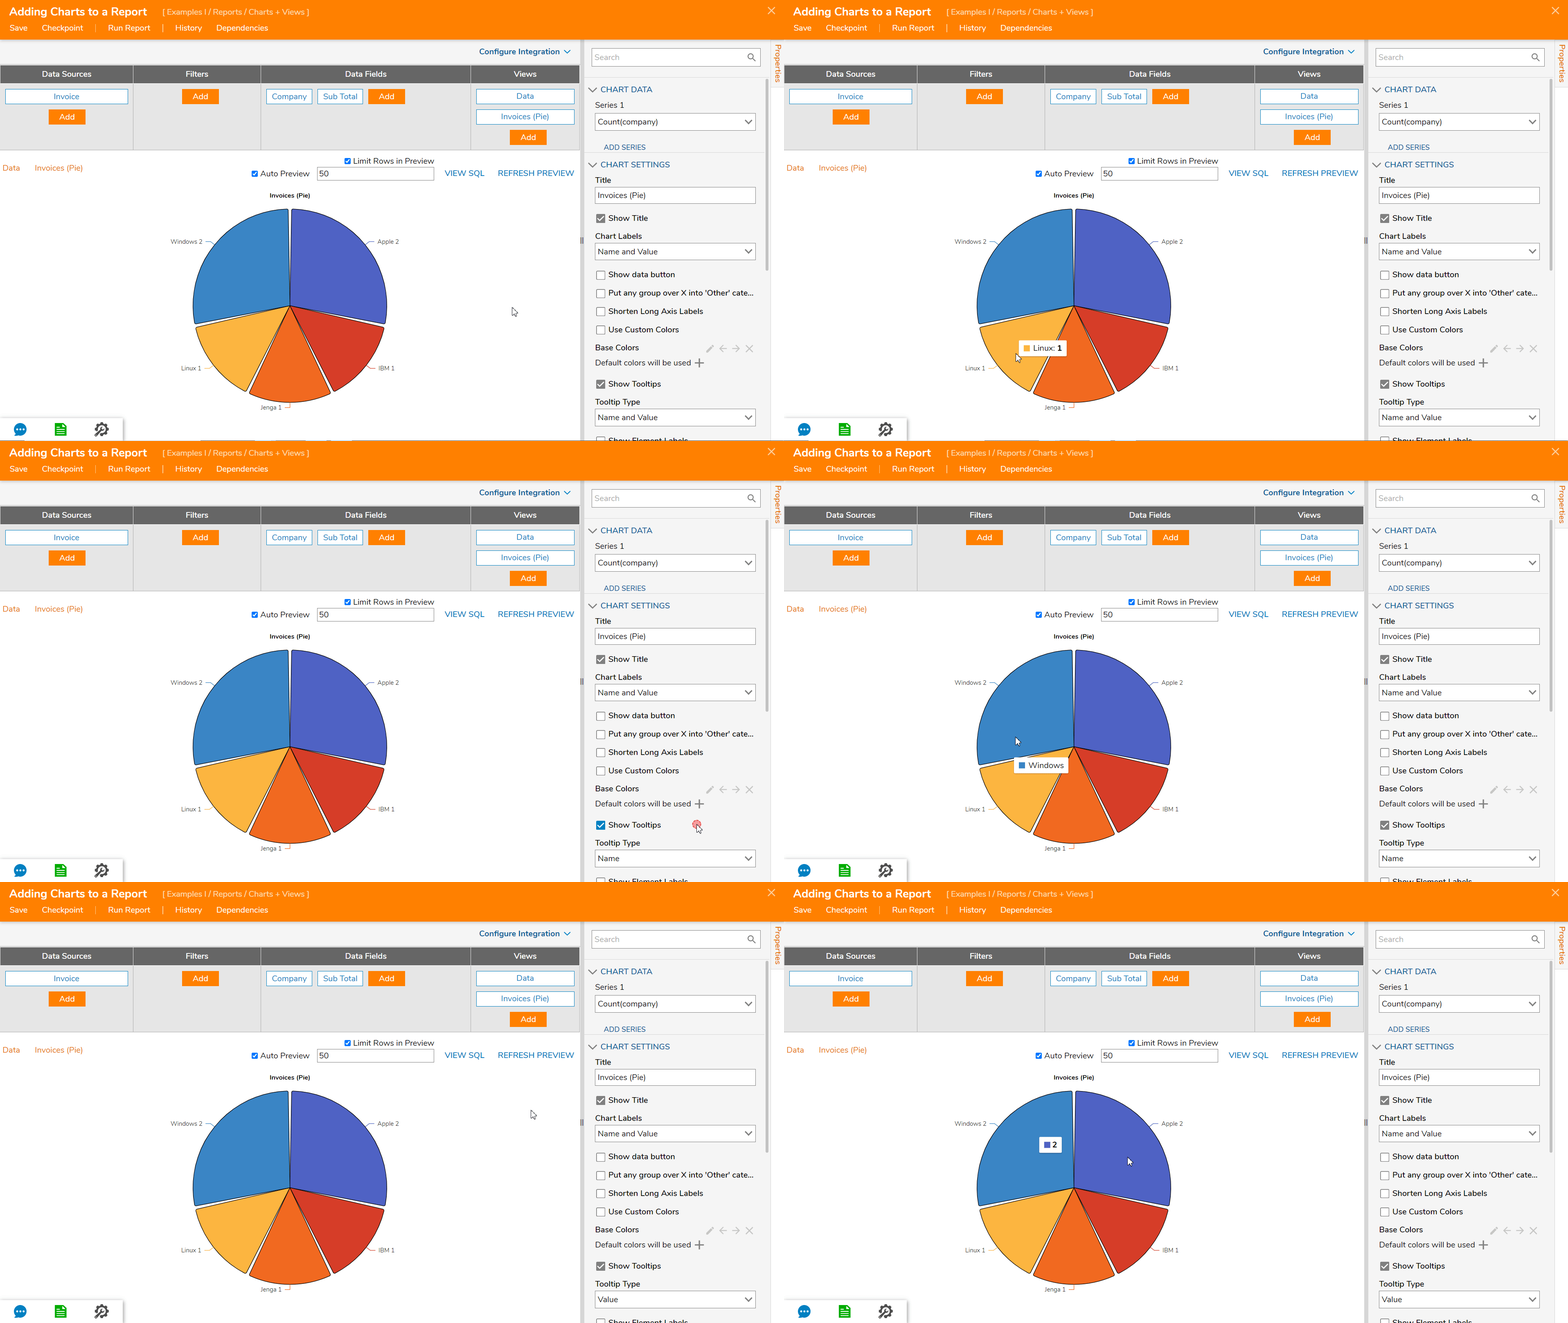
- Then, navigate to the Sorting drop-down and select a value from the drop-down list.
None The chart does no additional sorting of original results from the Data Source Value Ascending Entries will go by value, smallest to largest Value Descending Entries will go by value from largest to smallest Label Ascending Entries will go by label, alphabetically ascending Label Descending Entries will go by label, alphabetically descending 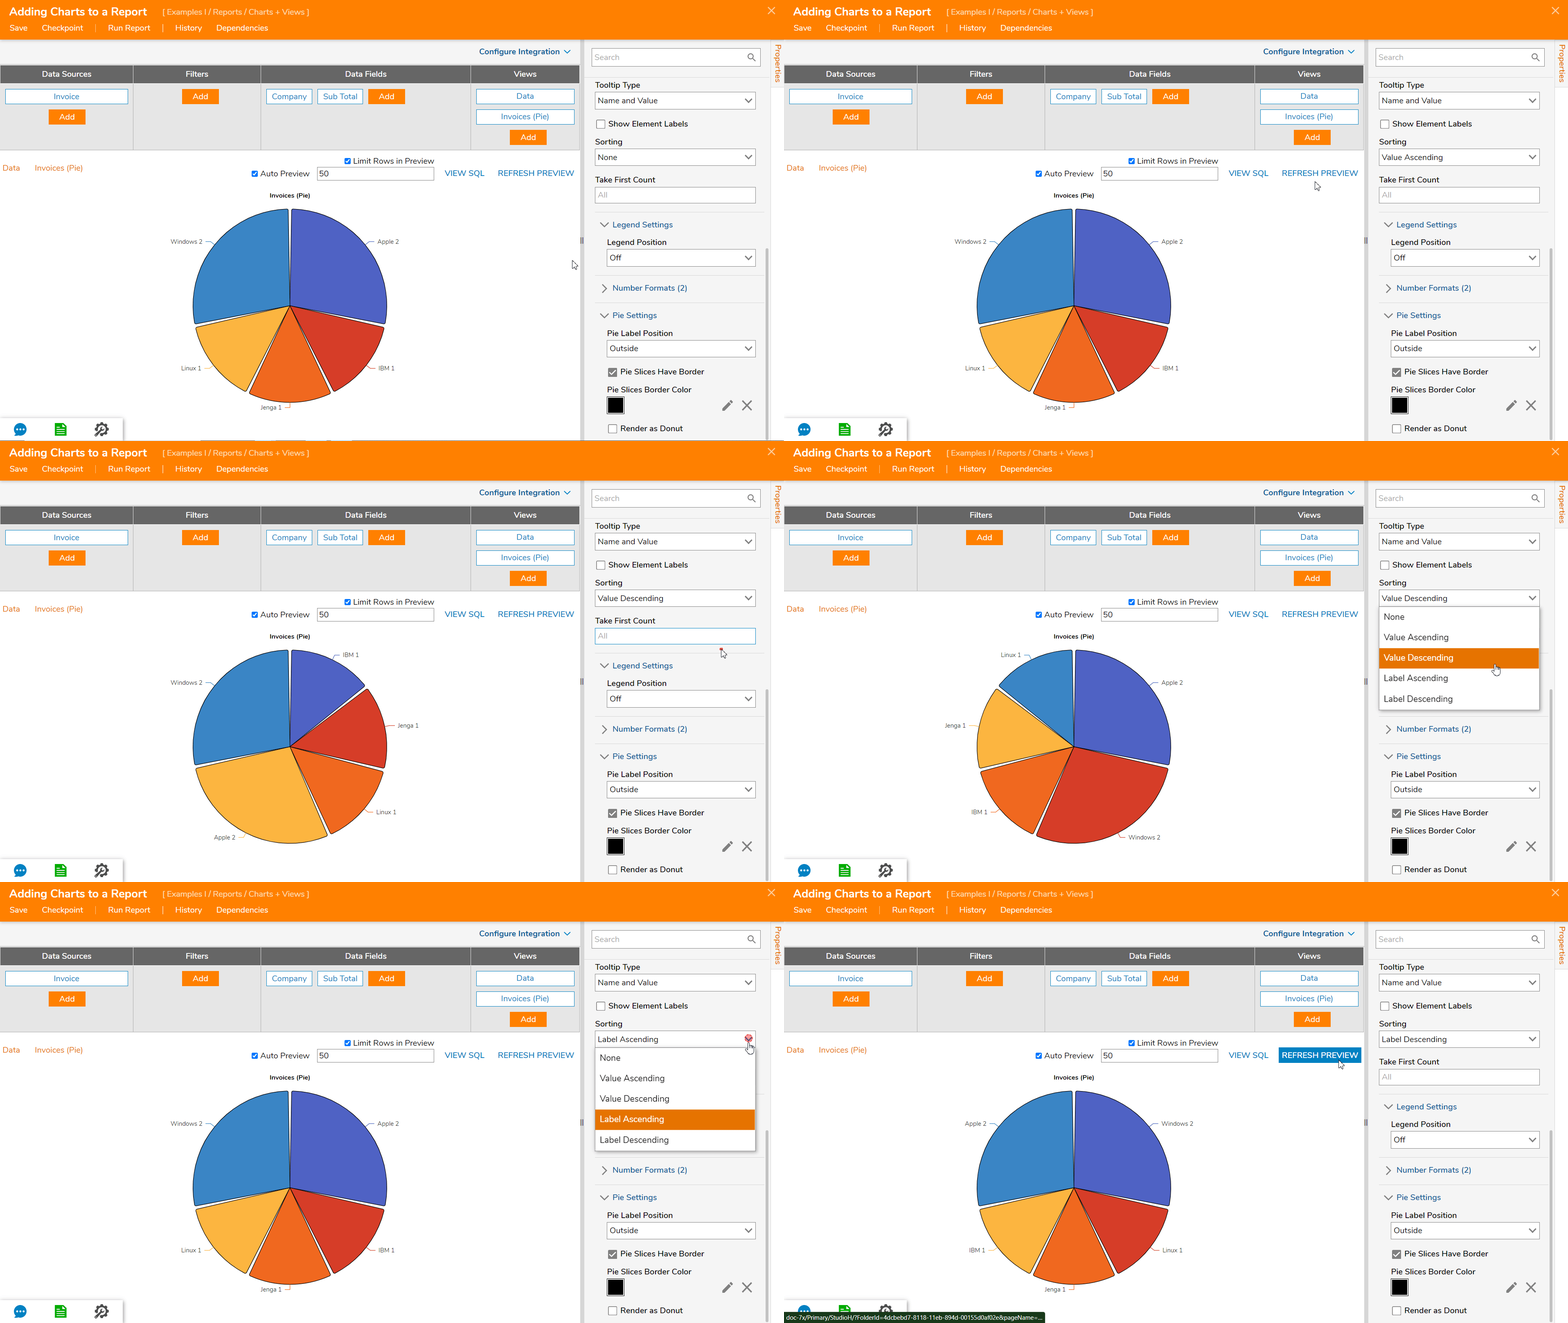
- Locate the Take First Count field and input a value greater than 0; this will enable the Chart to only show that a specified number of entries.
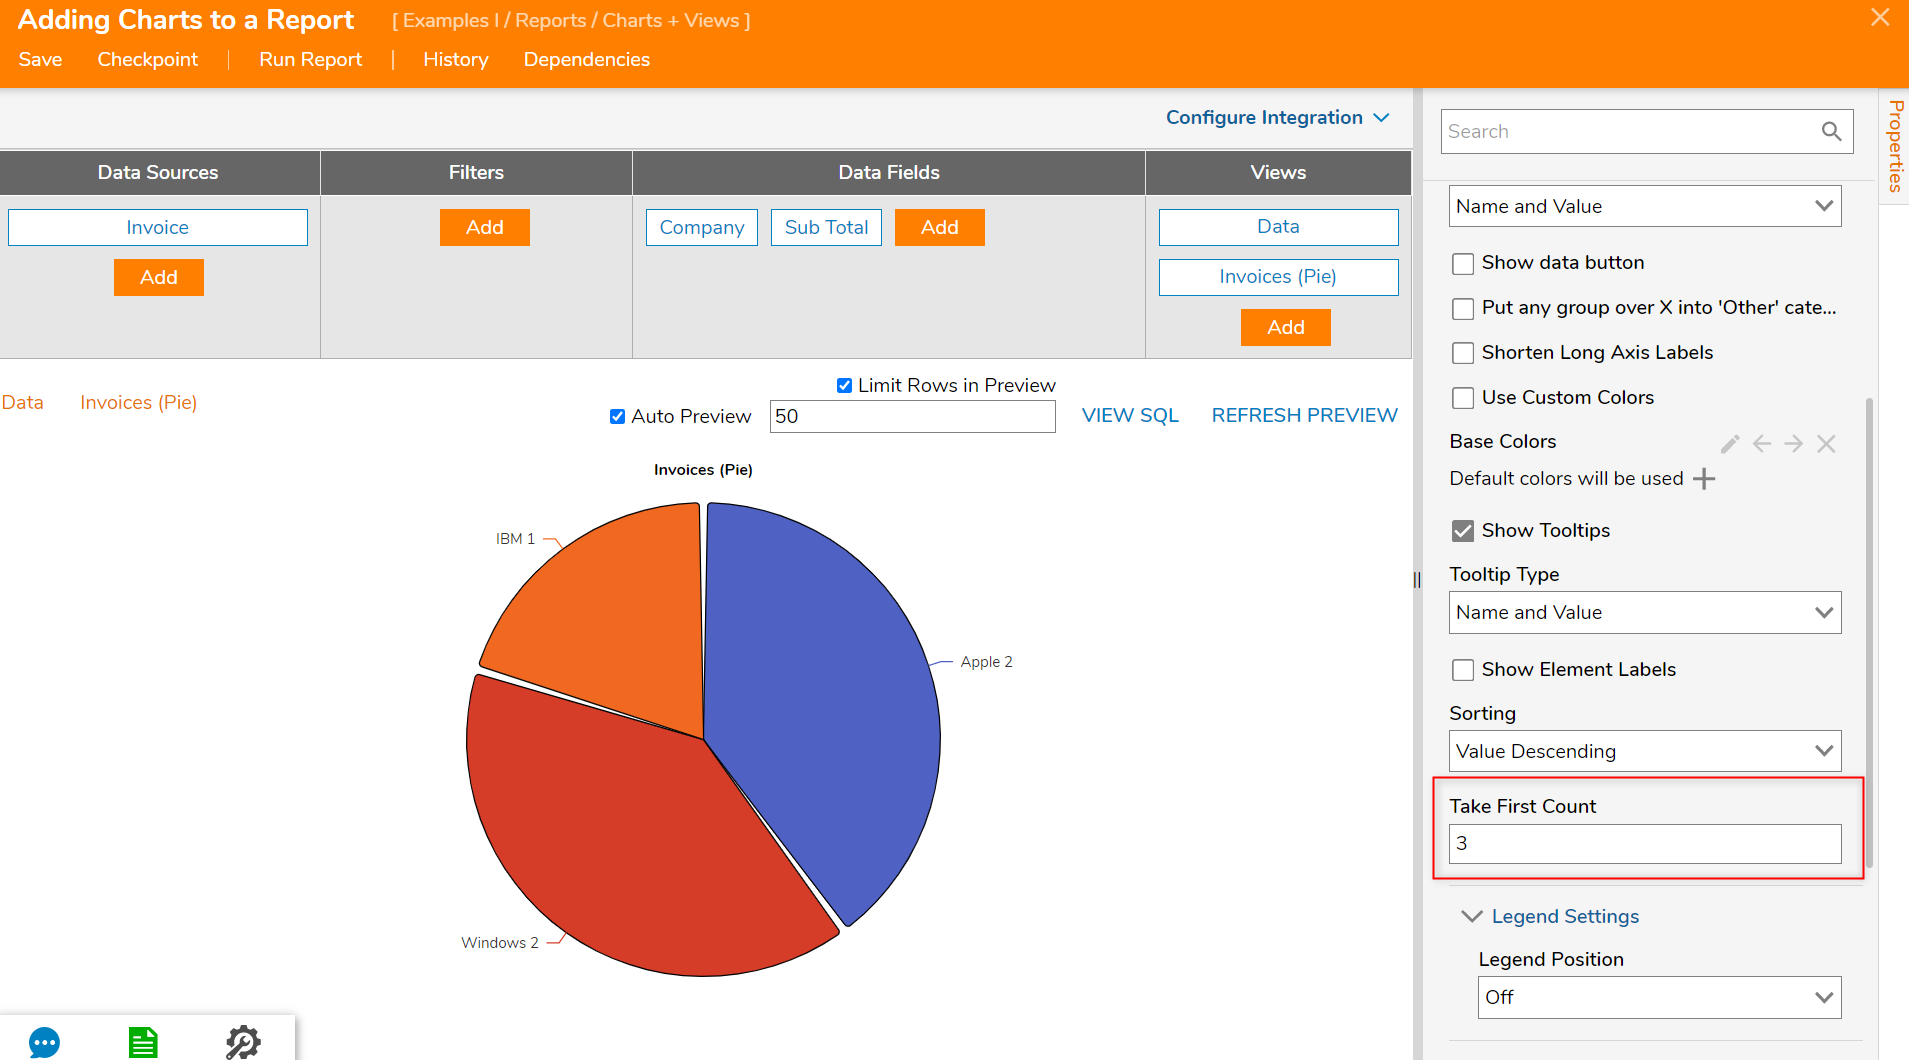
- Select Run Report from the top action panel; this will automatically save the Report.
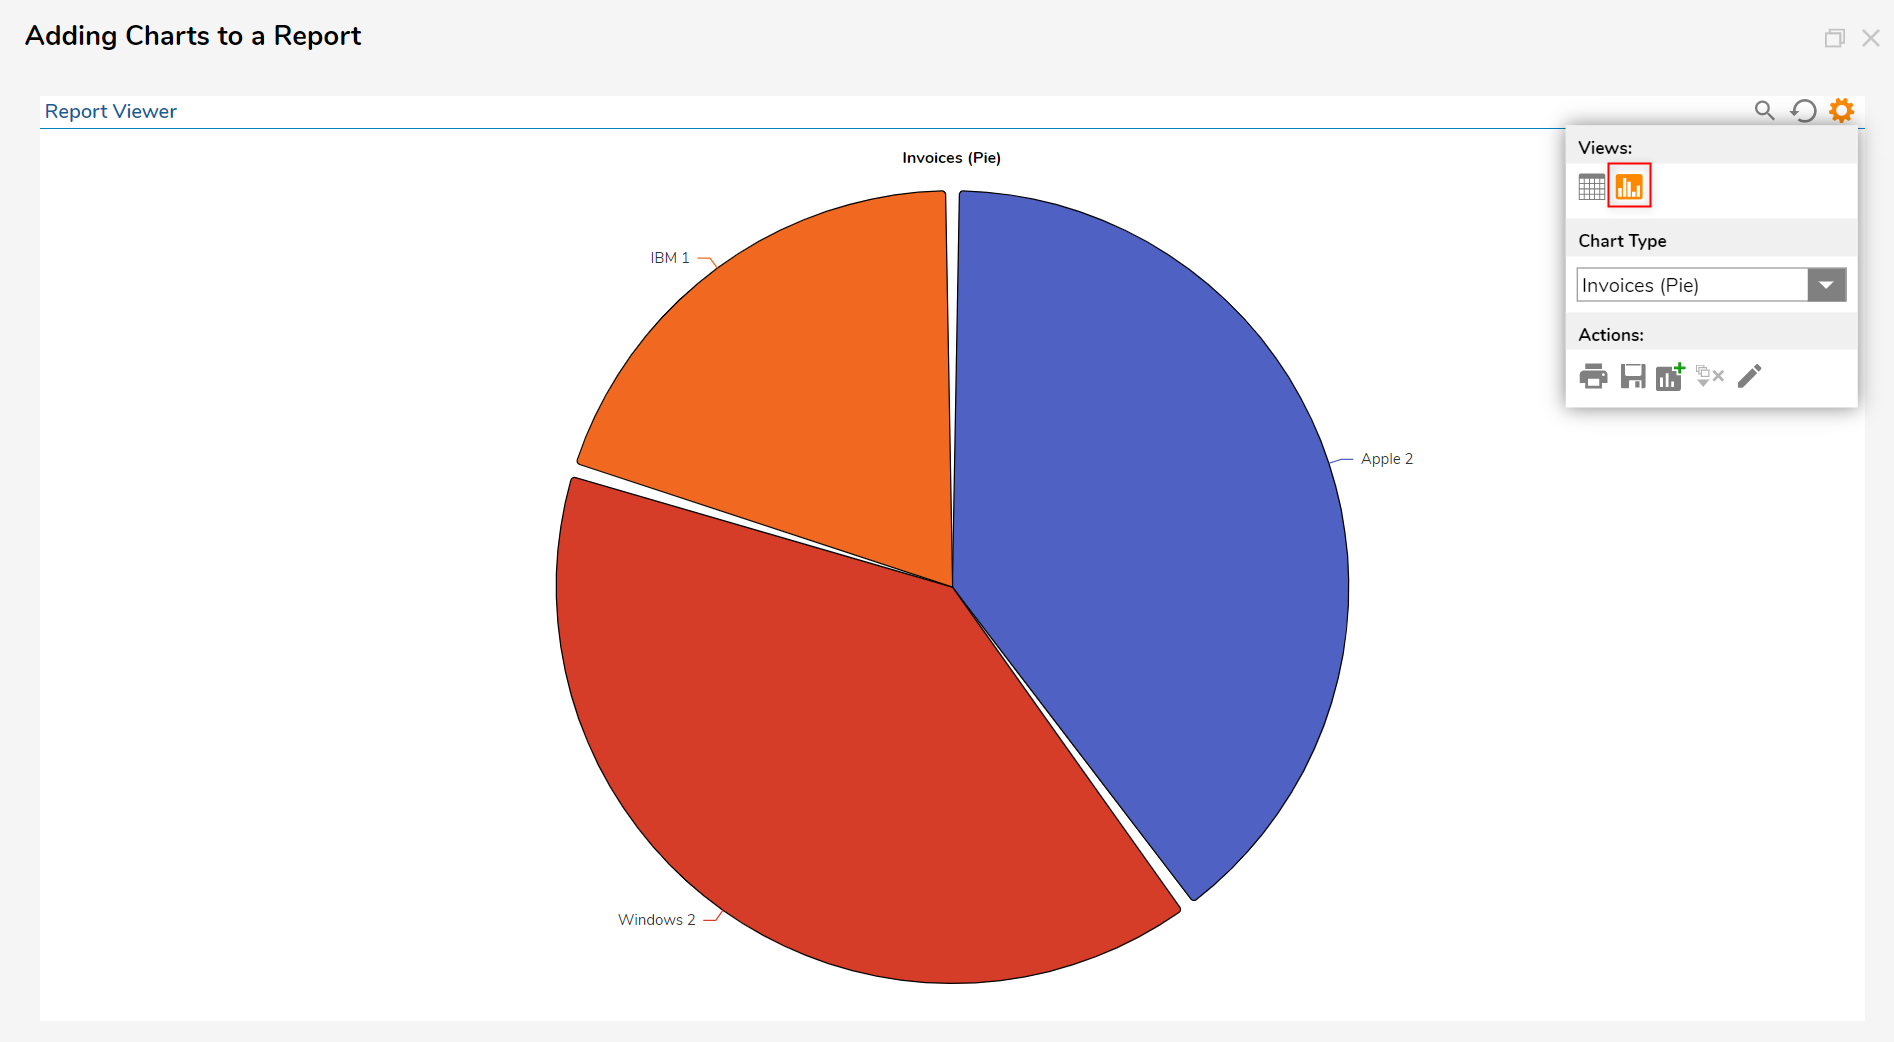
- In the Report Viewer, navigate to the Pie Chart view.
