Overview
Accounts represent authenticated users of the system's environment. An admin can Create, Update, Edit, and Delete Accounts, as well as administer a password reset if needed. Groups can be created to better organize multiple Accounts. Permission levels can be modified at the individual Account level or by Group.
Example
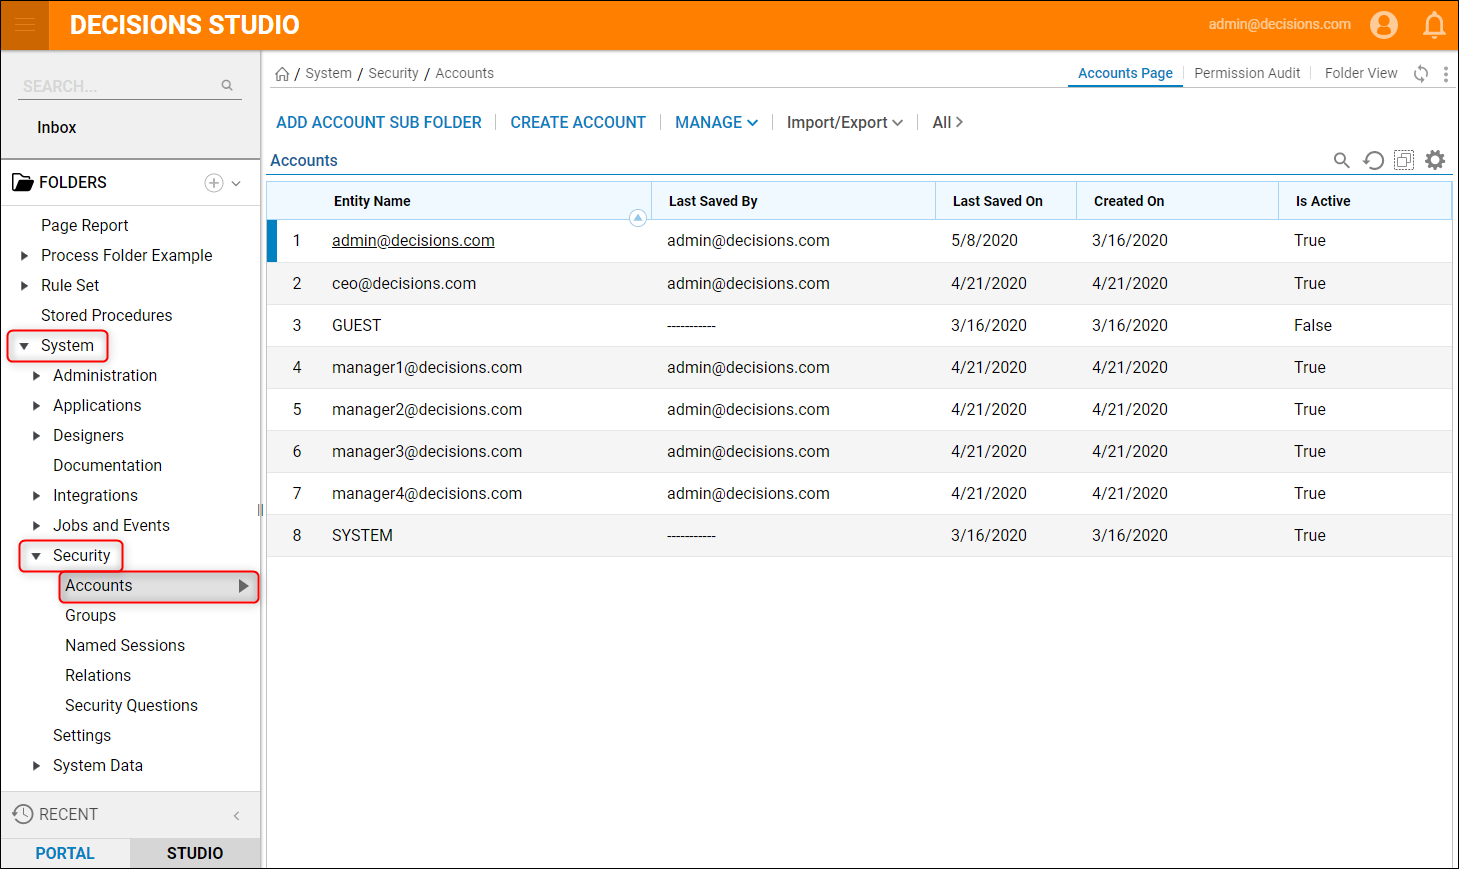
- In the Designer Studio, navigate to System > Security and select the Accounts Folder.
- This Folder shows a list of the Accounts associated with the environment and gives options to create and manage them. Use the CREATE ACCOUNT button on the top action bar to make a new Account for this instanced environment.

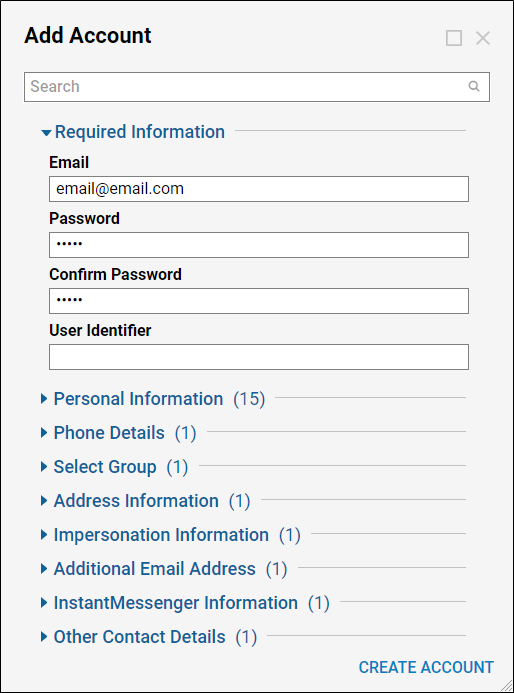
- In the Add Account window, an email and password are required at minimum to create the Account. Additional details can be added to the Account by entering information in the appropriate sections.
- On the back-end, this information is compiled to create an object of the Account datatype. This object can be referenced later on, and pieces of that information can be used as data in Flows, Rules, and more!Test AccountsTest accounts can be created with faux parameters, as shown in the screenshot below, for local development purposes. Sending emails or communications to a test Account via Flow Steps or other advanced configurations would not be recommended.Hard-Deleting AccountsTo hard-delete accounts, please reach out to the support team for an account deletion query.
- Once the appropriate information has been provided, select the CREATE ACCOUNT button. The new Account will now appear in the list of Accounts at the root level of the Accounts Folder.

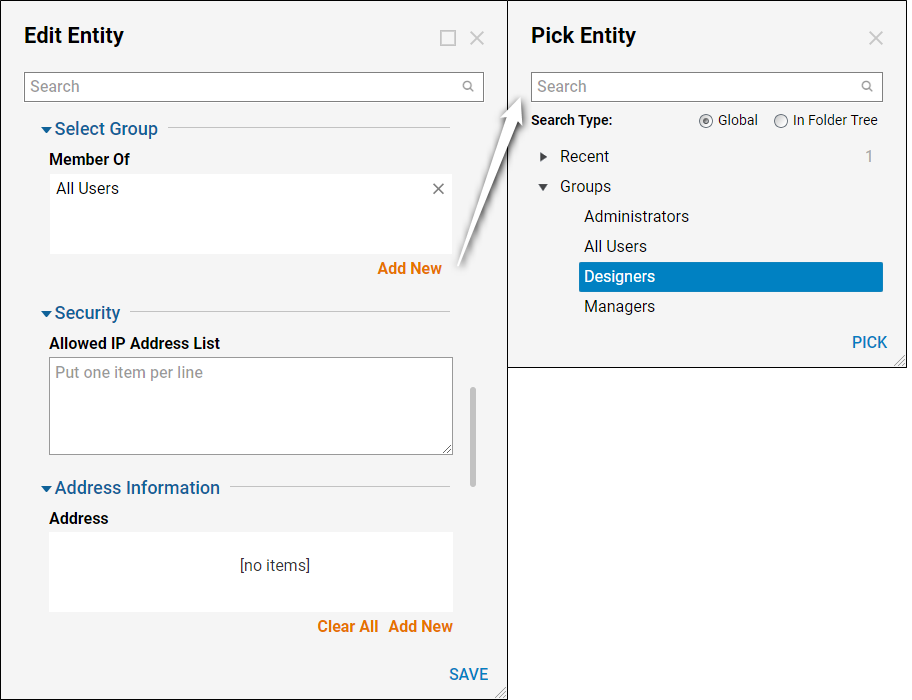
- Use the Select Group section to associate this Account with a Group. Groups have a wide range of functionality when it comes to building, assigning, and organizing Accounts. Learn how to create a Group with the Adding A Group article.
- Select the Add New button and choose a Group from the Pick Entity list to associate with this Account. Once the Group is associated and the Account is created, the account will have permissions on the same level of the Group it was assigned to.
