Overview
A timeline is a helpful feature to show on a Form when a series of Forms need to be filled out by a user.
Example
A timeline keeps the user informed about what steps in a submission process have been completed or which steps are next; this example shows a timeline set up for a request process.
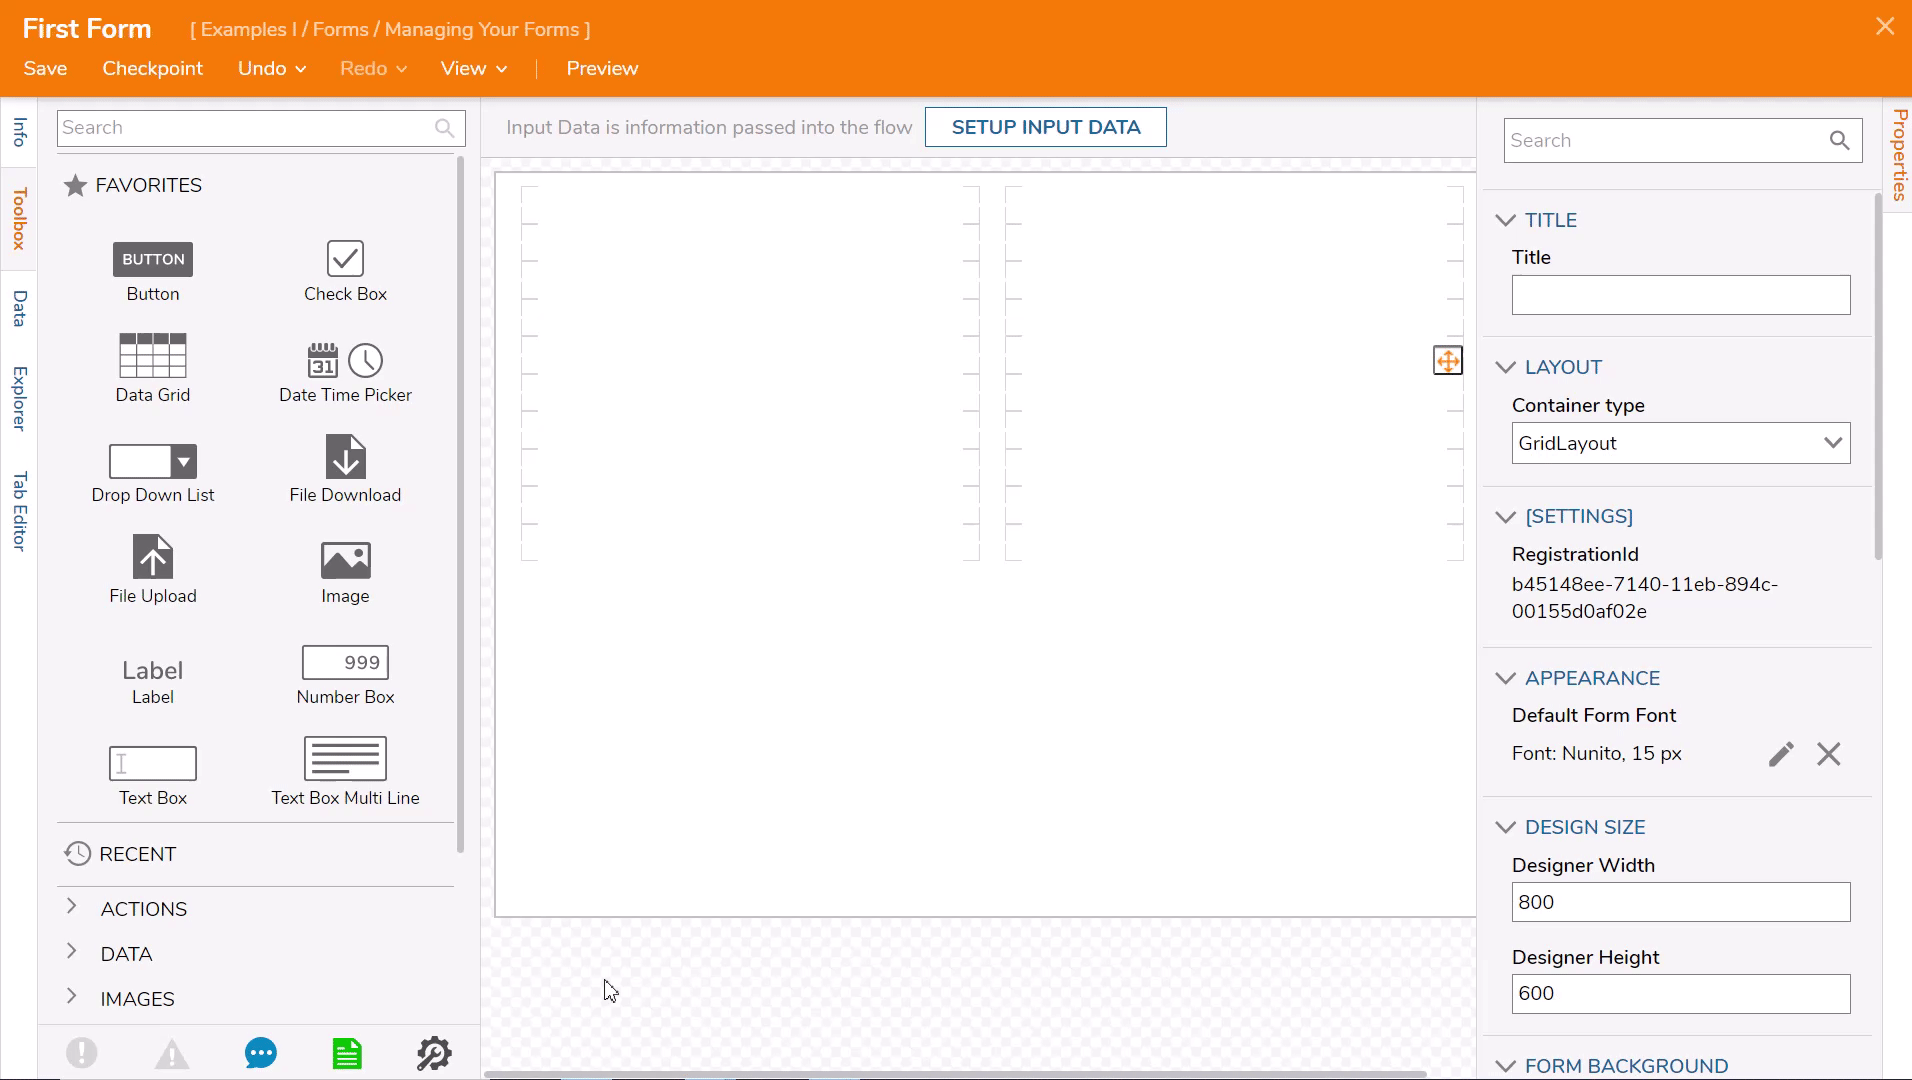
- First, create a Form by selecting CREATE FORM from the Top Action Panel while in a Designer Folder.
- Name the Form and proceed to the Form Designer by clicking CREATE.

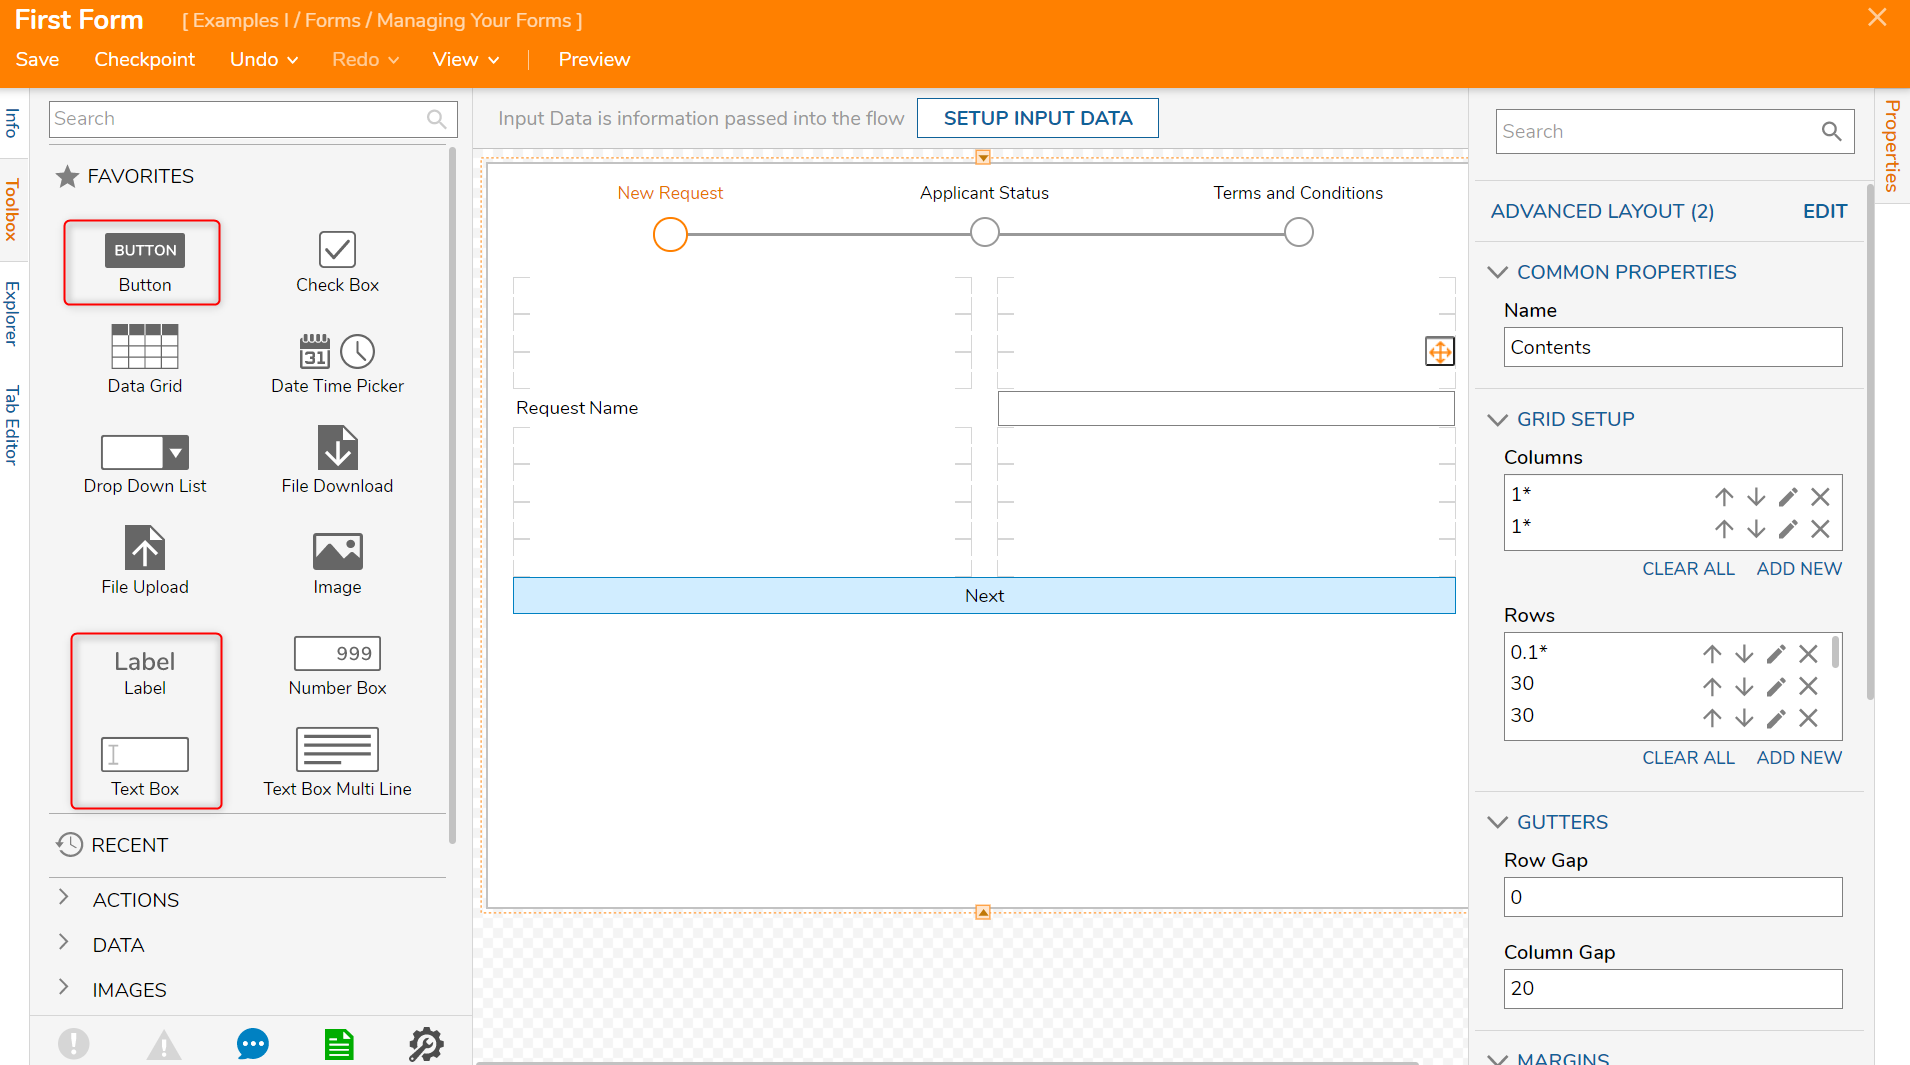
- In the Toolbox tab on the left side, search for Horizontal Timeline or expand the Toolbox > Data category to drag out a Horizontal Timeline. Place on the Form.
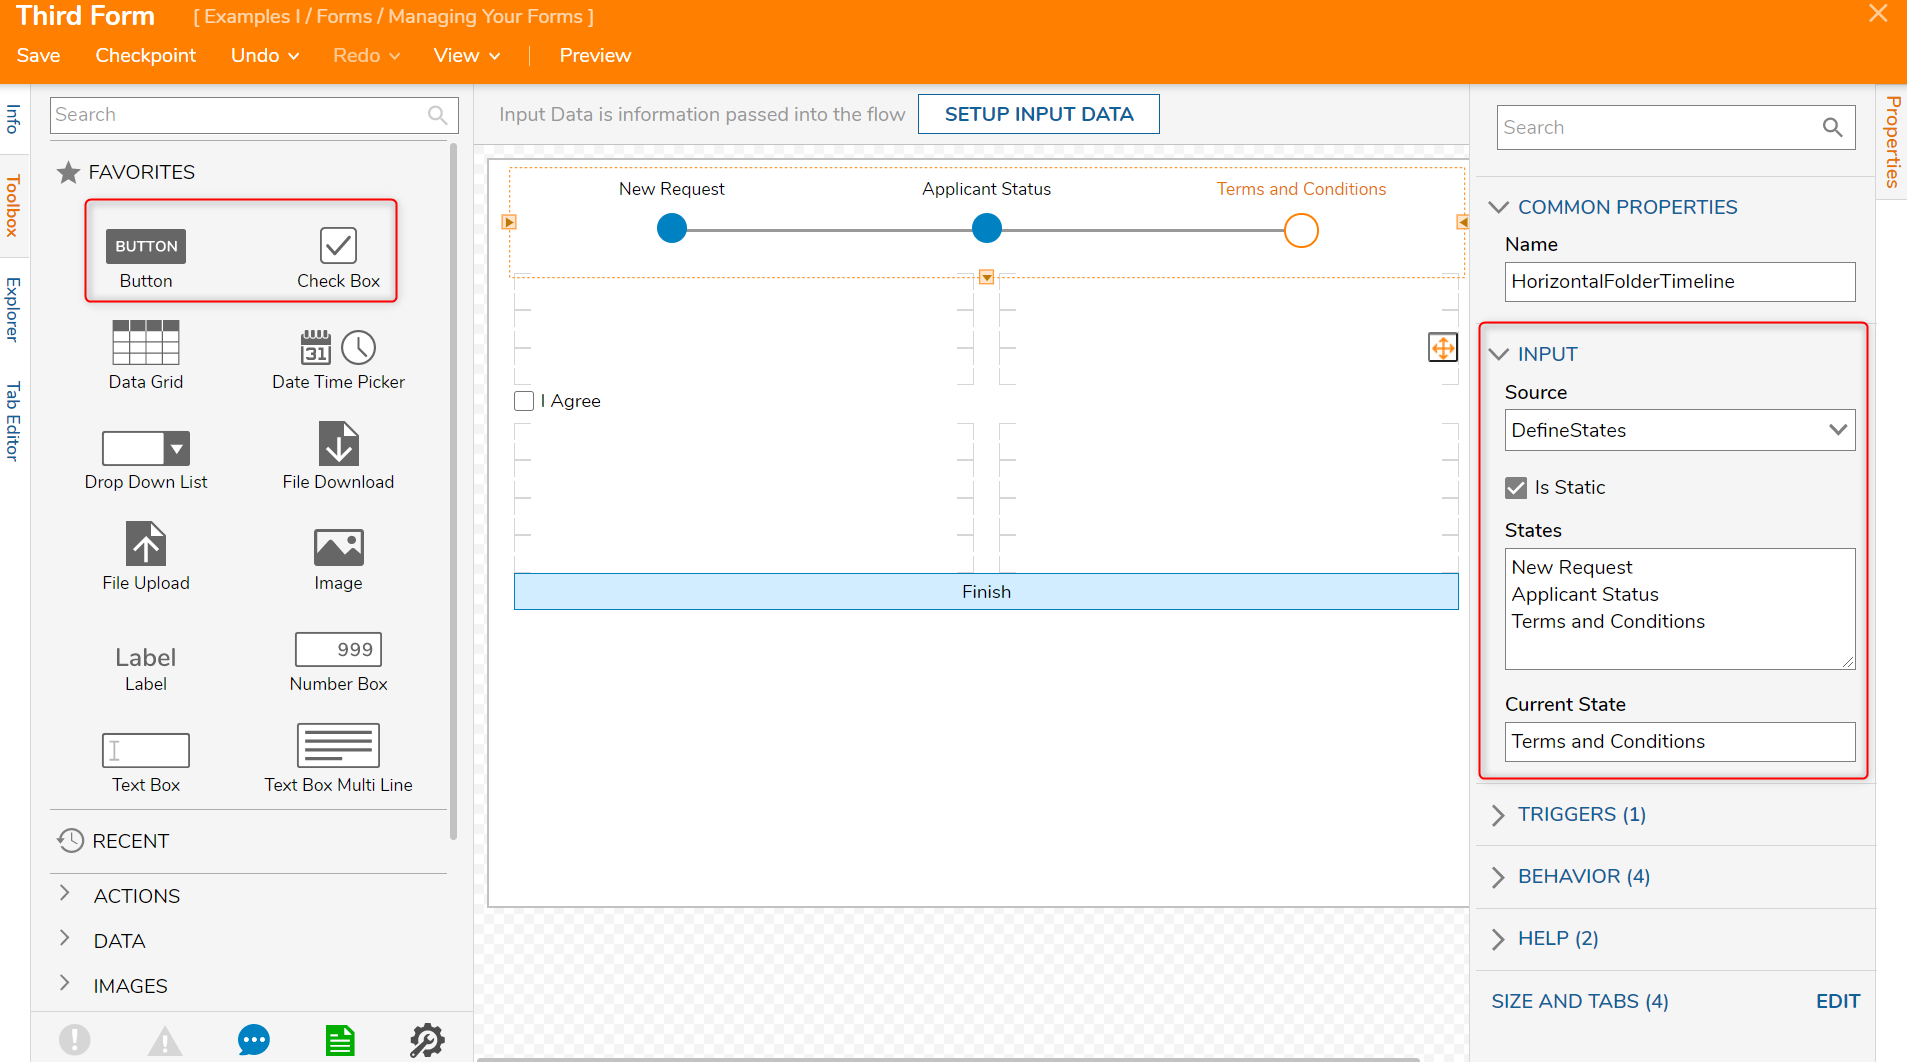
With the Horizontal Timeline selected, change the INPUT > Source to DefineStates in the Properties panel.
Change the boolean Is Static from false to true.
Input New Request, Applicant Status, and Terms and Conditions under INPUT > States.
Next, INPUT > Current State will be New Request. The Current State refers to the step in the submission process the user is currently on; the Current State on the Form will be highlighted in the Horizontal Timeline.

A Label [Request Name], Text Box, and a Button [Next] will be added to the Form [First Form].
Next, Save and Close the Form [First Form].
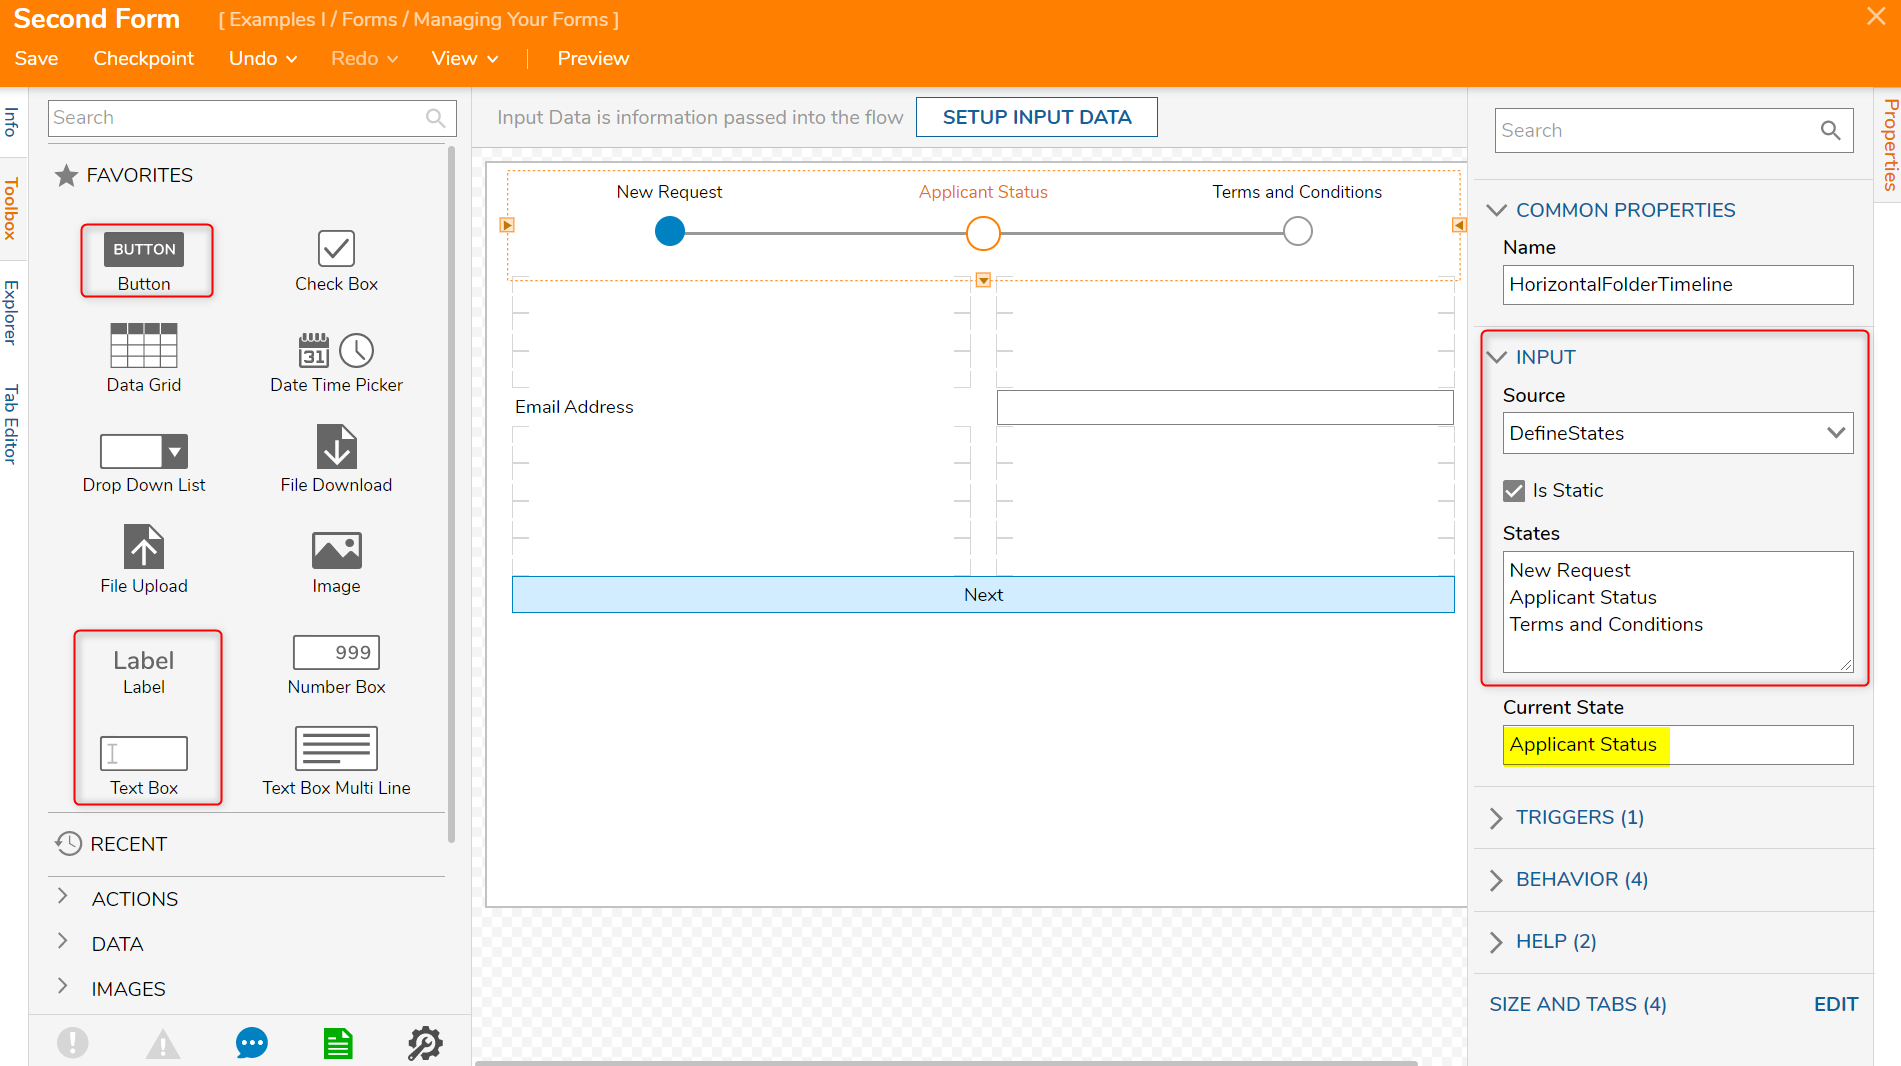
Create a second Form [Second Form] using the previous steps.
When adding the Horizontal Timeline feature, as shown above, the INPUT > States will remain the same.
On this Form [Second Form], the INPUT > Current State will be Applicant Status.
A Label [Email Address], Text Box, and a Button [Next] will be added.
Save and Close.
- Create the third Form [Third Form] using the previous steps.
- When adding the Horizontal Timeline feature, the INPUT > States are the same as above.
- INPUT > Current State will be Terms and Conditions.
- A Check Box [I Agree] and a Button [Finish] will be added.
- Save and Close.
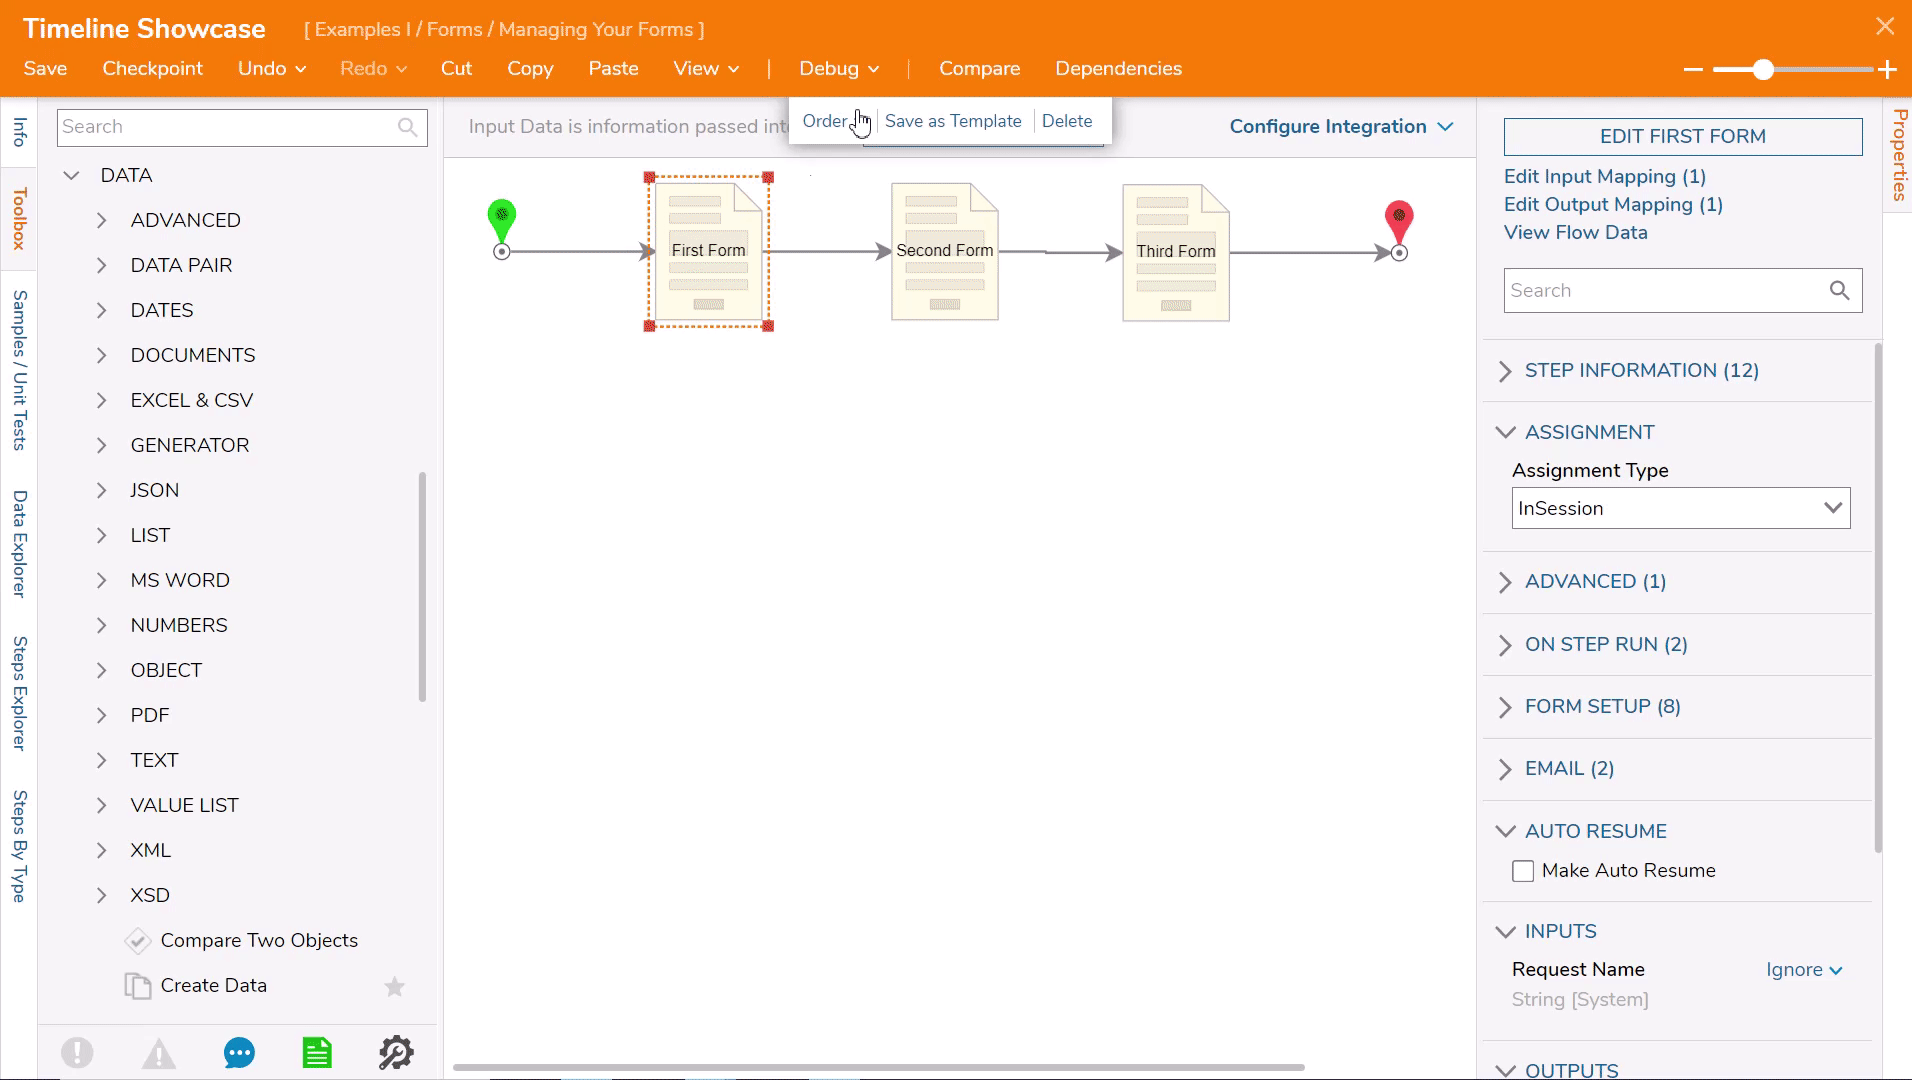
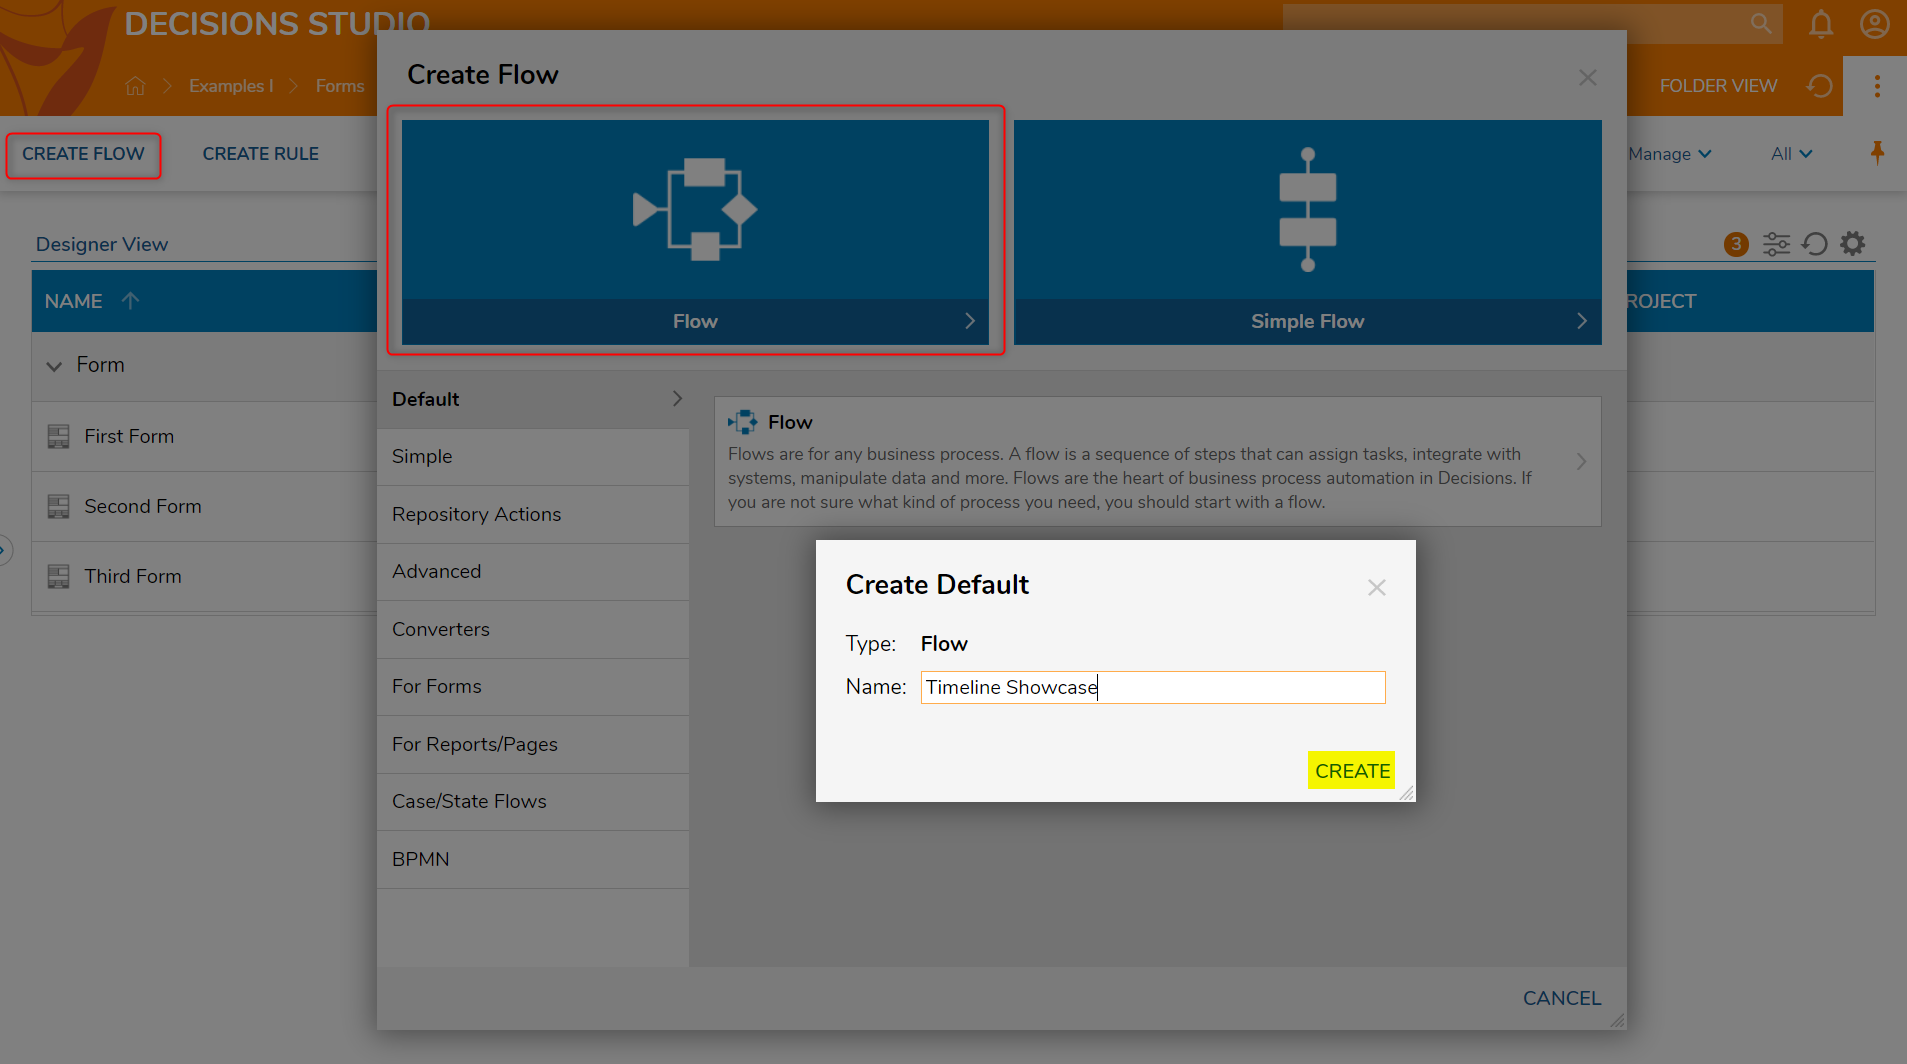
- In the Designer Folder, select CREATE FLOW from the Top Action Panel to create a new flow that will display the recently created forms.
- In the new Flow, add three Add Task steps from the Toolbox > FAVORITE STEPS.
- On each Add Task step, select PICK OR CREATE FORM. Select PICK, toggle RECENT, and repeat until each new Form is shown in the new Flow.
- Connect last Form [Third Form] to the End step.
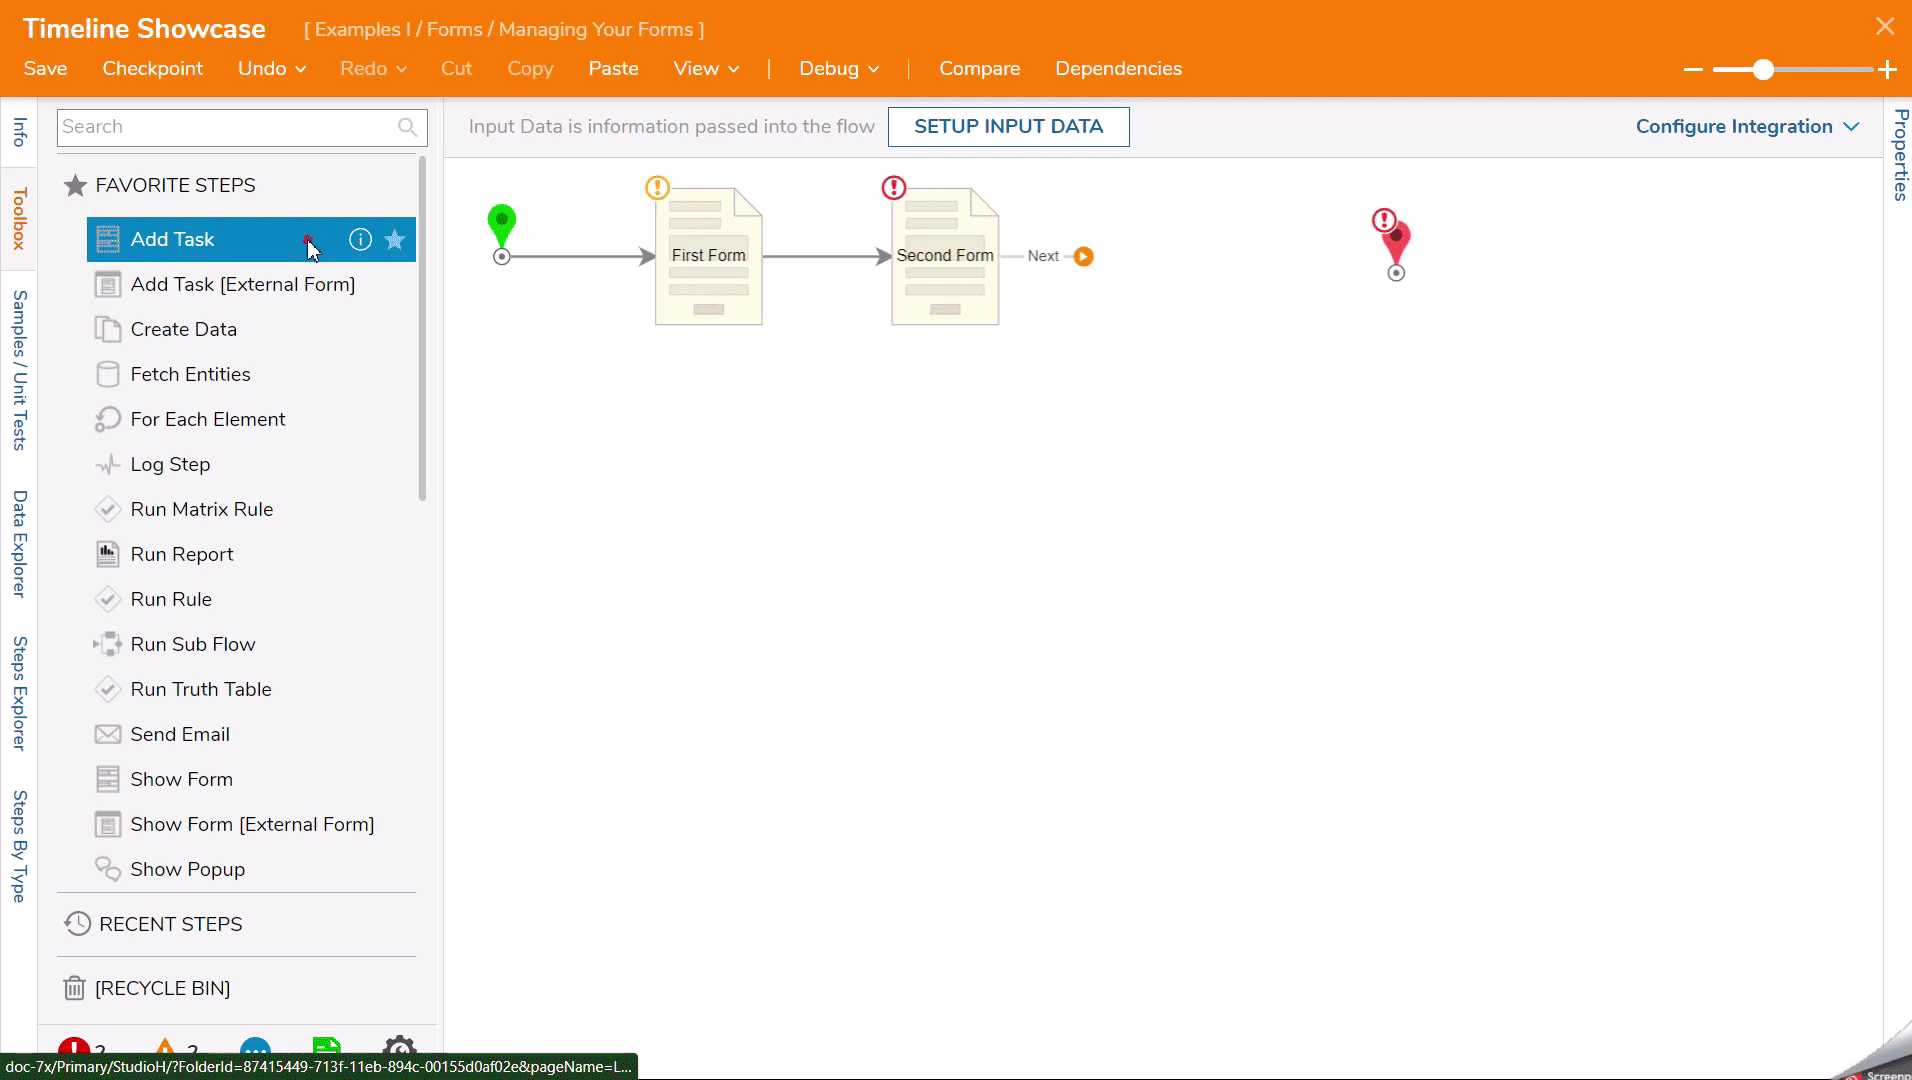
- Set the INPUTS on each Form to an Ignore mapping.

Debug
- Save and select Debug from the Top Action Panel.
- Click START DEBUGGING.
- Input a Request Name and select Next. On the first Form, type 'Vacation'.
- Next, input an Email Address and select Next. On the second Form, type "admin@decisions.com".
- Lastly, change the boolean I Agree from false to true and click Finish.
- The Flow runs through the Debugger successfully.