Overview
Users can save executed Forms by combining Flow Logic with a created Form. Currently, Users can save data from executed Forms as a PDF or save an entire completed Form with data and formatting as an image. Once a Form is completed, various Flow steps can be added, depending on the desired use case. For example, Users who wish to save specific data from a completed Form can use the Merge Text Editor to choose which Fields will be displayed for End Users.
There are two Form controls available to help Users view and save completed Forms as a PDF. The Document Viewer Form Control enables Users to view and save the completed Form as a PDF within Decisions. Users must configure the control with the same data value as the completed Form for it to display correctly. The File Download Form Control enables End Users to download the completed Form via the File System. File Download is available as a link or button.
Users can save the contents of a completed Form as an image by enabling the Include Completed Form Image checkbox on the Form. This feature is available for Users with v9.5 and above.
This article walks through saving a completed Form as an image and saving data from a completed Form. Both sections include examples with a step-by-step walkthrough of building a Form as well as the Flow Logic required to accomplish each desired outcome.
Saving a Completed Form as an Image
The following example will discuss how to save a completed Form as an Image, using a newly created Form. This Form will include four text fields where End Users will enter their contact information.
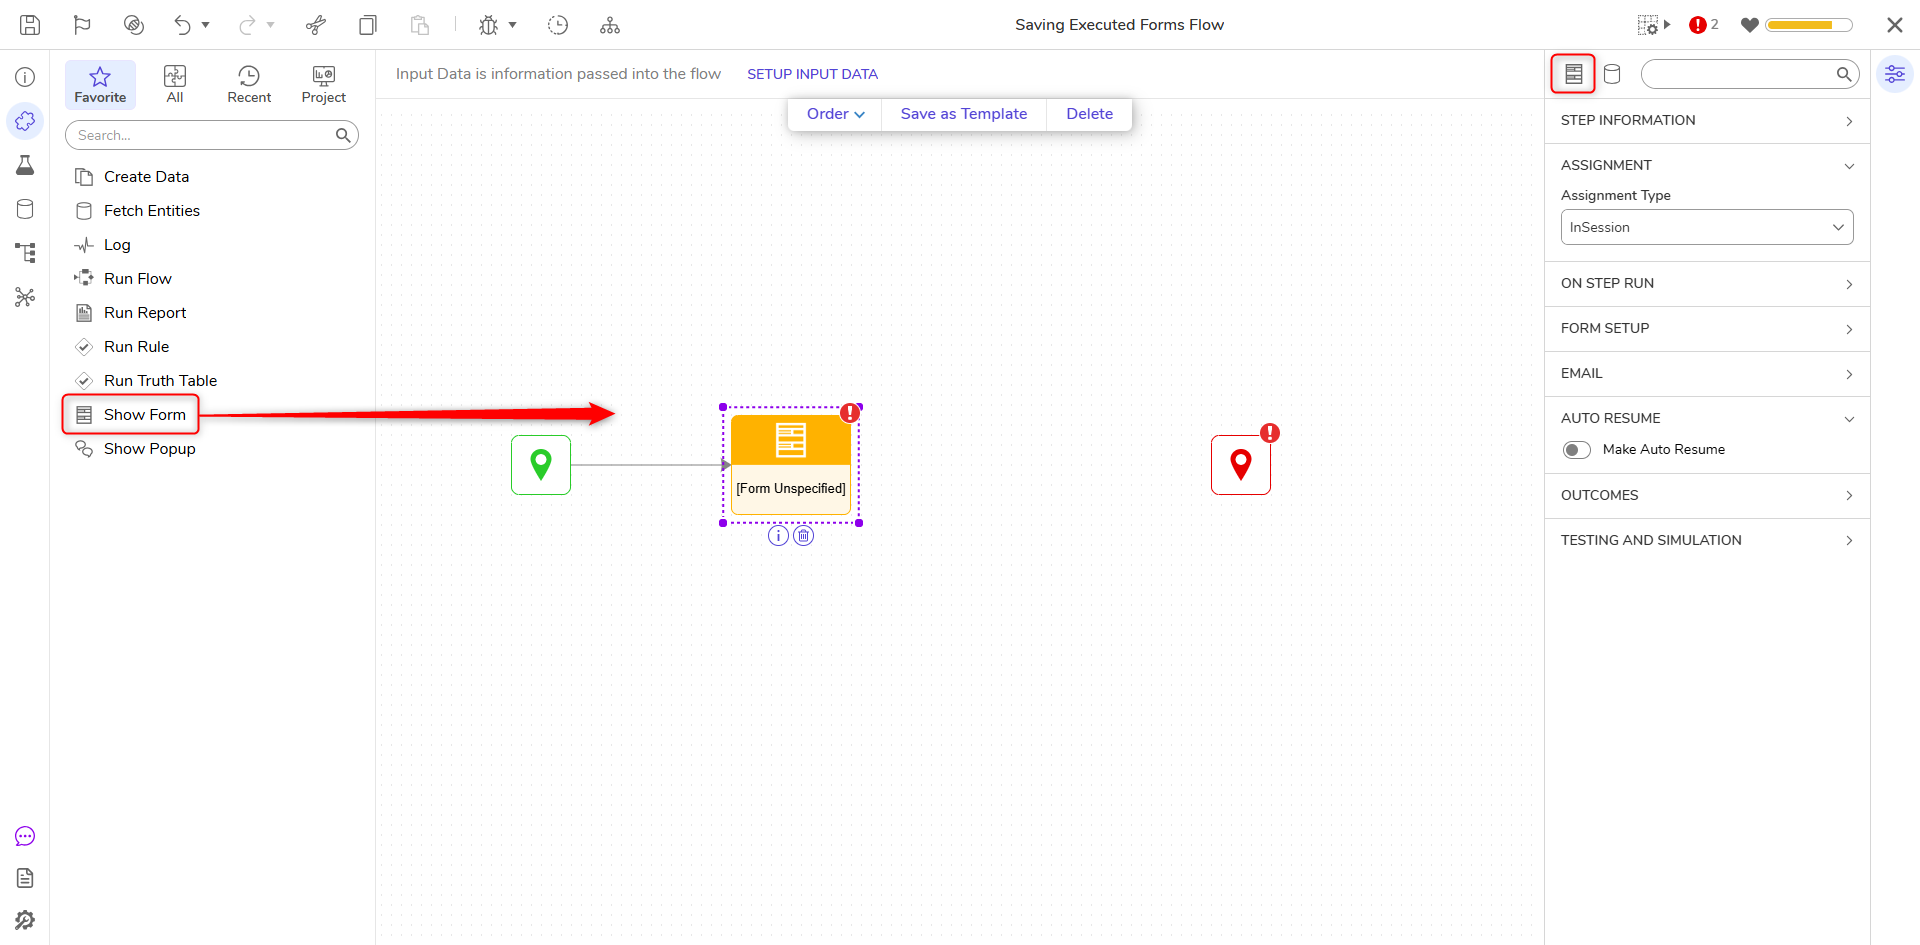
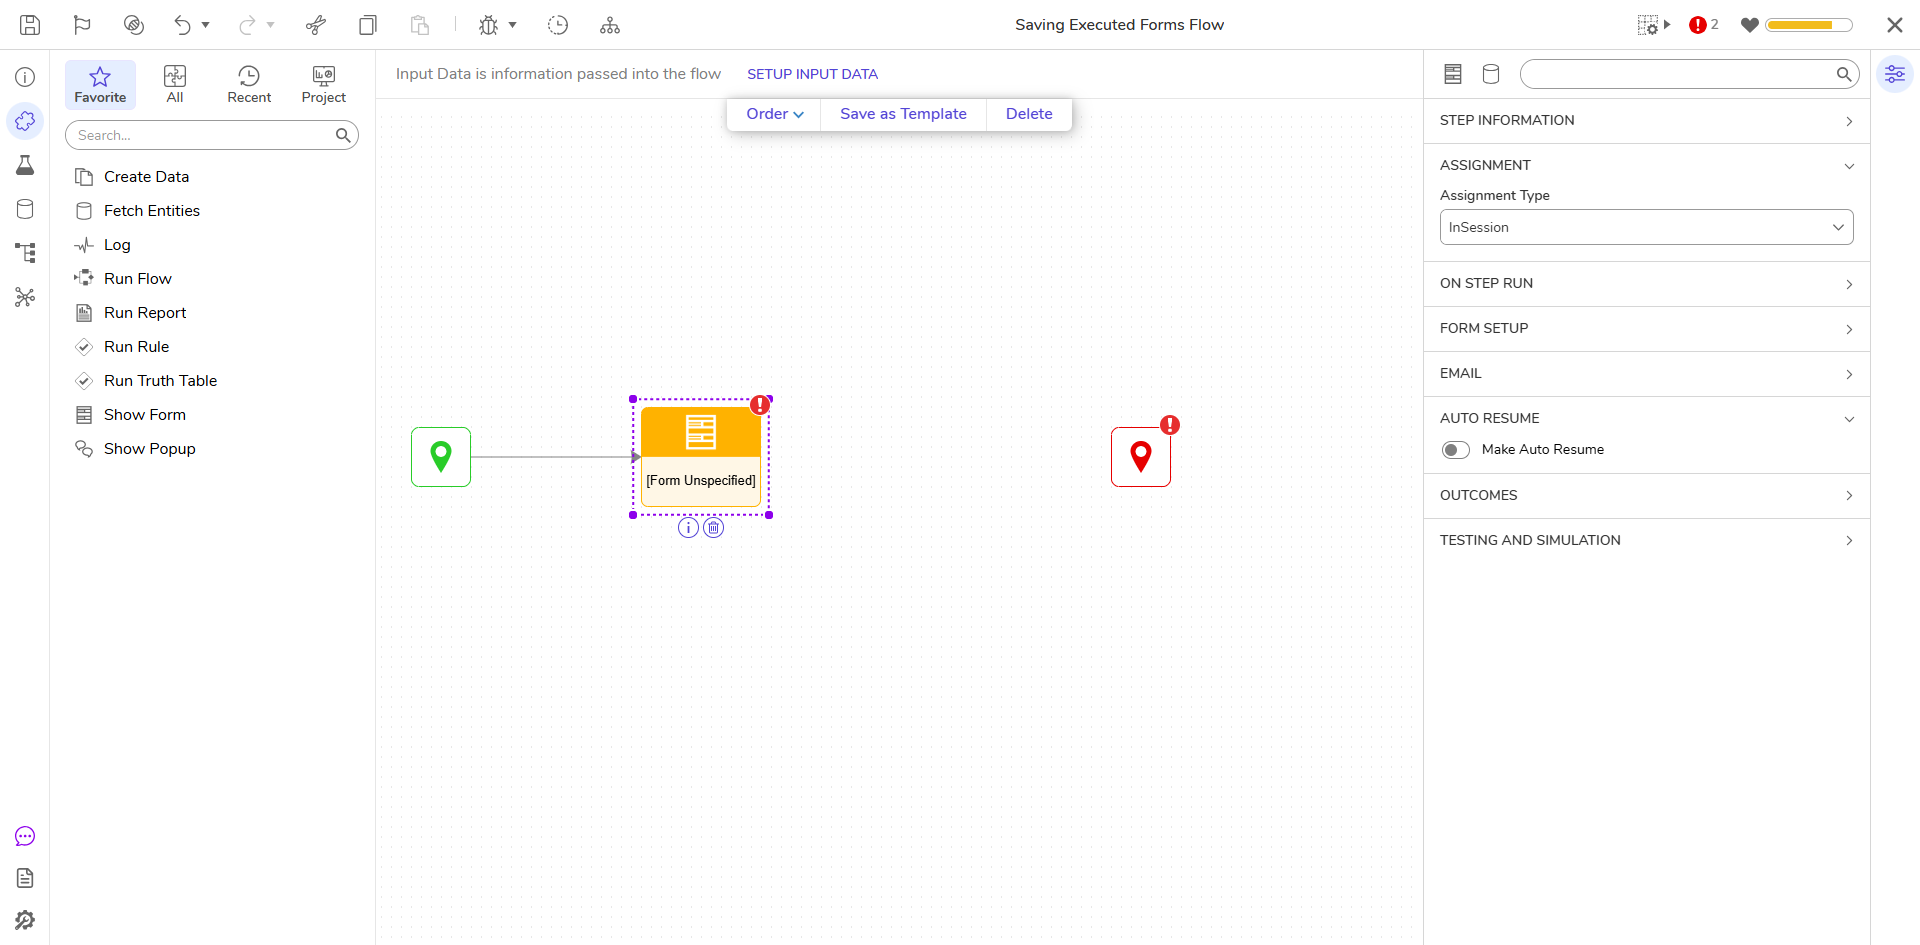
- Drag a Show Form Step to the workspace and attach it to the Start Step.
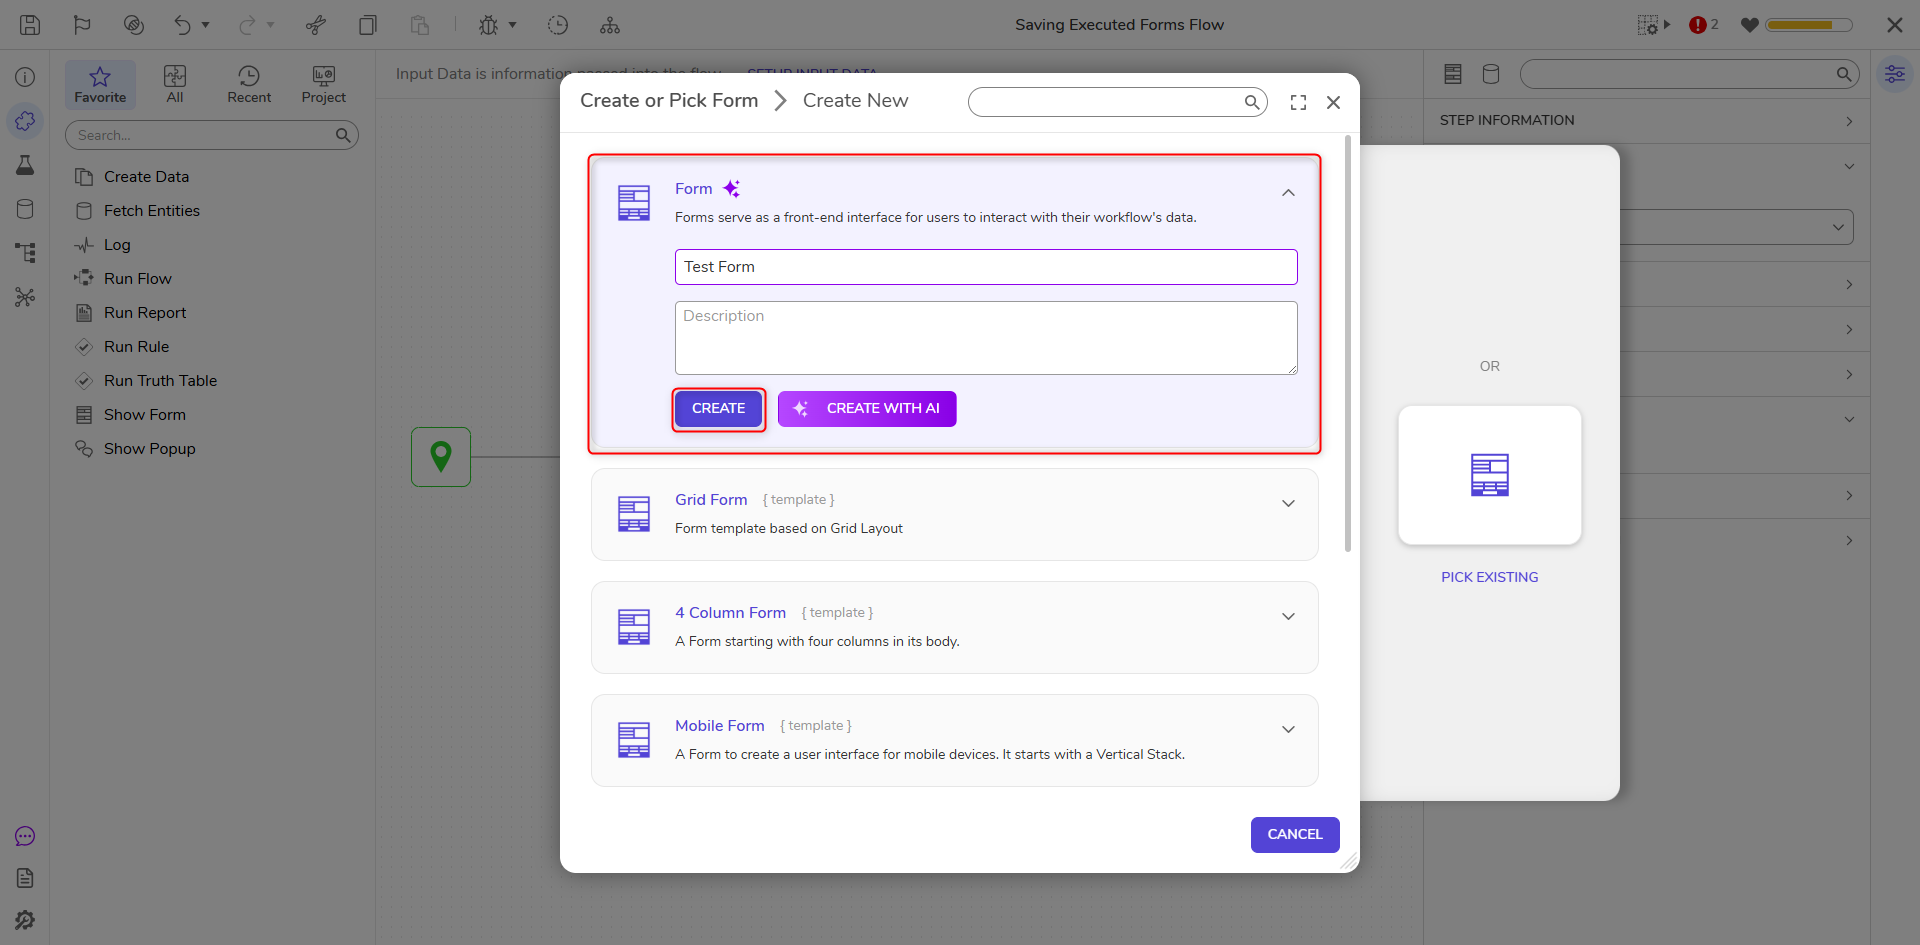
- Click Create New and name the Form Contact Information.
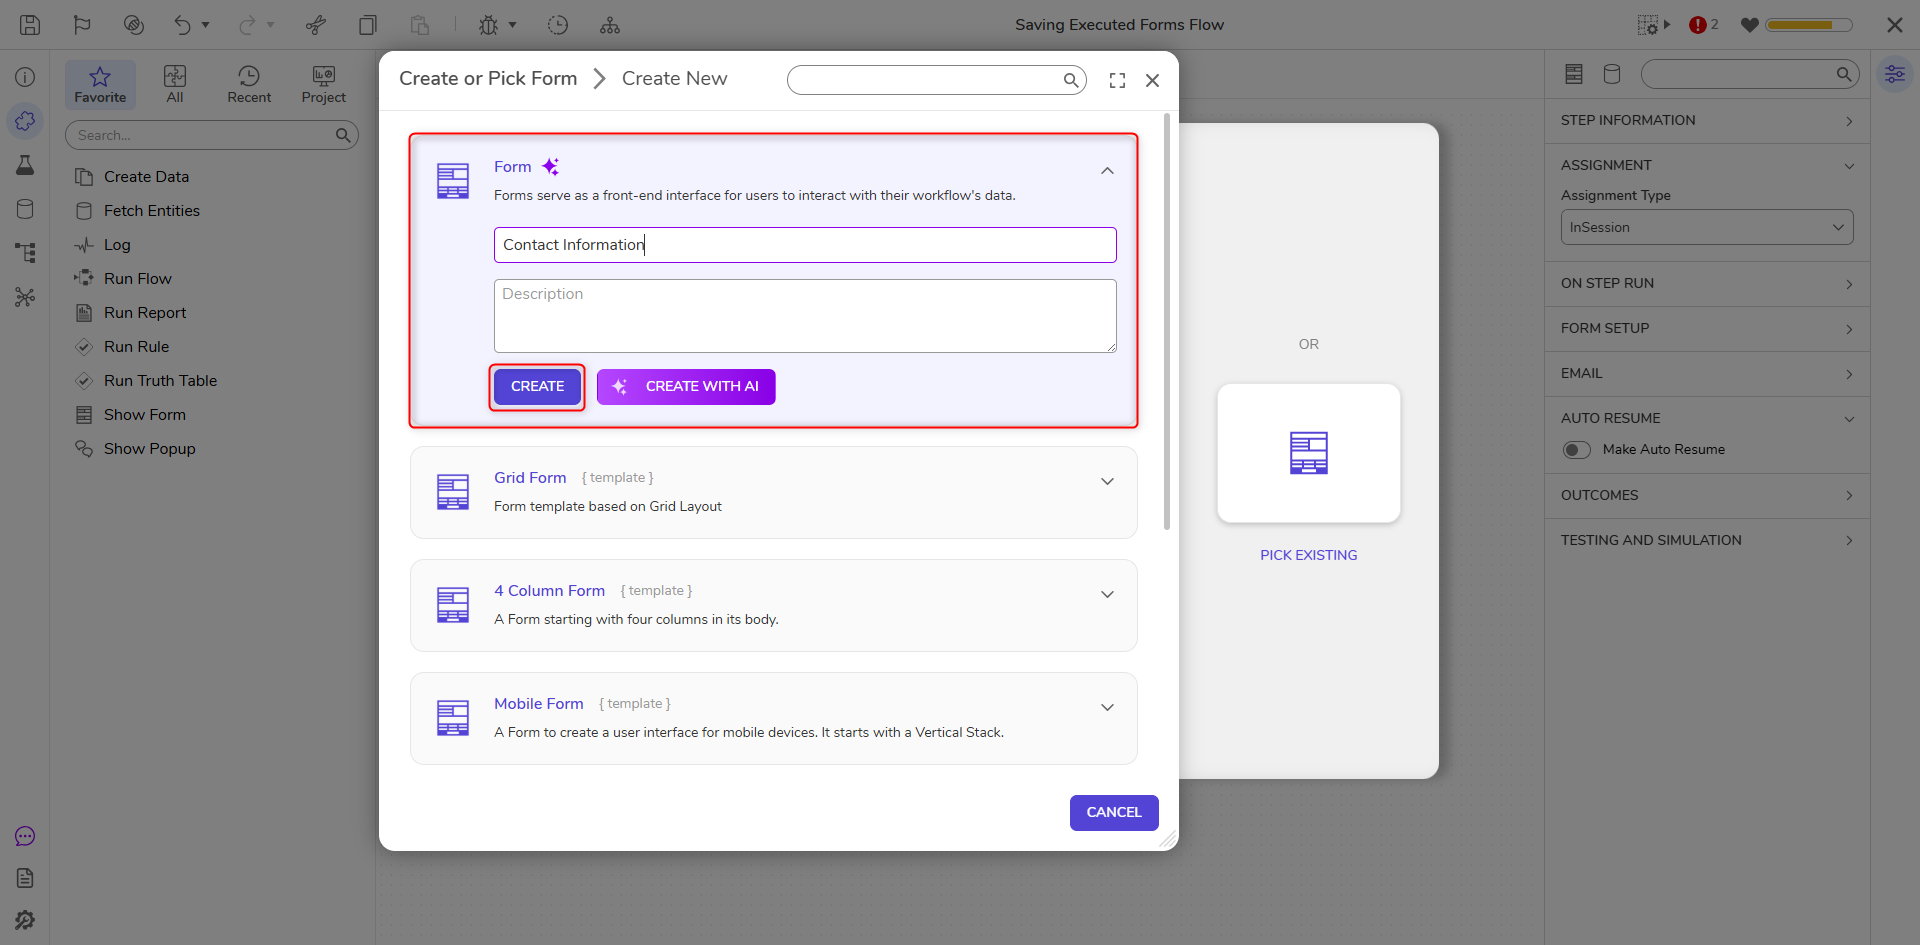
- Click Create New and name the Form Contact Information.
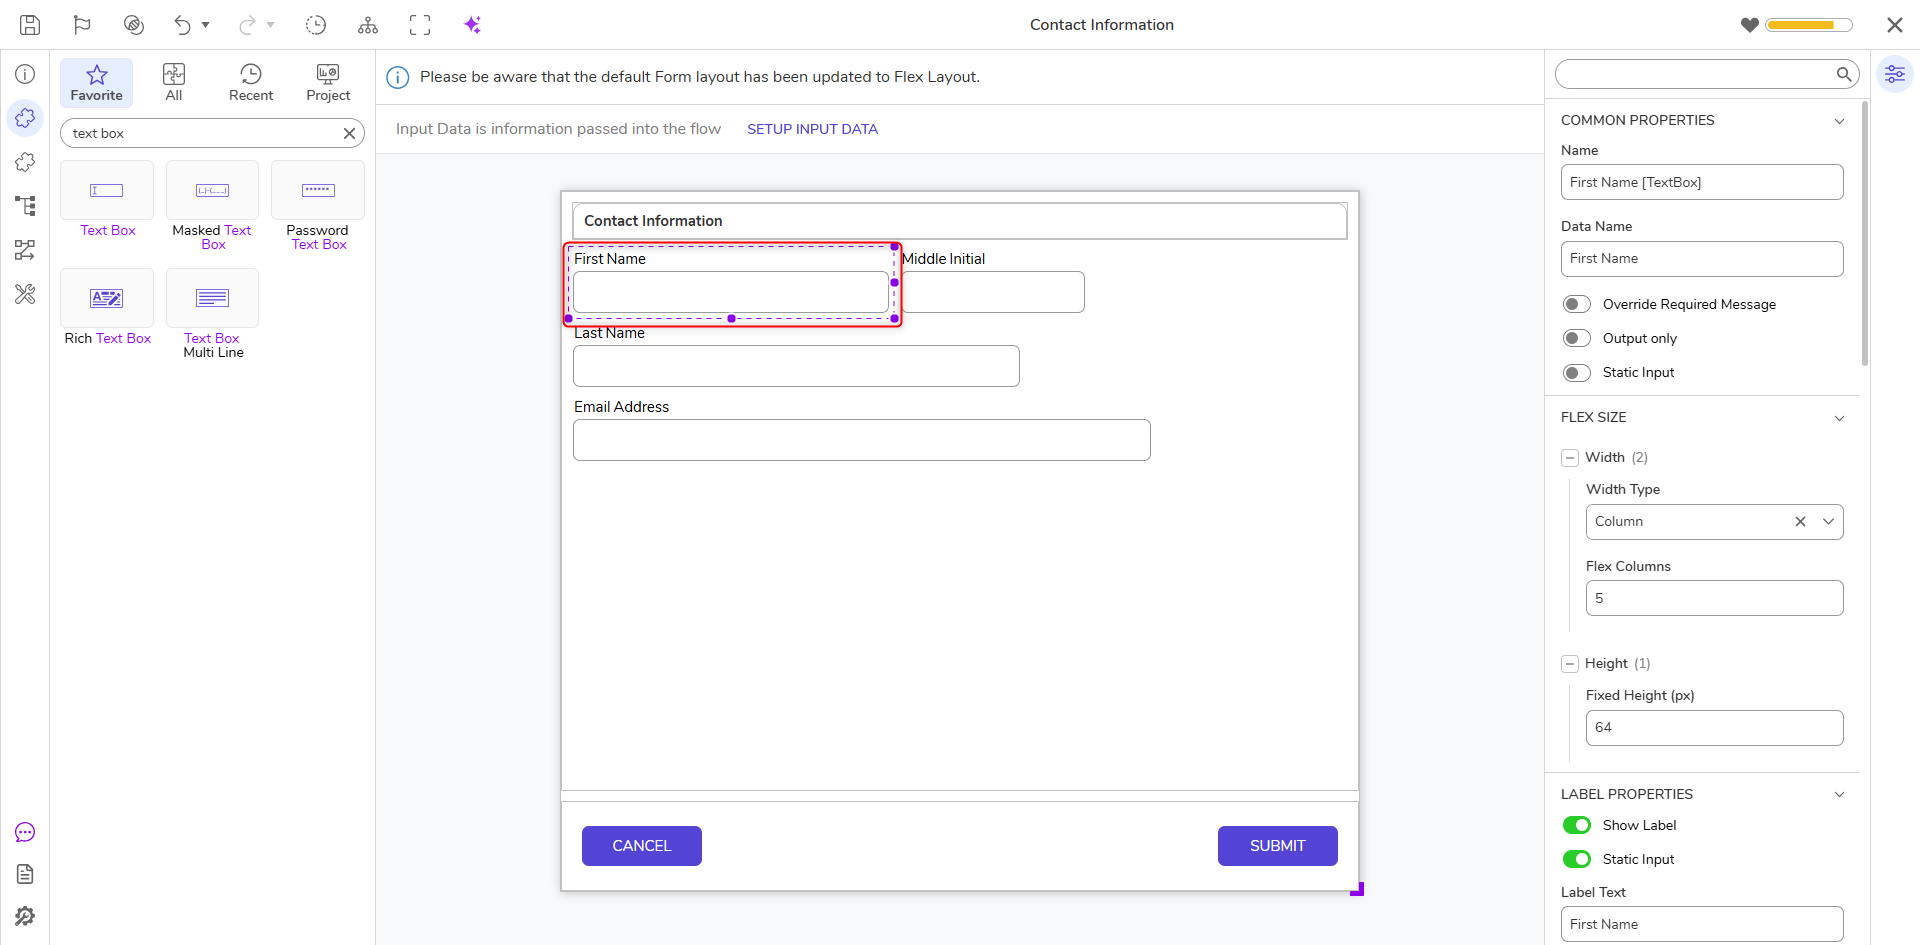
- From here, add four text boxes to the Form and label them as: First Name, Middle Initial, Last Name, and Email Address. Add a Button and name it Submit before saving and closing the Form.
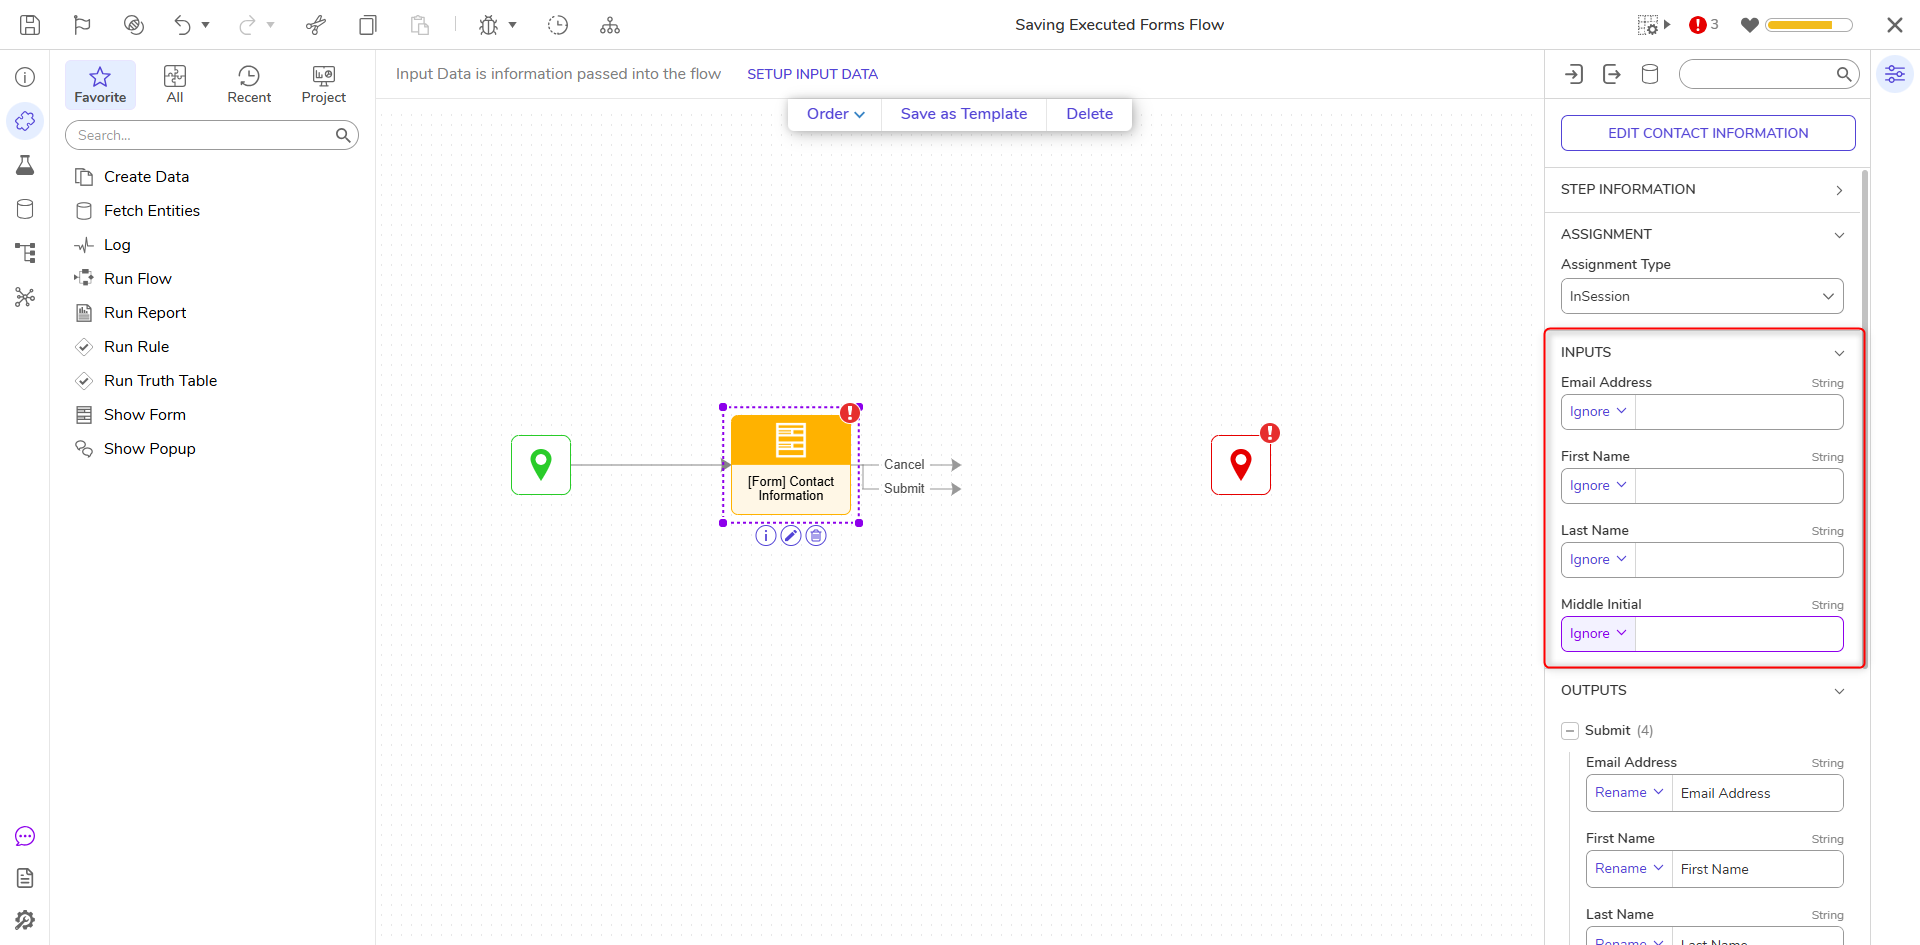
- Navigate back to the Flow and set all the Inputs on the Form to Ignore.
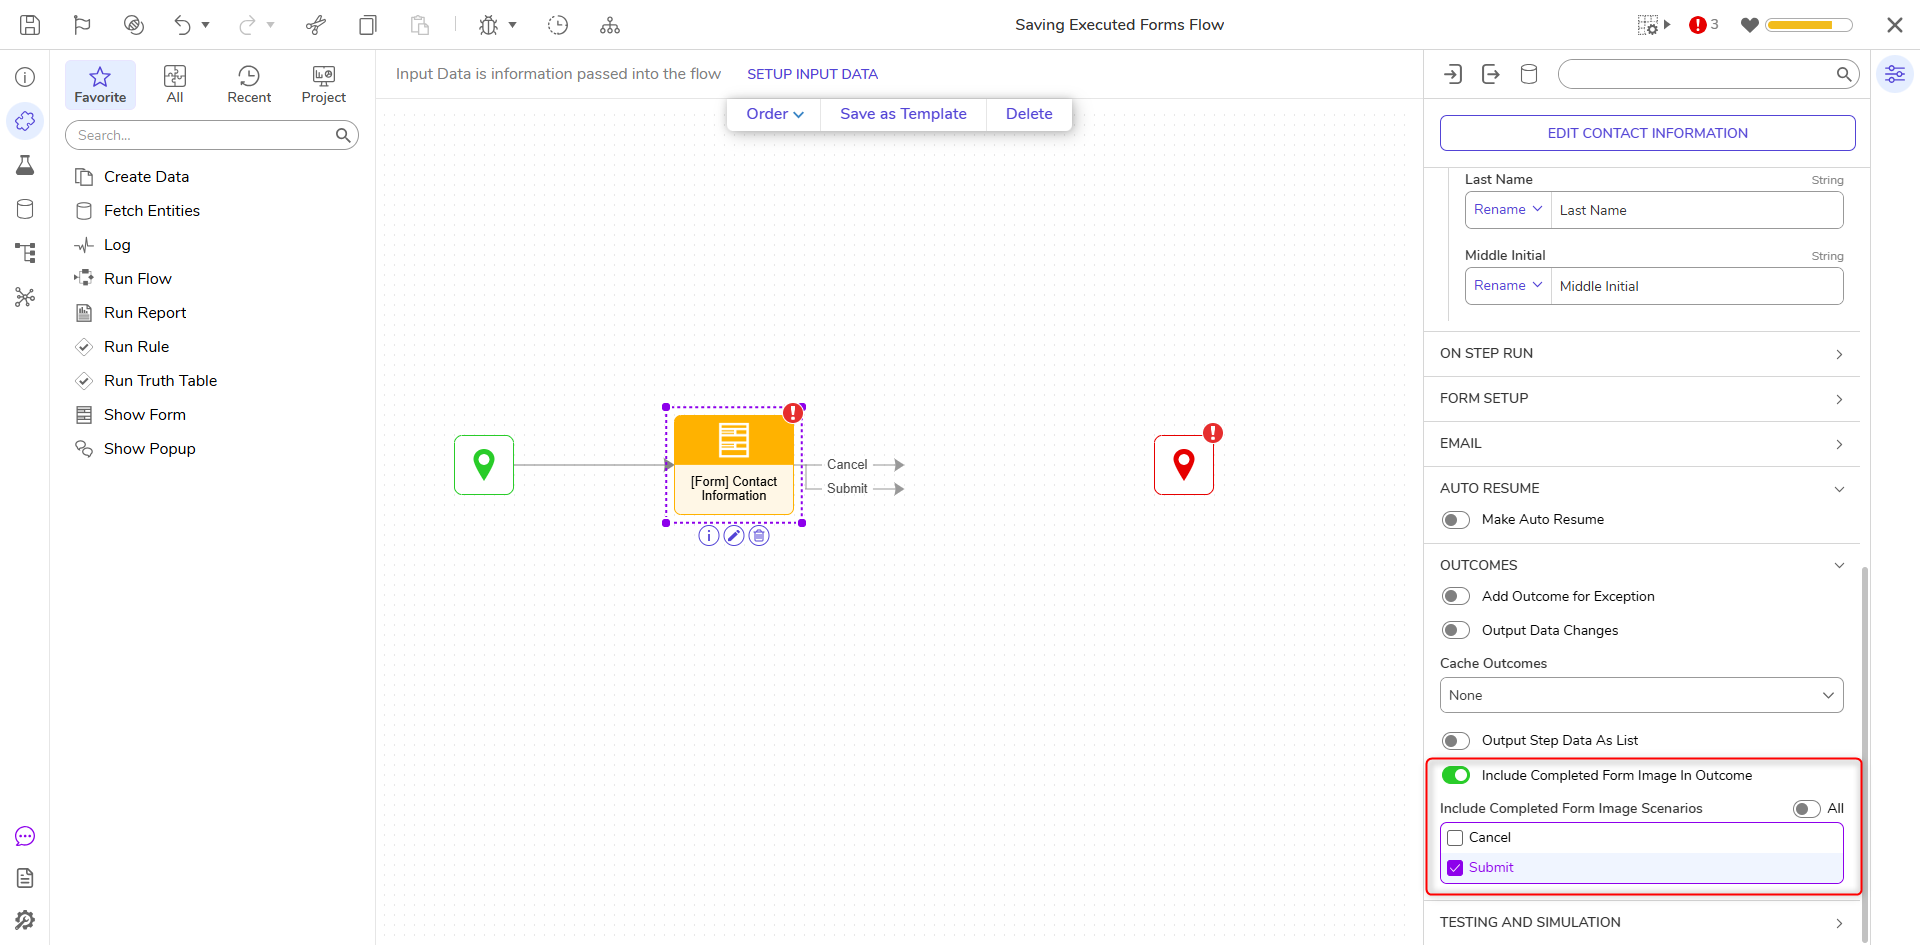
- Scroll down to Outcomes and click the checkbox next to Include Completed Form Image in Outcome.
- This action will populate a new checkbox with the name of the outcome button (Submit). Click the checkbox. This will enable Users to save the Form after clicking Submit.
- This action will populate a new checkbox with the name of the outcome button (Submit). Click the checkbox. This will enable Users to save the Form after clicking Submit.
- Drag another Show Form Step to the workspace and connect it to the Submit Outcome.
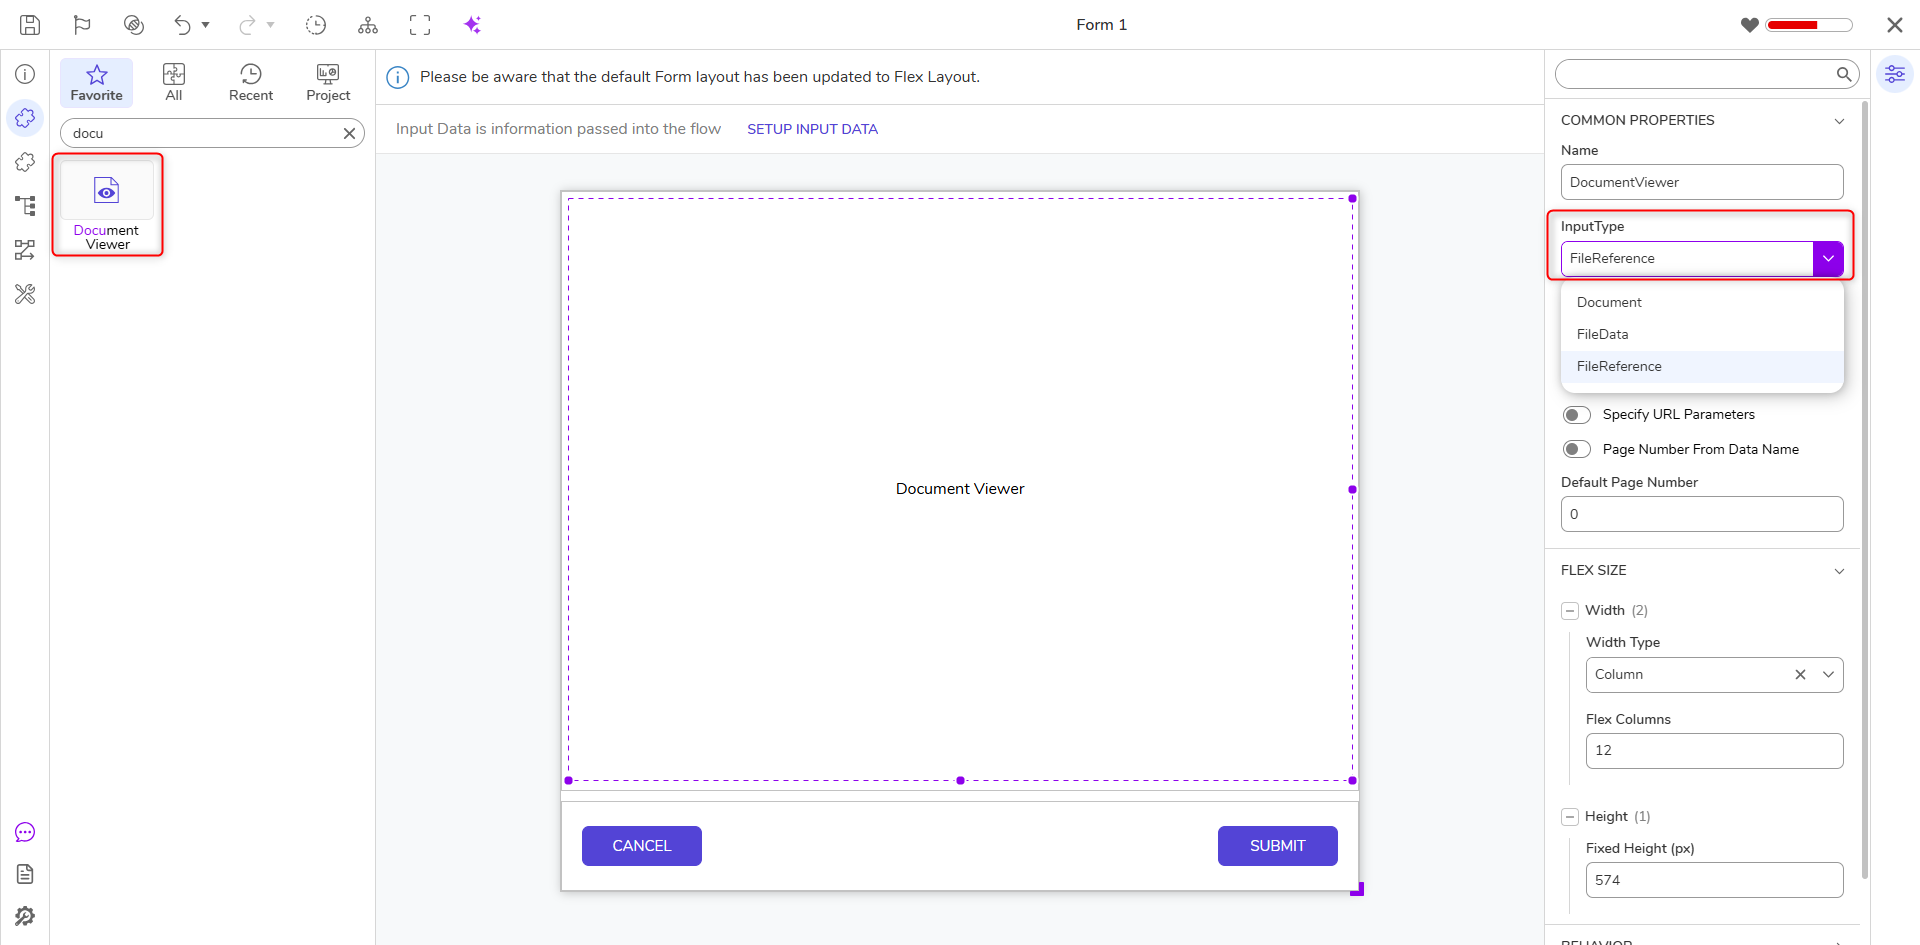
- Create a new Form and add a Document Viewer Control to it. Change the InputType to File Reference to match the Completed Form Output in the previous Step.
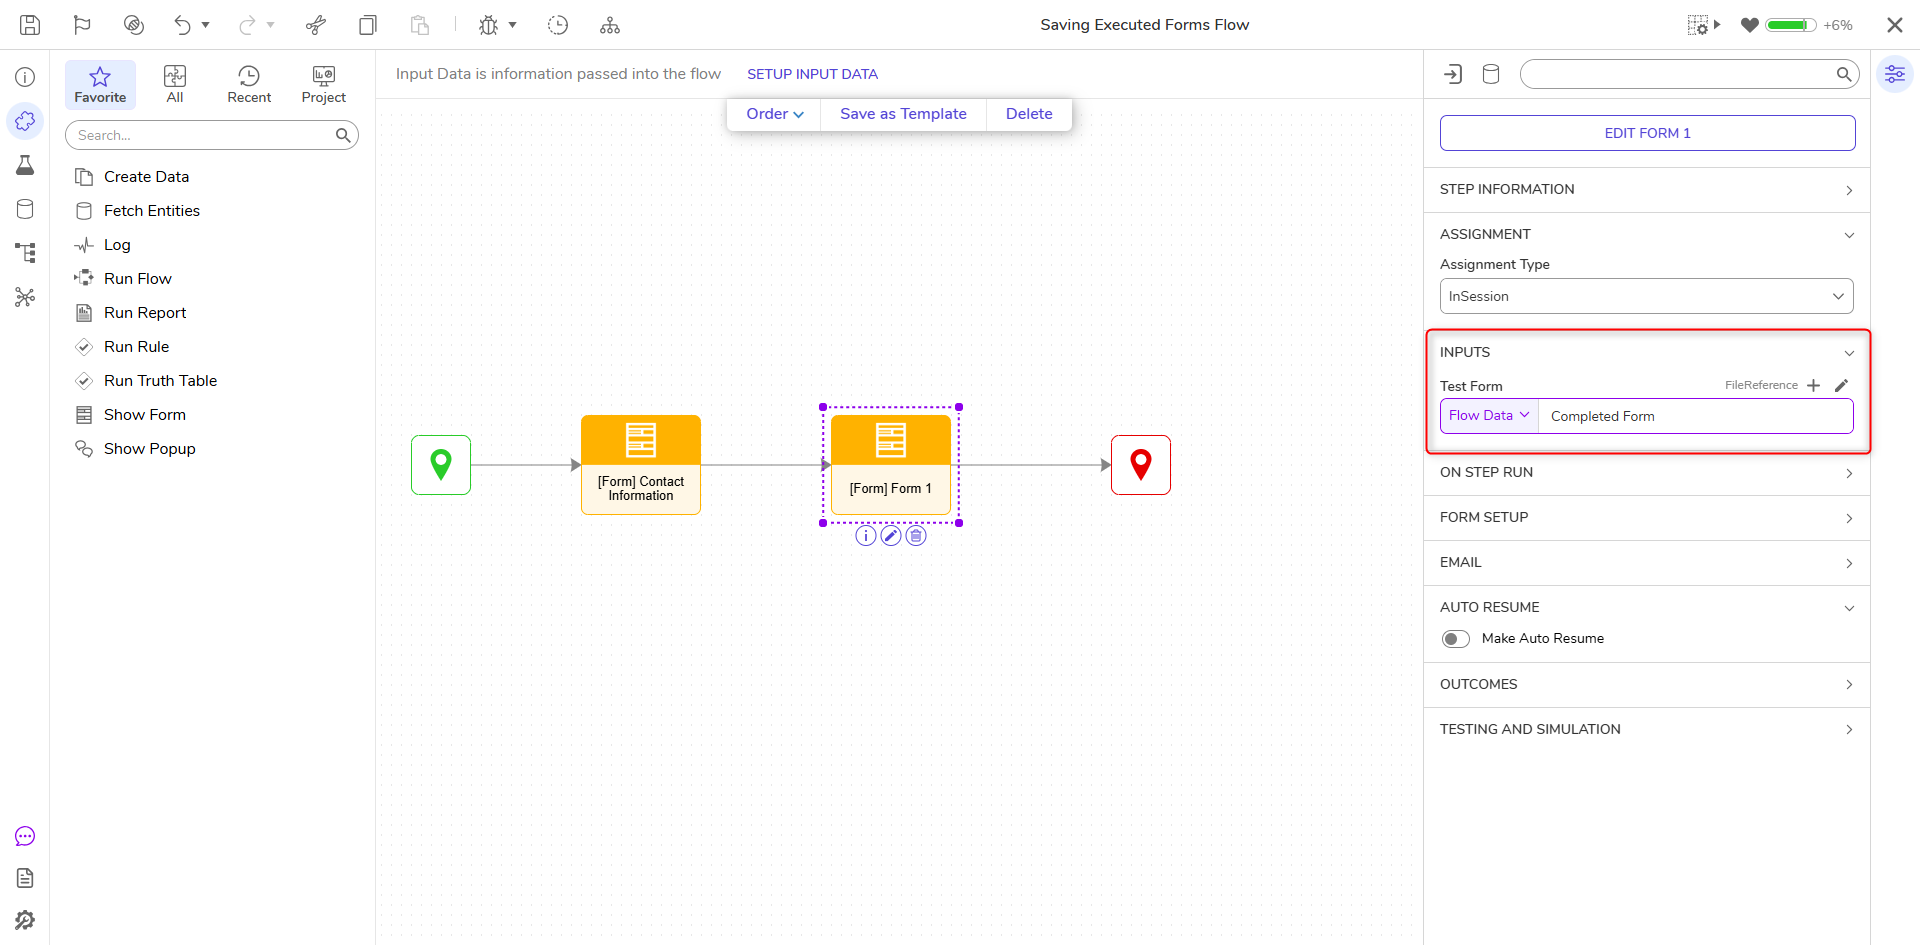
- Save and close the Form. Map the Completed Form (File Reference) to the Input.
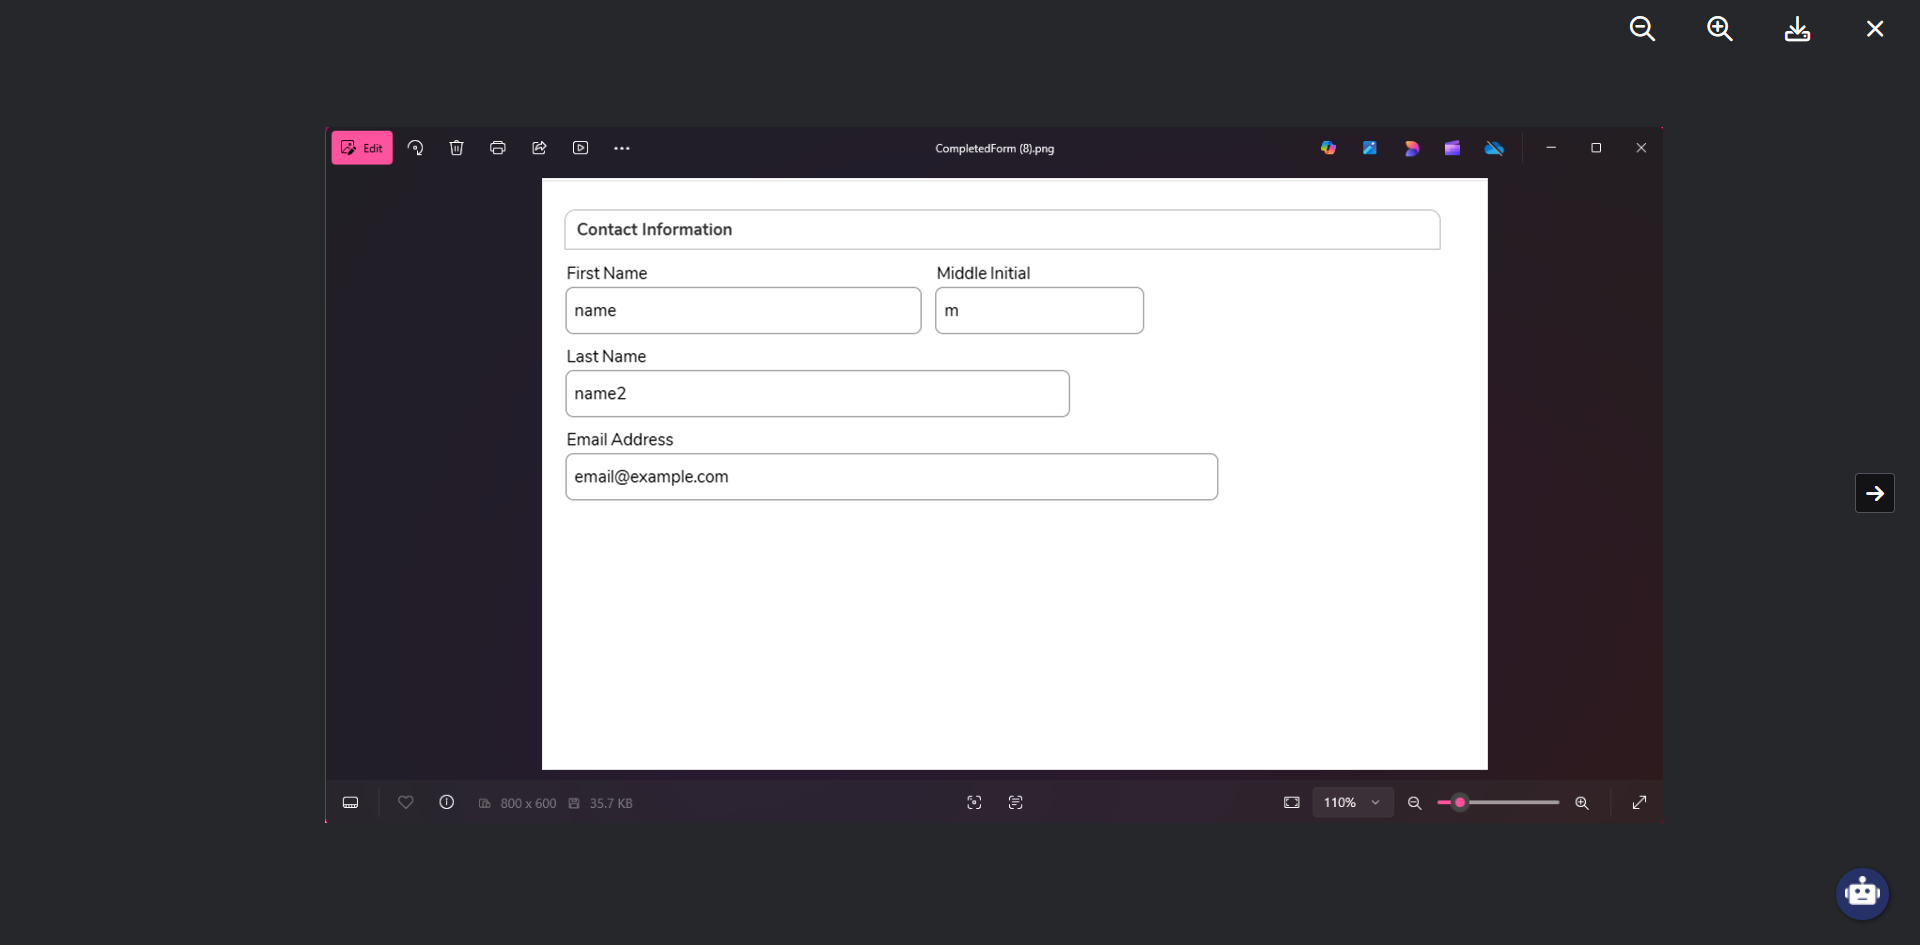
- Click Debug. The Flow will generate an image of the completed Form.
- Users can enable downloading by adding a File Download Form Control to the bottom of the Form. This can be utilized as a button or link, and Users can customize how the file is downloaded in the Properties Panel.
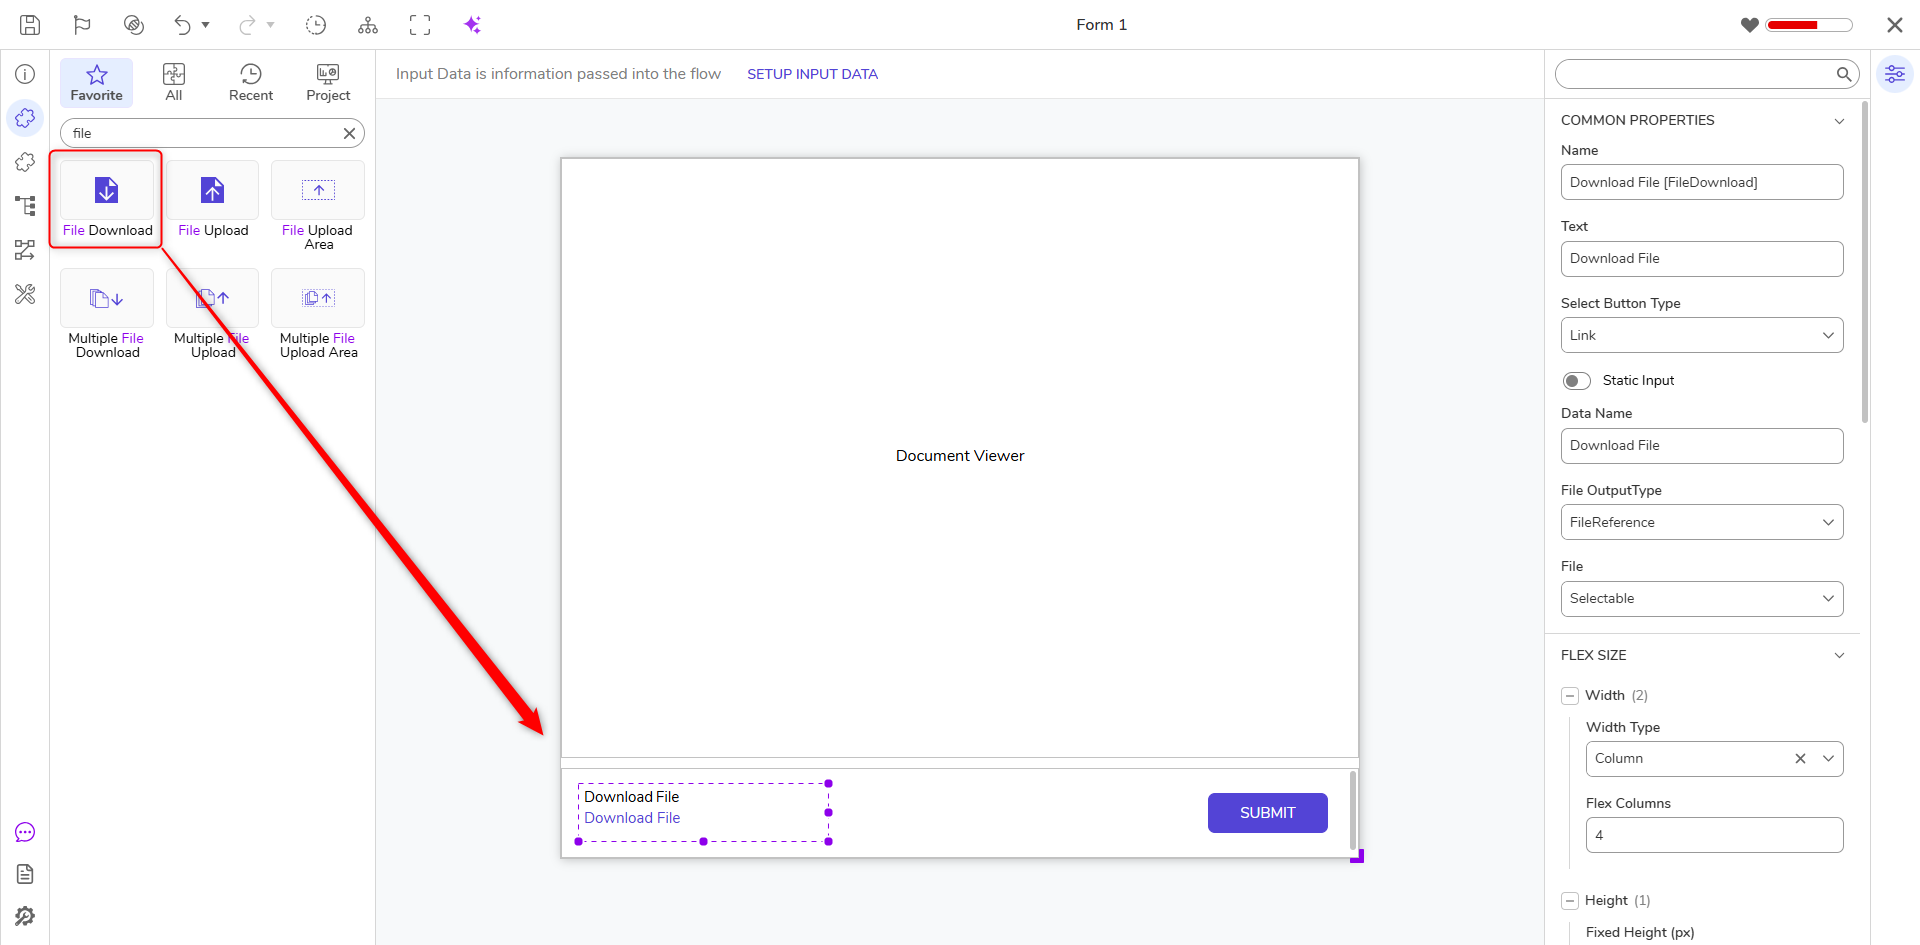
- Ensure the File OutputType is mapped to the same value as the completed Form (FileReference) before saving and closing the Form.
- Click Debug again. The Form can now be downloaded and saved to the File System.
- Users can download the image and view it in their File system.
Saving Data from a Completed Form
The following example demonstrates how to save data from a completed Form. This example requires a similar format to the previous example, but does not require the same properties.
- Users will first need to create a Flow and connect a Show Form Step to the Start Step on the workspace.
- From here, select Pick or Create Form. Choose a name for the Form and click Create.
- From here, select Pick or Create Form. Choose a name for the Form and click Create.
- In the new Form, add desired controls to the workspace. Four textboxes are added to capture an End User's First Name, Middle Initial, Last Name, and Email Address. A Header Container can also be added to display the type of Form. In this example, the Form is named Contact Information.

- Once all the desired fields are added to the Form. Add a button and name it Submit. Users will click this button to submit the Form.
- Once the Form is completed, save the Form and navigate back to Flow.
- From here, set all the inputs on the Form to Ignore, then connect the outcome to a Create Data Step.
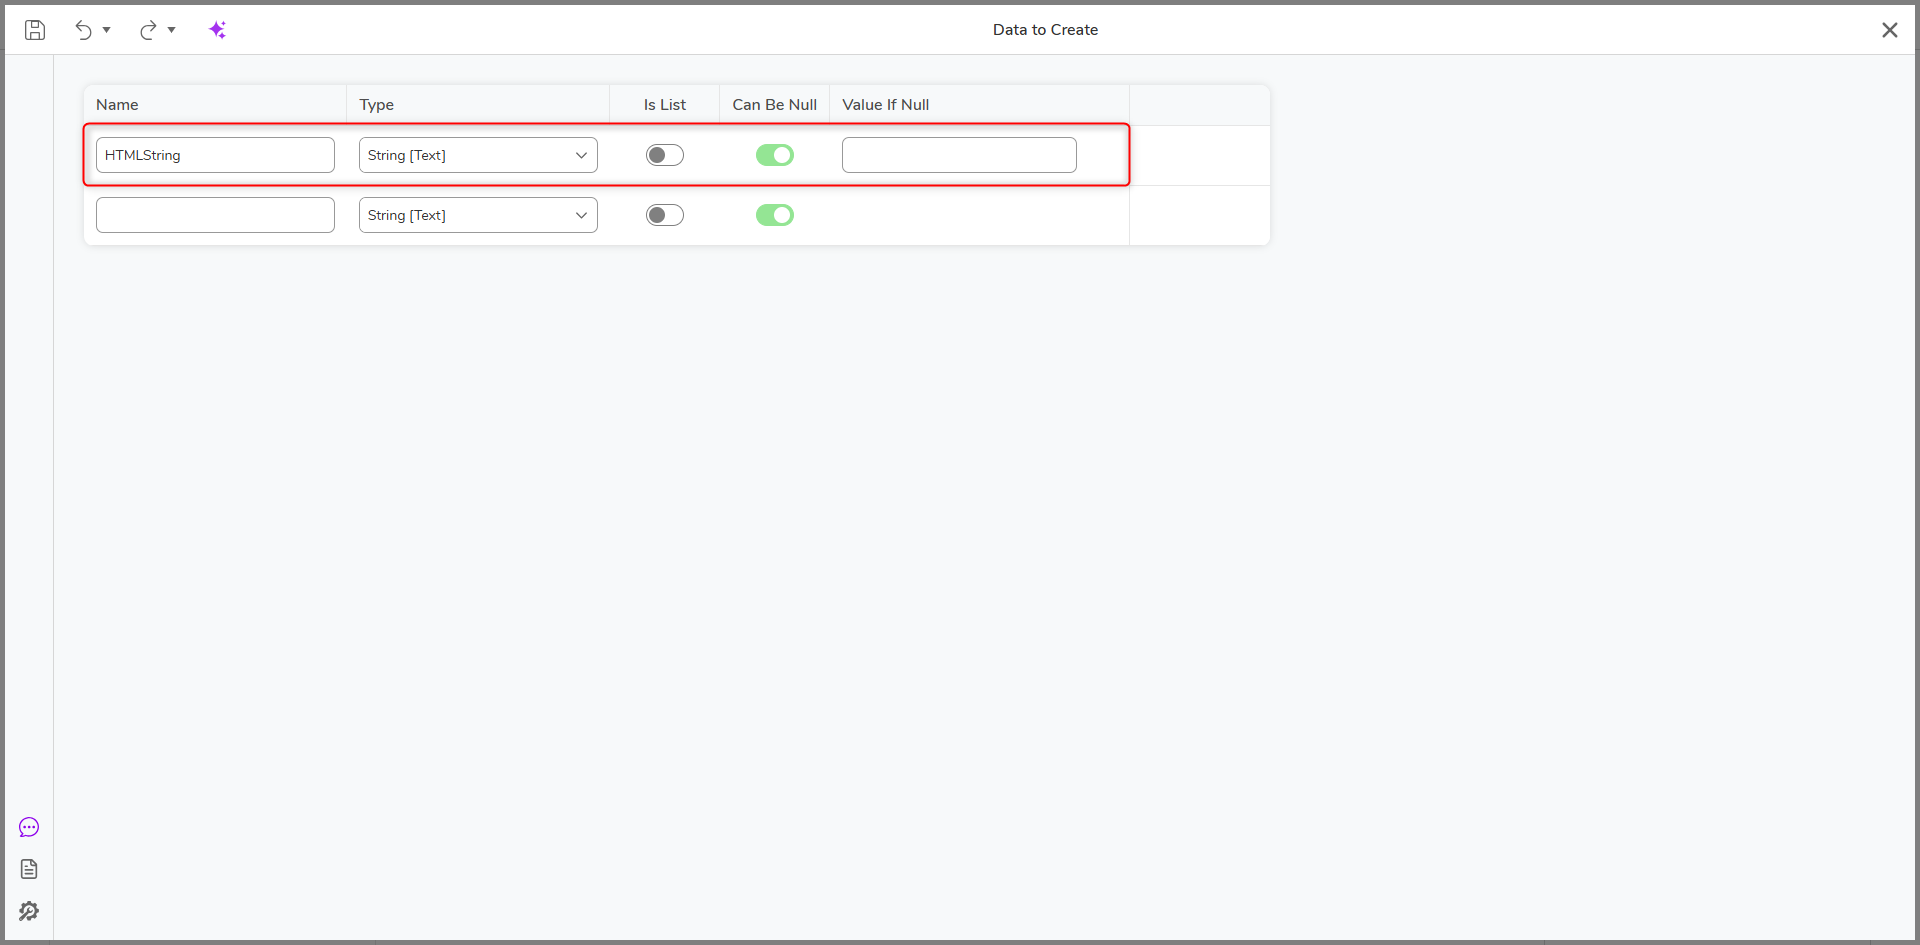
- On the Create Data Step, click on Show Editor under Data to Create, and enter HTMLstring with String as the Type. Save and exit the window.
- Next, select Merge HTML and select the pencil icon. This action will populate the Merge Text Editor.
- From here, enter a desired title. For this example, the same title as the Header Container on the previous Form is used.
- Enter the name of each field on the previous Form and drag the associated data value from the Menu on the left-hand side of the window. The result should look similar to the image below.
- After the desired information has been entered, click Save. This information is what will be displayed in a PDF for Users after clicking Submit on the Form.

- Drag an HTML to PDF step and connect the Done outcome to the Create Data Step. Connect the failed outcome to the End Step. This Step will convert the HTML string created in the previous Step to a PDF. If the Step fails for any reason, the Flow will end. Users can make note of areas that have issues in the Debugger.
- Select Flow Data and map in the HTML String Output from the Create Data Step.
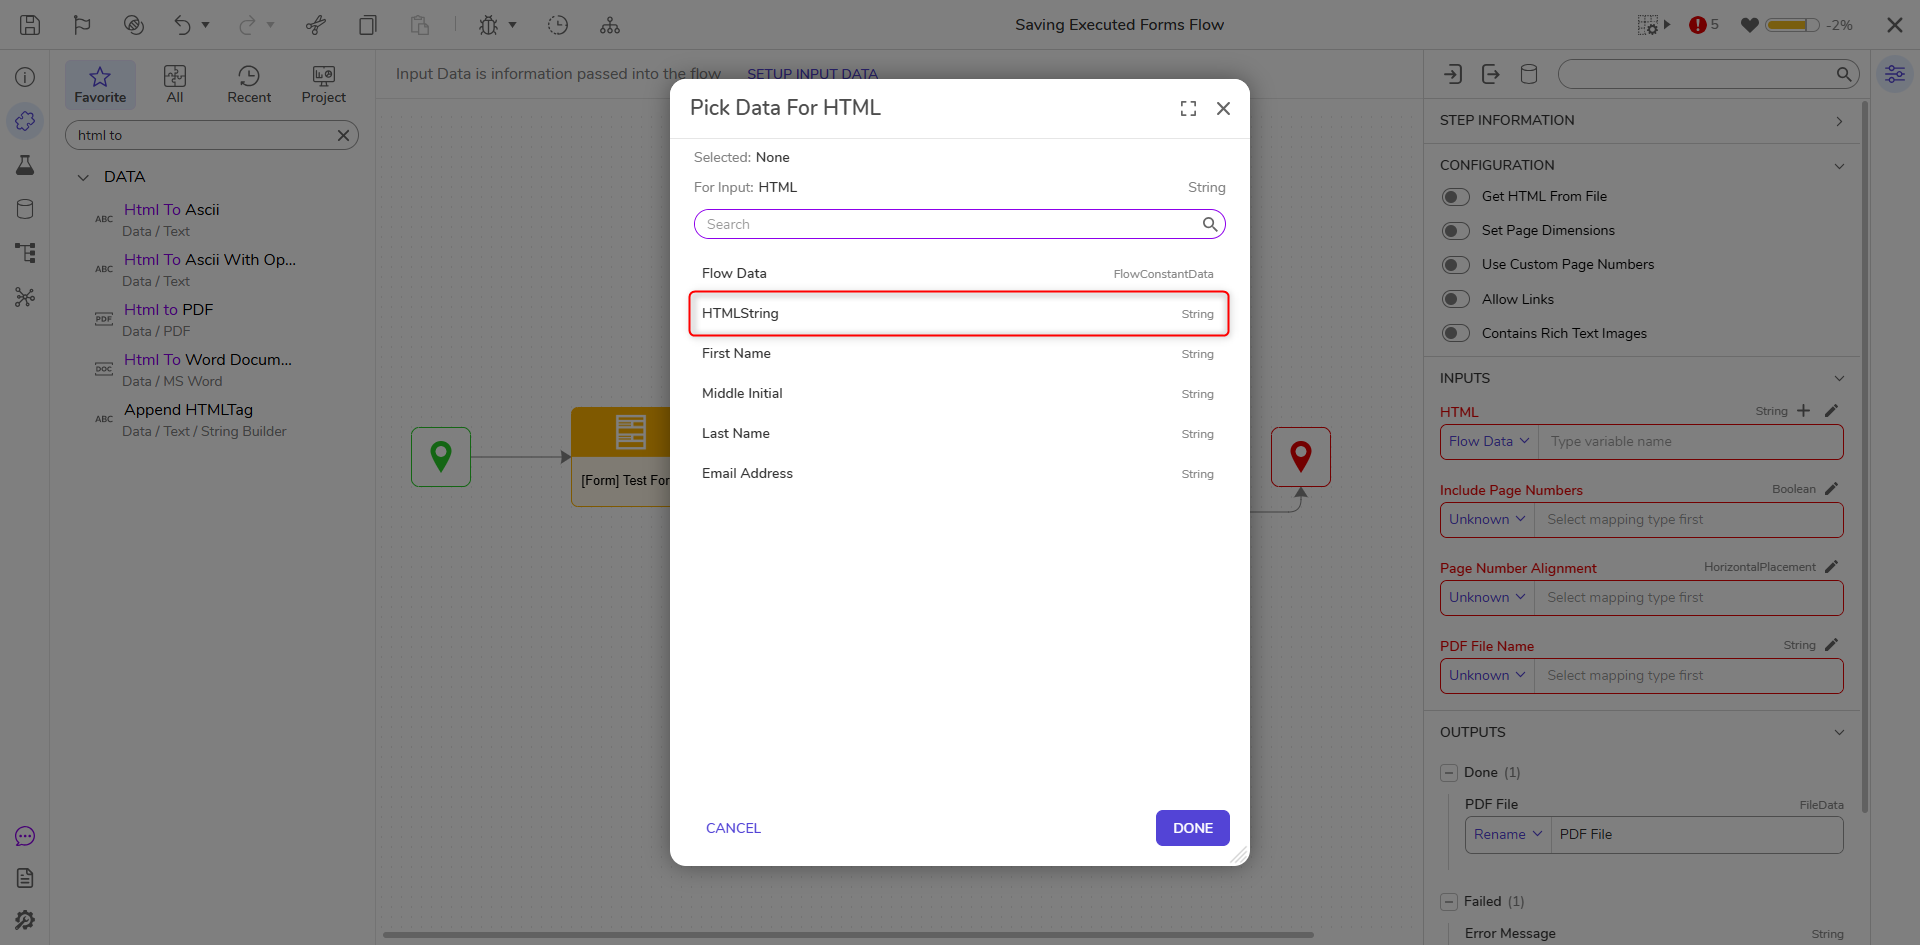
- The Inputs, Include Page Numbers and Page Number Alignment, are ignored, but both inputs can be customized to the User's desired specifications. The PDF file name for this example is Testform.pdf.
- After all the Inputs have been mapped. Connect the outcome to another Show Form Step.
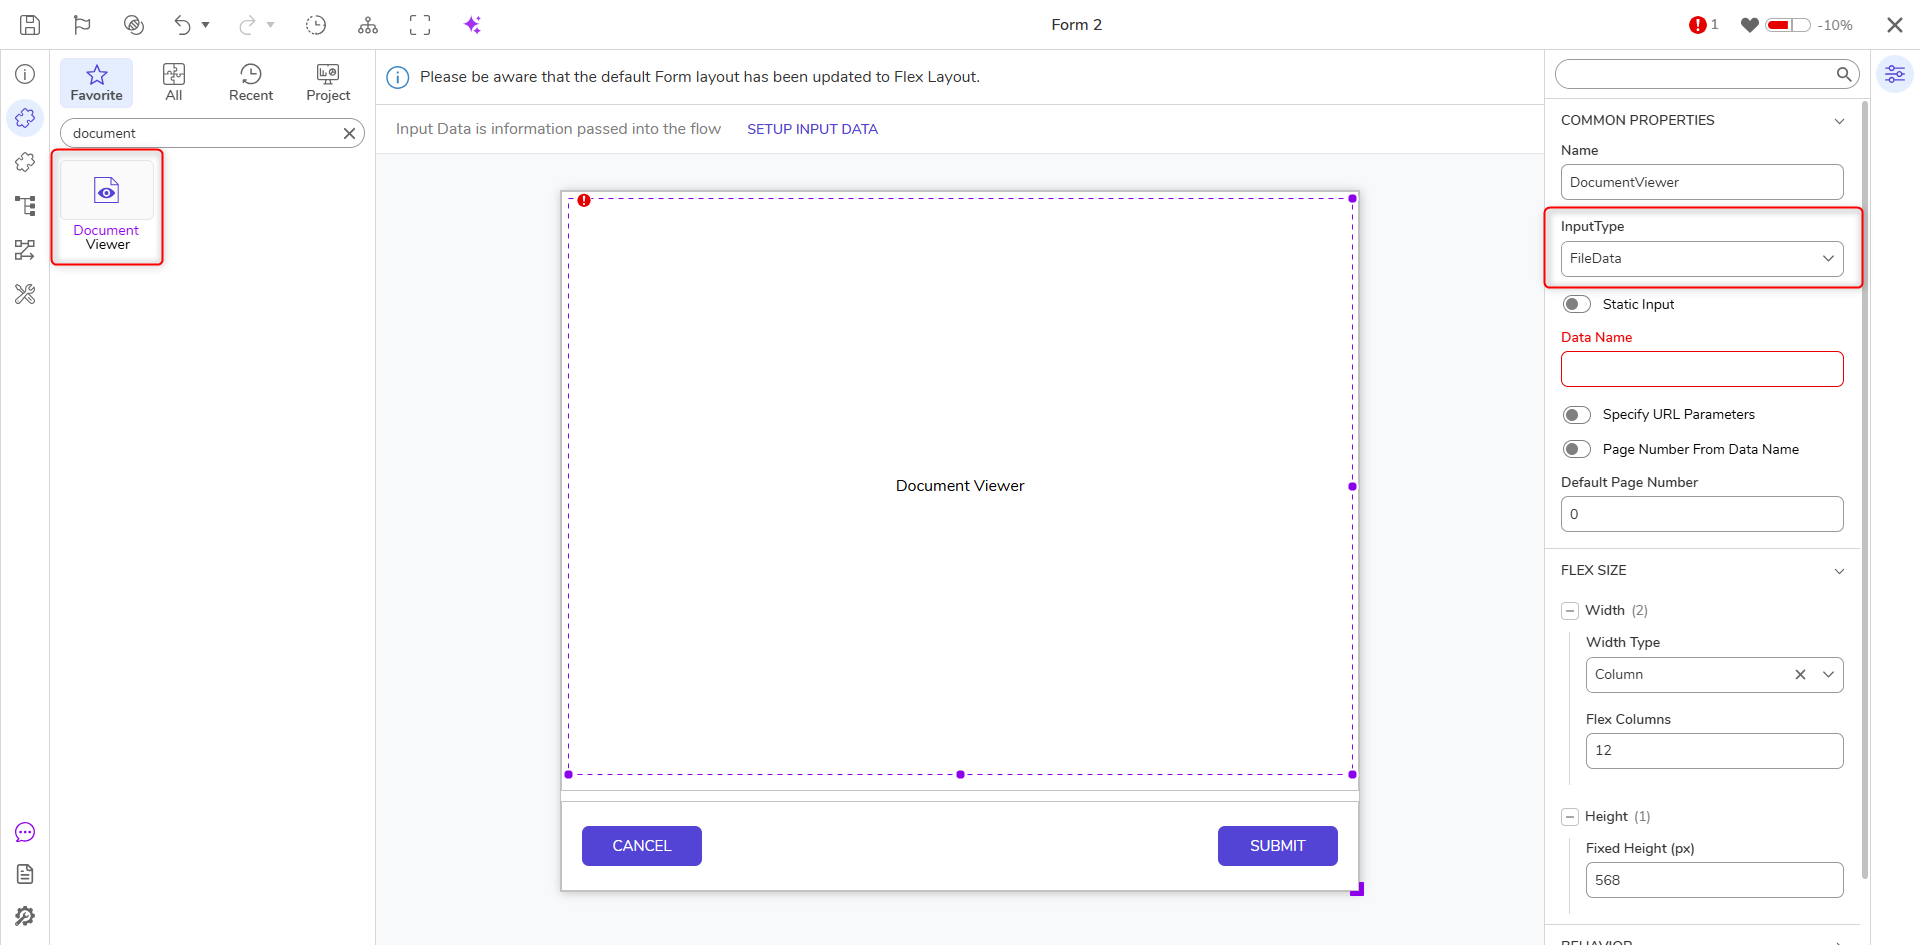
- Create a new Form and add a Document Viewer control to the workspace. This control will display the completed Form in the previous Form as a PDF.
- Before saving the Form, ensure the InputType is set to File Data and the desired data name is entered.
- Once the Form is completed, click Save and navigate back to the Flow. Map the PDF File outcome (File Data) from the HTML to PDF Step.
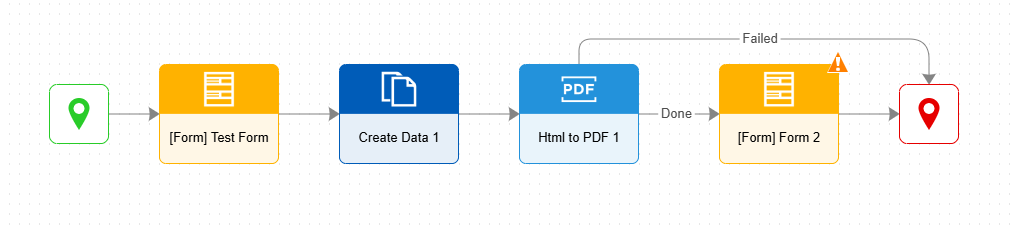
- Connect the outcome to the End Step and click Debug. Users who submit the Form will now be able to view and download the executed Form as a PDF.

Feature Changes
| Description | Version | Release Date | Developer Task |
|---|---|---|---|
| Users can now save the contents of a filled-out Form as a PDF or image file on submission. | 9.5 | November 2024 | DT-046762 |