Overview
Rabbit Message Queue (RabbitMQ) is a messaging system for application-to-application communication. The RabbitMQ Module adds the capability to the Decisions Messaging Service, which lets users connect to built-in Flow steps to manage a RabbitMQ. The RabbitMQ Module allows users to queue subscribers so that Flow can work and push messages to Queues using Flow steps. Users can also integrate with RabbitMQ, take in a message, and then convert the message to any type of data for processing.
To configure RabbitMQ in Decisions, users must install the RabbitMQ Module. Refer to our Installing Modules article.
Prerequisites
- Install the RabbitMQ Module.
- Create a project dependency
Considerations
Installing RabbitMQ
Refer to RabbitMQ's official website to Download and Install RabbitMQ.
RabbitMQ Settings
- To establish a connection with a RabbitMQ broker, users must configure the server information in System Settings. This can be found by navigating to System > Settings > Message Queue Settings > RabbitMQ Settings.
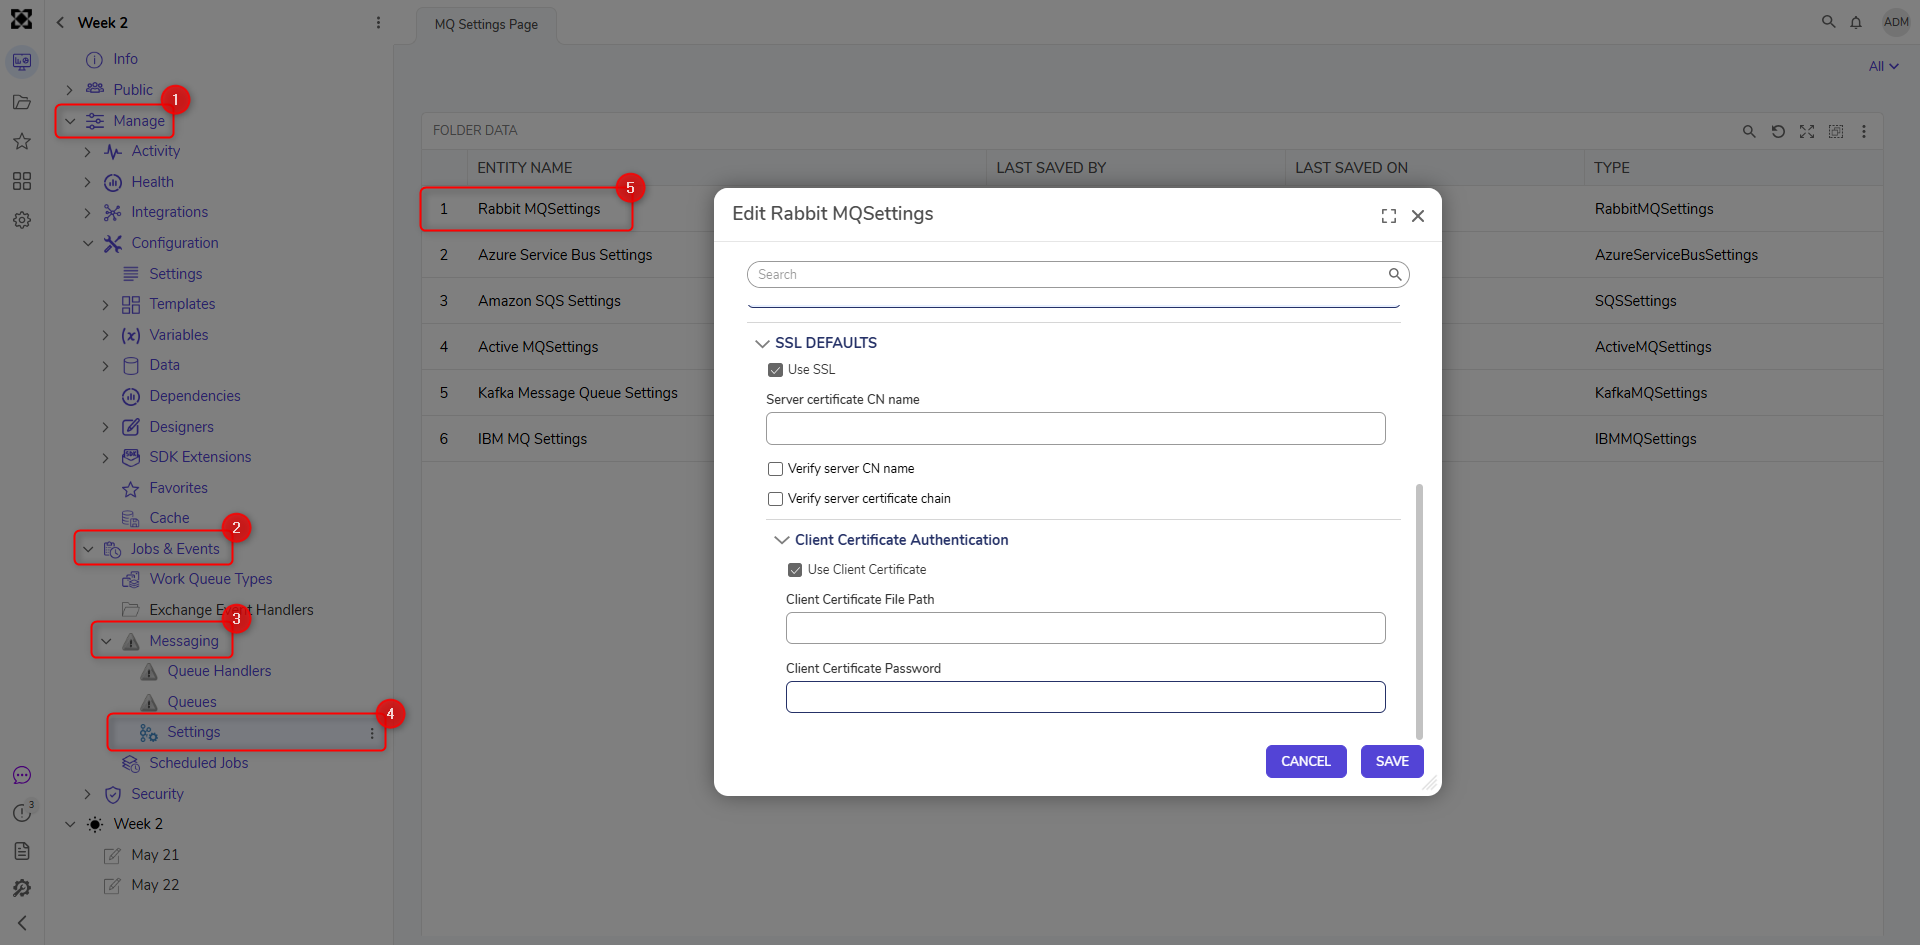
- Below is a breakdown of each property for the setting. These configurations will serve as global settings for all the RabbitMQ Message Queues that will be created in the next section.
Property Setting Default Server IP or Name The Default Server IP or name hosting the RabbitMQ broker. Use Default Port When disabled, it opens a new field where the port number can be specified. Ensure the port is open and is not assigned to any other service. Default Virtual Host An optional field used to identify the virtual host location. Due to RabbitMQ being a multi-tenant system, it allows for a specific tenant to be used as the connected system. Default User Name Sets the default user name when establishing a connection to RabbitMQ. Default Password Sets the default password for establishing a connection to RabbitMQ. Use SSL When enabled, this will open a field to enter the Server certificate name. Server certificate CN name Enter the name of the server certificate CN (Common Name / Fully Qualified Domain Name). Verify server CN name When enabled, this will verify the certificate (Common Name / Fully Qualified Domain Name). Verify server certificate chain When enabled, this will verify the certificate chain. Use Client Certificate Enables client certificate authentication. When enabled, additional fields for certificate path and password are displayed. Client Certificate Path Specifies the file path to the client certificate used for authentication when SSL is enabled. Client Certificate Password Specifies the password associated with the client certificate.
Connecting to a RabbitMQ
- Navigate to Systems > Jobs and Events > Message Queues and select Add Rabbit Queue.
- On the Add Rabbit Queue dialog window, enter a Display Name and the Queue Name. Configure any other options necessary and click SAVE.
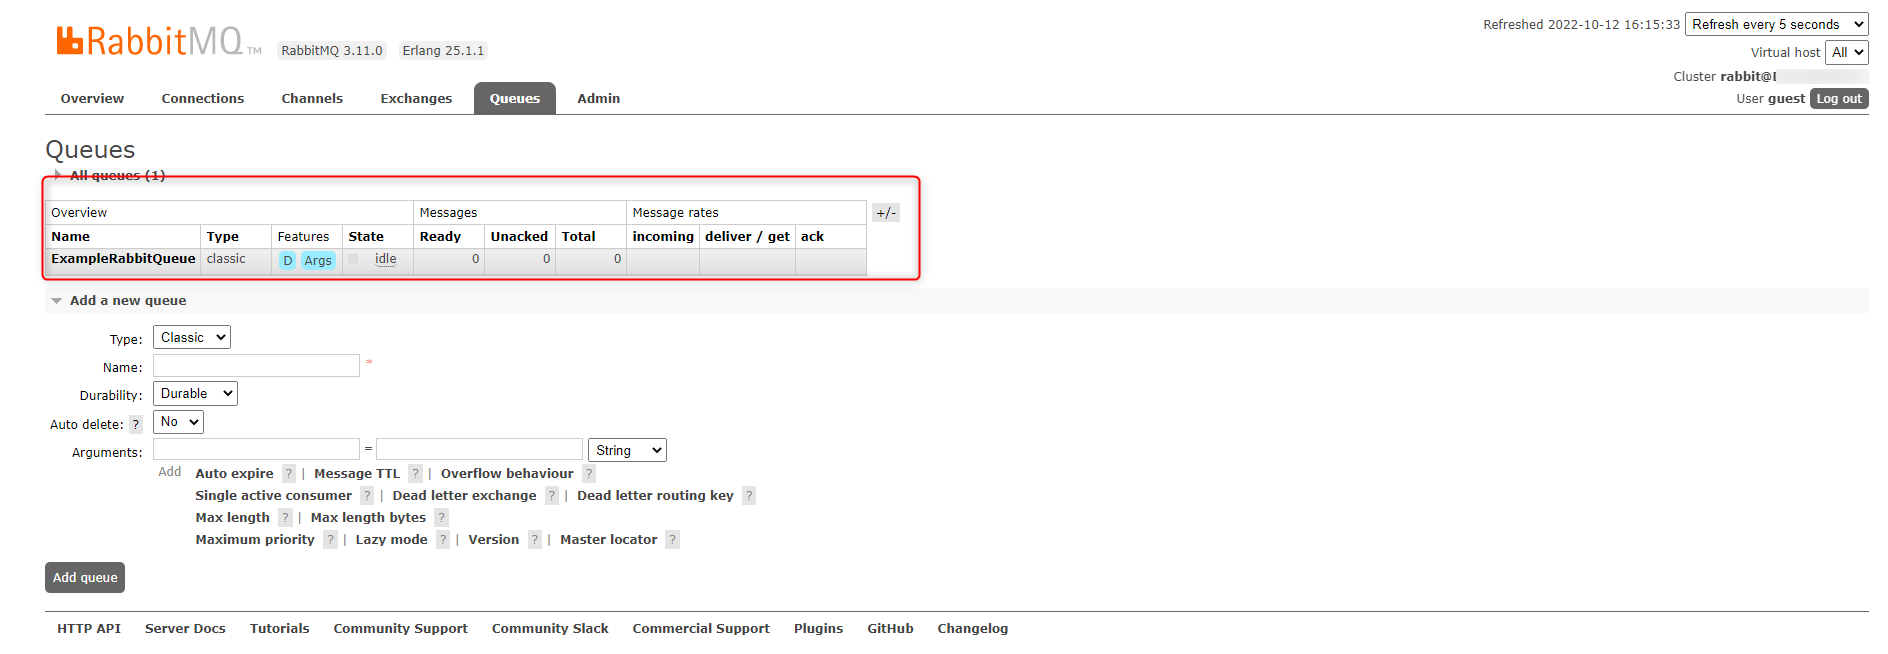
DEFINITION Display Name Determines how the Queue's name displays. Queue Name The name of the Queue that the system references. Is Durable Queue When Decisions create the Queue, this setting keeps the Message permanent. If no one is using the Queue, this setting will reclaim the Message Queue and recreate the Message. Auto Delete Instructs the Message Server to delete the Queue when its last consumer disconnects. Use Passive Queue Declaration This setting only verifies that the queue exists on the RabbitMQ server without the ability to create it. No other permissions are needed. Override Server Info This will override the server settings configured in the RabbitMQ Settings. Server IP or Name The Server IP or name hosting the RabbitMQ. Use Default Port When disabled, this will open a new field where the port number can be specified. Ensure the port is open and is not assigned to any other service. Virtual Host Override Behavior Override if Specified (Otherwise use default) This will override the virtual host configured in the RabbitMQ Setting only if specified. Never Override (Always use default) Will not allow override virtual host. Always Override Will always override the virtual host configured in the RabbitMQ Setting. Override Virtual Host This will override the Virtual Host configured in the RabbitMQ Settings. Allows the ability to set up multiple virtual hosts allowing the user to host Decisions. The Virtual host runs to keep the actual production from interference. Override Queue Credentials This will override the credentials configured in the RabbitMQ Settings. Provides the ability to set up a username and password that can be assigned, allowing specific credentials to be required Override SSL This will override the SSL configured in the RabbitMQ Settings. Enables the use of SSL for specific Message queues. Server certificate CN name Enter the name of the server certificate CN (Common Name / Fully Qualified Domain Name). Verify server CN name When enabled, this will verify the CN (Common Name) of the entered certificate. Verify server certificate chain When enabled, this will verify the certificate chain of the entered certificate. QUEUE ARGUMENTS Queue Type Specifies the queue type (classic, quorum) Dead Letter Exchange The queue for undelivered or failed messages Dead Letter Routing Key Routing key for dead letter Maximum Queue Length Sets the maximum queue length Message TTL (msec) Sets the message time-to-live in milliseconds. These values can be found within the web portal for RabbitMQ under the Queues section. These values must match; otherwise, a new queue will be created within RabbitMQ to match the settings defined in Decisions.
- Navigate to System > Jobs and Events > Message Queues. Right-click on the Message Queue and select Control. Select Test Queue to verify the connection with RabbitMQ. If successful, a dialog pop-up screen will appear, displaying the test result.
Configuration Options Description Disable Queue Disables the queue Resync Queue Recreates the Message Queues if necessary and resynchronizes with the Message Server Start Queue Starts processing Messages on the Message Queues (if stopped) Stop Queue Stops processing Messages on the Message Queues. The Message Server will hold any unprocessed messages. Test Queue Reads the number of awaiting Messages in the Queue and shows a pop-up with the number of awaiting Messages
- To subscribe to messages in a queue, a Message Handler Flow needs to be configured. For more information, refer to Setting Up Message Handlers.
- Refer to the Step Article Library to learn more about how to use RabbitMQ Flow steps within a Flow.
Feature Changes
| Description | Version | Release Date | Developer Task |
|---|---|---|---|
| Authentication Via Certificate | 9.22 | March 2026 | [DT-046677] |
| Added Use Passive Queue Declaration action. | 9.13 | July 2025 | [DT-044636] |
| A hidden Module called Decisions.MessageQueues Module will be downloaded automatically when any message queue Module is installed. | 9.0 | May 2024 | [DT-039289] |
| Added new setting on RabbitMQ Queues: Virtual Host Override Behavior. | 8.13 | September 2024 | [DT-038175] |