Overview
The Deployment Server provides a centralized way to manage user accounts across connected environments. Administrators can create accounts on the Deployment Server and assign them to the required environments, helping ensure consistent access across Development, QA, and other connected servers.
Once an account is assigned to an environment, its information is synchronized with that environment, allowing the user to sign in with the assigned access. This centralized model applies regardless of how the account was originally created, including locally created accounts or accounts managed through SSO.
- The Deployment Server must already be installed and configured.
- The target environment (for example, Development or QA) must already be connected to the Deployment Server.
- Administrative access to the Deployment Server is required to create accounts and assign them to environments.
Why Use Centralized Account Management?
Centralized account management allows administrators to manage access across connected environments from a single location. Instead of going into each Decisions environment individually to manage access, administrators can create and assign accounts from the Deployment Server and control which environments those accounts can access. This makes account administration easier and reduces repeated setup work across environments.
The Deployment Server manages accounts and the environments those accounts can access. However, permissions are still managed within each target environment. Configure any project-specific or folder-specific permissions (and related security settings) directly in the environment where the user will work. See Beyond Environment Access: Org-Level and Project-Level Permissions below for details.
Create and Assign an Account
The following steps explain how to create an account on the Deployment Server and assign it to a connected environment.
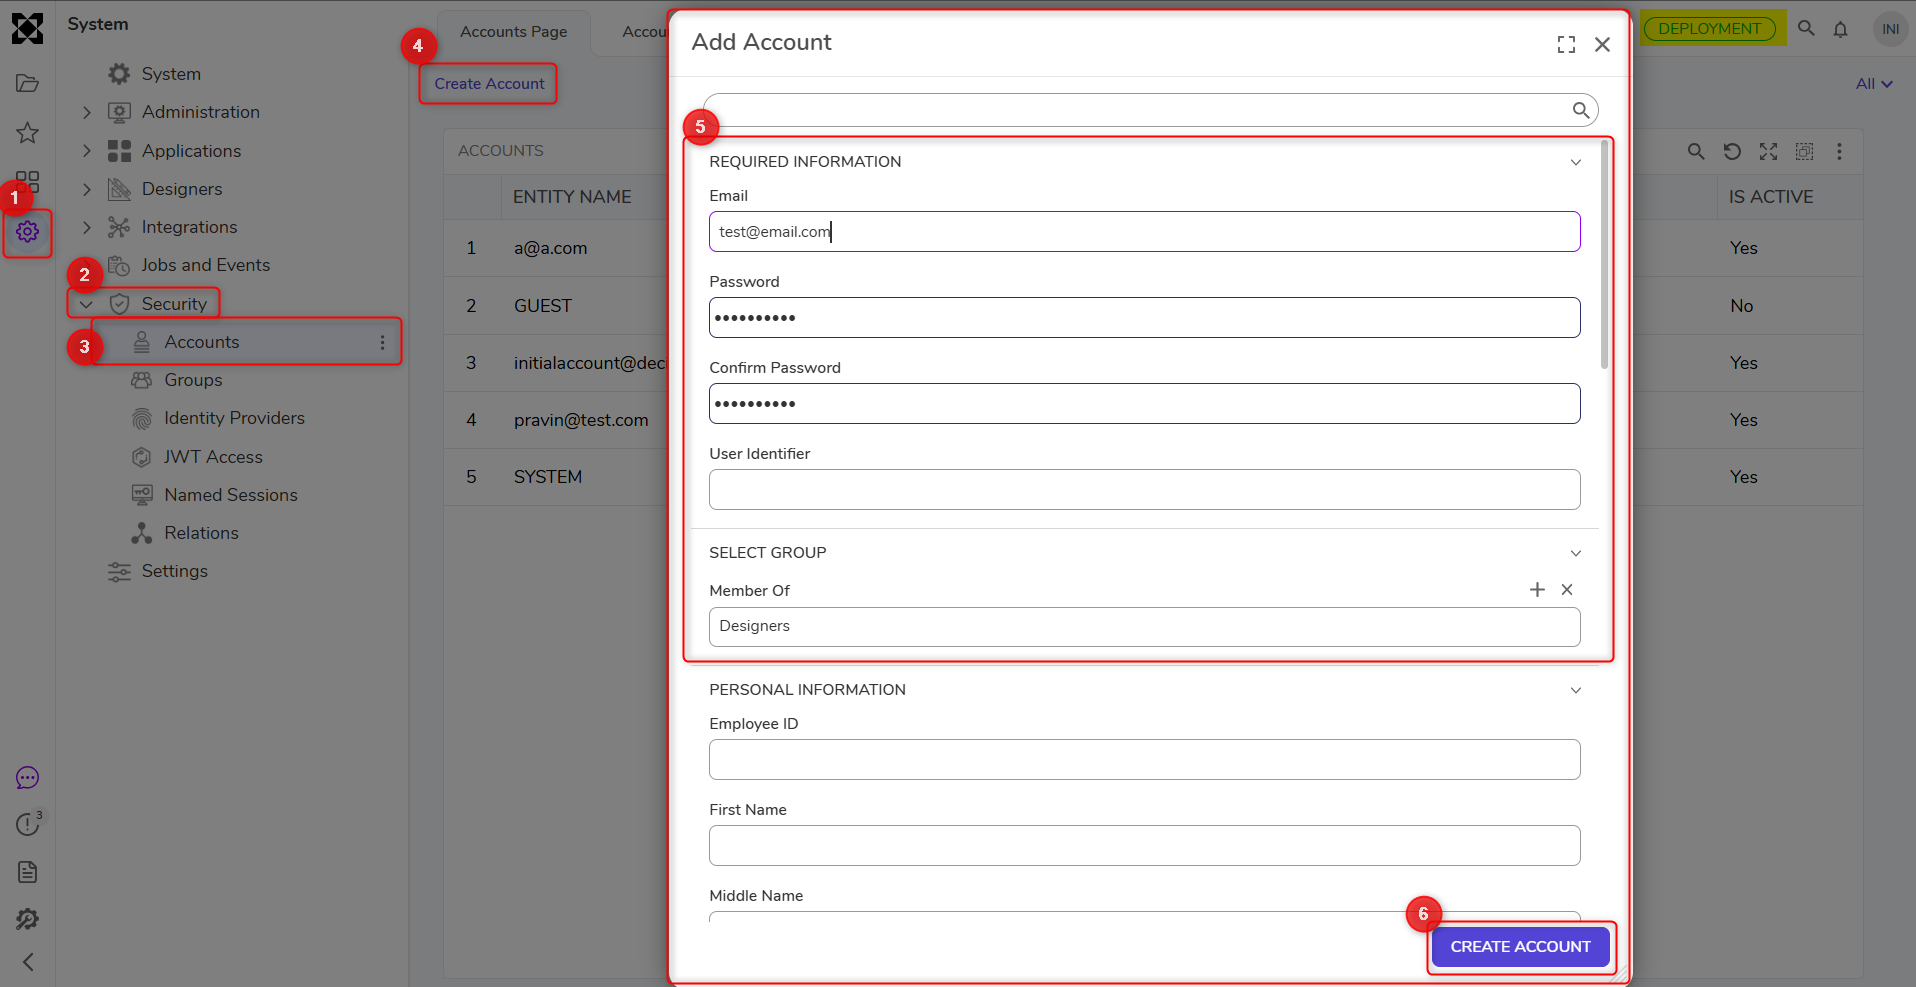
- On the Deployment Server, navigate to the System > Security > Accounts. This is where centrally managed accounts can be created and maintained.
- Create a new account by entering the required details, such as an email address and password.
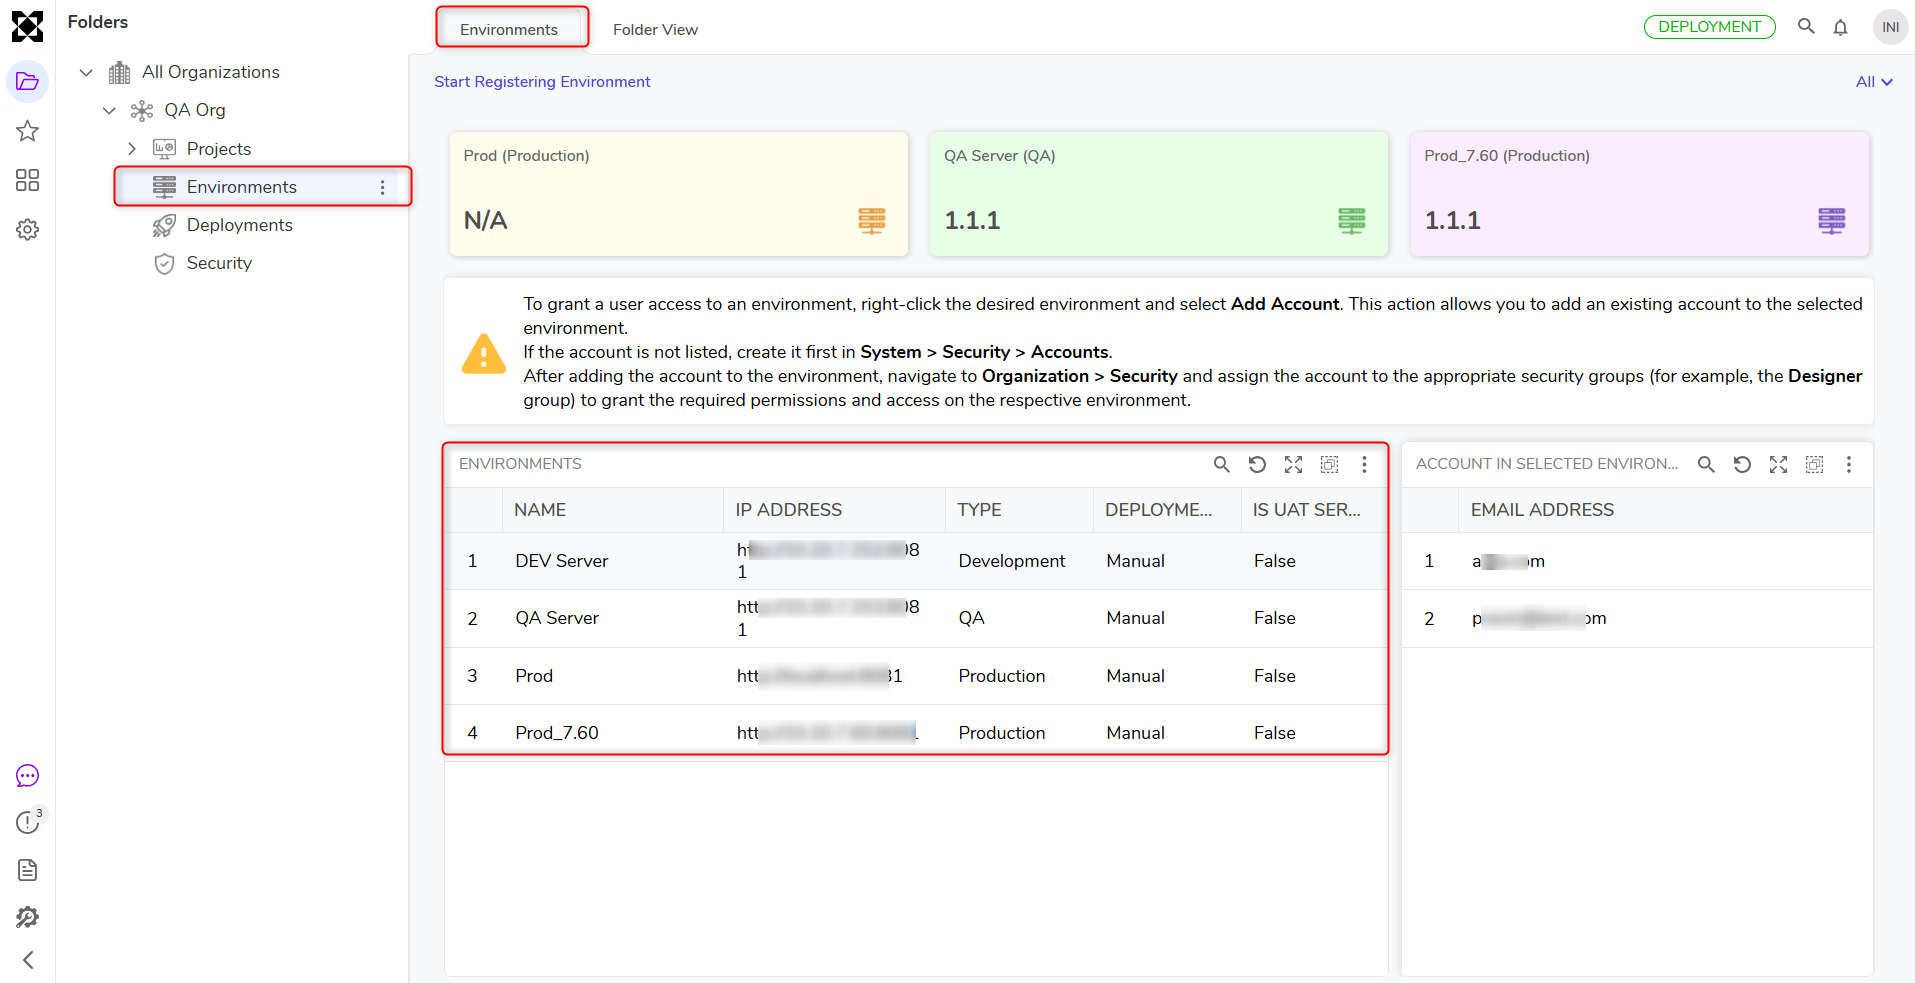
- After the account is created, navigate to the target environment under the Deployment Server environments list.
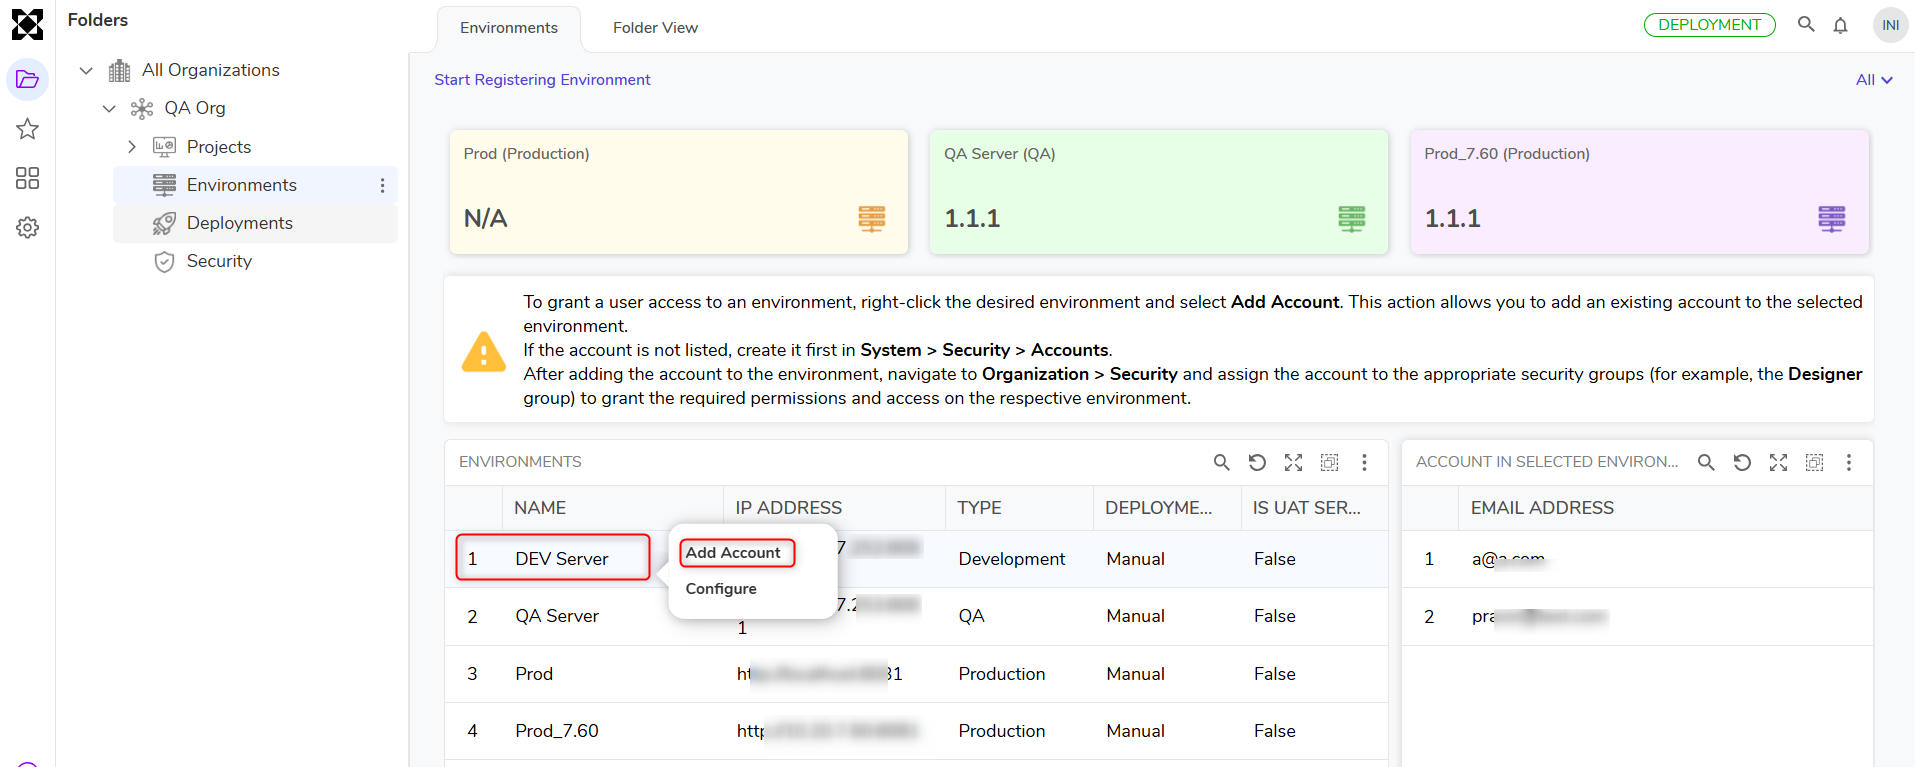
- Right-click the environment and select Add Account.
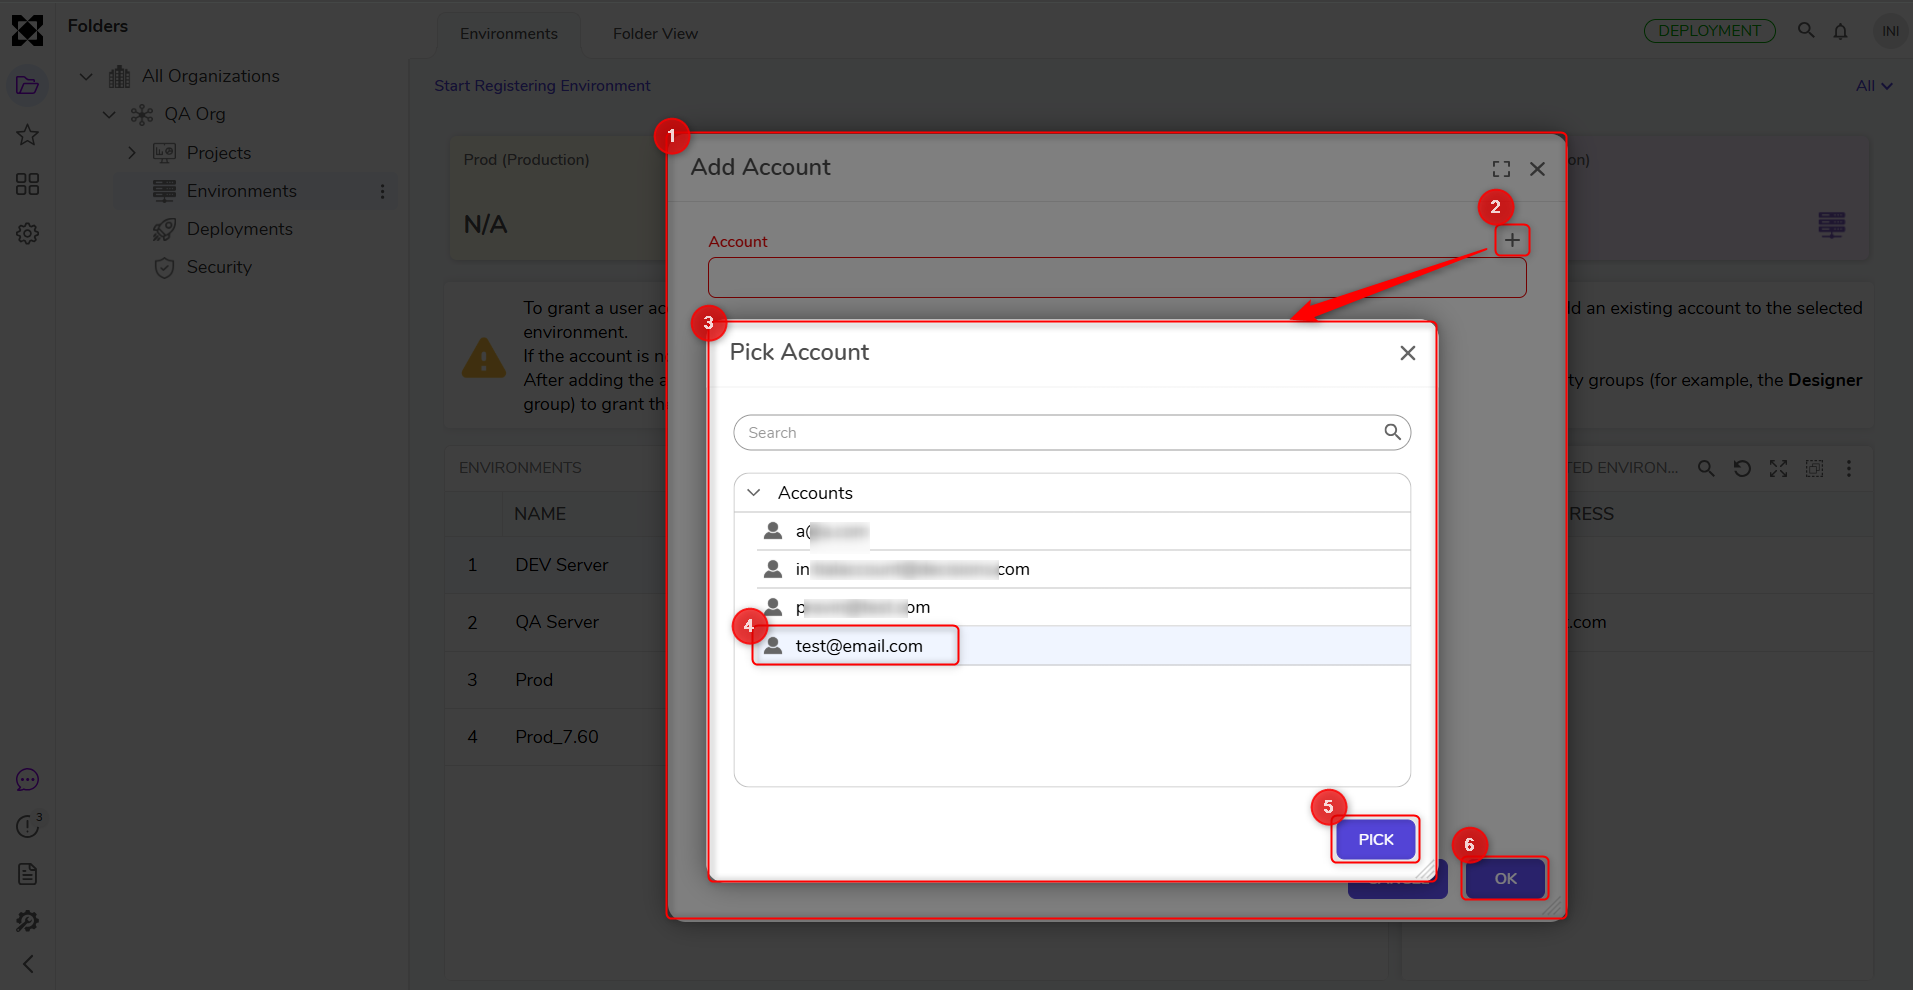
- Select the account to assign to that environment. During the assignment, the following options can be configured:
- Is Admin: Grants administrator access in the selected environment.
- Can Use Portal: Controls whether the user can access the portal in that environment.
- Save the assignment. Once saved, the account becomes associated with that environment in the Deployment Server.
- Verify that the account appears in the selected environment.
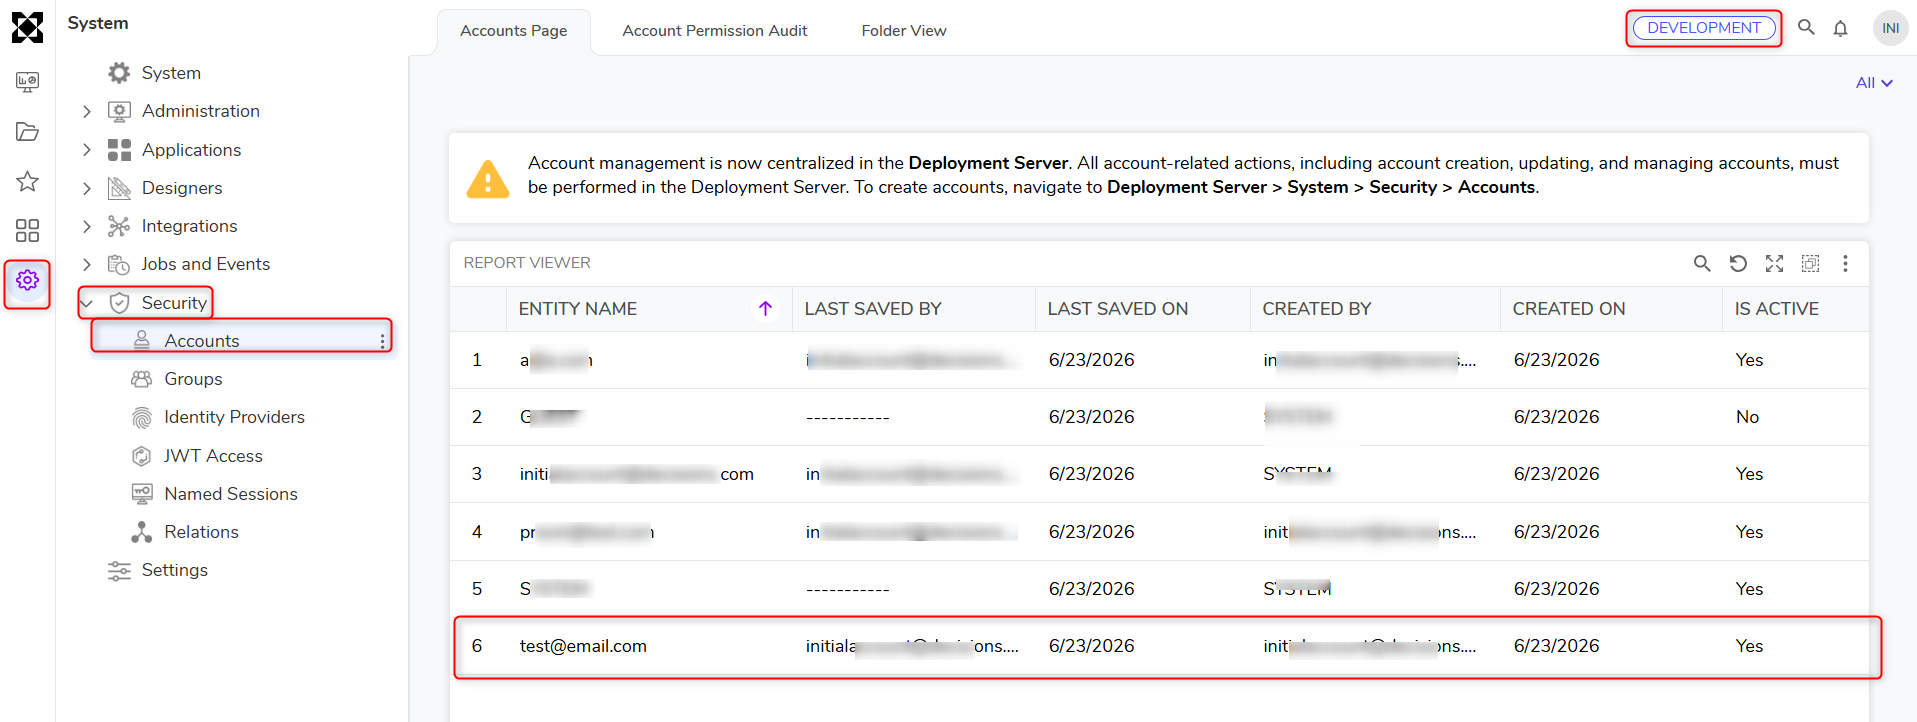
- Sign in to the target environment using the assigned account credentials to verify that access is working correctly.
Synchronization Behavior
After an account is assigned to an environment, the account may not always appear instantly in that environment. The Deployment Server uses a synchronization mechanism to send the assigned account information to the target server, and this process may take some time.
Synchronization is typically handled automatically after the account is assigned. If the account does not appear, a manual sync can be run from the target environment's Settings > Deployment Server Connection Parameters by right-clicking and selecting Start Sync. Once synchronization completes, the account appears in the target environment, and the user can sign in with the assigned credentials.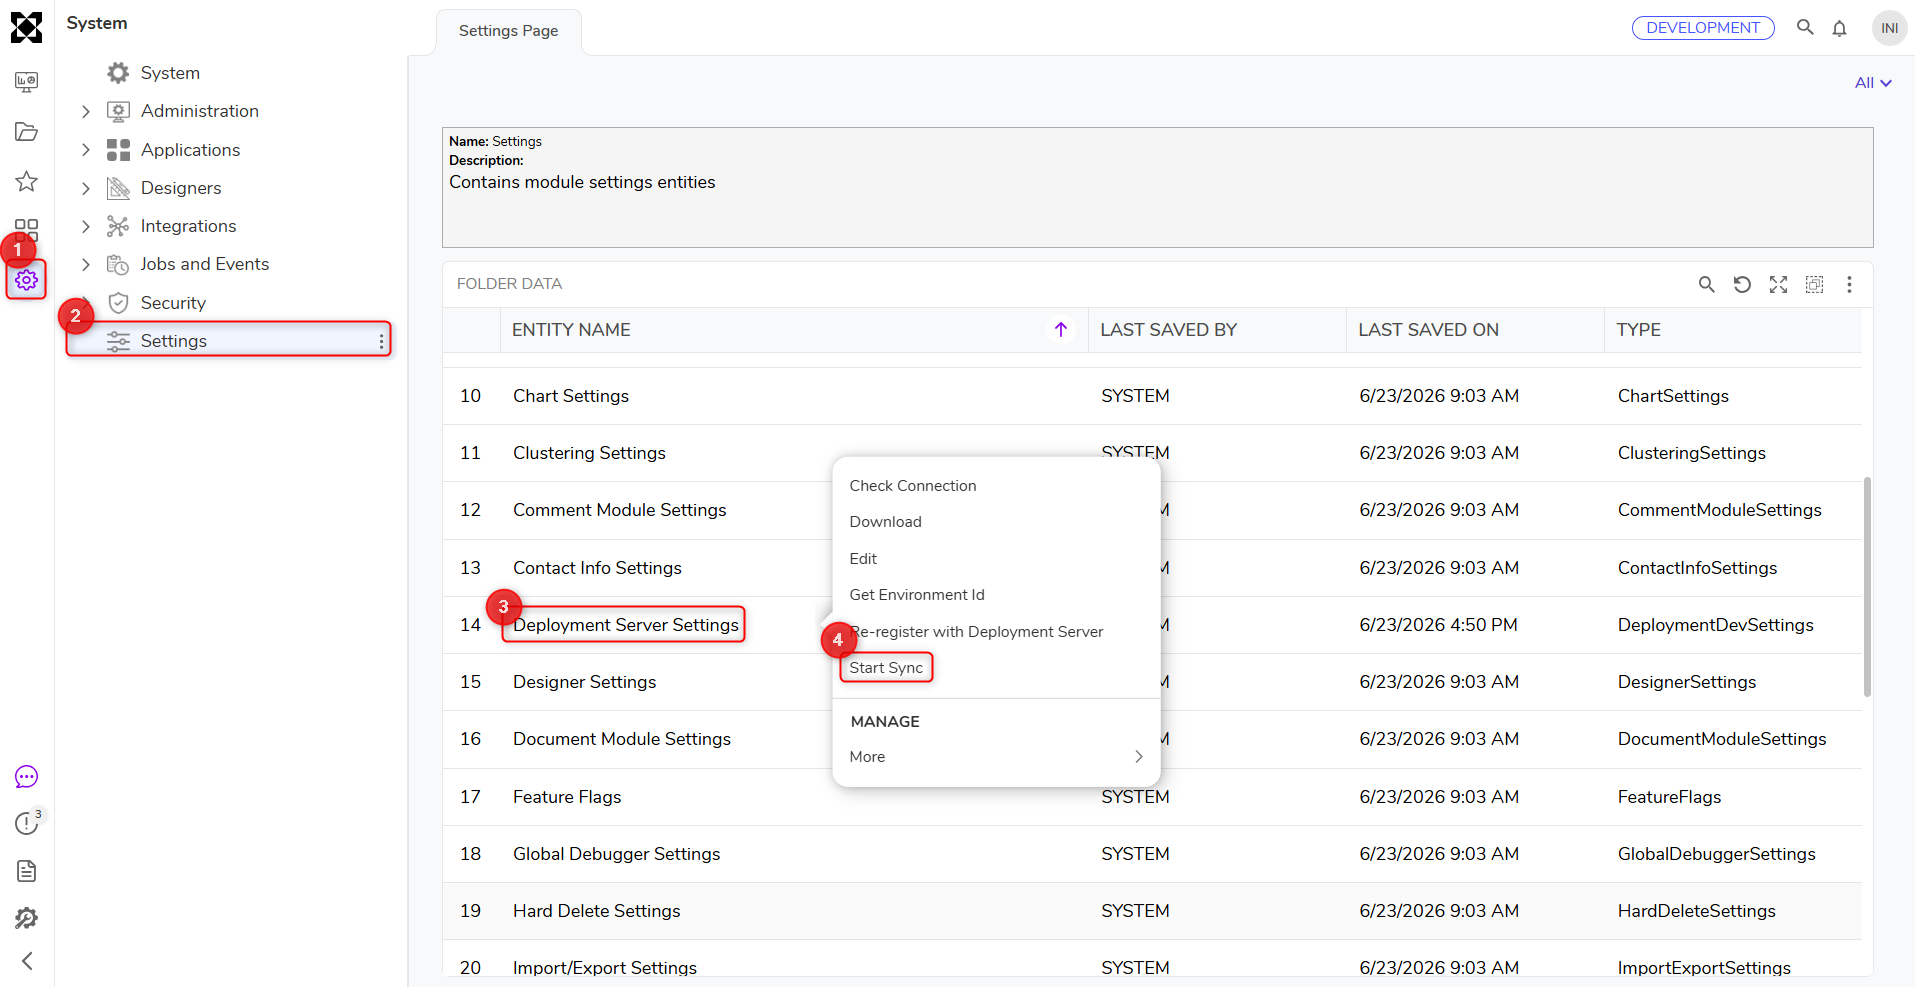
If an assigned account does not appear immediately in the target environment, wait for synchronization to complete or run a manual sync.
Account Synchronization During Environment Registration
When an environment is connected to the Deployment Tower for the first time:
- Accounts from that environment are synchronized to the Deployment Tower.
- Accounts are associated with the environment they came from.
- Native Decisions account passwords are synchronized using a first-come, first-served approach.
- Active Directory passwords are not synchronized because they are managed externally.
For more details, see the account synchronization section in the environment connection documentation.
Beyond Environment Access: Org-Level and Project-Level Permissions
Assigning an account to an environment (as described above) allows the account to sign in, but it does not by itself grant access to any Project, Group, or specific action. To give an account full access to a Project, configure all three layers below. All three are configured on the Deployment Server; the changes then sync to the connected environment.
- Layer 1: Environment access
- Path: Organization > Environments
- Action: Add Account to the Environments report
- Result: The account is added to that environment's Users Group. The user can sign in to the environment, but has no Project or Group permissions yet.
- Layer 2: Org Group access(grants Admin or Designer access)
- Path: Organization > Security
- Action: Add/Remove Accounts on the Groups report
- Result: The account is added to the selected Org Group on the environment:
- Admin: Grants access to all Projects in the environment.
- Designer: Still requires Project Group access (Layer 3) before the user can work within a specific Project.
- Layer 3: Project Group access(grants access to a specific Project)
- Path: Organization > Project > Security
- Action: Add/Remove Accounts on the Groups report
- Result: The account is added to a Project Group. Each Project Group is a Role that defines the account's allowed actions:
- Project Manager: A Designer-type role with all pages and actions visible in the Project. Can Create, Edit, Assign, Delete, and Change State for both Sprints and User Stories, including full access to the Release Management folder.
- Developer: Can Start Work, Commit Changes, Mark as Complete, Add Document, Add Entity, Mark As On Hold, Manage Local Changes, and Manage Tags on a User Story.
- Reviewers: Can Approve, Request Changes, and Add a User Story to a Deployment Package.
- QA - Access depends on the server:
- On a Dev server: view-only access to Sprint and User Story details, plus Add Document.
- On a QA server set up as UAT: once the account is added to the QA Environment, the Test Management folder (UAT (QA) Server > Folders > Test Management) becomes available, with actions to Open Test Case, Assign Test Case, Change State, and Set Test Result.
- On a QA server not set up as UAT: the Test Management folder is not available.
- In the Deployment Server itself: a Test Management folder is now shown under each Project, where QA accounts can Add Test Suite, Add Test Case, Include in Deployment Package, Remove from Deployment Package, and Reset Test Status and Results.
- User: Accounts under this role do not have Designer or Admin permissions.
Project Groups are Roles that define what a user account can do once inside a Project. For example, Release Management actions on the Dev server, or Test Management folder actions on the QA server.