Overview
The import and export actions enable the exchange of Projects and promote interoperability among different systems, allowing users to collaborate across various platforms. Projects are exported as .zip files, while all elements within the Project are exported as .decObj files.
Changes From Version 8 to Version 9
Version 8 | Version 9 |
|---|---|
Users had the choice to include or exclude designer entities, hidden items, history folders, and subfolders when exporting a project. | Users don’t have the option to selectively include or exclude items. All entities associated with the Projects are automatically included when exporting. |
When exporting individual entities, any hidden items associated with those entities were excluded. For instance, when exporting Forms, the Active Form Flows linked to the Form were not included in the export. | When exporting individual entities, all associated hidden items are included in the export. They will also be included when imported into another instance. |
Exporting a Project
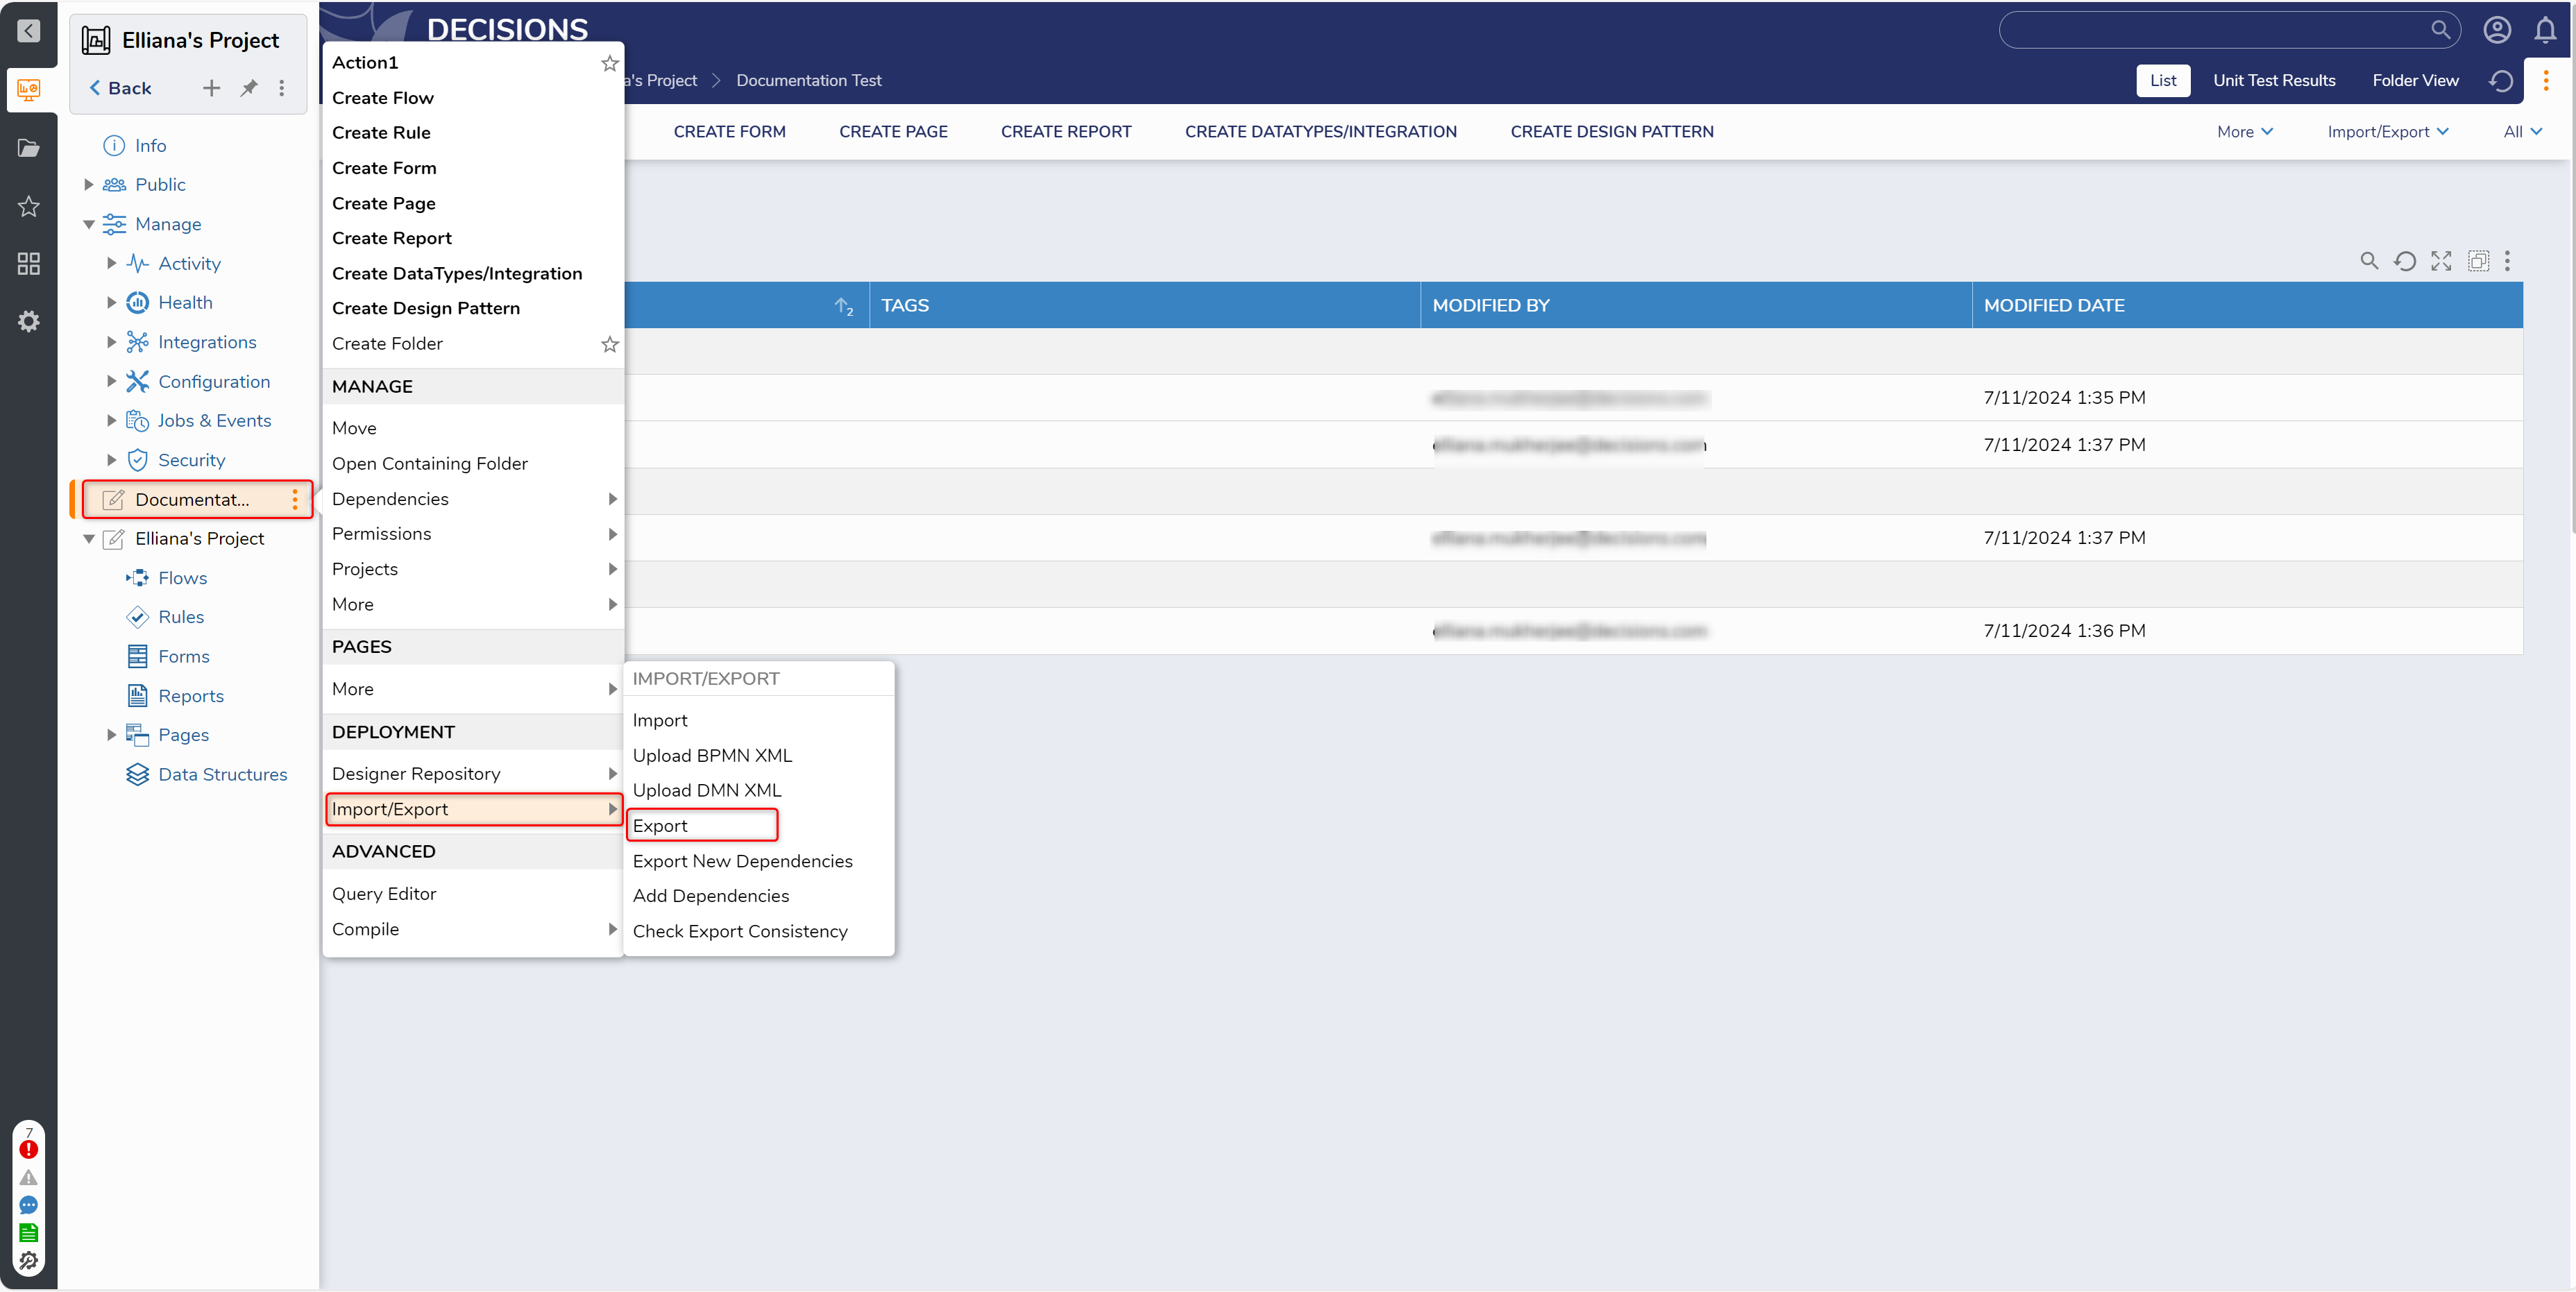
Locate a Project. Right click the Project and navigate to Import/Export > Export.

Depending on the number of entities within the Project, the Project may take some time to download.
Click the Download button to download the Project.
.png)
Importing a Project
Important Considerations
Importing a Legacy Project (Projects from V8 and older versions) is not allowed in the Projects Hub, but can be imported within a Project created in V9.Consequently, the entities within the Legacy Project will become part of the new Project.
It is important to import the dependent items (Modules, Projects, etc.) before importing the Project.
While importing the Project, users might see a Resolve Import Issue screen. This screen appears when Decisions finds some issues in the imported Project that cannot be resolved automatically. So, Decisions allows the user to resolve the issues manually. Refer to Import Resolution to resolve the issues.
Navigate to the Projects Hub in the platform. On the top right of the page, navigate to Import/Export > Import.
.png)
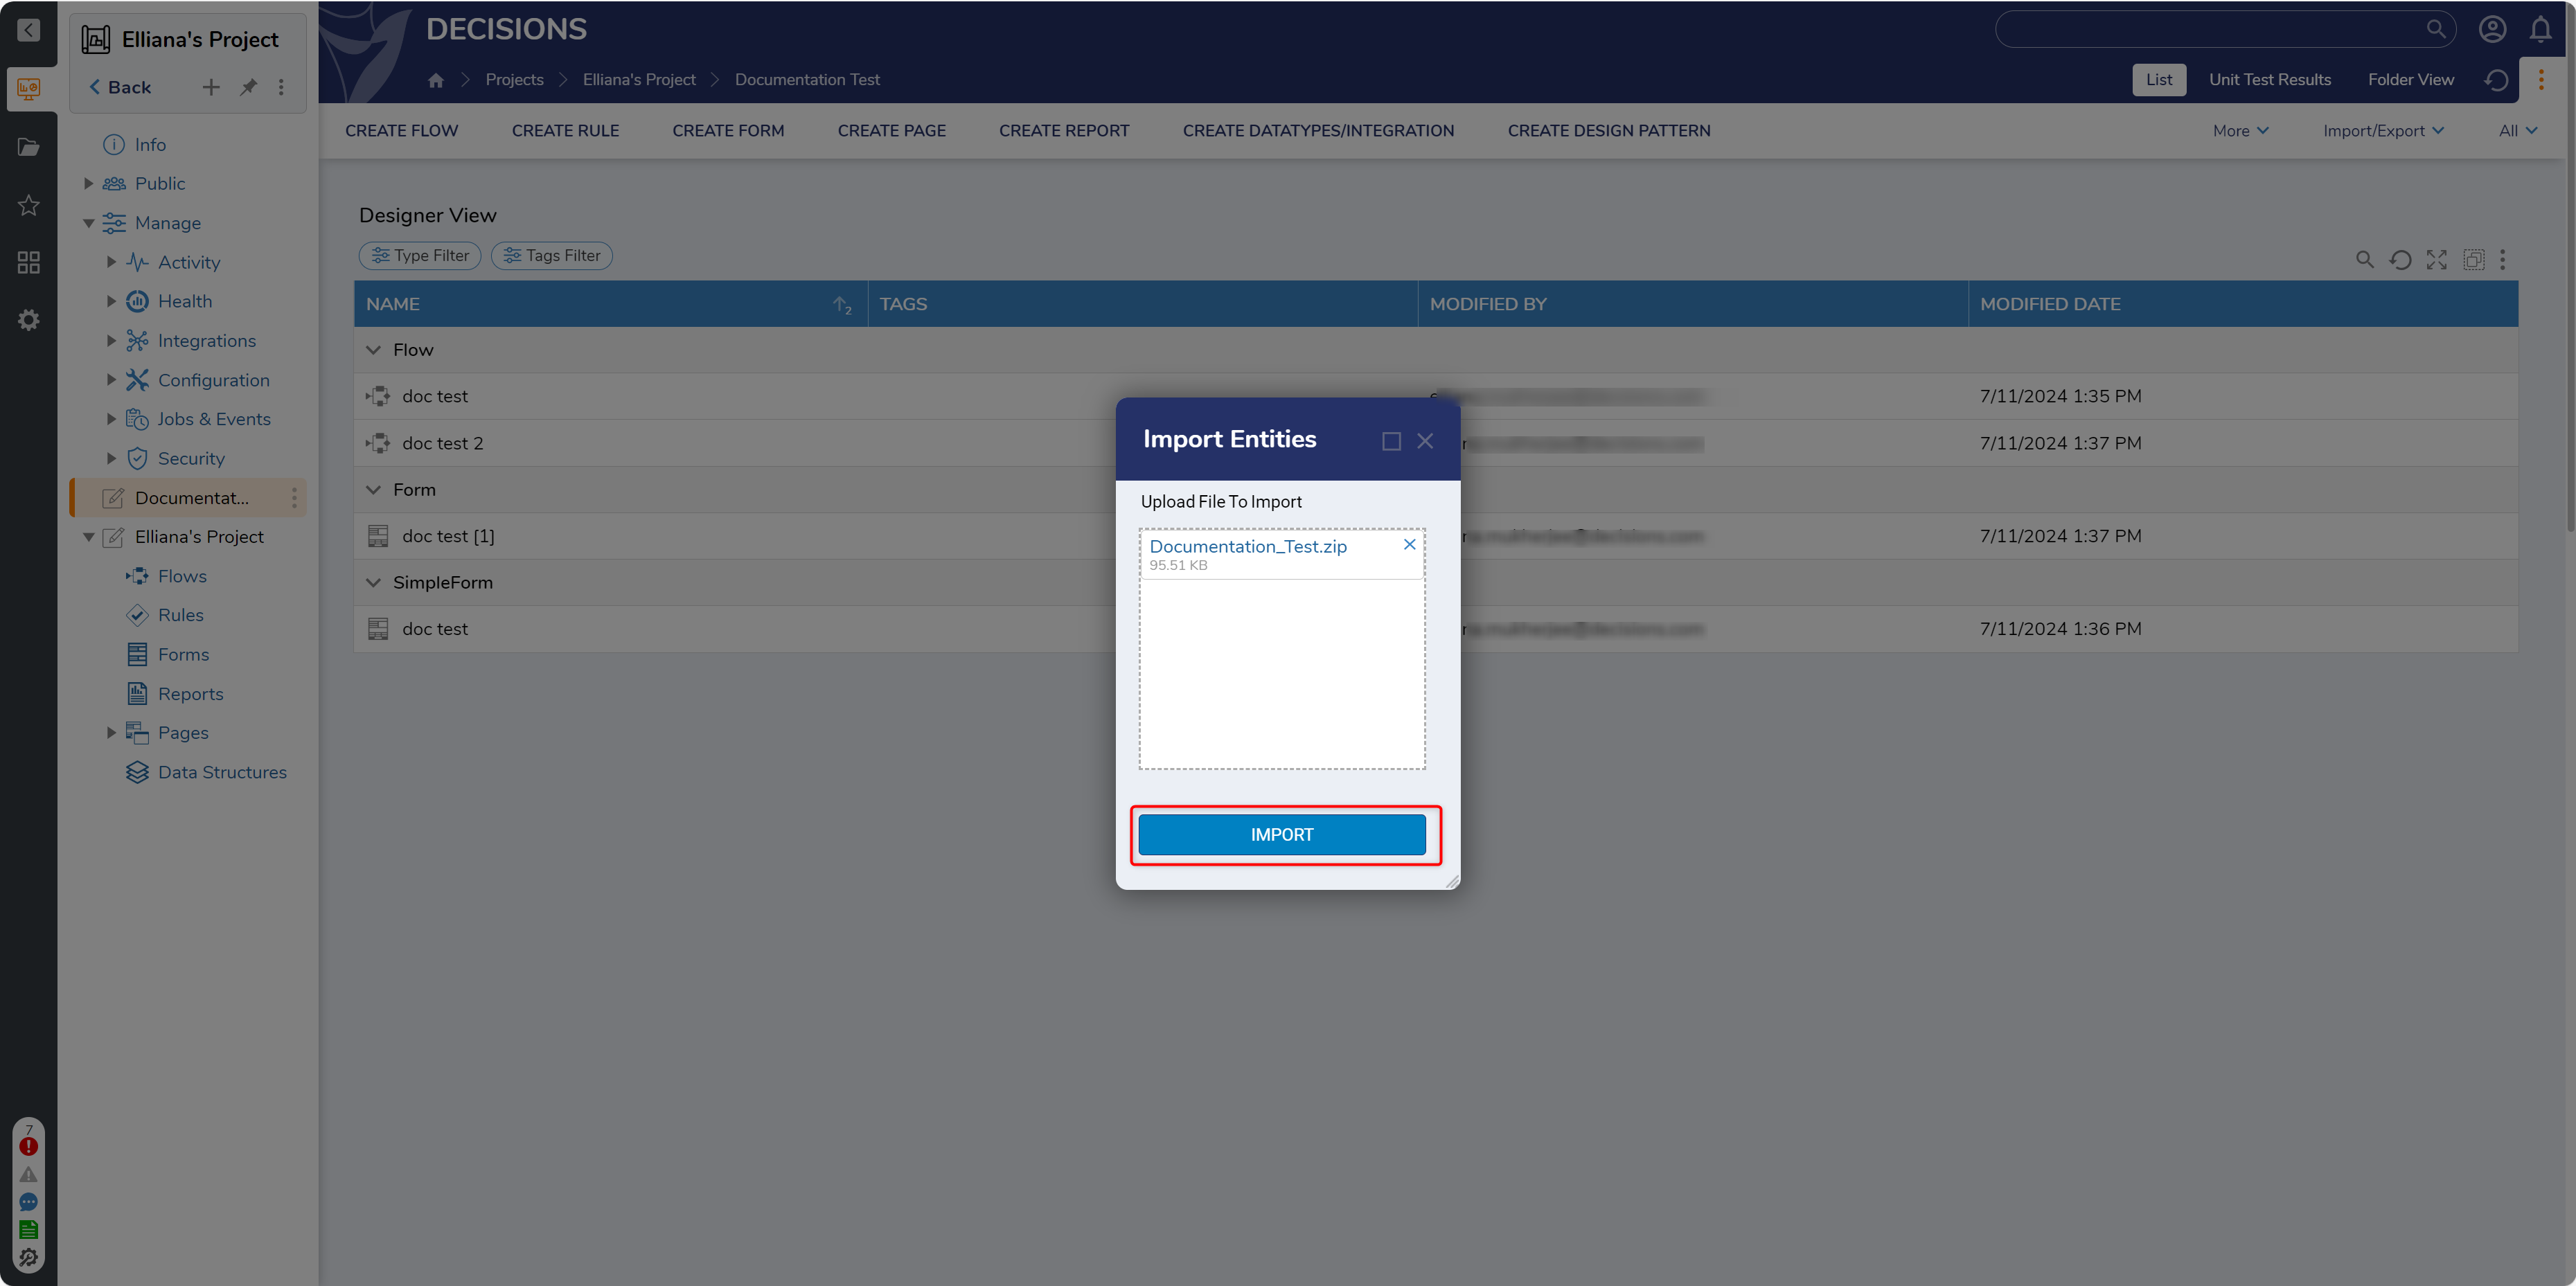
Upload a file to the file upload area. Uploading might take a few seconds based on the size of the Project. Once the Project is uploaded, click Import. An Import Entities Report will then open.

Users can drag and drop the .zip file directly on the Projects Hub to import a Project.
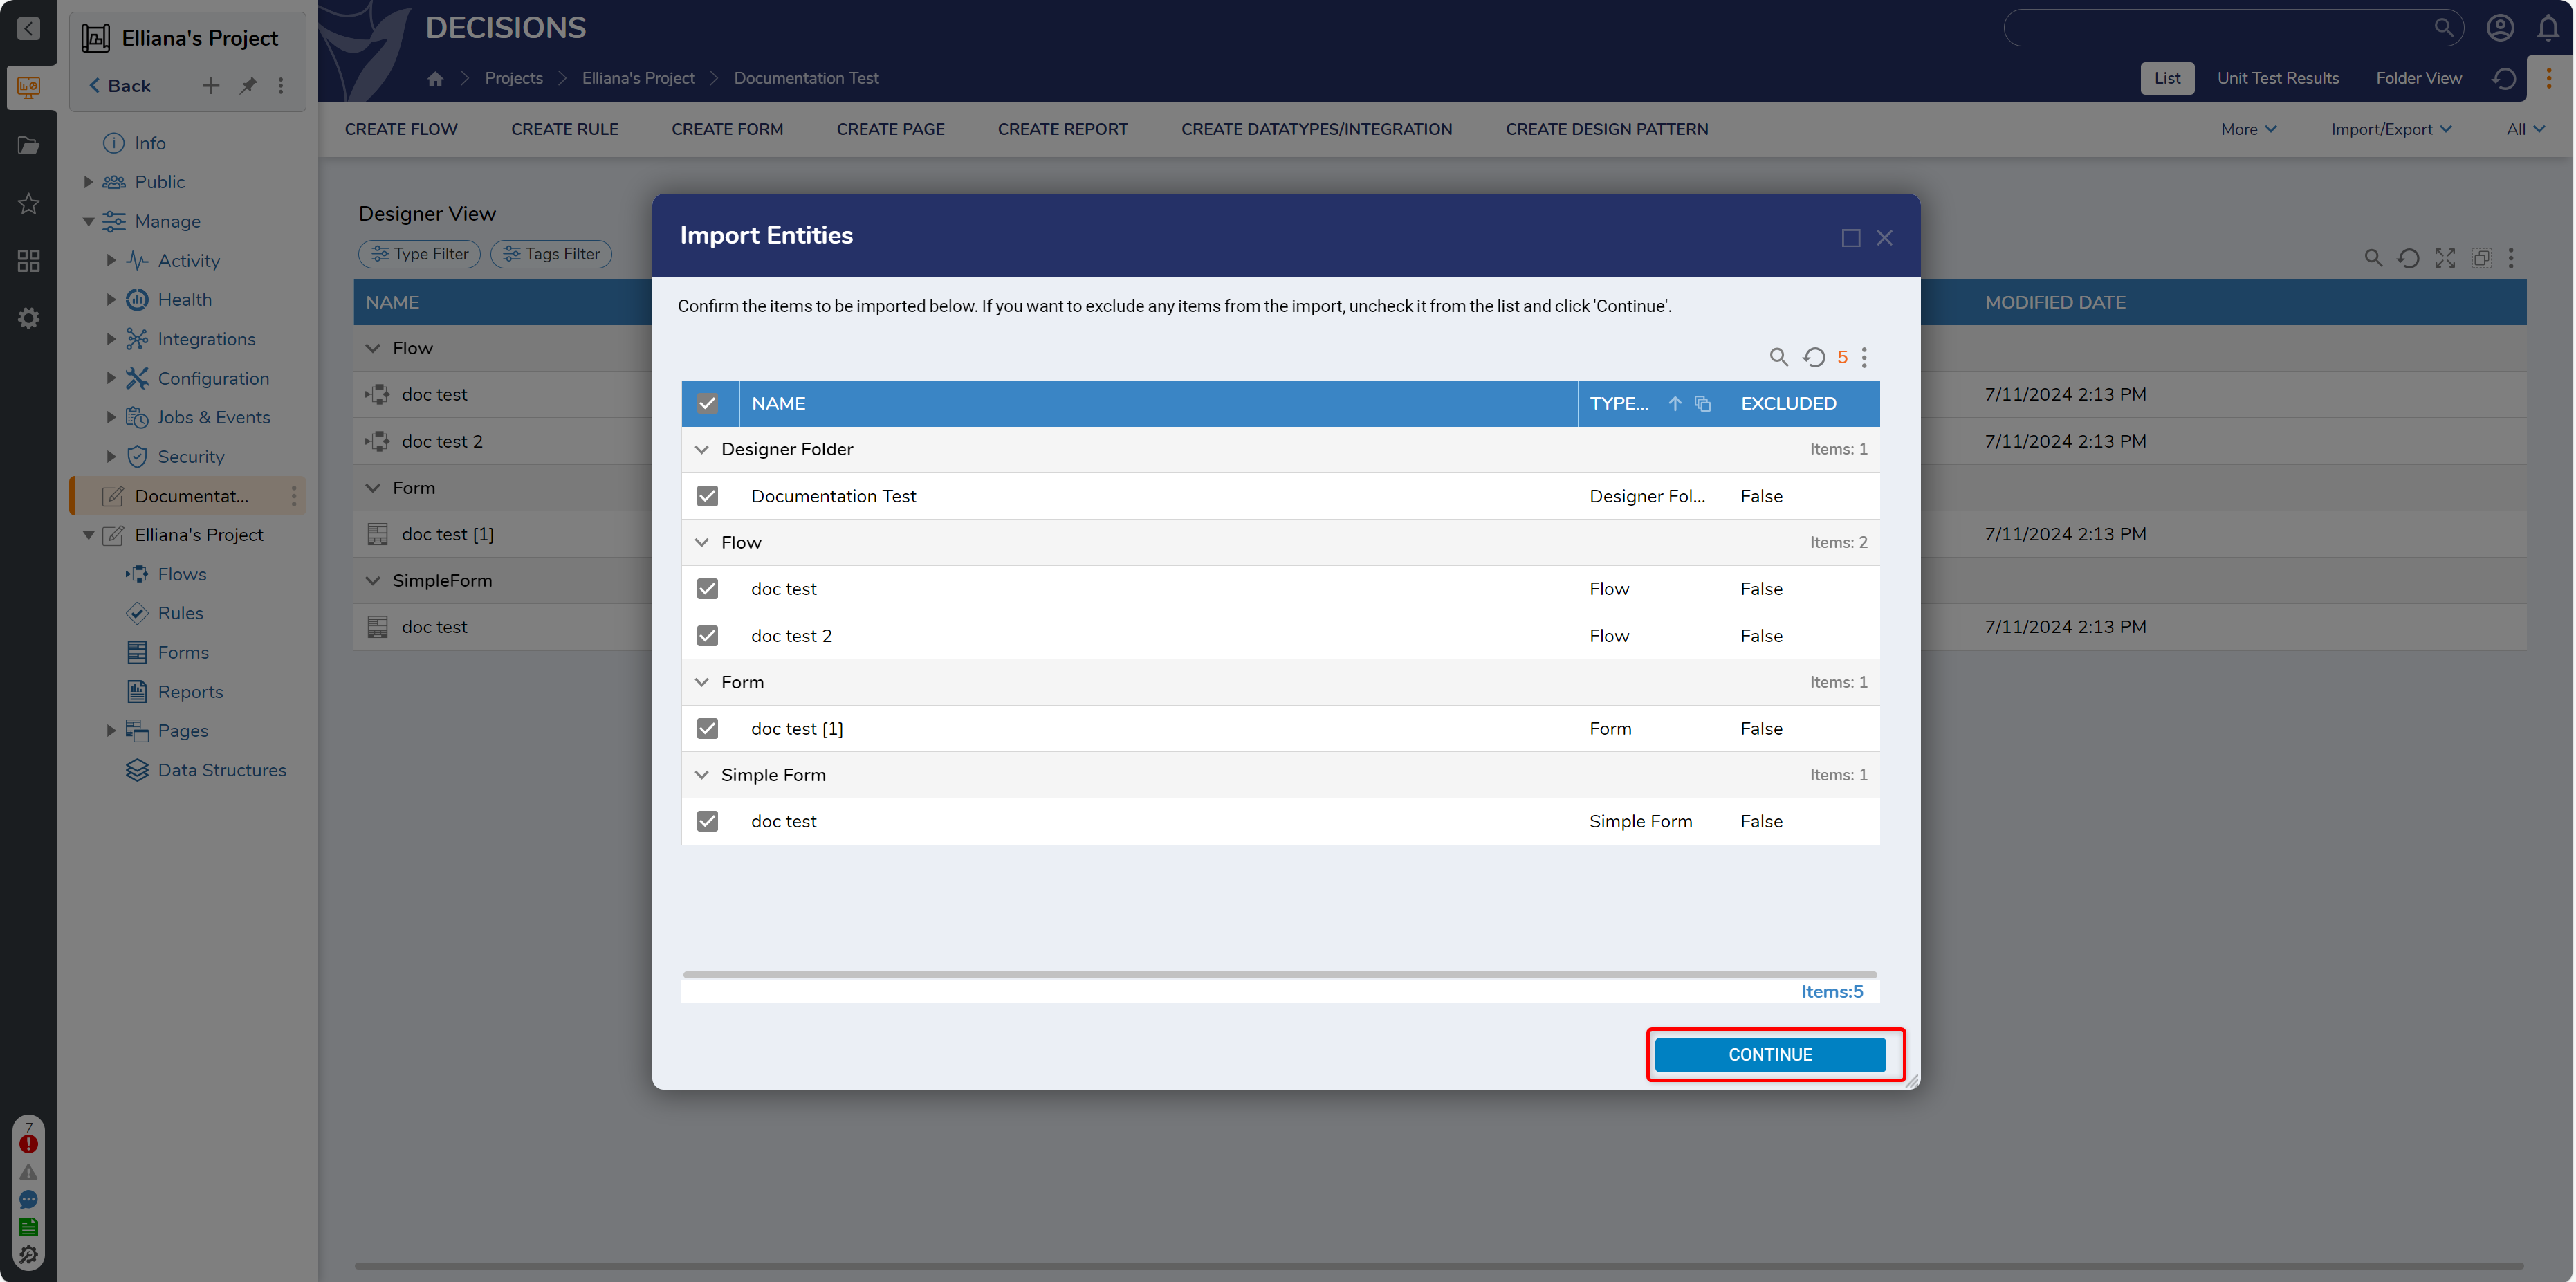
Select the entities to be imported and then click Continue.

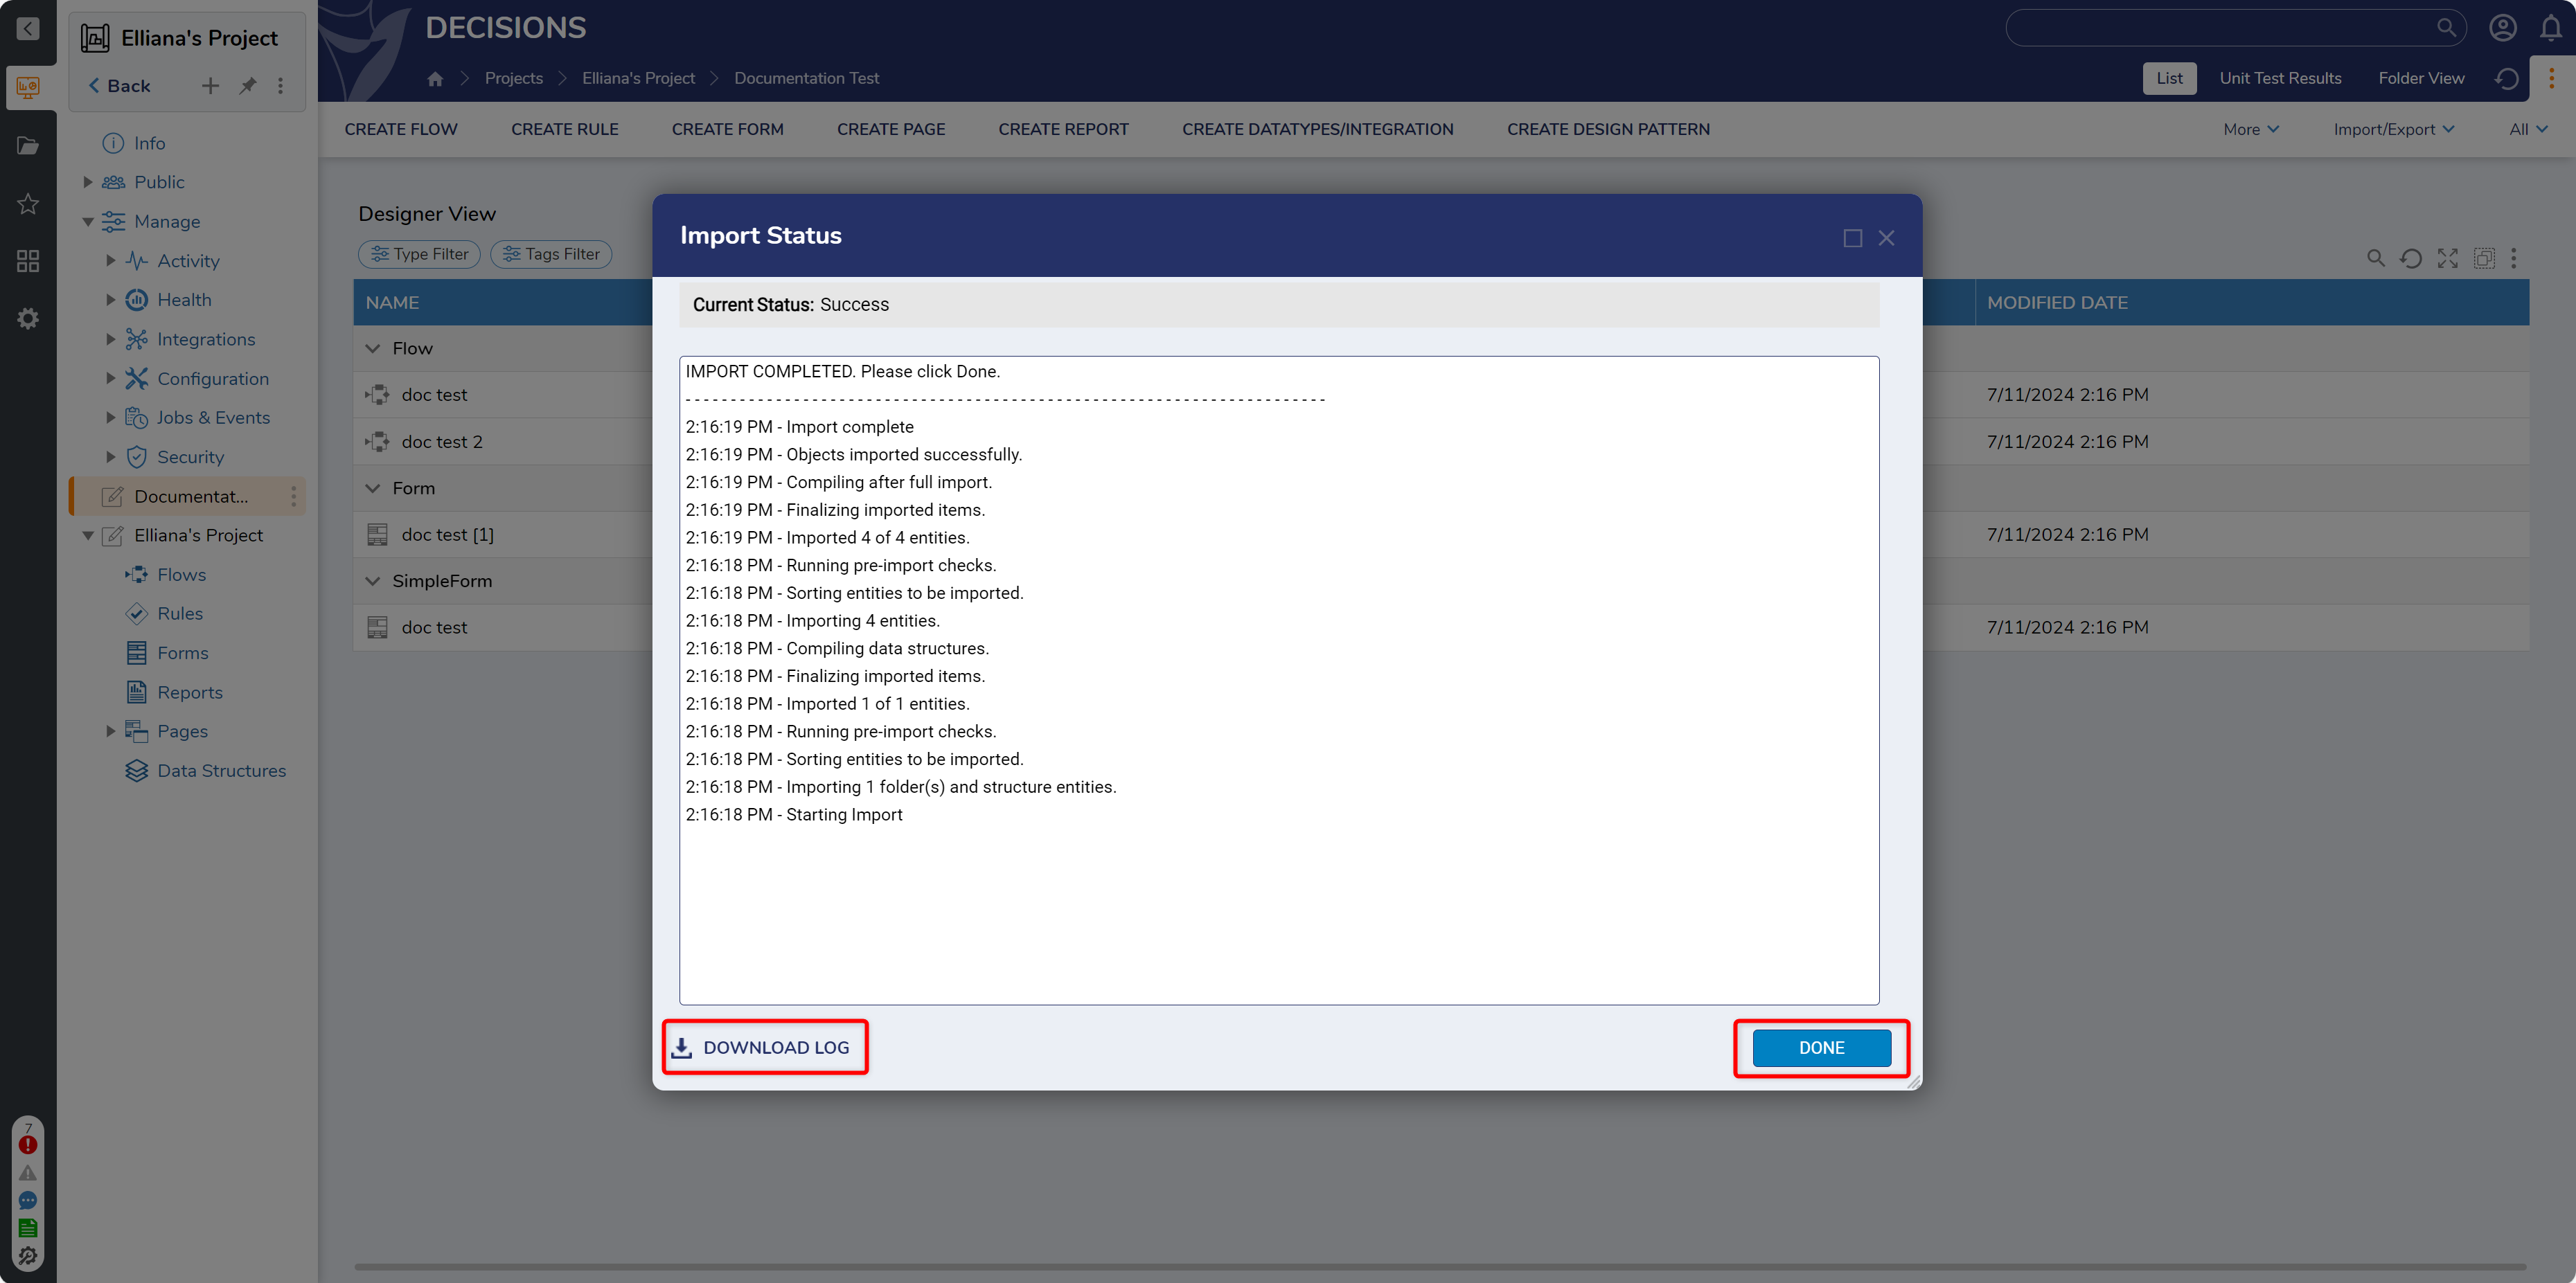
An “Import Status” dialog will appear. This dialog generates the import logs, which can be downloaded in .csv file format. Click Done. The Project is now successfully imported.

Import/Export Settings
Admin users can optimize the import and export of larger Projects by configuring the Import/Export Settings. Navigate to System > Settings > Import/Export Settings. Refer to the following table to configure the settings accordingly.
Setting Location | Setting Name | Description |
|---|---|---|
Import Directories | Default Export Directory | Enter the file path on the local file system where exported .decObj files will be stored. For instance, “C:\Users\decisionsuser\Desktop”. |
Make Subdirectory Module In Default Export Directory | This feature will create a new folder for each Project in the default directory. | |
Export To Directories | This setting allows users to export Projects to specific locations. | |
Import Settings | Do Not Import Export Preview Images | This will disable the import and export of preview images. A preview image is a thumbnail of a Designer Entity (Flow/Form/Rule/Page etc.). |
Project | Types To Ignore When Exporting | Allows selection of which data type(s) to ignore when exporting Projects. Selecting ignored data types allows Administrators to limit what data can be exported and reduce the number of dependencies in a Project for quicker exporting. |