Overview
In addition to the onboard filtration options available in the Report Designer, Reports can be filtered using various Page Controls in conjunction with the Report's Runtime Behavior. Such controls include but are not limited to the Form Tile or a Flow Run Part.
The Flow Run Part allows a Flow that contains a Form to run within the designated space on a Page/Dashboard; this Flow can be configured to take in user-defined Filter criteria and send it to the Report.
A Form Tile can be used in tandem with an Active Form Flow to Trigger an event that filters the Report after an Event Button (or another Trigger object) is selected.
Setup
The following section can establish an attached Page/Dashboard with a Report Designer that displays Account Data Source information that can subsequently be filtered via a Flow Run Part or Form Tile.
- From a new or preexisting attached Page/Dashboard, add a Report Viewer from Toolbox > FAVORITES.
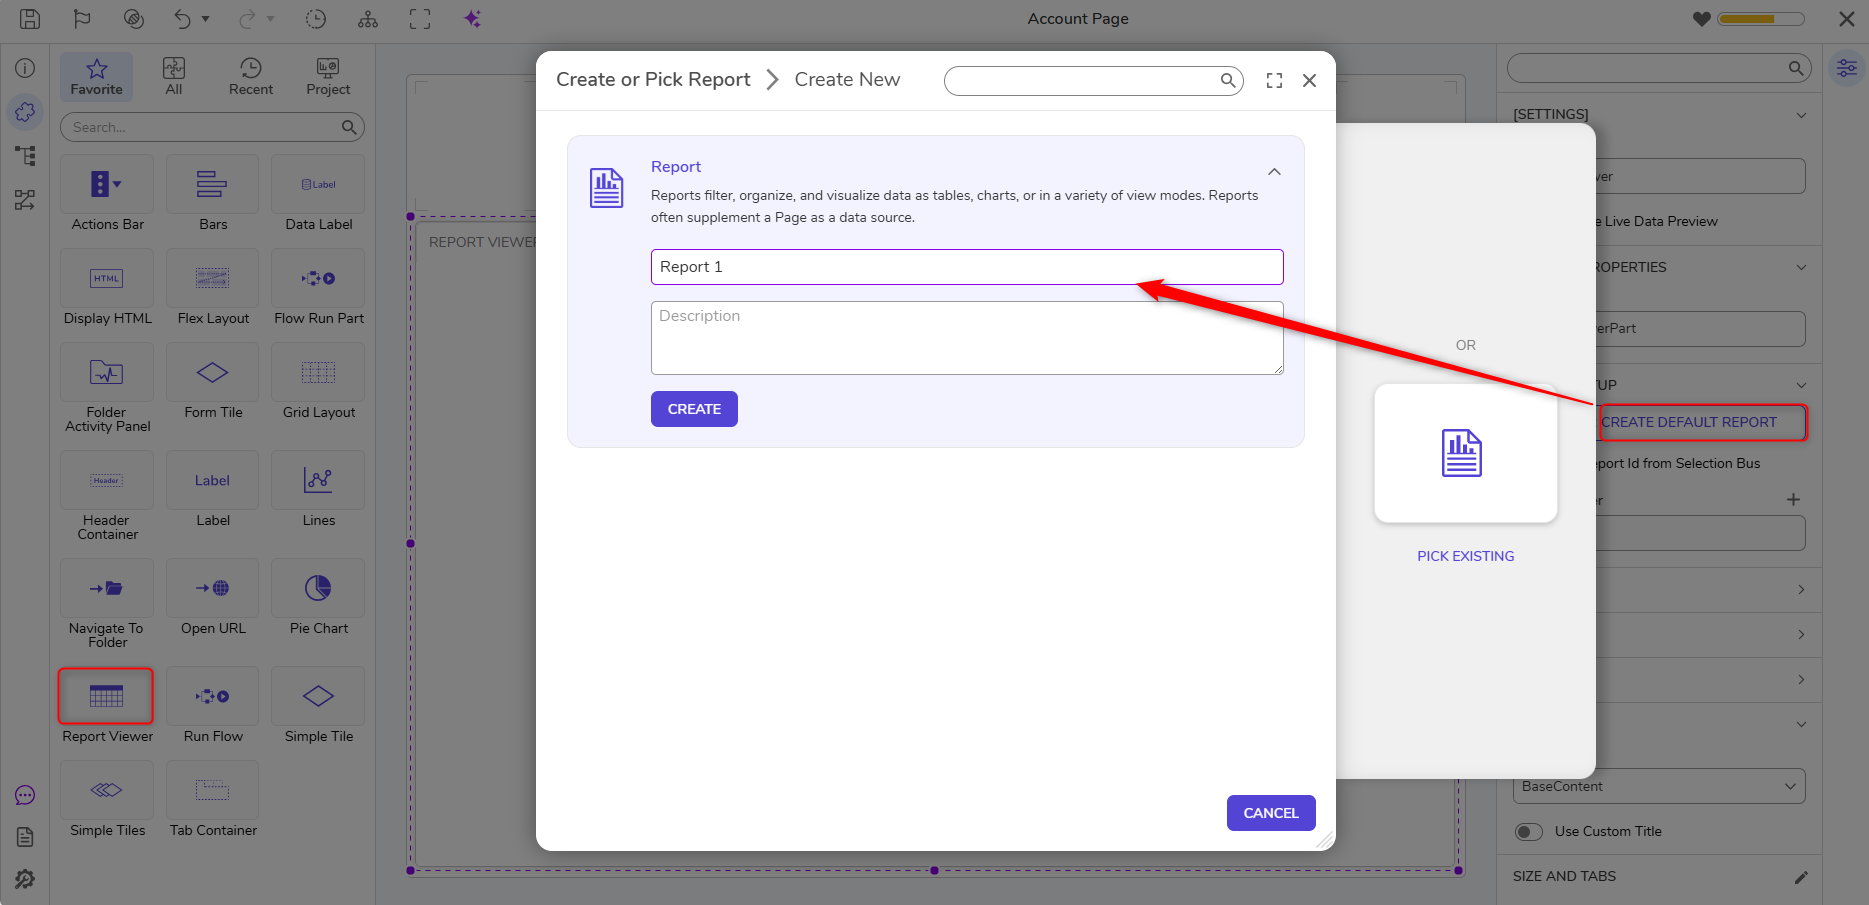
- From the Properties of the Report Viewer, under REPORT SETUP, click PICK OR CREATE DEFAULT REPORT, then CREATE a new Report.
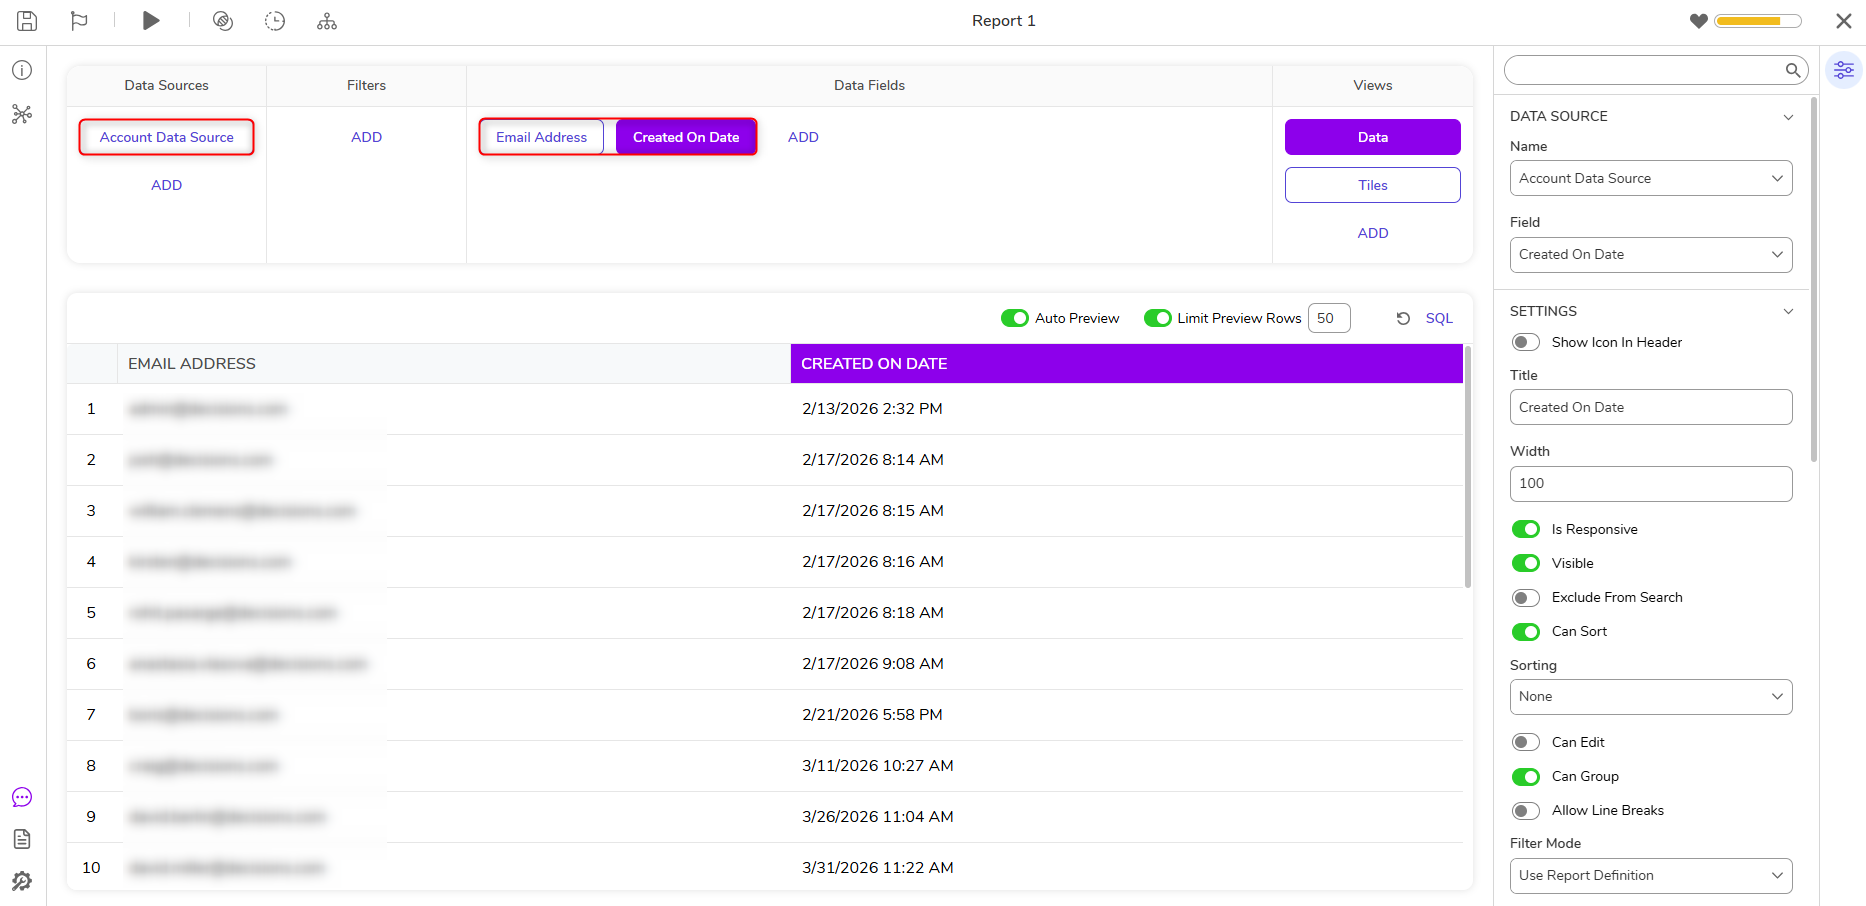
- From the Report Designer, create a Report that uses the Account Data Source and the Email Address Data Field.
- Under Filters, Add and select Field Filters > Email Address > Email Address Contains. Then from the Properties tab under SETTINGS, select Get Values From Other Reports from the Runtime Behavior dropdown.
While still in the Properties tab, enable Show all data when filter value empty. Then, Save and close the Report Designer.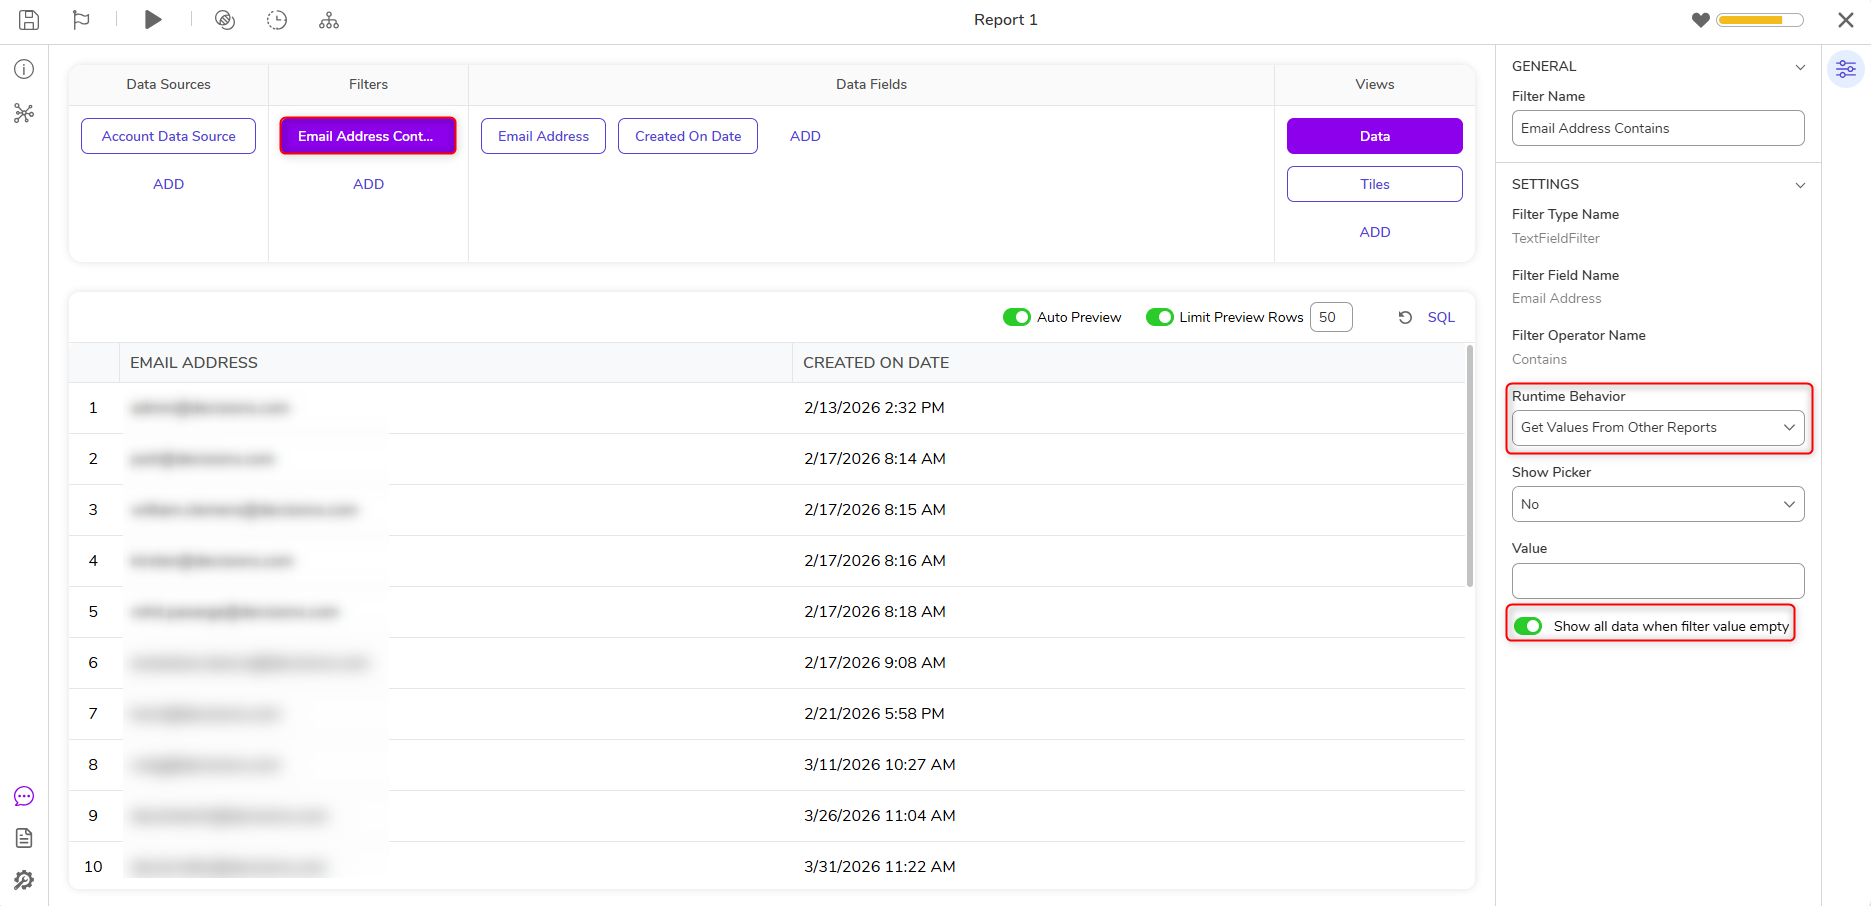
Flow Run Part
- Back in the Page Designer, under Toolbox > Buttons & Actions > FLOWS, add a Flow Run Part to the top portion of the Page, and expand it horizontally across the workspace.
From the Properties tab of the Flow Run Part, under FLOW INFO, click PICK OR CREATE FLOW ID, then CREATE a new Flow.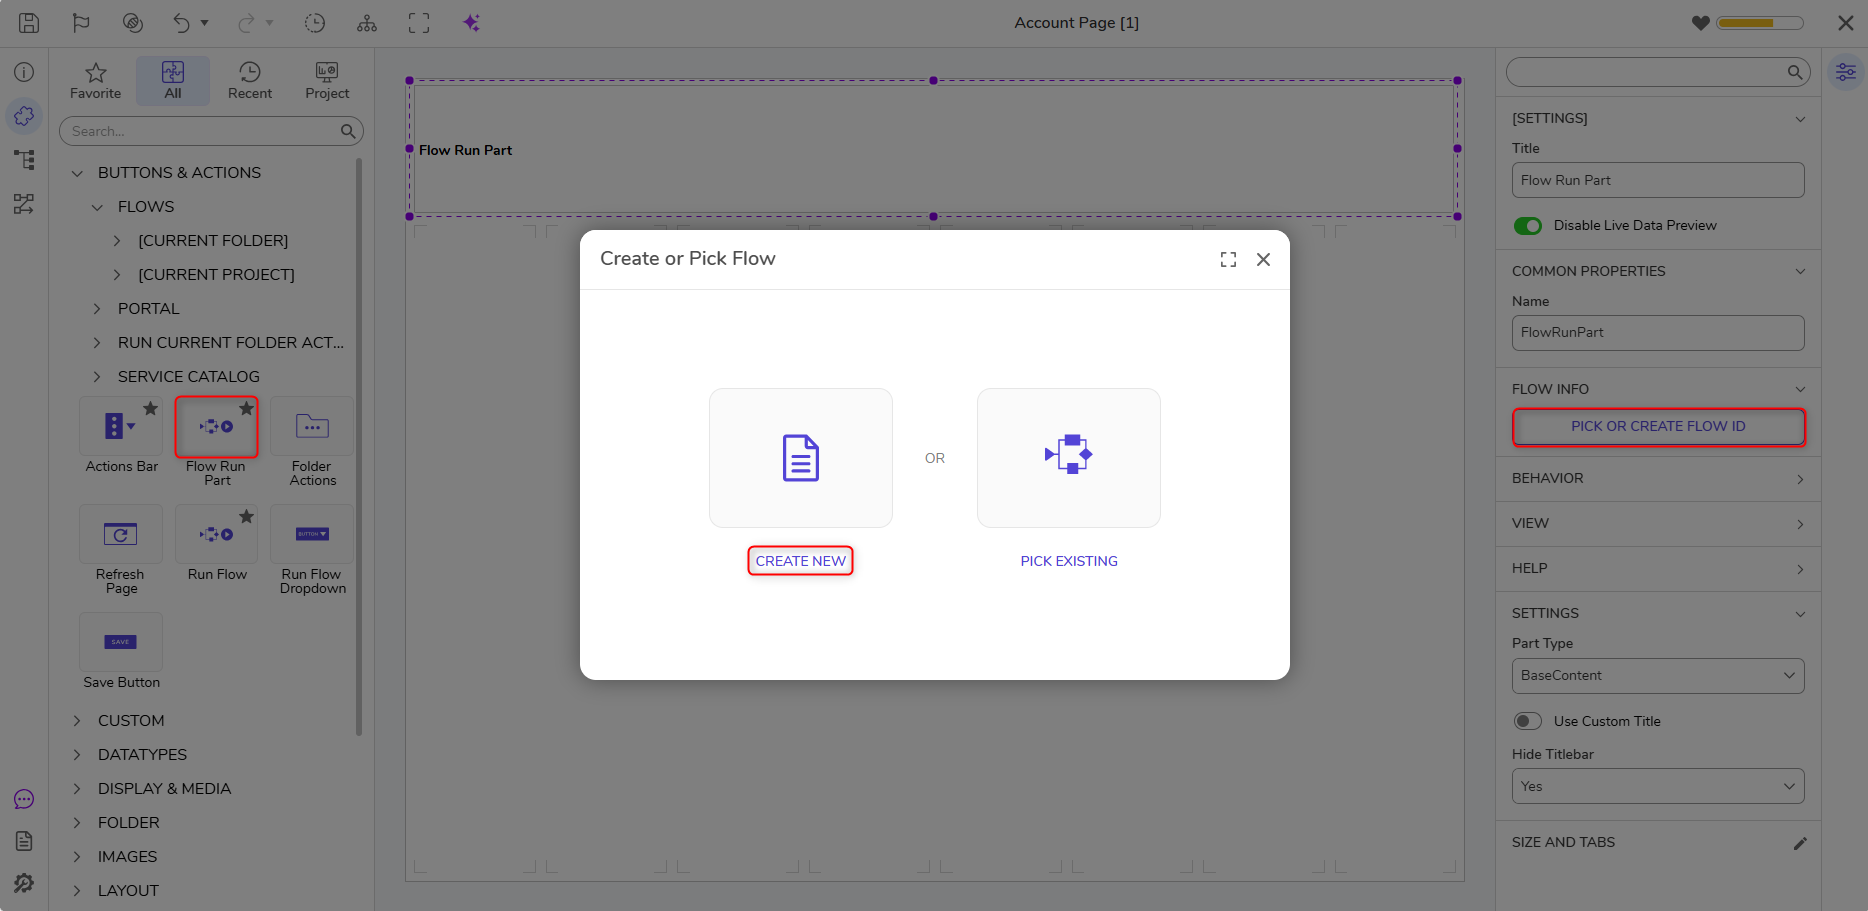
- From the Flow Designer, under Toolbox > FAVORITE STEPS, attach a Show Form step to the Start step.
From the newly added step's Properties, click PICK OR CREATE FORM, then CREATE a new Form. - From the Form Designer, create a Form using a single Text Box with the corresponding Label "Email Address Contains" and two Buttons; one labeled "Clear Filter" and one labeled "Search."
From the Properties of the TextBox, ensure that each item under OUTCOME SCENARIOS is set to Optional. Then, Save and close the Form Designer.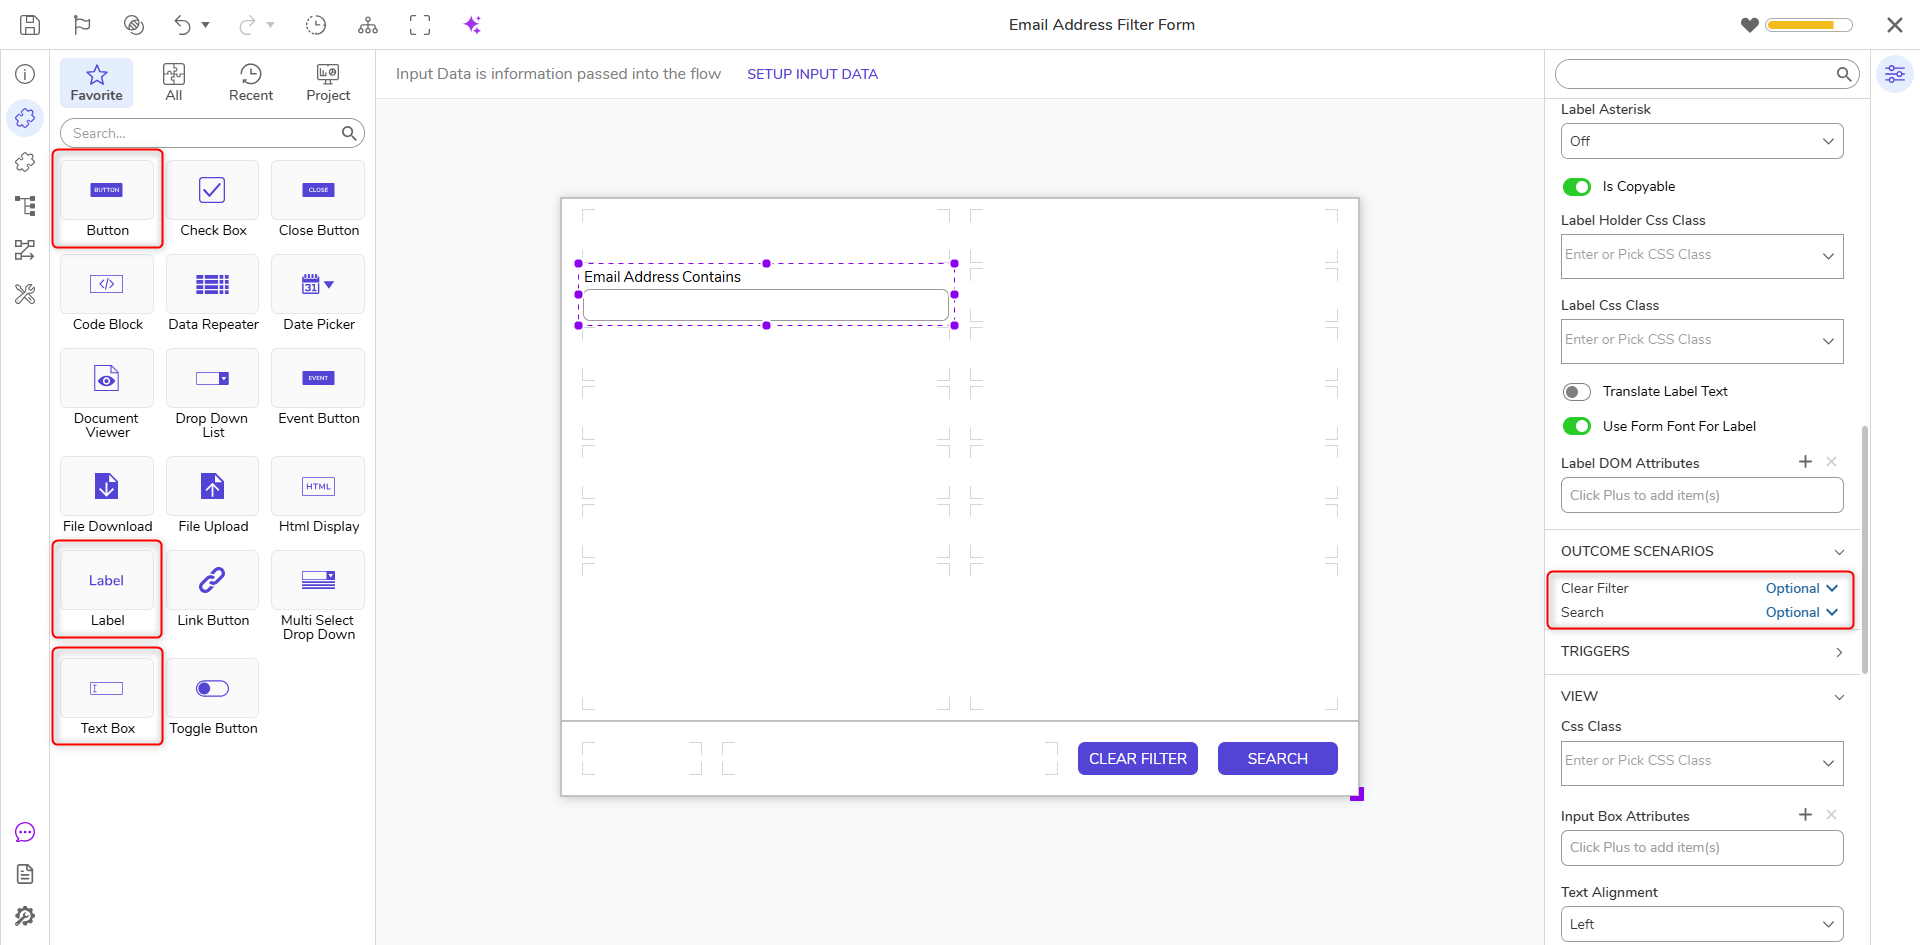
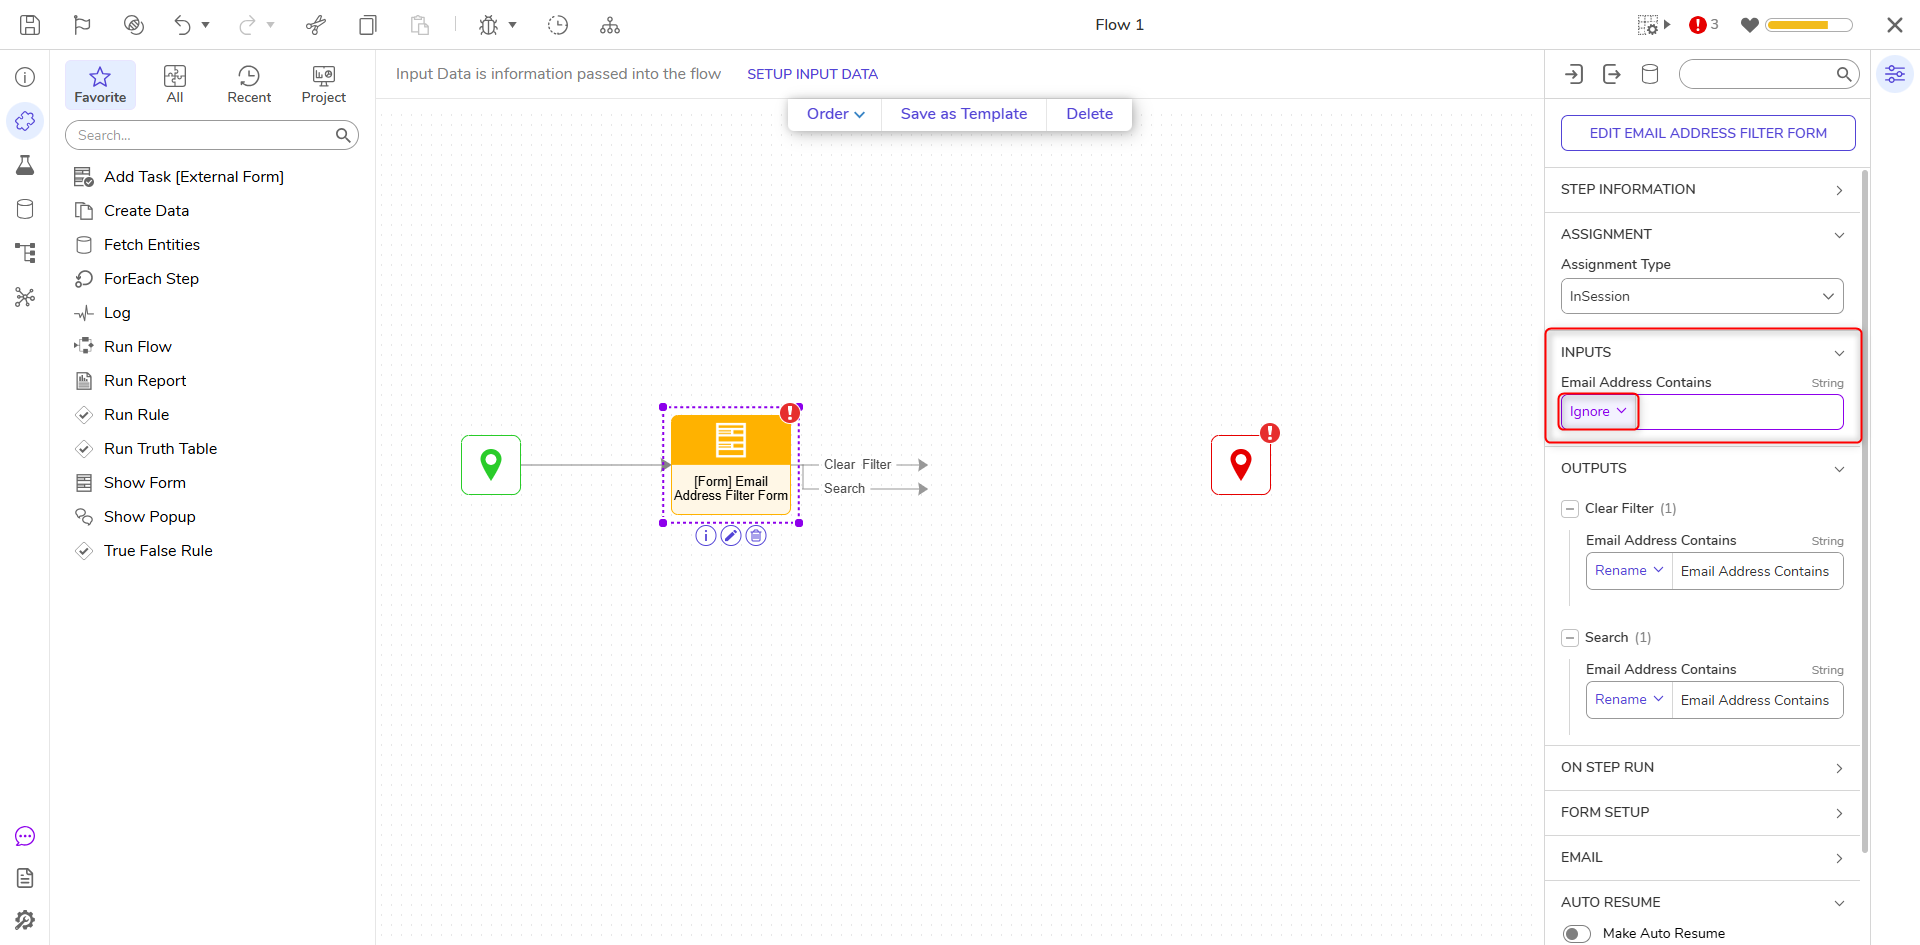
- From the Flow Designer in the Properties for the Form step, set the mapping for Email Address Contains to Ignore.
- Under Toolbox > DESIGNER ENTITIES > REPORTING, attach a Set Dashboard Report Parameters step to the Search path of the Form step.
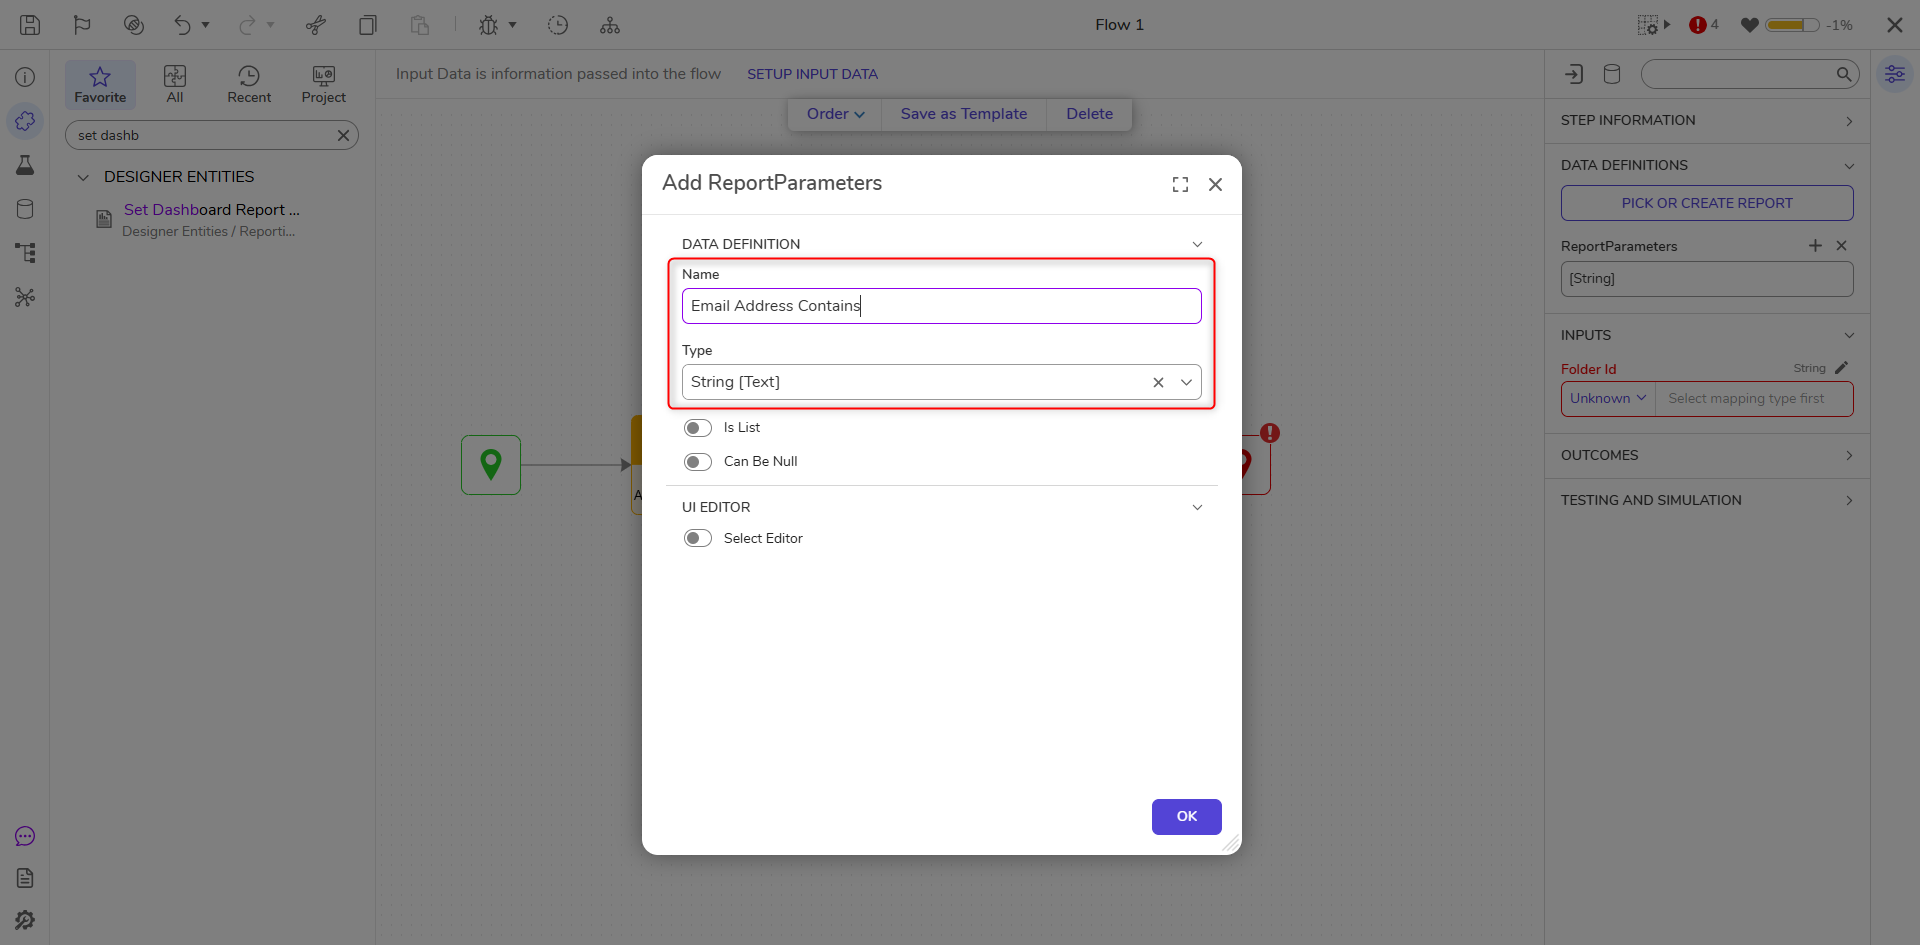
From the Properties of Set Dashboard Report Parameters, under DATA DEFINITIONS > ReportParameters, click the +.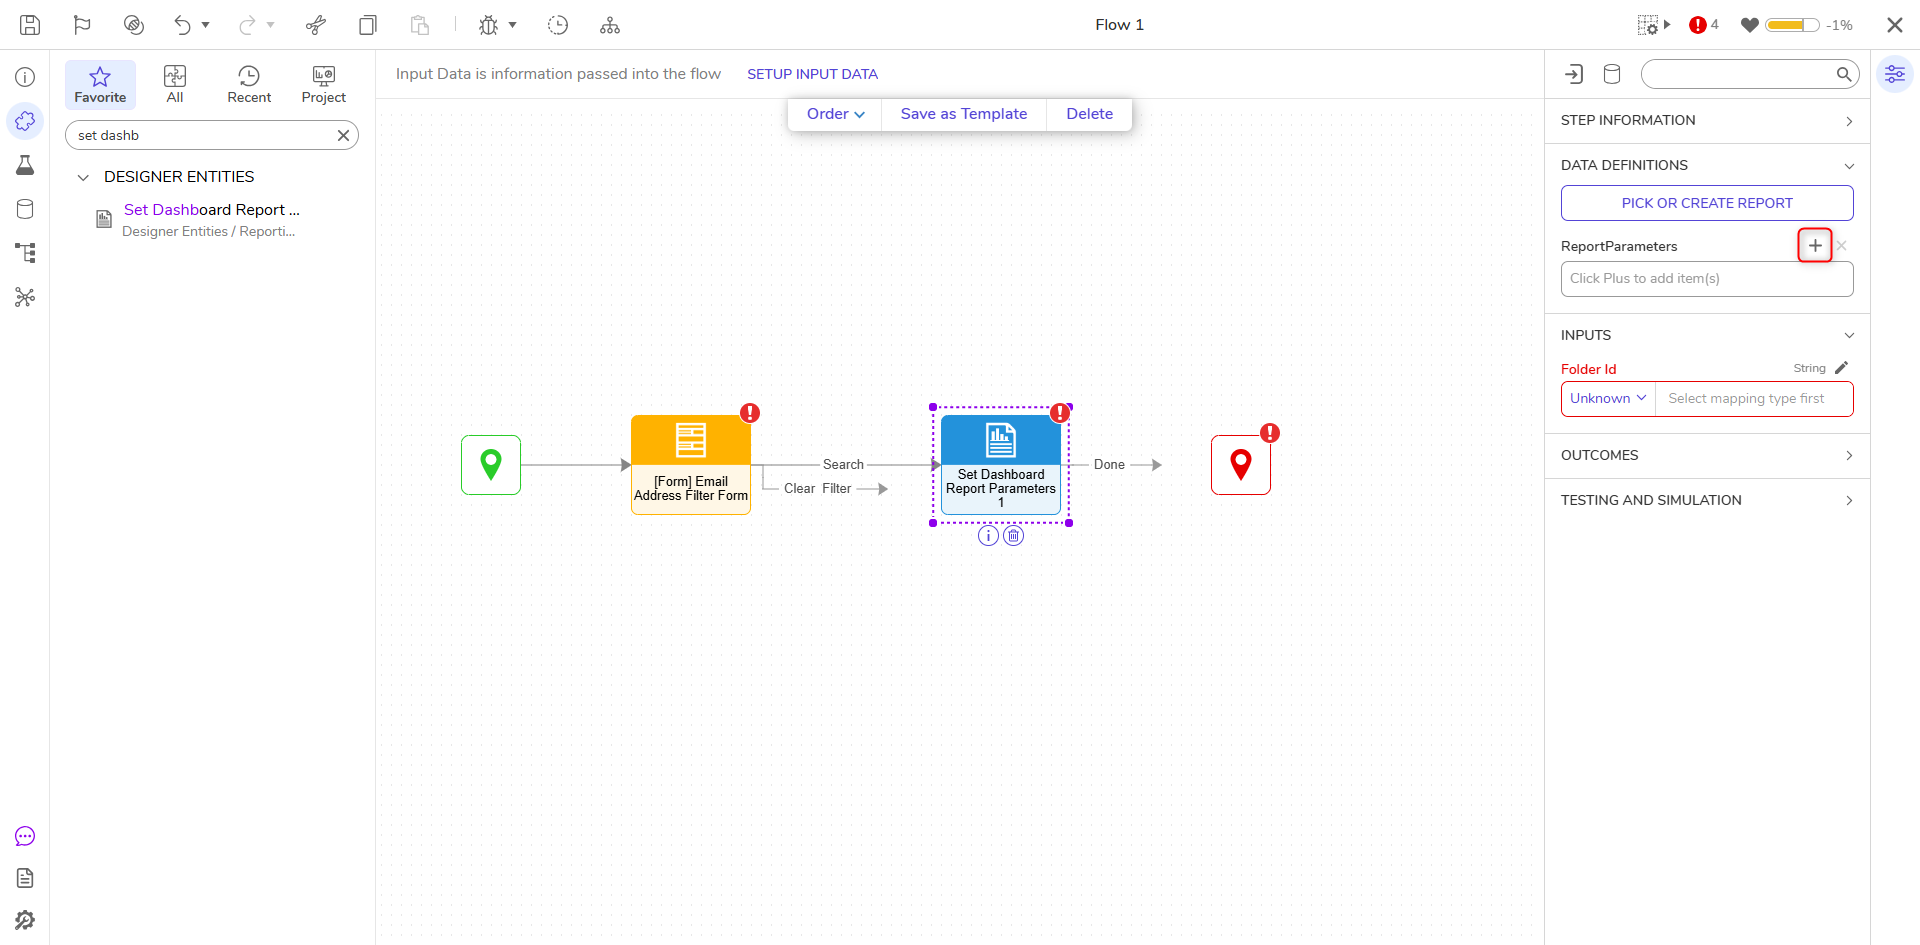
- From the Add ReportParameters window, provide a Name that matches the Report's Filter (in this case, "Email Address Contains"). Leave Type set to String [Text], then click OK.
- Under the INPUTS section of the Set Dashboard report Parameters step's Properties, map "Email Address Contains" to its respective Input.
Then, in another tab, obtain the Designer Folder ID of the Designer Project containing the Page; return to the Flow and Constant map the obtained Designer Folder ID to Folder Id.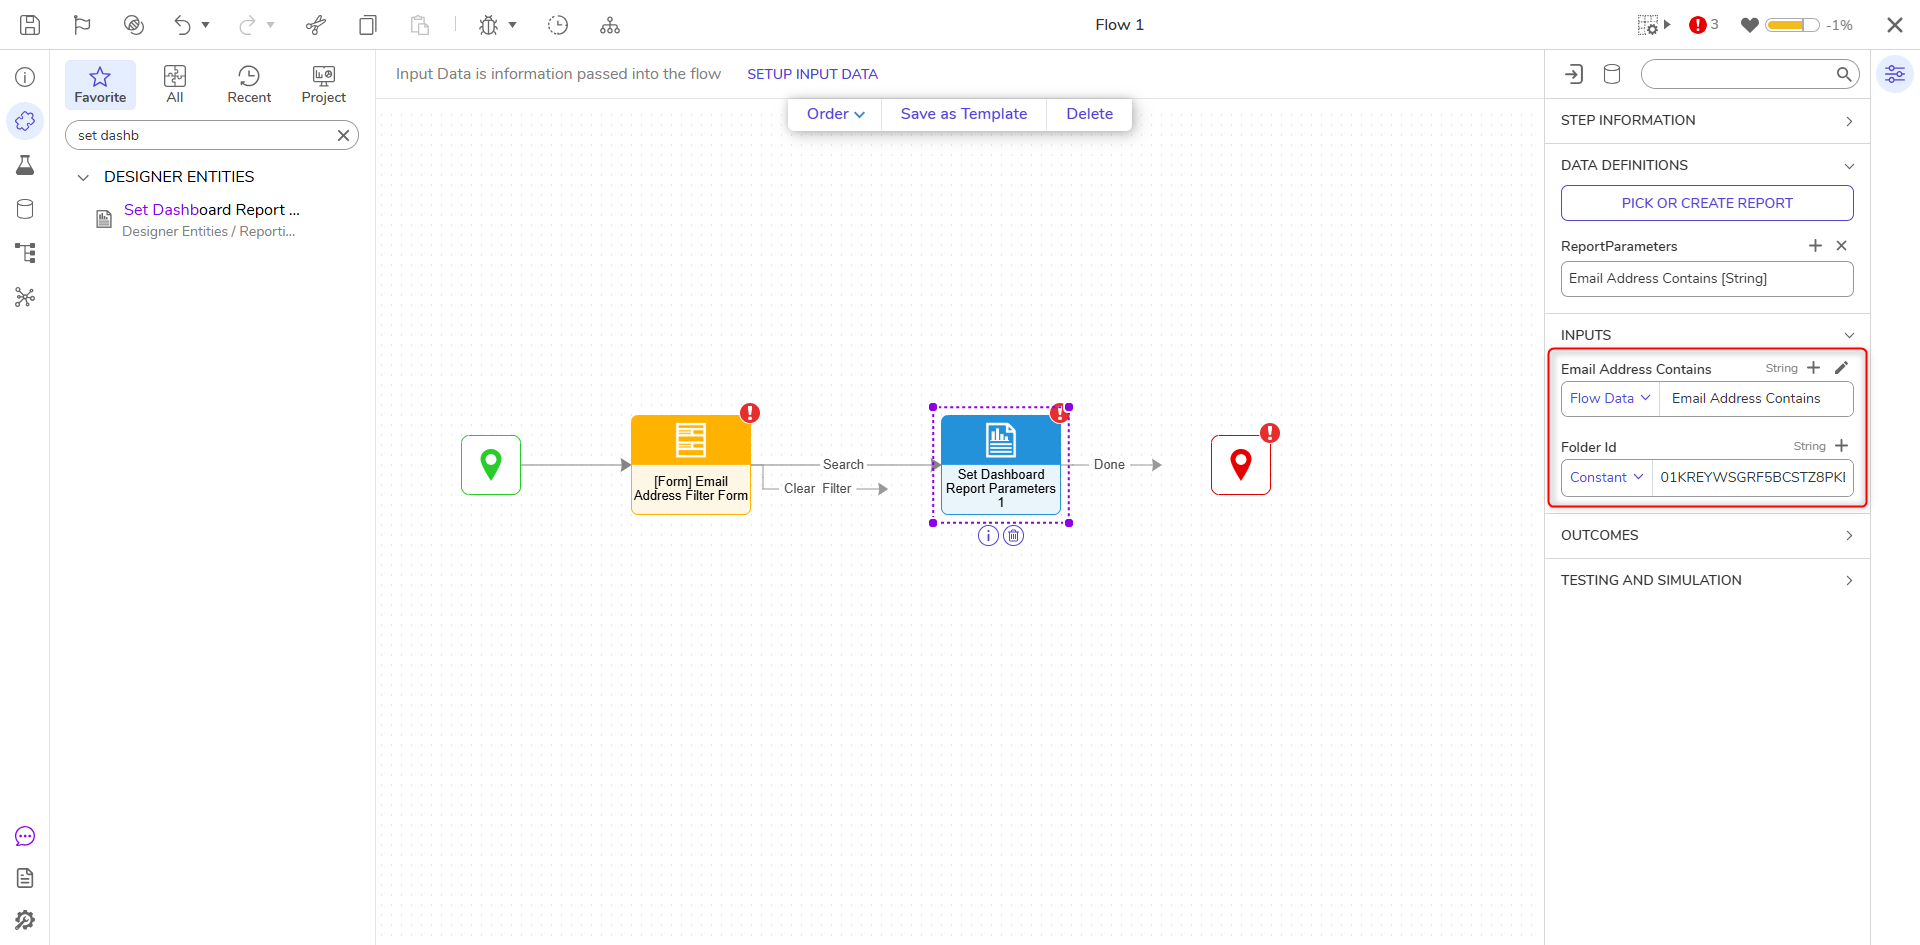
- From the FAVORITE STEPS category, attach a Create Data step to the Clear Filter path. From the Properties of the Create Data step, under DATA > Data to Create, click SHOW EDITOR.
In the resulting Data to Create window, define the data by providing a NAME, selecting String [Text] from the TYPE dropdown, and leaving the INPUT blank.
Then, Save and close the window; the blank INPUT is used to clear out the Text Box upon selecting the Clear Button.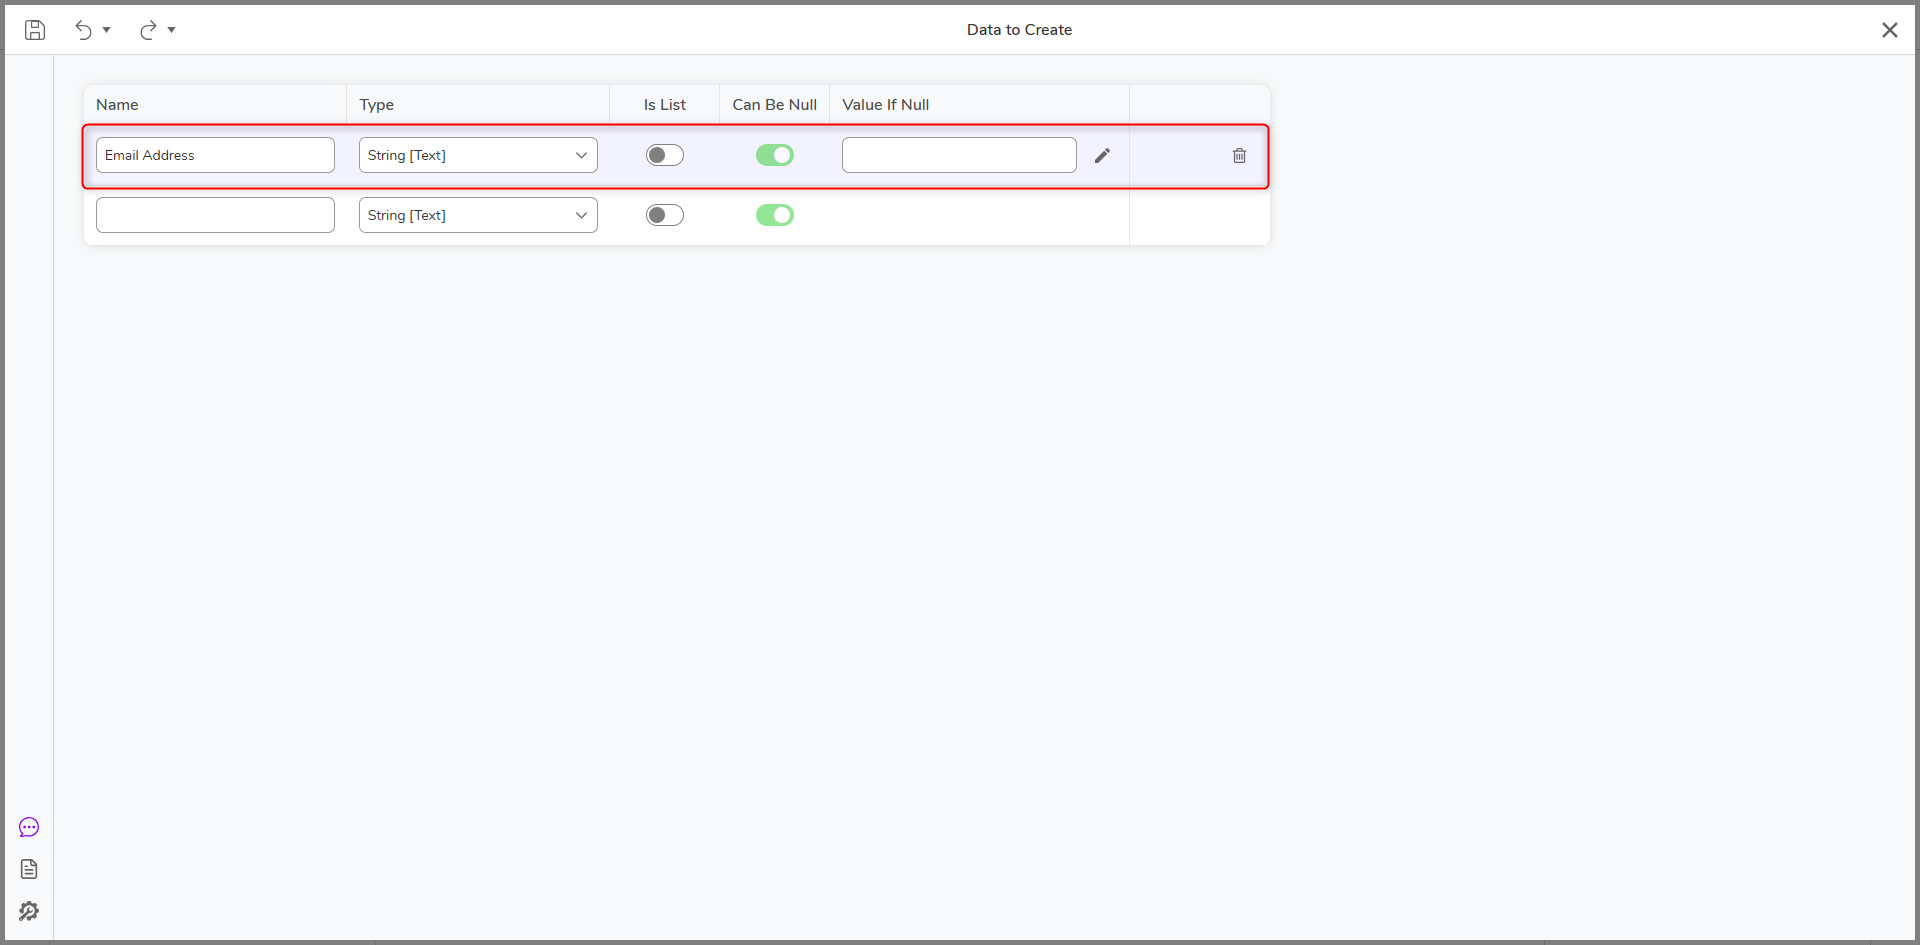
- Back in the Flow Designer, connect the Done path of the Create Data step to the Set Dashboard Report Parameters step and the Done path of Set Dashboard Report Parameters to the Show Form step.
Save and close the Flow, then Save and close the Page. Back in the Add Page/Dashboard window, click SAVE.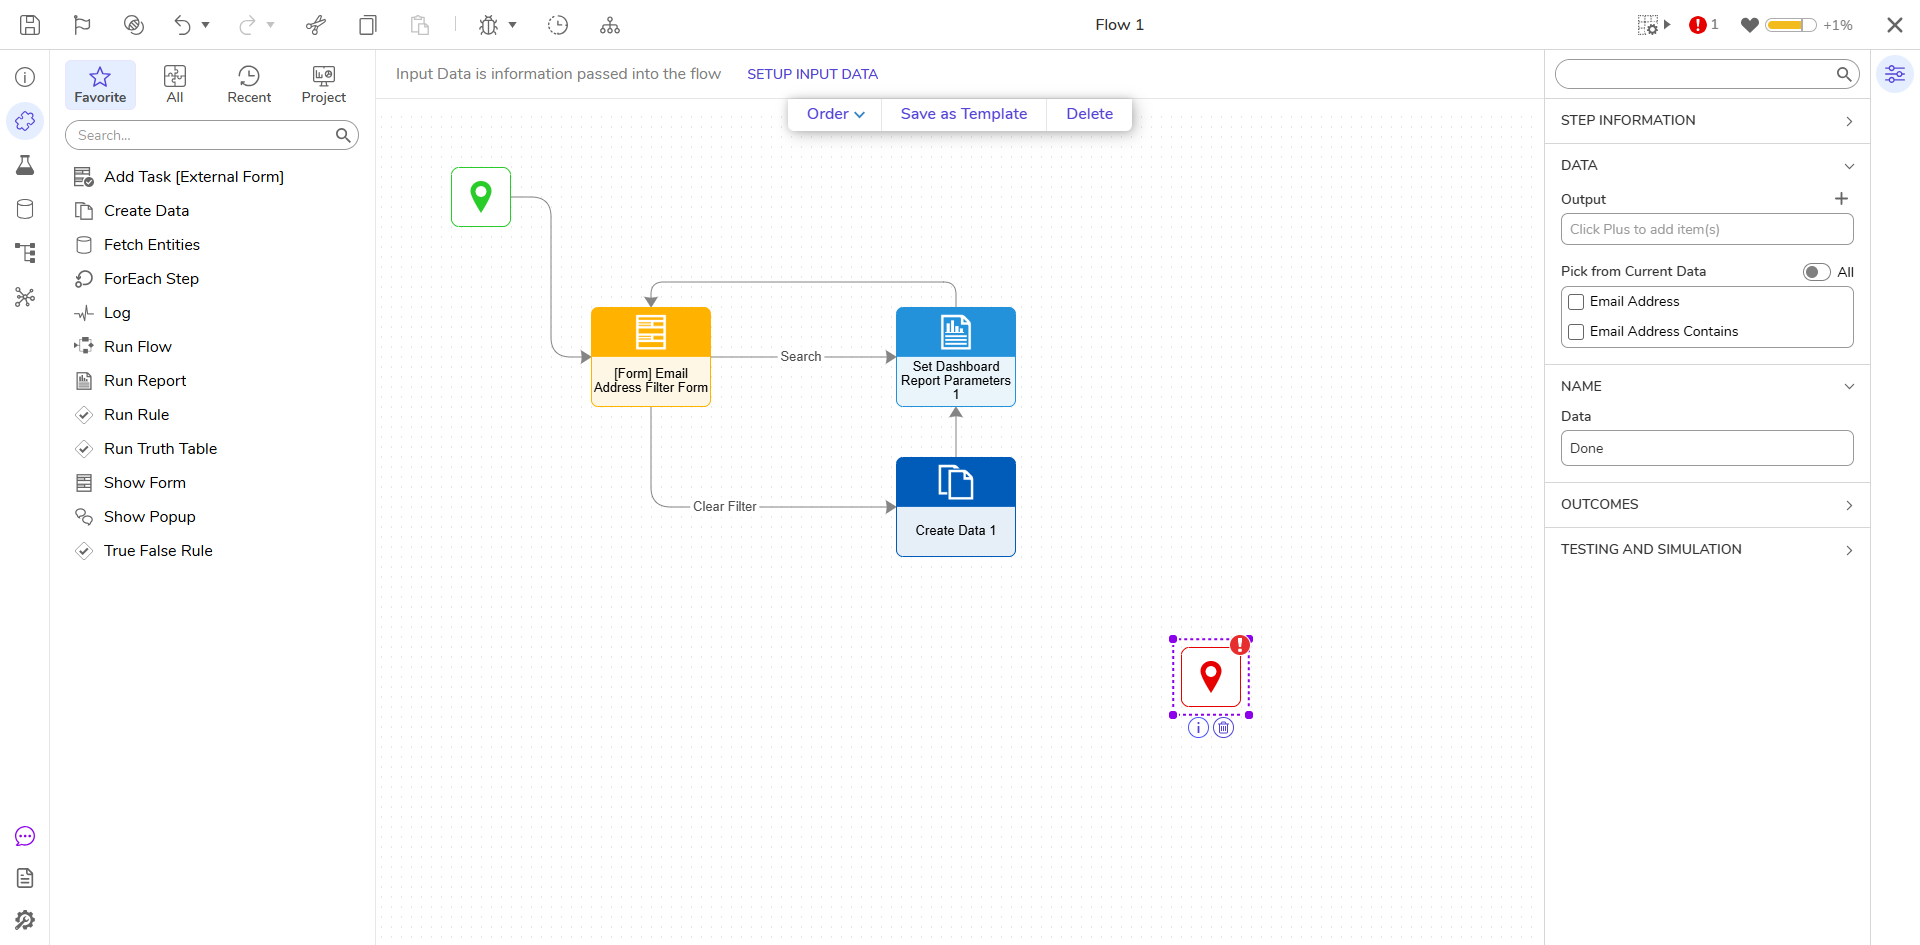
Debug
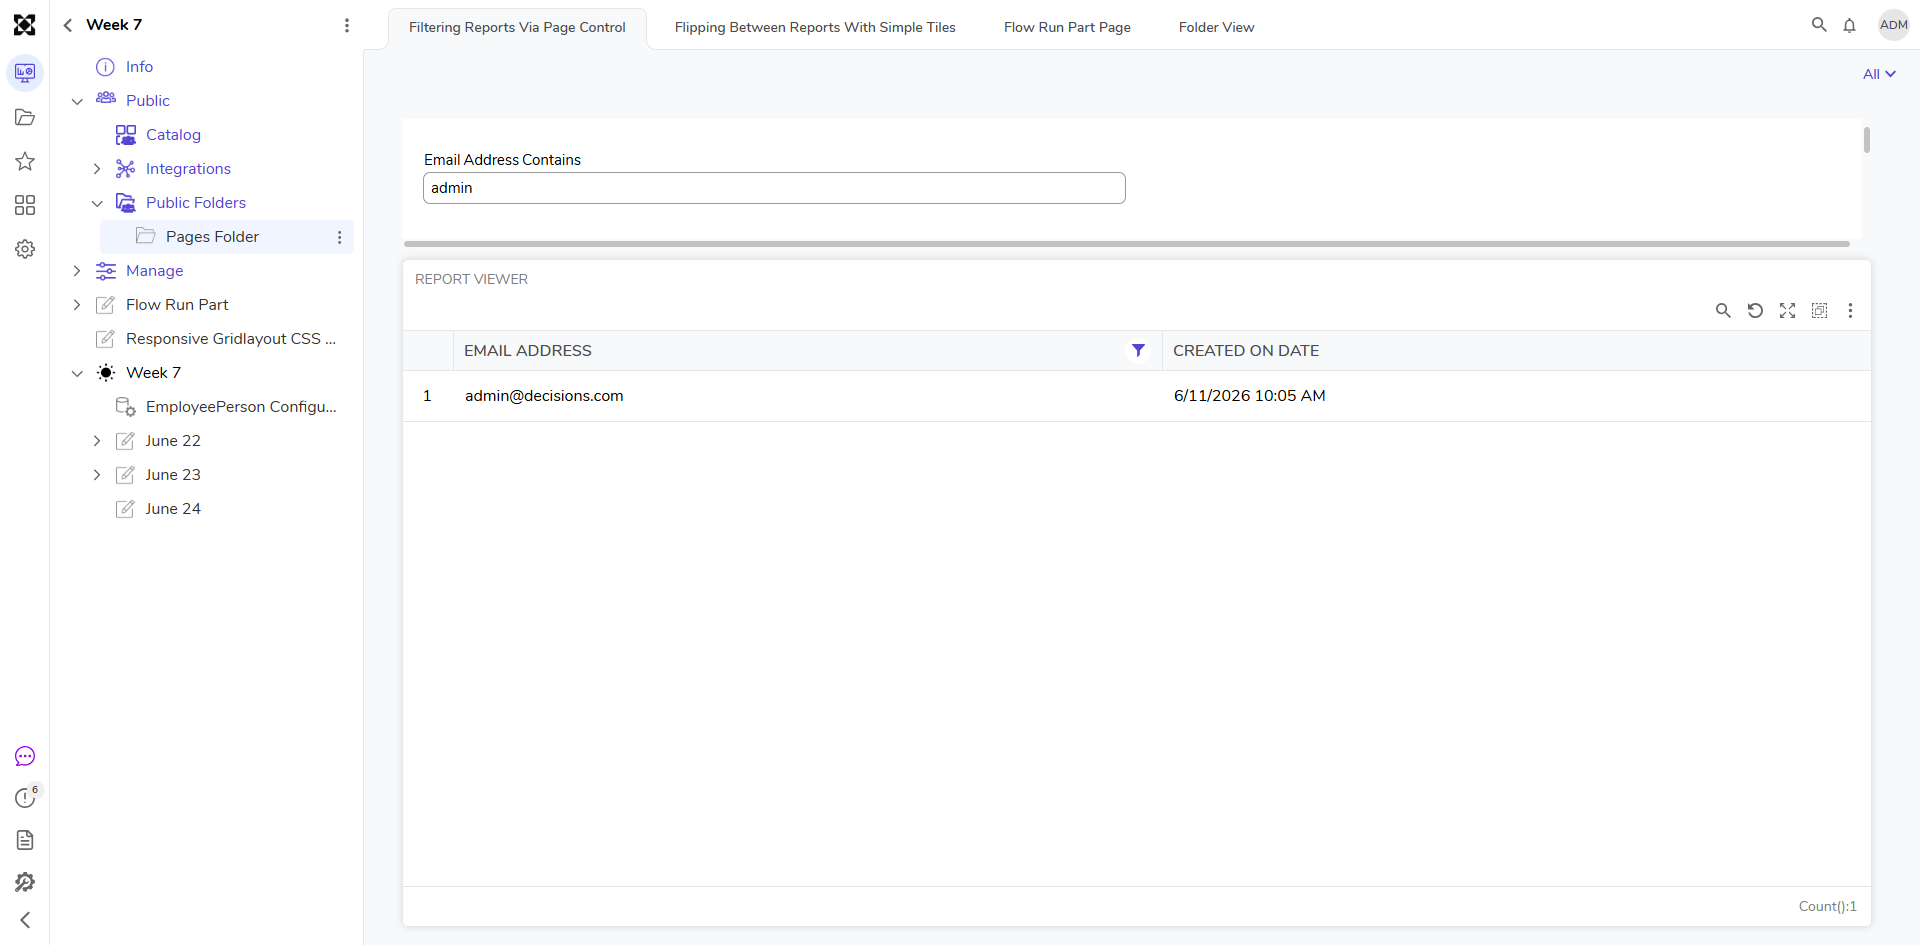
- Navigate to the added Page by clicking its respective tab at the top of the Page.
- From the Flow Run Part on the Page, verify that the Report filters out values based on the submitted Search criteria and that the criteria clear out upon selecting the Clear Filter Button.
Form Tile
- Back in the Page Designer, under Toolbox > Tiles, add a Form Tile to the Page.
From the Properties of the added Form Tile, under INPUT, select PICK OR CREATE TILE FORM. Then, CREATE a new Form Tile.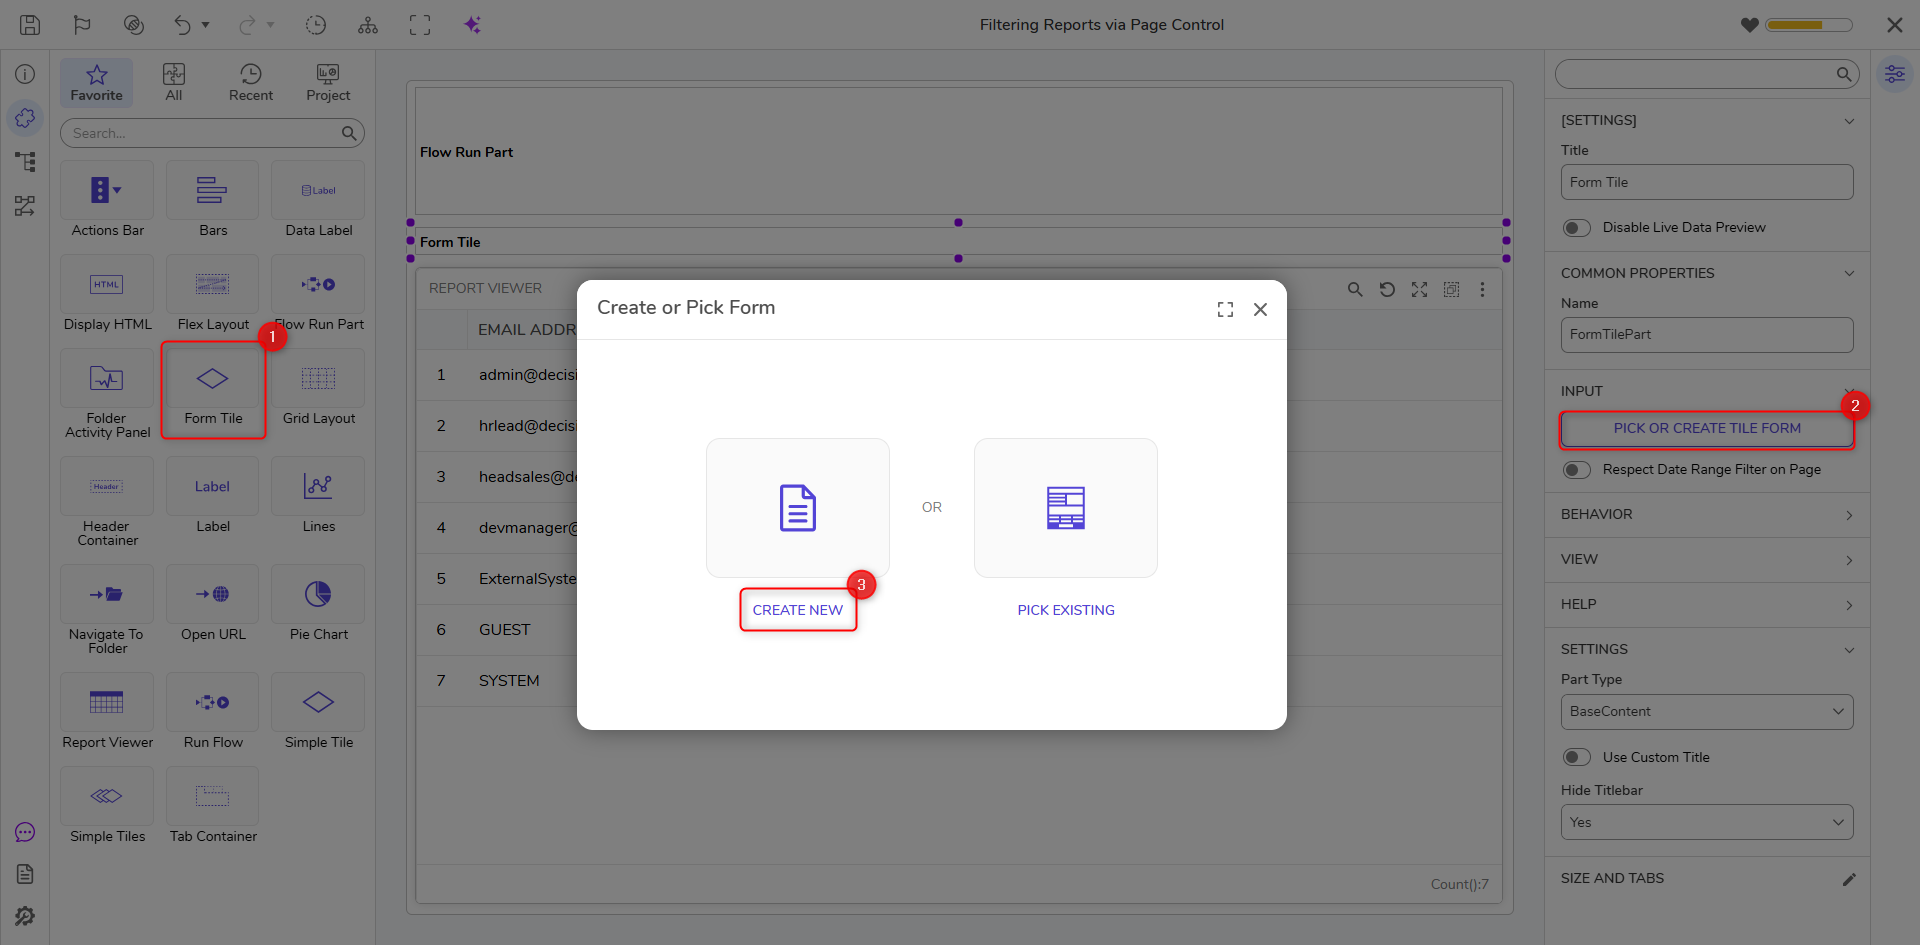
- From the resulting Form Designer, add an Event Button from Toolbox > ACTIONS > EVENTS to the Form.
Note that the Event Button is used as the trigger for filtration on the Report; any other Control can be used in its place if desired.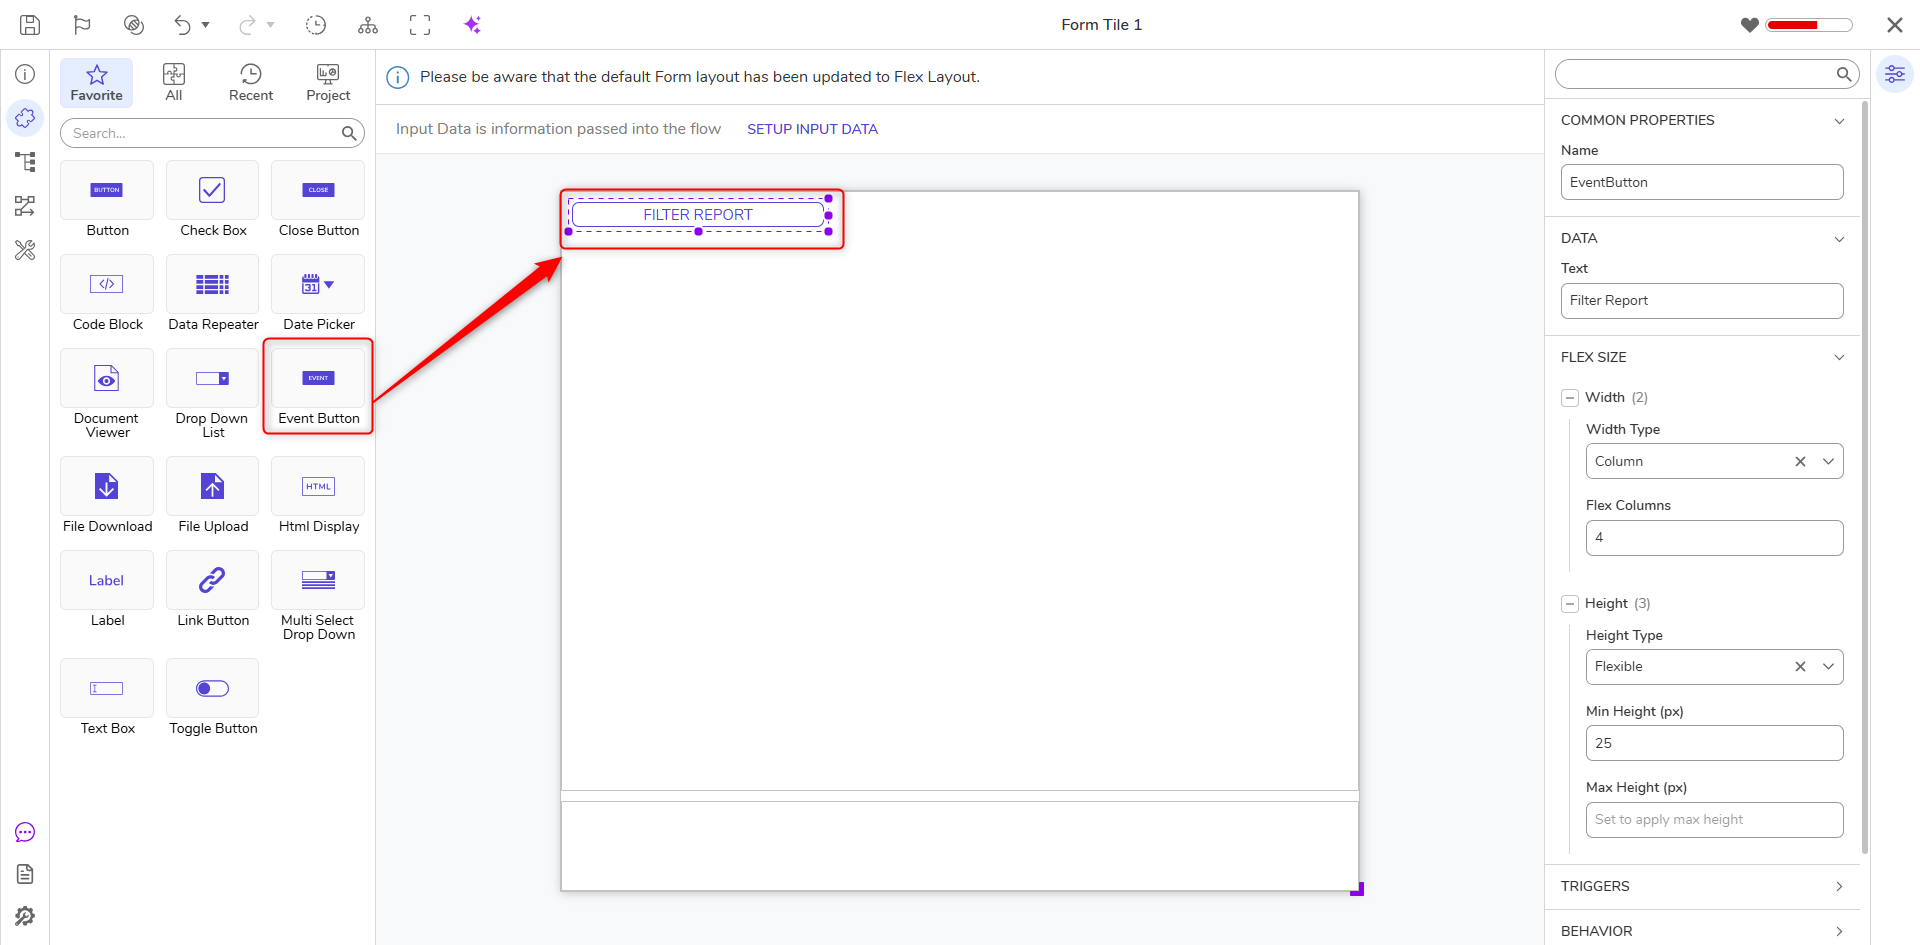
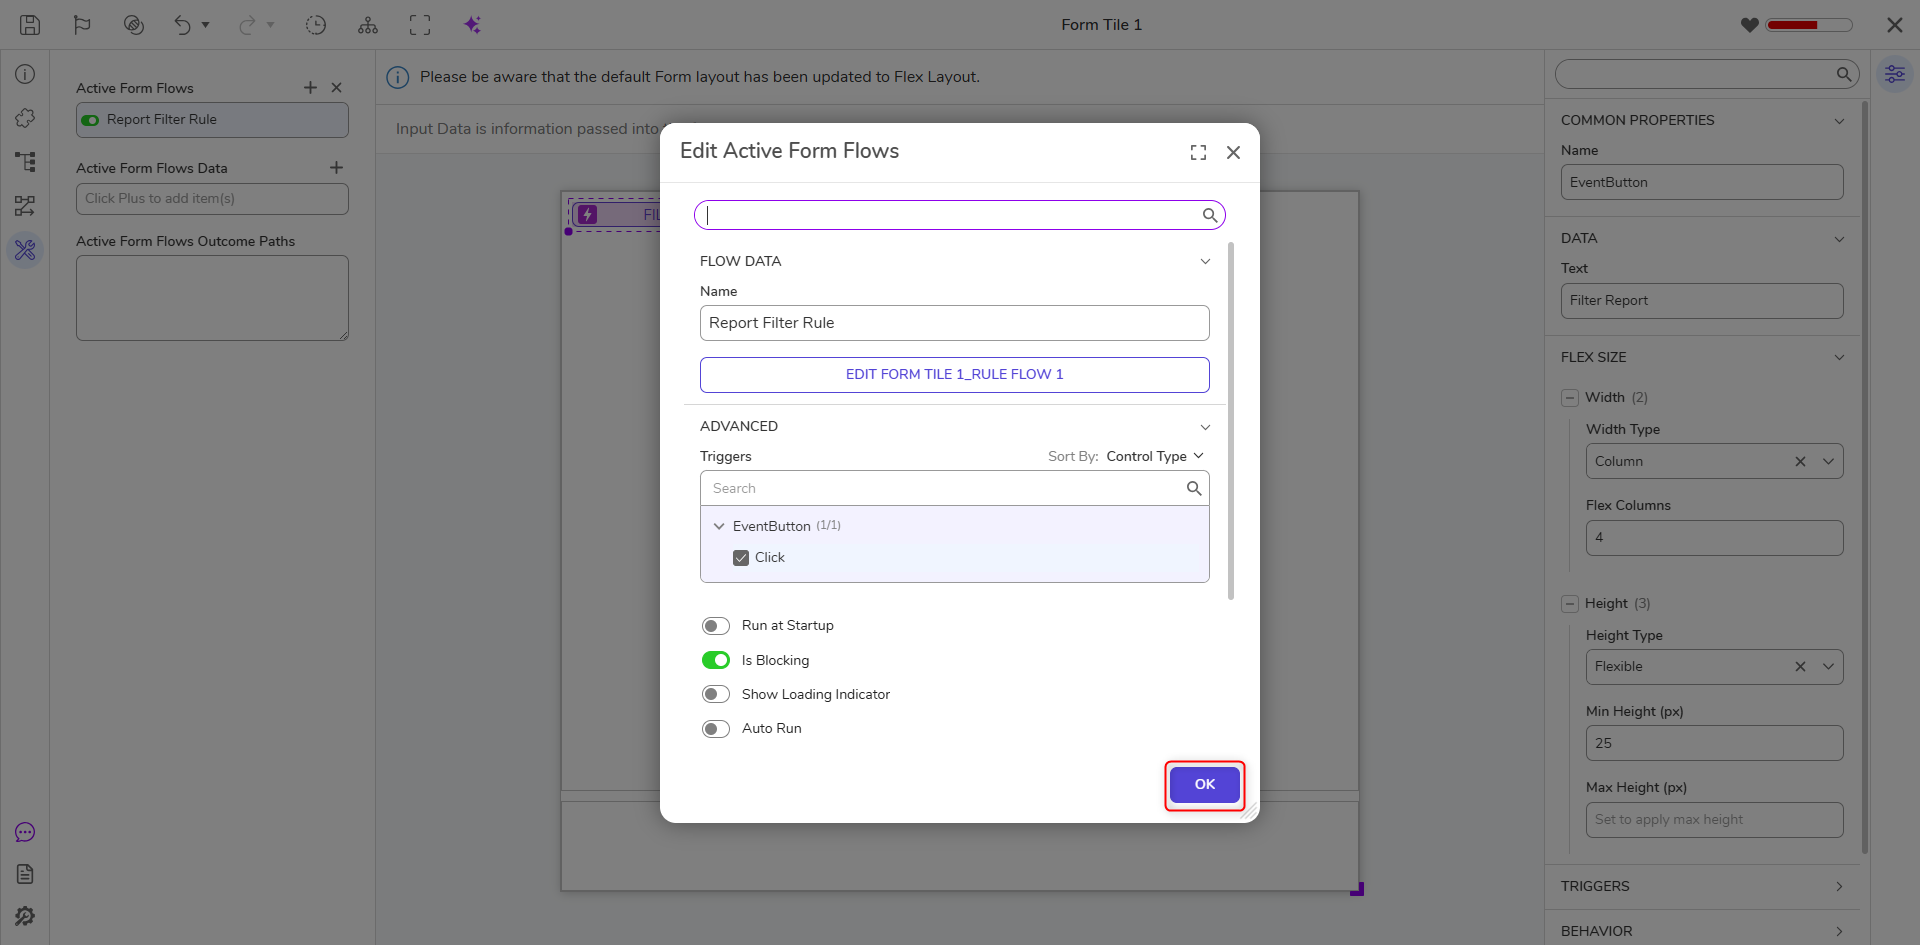
- From the Properties tab of the Form, under FORM RULES > Active Form Flows, click ADD. In the resulting Add Active Form Flows window, under ADVANCED > Triggers, select the Event Button and enable the Click checkbox.
In FLOW DATA, provide a Name, then click EDIT RULE FLOW.
- From the Flow Designer, attach a Set Dashboard Report Parameters step to the Start and End steps.
Navigate to the Properties tab of the newly added step. Under DATA DEFINITIONS > ReportParameters, click ADD. - In the Add ReportParameters window, under DATA DEFINITION, provide the Name "Email Address Contains", then click OK.
This Report Parameter will be used to dictate which value is adjusted upon selecting the Event Button.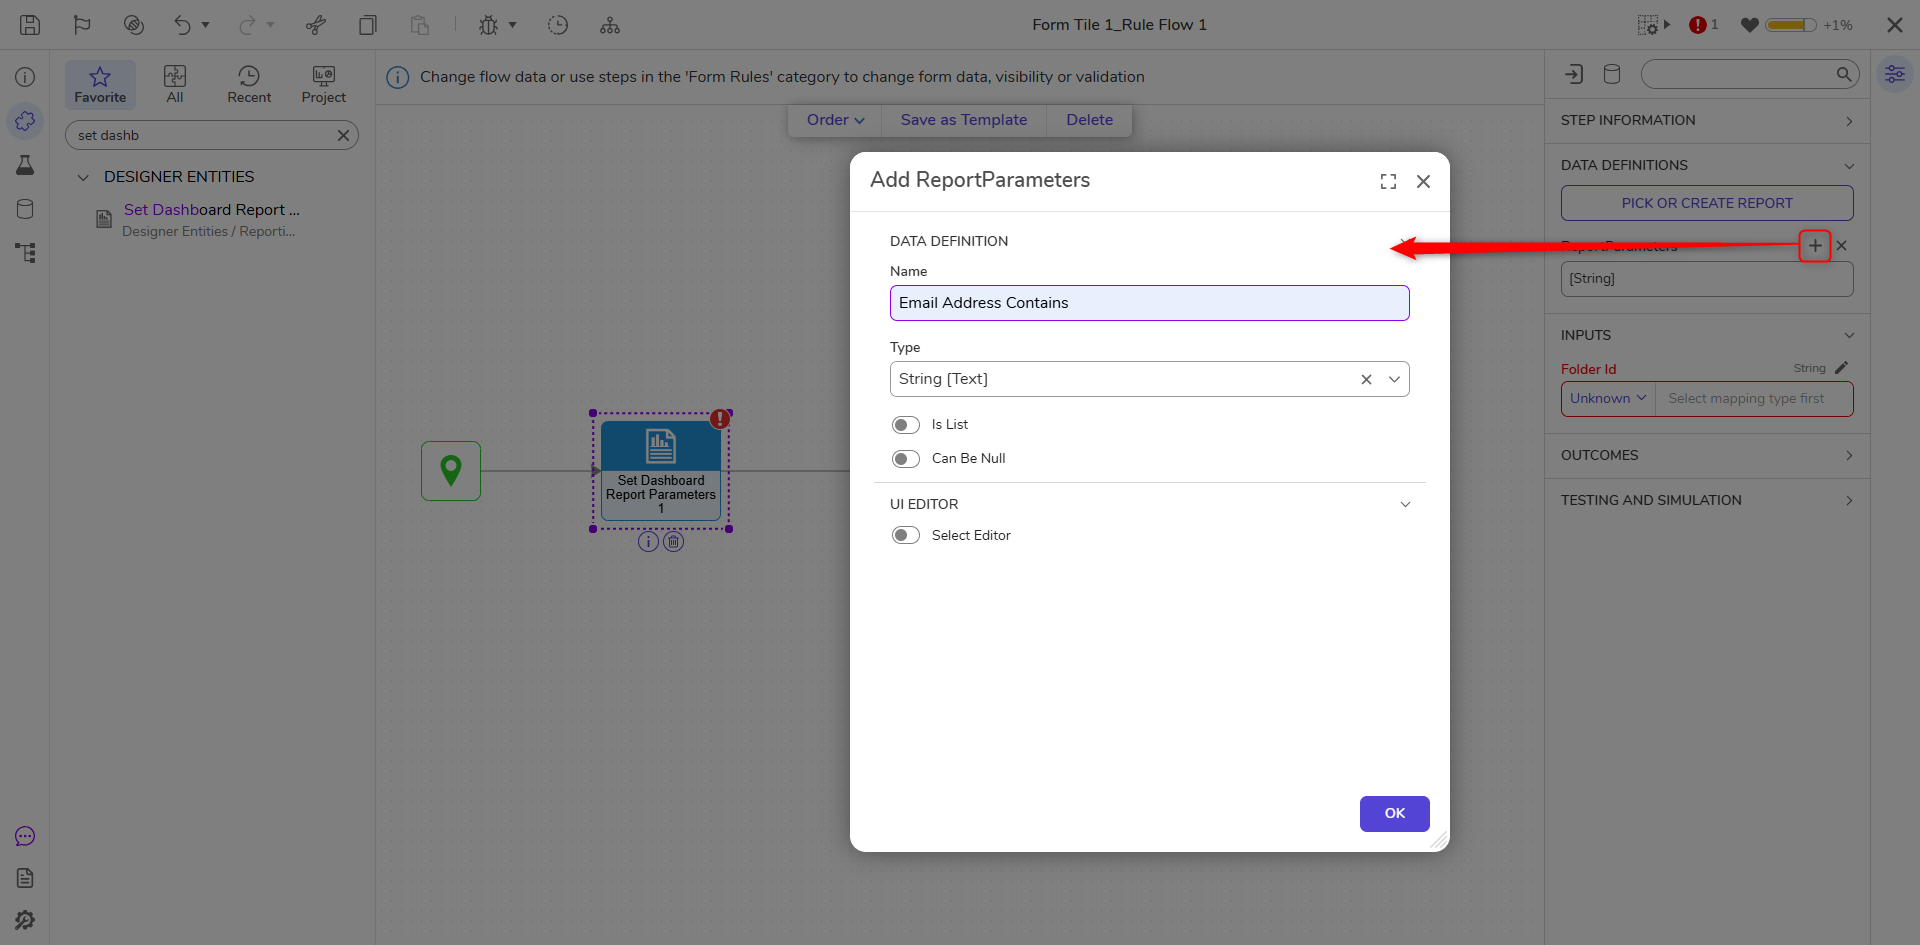
- From the Properties tab of the Set Dashboard Report Parameters step, map Flow Data.InitiatingUserEmail to Email Address Contains; this will filter the Report to values containing the specific Email of the user that selects the filter Button.
Then, open a new tab.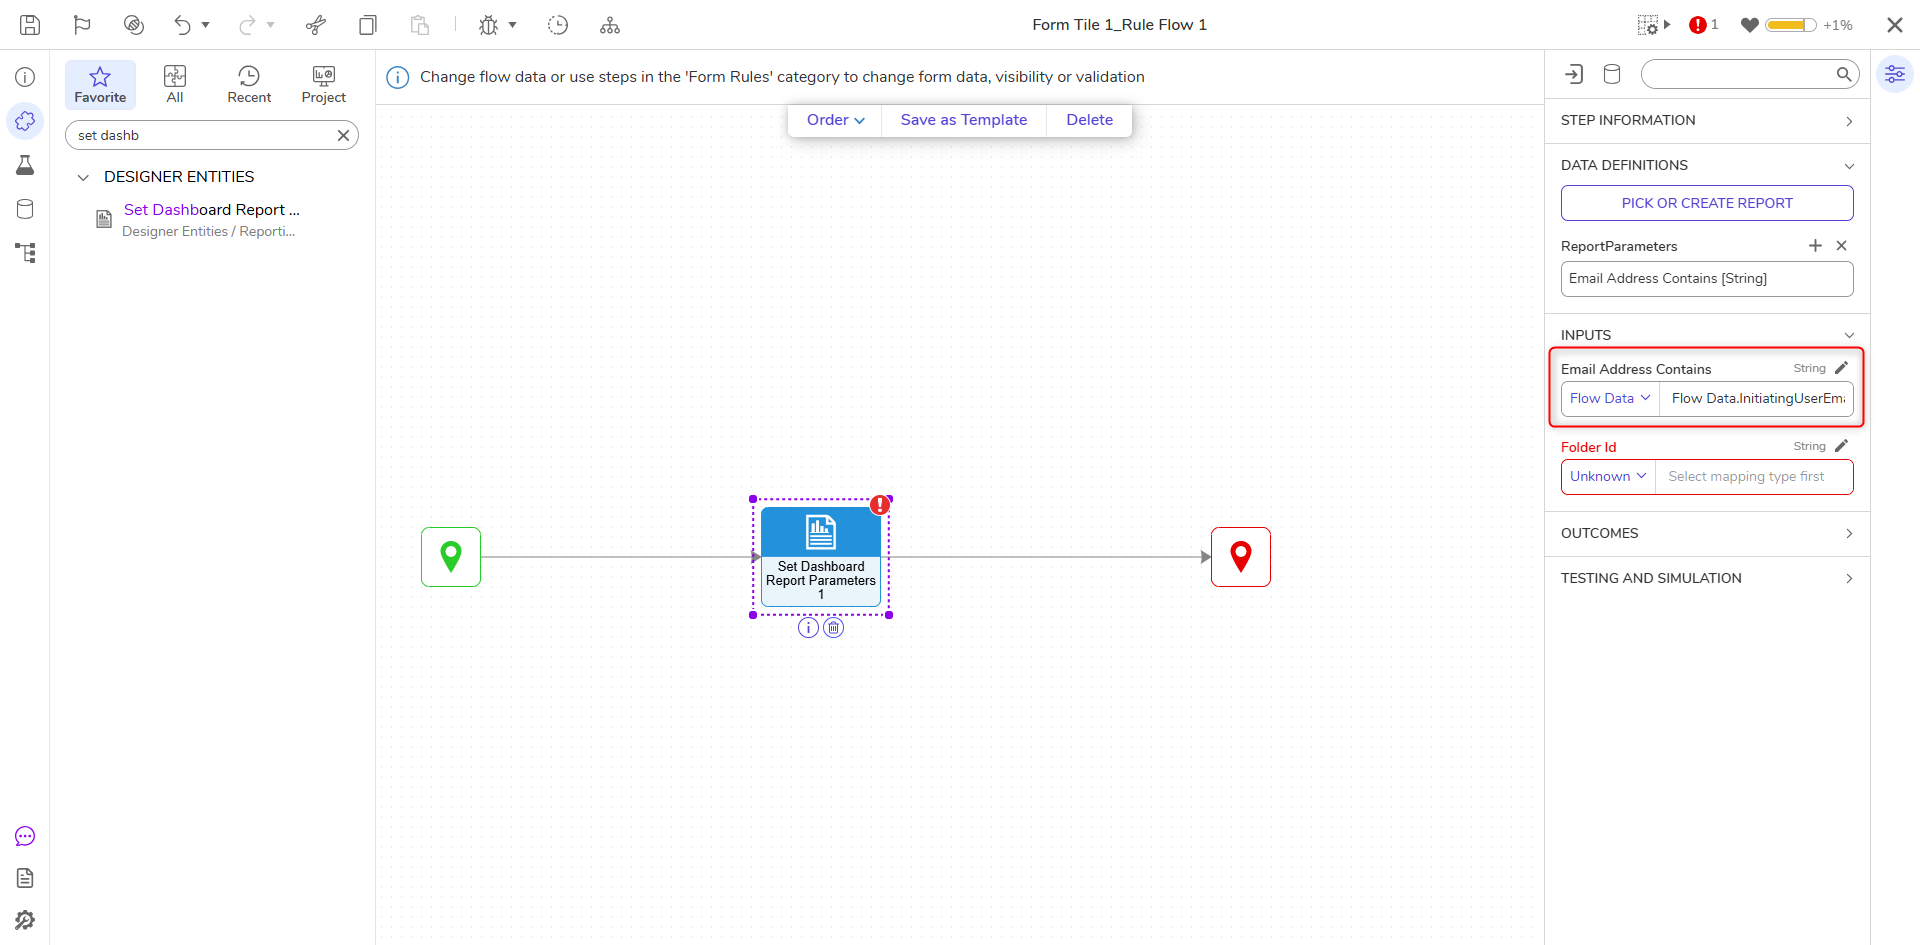
- In the new tab, navigate to a Folder or Designer Project that the Page is attached to, right-click it and select Manage > Get Folder ID; copy the resulting ID via Copy Text, then click DONE.
Then, navigate back to the Flow. Back in the Properties tab of the Set Dashboard Report Parameters step, under INPUTS, Constant map the copied Folder Id to its respective Input.
Then Save and close the Flow Designer.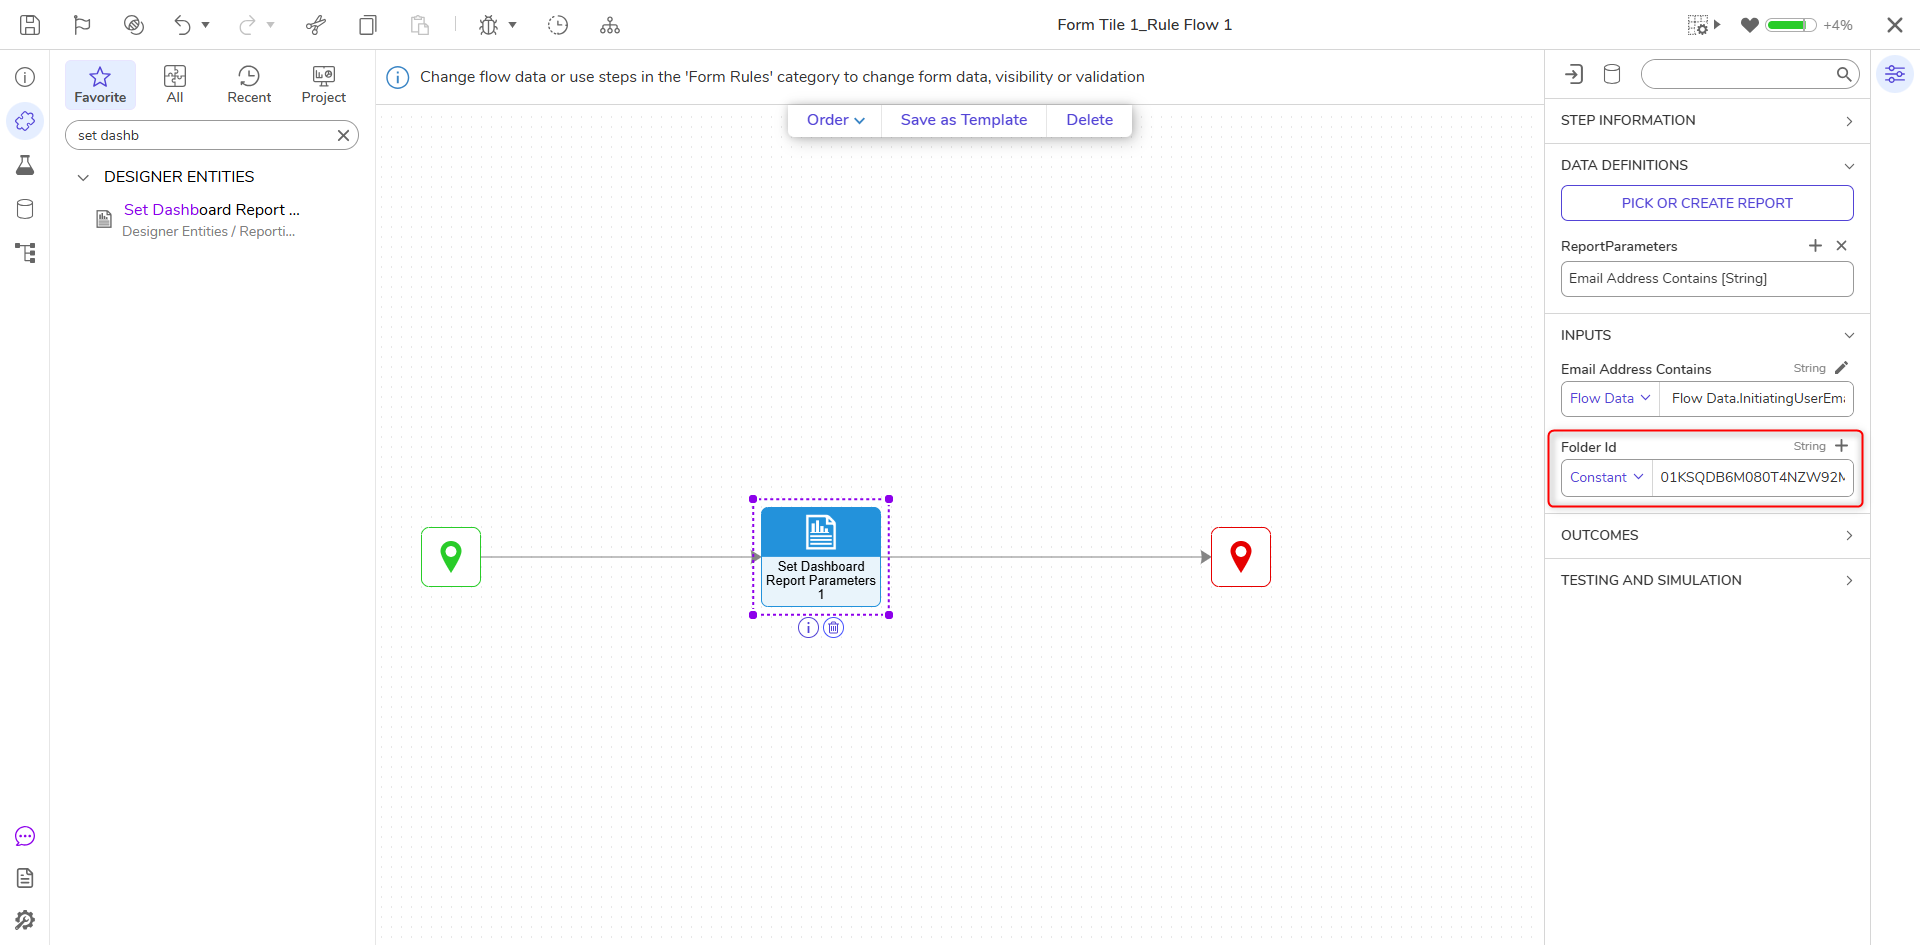
- Back in the Form Designer in the Add Active Form Flows window, click OK. Then, Save and close the Form Designer, as well as the Page Designer.
Debug
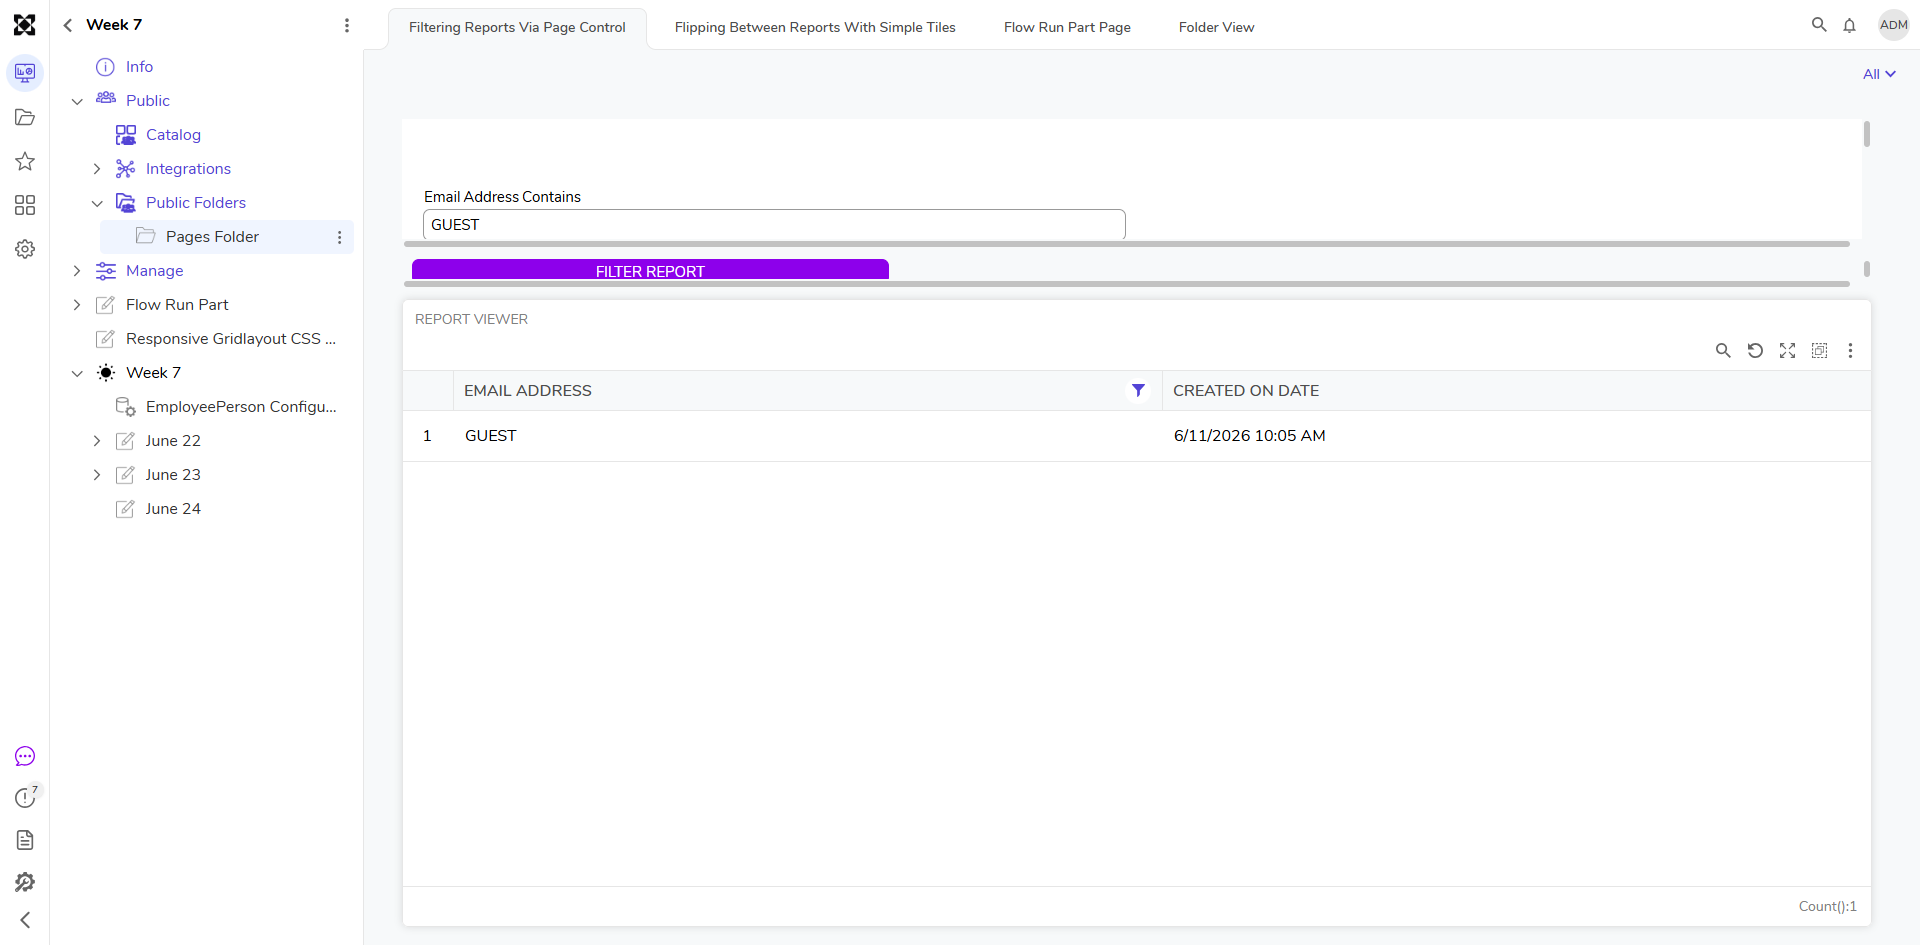
- From the Decisions Studio, navigate to the Folder containing the attached Page.
- From the Page, in the Form Tile section, click the Event Button.
- Verify that the Report filters out the expected values.