Overview
Adding documents to the Portal makes them available throughout Decisions by giving the Document an ID and a URL. The ID/URL is then mapped to specific objects within Decisions that function to call on the intended document. This ability allows users to use pre-existing written content as a data source for various steps. Documents can be viewed in various ways after enabling a DocumentType in the Internal Viewer. One of the most common ways to view added documents is on a Folder Activity Panel control.
Add Document
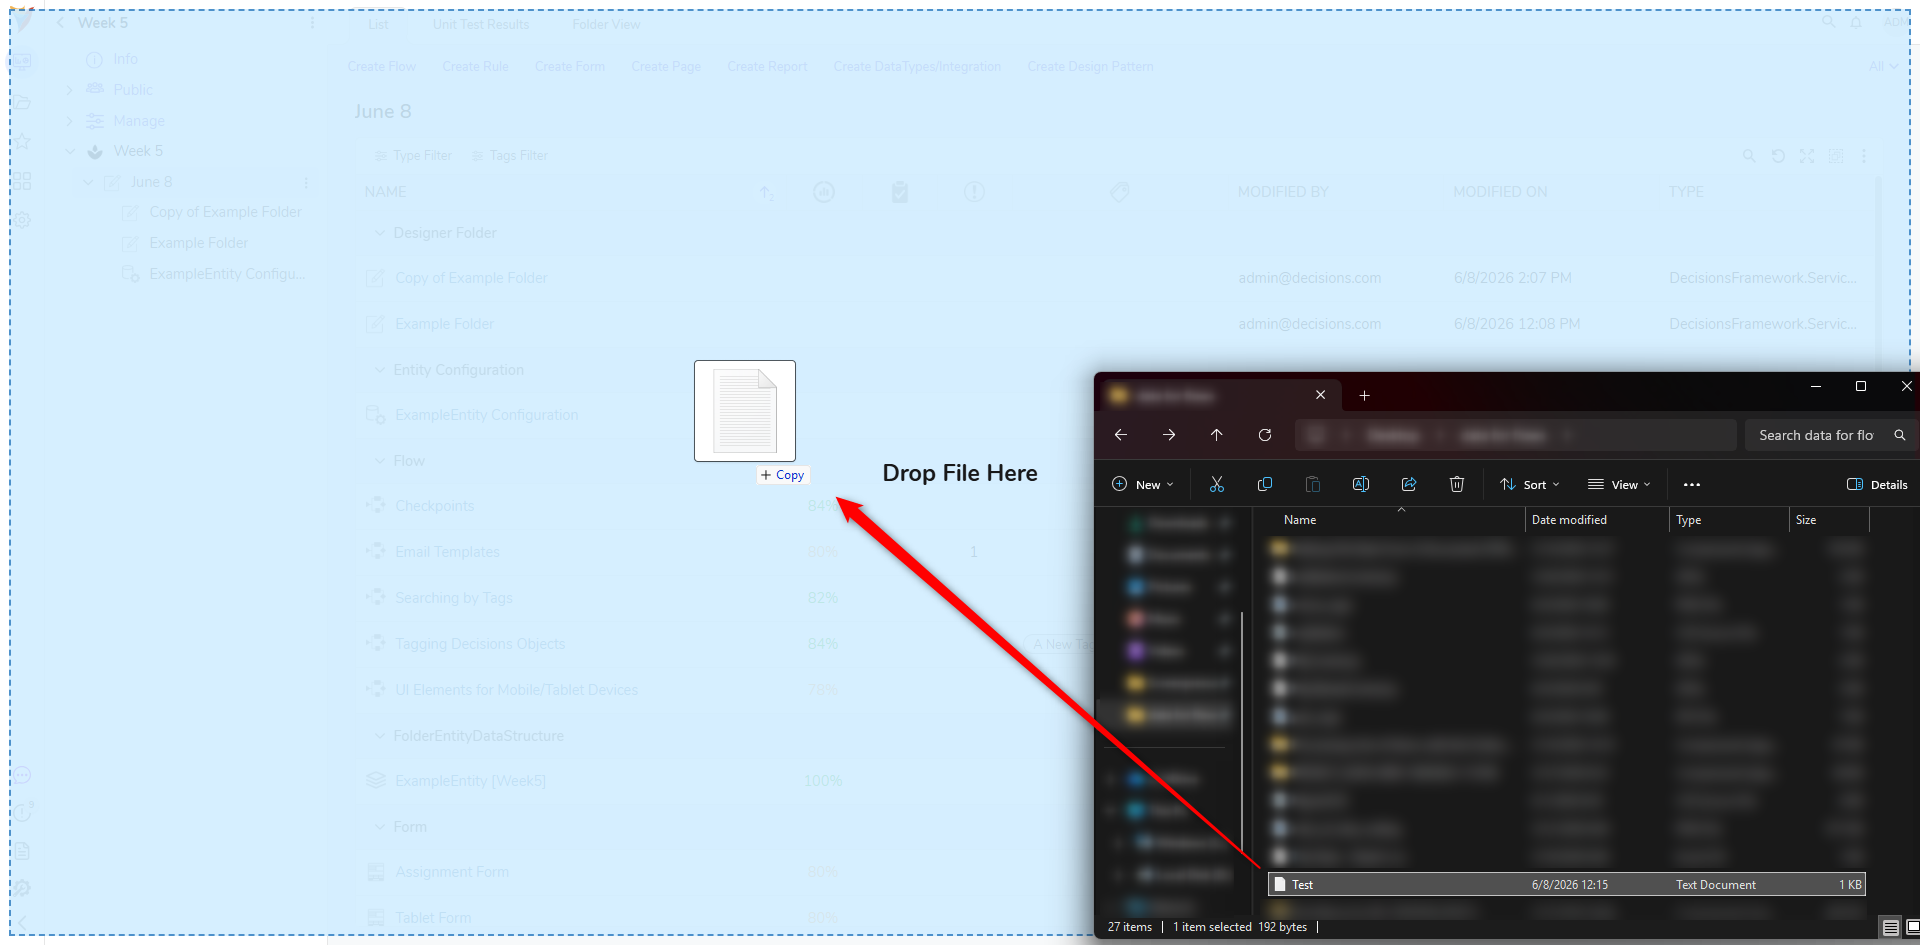
Adding a Document to Decisions is as easy is dragging and dropping the document into space in the Designer Project from the location of the document in the local computer.
- Navigate to the desired Designer Project.
- Navigate to the file's location in the local computer.
- Drag and drop the document from its location in the local computer into the empty space of the Folder.
- When the File Upload box appears, confirm that the correct document is being added.
- Select ADD AS DOCUMENT.
- Once the document has been added, it can be viewed in the Folder it was added to.
Controlling the types of Documents
Decisions have the ability to control the types of documents that can be added by providing or blocking certain File types extensions in the Portal settings. Refer to this article to see in-depth about including and excluding file extensions.
Mark Document Public / Mark Document Private
Documents that are added to the portal are initially marked as Private. Private documents can be accessed outside the Decisions only if it is integrated within the Flows/Dashboards/Reports etc., and are configured and authenticated with View Integration Details.
Documents can be accessed outside the Decisions via a URL directly if the Documents are marked as Public.
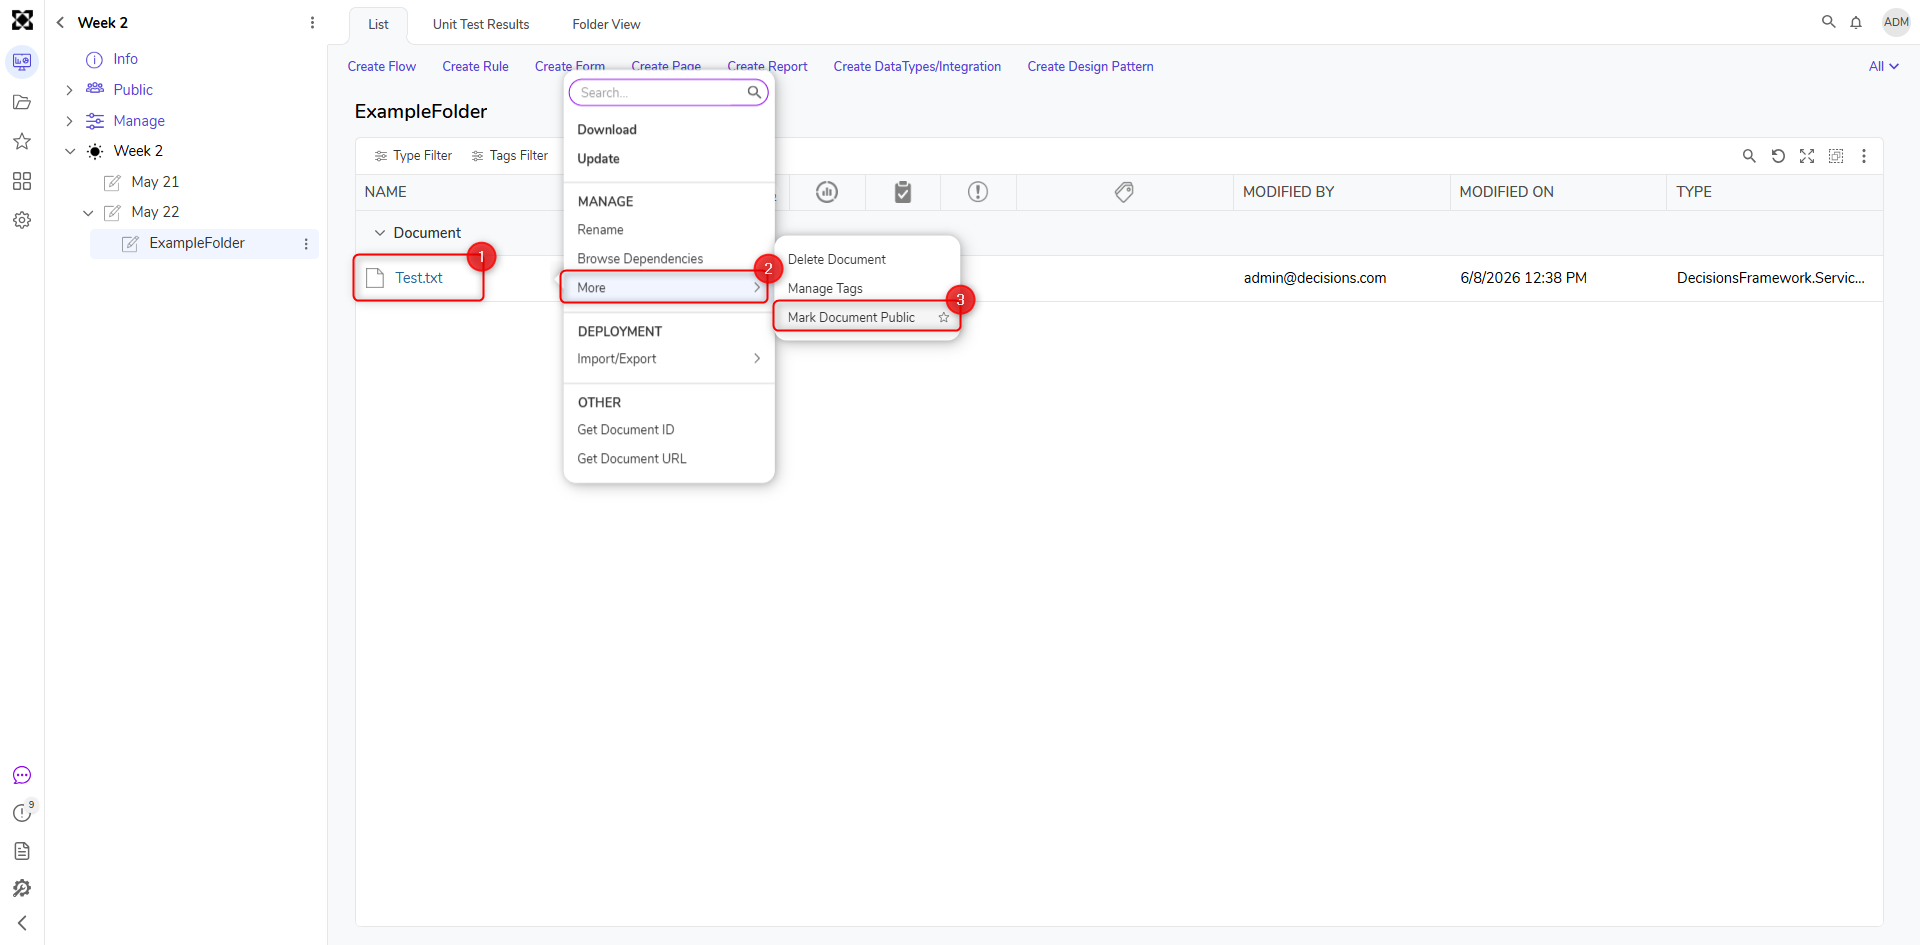
To mark the document Public, right-click on the document > Manage > Mark Document Public. The document is now publicly available, and no authentication is needed to access this document. To mark a Public document Private, repeat this process and under ADVANCED the option will be Mark Document Private.
To get the URL of the publicly available document, right-click on the document > Manage > Get Document URL. The Document Direct URL dialog box will appear with a URL. This URL can be used outside the Decisions to get access to the document.