Overview
Custom Web Apps allow users to generate a pre-configured React application template that is already wired up to communicate with the Decisions API and a specific Case Entity's data. Instead of building a frontend connection from scratch, users can download a ready-to-run React project, connect it to their Case Entity data, and build a custom view or interface on top of it.
This is intended for customers who want to quickly stand up a custom frontend, for example, a tailored dashboard, intake form, or status tracker that displays or interacts with Case data stored in Decisions, without manually configuring authentication, API endpoints, or data models by hand.
Because the generated project is a standard React application, it can be opened, edited, and extended using any code editor. The template can be customized like any other React project.
Prerequisites
- Decisions Version 10.0 or later.
- A System Administrator must enable the Custom Web Apps feature flag.
- An existing Case Entity Data Structure to connect the generated web app to.
- Node.js and npm installed on the machine used to edit and build the web app locally.
- A command line / terminal application.
Enabling Custom Web Apps
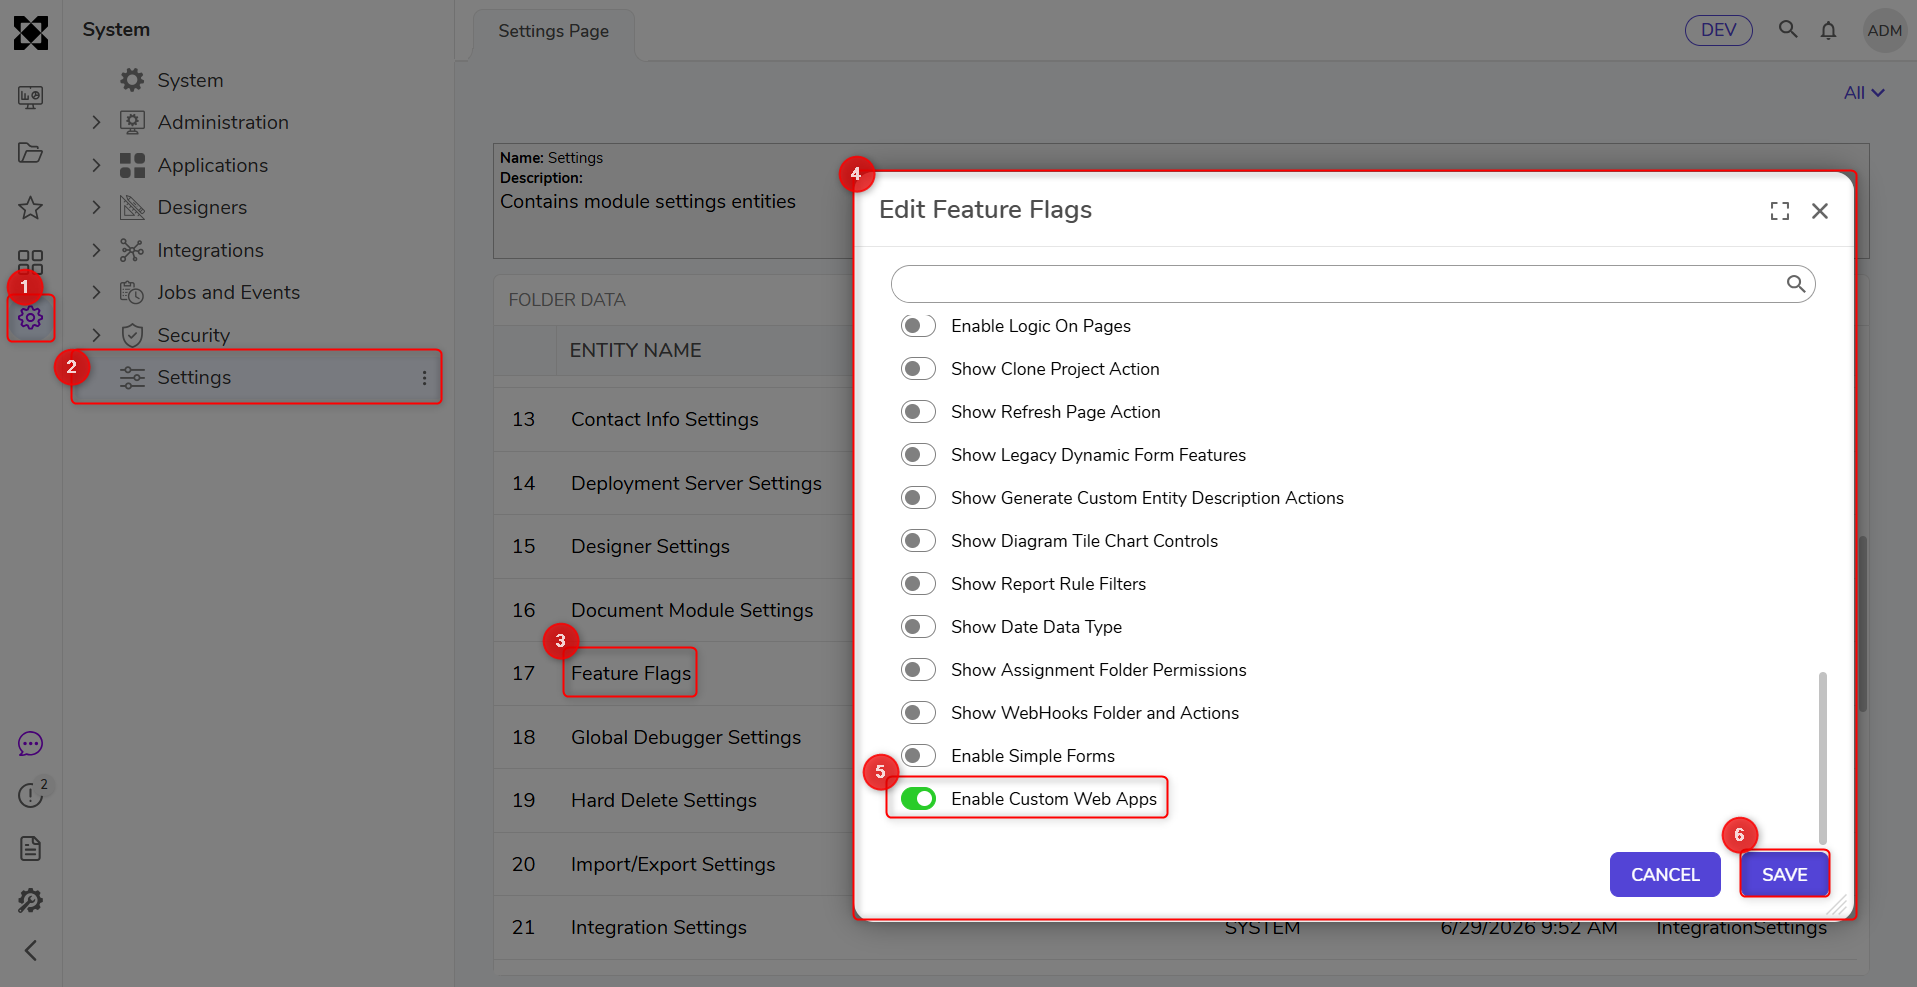
Custom Web Apps is released behind a feature flag. Until the flag is enabled, the Custom Web Apps folder will not appear in a project's Public folders, and the related Case Entity actions will not be available.
- Log in to Decisions as a System Administrator.
- Navigate to System > Administration > Feature Flags.
- Locate Custom Web Apps in the list and set it to Enabled.
How It Works: The Case Data Service
Every Custom Web App generated from a Case Entity communicates with Decisions through a CaseDataService. This service exposes the Case Entity's data through the Decisions REST API, giving the generated React template a ready-made way to read and write Case data without any manual API configuration.
| Case Entity | CaseDataService Behavior |
|---|---|
| Newly created Case Entities (v10+) | A CaseDataService is created automatically when the Case Entity is created. No additional action is required. |
| Existing Case Entities from previous versions of Decisions | Right-click the Case Entity and select Generate Case Data Service to create the service. |
Creating a Custom Web App
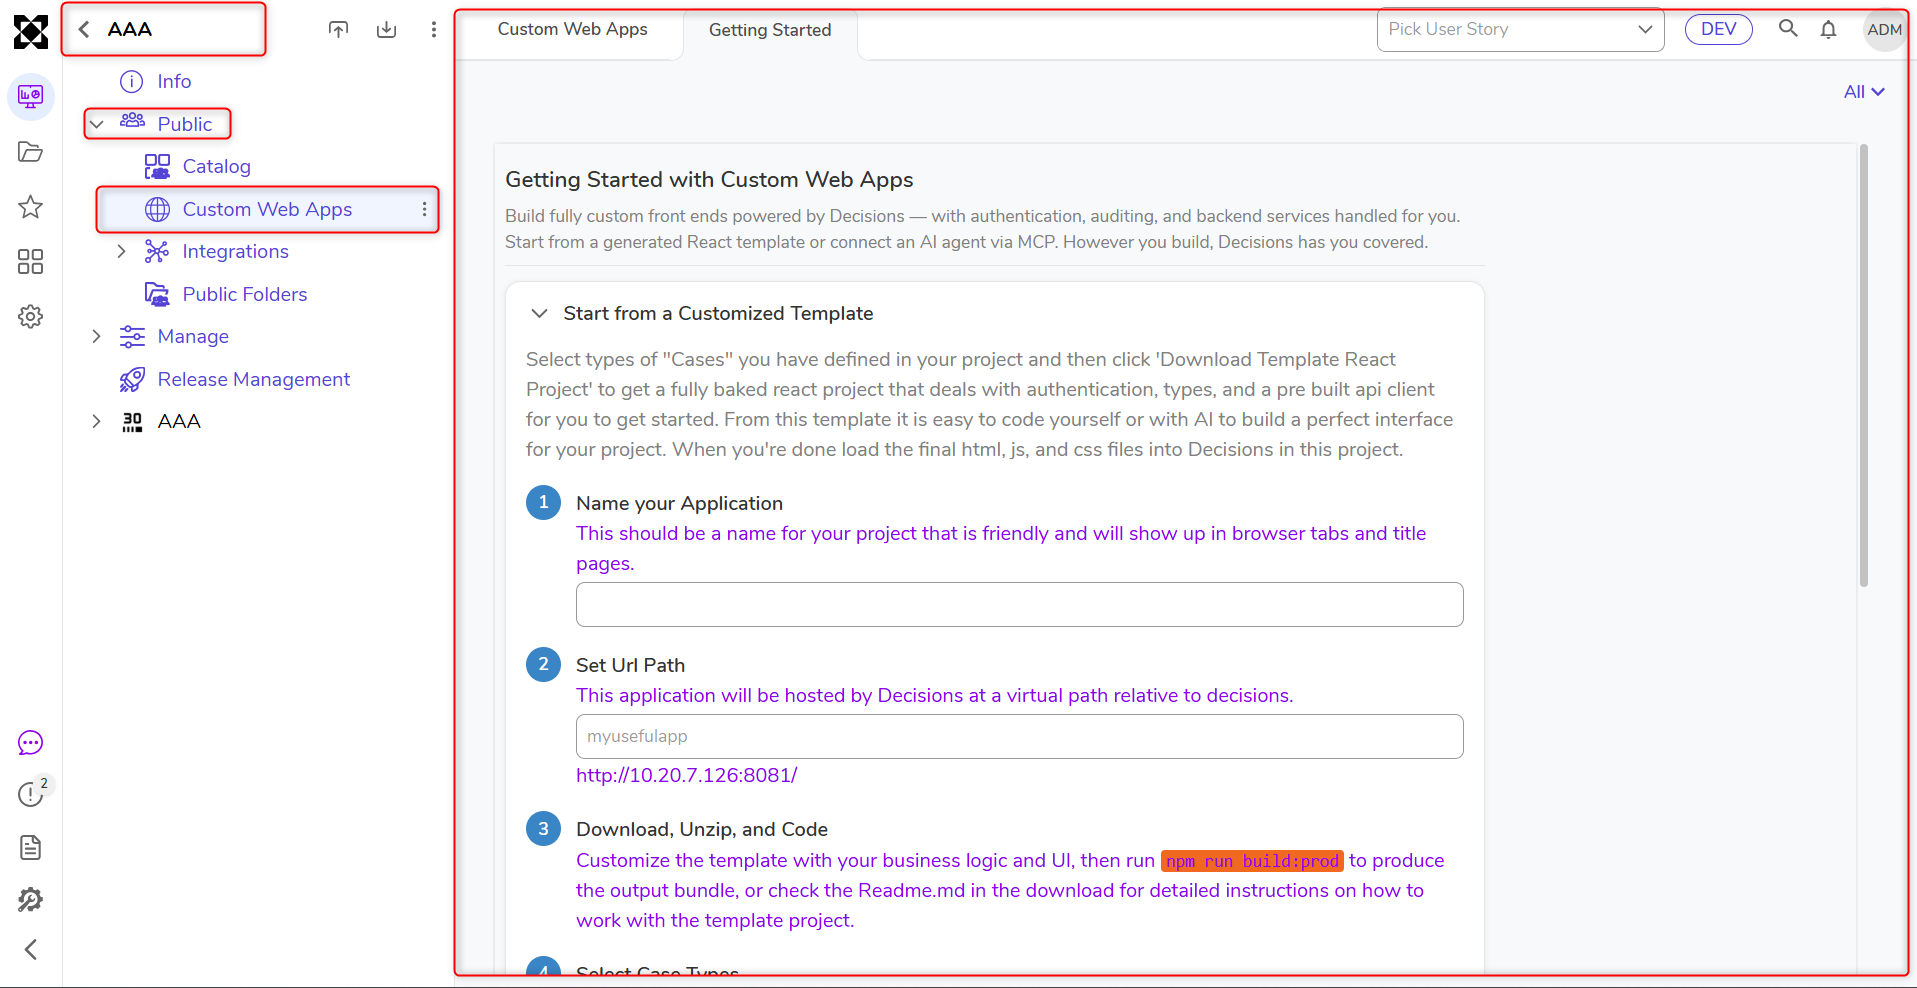
- Navigate within the project to Public > Custom Web Apps.
The folder contains two tabs: Getting Started and Custom Web Apps.
- Getting Started is shown by default and explains the two ways to build a custom frontend: starting from a generated React template or connecting an AI agent through MCP.
- Custom Web Apps lists any web apps that have already been created. If none exist yet, an Add a New Custom Web App button returns to the Getting Started page.
Start from a Customized Template
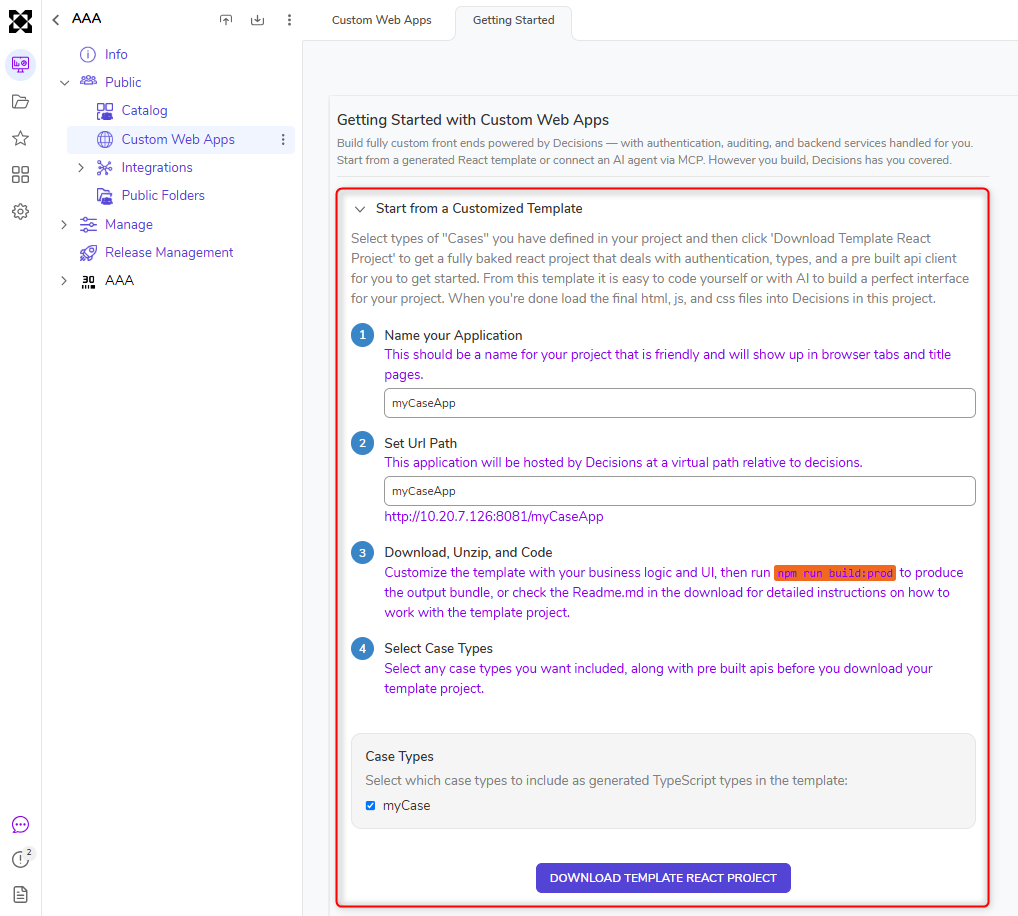
On the Getting Started page, under Start from a Customized Template, select the case types already defined in the project, then download a fully baked React project that handles authentication, types, and a prebuilt API client. The template can then be customized either by manual coding or with an AI tool, and the final build is loaded back into Decisions within the same project.
| Field | Description |
|---|---|
| Name Your Application | A name for the project. This will show up in browser tabs and title pages. |
| Set Your Path | The virtual path, relative to Decisions, where this application will be hosted. |
| Select Case Types | Select any case types to include along with prebuilt APIs before downloading the template project. In v10.2+, Users can modify Case Types included in the Custom Web App Project after it has been created. |
- Enter a name under Name Your Application.
- Enter a path under Set Your Path.
- Under Select Case Types, select the case type(s) the template should include prebuilt APIs for.
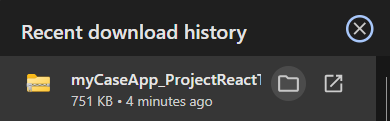
- Select Download Template React Project.
- Unzip the downloaded package to a folder on the local machine.
Customize the template with the project's business logic and UI, then run npm run
build:prod to produce the output bundle. The README.md included in the download contains detailed instructions for working with the template project. In v10.2+, Users can redownload Project templates at any time once the Project has been created.
Connect Your Agent to Our Services
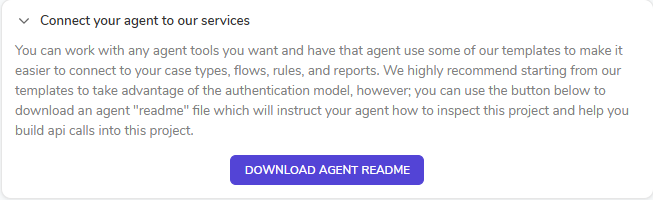
For customers who prefer to use their own AI agent or tooling rather than start from the generated template, the Getting Started page also offers Connect Your Agent to Our Services. This option works with any agent tooling and lets that agent use Decisions templates to more easily connect to case types, flows, rules, and reports.
Starting from the generated React template is recommended, since it already takes advantage of the platform's authentication model. Select Download Agent README to download instructions for connecting an AI agent to the project and building API calls.
The Custom Web Apps Tab
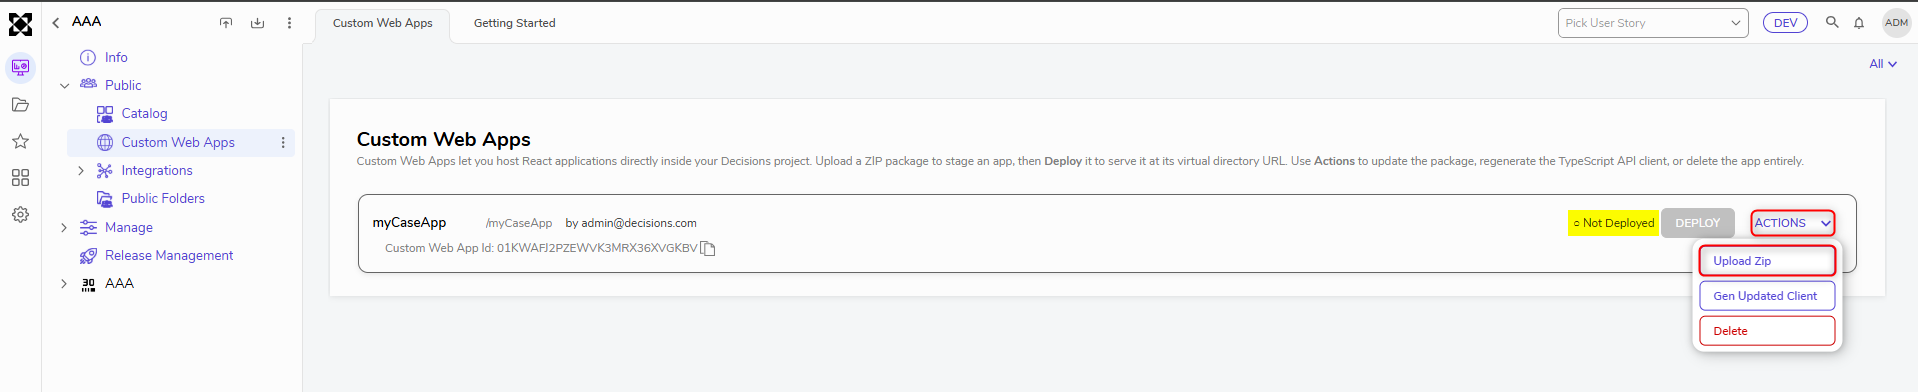
The Custom Web Apps tab lists every web app that has been created in the project. Each entry shows one of two statuses:
| Status | Description |
|---|---|
| Not Deployed | No build has been uploaded for the web app yet. A Deploy button is present but disabled; select Upload Zip from the Actions menu to upload a build and enable it. |
| Staged for Deployment | The web app has not been deployed yet, or has since been undeployed. A Deploy button is available to publish it. |
| Deployed | The web app is live at its configured path. An Undeploy button is available to take it offline. |
Each web app entry also has an Actions menu with the following options:
| Action | Description |
|---|---|
| Upload/Update Zip | Opens a file browser to select an updated zip of the React app's production build to upload to Decisions. |
| Generate Updated Client | Generates an updated TypeScript client file reflecting the current case type schema, for use in the web app's code. |
| Delete | Deletes the web app. |
Running the Web App Locally
- Open the unzipped project folder in a command line/terminal.
- Install the project's dependencies:
npm install - Start the local development server:
npm run localdev
The web app now runs locally and is connected to the selected Case Entity's data through its CaseDataService.
Editing the Web App
At this point, the project is a standard React application and can be edited using any code editor. Because the connection to Decisions data is already configured, customers can focus on building the views, components, and layout needed to display or interact with their Case data.
Customize the application as needed for your use case.
Continue editing and reviewing changes against the local development server (npm run
localdev) until the web app behaves as expected.
File Upload Support
In v10.2+, generated apps now support file upload parameters, including chunked uploads and upload progress callbacks.
Building for Production
Once editing is complete, build a production-ready version of the web app:
npm run
build:prod
This produces a production build that can be uploaded back into Decisions and deployed.
Deploying the Web App
- Package the production build output into a zip file.
- Log in to Decisions and navigate to the Custom Web Apps tab.
- Locate the web app created earlier.
- Select Upload and choose the new production zip file.
- Select Deploy.
Once deployed, the web app is available at its configured path and can interact with live Case data through its CaseDataService.

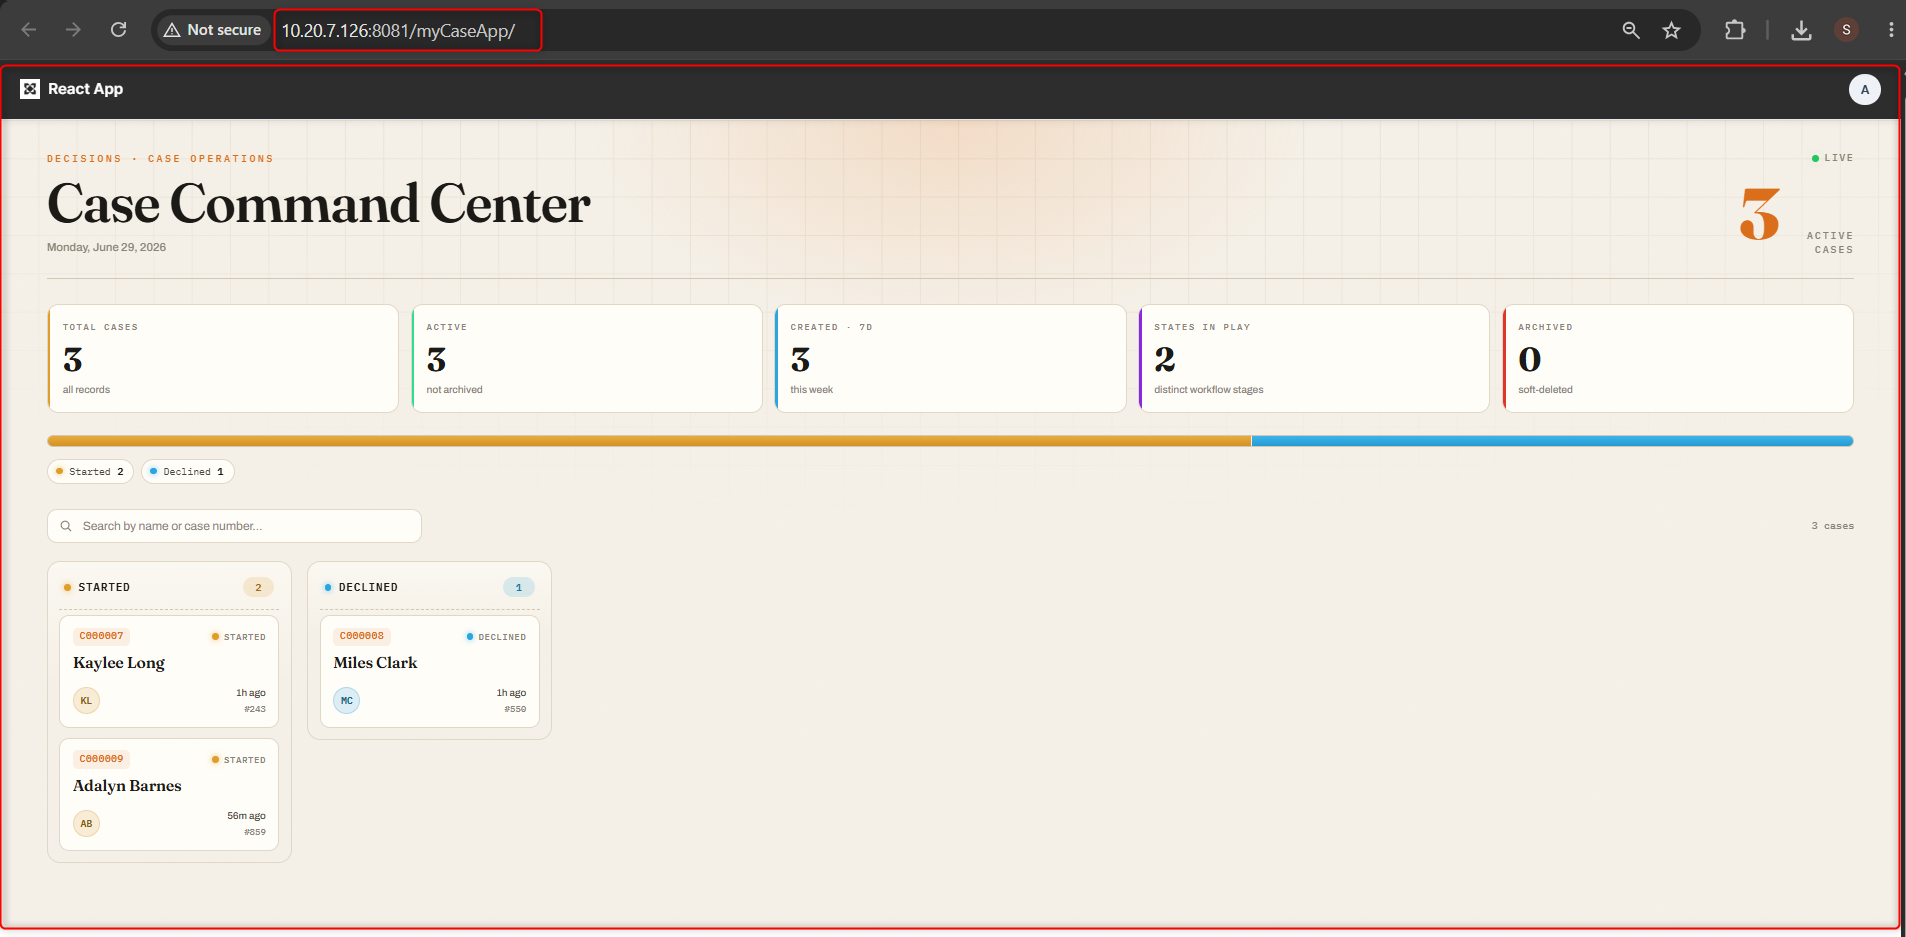 In v10.2+, Deployed Custom Web Apps are scoped to a specific instance through an instance-specific URL path, improving support for multi-instance environments.
Updating a Deployed Web App
To make further changes to a web app after it has been deployed:
- Make the desired changes locally using
npm run localdevto review them. - Run
npm run build:prodto produce an updated production build. - Return to the Custom Web Apps tab in Decisions. From the Actions menu, select Update Zip, choose the updated zip file from the file browser, upload it, and then select Deploy again.

To take a deployed web app offline, select Undeploy. The application is removed from its configured path and can be deployed again later if needed. 
| Description | Version | Release Date | Developer Tag |
|---|---|---|---|
| Custom Web Apps Phase 2 enhances Project management, deployment flexibility, and generated app capabilities with improved API generation, file uploads, Case Type management, Project template access, and instance-aware deployments. | 10.2 | September 2026 | [DT-048271] |