Overview
Users may upload their custom CSS documents for customization of elements in Decisions to easily fit the branding and image of any company or enterprise.
CSS in Decisions is implemented by using a CSS document and manually mapping the custom-defined classes to each Form component or a CSS document with Decisions' predefined classes for automatic mapping to their respective Form components. To apply a custom CSS file, navigate to Properties > Style to view a checklist of recognized CSS files. Atomic or unopinionated CSS frameworks like Tailwind should apply smoothly to most Forms and Pages, depending on their components.
What changed from V8 to V9?
Version 8 | Version 9 |
|---|---|
CSS handling was configured at the System level and was visible across the platform. | CSS handling is now Project-level and is visible only within the Project. |
Uploading CSS in Decisions
The following example will demonstrate how to upload a CSS file in Decisions.
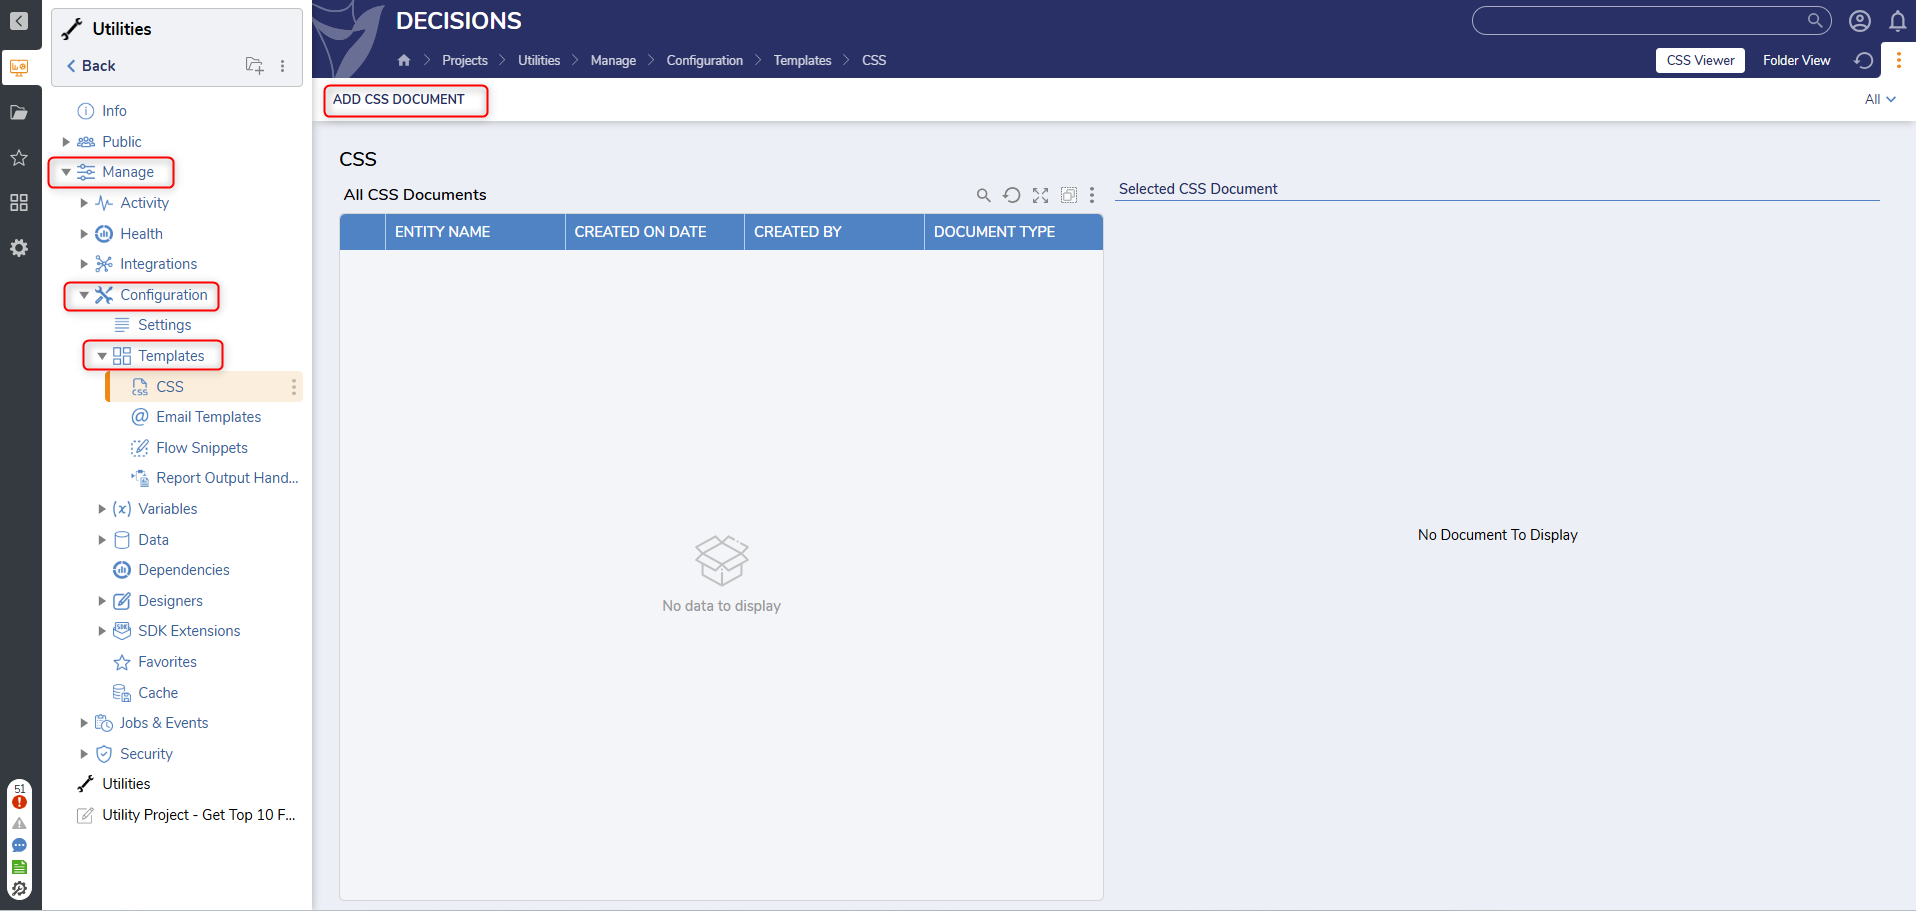
- In the desired Designer Folder, navigate to Settings > Configuration > Templates > CSS. Navigate and click on the ADD button.

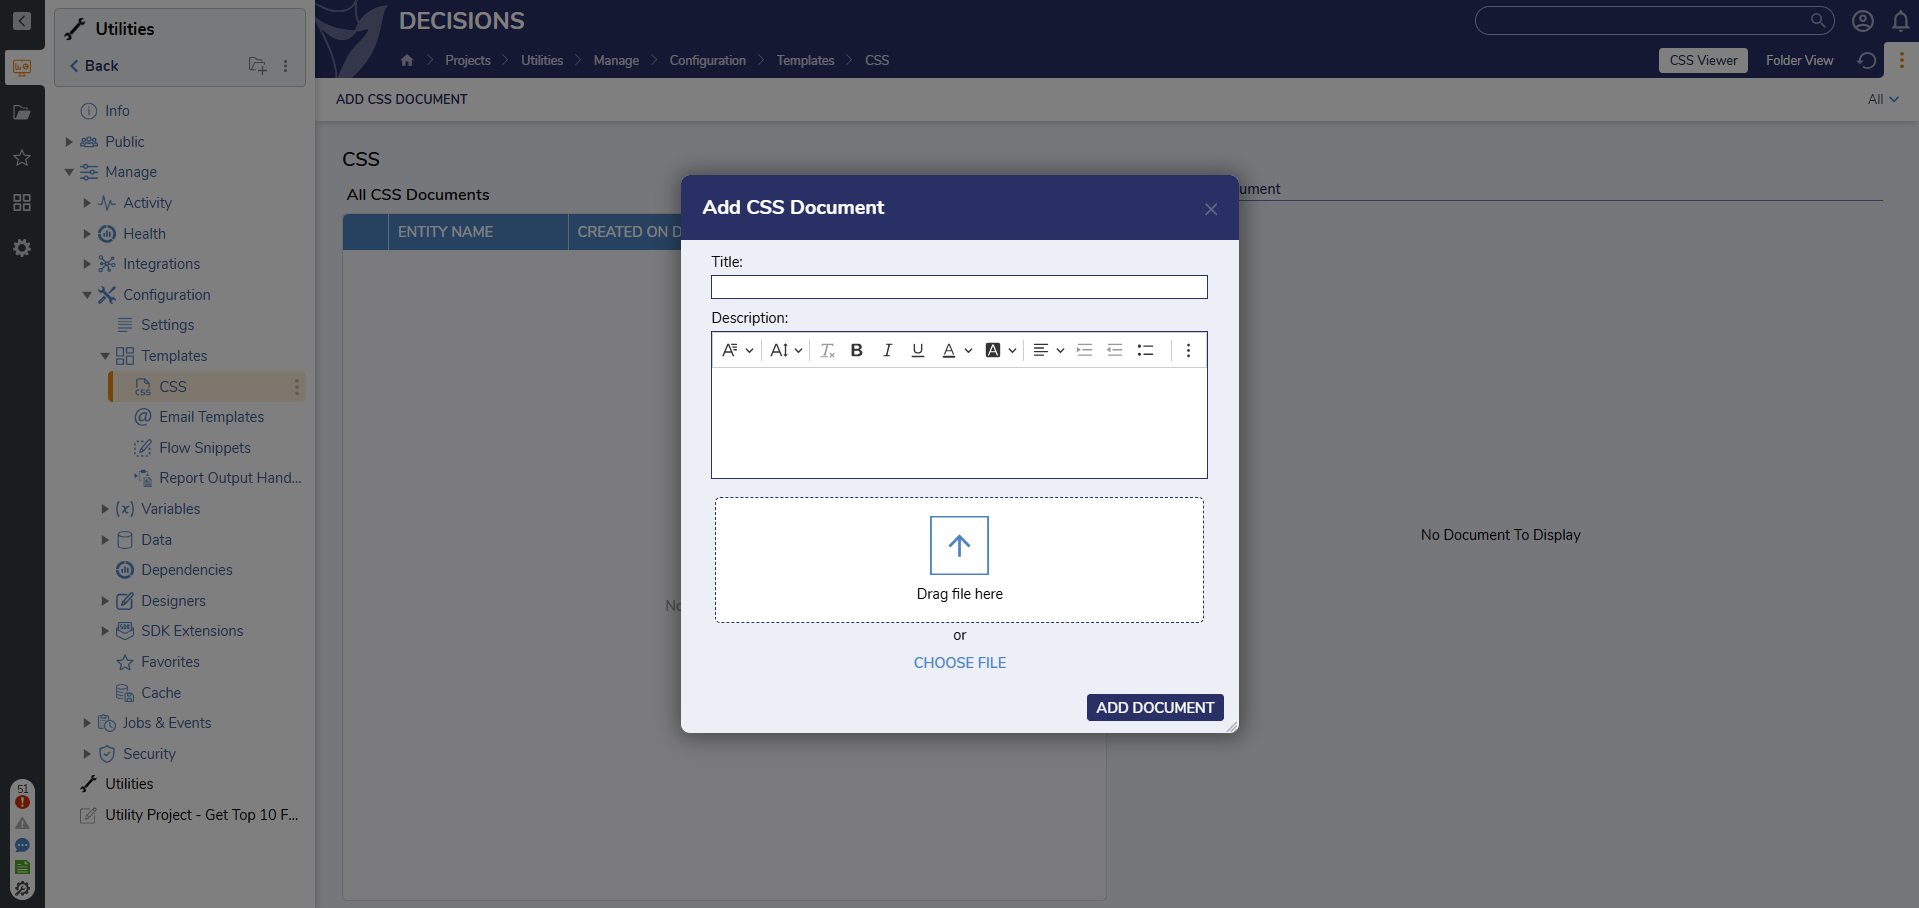
- In the Document window, enter a Title, describe what the CSS does in the Description, and either drag the file to the box or use the CHOOSE FILE action. Click ADD DOCUMENT.Once the CSS file is added, it will appear in the Form or Page Designer Properties under the Style section. In v9.13+ LESS files can be uploaded as well.

Applying custom CSS to Login Page
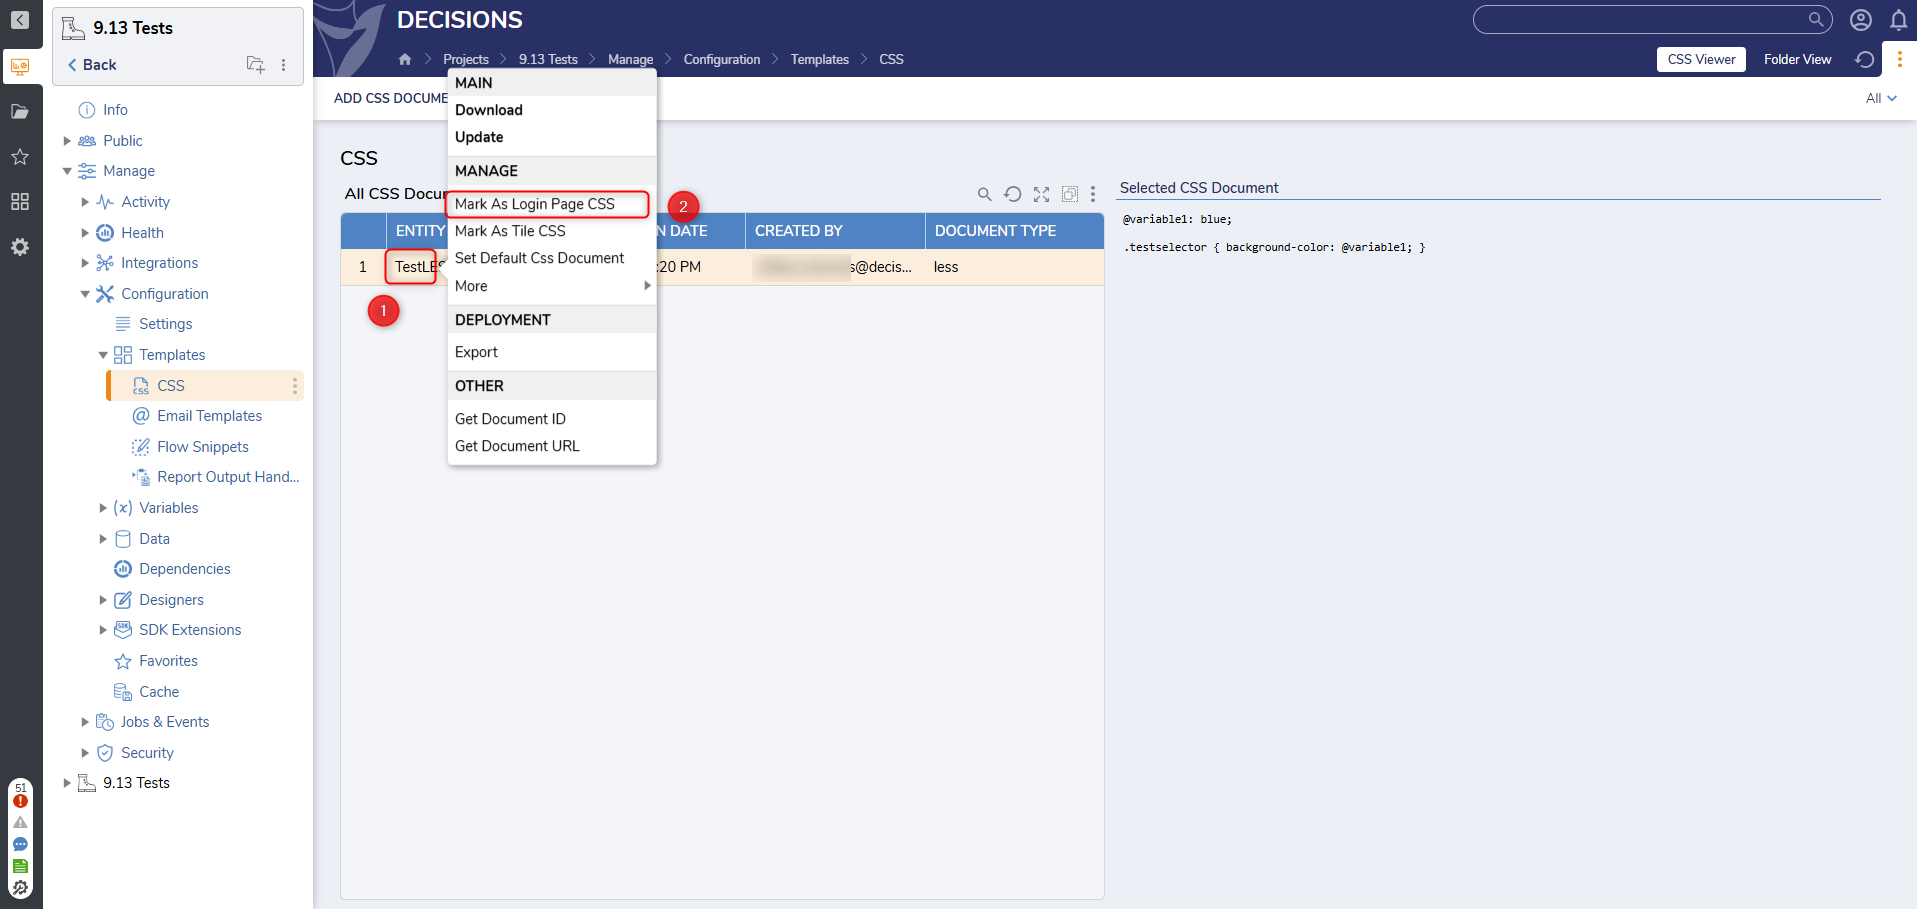
After uploading the Custom CSS to the Decisions. Right-click on the CSS document > Mark as Login Page CSS. This will automatically apply the CSS to the login Page.
Feature Changes
| Description | Version | Release Date | Developer Task |
|---|---|---|---|
| LESS files can now be uploaded through the Add CSS Document action. | 9.13 | July 2025 | [DT-044675] |