Overview
Module Details | |
| Last Modified | 8.17 |
| Installation Location | System > Security > Identity Providers > SAML |
| Restart Required? | No |
| Step Location | N/A |
| Settings Location | Settings > SAML Settings |
| Prerequisites |
|
Configuring Single Sign-On (SSO) involves details that vary based on provider and customer environment; these settings are strict and must be at the knowledge of the administrator configuring the connection.
If SSO is a new concept, it may take time and multiple attempts to configure all the identifying data and settings accurately, allowing for secure and reliable authentication. An administrator with experience in SSO or the organization's IT infrastructure can help streamline the process.
The Decisions Support team is available to help, but may not be able to answer questions or solve problems that are unique to a customer's organization.
Accounts created before the required module is installed will need an update before using SSO. Please contact the Support team for instructions on how to update an account.
The SSO Basics article can provide an overview of SSO and how to update the accounts once configured.
Like other identity provider modules, SAML can be found and installed from System > Security > Identity Providers.
In addition to the module prerequisites, an X.509 Certificate in PEM format is needed. Below is an example of a PEM-formatted certificate:
-----BEGIN CERTIFICATE-----
MIIB9TCCAWACAQAwgbgxGTAXBgNVBAoMEFF1b1ZhZGlzIExpbWl0ZWQxHDAaBgNV
BAsME0RvY3VtZW50IERlcGFydG1lbnQxOTA3BgNVBAMMMFdoeSBhcmUgeW91IGRl
Y29kaW5nIG1lPyAgVGhpcyBpcyBvbmx5IGEgdGVzdCEhITERMA8GA1UEBwwISGFt
aWx0b24xETAPBgNVBAgMCFBlbWJyb2tlMQswCQYDVQQGEwJCTTEPMA0GCSqGSIb3
DQEJARYAMIGfMA0GCSqGSIb3DQEBAQUAA4GNADCBiQKBgQCJ9WRanG/fUvcfKiGl
EL4aRLjGt537mZ28UU9/3eiJeJznNSOuNLnF+hmabAu7H0LT4K7EdqfF+XUZW/2j
RKRYcvOUDGF9A7OjW7UfKk1In3+6QDCi7X34RE161jqoaJjrm/T18TOKcgkkhRzE
apQnIDm0Ea/HVzX/PiSOGuertwIDAQABMAsGCSqGSIb3DQEBBQOBgQBzMJdAV4QP
Awel8LzGx5uMOshezF/KfP67wJ93UW+N7zXY6AwPgoLj4Kjw+WtU684JL8Dtr9FX
ozakE+8p06BpxegR4BR3FMHf6p+0jQxUEAkAyb/mVgm66TyghDGC6/YkiKoZptXQ
98TwDIK/39WEB/V607As+KoYazQG8drorw==
-----END CERTIFICATE-----Version 9 Endpoints
Below is a list of endpoints used for version 9, along with an example of the endpoints.
| Endpoint | Example endpoint |
|---|---|
| LoginURL | [baseportalurl]:[port]/Login |
| LogoutURL | [baseportalurl]:[port]/Logout |
| SAML | [baseportalurl]:[port]/SAML/AssertionConsumer or [baseportalurl]:[port]/Primary/SAML/AssertionConsumer |
| TokenHandler | [baseportalurl]:[port]/HandleTokenResponse |
AD Sync and SSO
SAML Login Flow Behavior
The SAML Login Flow is an optional Flow that can be executed during the Single Sign-On (SSO) authentication process. It is typically used to handle user provisioning, attribute mapping, and custom login logic when integrating with a SAML Identity Provider.
When the SAML Login Flow Runs
The behavior of the SAML Login Flow depends on the configuration of the following settings:
- Run Flow on Each Login
- Process If User Not Found
Key behavior:
- If Run Flow on Each Login is enabled, the Flow can be triggered during login attempts.
- If the user does not exist in the system, the Flow will run to determine how the login should be handled.
- If the user already exists, the Flow may not run depending on configuration.
Note: The SAML Login Flow does not always execute on every login. Its execution depends on both system configuration and whether the user exists.
Behavior by Scenario
The following outlines how the system behaves under common scenarios:
- Existing User:
- Authentication proceeds normally.
- The Flow may not run unless explicitly configured.
- New or Unknown User:
- The Flow is triggered if configured.
- If the Flow creates the user successfully, login can proceed.
- If the Flow does not create the user, login may fail or redirect based on configuration.
Data Available in the Flow
When the SAML Login Flow executes, it has access to data returned from the Identity Provider.
- SAML Response Data: Available in the Data Explorer under:
SAML Response > Assertion > AttributeStatement - RelayState: Available as an input when RelayState is provided during authentication.
This data can be used to extract user attributes such as email, username, or other identity claims.
Expected Flow Responsibilities
The SAML Login Flow is typically responsible for one or more of the following:
- Creating a new user account when one does not exist
- Mapping SAML attributes to user fields
- Assigning roles or groups to the user
- Handling login errors or conditional access logic
Common Issues and Considerations
- Flow does not run: Ensure Run Flow on Each Login is enabled and the scenario requires execution.
- User cannot log in after Flow runs: Verify that the Flow is correctly creating or updating the user.
- Missing user data: Confirm that the Identity Provider is sending the required attributes in the SAML response.
- Repeated login attempts or loops: Review the Retry Login After setting and Flow logic.
Best Practices
- Use the default Flow (SAMLDefaultCreateAccount) as a starting point.
- Log or inspect incoming SAML attributes during development.
- Test with a new user to validate provisioning behavior.
Example
This example will demonstrate how to configure Single Sign-On using the SAML module.
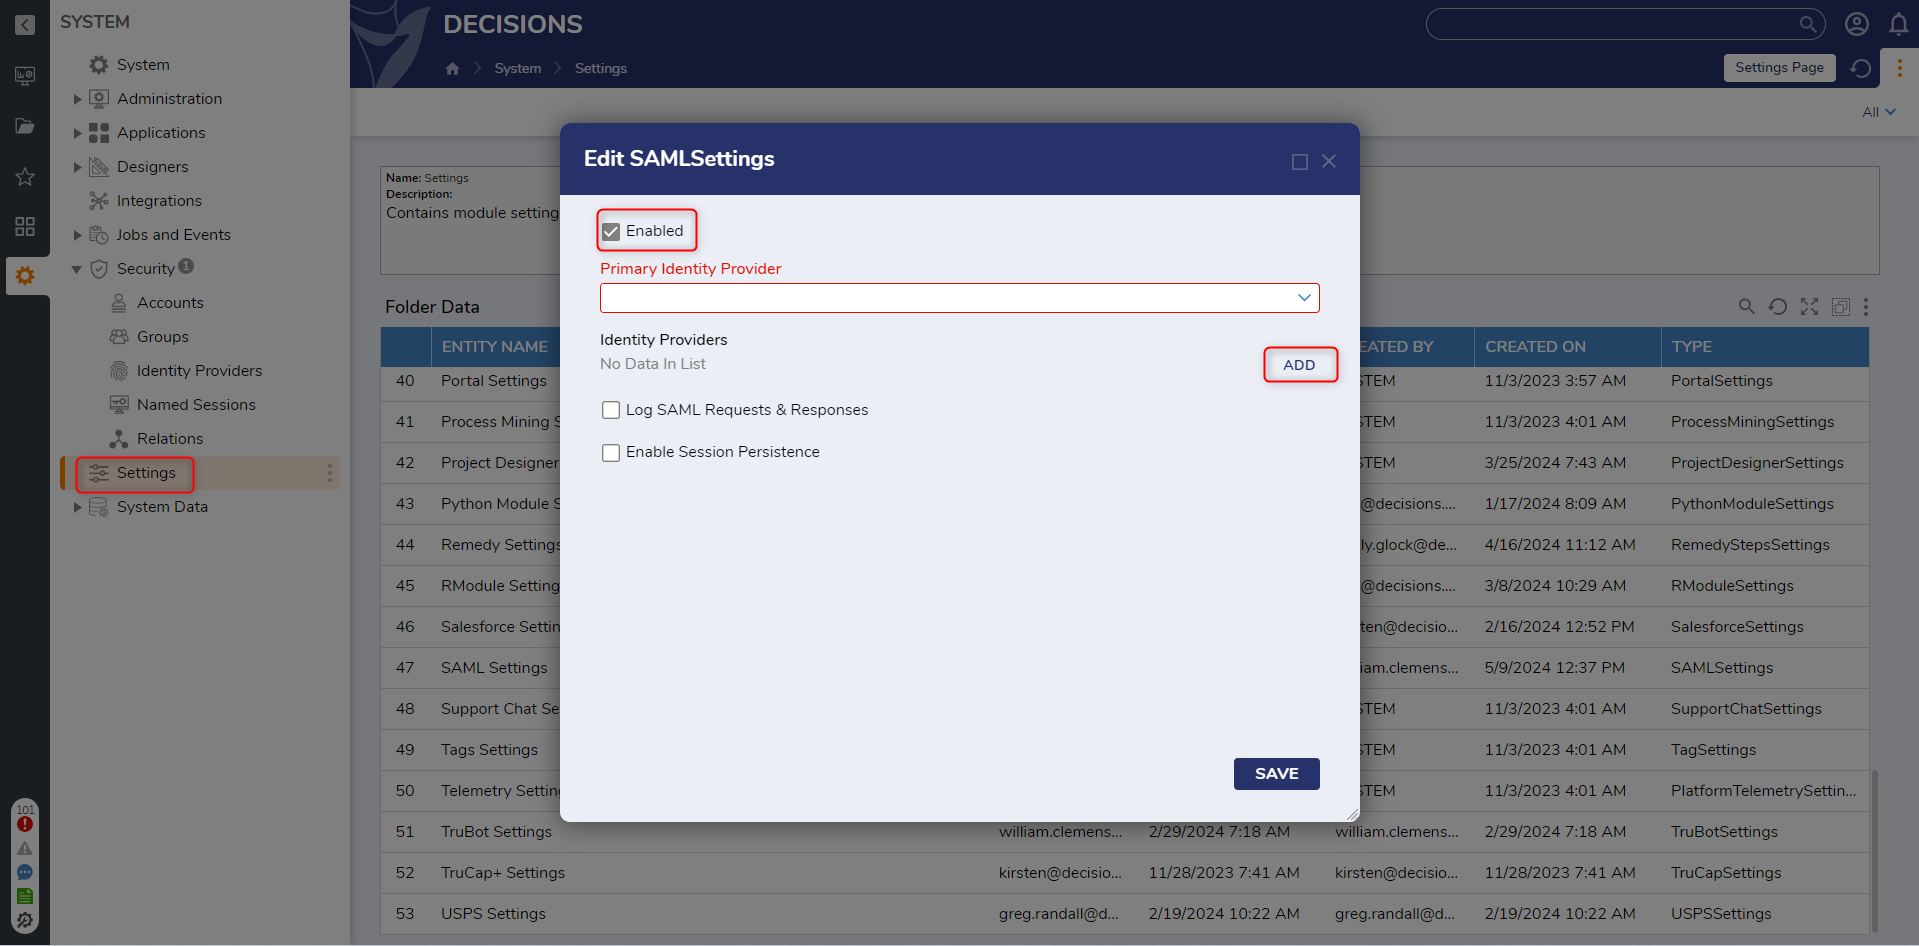
- Navigate to the System> Settings. Right-click SAML Settings and select Edit.
- In the Edit SAML Setting window, check the Enabled option. Then, under the Identity Providers section, select ADD. Enable Session PersistenceEnable Session Persistence keeps the Decisions session active after the browser is closed, so users do not need to sign in again each time they reopen the portal. This setting can be useful in SSO environments where a more persistent login experience is needed. When enabled, users remain signed in until they log out or the session is otherwise ended by system or security controls.
- Configure the appropriate fields in the Add Identity Providers window. This information is based on the SSO provider information used for the organization. When complete, click OK.
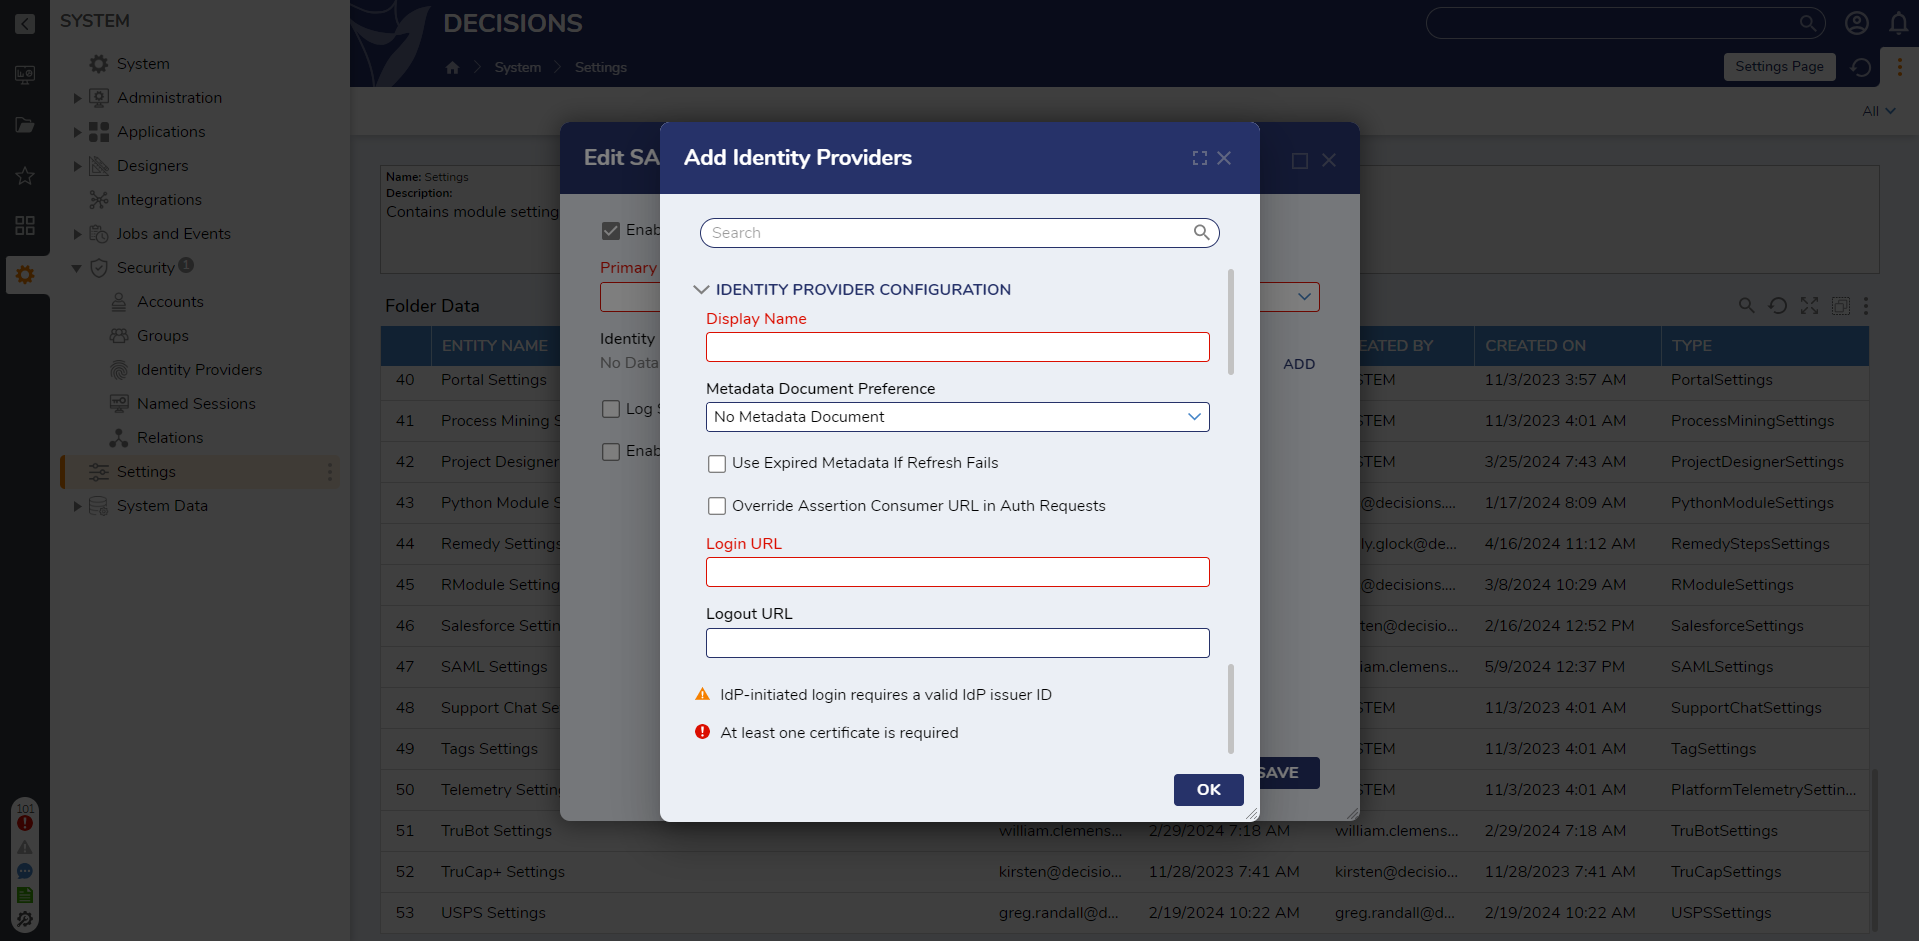
Setting Name Description Display Name Provide a Name for the Identity Provider Metadata Document Preference Specifies the preferred method for obtaining metadata No Metadata Document Configure SAML without providing any metadata Fetch Metadata From URL Enables the retrieval of metadata from a specified URL. Metadata URL Field to provide the metadata URL Refresh Metadata if All Certificates Fail Determines whether the metadata should be refreshed if all the certificates associated with the Identity Provider (IDP) fail to validate during the authentication process. Read Metadata From File Enables retrieval of metadata by reading it from a specified file. Read Metadata From Text Enables the retrieval of metadata from the provided text Use Expired Metadata if Refresh Fails Allows the utilization of expired metadata if the refresh process fails to retrieve the latest version. Override Assertion Consumer URL in Auth Requests Allows them to replace the default Assertion Consumer URL with a specified URL when sending authentication requests Assertion Consumer URL Field to enter the "Override Assertion Consumer URL". Login URL The SSO login of the Identity Provider Logout URL The SSO logout URL of the Identity Provider Sign Logout Requests/Responses When set to true, logouts will be signed with a private certificate. Logout Signature Algorithm RSA-SHA1 and RSA-SHA256 are the available signature algorithms. Filename of PFX File Path to the private cert file on the server's filesystem. Password for PFX Password for the private cert IdP Issuer/Entity ID The ID of the identity provider. This value is only required to allow Identity Provider-initiated logins. SP Issuer/Entity ID Usually, the Base URL to the Decisions Portal. The Portal Base URL can be found by clicking the Profile icon in the Designer Studio, then selecting About from the menu. Name ID Policy Either email or transient ID based on the Identity Provider Ignore Date Conditions Allows for bypassing the enforcement of validity dates in SAML responses received from the identity provider. Authorization Context Comparison Attribute The "Authorization Context Comparison Attribute" setting provides options for comparing attributes in the authorization context. Exact If set to "exact" or omitted, then the resulting authentication context in the authentication statement MUST be the exact match of at least one of the authentication contexts specified. Minimum If set to "minimum", then the resulting authentication context in the authentication statement MUST be at least as strong (as deemed by the responder) as one of the authentication contexts specified. Maximum If set to "maximum", then the resulting authentication context in the authentication statement MUST be as strong as possible (as deemed by the responder) without exceeding the strength of at least one of the authentication contexts specified. Better If set to "better", then the resulting authentication context in the authentication statement MUST be stronger (as deemed by the responder) than any one of the authentication contexts specified. Specify Authentication Methods Allows the selection of the authentication context classes that can be used during the authentication process. X.509 Certificate The PEM formatted string of the X.509 cert RelayState Behaviour In SAML 2.0, RelayState is an optional parameter that designates a particular URL as the destination for users after successful Single Sign-On (SSO) authentication. Ignore relay state The IDP will ignore the presence of a RelayState if it exists. Single-Encoded URL Redirect The value of the relay state is a URL that has been encoded one time, so Decisions decodes it one time. Double-Encoded URL Redirec The value of the relay state is a URL that has been encoded two times, so Decisions decodes it two times. Allow JWT Redirect Login Enabling this will expose a new field, "Remote JWT Endpoint URL".
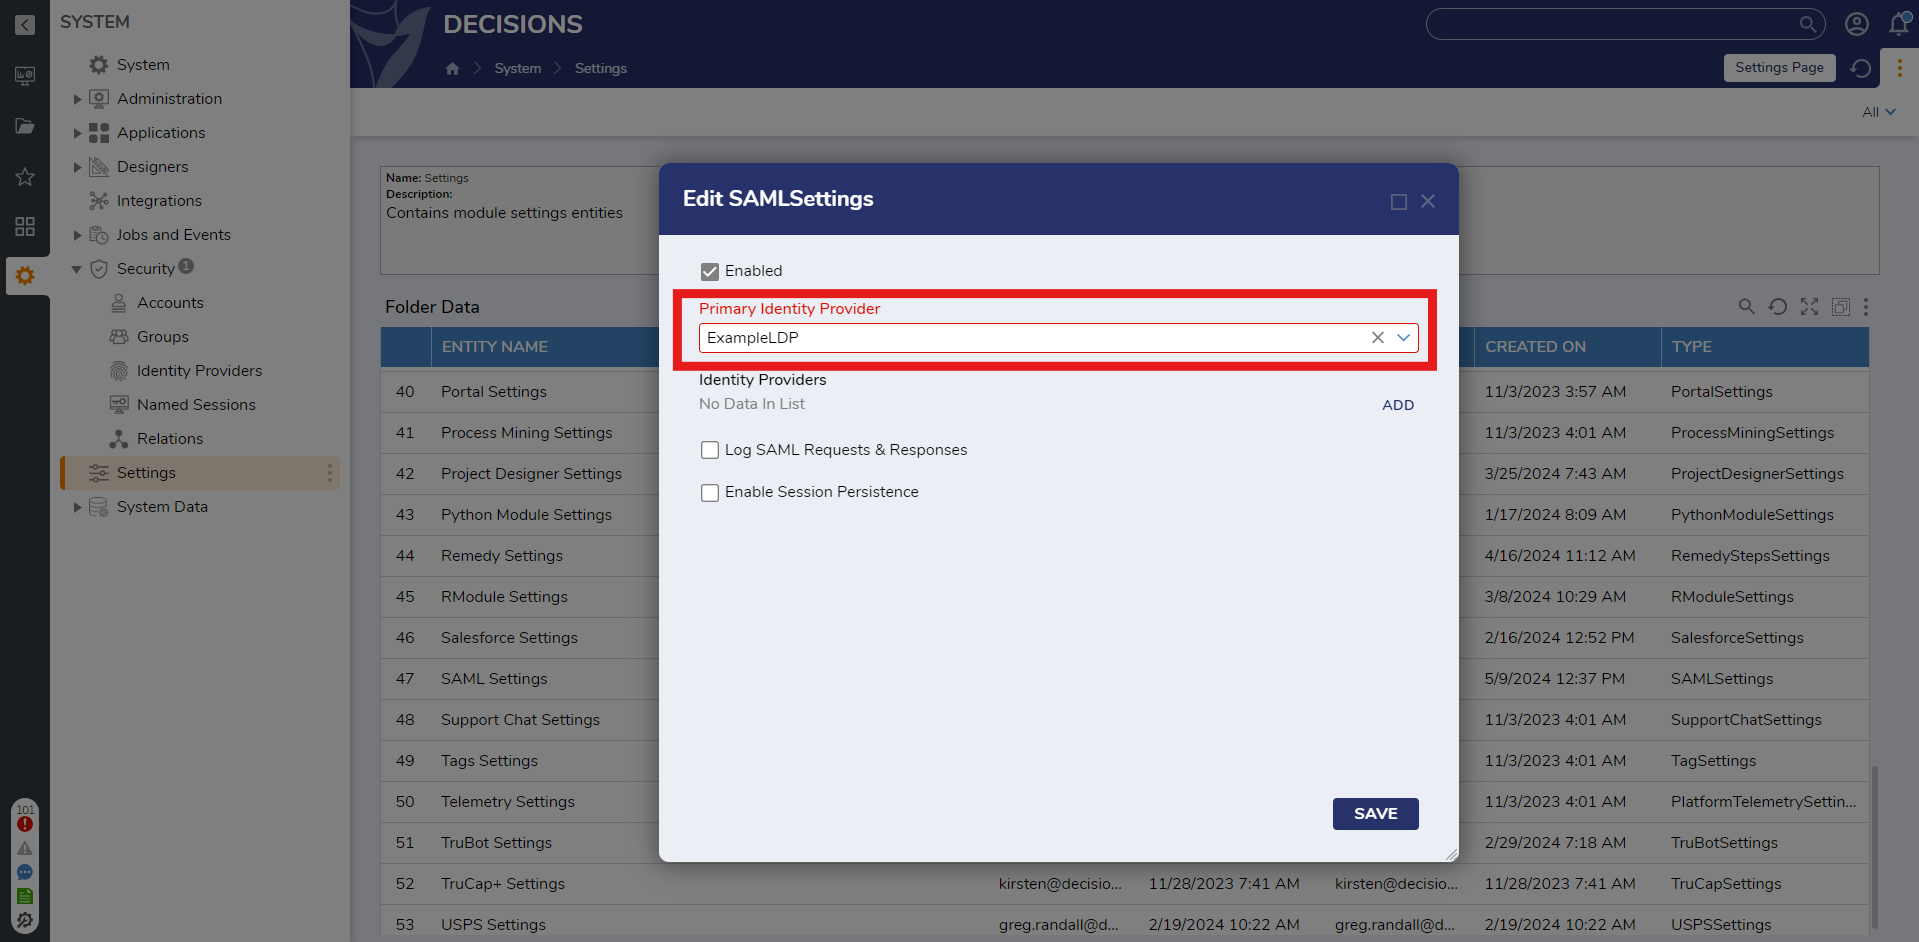
This will allow Decisions to send a correlation value to a 3rd party app. (To use this feature, the 3rd party app must have an endpoint to receive the JWT response). The 3rd party app should generate a random correlation ID (so that it can match the request to the response) and redirect the user to our login endpoint with a 'CorrelationId' parameter.Run Flow on Each Login When enabled, the selected Flow will be run if a user with an unknown ID tries to log in. This Flow is typically used to create an unknown user in the Decisions Portal so that they can log in. Users can choose to pick a Flow or create the Flow Behavior SAML User Not Found Flow. Process If User Not Found This section gives a handling mechanism if the user is not found in the Decisions. Redirect to URL Allows the platform to redirect the user to a designated URL, such as an error Page or a custom-defined location, to handle the situation where the user is not found. URL Field to specify the redirect URL. Add UserID Parameter If enabled, then an extra query parameter will be added to the end of the chosen URL. The name of the query parameter will be whatever you've entered for the UserId parameter name, and the value will be the user ID from the SAML response. Run Flow in Background Allows running a Flow when an unknown user tries to log in. Edit Flow This is the Flow that will be run when an unknown user tries to log in. The default Flow can be used for creating unknown users. It is named SAMLDefaultCreateAccount. Retry Login After When set to true, the System will try to log in after running the selected Flow. If the Flow creates the user, set this to true so the user is logged in automatically; otherwise, they would have to log in again. None No handling mechanism is required. - In the Edit SAML Settings window, click the dropdown list under Primary Identity Provider and select the created Identity Provider. Click SAVE to save SAML Settings.
 When using a SAML Login Flow from the option Run Flow on Each Login, Relay State is available as input in the Flow Designer on the Data Explorer panel. Auto Timeout should only be used with the built-in SignOn. In the HTML Portal, log out the user to return to their SSO Sign-in Page. To get Attributes passed in from the SAML Response, navigate to the Data Explorer panel, then SAML Response > Assertion > AttributeStatement.
 - Navigate to System > Security > Accounts and right-click an account that should be able to use SAML SSO. Select Edit.
- In the Edit Entity window, locate the PERSONAL INFORMATION section and define the User Identifier value. This value should be used for the Identity Provider to send as the User ID. Click SAVE.

- Once at least one admin user can work with SSO, open the Settings.xml file at C:\Program Files\Decisions\Decisions Server.
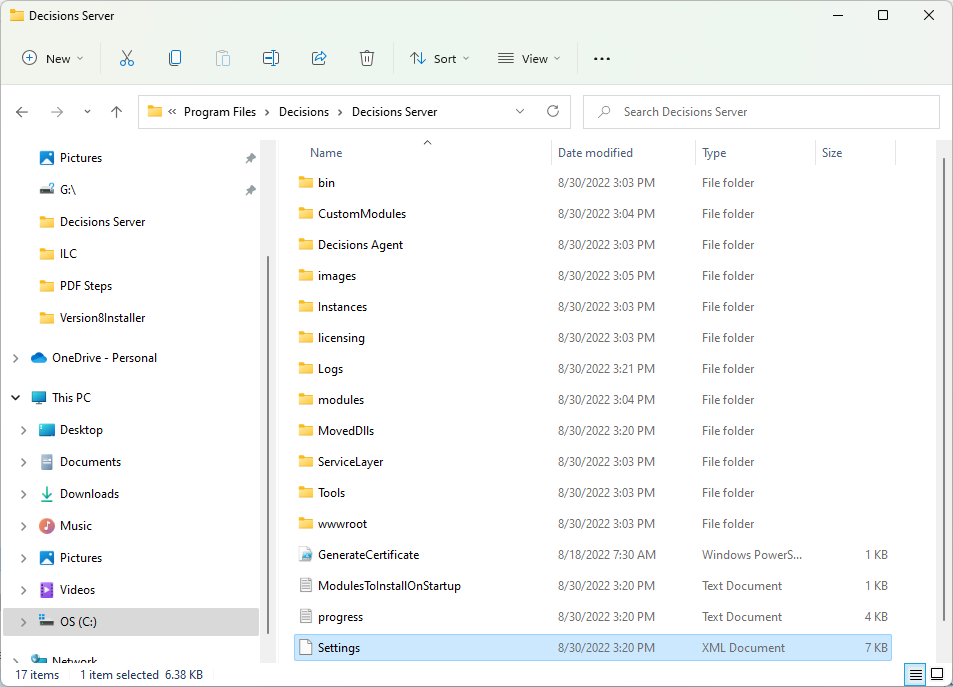
- Find the line <EnableSingleSignOn>false</EnableSingleSignOn> and set the value to true. Save changes to the file. If the line is not present, add the line to the Settings.xml file.
<EnableSingleSignOn>true</EnableSingleSignOn>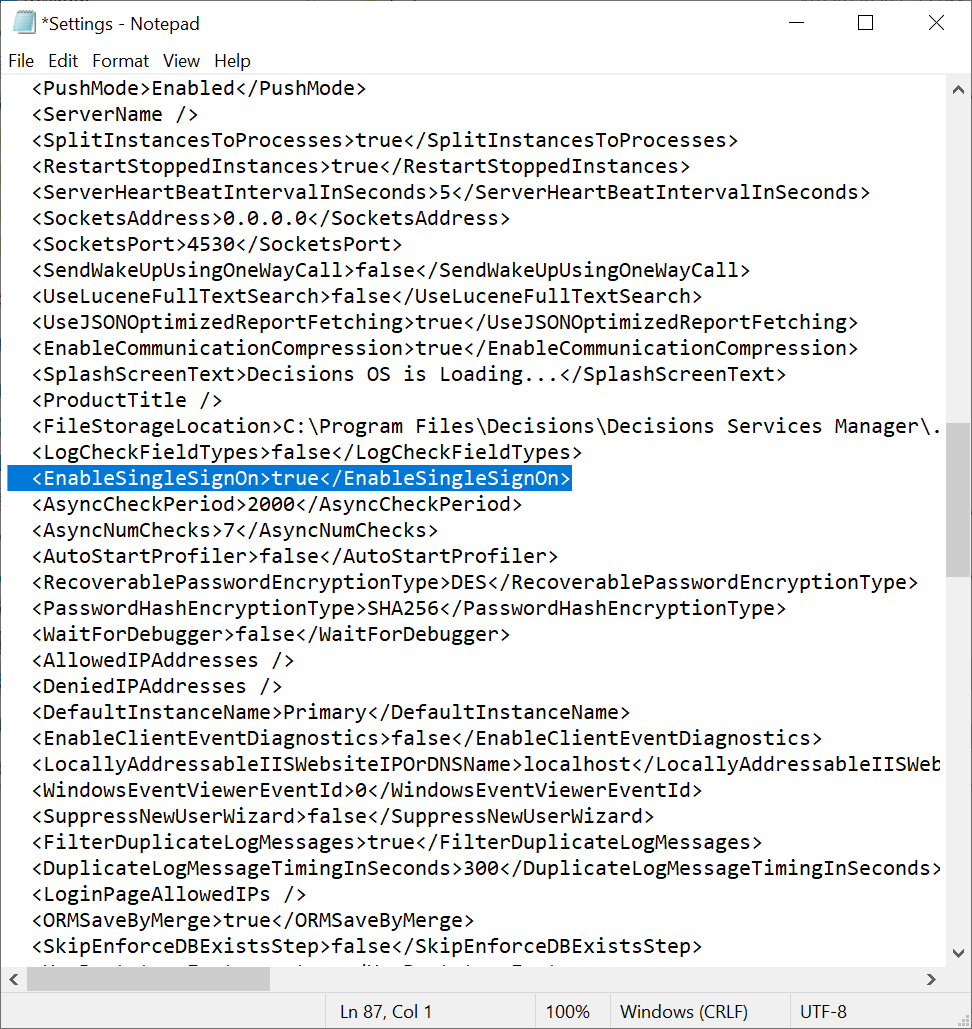
- Restart the Decisions Server service to enable SAML SSO mode.
Feature Changes
| Description | Version | Release | Developer Task |
|---|---|---|---|
| SAML Login Flows are now visible on the Pick entity dialog while configuring login flows for identity providers. | 9.6 | January 2025 | [DT-043179] |