- 19 Aug 2024
- 2 Minutes to read
- Print
- DarkLight
Query Editor
- Updated on 19 Aug 2024
- 2 Minutes to read
- Print
- DarkLight
The Query Editor allows users to write queries against any established database connection. These queries can be saved for future use and are available for quick access. The results of any query can be downloaded and saved as a CSV file.
Enable/Disable Query Editor for Designers
The option Allow Designers to Use Query Editor under System > Settings > Designer Studio > QUERY EDITOR permits all Designer users to access the Query Editor and the ability to execute queries if they are checked.

Accessing the Query Editor
The Query Editor can be found by right-clicking any Designer Folder and selecting Query Editor from the user action menu.

Using the Query Editor
To ensure that data is not caught in the cache, changes in the Query Editor should be followed by a service restart.
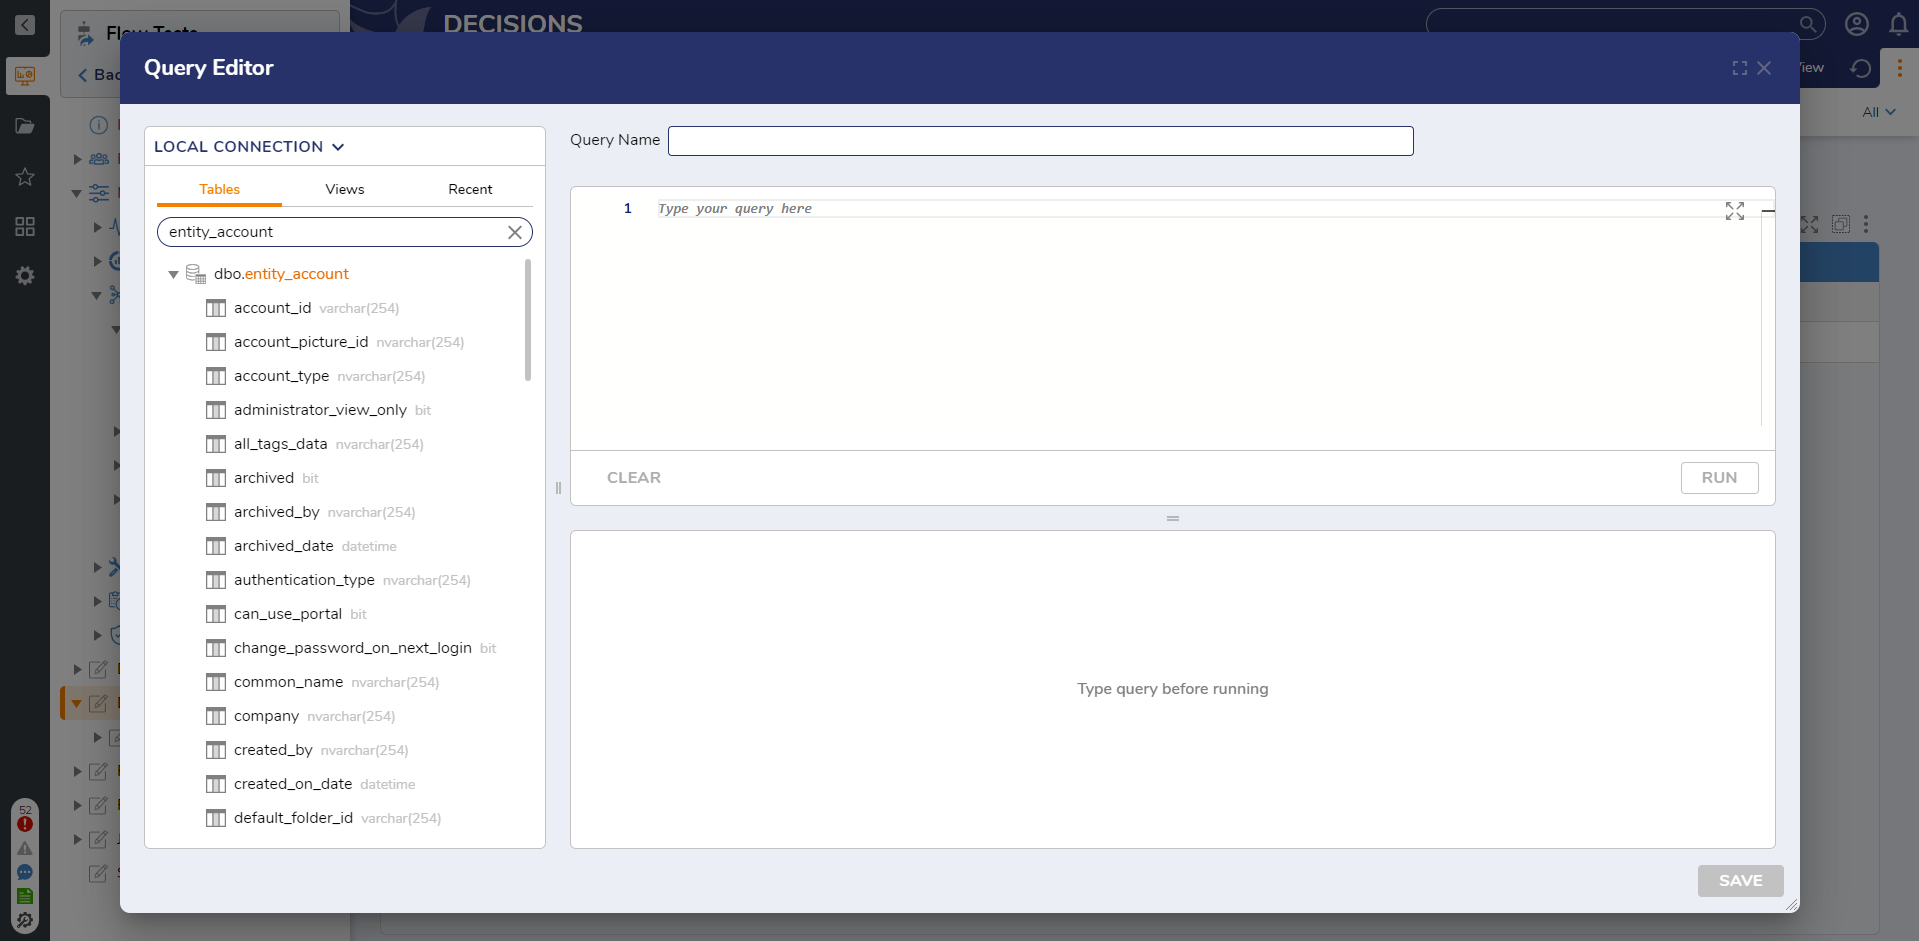
Selecting Query Editor will open the New Database Query window. The Connection drop-down menu on the right side of the window allows the user to choose any established database connection.
In the search bar, enter "entity_account" to search the database connection for the entity_account Table. To inspect the Table schema, expand the list by clicking to the left of the Table name.

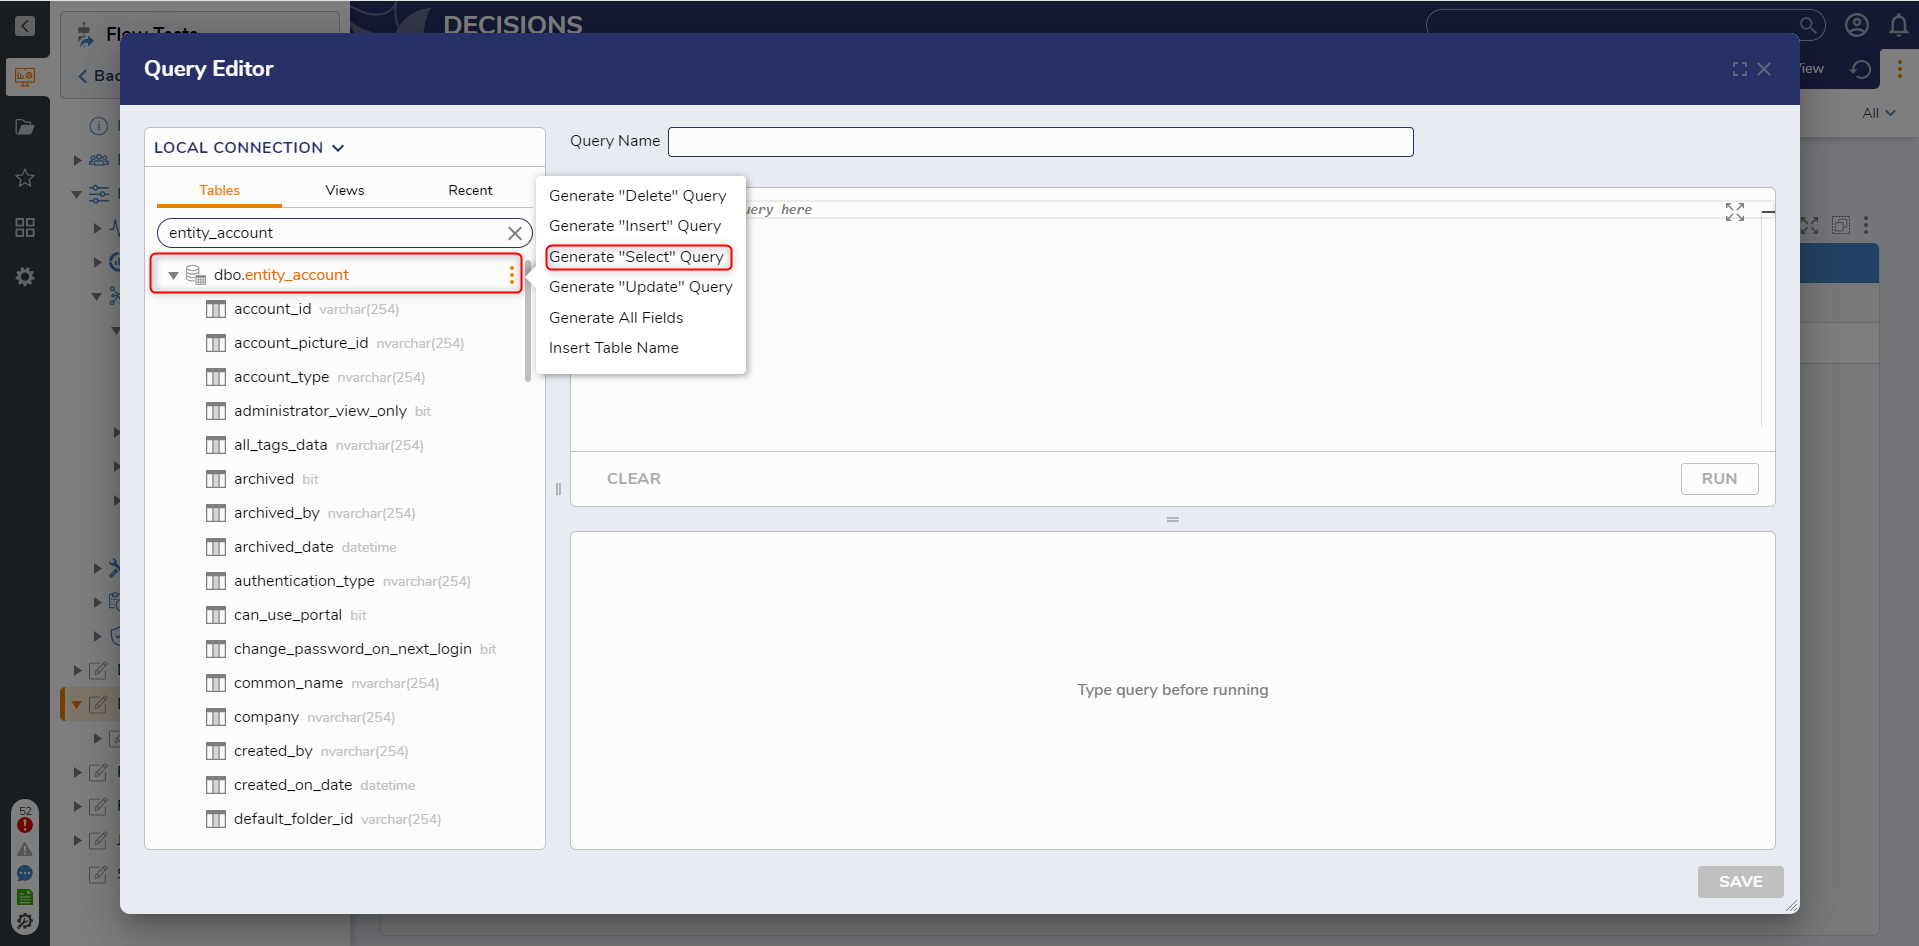
Generate a query on the table by selecting a query on the action menu when hovering over a Table. In the entity_account action menu, select Generate "Select" Query.

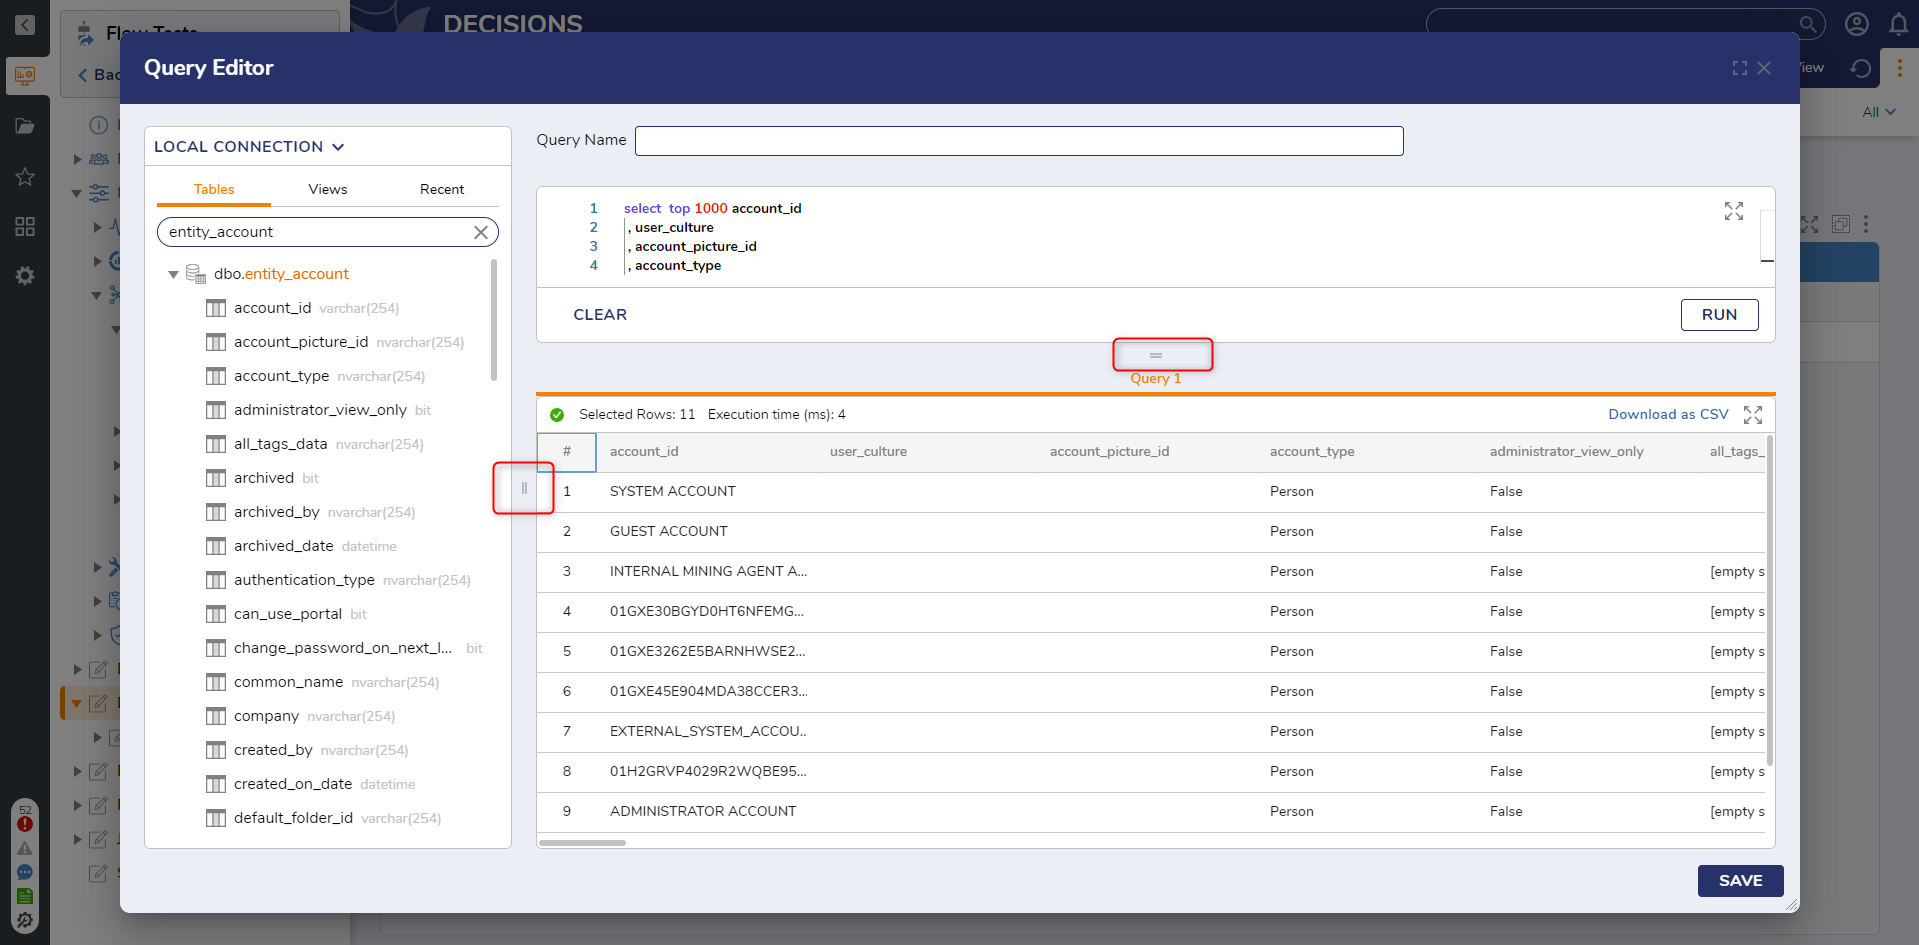
As the Query Editor allows the ability to perform queries on Tables within a selected database, SQL Queries may also be generated manually by providing them as text input in the box on the left-hand side and then clicking RUN.On the left-hand panel, click RUN.
After the query runs, users can export the results to a CSV file by clicking Download as CSV.
Users can save the query for future use by clicking SAVE, naming the query, and selecting Save if desired. Note that the Save button will no be useable until a query is written.
In the Designer folder, users can see saved queries and re-run them via the action menu.
The different menus that make up the Query Editor can be enlarged by using the || or = icons depending on which window needs to be changed.

All Queries Report
All queries created in Legacy Projects in the query editor are saved to a centralized location and accessed in a Report Format. This Report is accessible at System > Integration > Database Queries.
Queries saved to a Project are viewable like any other Designer Entity.
Actions to perform on Queries within a Project:
Right-clicking on the query allows several actions to be performed on the query. Refer to the following table:
Actions | Description |
|---|---|
Edit Database Query | Allows users to edit the query. |
Auto Run > Create Interval Flow Auto Run > Create Scheduled Job Flow | Clicking on any of the options creates automated jobs in the respective job type. These jobs can be found at System > Jobs and Events > Scheduled Jobs. For more information, refer to Understanding Scheduled Jobs. |
Auto Run > Enable Run on Import | When the query is imported to the platform, it will run immediately. |
Manage | Allows users to perform actions such as Delete, Get Query ID, and Move the Query. |
Deployment | Allows to perform repository actions. |

Feature Changes
Description | Version | Date | Developer Task |
|---|---|---|---|
ODBC connections (for example, Snowflake) are no longer selectable in the Query Editor. Query Integration (Add Query) is supported. | July 9, 2024 | [DT-040547] | |
Updated the Query Editor’s UI. | July 9, 2024 | [DT-041366] | |
Update the Query Editor’s UI to allow resizing of different aspects. | August 19, 2024 | [DT-041615] |


