Overview
The MongoDB Module can be configured to integrate with a Cosmos database.
The MongoDB Module will need to be installed. To learn how to install a module, click here.
Example
This example will demonstrate how to integrate the MongoDB Module with a Cosmos database.
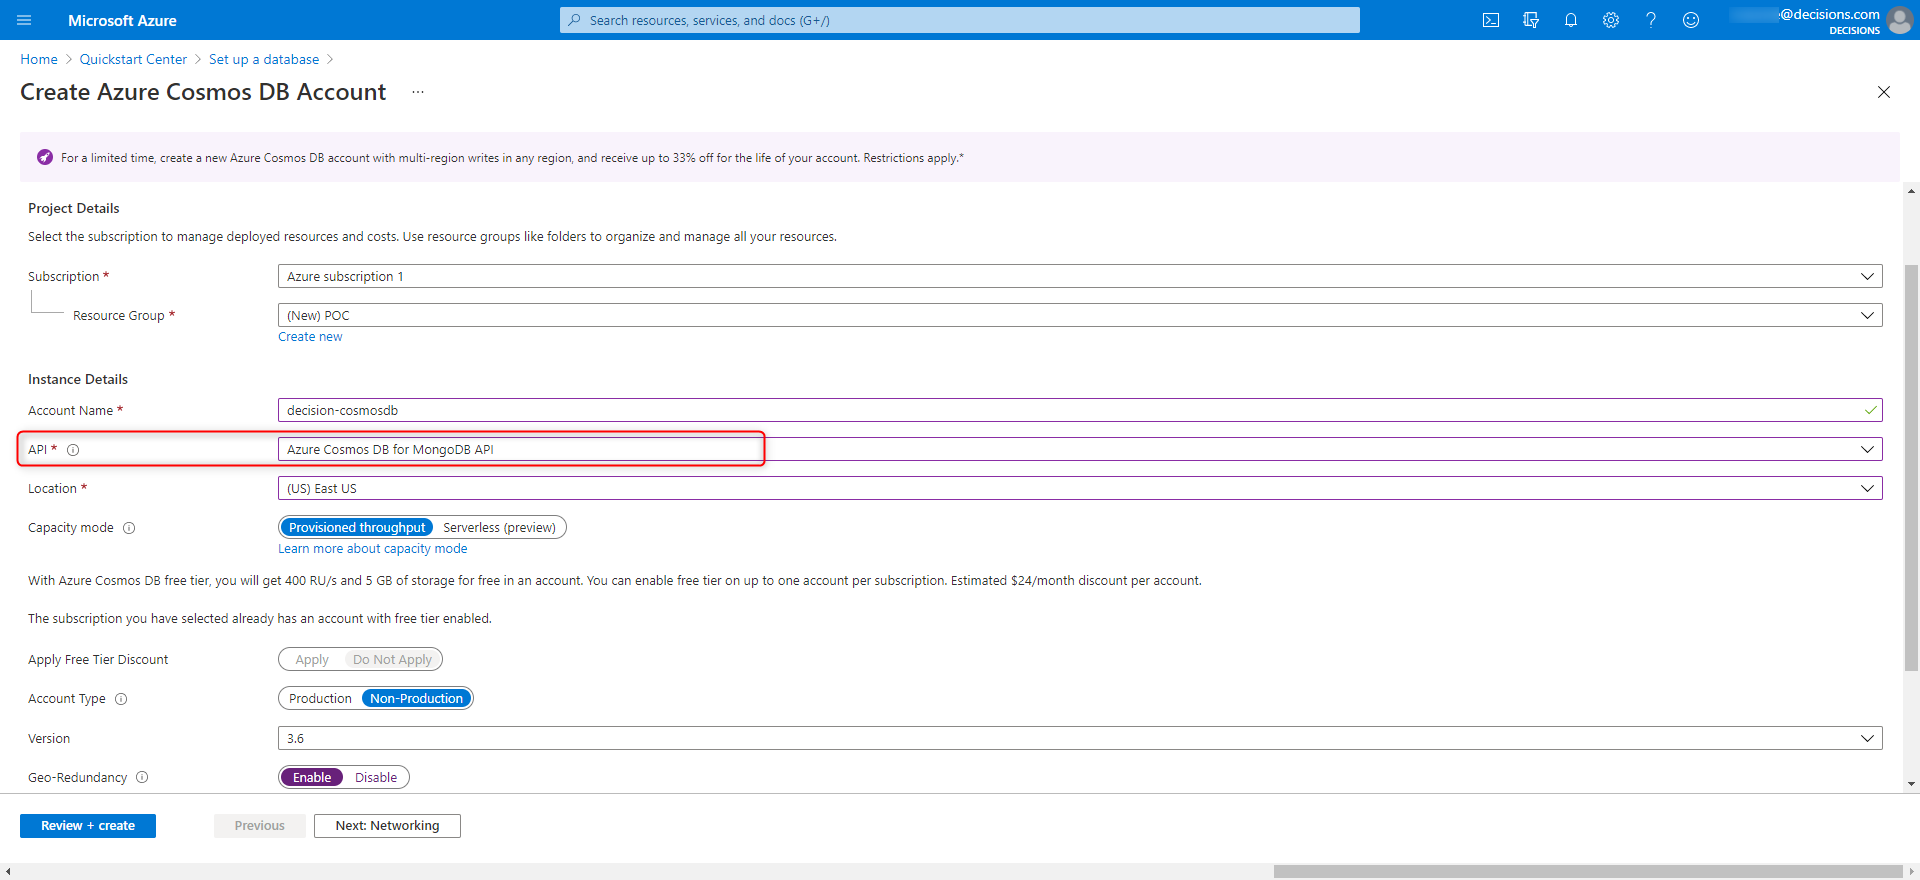
- When setting up the configuration for Azure, be sure that the CosmosDB API is set to Azure Cosmos DB for MongoDB API.
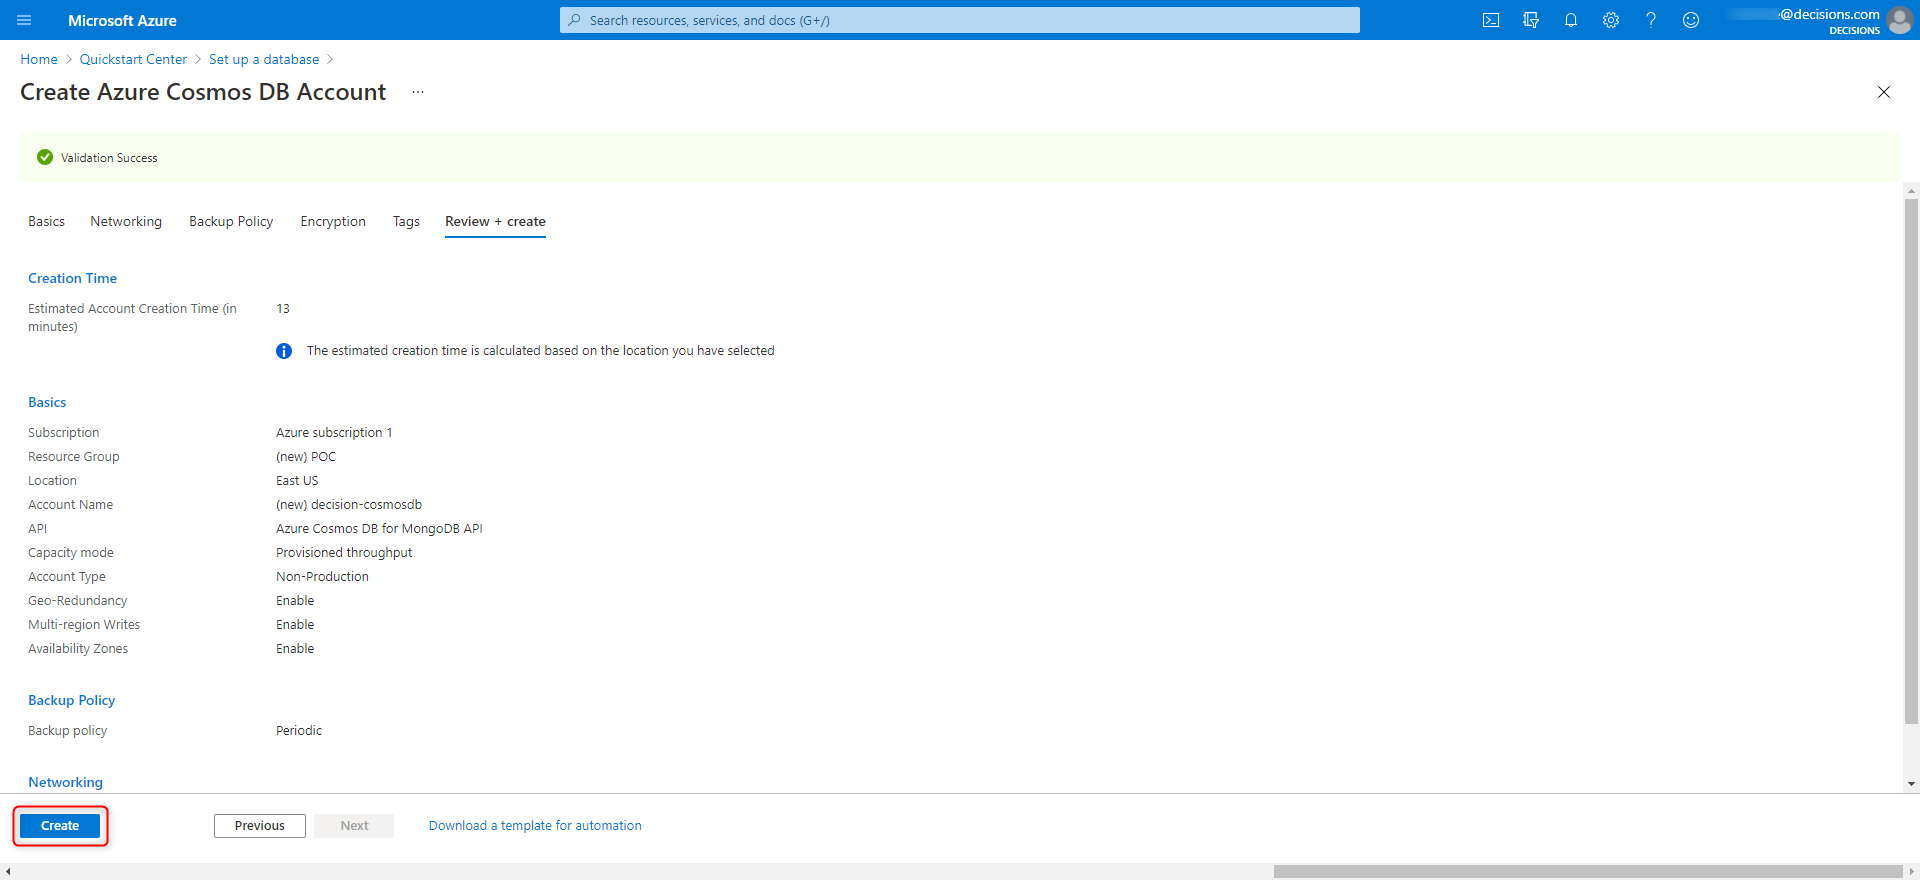
- Under Review + create, click Create.
- After the Cosmos DB has been deployed, go to Connection String and copy the Primary Connection String.

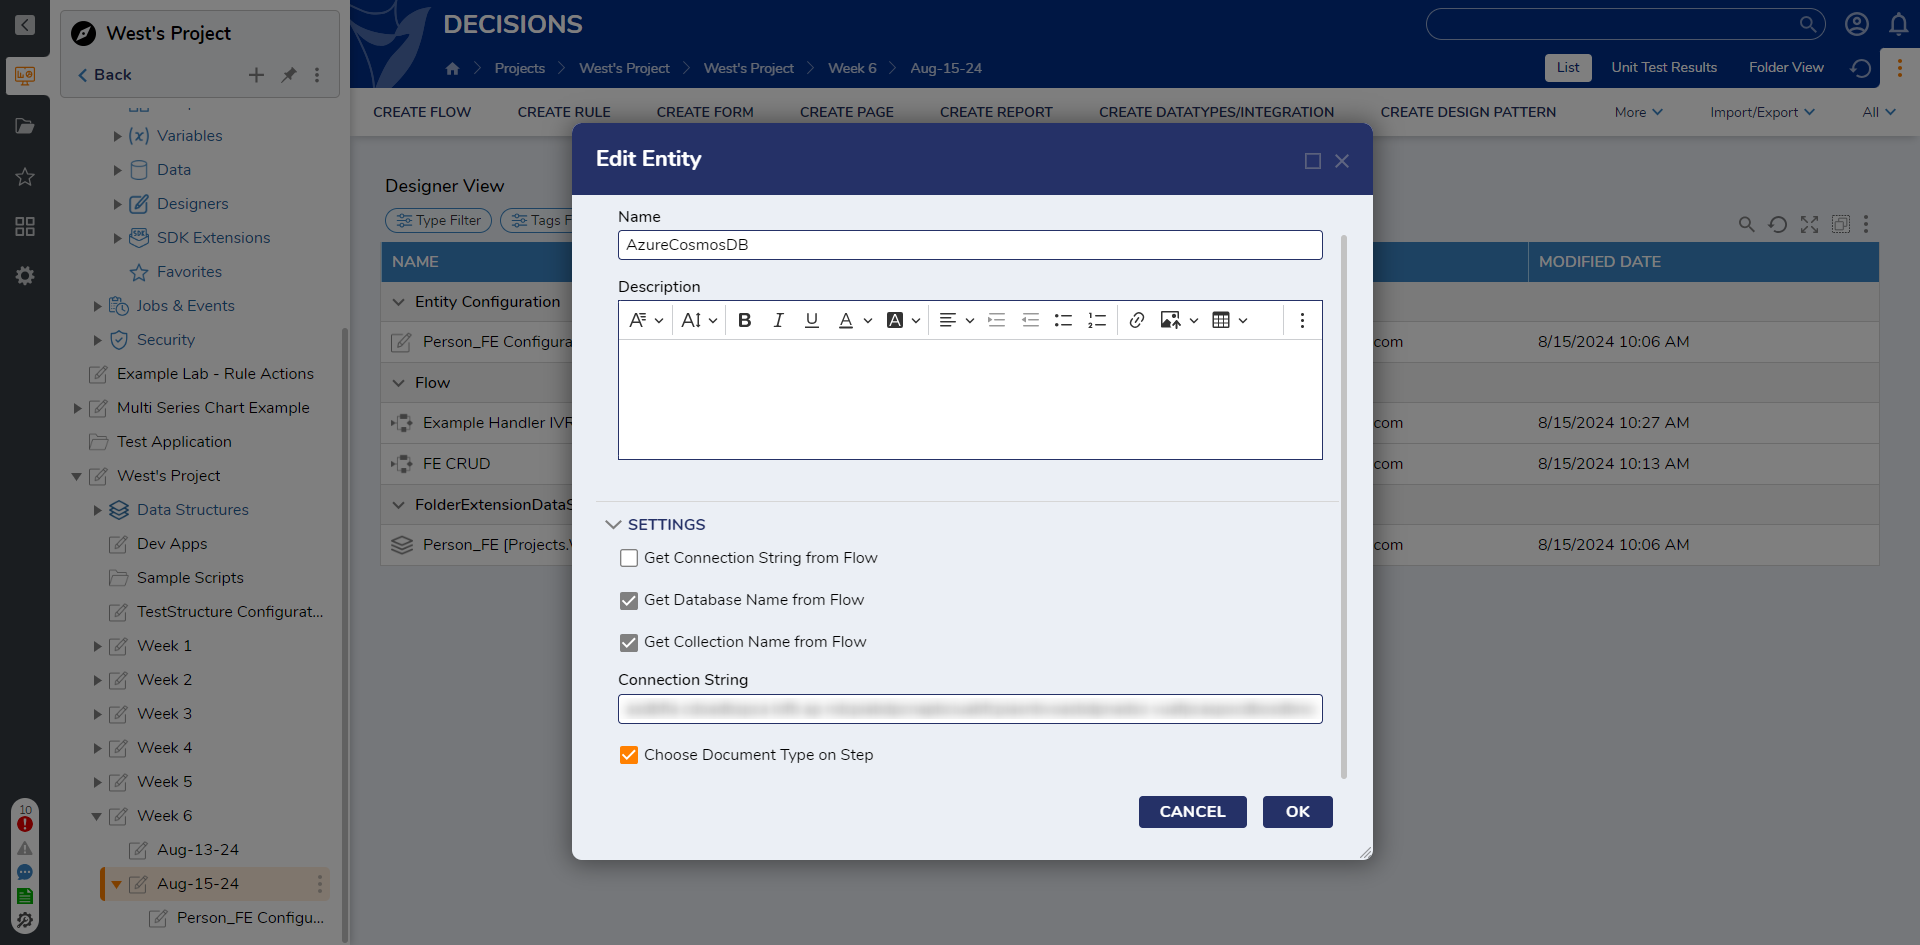
- In the Edit Entity dialog window, enter a name for the server. Select the checkbox for Get Database Name from Flow, Get Collection Name from Flow, and Choose Document Type on Stepand paste in the Connection String from Azure. Then, click OK.The Database and Collection Name can be configured within the Flow. If it does not exist, it will be created.
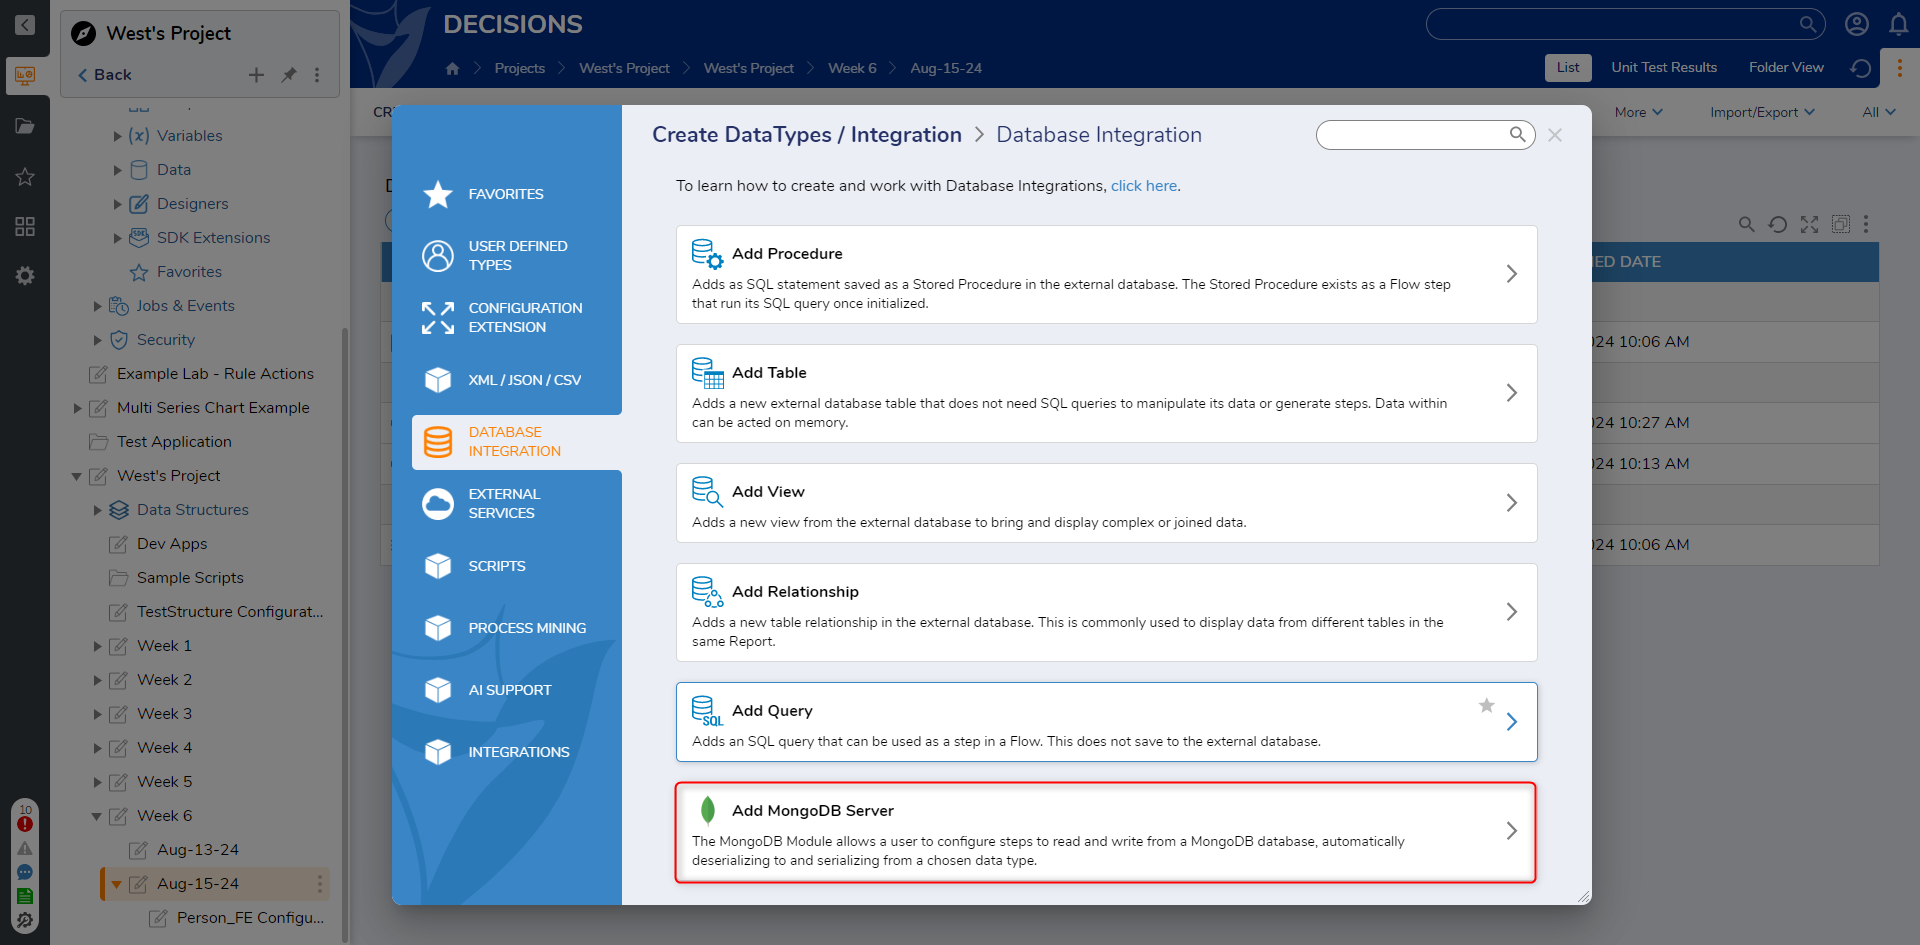
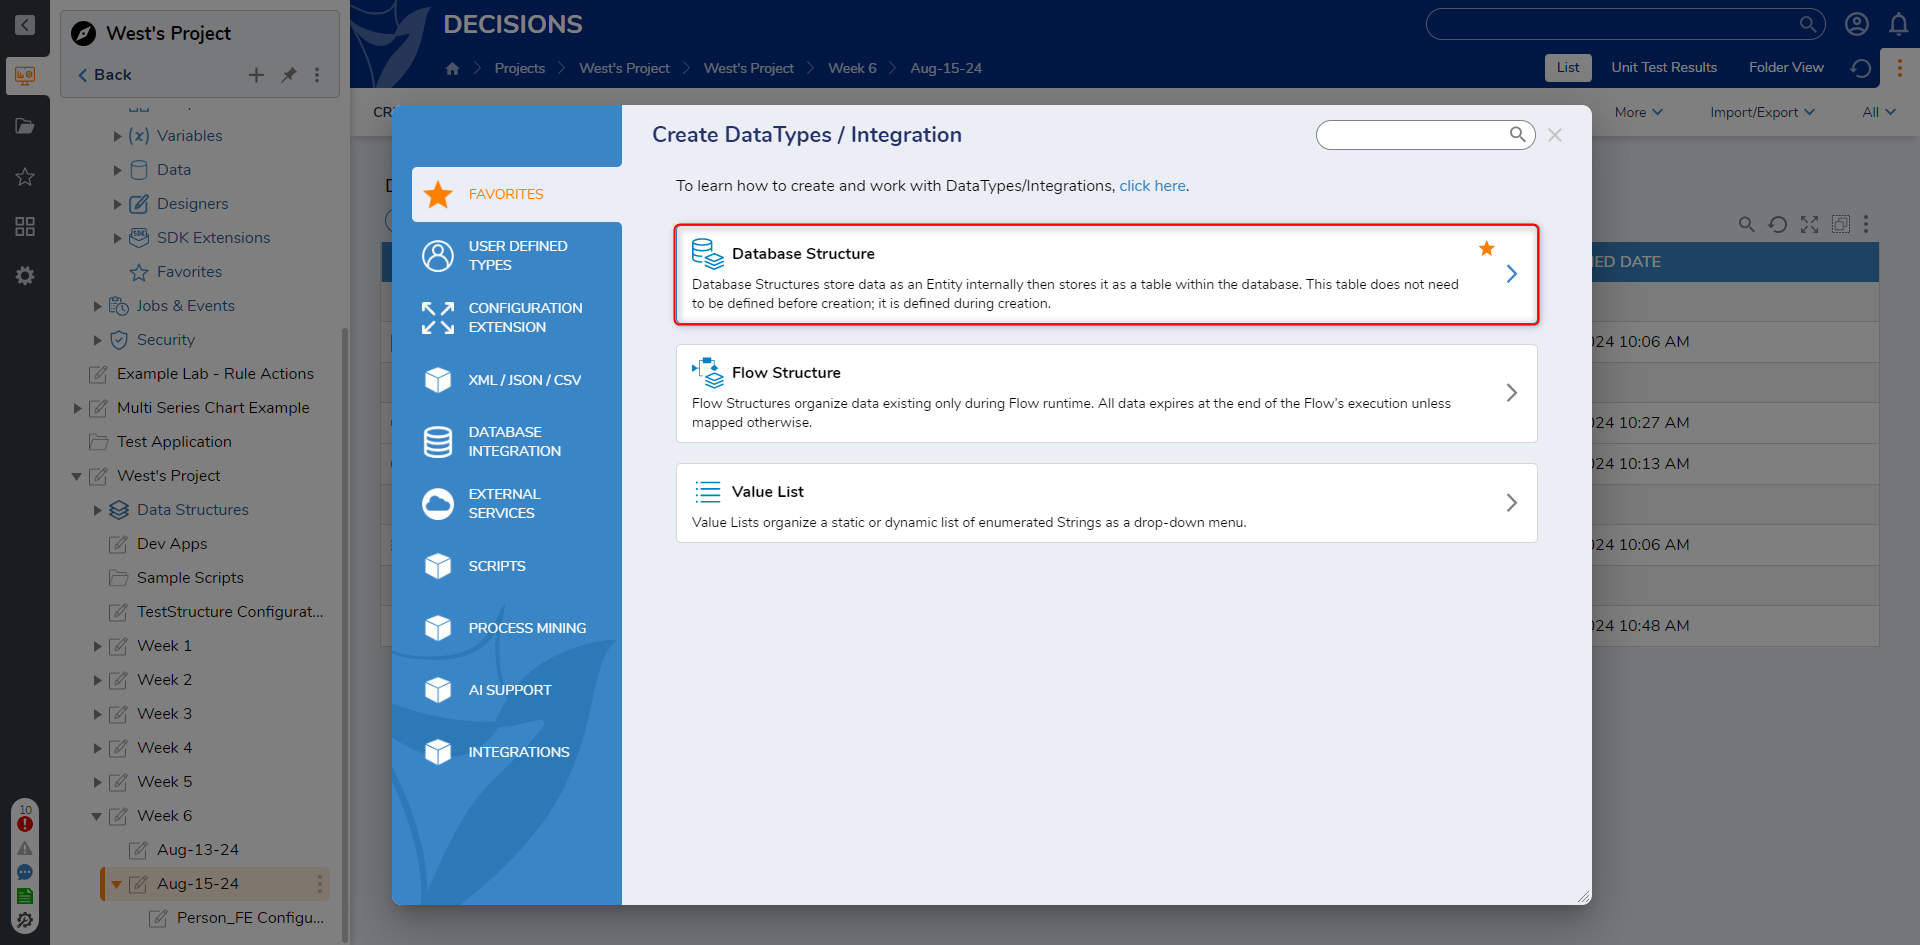
- In a Designer Project, click CREATE DATATYPES/INTEGRATION from the Global Action Bar and select Database Structure.
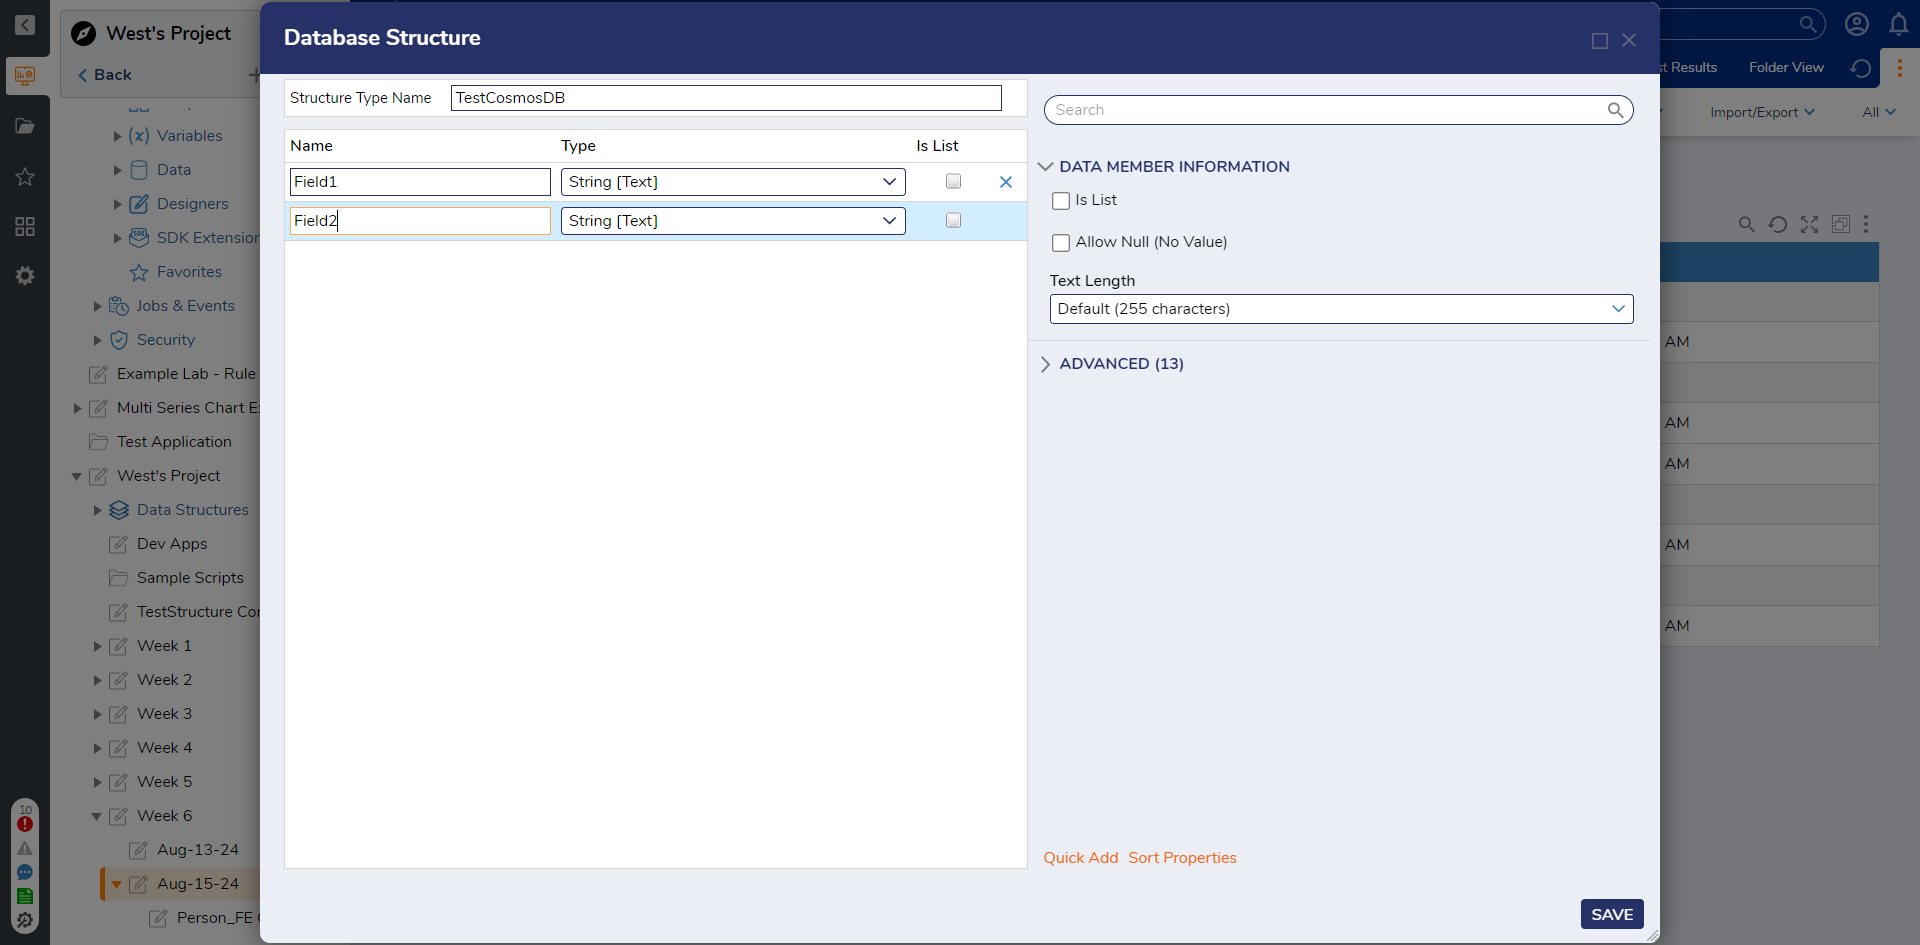
- Enter a name for the Structure Type Name and add two String [Text]data members (Field1, Field2). Then, click SAVE.If creating a Flow Structure, it should include a field called id.
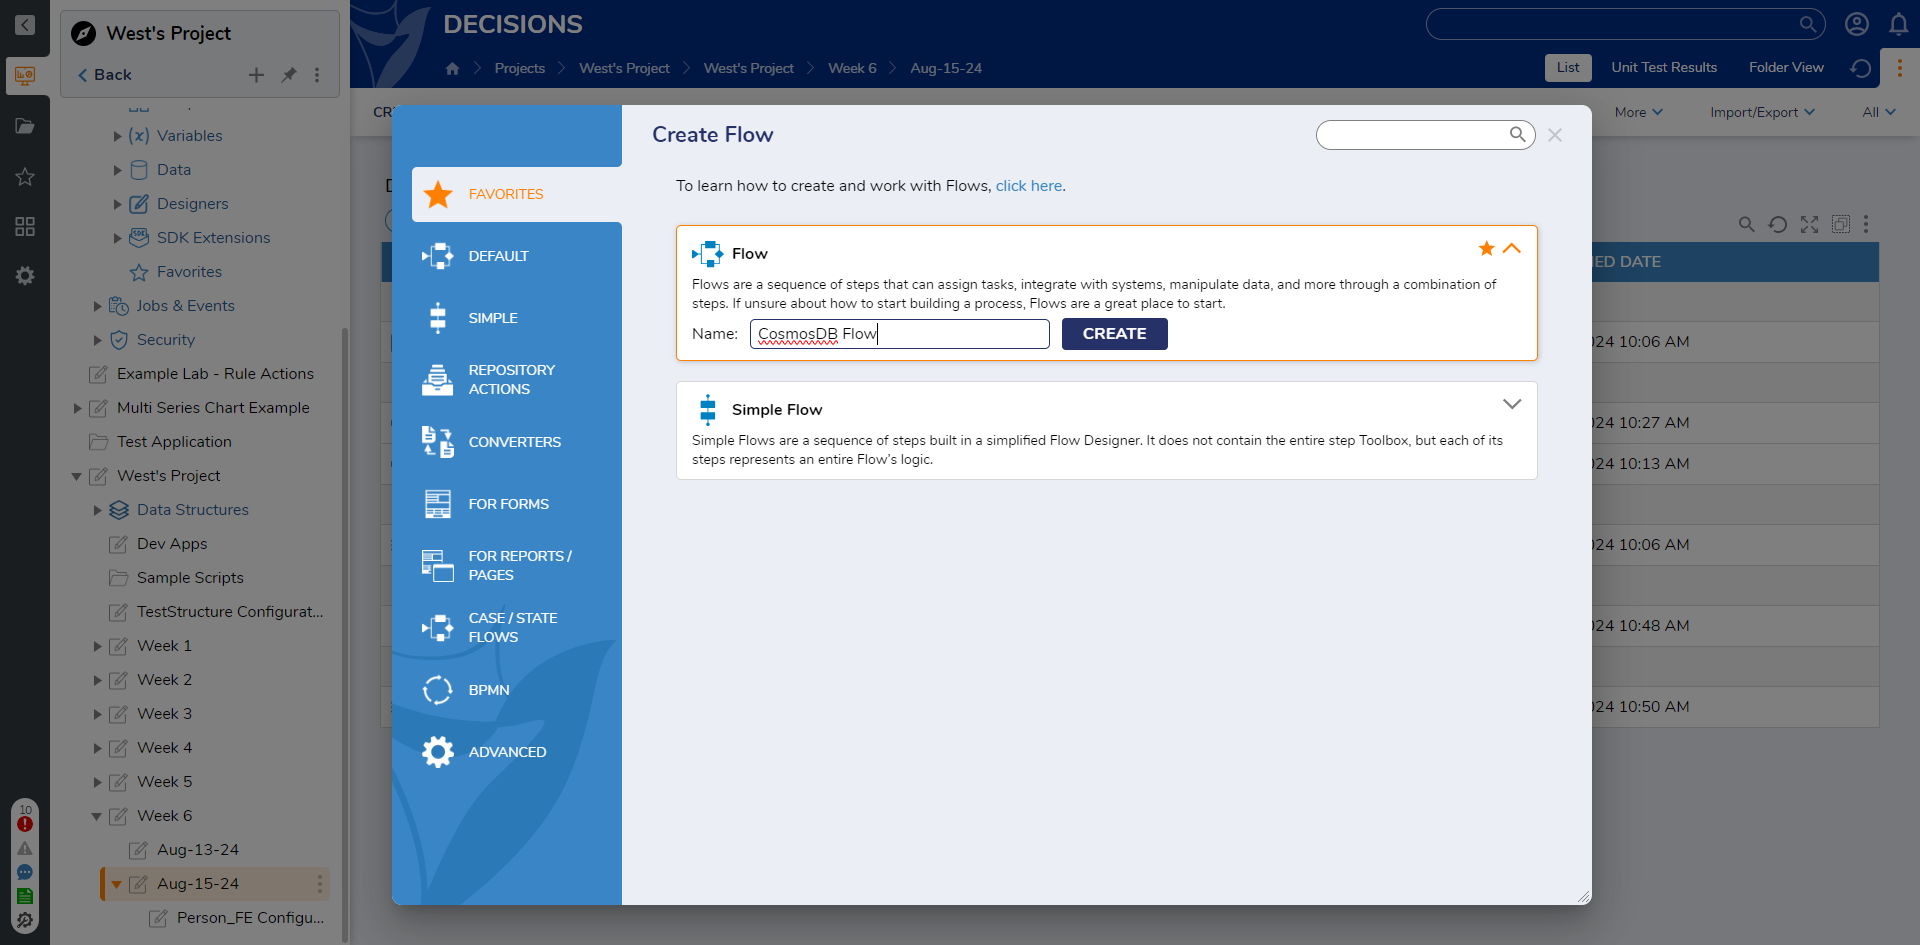
- Click CREATE FLOW from the Global Action Bar and select Flow. Name the Flow (CosmosDB Flow) and click CREATE.
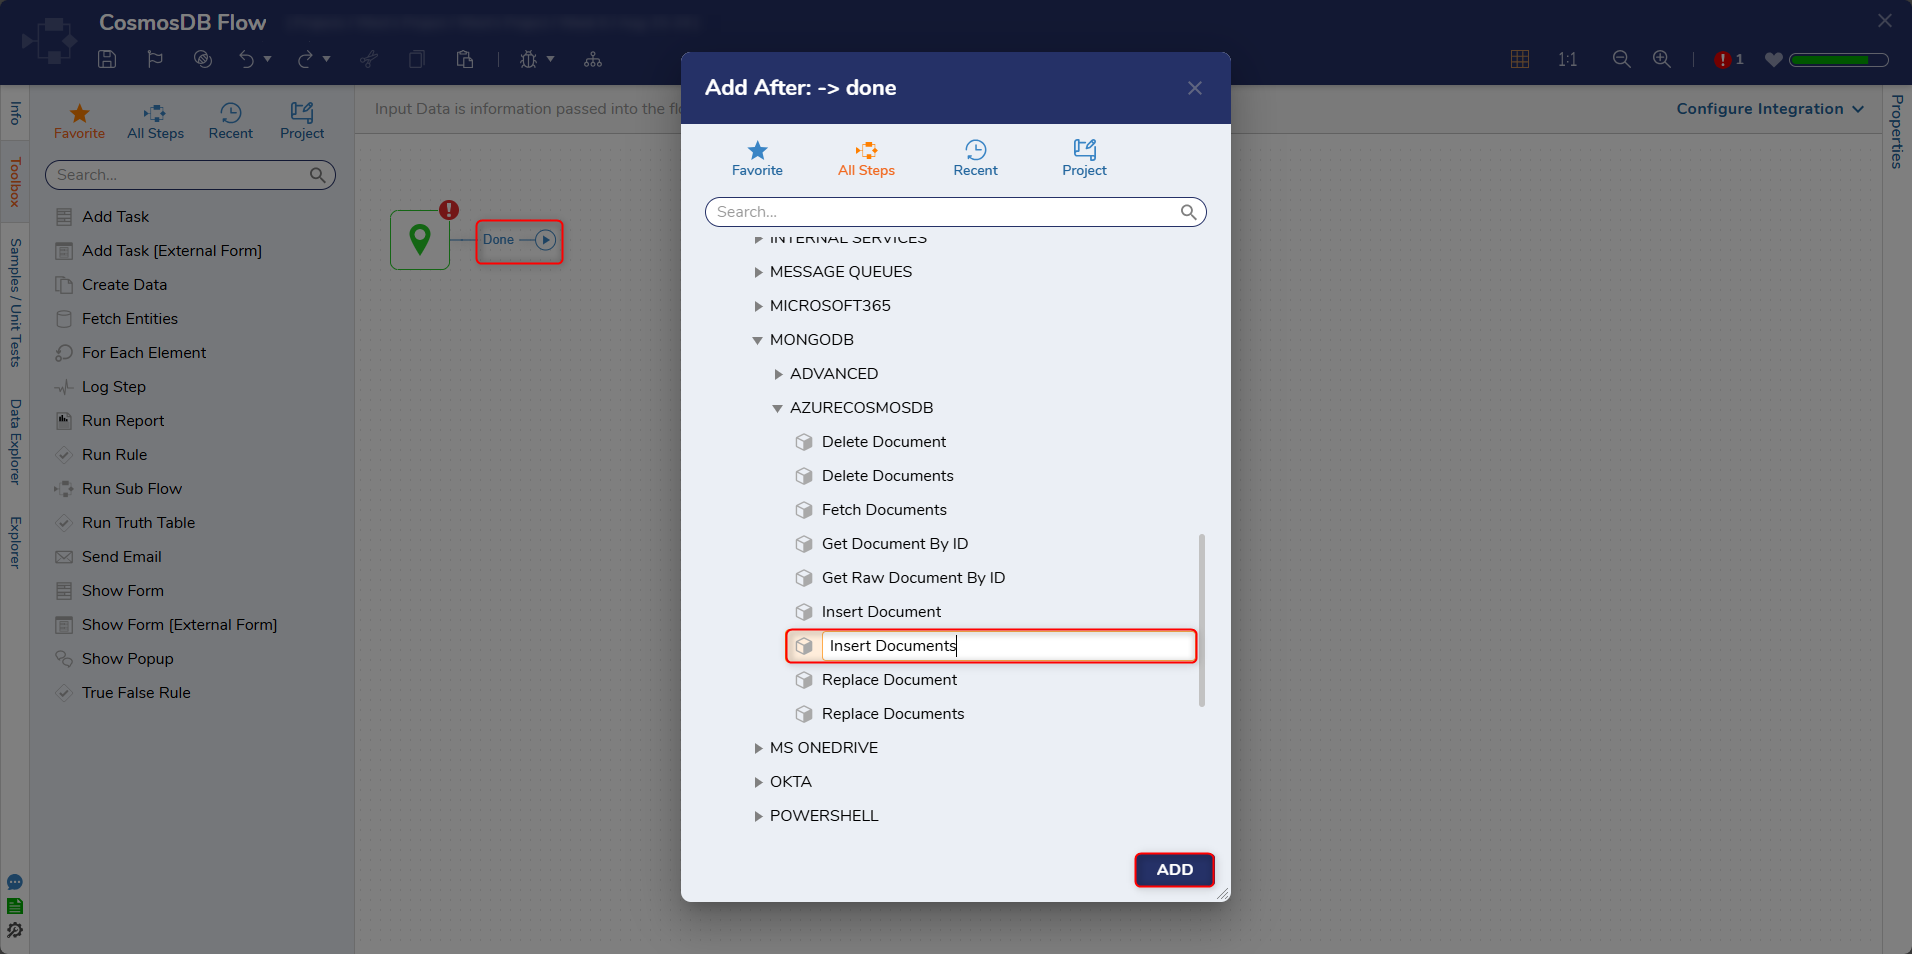
- On the Start step click the Done path and navigate to Integrations > All Integrations > MongoDB > AzureCosmosDB. Select the Insert Document step and click ADD.
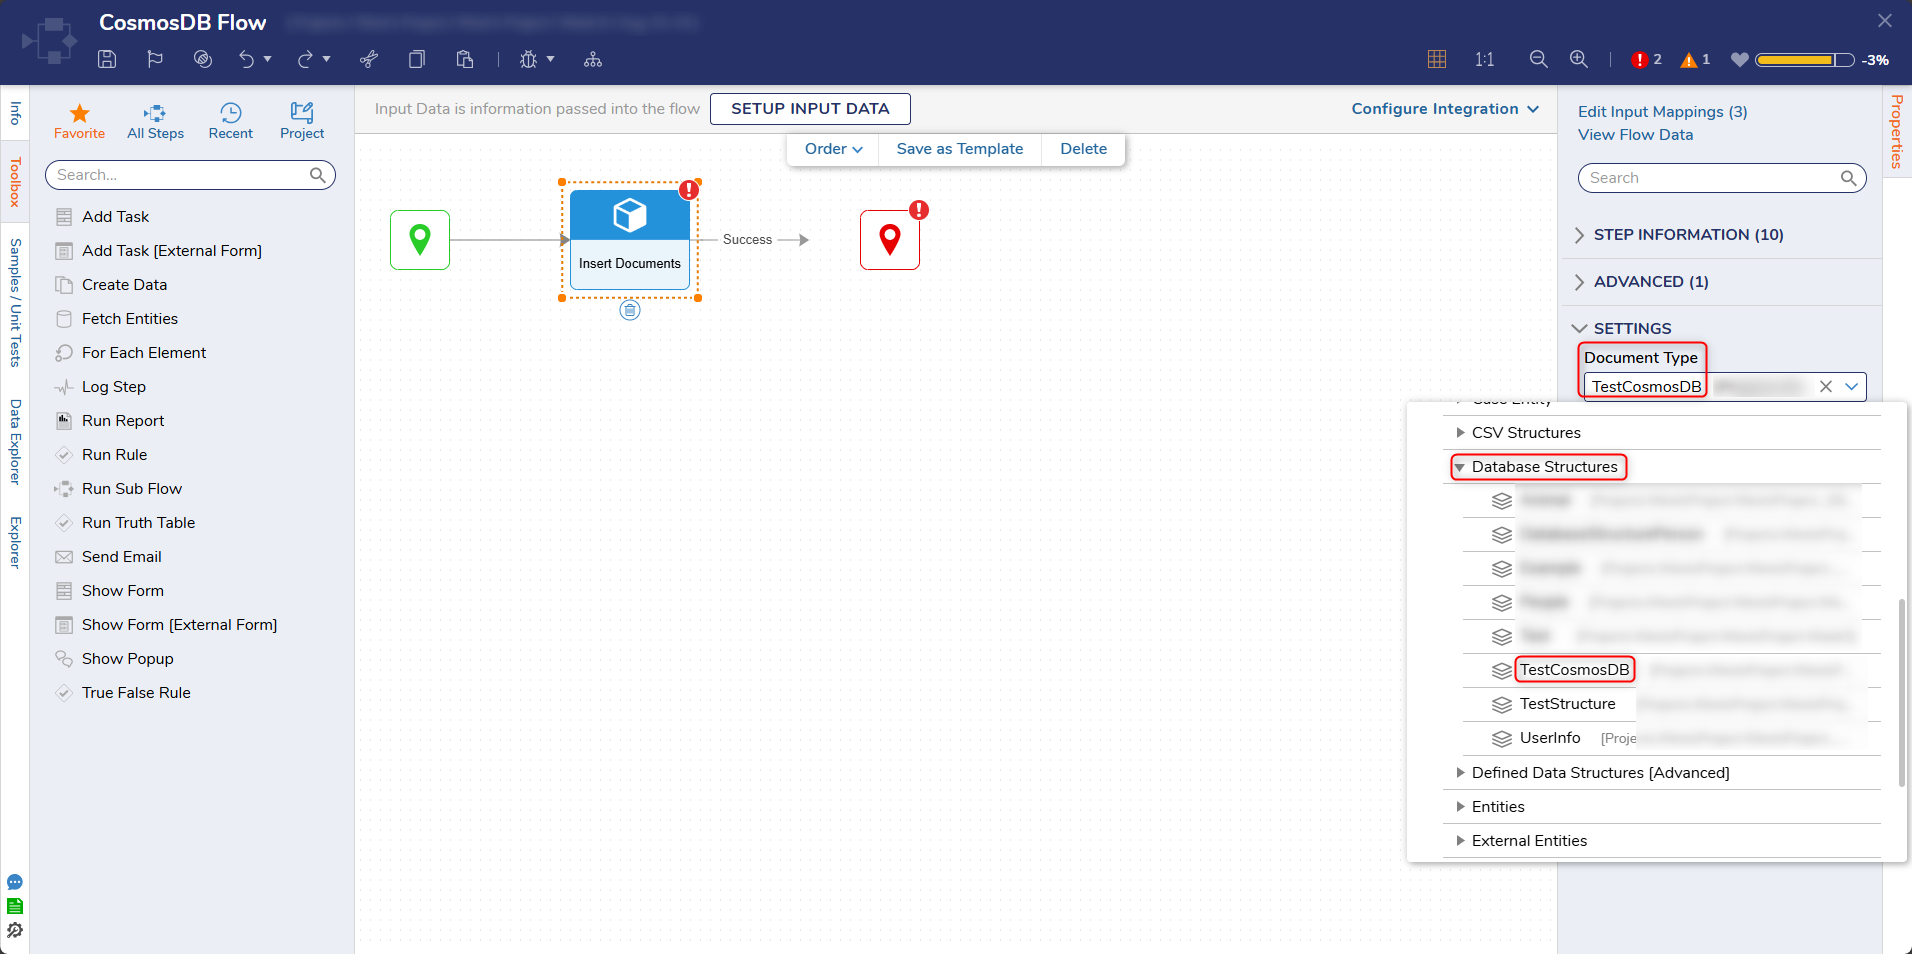
With the Insert Document step selected, click the Document Type dropdown list under the SETTINGS category on the Properties panel. Navigate to User Defined Types > Database Structures and select TestCosmosDB.
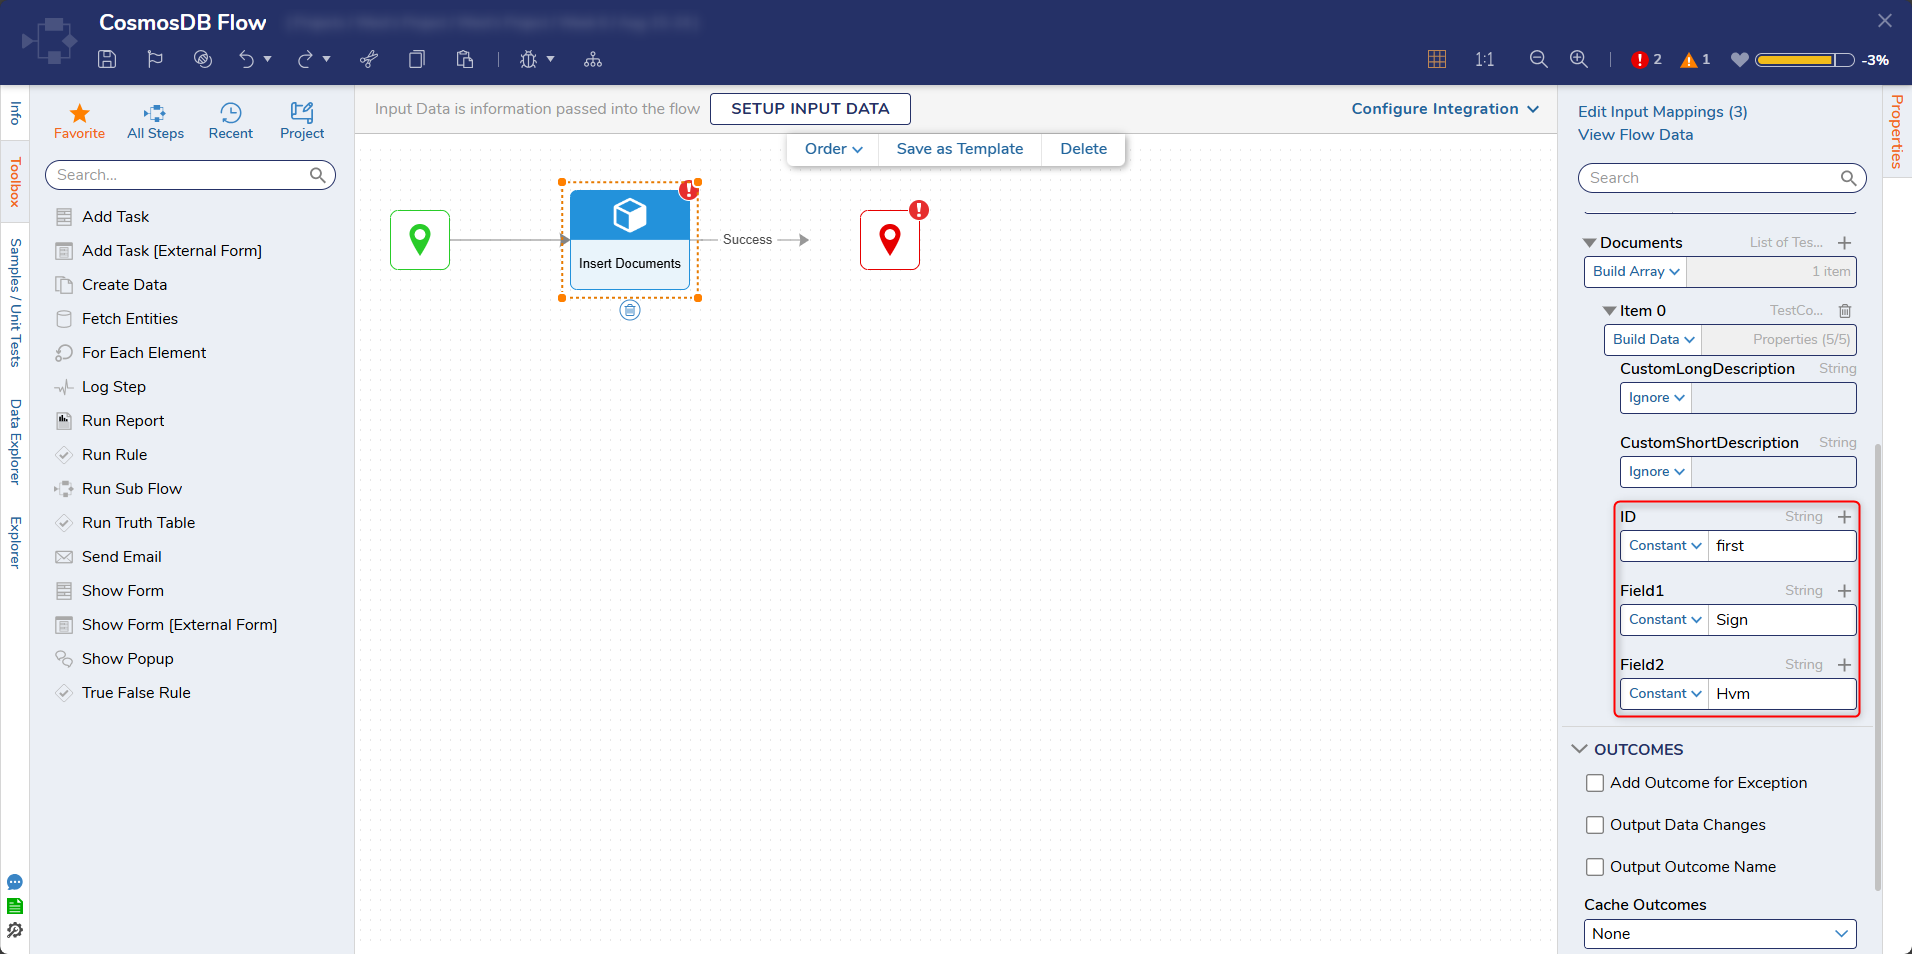
Enter a constant value in the Collection Name and Database Name fields. Select Unknown next to the Document field and select Build Data. Change the mapping type of the ID, Field1, and Field2 to Constant and enter values.
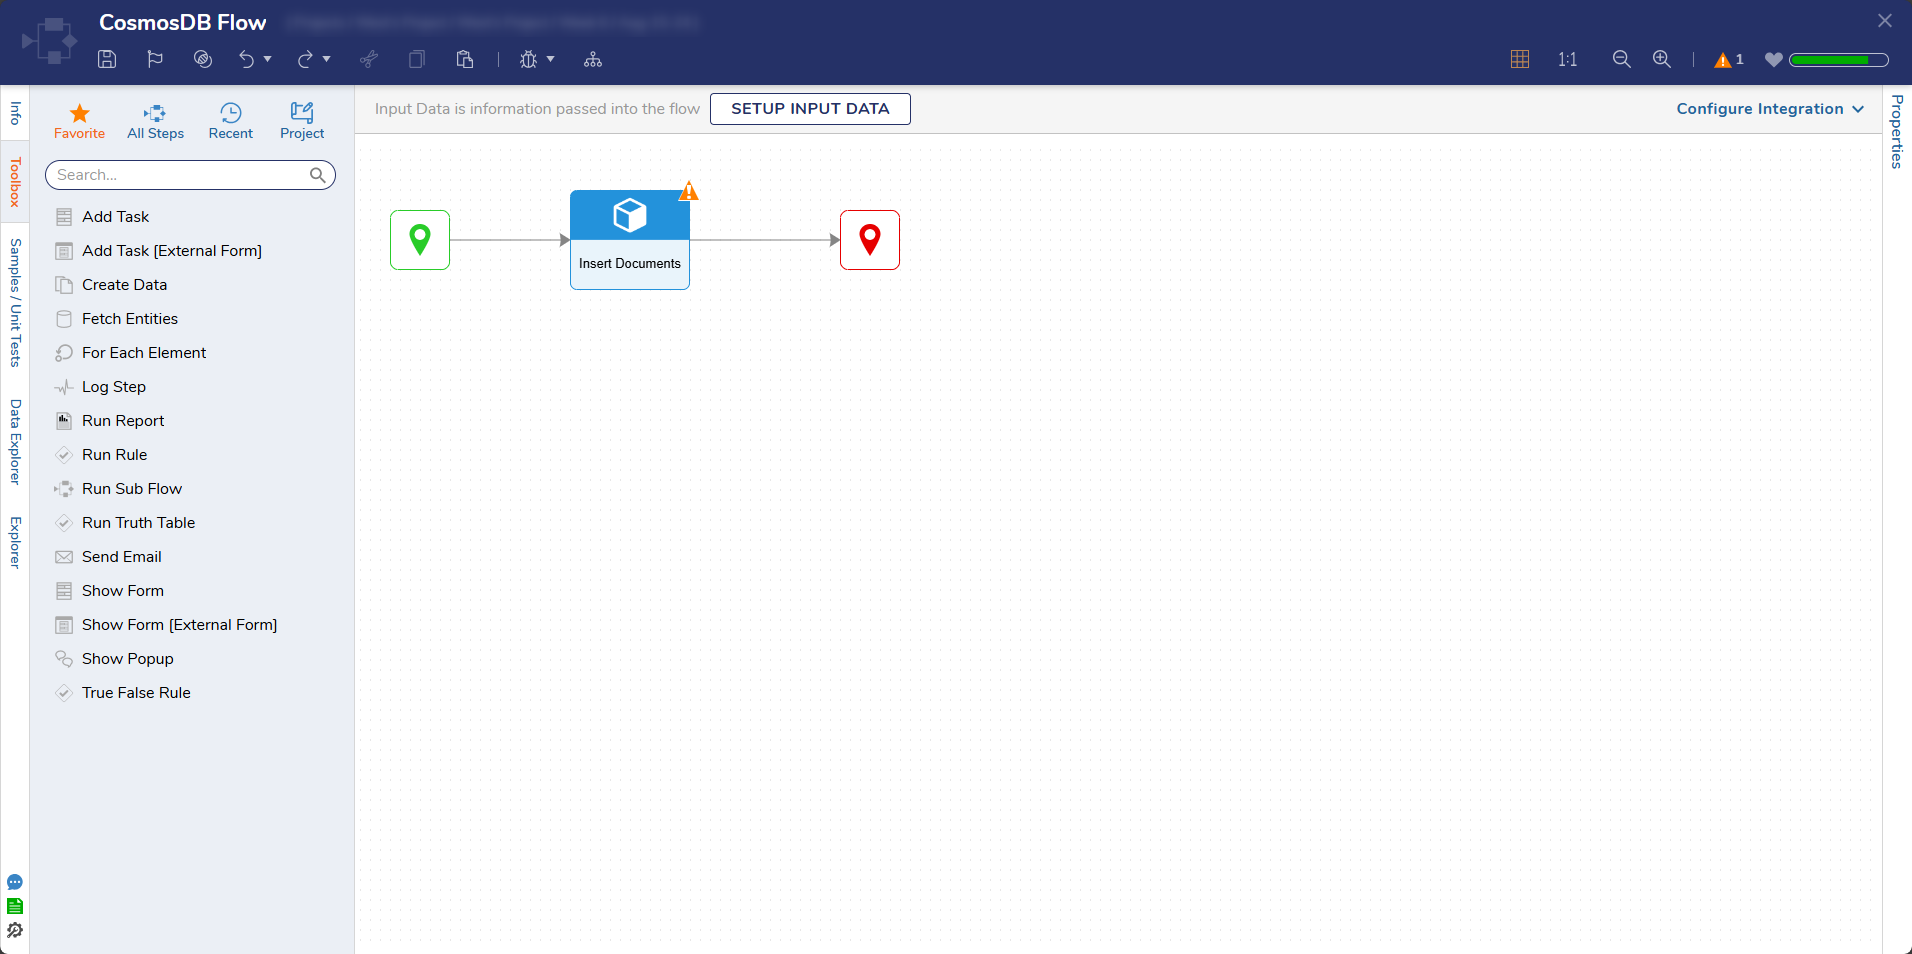
Connect the Success path to the End step. Then, click Save to save changes to the Flow.
Debug
- On the top action bar, click Debug. Then, click START DEBUGGING.
- After the debugger runs, click on the Insert Document step. Click Execution 1 and select View Input/Output Data to view the data.
- To verify the connection, navigate back to Azure. Then, navigate to Data Explorer > [DATABASE NAME] > [COLLECTION NAME] and click Documents.