| Feature Details | |
| Introduced in Version | -- |
| Modified in Version | 8.13 |
Overview
The Post to Flow Handler is a Flow behavior type that allows arbitrary data to be sent to a Flow via a REST Integration by POST or GET methods. The data used in a Post to Flow Handler does not have to conform to the contract obtained via the View Integration Details page. Flows using this behavior can operate as a Named User; therefore, calls utilizing the Flow circumvent the need to specify user credentials.
A Post to Flow Handler provides a URL for users to call on the Flow via API. Additionally, a Post to Flow Handler is designed to be very flexible. REST service calls require passing parameters to a Flow in a strictly structured XML-encoded way. By contrast, a Post to Flow Handler can post data into the Flow in a "query key=value" style or through plain text format. The Flow Designer allows users to handle the Call Data as a variable to use in the Flow.
The Call Data variable can be viewed using the Data Explorer tab for the Flow.
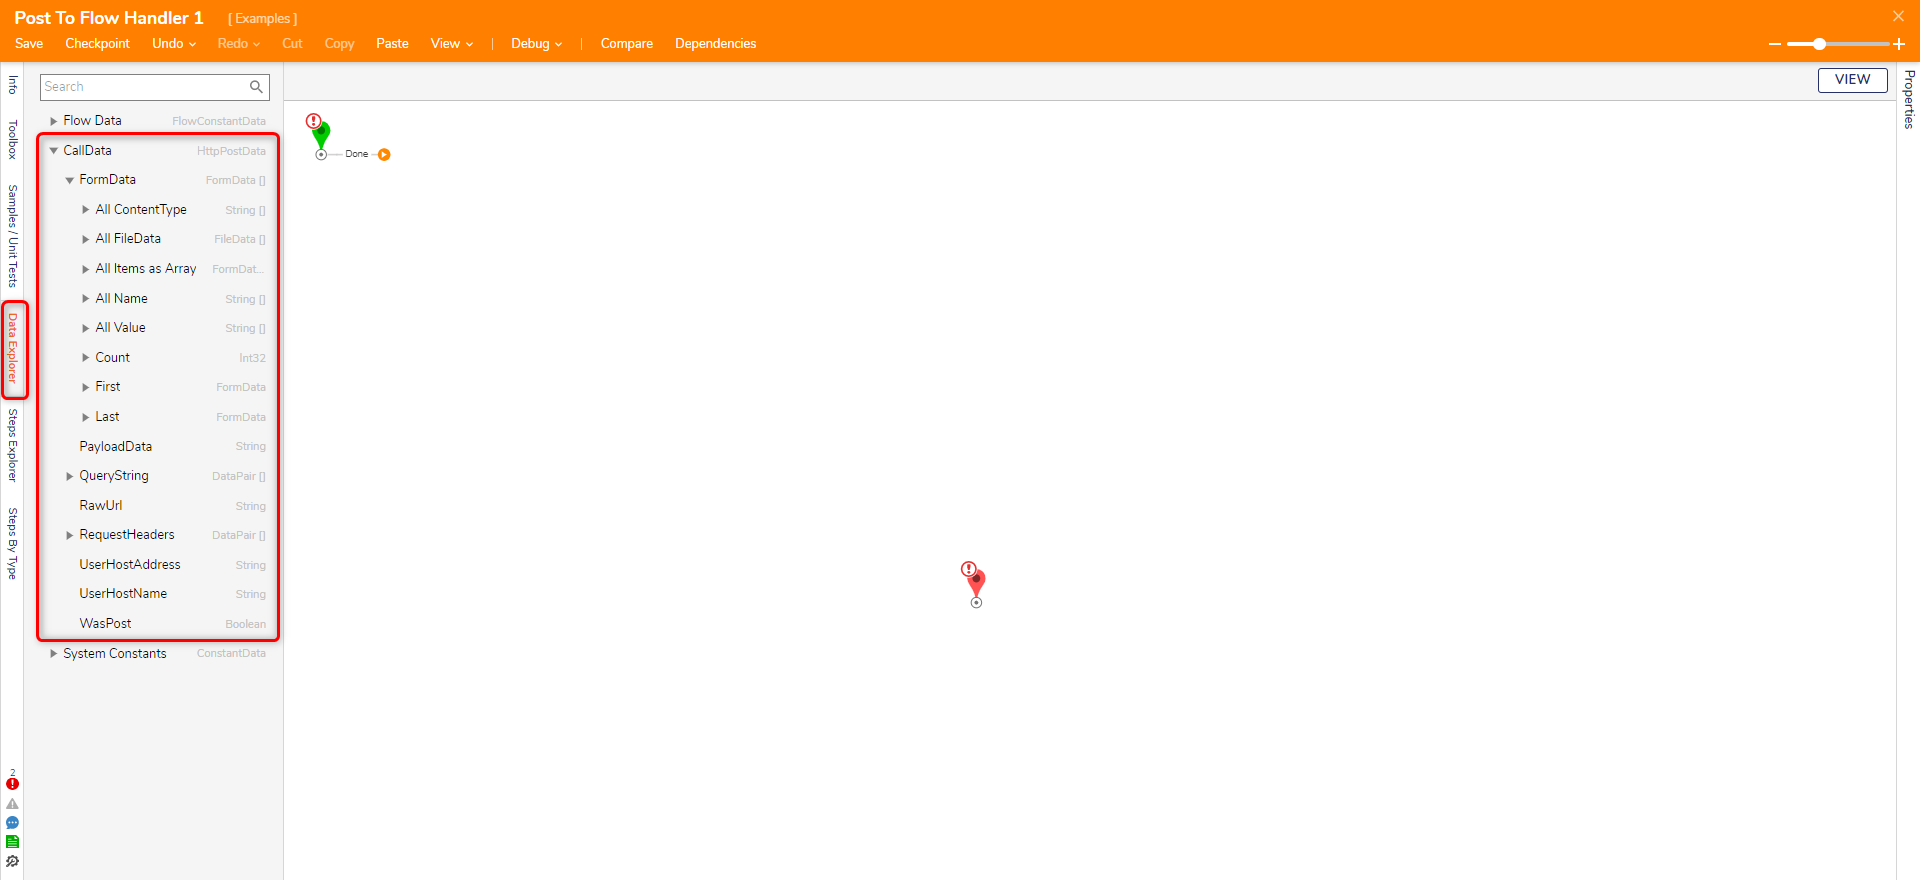
Below is an overview of the CallData input fields and their type.
| Data Field | Type | Description |
|---|---|---|
| FormData | FormData | Allows files to be uploaded (file size should not exceed 30MB) |
| Payload Data | String | A string field representing the Body of the request |
| QueryString | DataPair | The query string representing the request in the URL |
| RawURL | String | The raw URL path of the request |
| RequestHeaders | DataPair | The request header that is used in the URL. This is typically either HTTP or HTTPS. |
| UserHostAddress | String | String field representing the address of the user |
| UserHostName | String | String field representing the name of the user |
| WasPost | Boolean | Boolean string value. If enabled, the request was submitted as a POST call. |
Configuration
To configure the Post to Flow Handler, click on the Properties Panel and refer to the following table to configure the settings.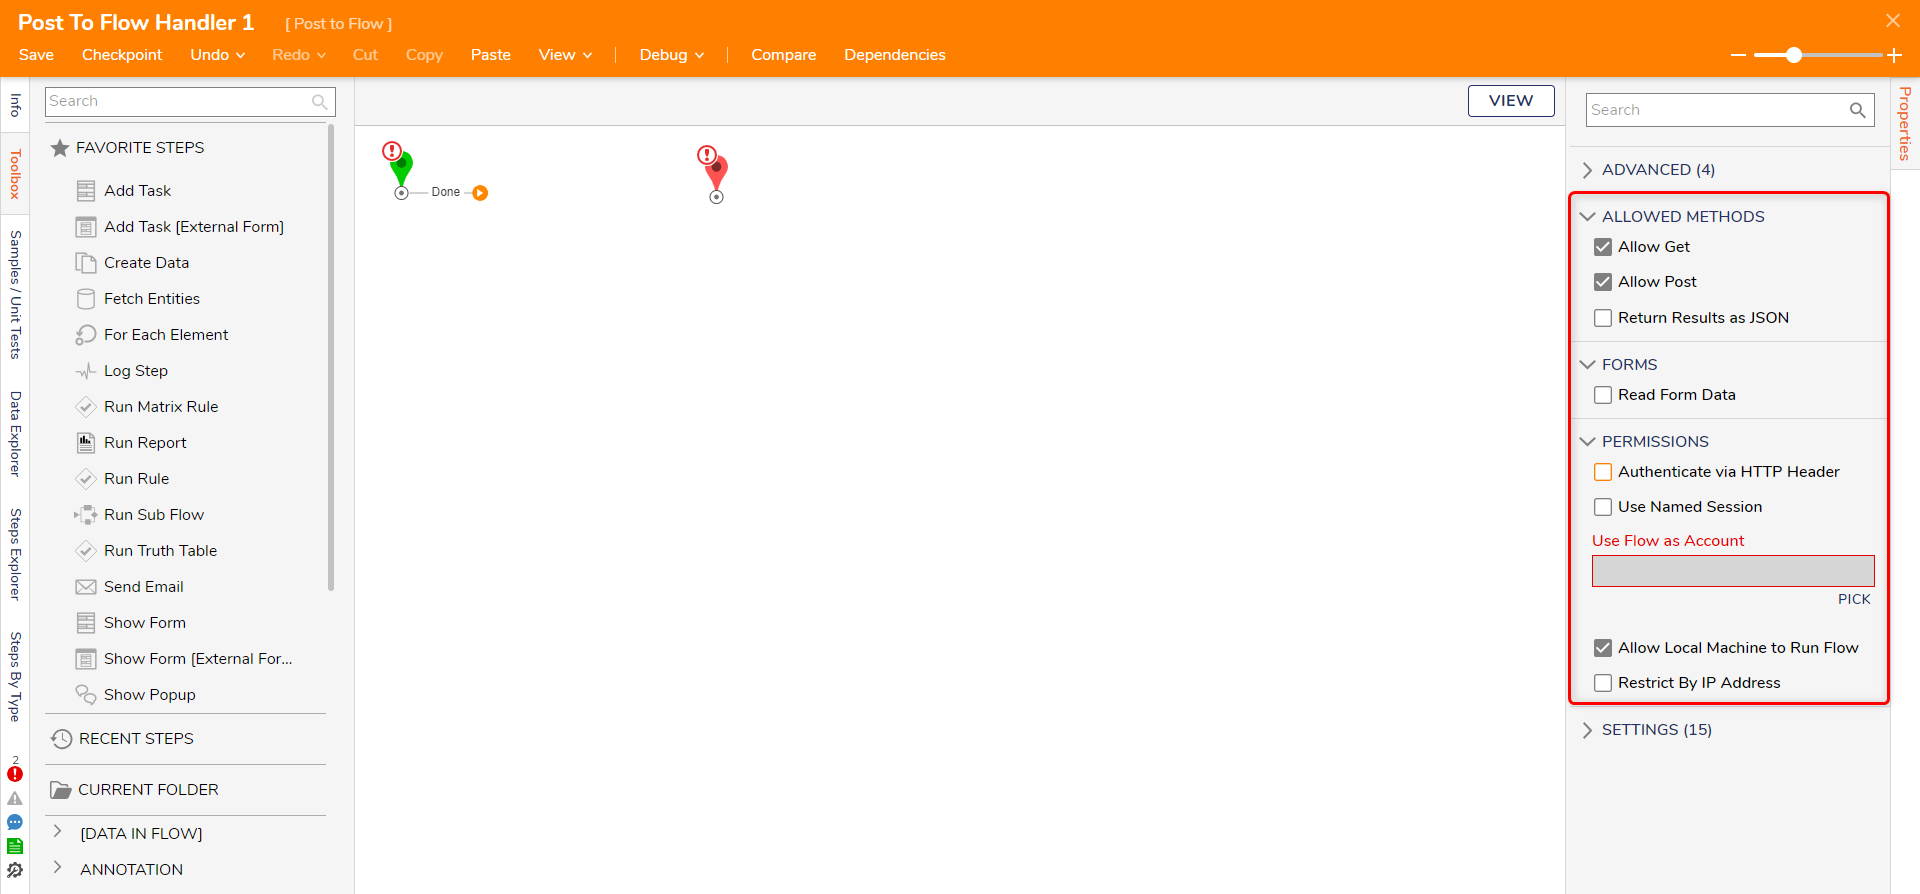
| Property | Description |
|---|---|
| Allow Get | Enabling allows calling the Flow via HTTP GET request. |
| Allow Post | Enabling allows calling the Flow via HTTP POST request. |
| Return Results as JSON | Enabling allows to return the data in JSON format. |
| Read Form Data | When enabled, it allows to receive value in the FormData. Note: Customers using FormData in their Flow must explicitly enable this option. Failure to do so will result in an inability to access the FormData property. |
| Use Named Session | Allows to pick a Named Session to call the Flow. |
| Authenticate via HTTP Header | Allows users to add the authentication credentials directly in the HTTP headers of the request. |
| Use Flow as Account | The specified account will be used to call the Flow. |
| Allow Local Machine to Run Flow | When disabled, this will not allow running the Flow from the local machine. |
| Restrict By IP Address | Specify an IP Address or list of IP Addresses to allow calling the Flow. |
Example
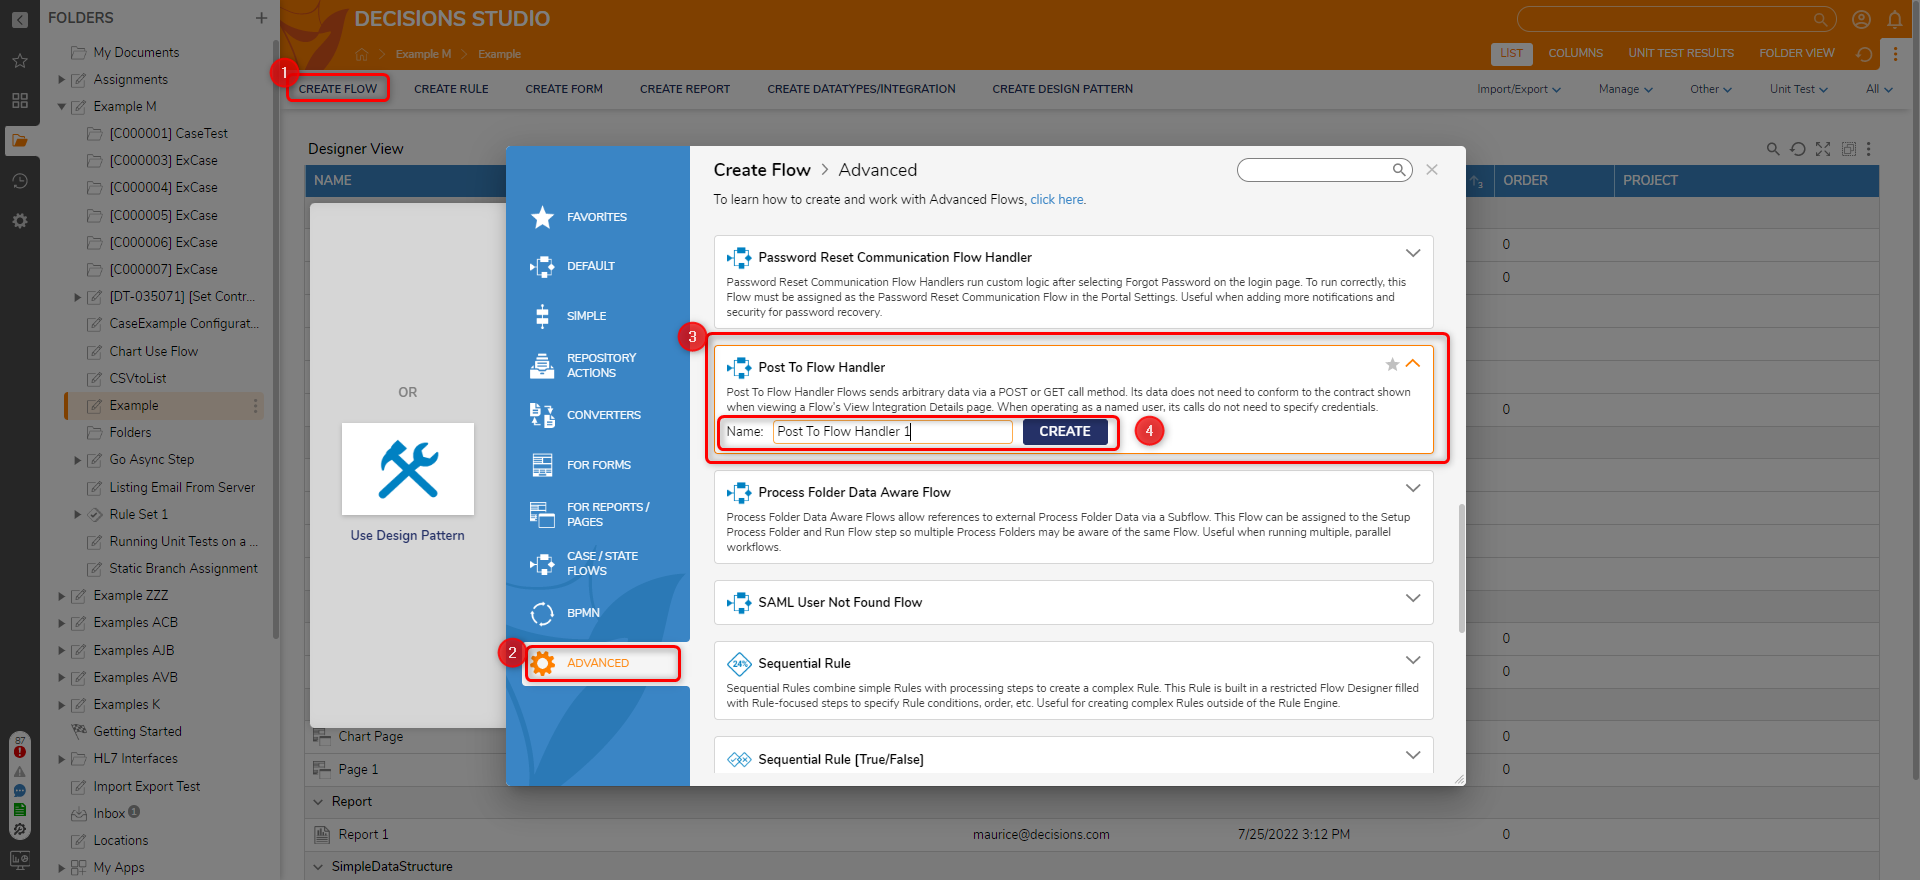
- In a Designer Project, click CREATE FLOW, select ADVANCED, and select Post To Flow Handler. Name the Flow and click CREATE.
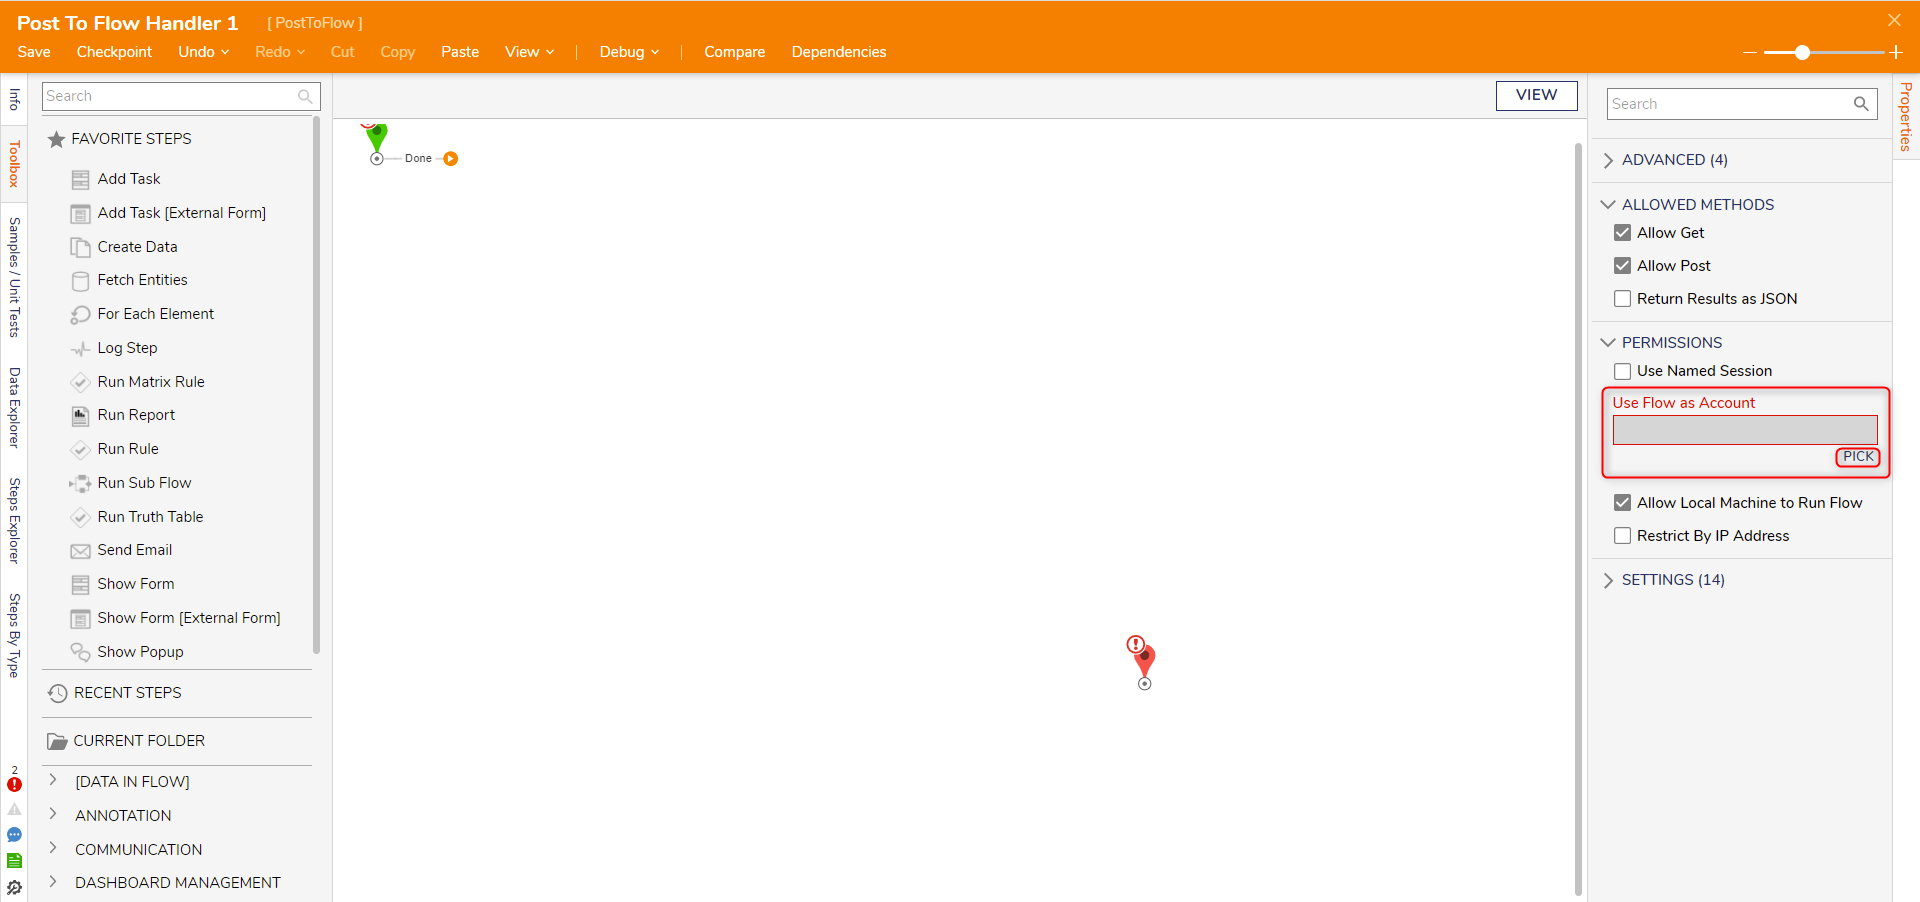
- On the Properties panel, click PICK under the Use Flow as Account field and select an account to pass the desired authorization level to the API call. Using Flow as Account allows users to operate the Flow from Postman with the same permissions as the selected account.
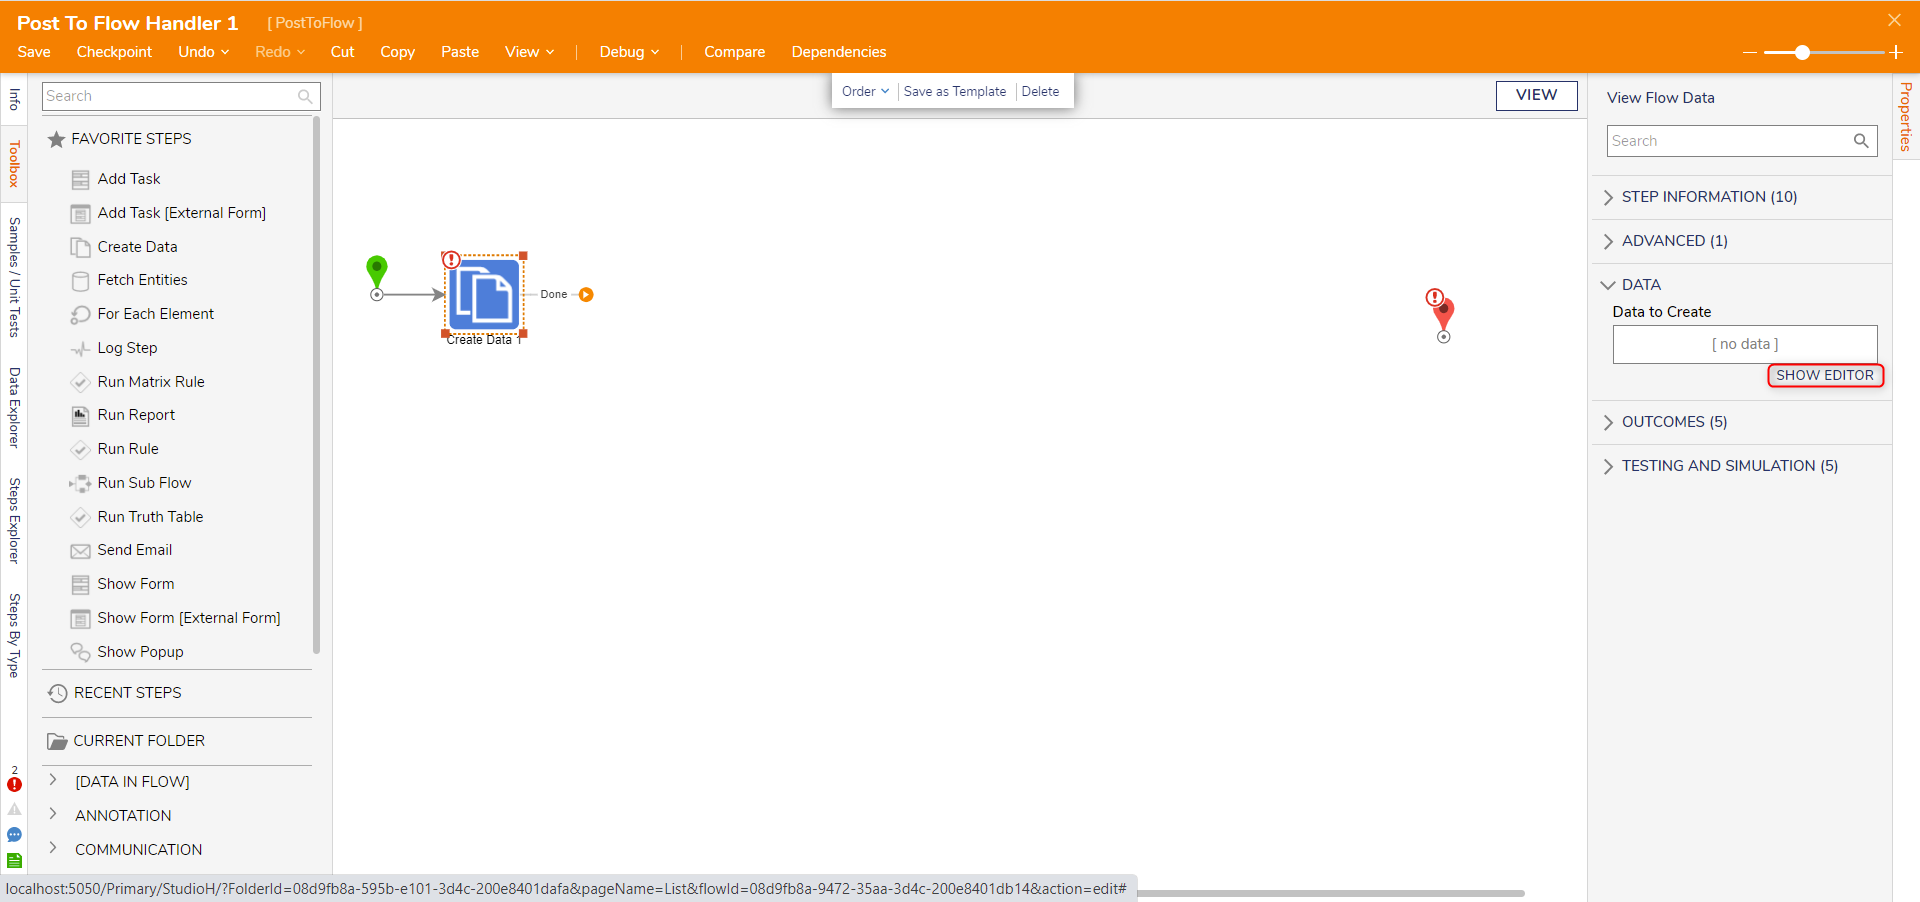
- Attach a Create Data step from the Toolbox panel to the Start step. On the Properties panel, click SHOW EDITOR under the Data To Create field.
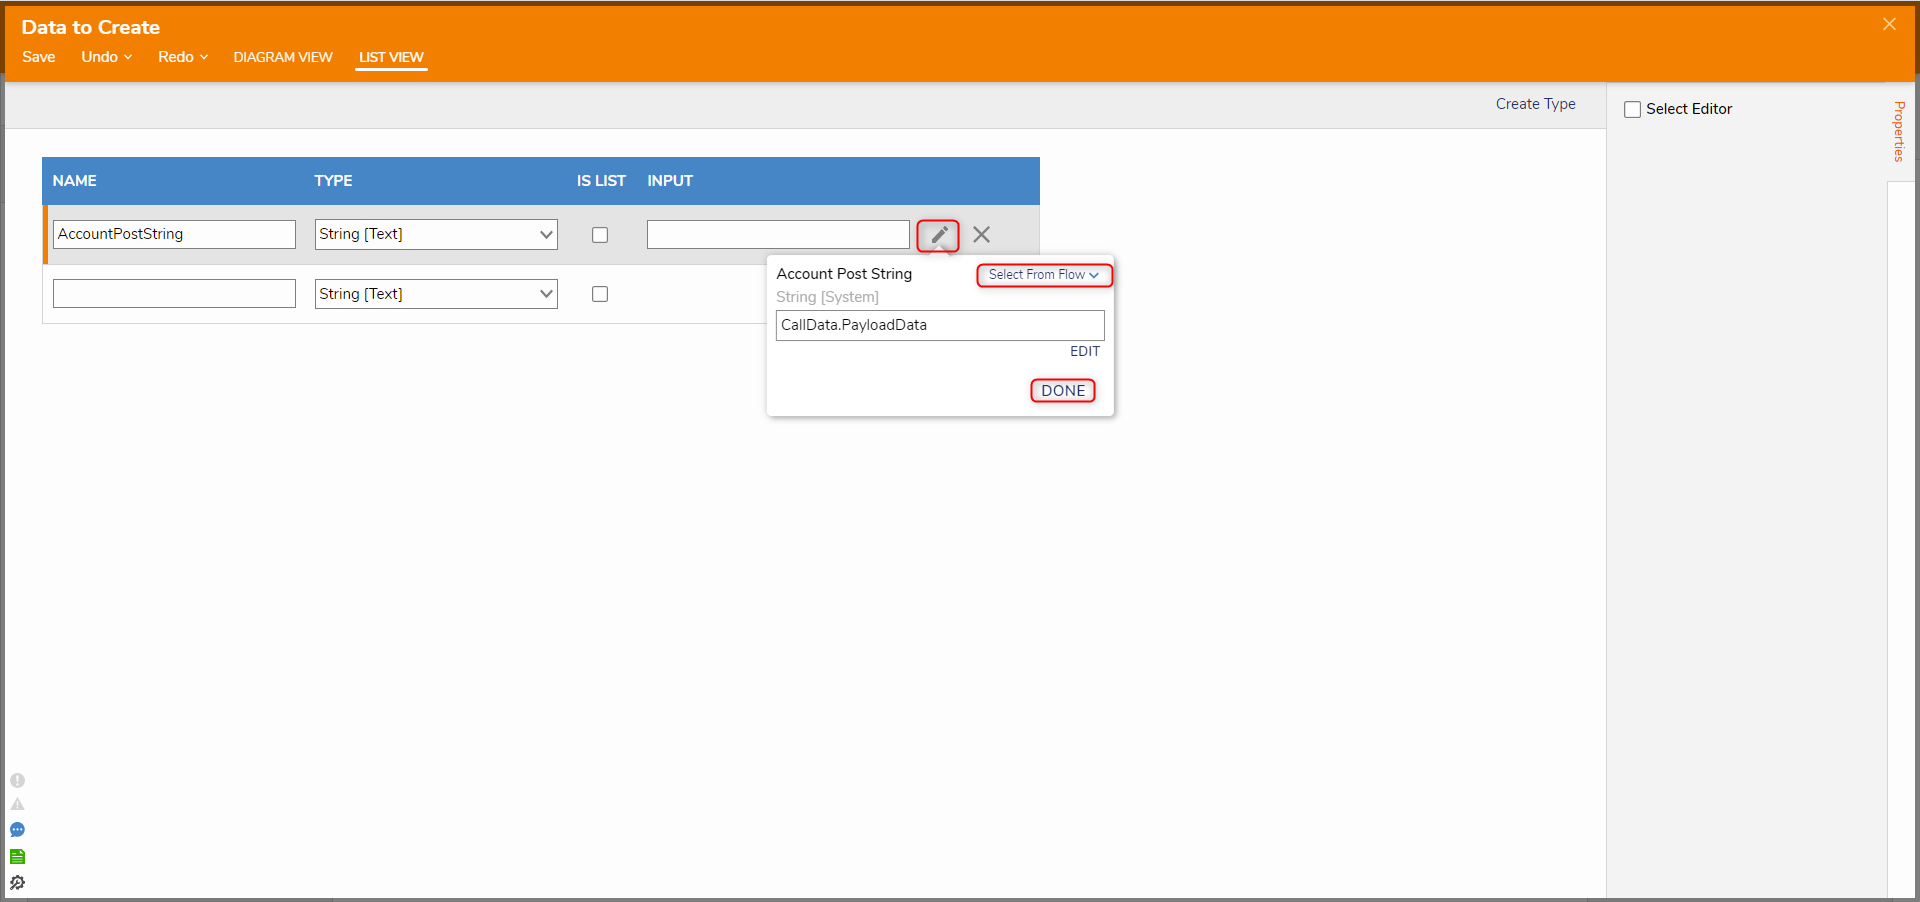
- In the Data Definition window, enter "AccountPostString" under NAME and select String [Text] as the TYPE. Click the pencil icon under INPUT. Change the mapping from Constant to Select From Flow. Click Call Data, select PayloadData, and click DONE. Click Save and close the window. This mapping will deserialize the body text from a Post call and turn it into a string that can be used in Decisions.
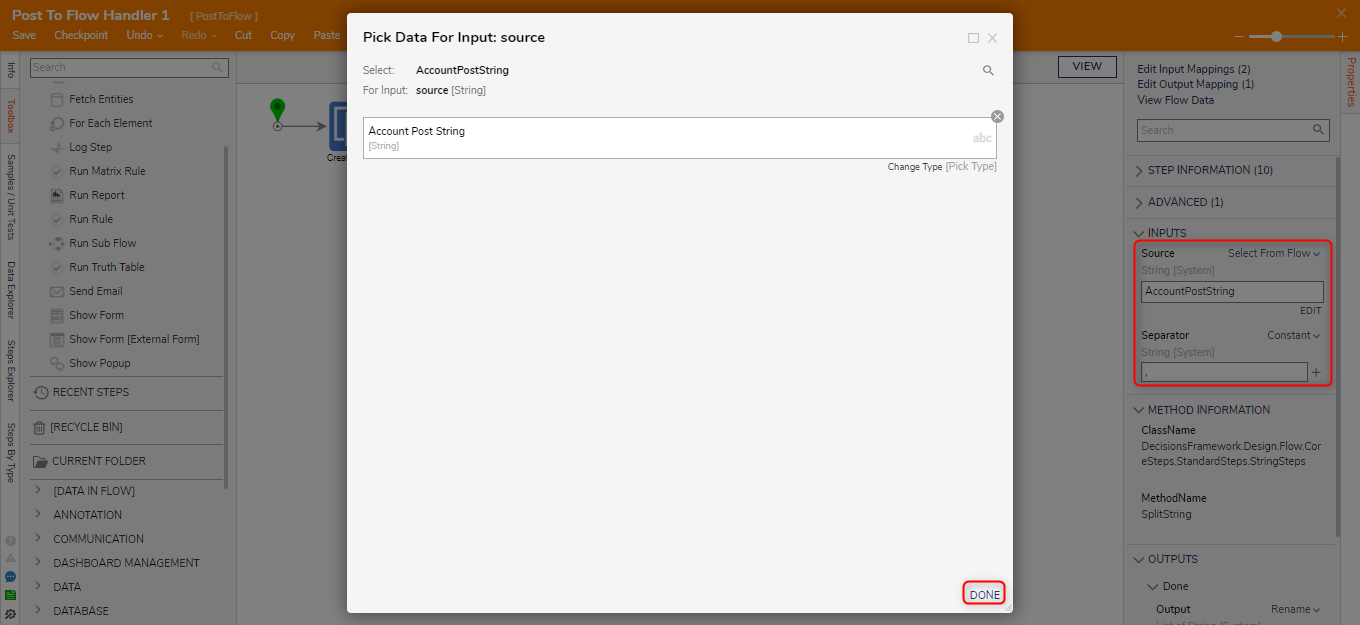
- Click the Done path and navigate to All Steps [Catalog] > Data > Text. Select the Split String and click ADD. This step will serve as a way to separate the data received from the POST method so that it can be used for individual parts of a data type. On the Properties panel, enter "," for the Separator field, change the Source mapping to Select From Flow, and select AccountPostString.
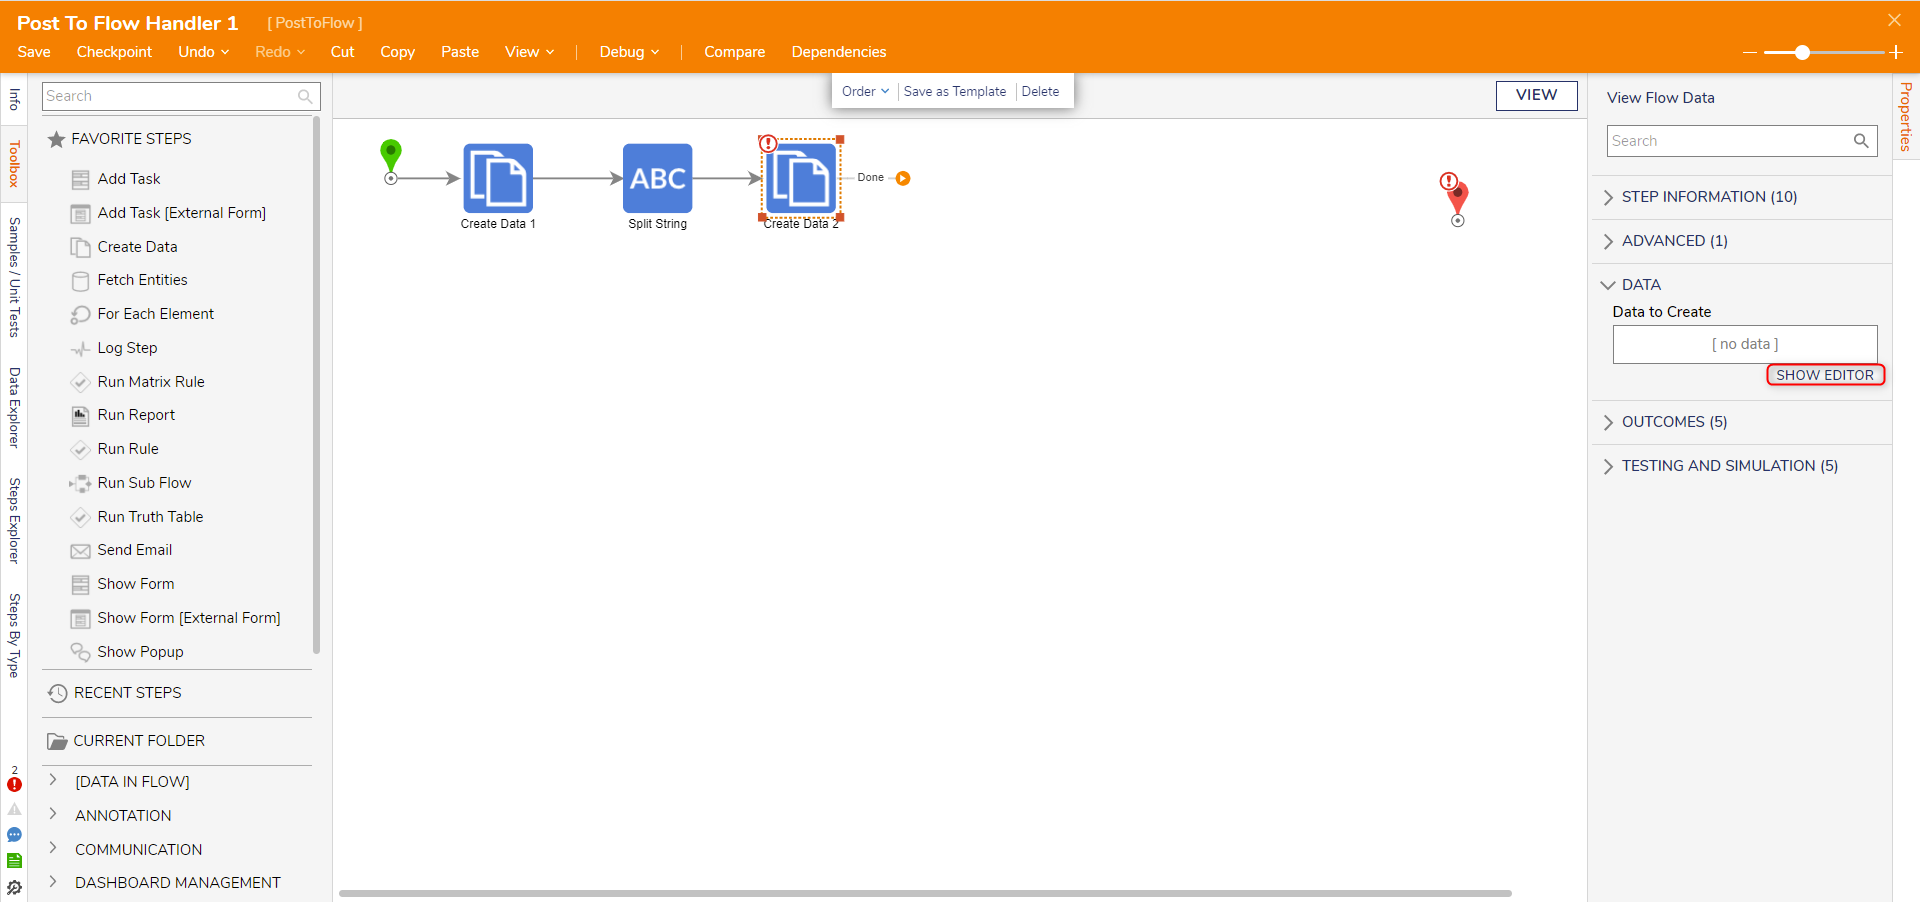
- Attach a Create Data step to the Done path. This step will create Account Info data that can be used in Decisions from the divided received Payload data. Click SHOW EDITOR.
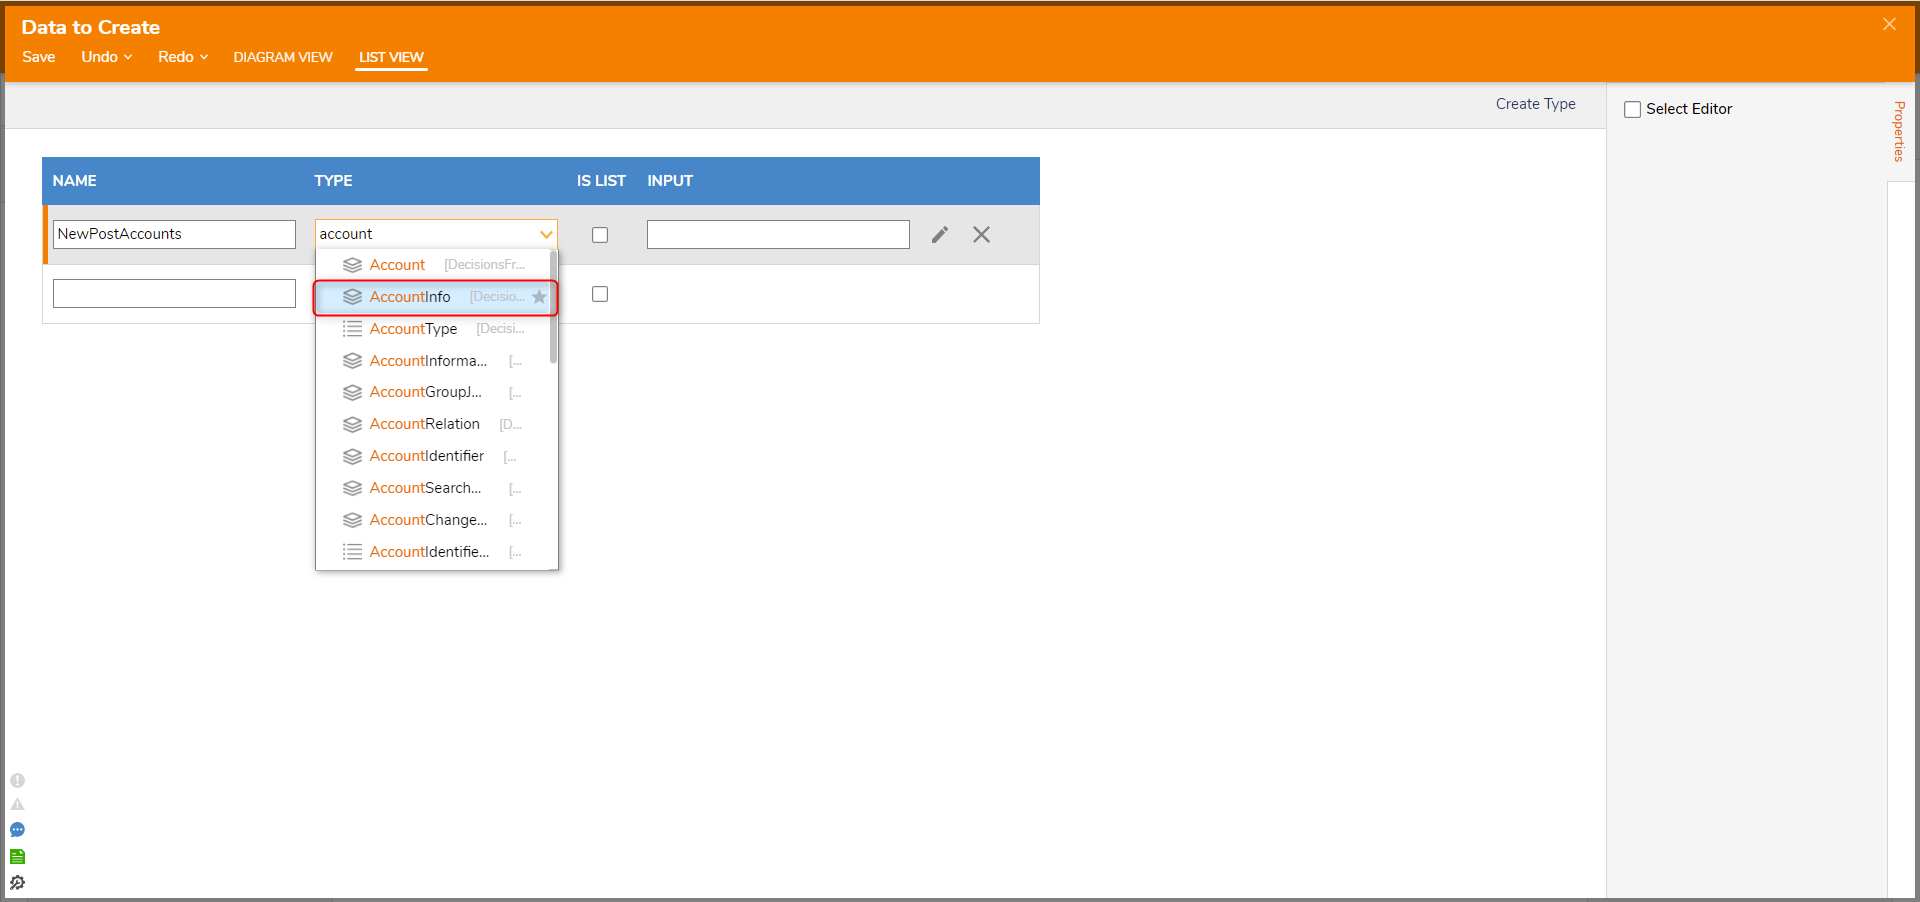
- Enter "NewPostAccounts" under NAME and select AccountInfo [DecisionsFramework...] as the TYPE.
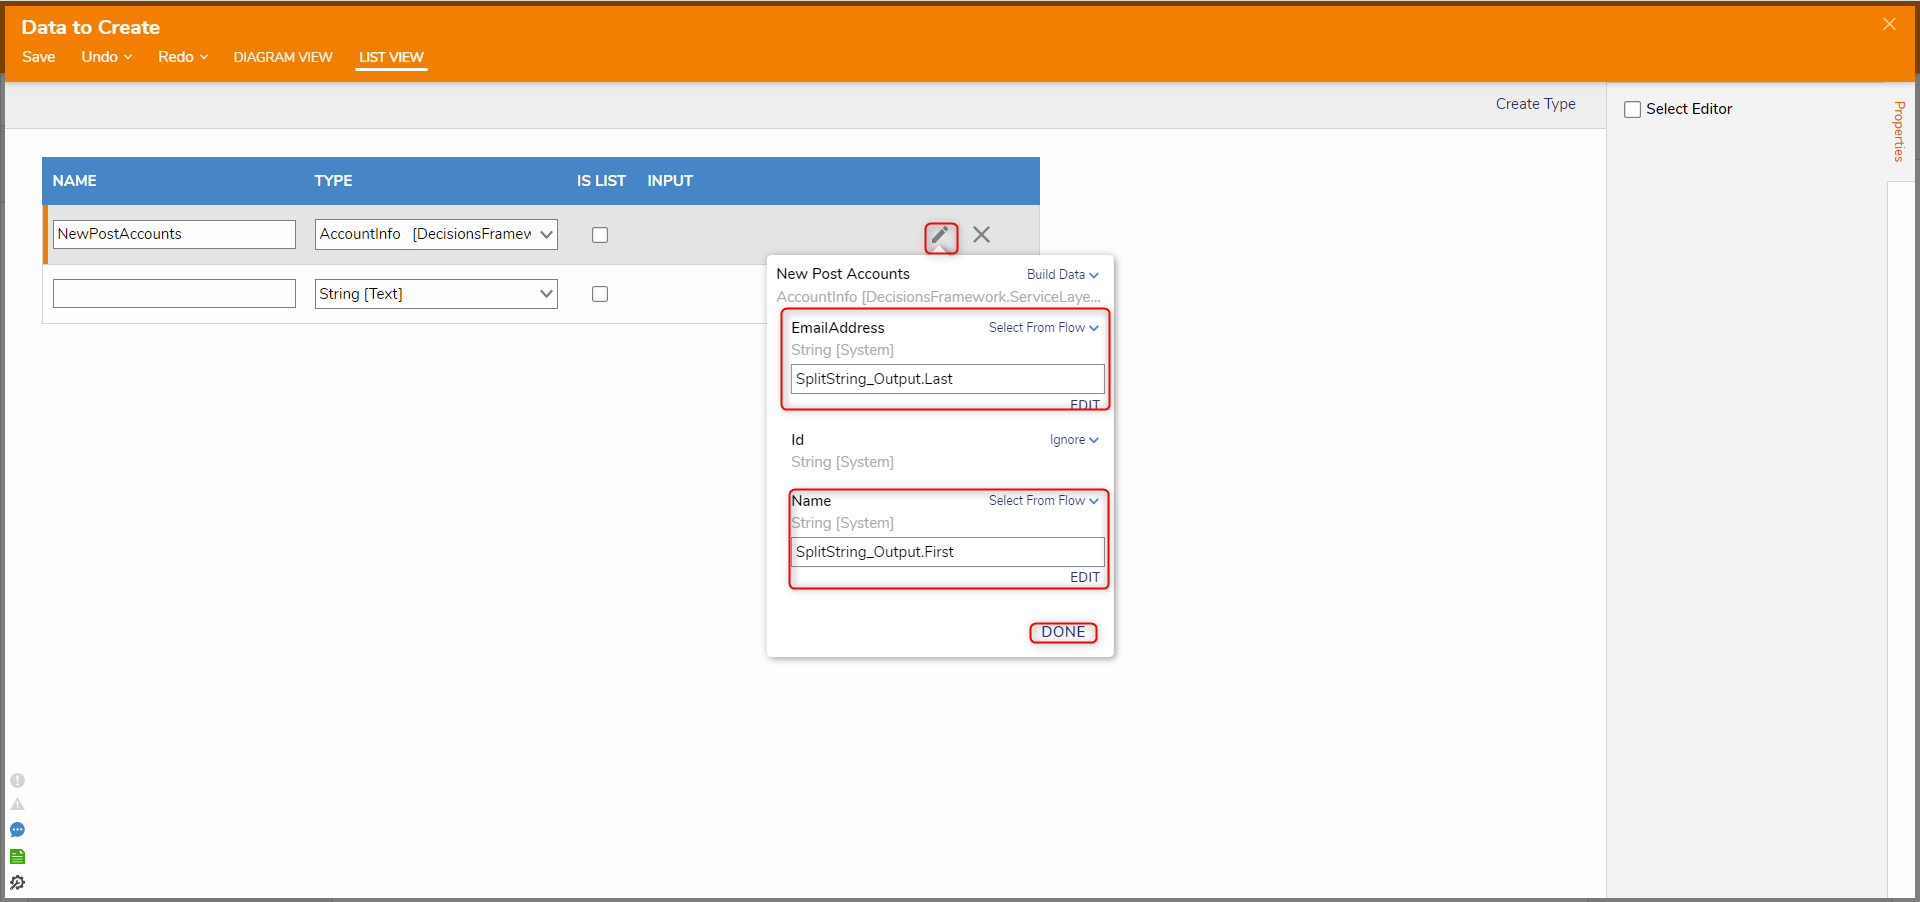
- In the Data Definitions window, click the pencil icon under INPUT. Change the mapping from Ignore to Build Data. Map in SplitString1_Output.Last, for the EmailAddress field and map SplitString1_Output.First, for the Name field.
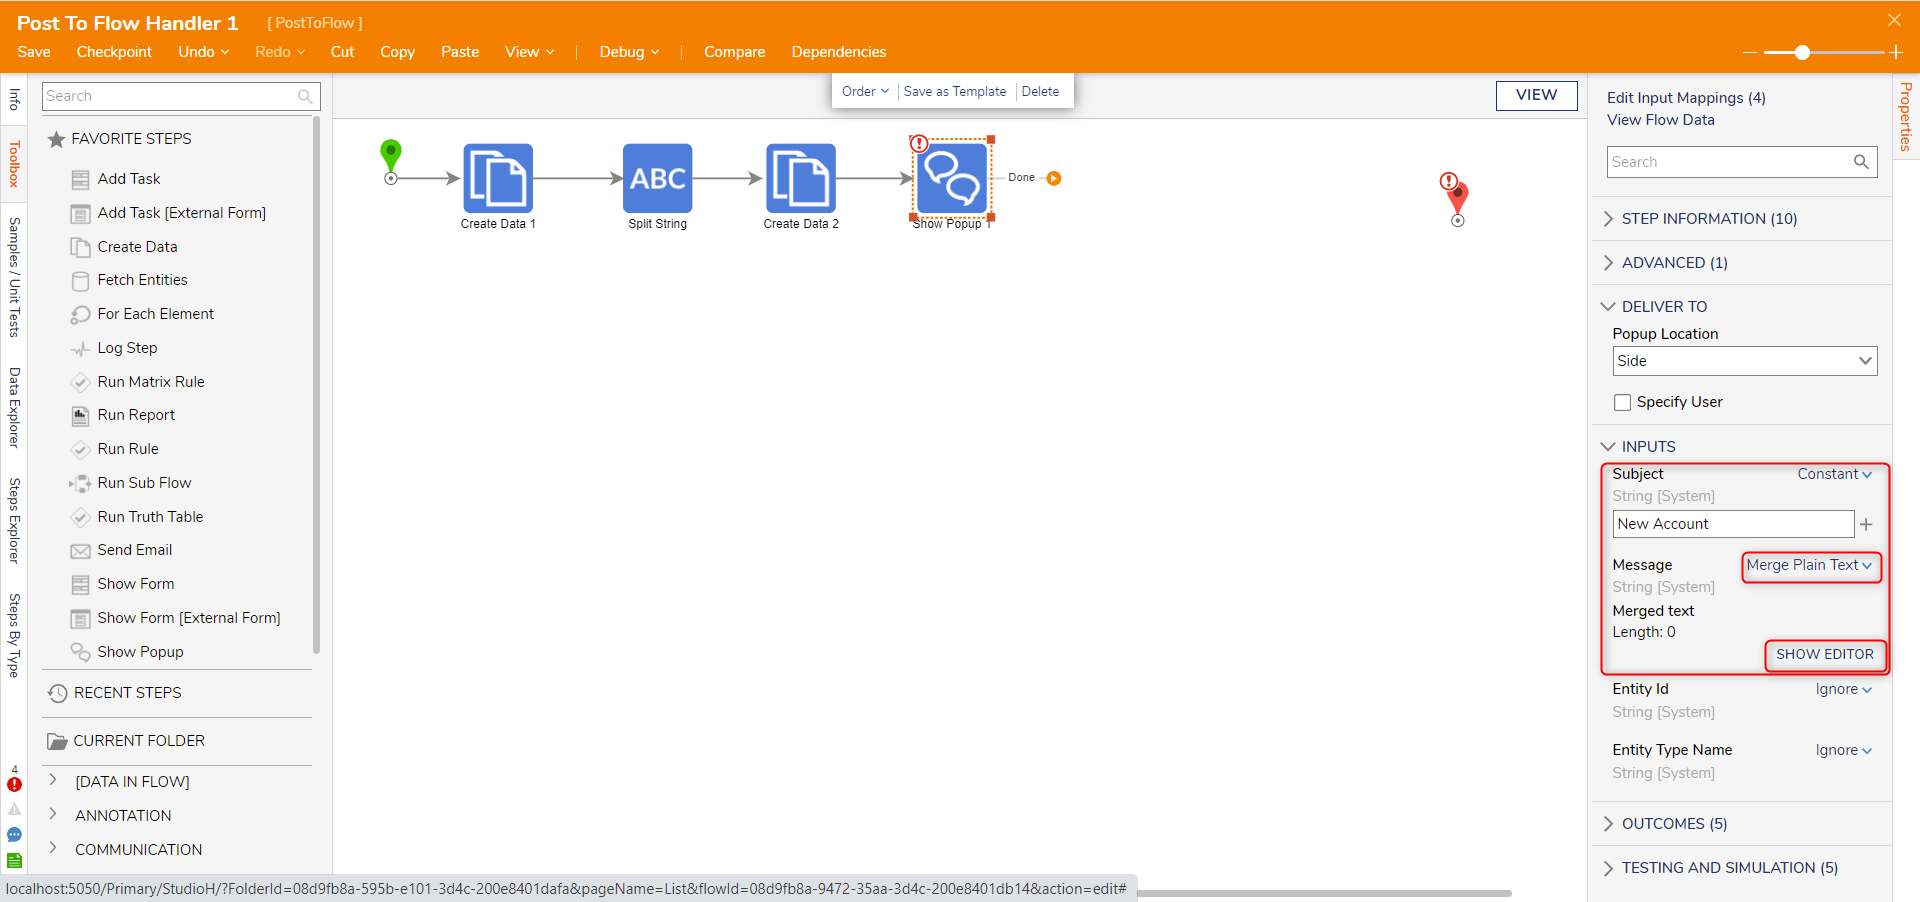
- Add a Show Popup step to the Done path. Enter "New Account" in the Subject field. Select Unknown next to Message, select Merge Plain Text, and click SHOW EDITOR.
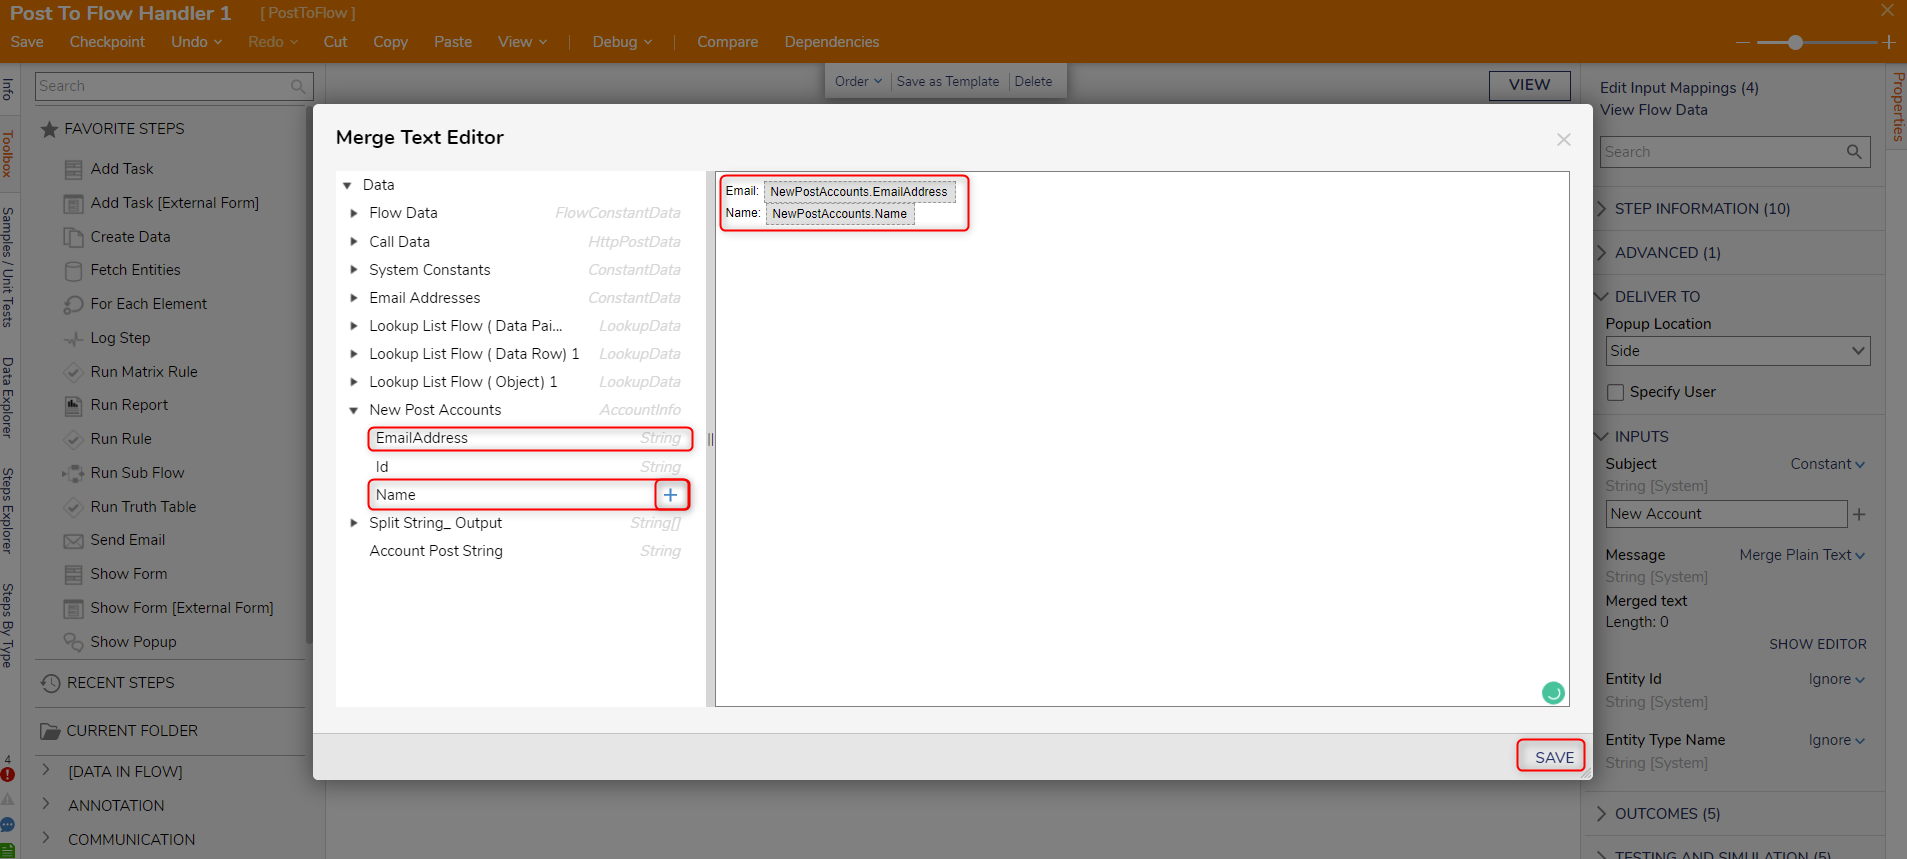
- In the Merge Text Editor window, configure the Message to read "Email: [NewPostAccounts.EmailAddress] Name: [NewPostAccounts.Name]" by selecting the plus sign from the Data panel. Click SAVE.
- Connect the Done path to the End step. Click Save to save changes to the Flow.
Make REST Integration Call
- Click VIEW to open the Integration Details Page.
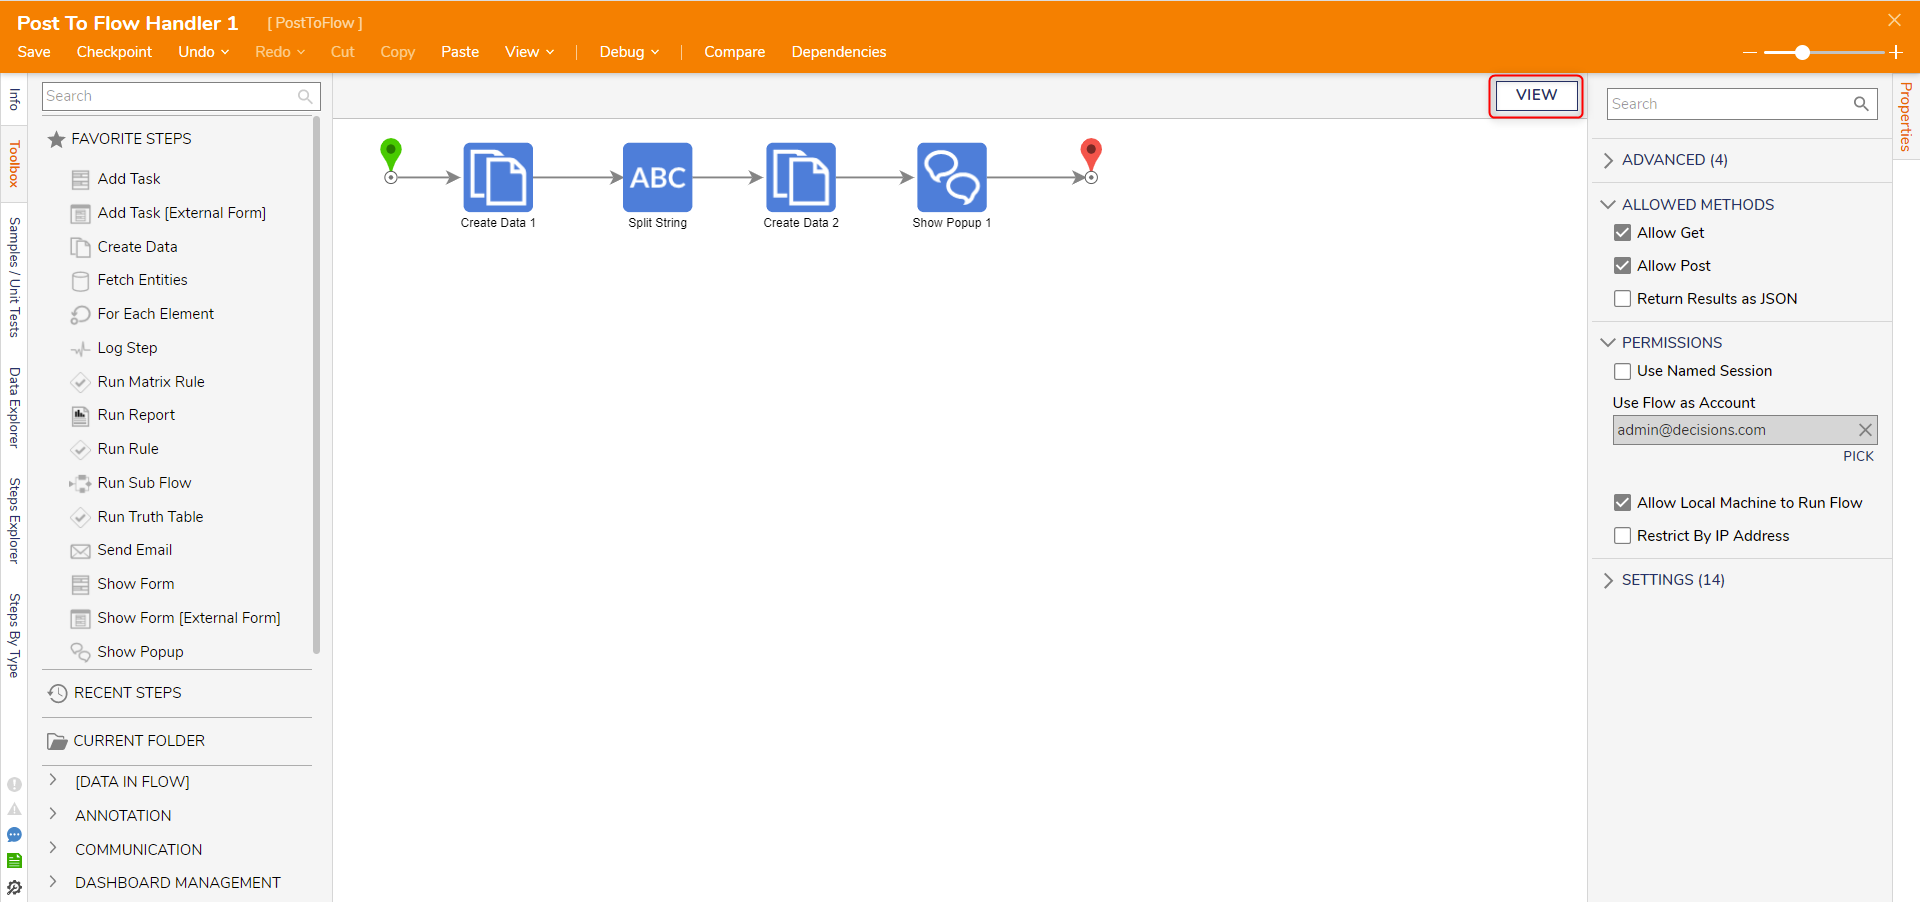
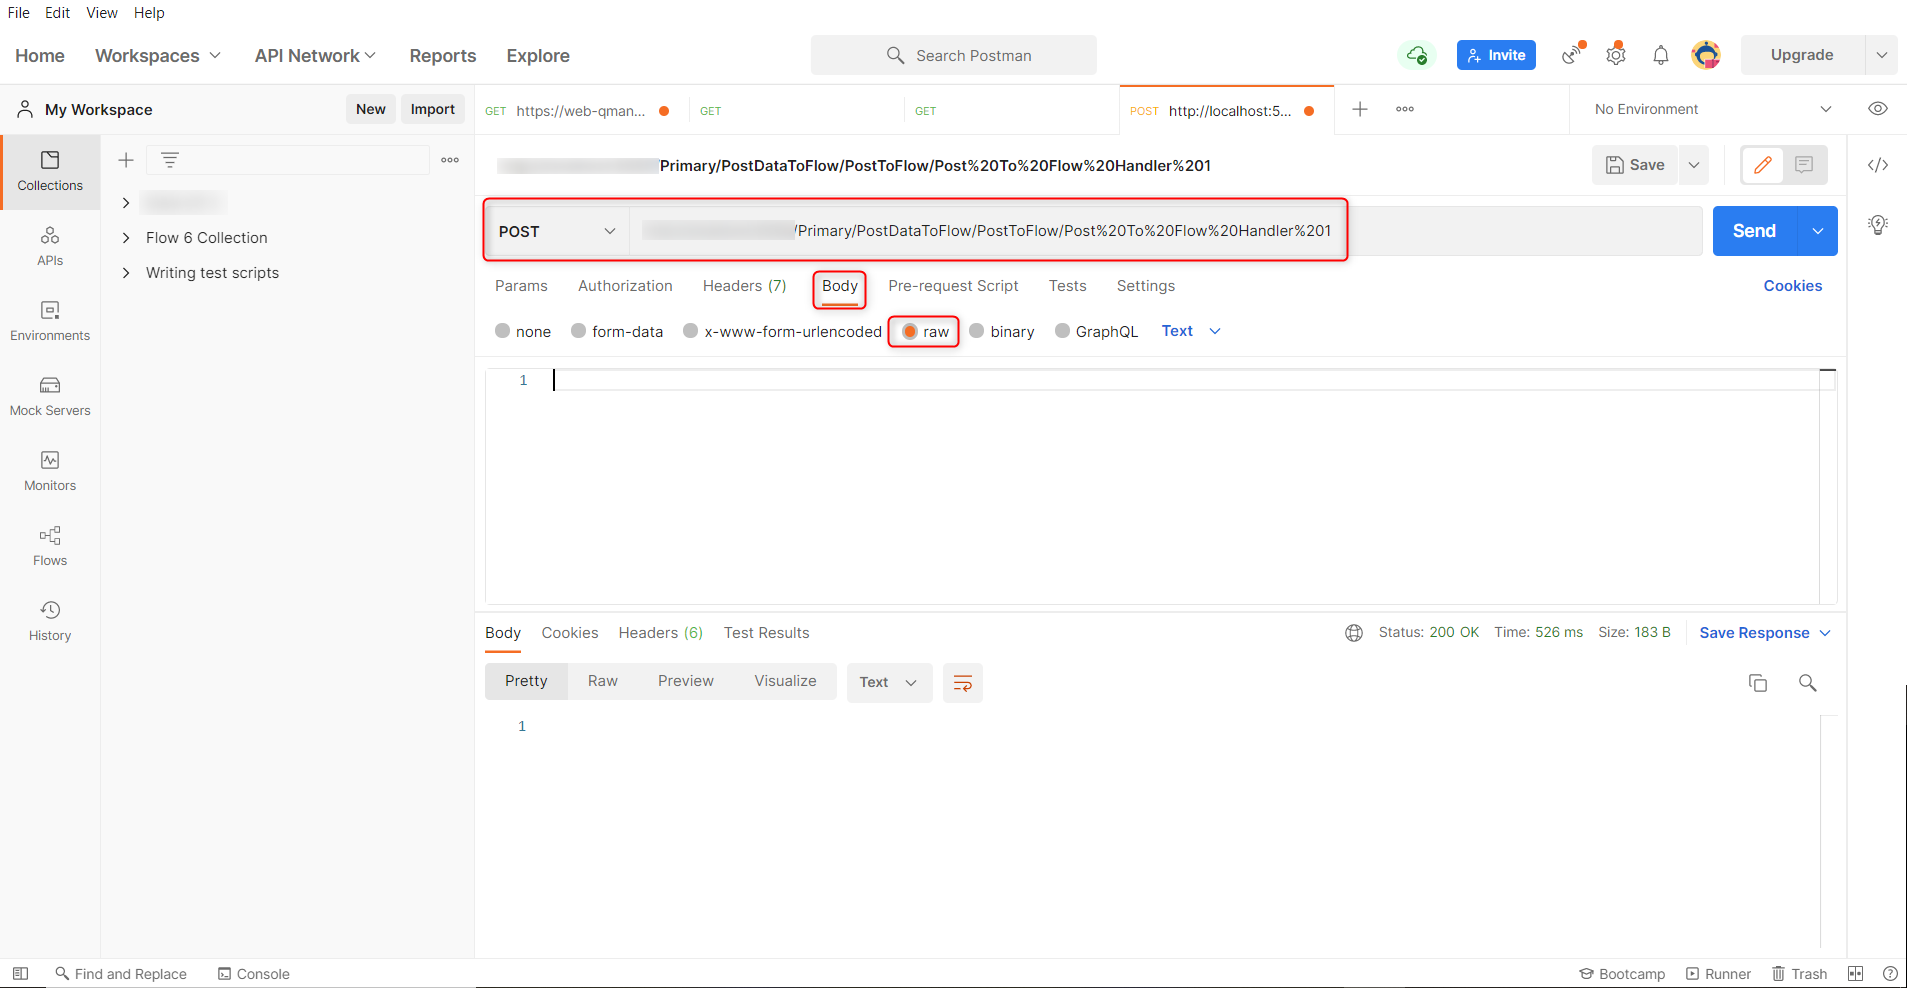
- On the INFO tab, copy the URL and open Postman. Click the Add button to create a new request in Postman. Next, to the left of the URL box, click the drop-down arrow and select the POST type. Paste the URL in the POST URL box.
- Configure the POST body by clicking Body. Select raw from the input toolbar located underneath the URL toolbar.
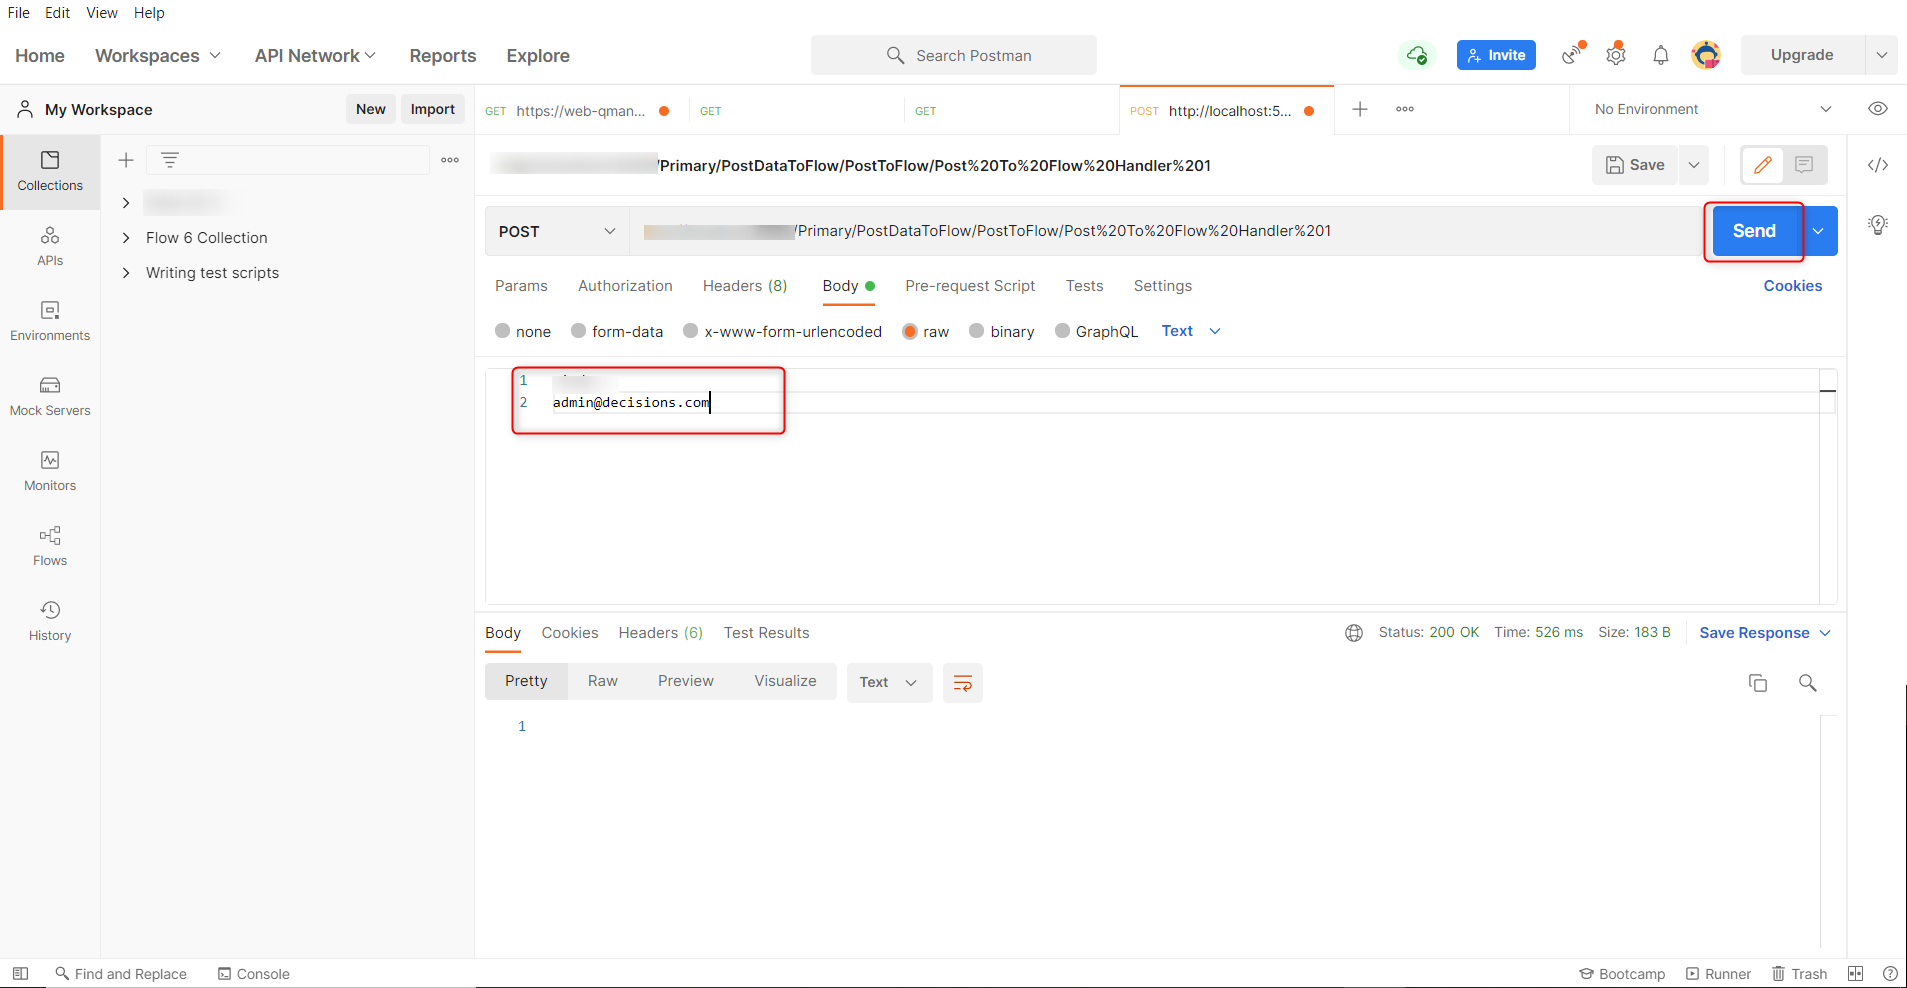
- Since this example only deals with the Payload data, the Body must be a simple text input and does not require any further Postman configuration. In the input text field, enter a name followed by a comma. On the next line, enter an email address. Click Send to submit the POST call.
Submitting the POST call will return a result for the Output underneath the Input box. Given that the Flow is configured to create AccountInfo data for Decisions, the Output will return as DecisionsFramework.ServiceLayer.Services.Accounts.AccountInfo; to verify the Flow is receiving the information, return to Decisions to see the notification received by the user. As configured, the notification displays the inputted email first and the user's name second, demonstrating that Decisions has created the AccountInfo data.Postman allows users to send a variety of body types, including JSON. Should a user send a POST call to Decisions, it will be deserialized into usable data for Decisions.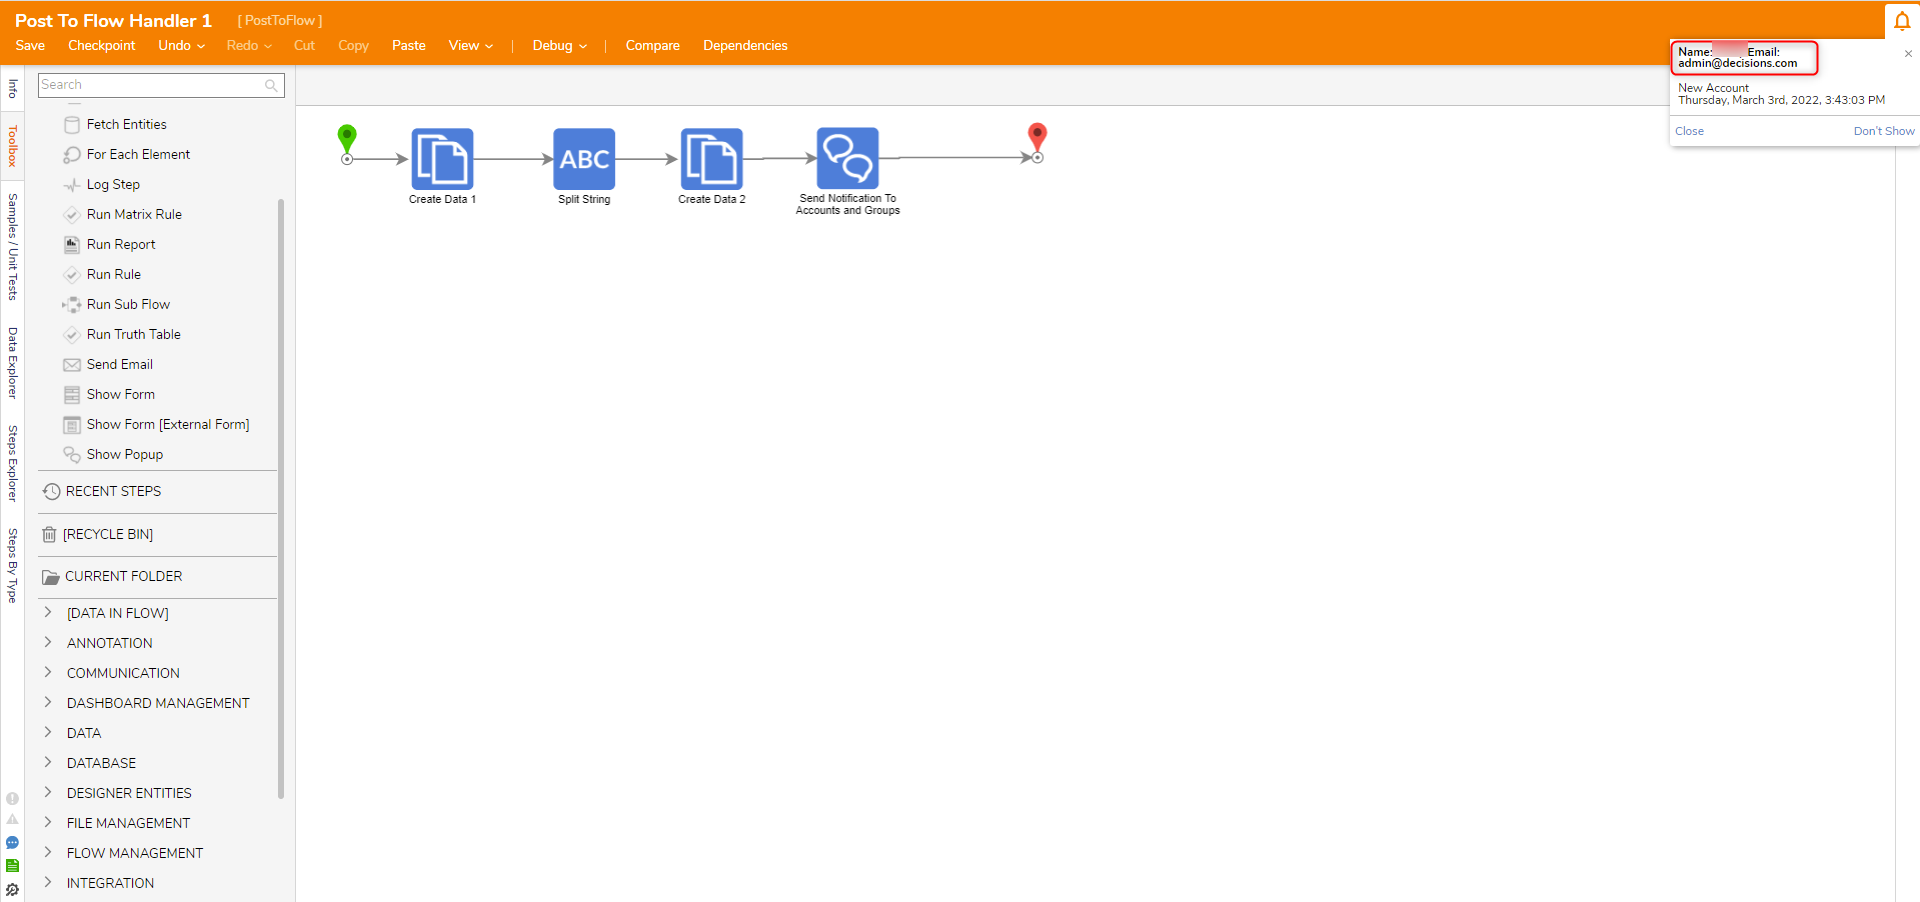
Feature Changes
| Description | Version | Date | Developer Task |
|---|---|---|---|
| Added "Read Form Data" check in the properties panel for Post to Flow | 8.12 | June 7, 2023 | [DT-038104] |
| Added "Authenticate via HTTP Header" check in the properties panel for Post to Flow | 8.13 | August 11, 2023 | [DT-038472] |