Overview
Form Tiles are Page controls in the Page Designer that are utilized to leverage Forms within a Page/Dashboard, allowing Designers to create and add interactive elements to their Page.
Such elements could provide functions such as request submission or Report filtration. The following article demonstrates how to utilize Form Tile on a Page to add an information submission Form that will be dynamically populated with the currently logged-in user's information.
Form Tile Inputs
The following chart displays the three possible Inputs that are available when configuring a Form Tile.
| Input Name | Function |
| Tile Form | This input is where the user can select or create the Form that will be displayed on the tile. |
| Input Data Flow | If the Form has variable data input declared, a data Flow will be made available for the user to configure the Flow input data to the form. |
| Output Data Flow | If the Form has a button, there will be an Output Data Flow option to configure a Flow to run when the outcome button is clicked. |
Example
- From a Designer Project, create a new Page.
- In the Page Designer, from Toolbox > TILES, drag a Form Tile component into the workspace.
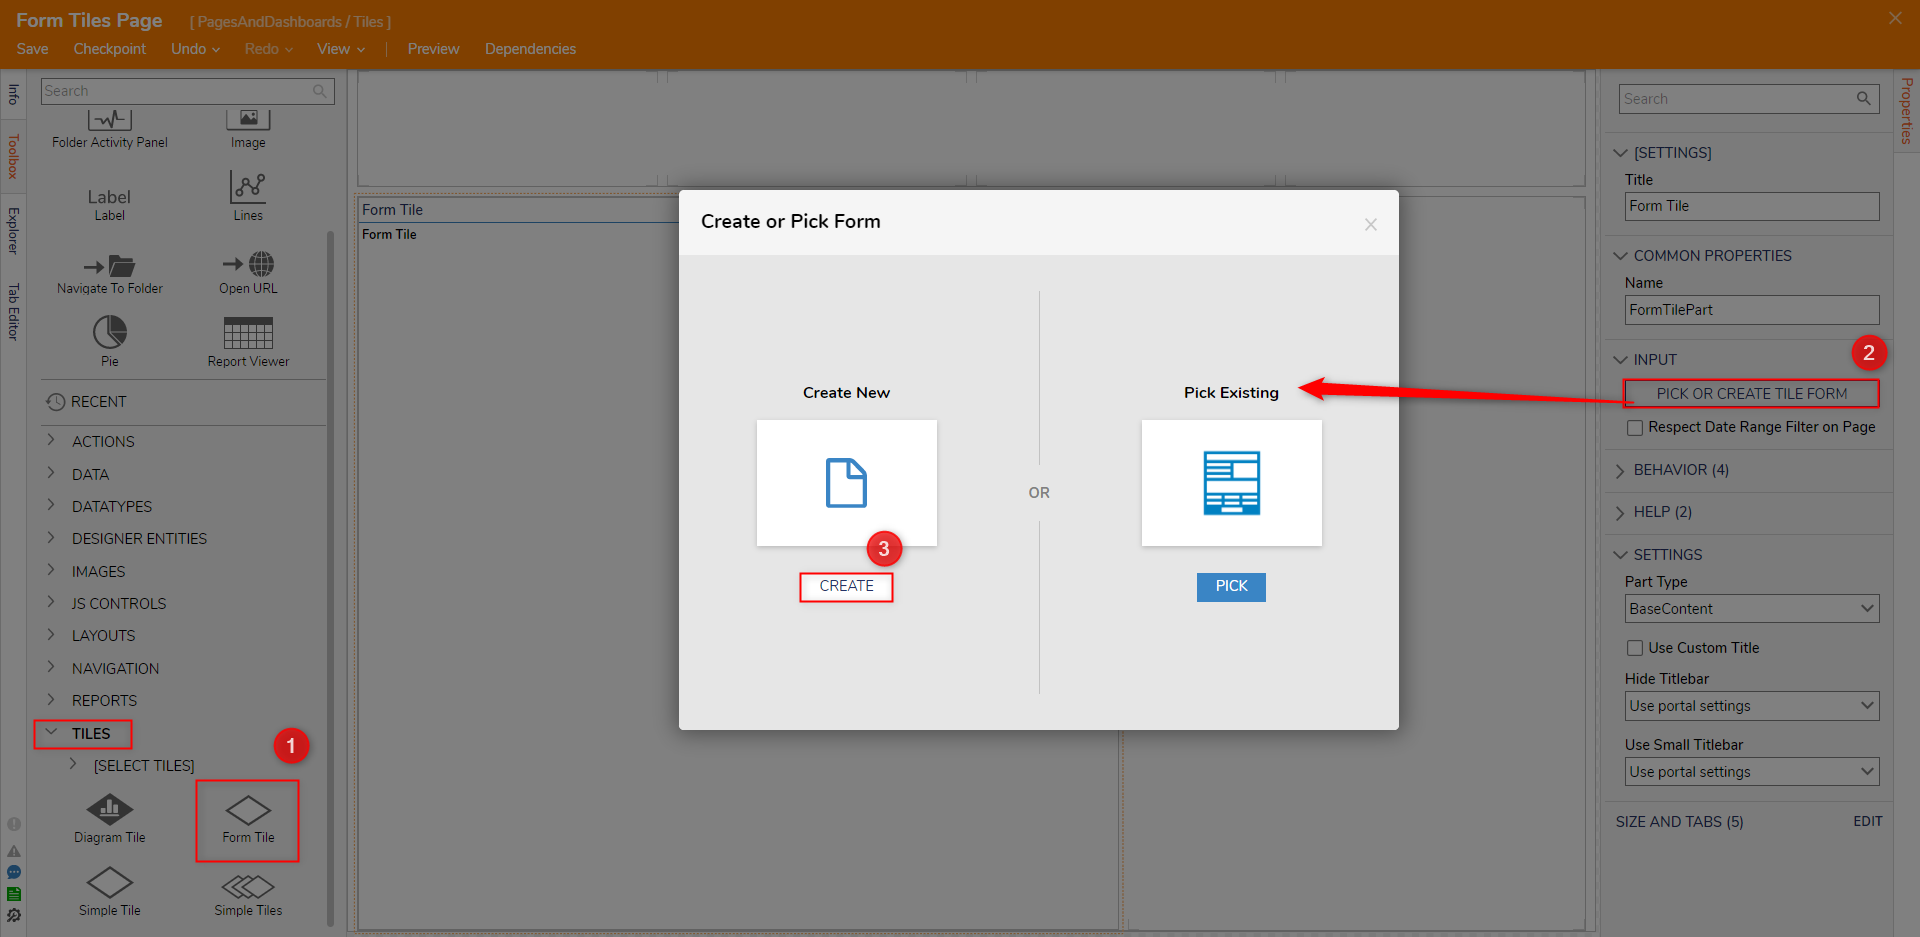
- From the Properties of the Form Tile, under INPUT, click PICK TILE FORM. Then, CREATE a new Form Tile.
- From the Form Designer, design a Form containing two Text Box controls and a Button (labeled "Submit").
Provide a Label for each Text Box ("Name" and "Email Address" respectively) and a Label with the Form's title (in this example, "Student Profile Form").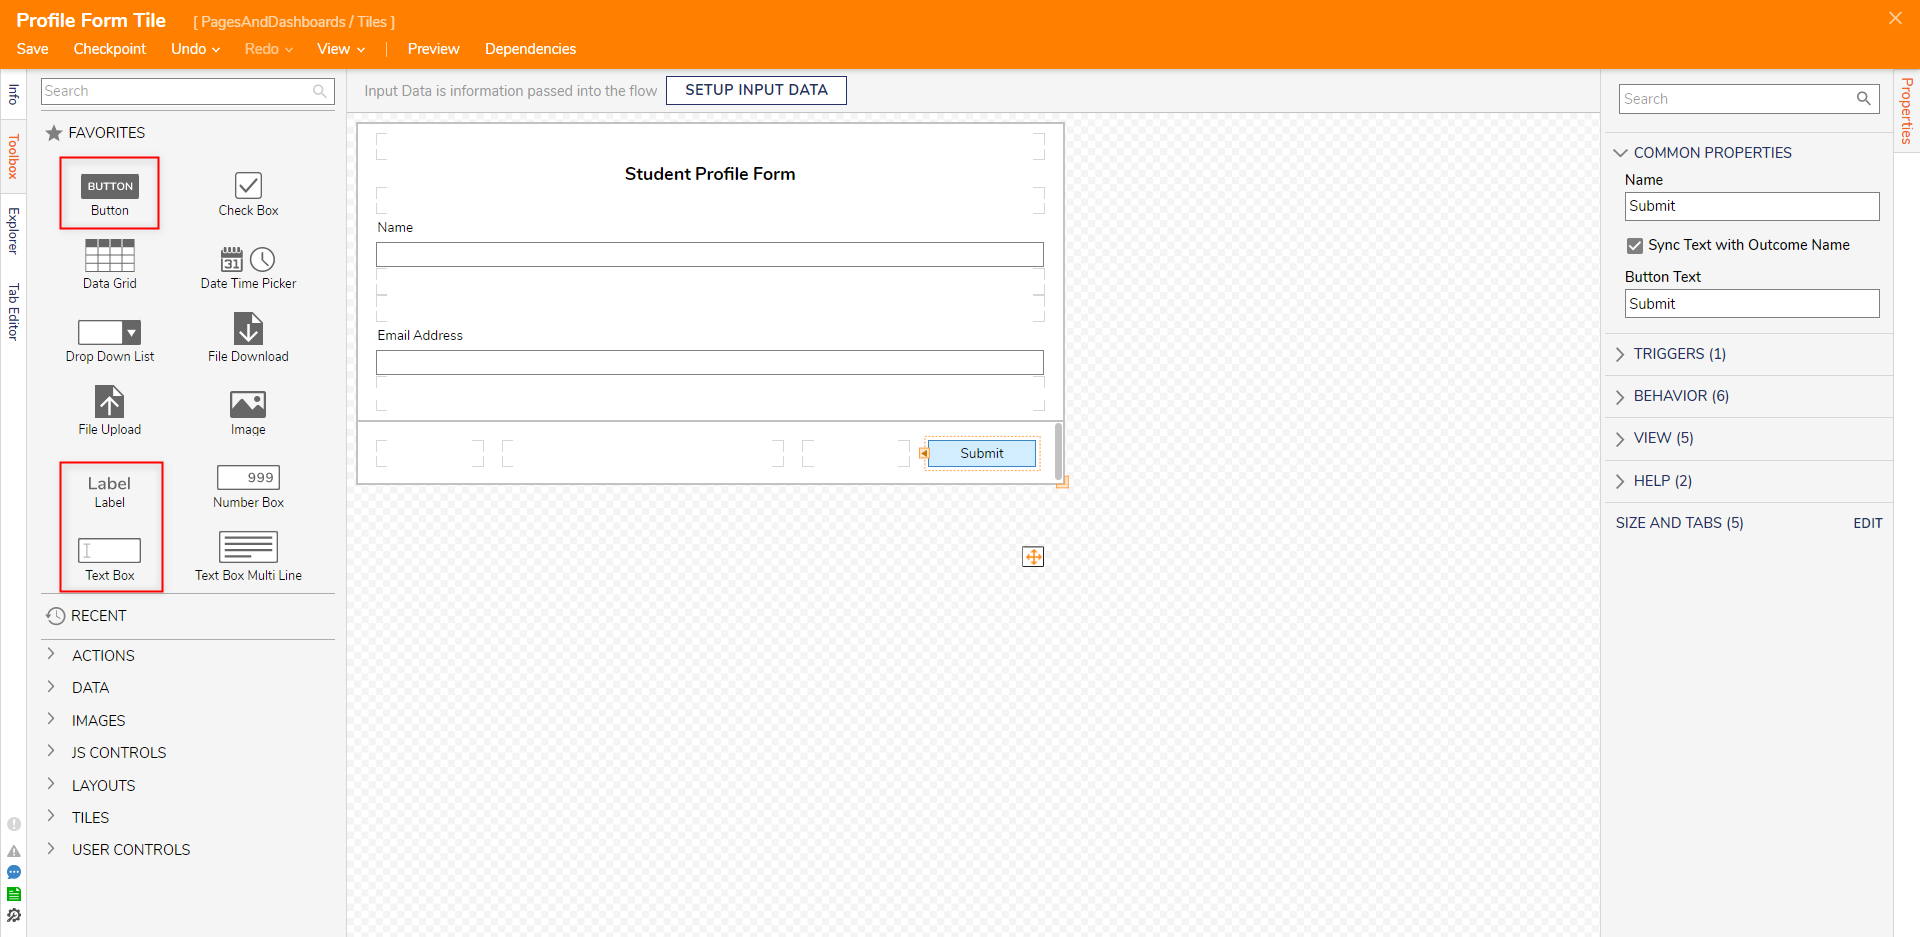
- Save the Form, then close the Form Designer via X.
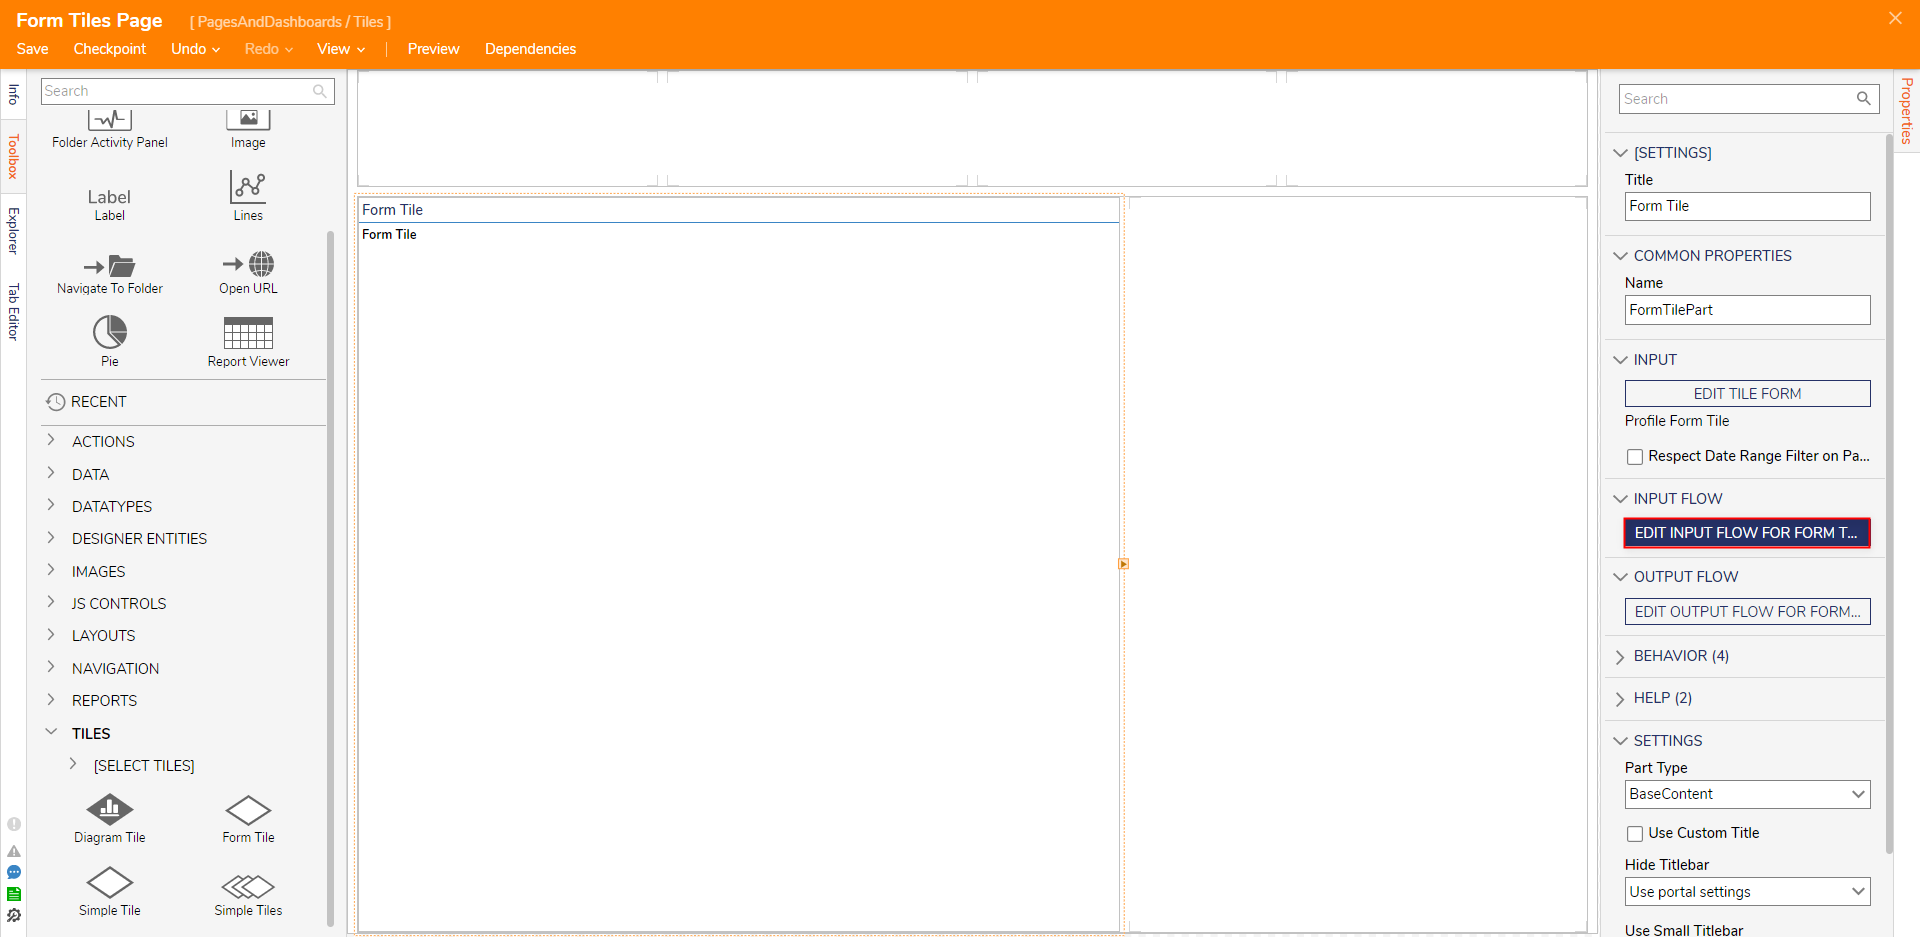
- In the Page Designer, from the INPUT FLOW category under the Form Tile's Properties tab, select EDIT INPUT FLOW FOR [FORM TITLE NAME}.
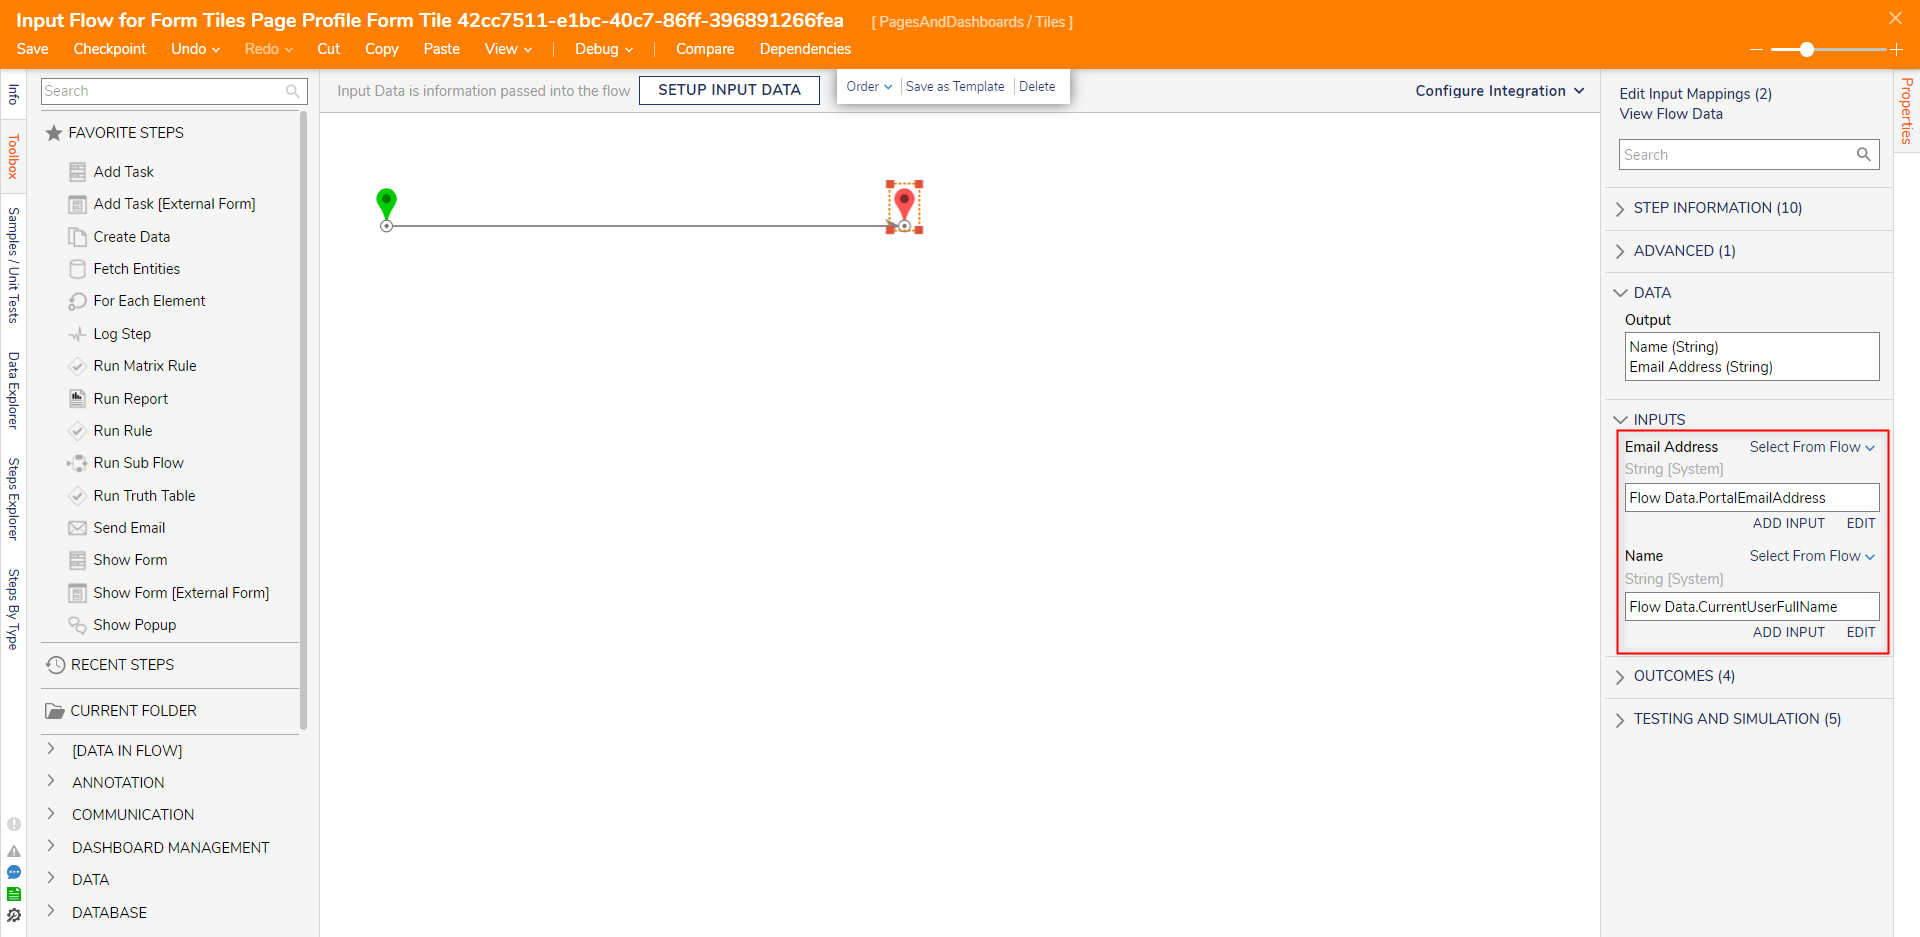
- In the Flow Designer, from the Properties tab of the End step, map Flow Data.PortalEmailAddress to Email Address, and Flow Data.CurrentUserFullName to Name.
- Save and close the Flow Designer, then the Page Designer.
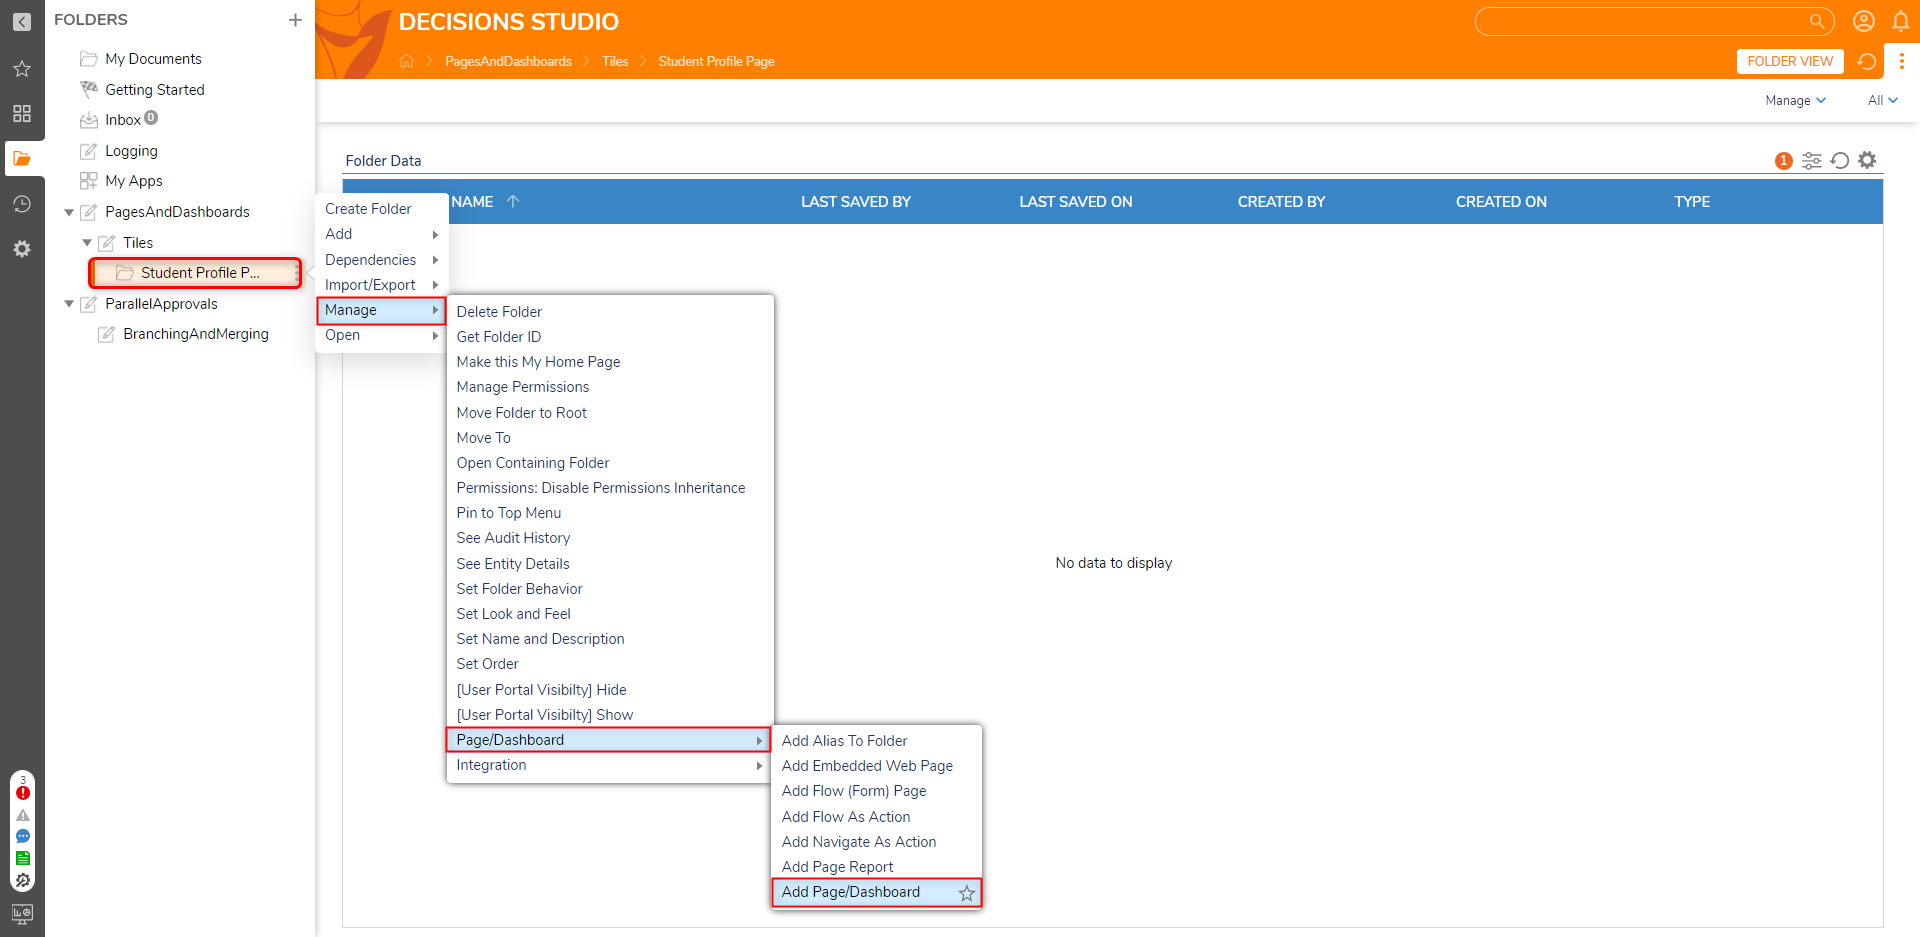
- From the Studio, right-click a Designer Project, then CREATE a new Folder.
.png)
- Right-click the Folder, then attach the Page via Add Page/Dashboard.
- Via the tabs at the top of the Folder, navigate to the newly added Page.
Verify that the Page displays the Form with the mapped data.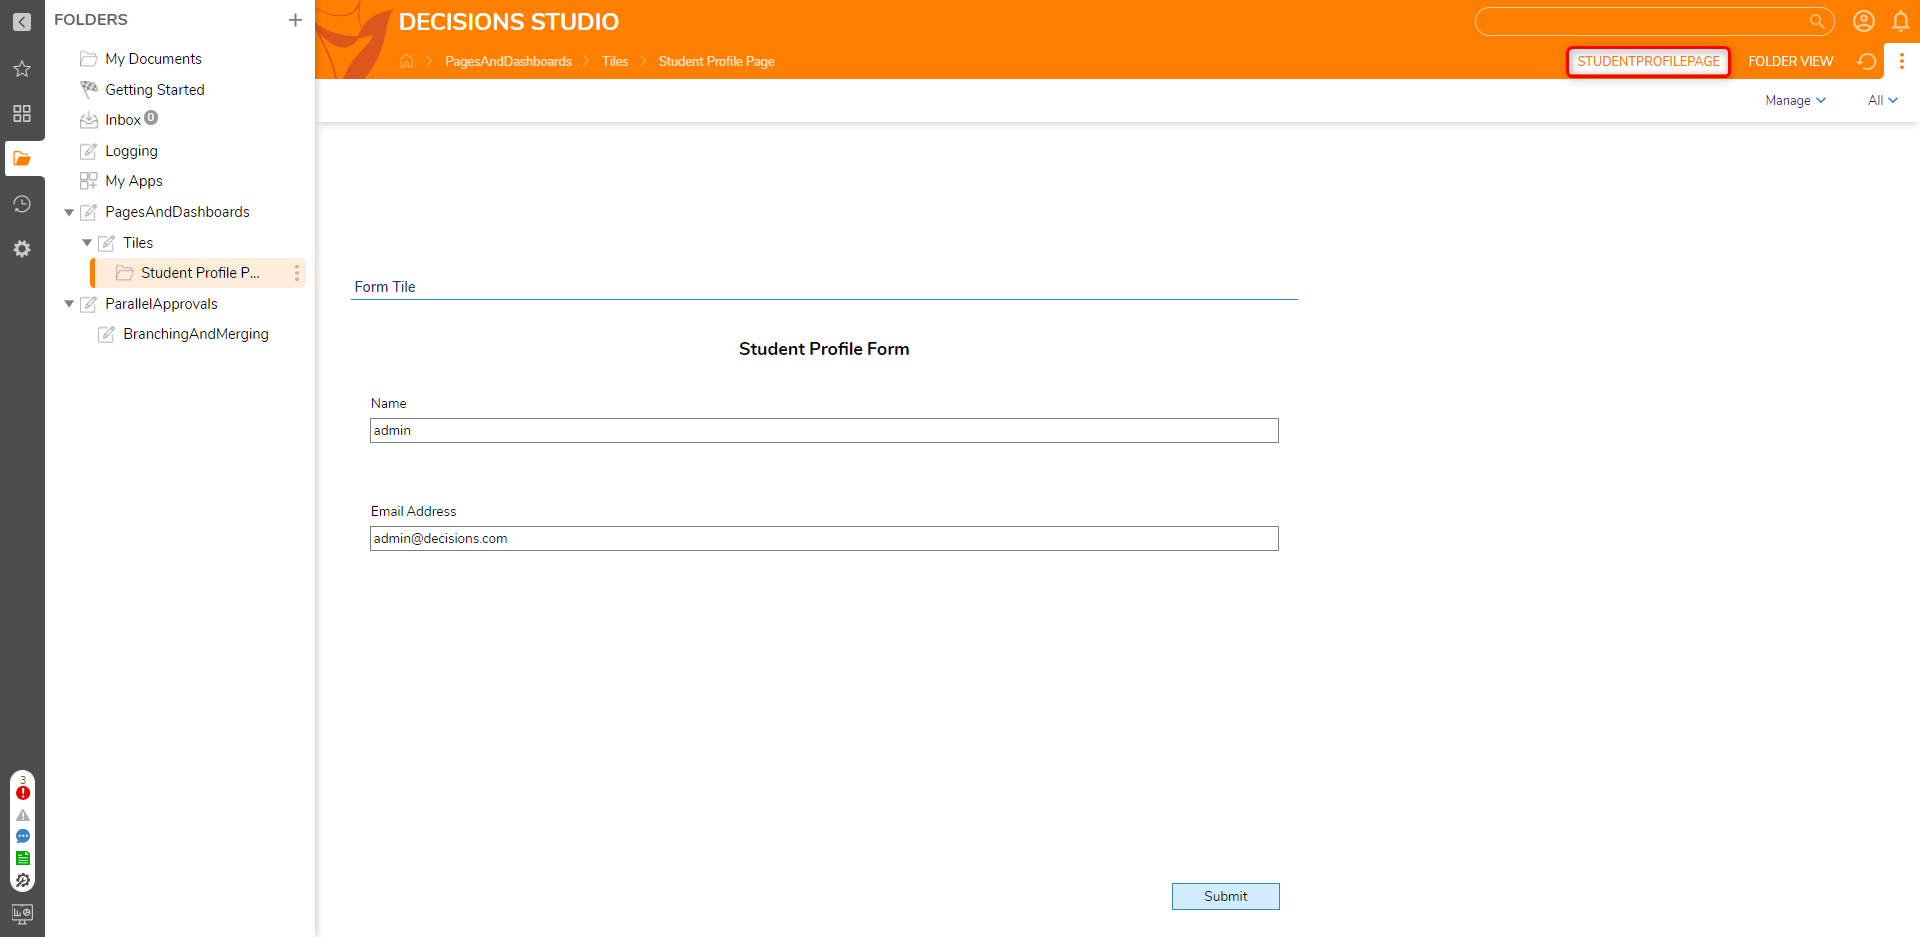
For further information on Pages, visit the Decisions Forum.