- 08 Oct 2024
- 5 Minutes to read
- Print
- DarkLight
Navigating the Studio/Portal
- Updated on 08 Oct 2024
- 5 Minutes to read
- Print
- DarkLight
Decisions utilizes two interfaces for navigation: the Studio for back-end users and Administrators, and the Portal for end-users.
Depending on the account's permissions, users may log into either one of these interfaces to initiate any created Designer Elements, create a new one via the Visual Designers, or access the System Settings.
Users with permission to access both the Studio and Portal may seamlessly transition between the interfaces.
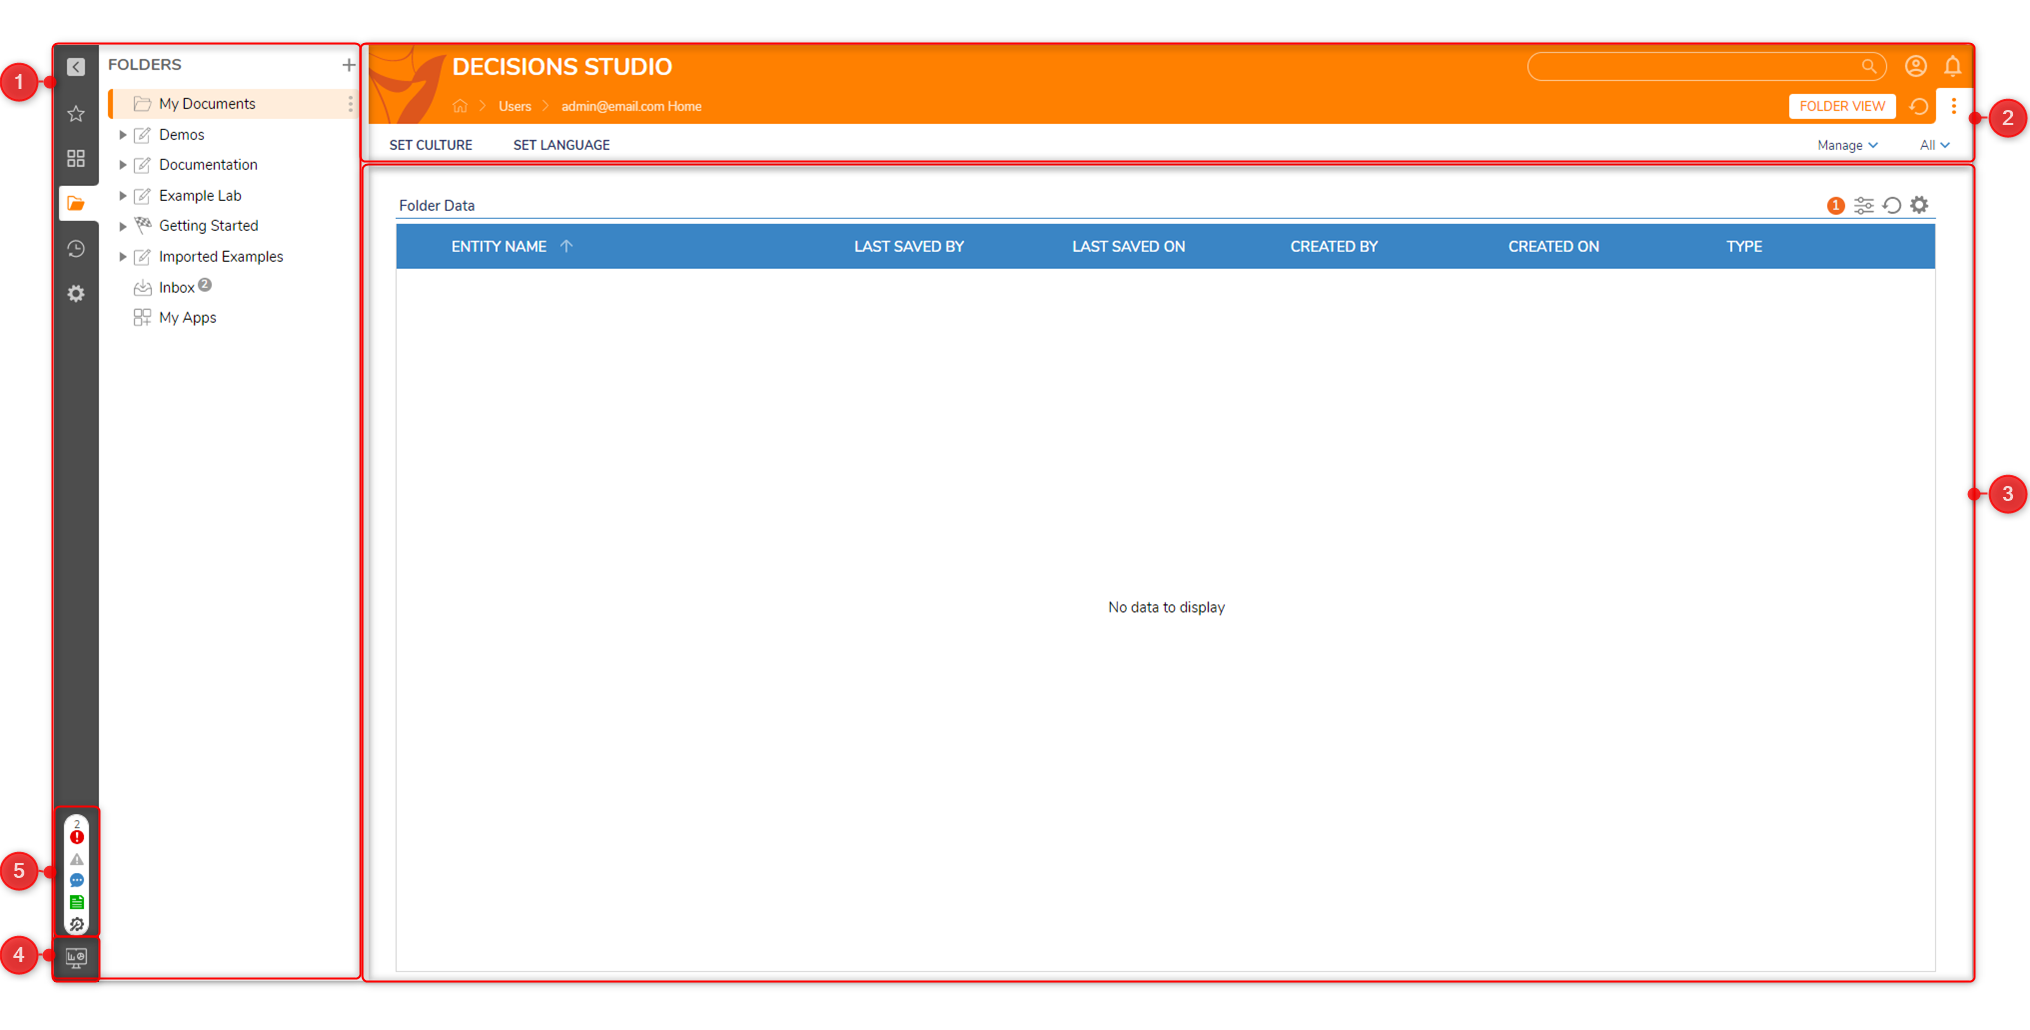
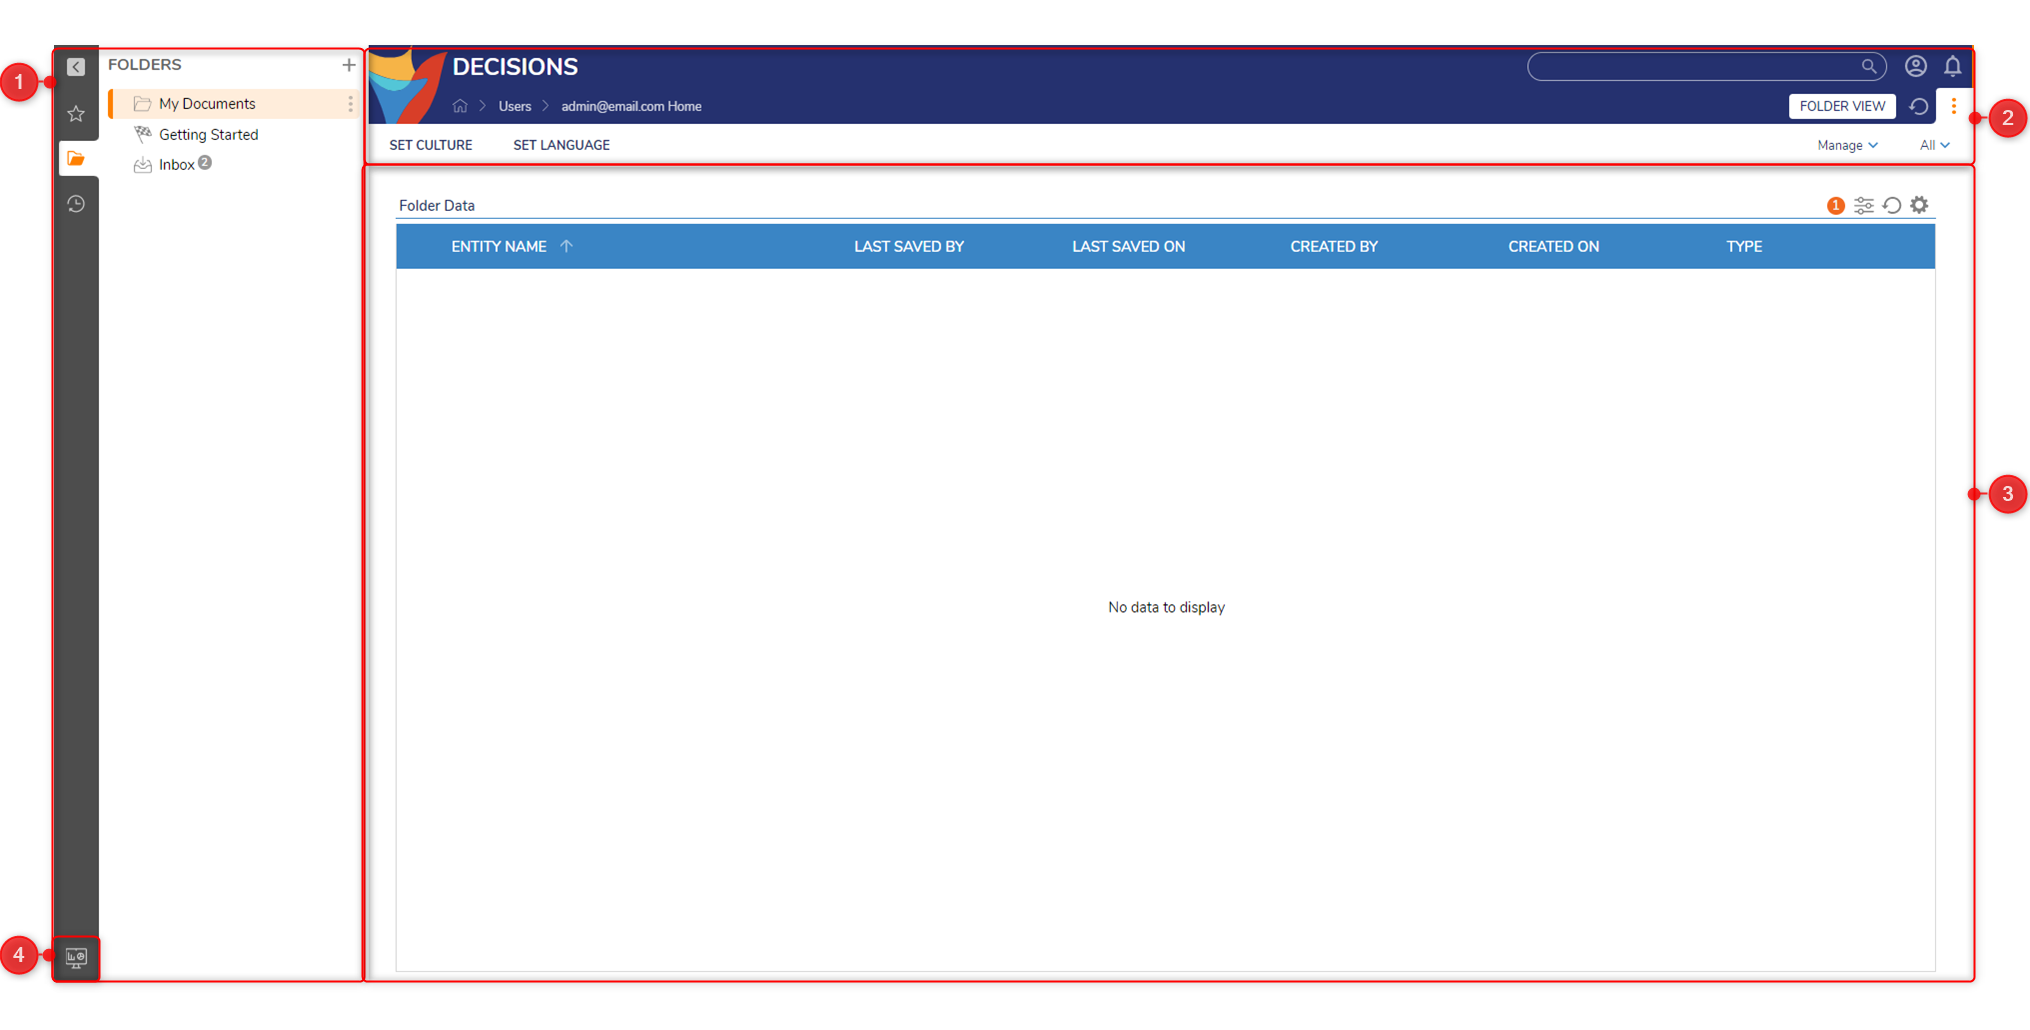
Studio/Portal Tour
While the Studio and Portal's layouts bare similarities to each other, they differ in where they can navigate to; this is because the Portal is more restricted and is not used to build processes. 

Unsupported navigation in the Portal is marked with an asterisk (*).
| Number | Name | Description | ||
|---|---|---|---|---|
| 1 | Sidebar | This expandable bar contains icons that navigate the user to certain areas of the Studio and/or Portal. Selecting the topmost icon aka the back arrow icon closes the Sidebar's contents so only the dark grey portion of the Sidebar remains. | ||
 | Favorites | This menu contains a list of favorite shortcuts to places such as a Designer Project or a Page. Favorites may be account specific or global. | ||
 | Workflow Catalog* | This menu contains a list of shortcuts to access and initiate processes. | ||
 | Folders | This menu contains the Folder Tree which list of all created Designer Projects and Folders that store all built processes, their necessary Designer Elements, and any stored process data. | ||
 | Recent | This menu contains a list of the most recently opened locations for quick access to frequent folders. | ||
| System* | This menu contains a list of System folders only Administrators may access and edit. Folders for system settings, account management, modules, etc. are located here. | |||
| 2 | Header | This contains Actions Bar, the search bar, account information, etc. Administrators may use the Theme Editor to edit the header's logo and appearance to meet branding needs. | ||
| 3 | Content Viewer | This contains information dependent on the selected location. For example, a selected Designer Project would populate the Content Viewer with its contents. The Content Viewer's layout and information may be altered by changing its view in the Banner. By default, it is set to Folder View. | ||
| 4 | Switch to Studio/Portal | The Switch to Studio/Portal icon allows the user to transition between these interfaces, but it is only available to accounts with both Studio and Portal access. | ||
| 5 | Help Center* | The Help Center contains information relating to any errors detected in the instance as well as links to a live support chat, the Documentation site, and the Global Debugger. | ||
Header

The left side of the Header contains the Studio/Portal Slogan and path of the selected location below. Administrators may alter the Slogan via the Designer Studio settings or Portal settings.
The top right provides a search bar for locating specific files within the instance; note certain items such as Designer Projects cannot be seen or searched for in the Portal.
To the right of the search bar are the Account Actions (person icon) and Notifications (bell icon) respectively.
Clicking the Account Actions icon displays the email of the current account, its timezone, and the following list of available actions:
| Account Action Name | Description |
|---|---|
| Lock Portal | A security feature that allows the user to lock the Portal. It can be unlocked by entering the account's password. It is a best practice to lock the Portal when stepping away from the computer, especially when logged into an account with Studio and/or Administrator access. |
| Submit Feedback | Allows the user to submit feedback to Decisions. Attachments may be added if wishing to add screenshots and/or project files relevant to the feedback. |
| Account Impersonation | Allows the user to take account permissions/access levels of another account without manually switching accounts. |
| Change Password | Allows the user to change their account password. |
| Switch to Studio/Portal | Allows the user to switch to the Studio or Portal depending on the current interface. |
| My Account | Navigates to the user's home page. By default, this is the My Documents Folder |
| About | Displays the following System Information for the instance. |
| Logout | Logs the user out of the instance and redirects the window back to the login screen. |
The bottom right of the Header lists the selected locations available View tabs, a refresh icon affecting the Content Viewer, and a vertical ellipses icon to open/close the Action Bar.
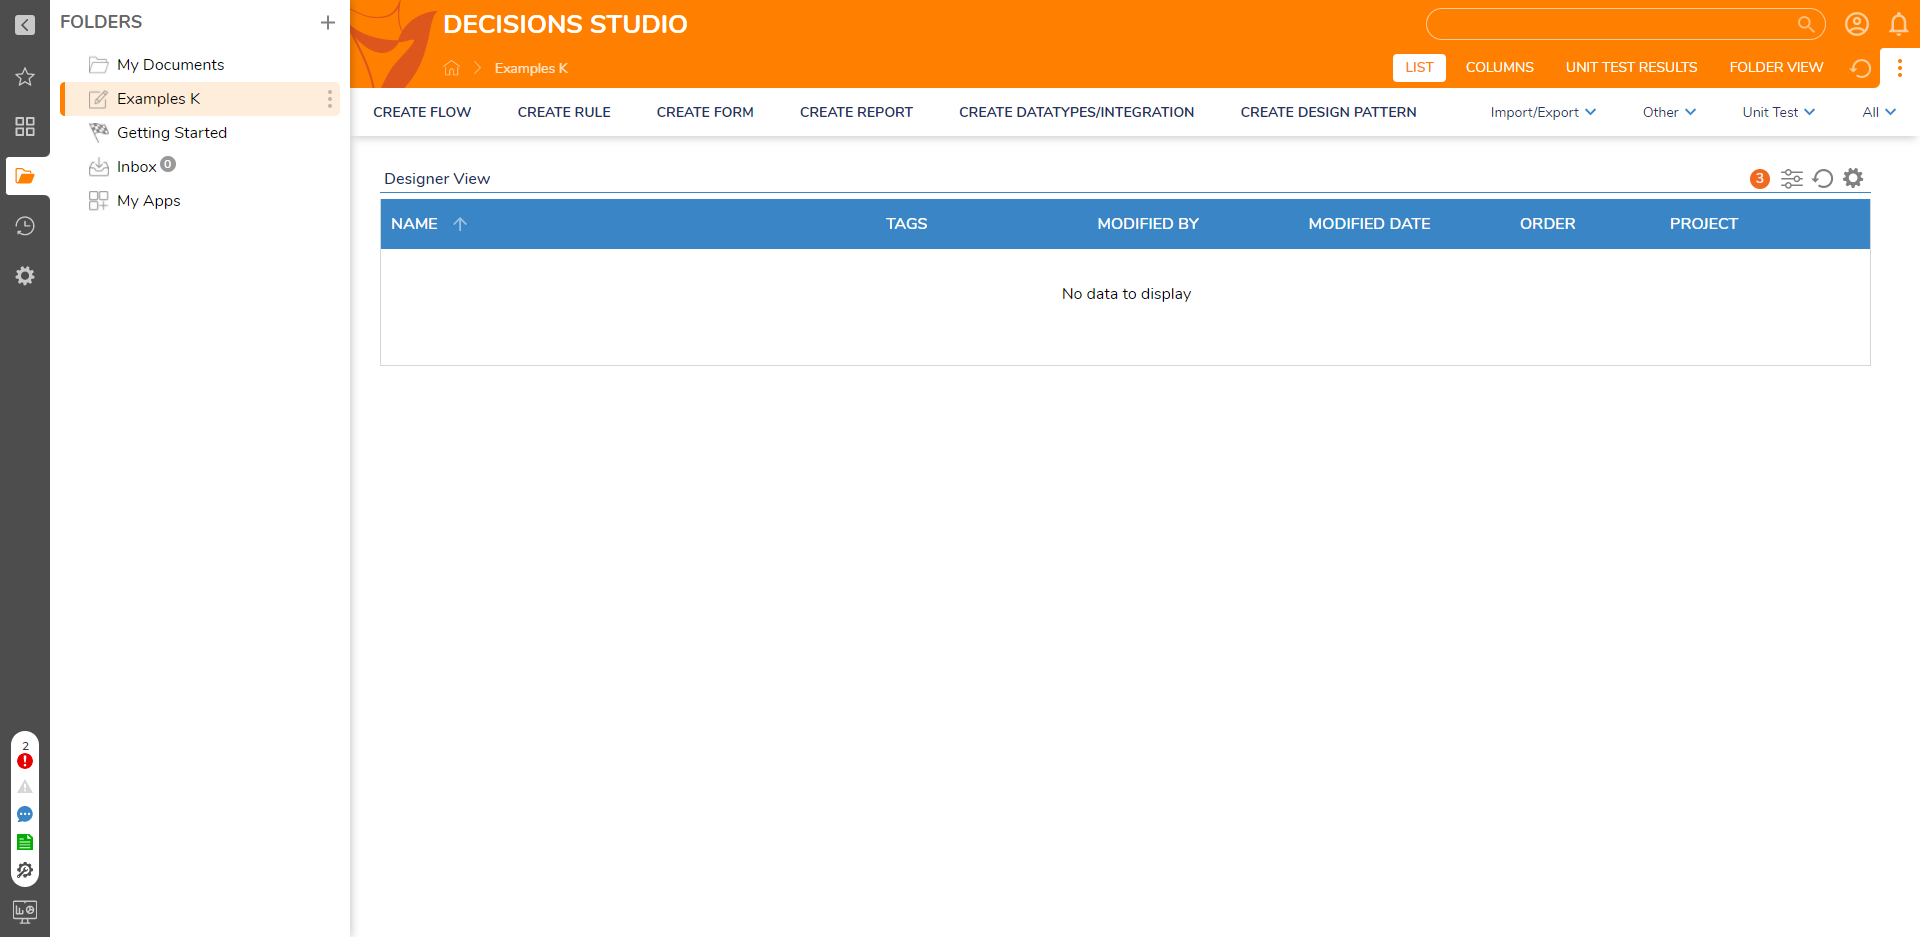
Actions Bar
The Actions Bar is located beneath the orange section of the Header, and contains actions a user may take while in the selected location.
For example, a Designer Project contains actions such as Create Flow, Create Rule, etc while a Configuration Folder would contain different actions such as User Actions, State Triggers, etc.
Default Folder Contents
All Folders are stored and organized in the Folders menu of the Sidebar. By default, the following Folders are available to all users in the Studio.
Folders that are unavailable in the Portal are marked with an asterisk (*).
| Folder Name | Description |
|---|---|
| My Documents | Contains documents only the Initiating Account can access. User-specific customization such as Culture and Language Settings are also made here. |
| Getting Started | Contains resources such as the Documentation site, video demonstrations, etc. |
| Inbox | Contains any notifications and/or Assignments for the user. |
| My Apps* | Contains the App Store with downloadable project templates, and all Installed/Not Installed Modules. |
After selecting a Folder from the Sidebar, its contents are displayed in the Content Viewer. Right-clicking any item in the Content Viewer opens its Action Menu which lists all available actions that may be performed on that item based on the user's folder permissions.
To add a new Folder, select the plus icon next to the FOLDERS header at the top of the Folder Tree.

Help Center
Located at the bottom of the Sidebar in the Studio, the Help Center toolbar provides information and links to the following resources listed from top to bottom:
| Help Center Icon | Description | |
|---|---|---|
 | Errors | Displays alongside the count of all global process blocking exception/validation and import errors. Clicking this opens the SYSTEM VALIDATION menu. If no errors are found, then this icon is grayed out. |
 | Warnings | Displays alongside the count of all global process warnings in the instance such as an upcoming license expiration. Clicking this opens the SYSTEM WARNINGS menu. If no warnings are found, then this icon is grayed out. |
.png) | Support Chat | Clicking this opens a support chat window with a Decisions Support member. Use this to get live help troubleshooting any issues or answer any questions. File sharing is allowed. If all Support members are occupied, then the chat will then request the user to submit a support ticket to support@decisions.com for a later follow-up. Once a support chat is open, the icon's colors invert until the chat closes. |
 | Documentation | Clicking this opens a new browser tab directing to Version 8 Documentation. |
.png) | Tools | Clicking this opens a menu to open either the Global Debugger or the Profiler. The selected tool then opens in a new browser tab. |
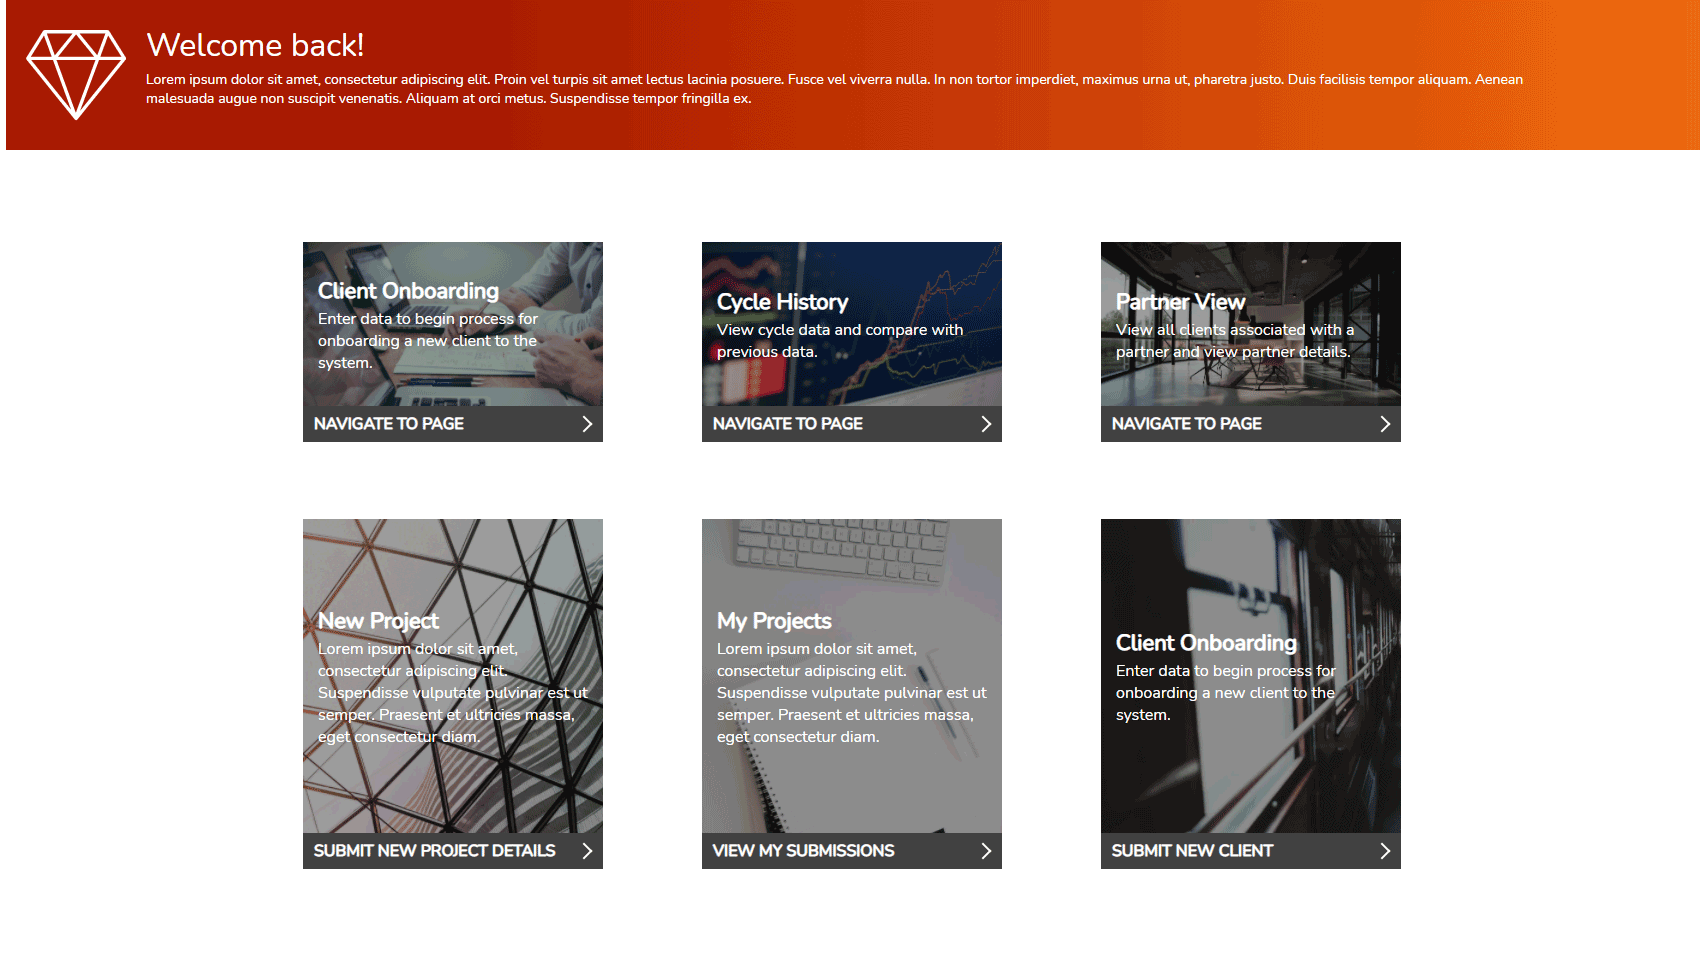
Custom End-User Portal Example
The below screenshot demonstrates an end-user Dashboard created in Decisions. To learn how to create a Dashboard, see Create Pages / Dashboards.


