Overview
Through the use of the OpenID Module, Accounts can be created via an OpenId Identity Provider, and utilized within a website that is setup to accept OpenID authentication.
In addition to Standard Server environments, this Module can be utilized to create Accounts that can be implemented and used for SSO across a Multi-Tenant environment. The following document demonstrates how to setup OpenID in a v.8+ Multi-Tenancy.
Prerequisites
- Pre-existing OpenID Account
- Access to an OpenID API
- Single Sign On set to True in Settings.xml
- Restarting the Instance post Settings.xml-configuration
Best Practices
While configuring SSO, perform any testing in an incognito window while the Admin session is ran from the normal window; keep this Admin session open until the system setup has been completed and Portal function can be confirmed stable.
Setup
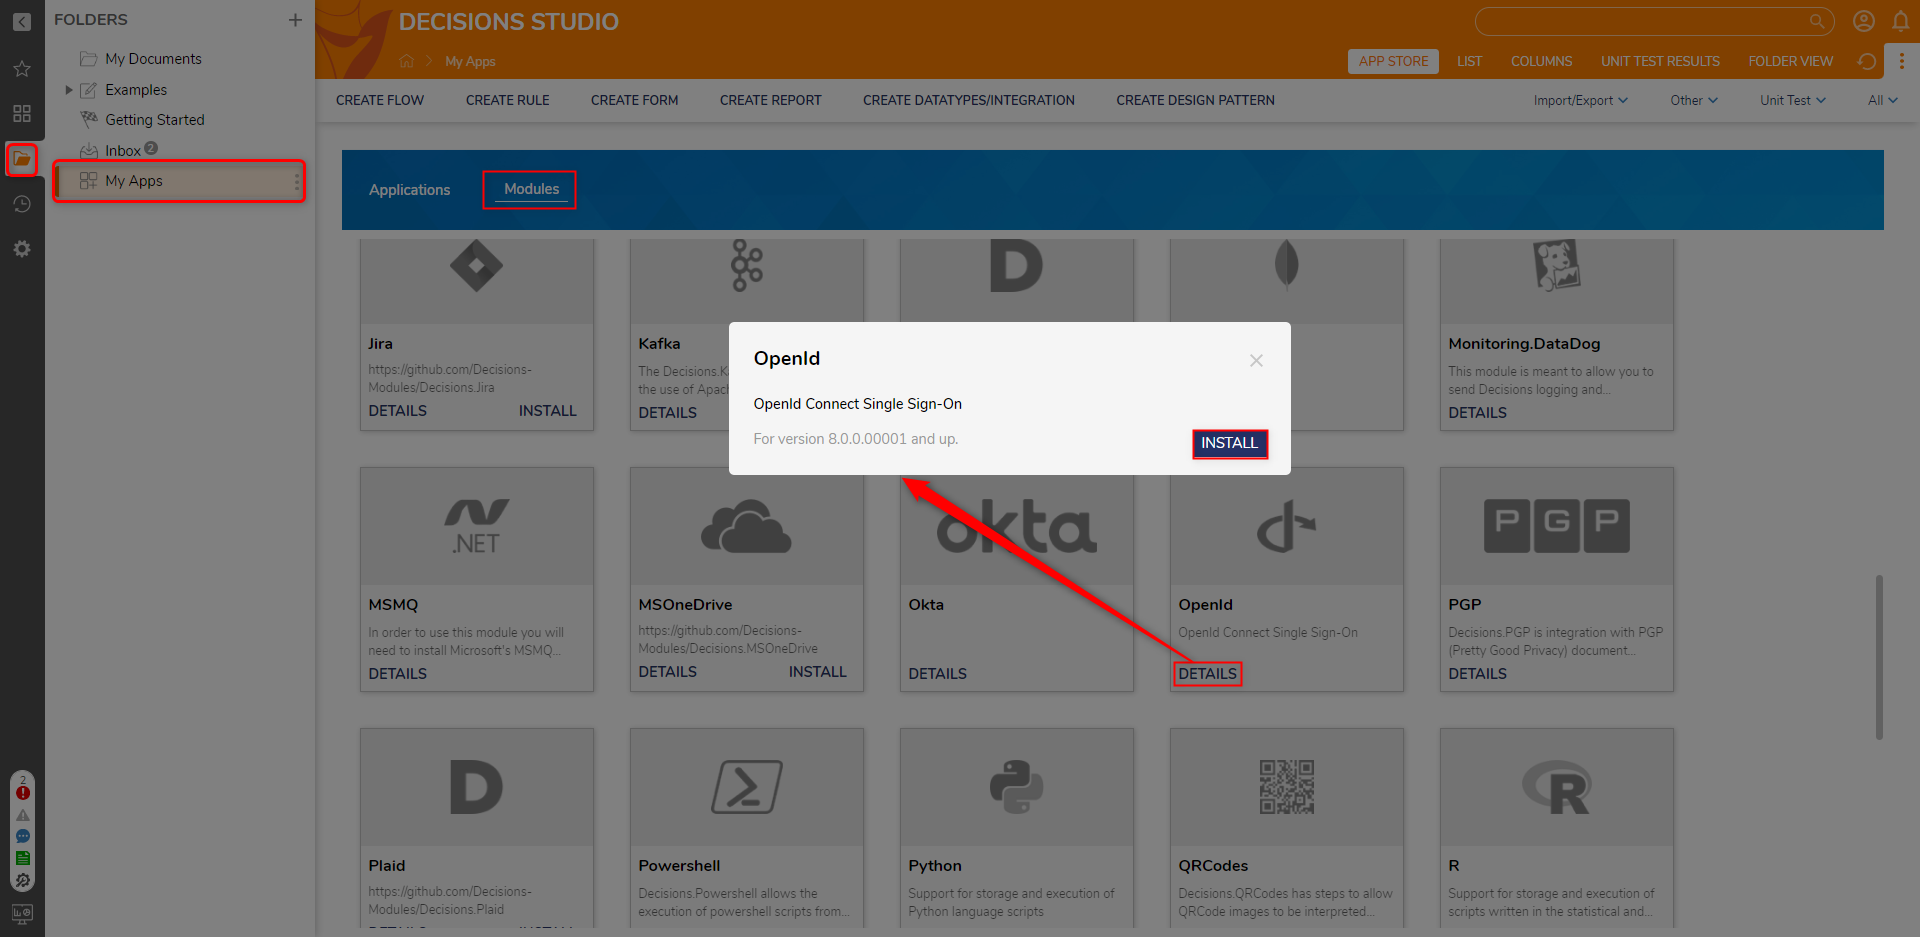
- From the Control Instance, navigate to FOLDERS > My Apps > Modules, then INSTALL the OpenId Module.
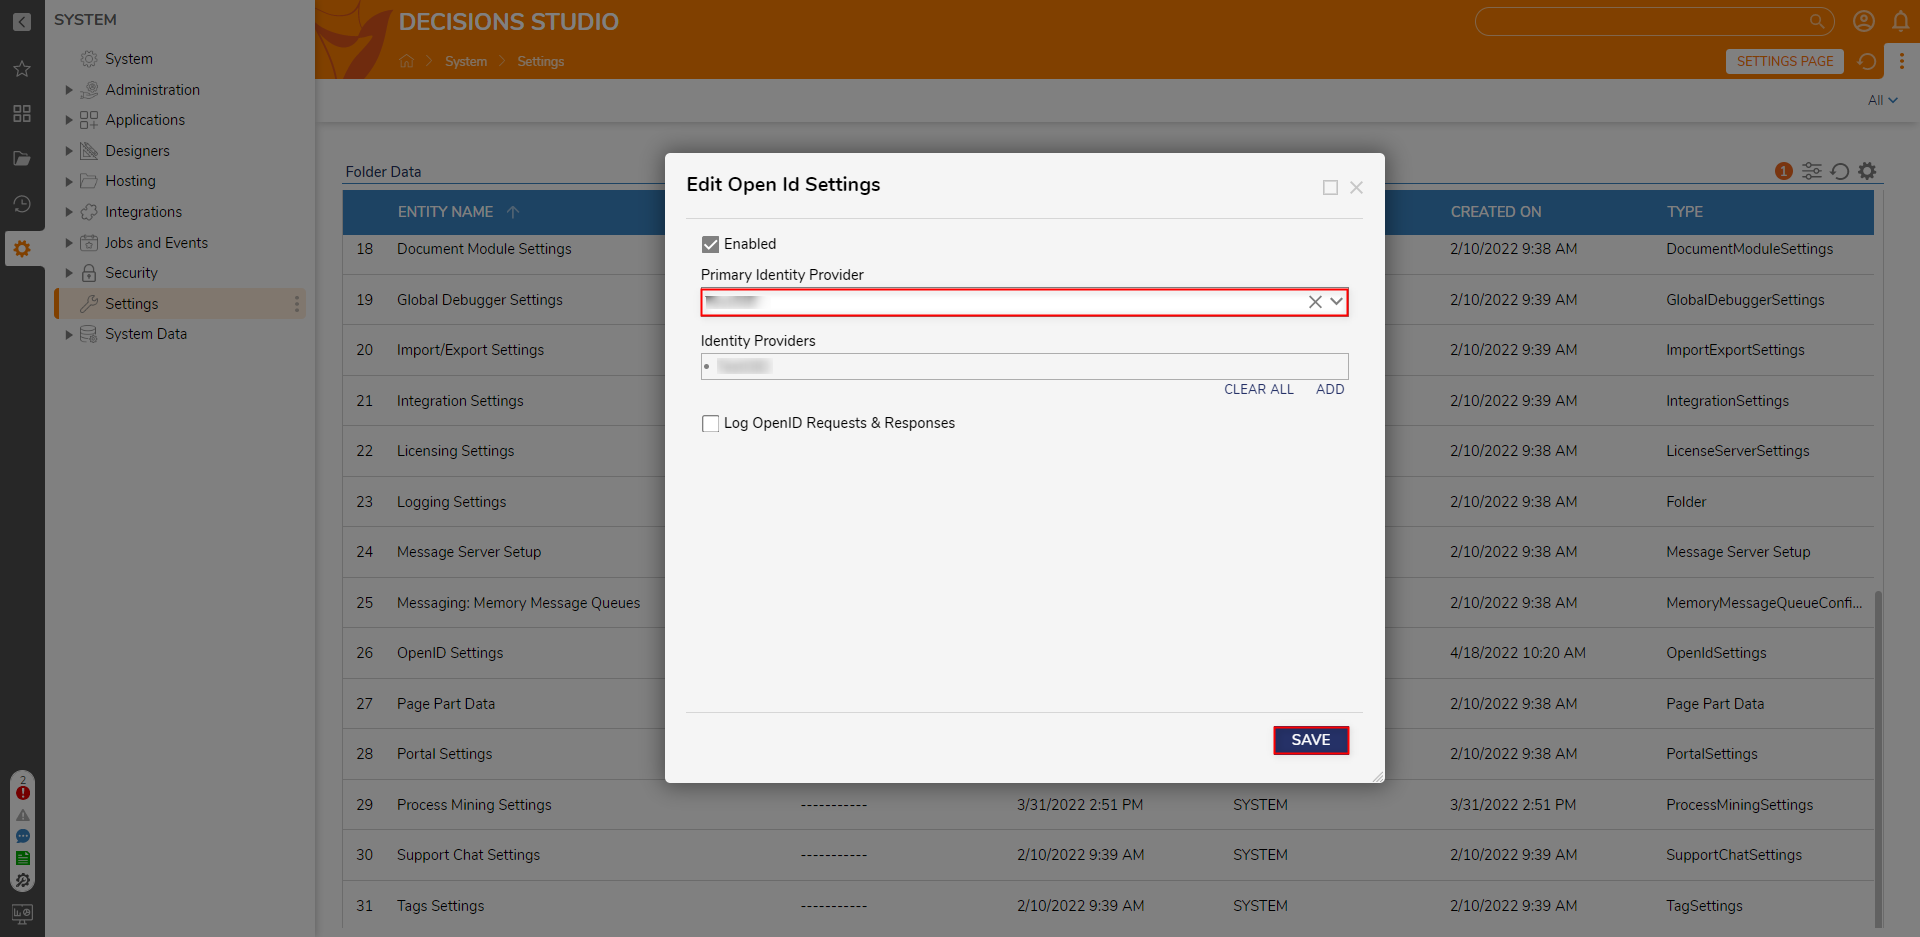
- After installing the Module, navigate to System > Settings > OpenID Settings.
Then, enable the Enabled checkbox, and click ADD under Identity Providers.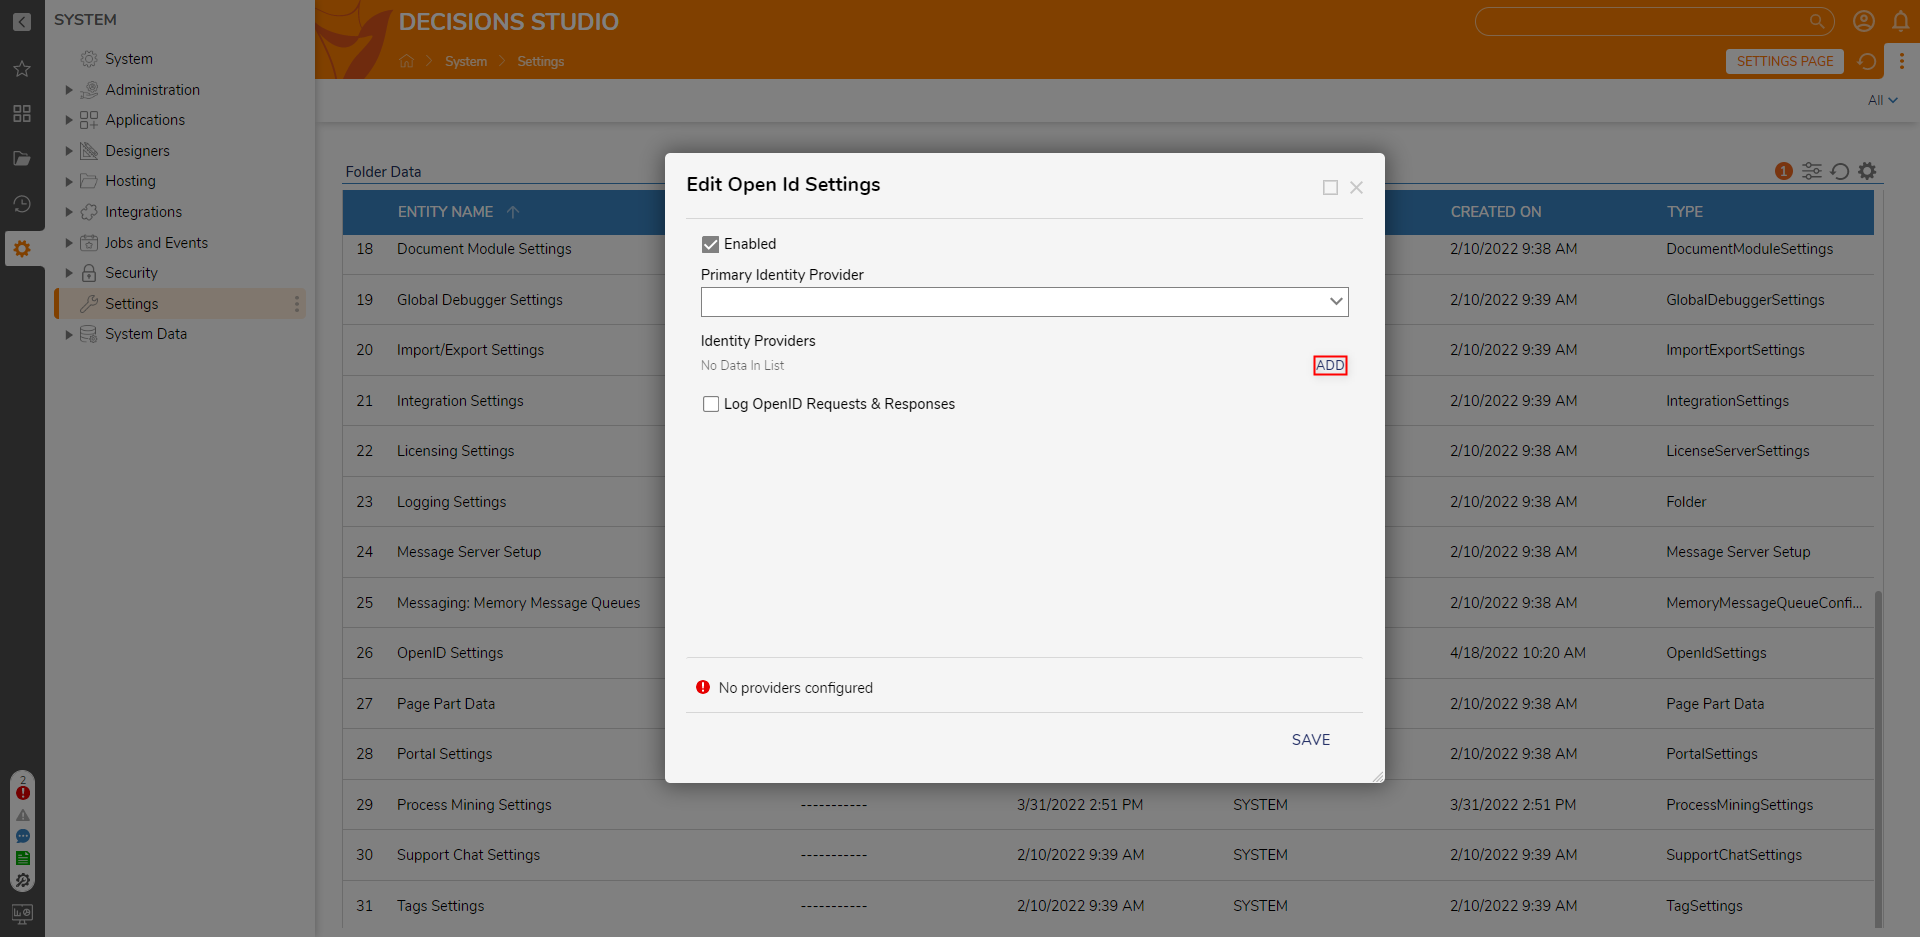
- In the resulting Add Identity Providers window, configure the respective IdP Name, Client ID, Client Secret, and Discovery URL values.
Then, uncheck Verified Email Addresses only, click OK.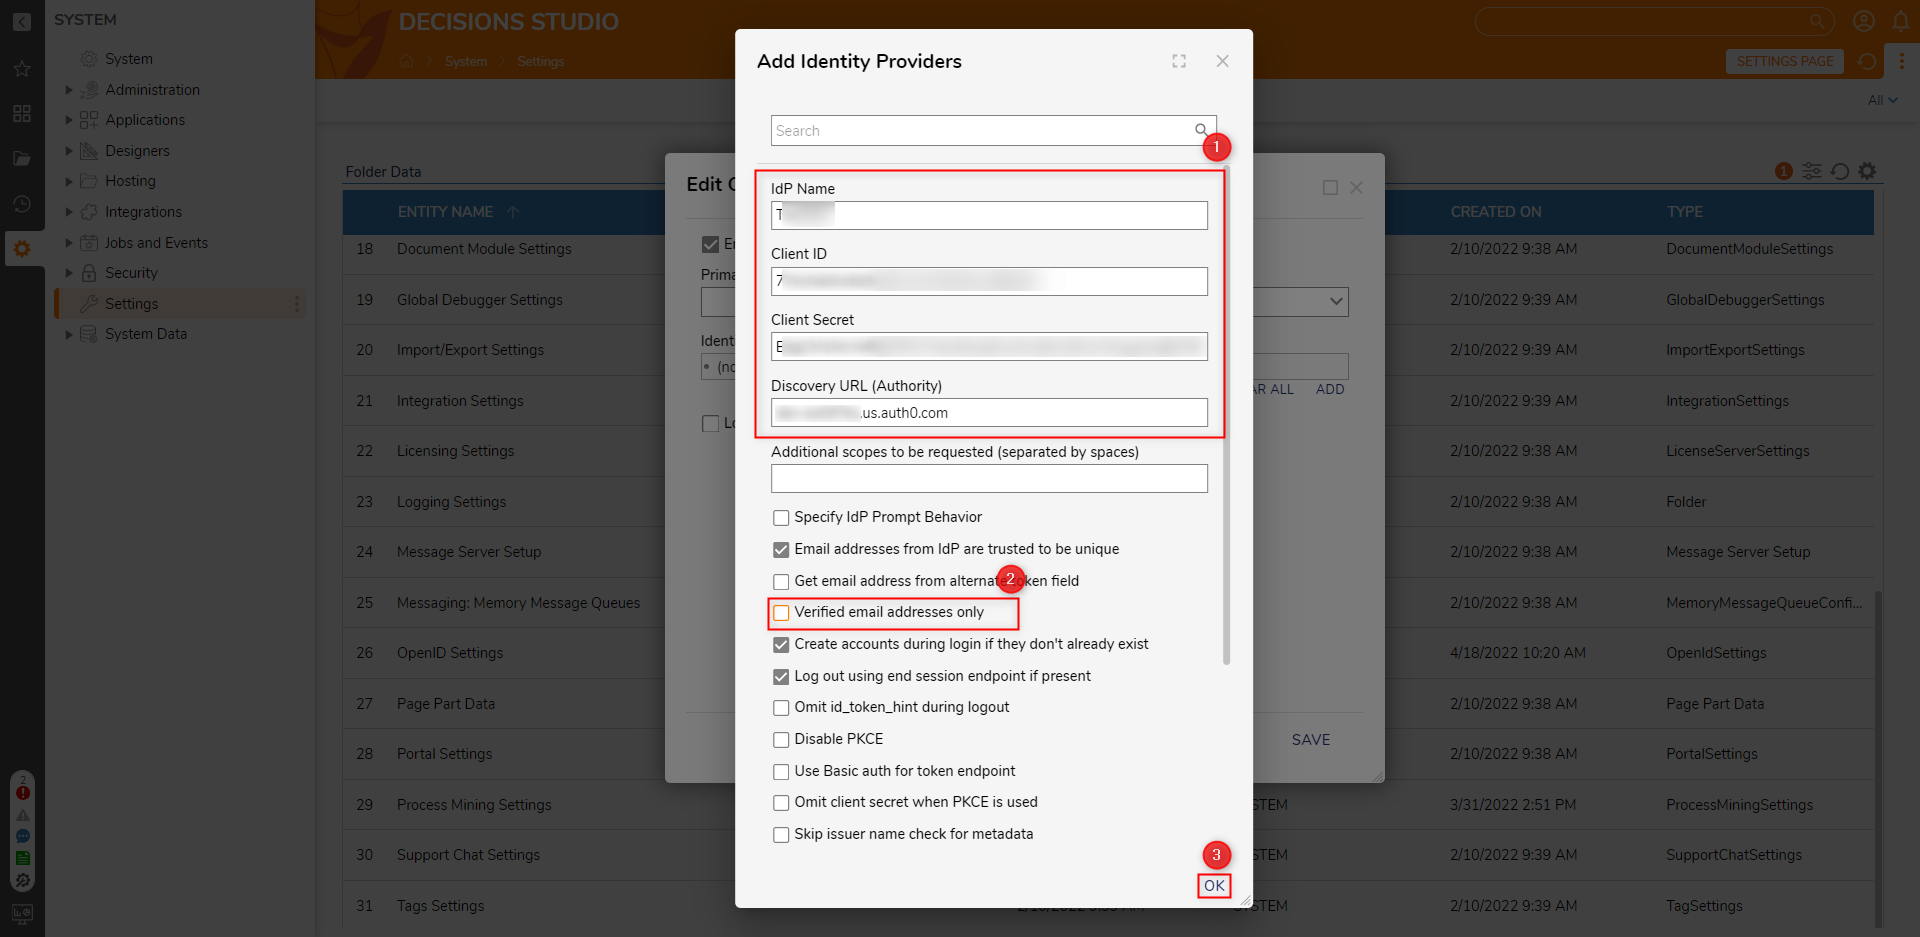
- Back in the Edit Open Id Settings window, select the newly added Identity Provider from the Primary Identity Provider dropdown, and click SAVE.
- Open an incognito window and navigate to the Control Instance. From the resulting OpenID Page, click Sign In with Google.
Then, provide the desired Google login credentials.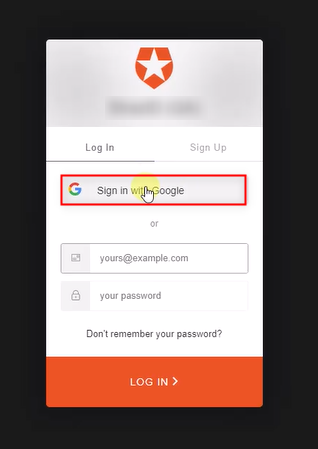
- Back in the original Portal window, navigate to System > Hosting > [Name of Desired Instance] and click ADD INSTANCE ACCOUNT.
PICK the Account that was added to the Control Instance via OpenID. Then, click OK.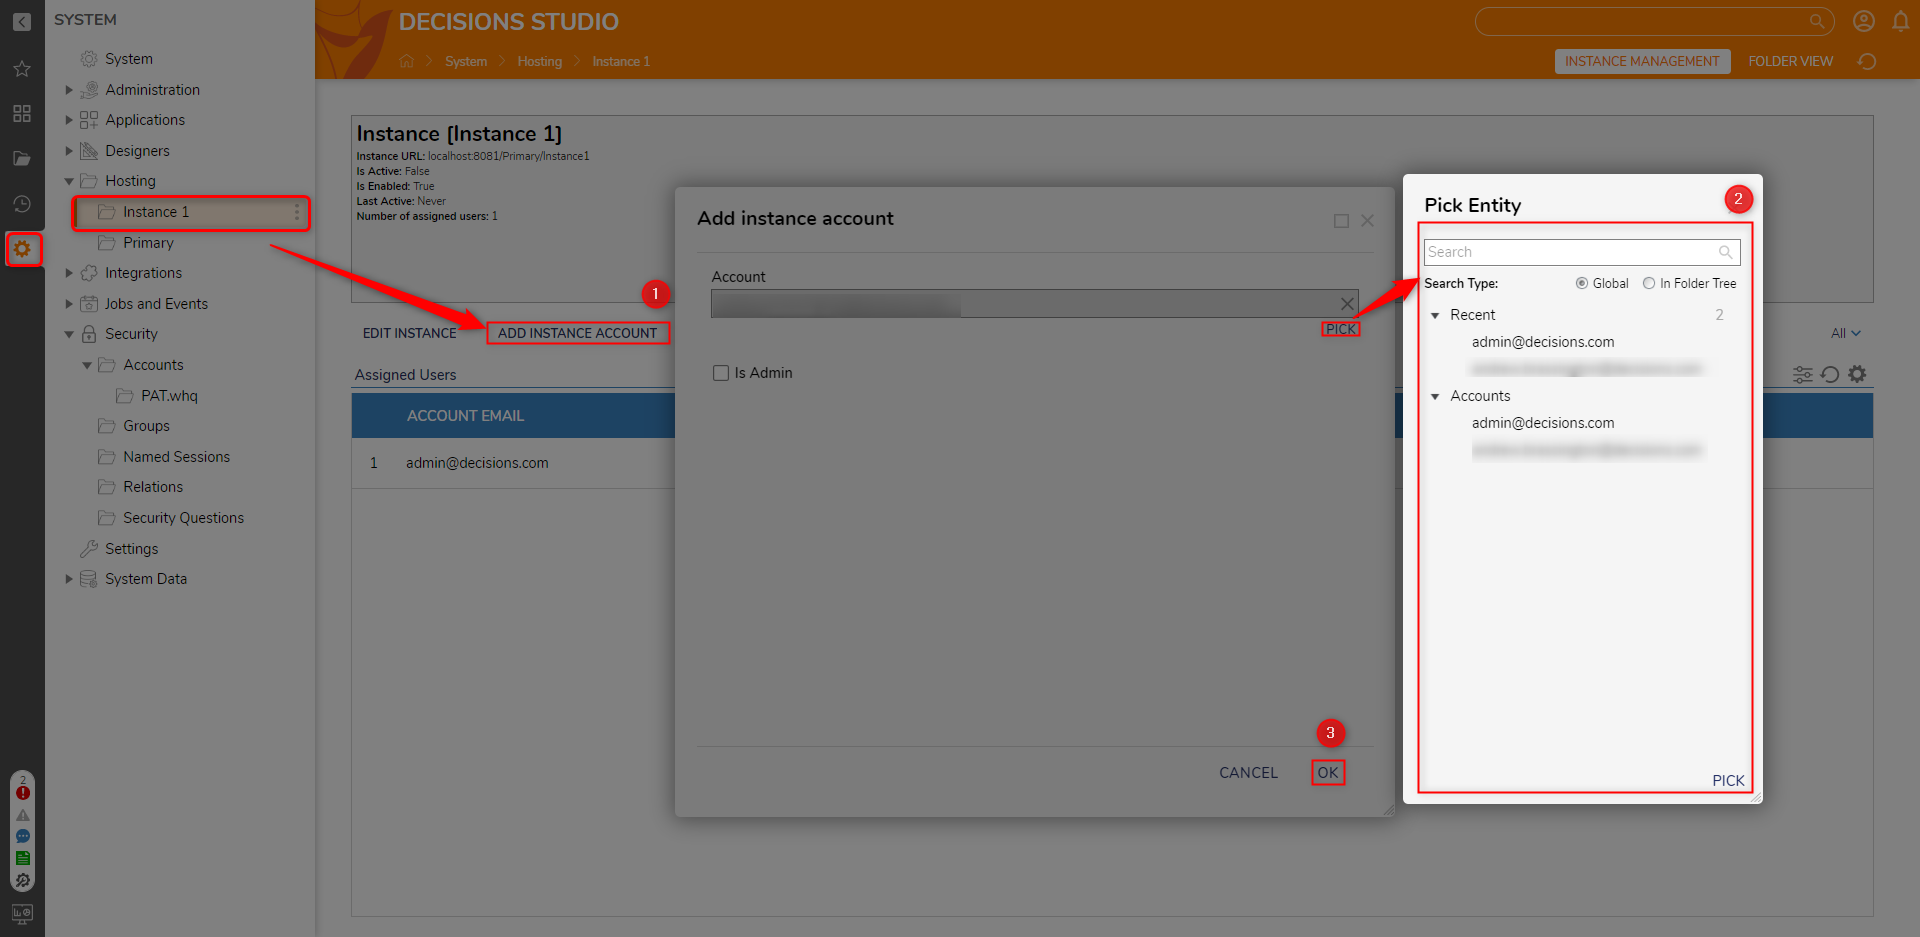
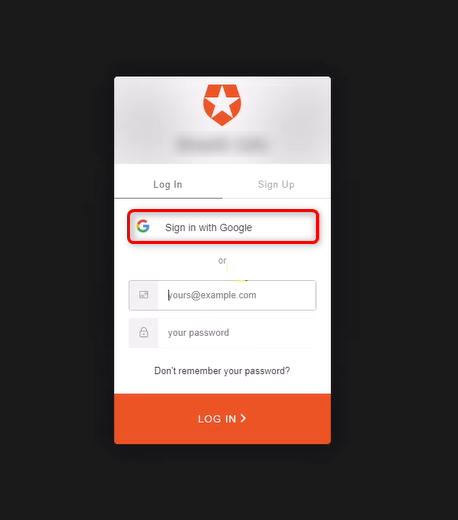
- Navigate to the Tenant Instance; upon seeing the OpenID screen, select Sign in with Google, and attempt to sign in with the OAuth Account's credentials.
- Verify that the OpenID Module allows login to the user Portal of the Tenant Instance.