Making Integrations Server Specific
- 02 May 2025
- 2 Minutes to read
- Print
- DarkLight
Making Integrations Server Specific
- Updated on 02 May 2025
- 2 Minutes to read
- Print
- DarkLight
Article summary
Did you find this summary helpful?
Thank you for your feedback!
Overview
By parameterizing a REST Integration, Designers provide the ability to make Integration dynamic without having to create a new Integration each time. This parameterization allows an environment to be dynamic enough to point to the Development environment and provides the ability to change from one Production server to another. The following document demonstrates how to make an Integration more Server-specific via parameterization.
Additional Information
The following example involves the creation and use of a REST Integration in Decisions. For more information on REST Integration see REST Service Integration Overview.
Global Variables
One additional method to support specific servers is the use of Global Variables to keep data uniform.
Example
- From the Decisions Studio, navigate to System > Integrations > External Services. Then select ADD REST SERVICE.

- From the Add REST Service window, provide a relevant Service Name.
- Under Service URL, define the URL first by providing the protocol, and then by blocking off the URL with curly brackets, separating each element with periods (for this example "https://{Server}.{Domain}"). Additional Information on ParameterizationAs the Note on this window states, encapsulating a text value in curly brackets ({}) will turn that value into a Flow Input that can be dynamically changed via the Flow Designer. For this example, one Input will represent the desired Server, the other will represent the Domain.
This allows Designers to use the same Integration Step to navigate to different specific without having to create separate Services for each one.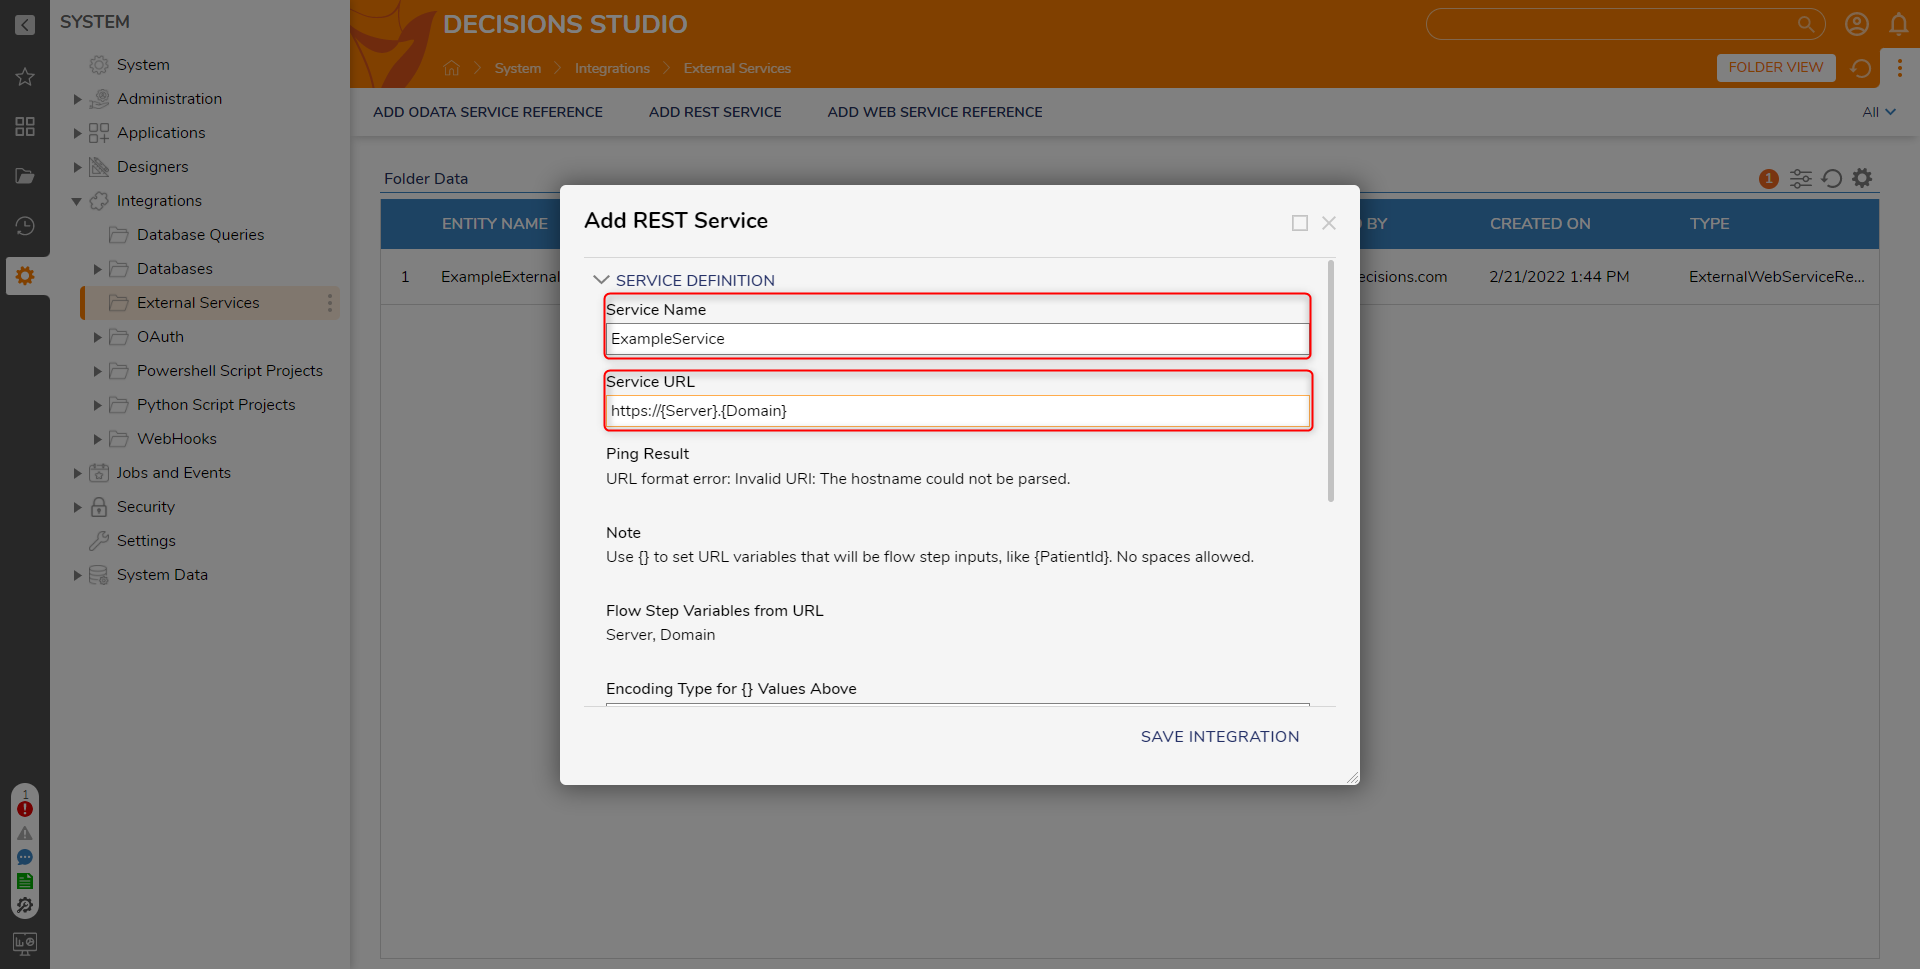
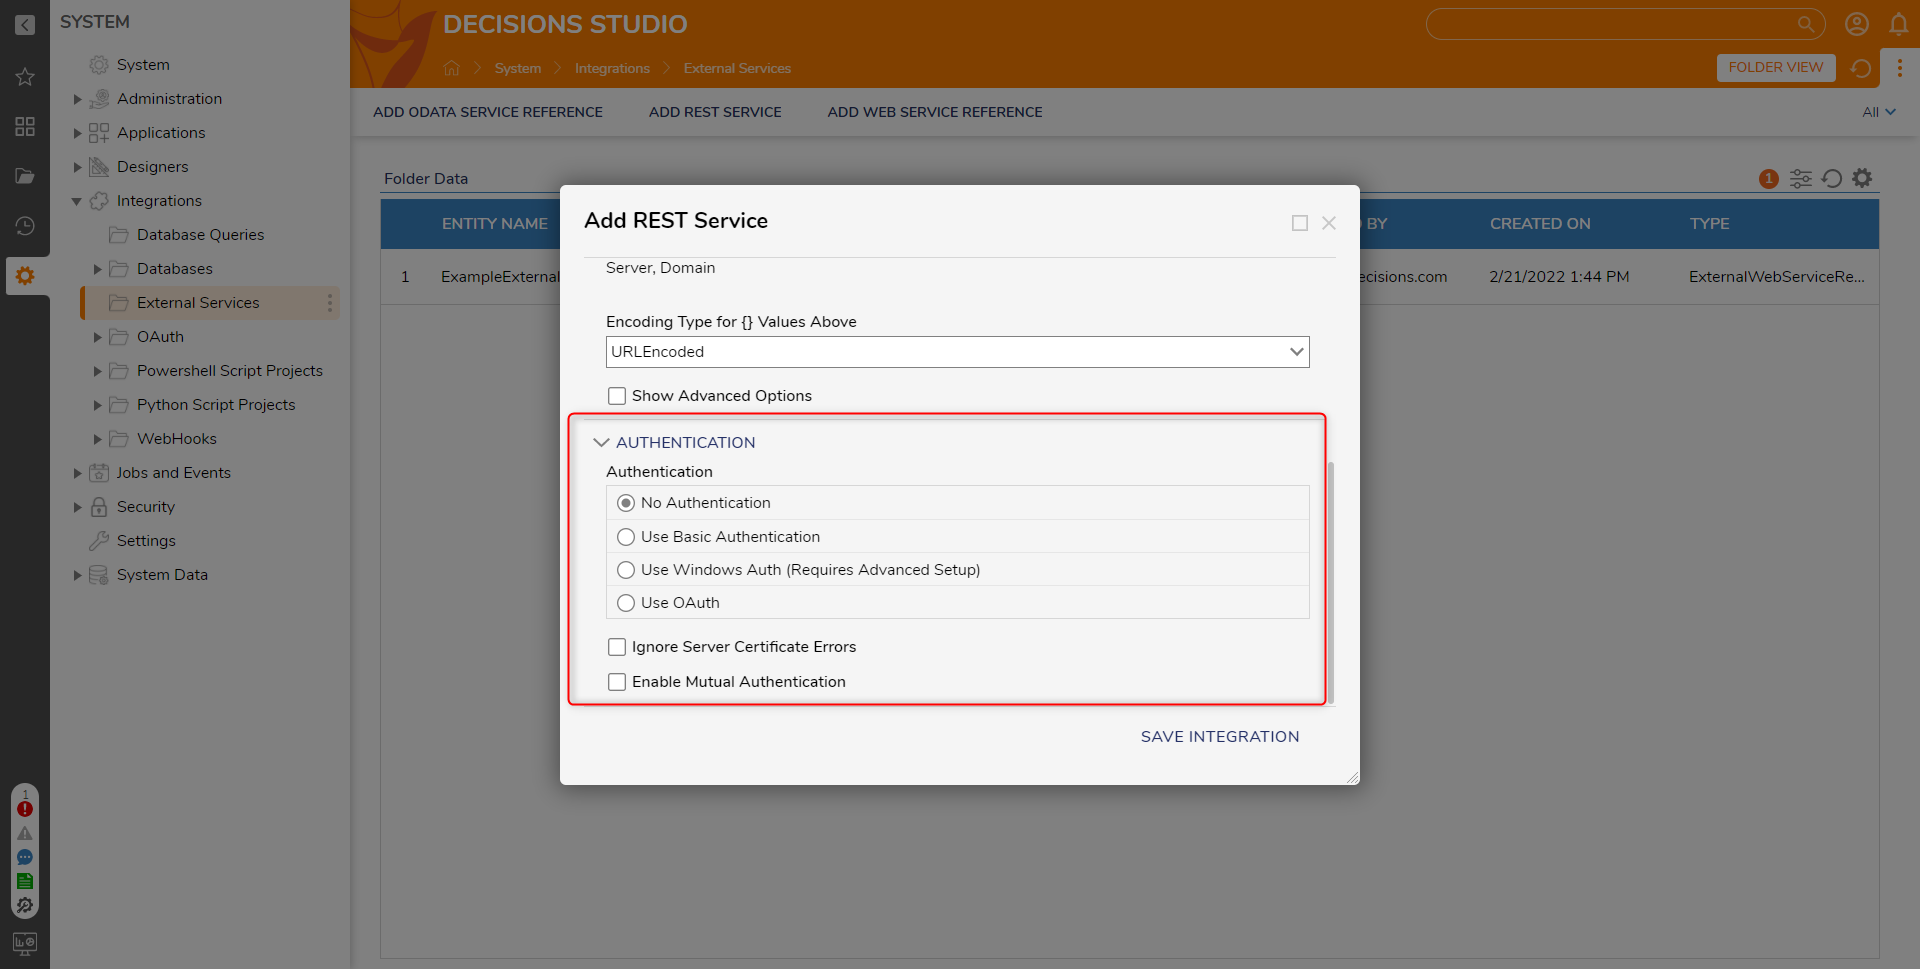
Under AUTHENTICATION > Authentication select/define the required Authentication type, then click SAVE INTEGRATION.
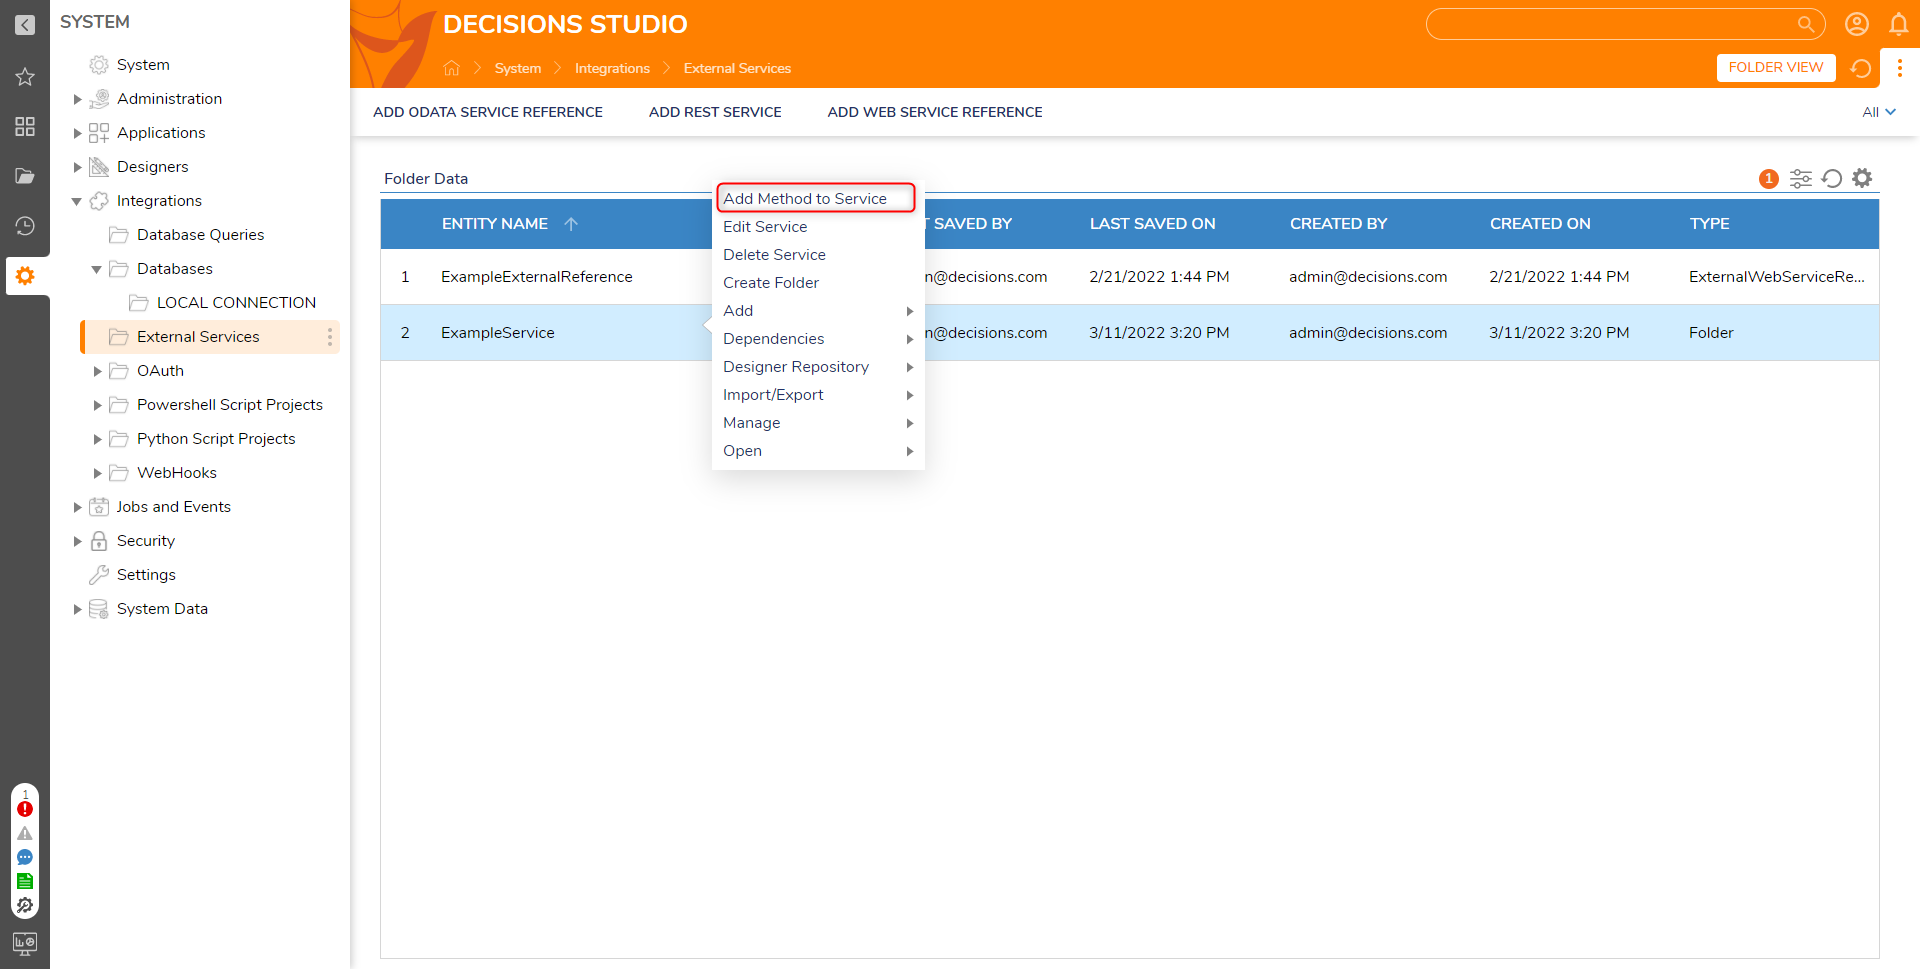
After the Service is added, right-click it and select Add Method to Service.
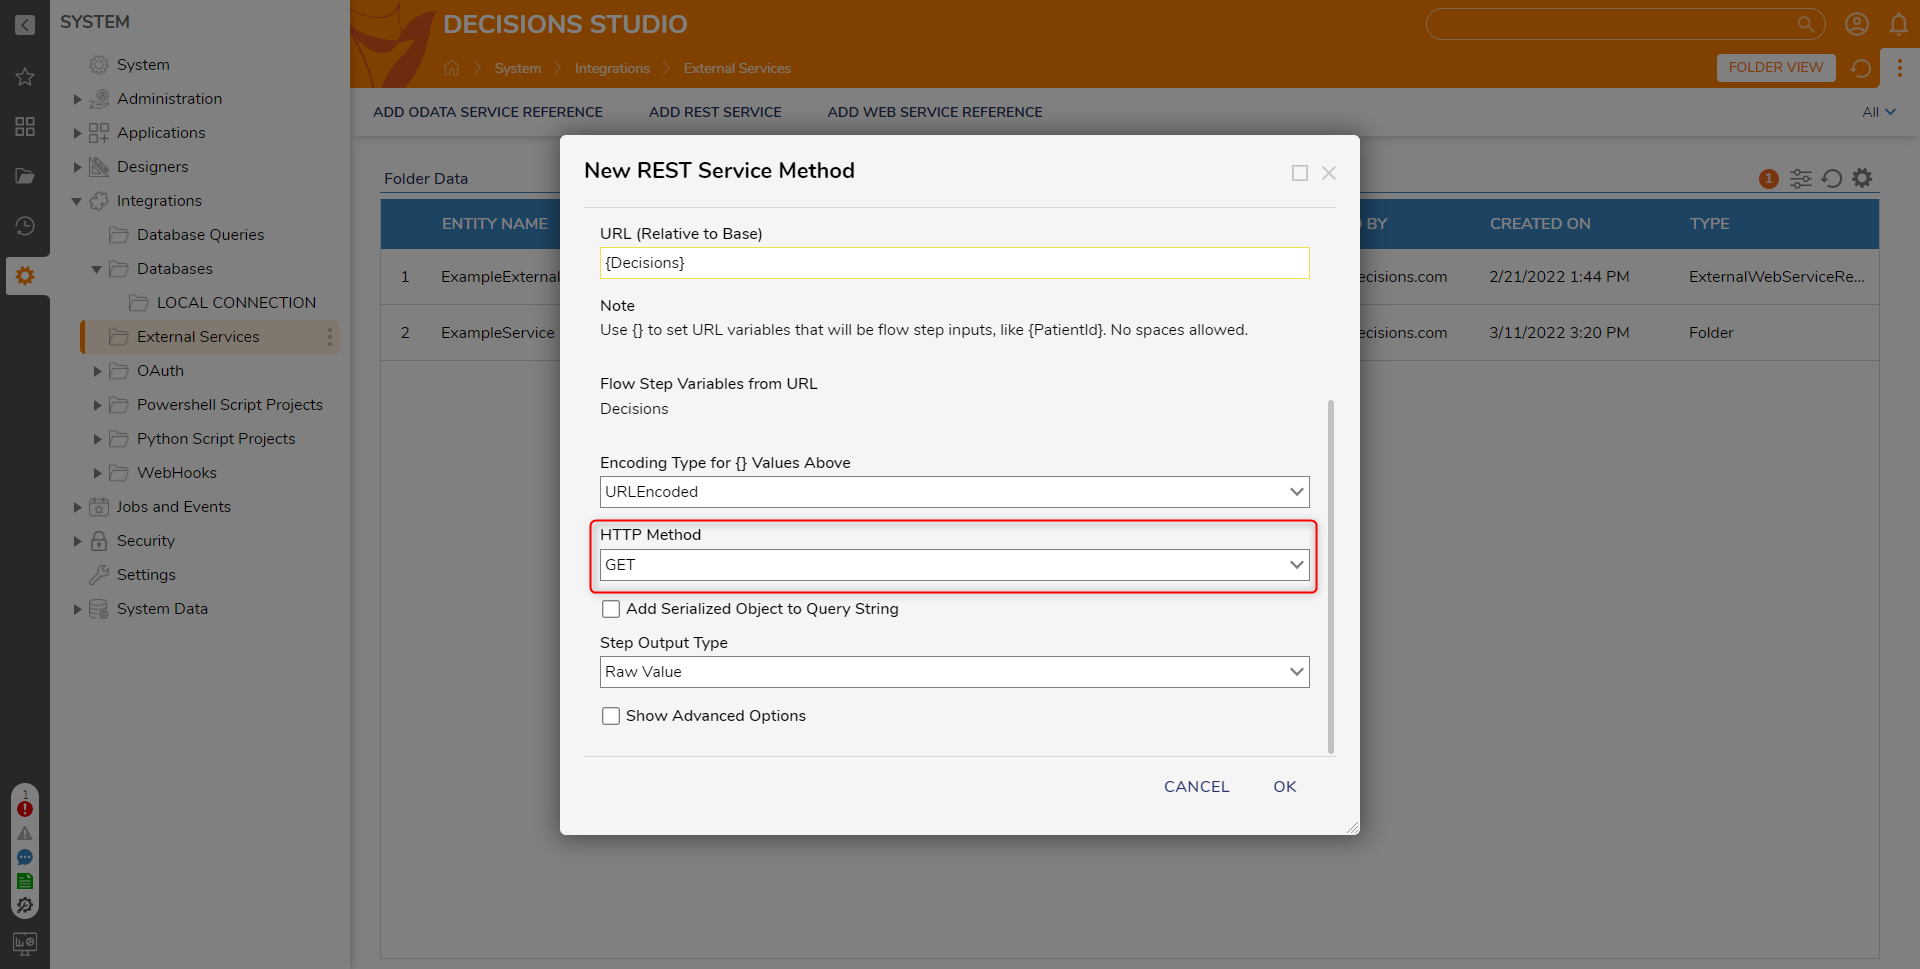
From the New REST Service Method window, provide a Name. Then in the URL box, provide a parameterized element (for example "{Decisions}").
About Method and URLAdding a Method to a REST Integration will create a Step for the Service within the Flow Designer.
Note that the URL value of the Method represents a path relative to the Service Base URL. This value would follow a forward slash in the typical URL configuration.
For example, in the URL https://support.decisions.com/decisions, the path "decisions" at the end of the entire URL would be represented by this value.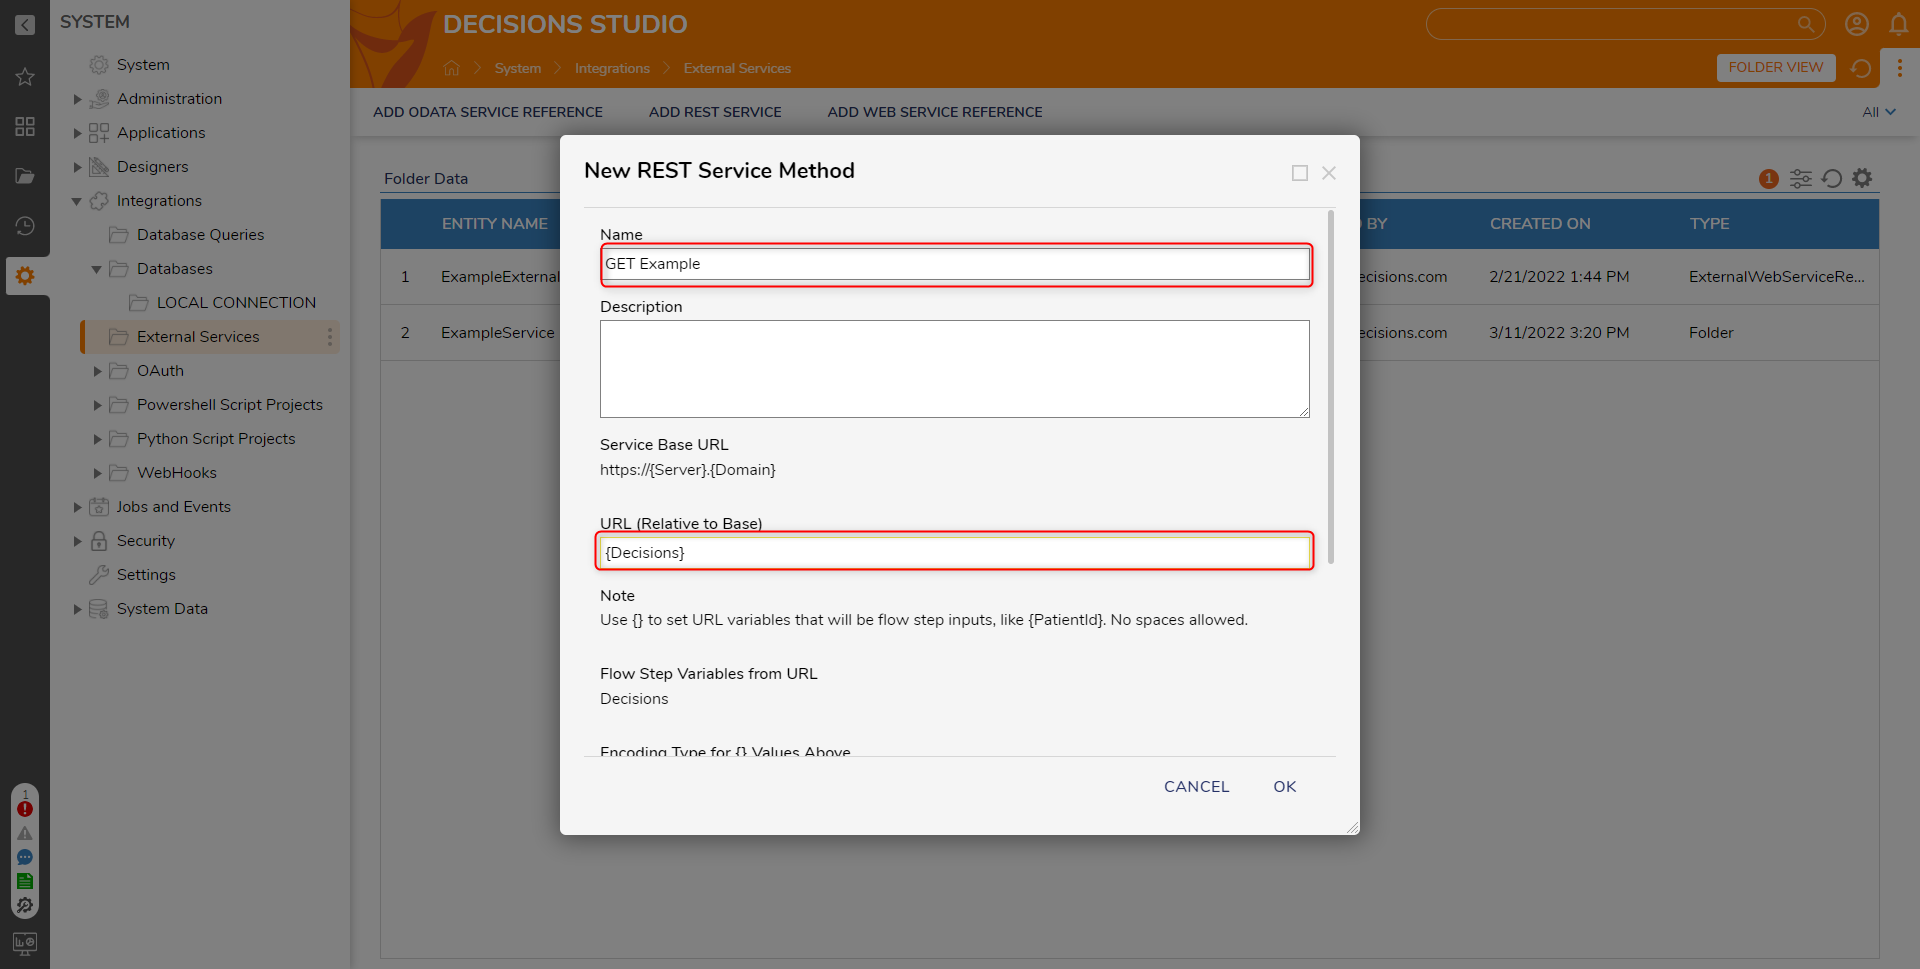
Select the desired HTTP Method, then click OK.
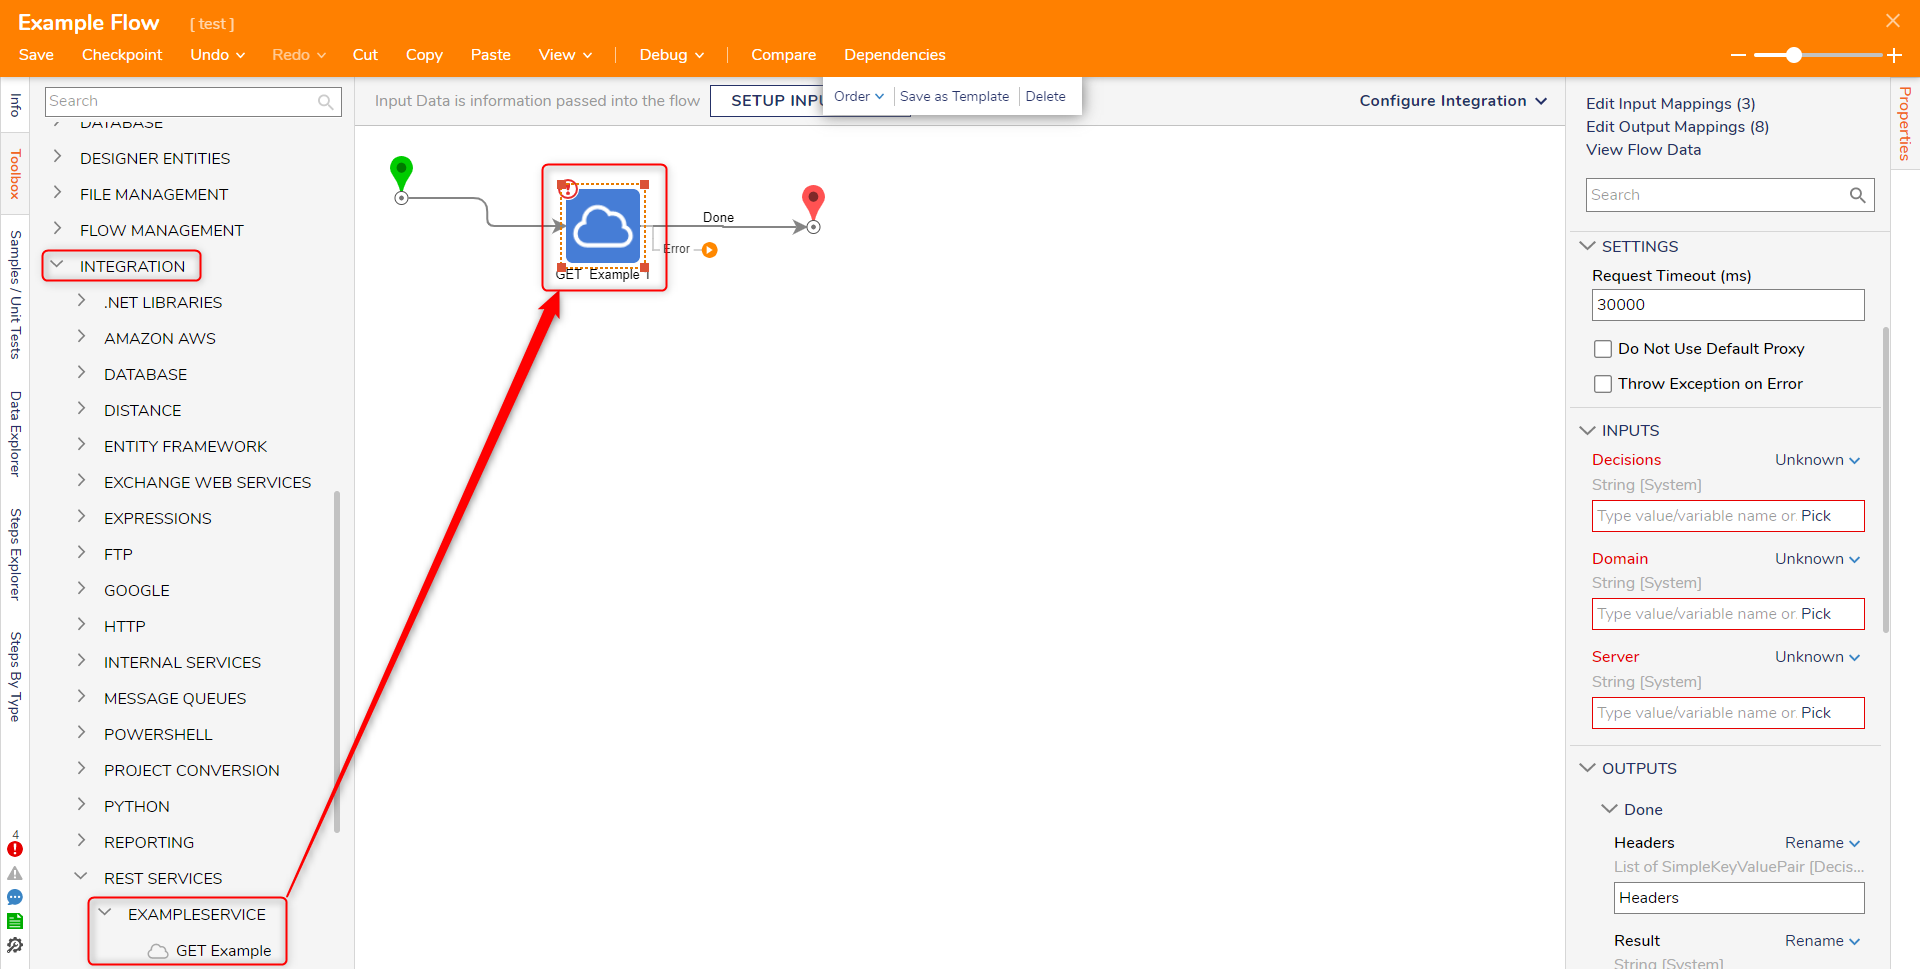
After the Method is successfully added, navigate to a Designer Project, select CREATE FLOW, then CREATE a new Flow.
From the Flow Designer, navigate to Toolbox > INTEGRATION > REST SERVICES > [NAME OF SERVICE], and attach the defined Method step to the Start step.
From the Properties tab of the Rest Method, Constant map the desired Domain, Server, and URL (Path) values. Then, connect the Done and Error paths to the End step.
Additional Information on InputsIf the Method calls for any additional Inputs (such as via POST), provide the respective value.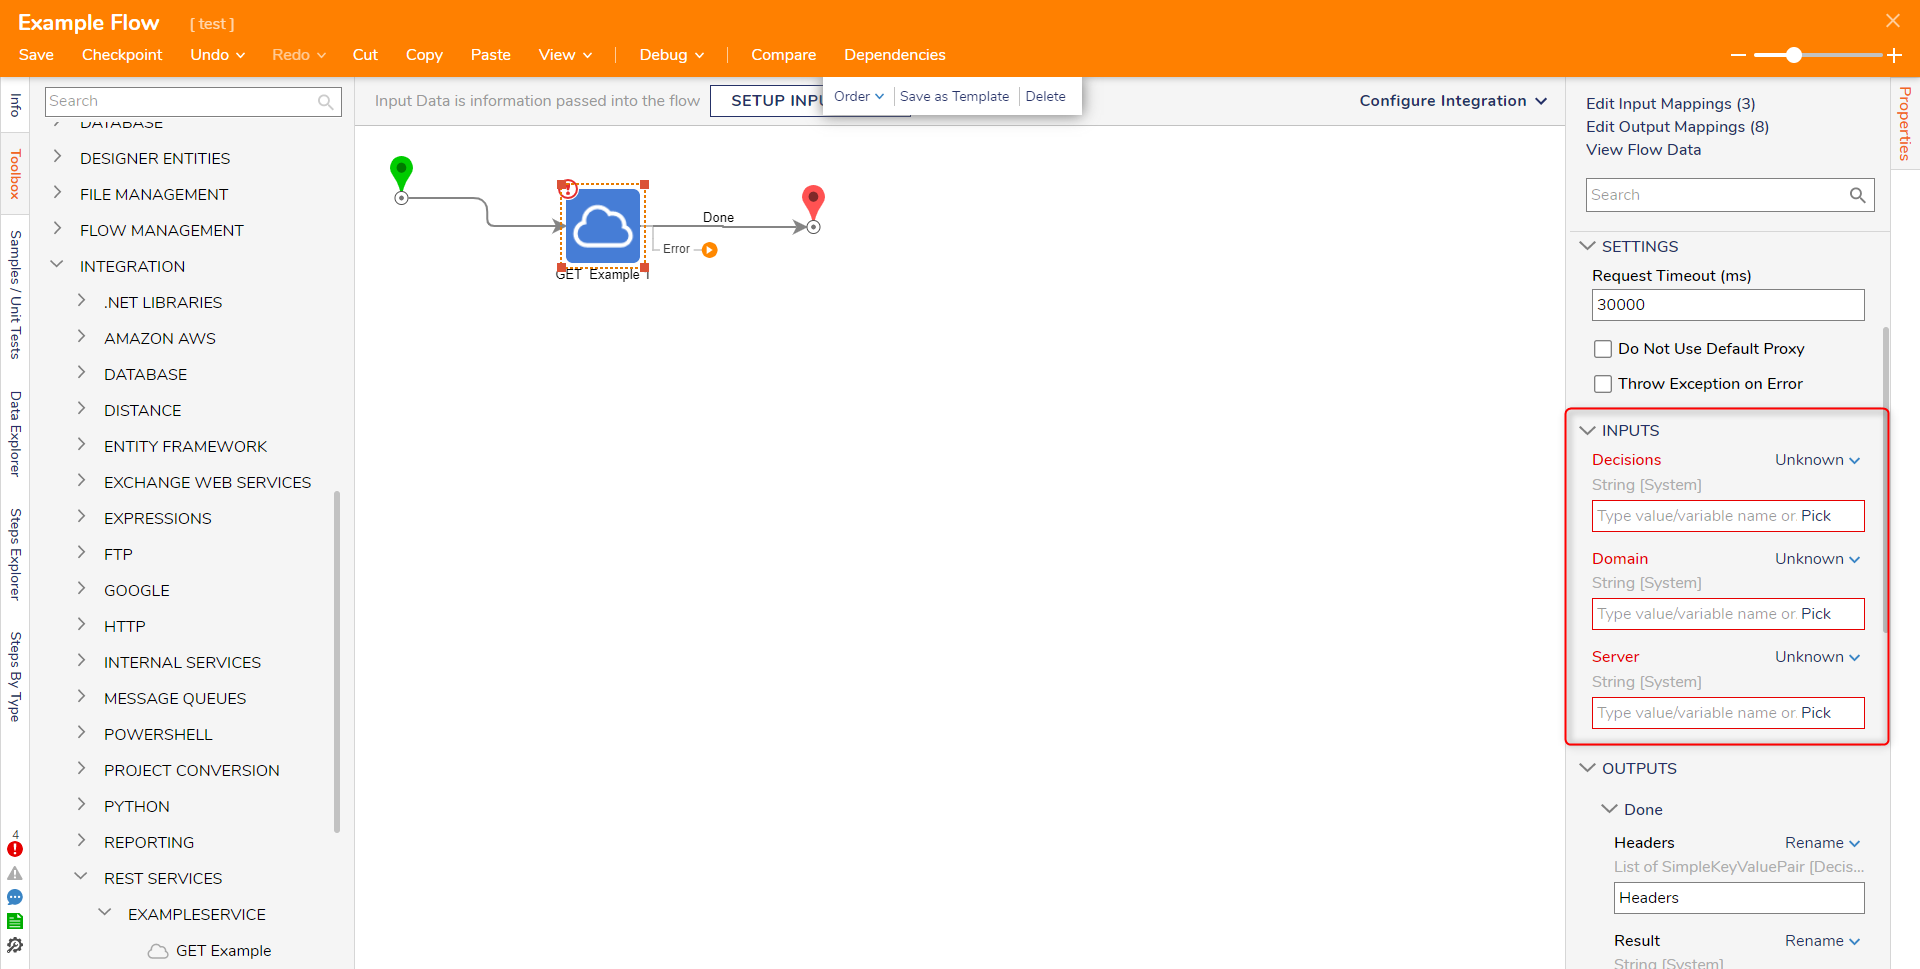
Save the Flow, then close via X.
Service ReuseUpon future uses, due to the parameterization of the URL for the REST Service Method, this step may be utilized in different Flows and mapped to navigate to different Servers/Domains/URL Paths in an environment.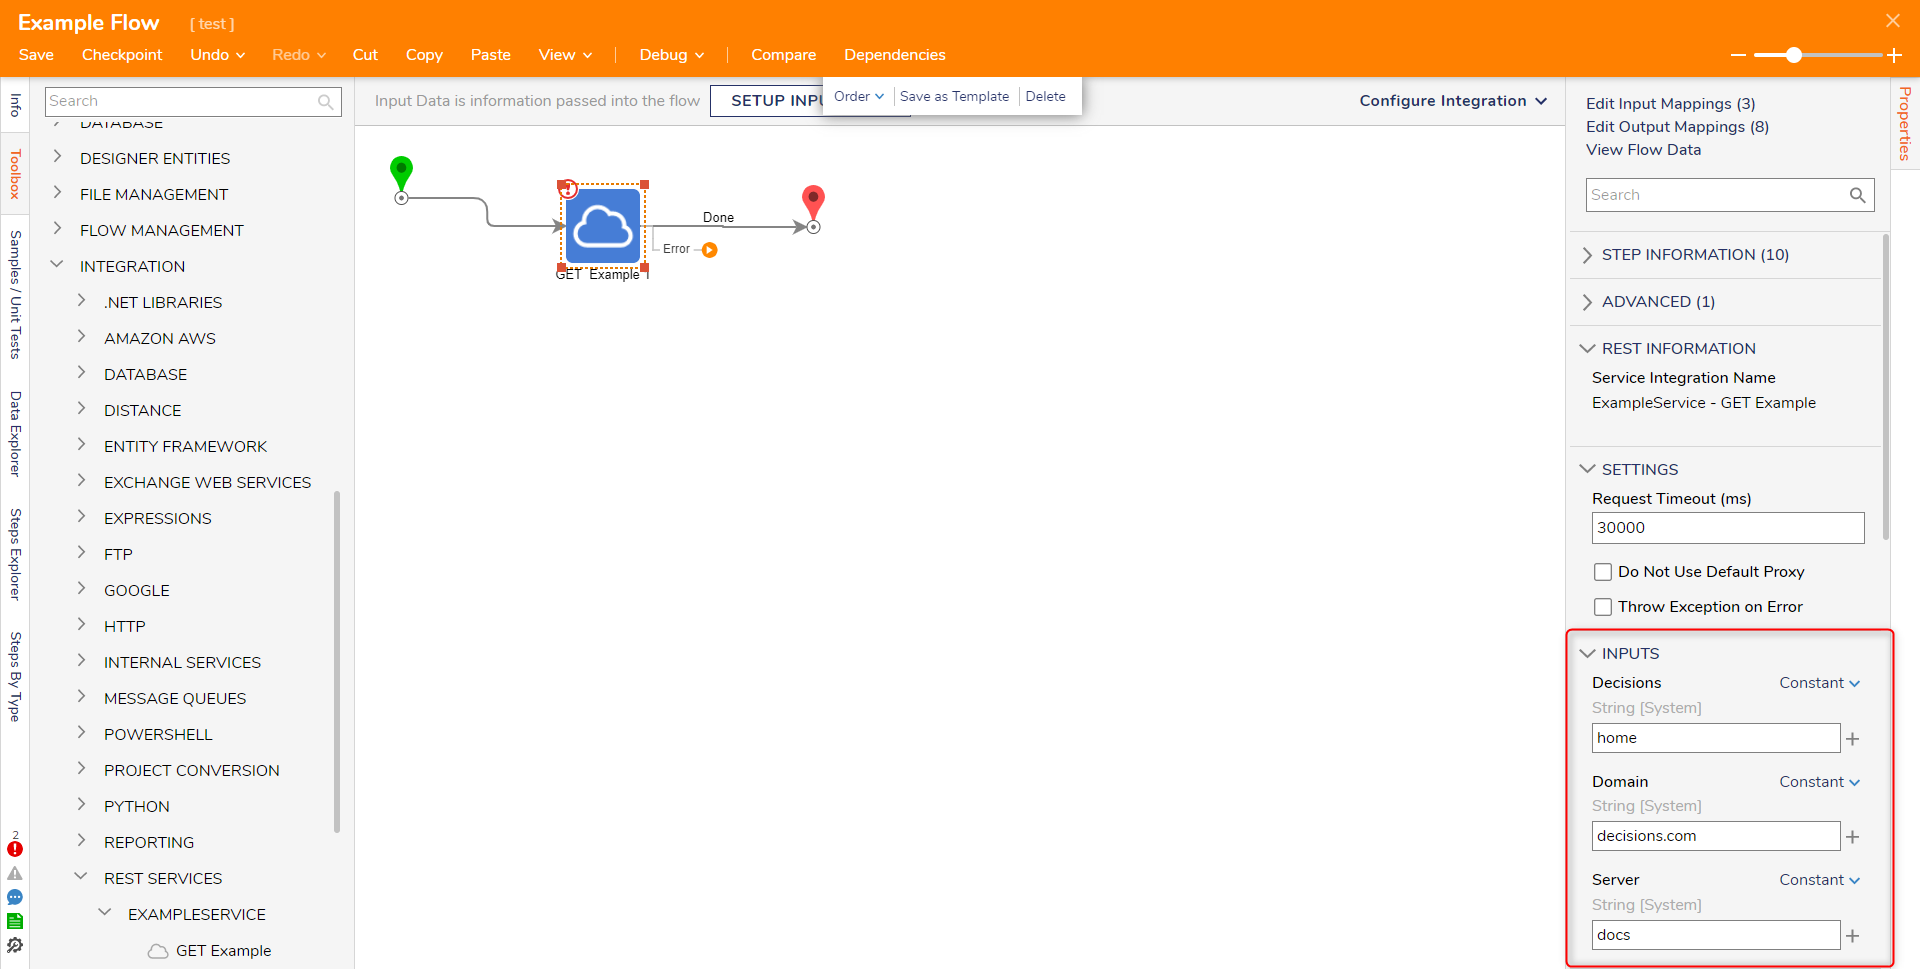 For further information on Integrations, visit the Decisions Forum.


Was this article helpful?