Enabling a Guest Account
- 03 Jun 2022
- 1 Minute to read
- Print
- DarkLight
Enabling a Guest Account
- Updated on 03 Jun 2022
- 1 Minute to read
- Print
- DarkLight
Article summary
Did you find this summary helpful?
Thank you for your feedback!
Overview
In the event that an Admin wishes to provide Portal access to non-Portal end users so they may engage with a Flow, Form, etc., the Admin may enable a guest account.
This is accomplished through a series of three steps:
- Activation of the Guest Account
- Applying the Can Use Portal Permission
- Enabling the Guest Account
Once the Guest account is active, a GUEST user will be seen in the Accounts list, and Forms will be provided with the "Assign to Guest" option available for doing the assignment. The following document demonstrates how to follow the three-step Guest Account Process.
Activate Guest Account
- Navigate to the System folder then open Security > Accounts.
- Locate and access the GUEST Account's action menu.
- Select Manage > Activate GUEST.


Can Use Portal
Once the GUEST Account has been activated, the Can Use Portal property must be enabled.
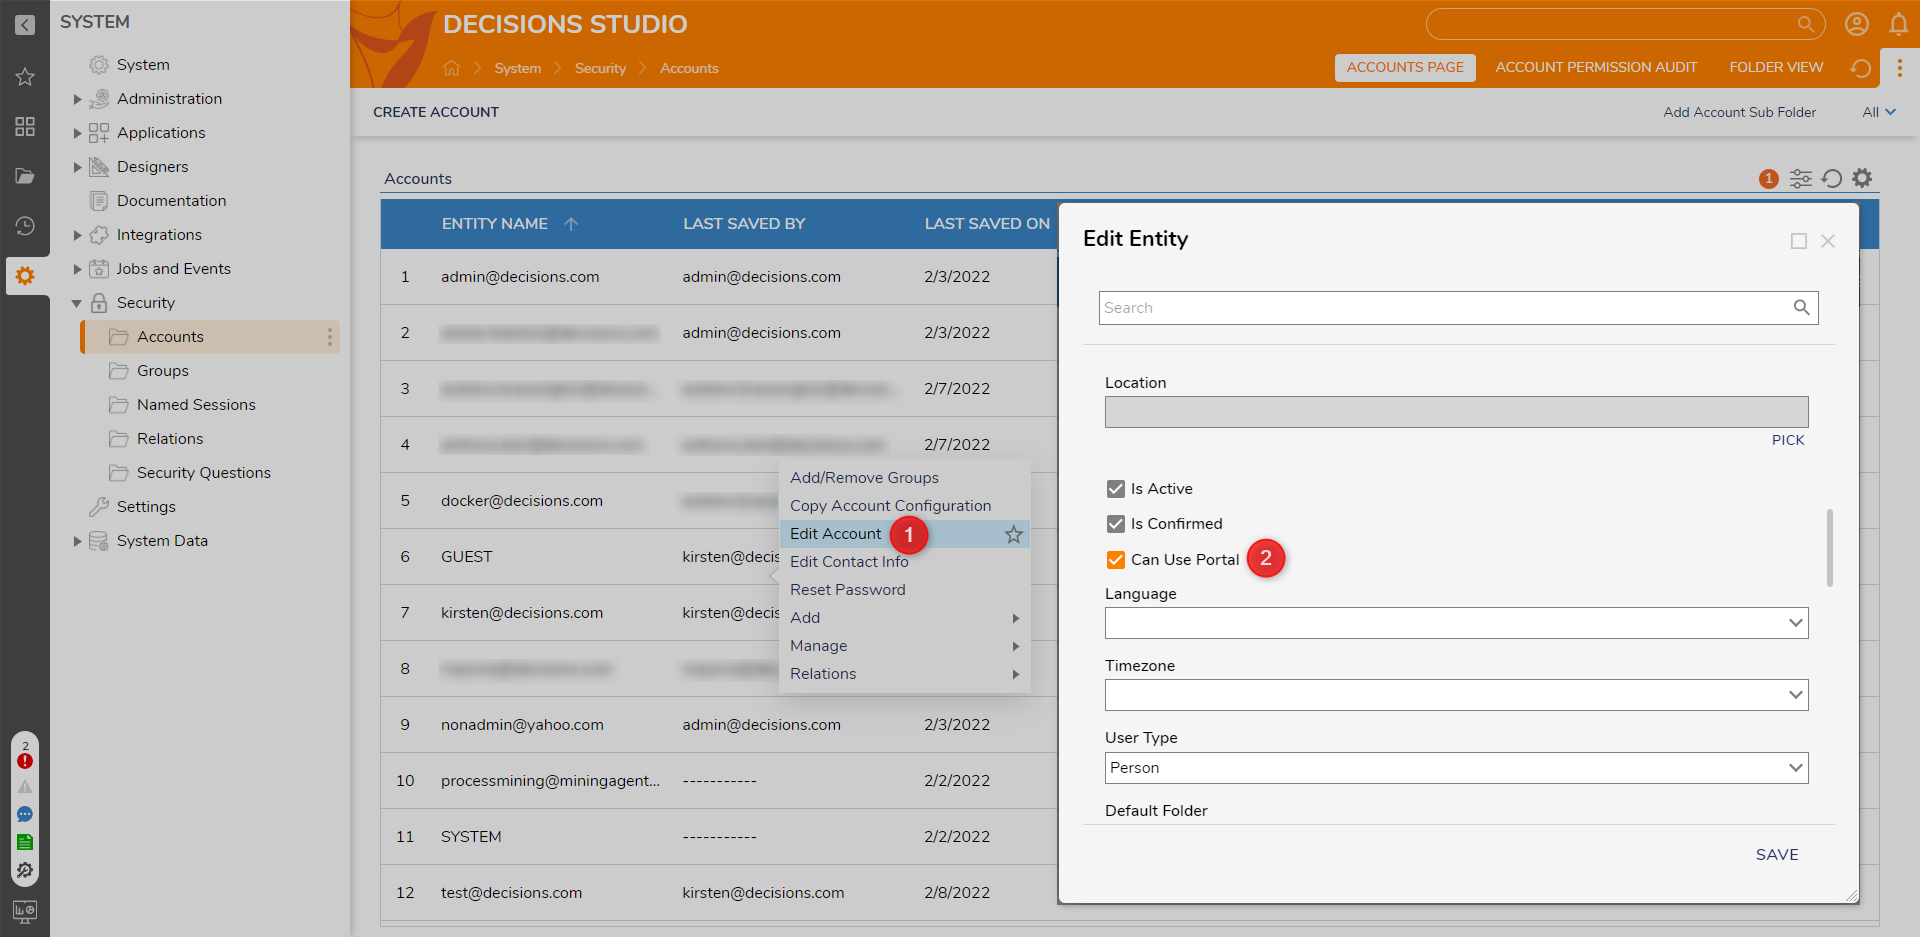
- From System > Security > Accounts, right-click the GUEST Account and select Edit Account.
- From the Edit Entity window, under PERSONAL INFORMATION, enable Is Active, Is Confirmed, and Can Use Portal. Then, click SAVE.

Enable Guest Account
The final step in setting up a Guest Account is to toggle the Enable Guest Account Setting.
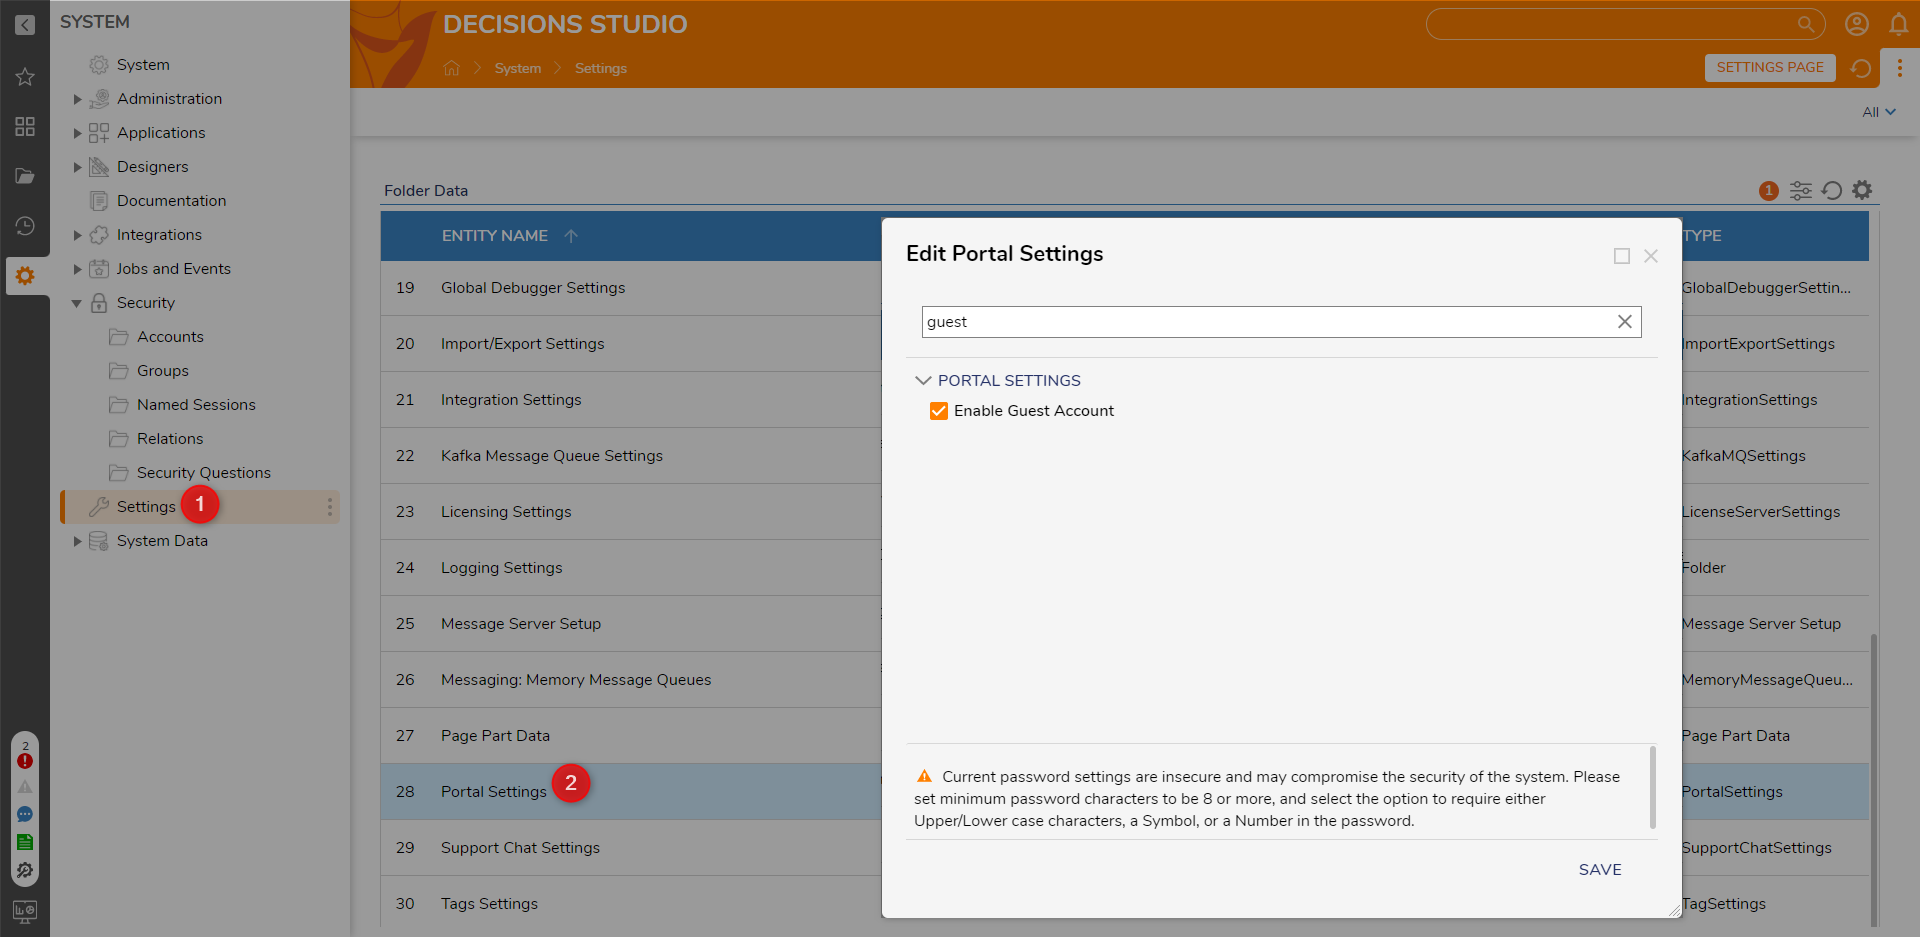
- Navigate to System > Settings. Then, right-click Portal Settings, and select Edit.
- From the Edit Portal Settings dialog, search for and enable Enable Guest Account under the PORTAL SETTINGS category. Then click SAVE.
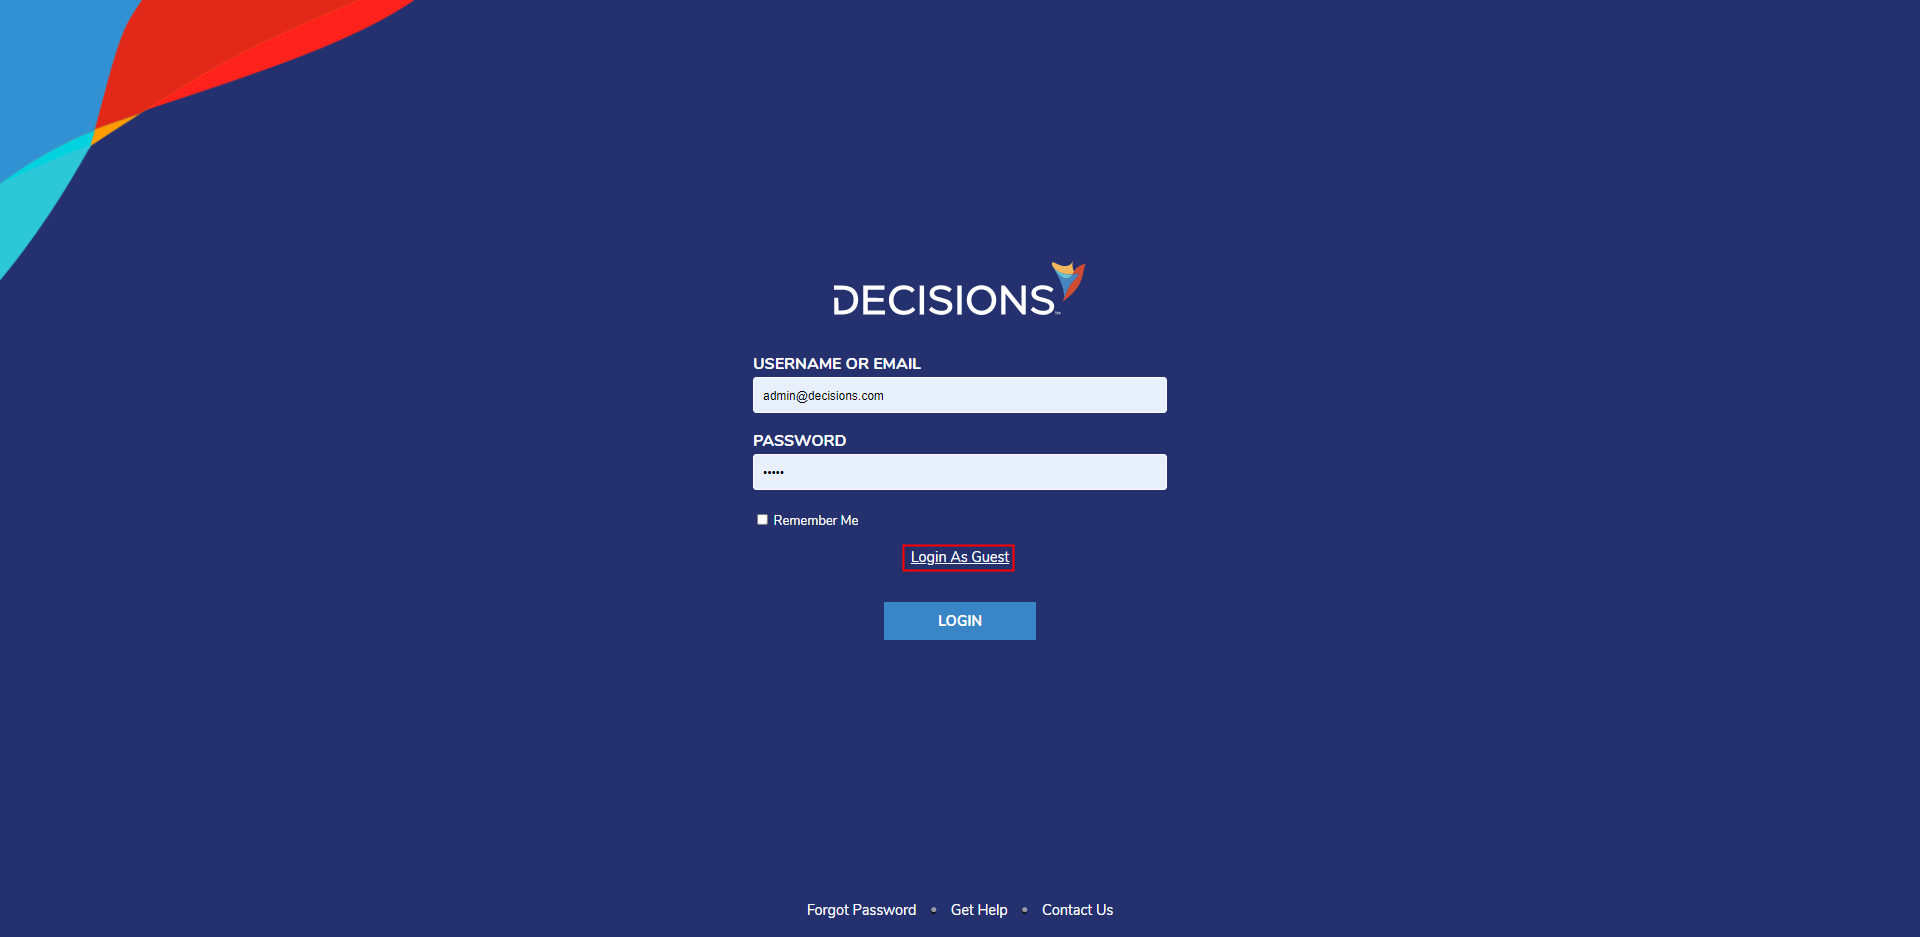
- Once the Setting has been enabled, log out of the Decisions Portal via the Logout action from the Account (person icon in the top right corner) Action Menu.
- From the Login screen, select Login as Guest.
- Verify that the Guest Account has successfully logged into the User Portal.


Was this article helpful?