Overview
Designer Projects are folders that store all objects such as other Folders, Designer Projects, and Designer Elements.
They are visible in the Studio by expanding the Folder  icon in the Sidebar but are not visible in the Portal.
On the other hand, Folders are visible in the Portal, but cannot create any Designer Elements since they are intended to store data, documents, and comments to prevent cluttering a Designer Project.
Example
There are two methods to create a Designer Project in the Decisions Studio:
- Clicking the plus icon to the right of FOLDERS atop the Folder Tree.
- Navigating the Action Menu on an existing Designer Project.
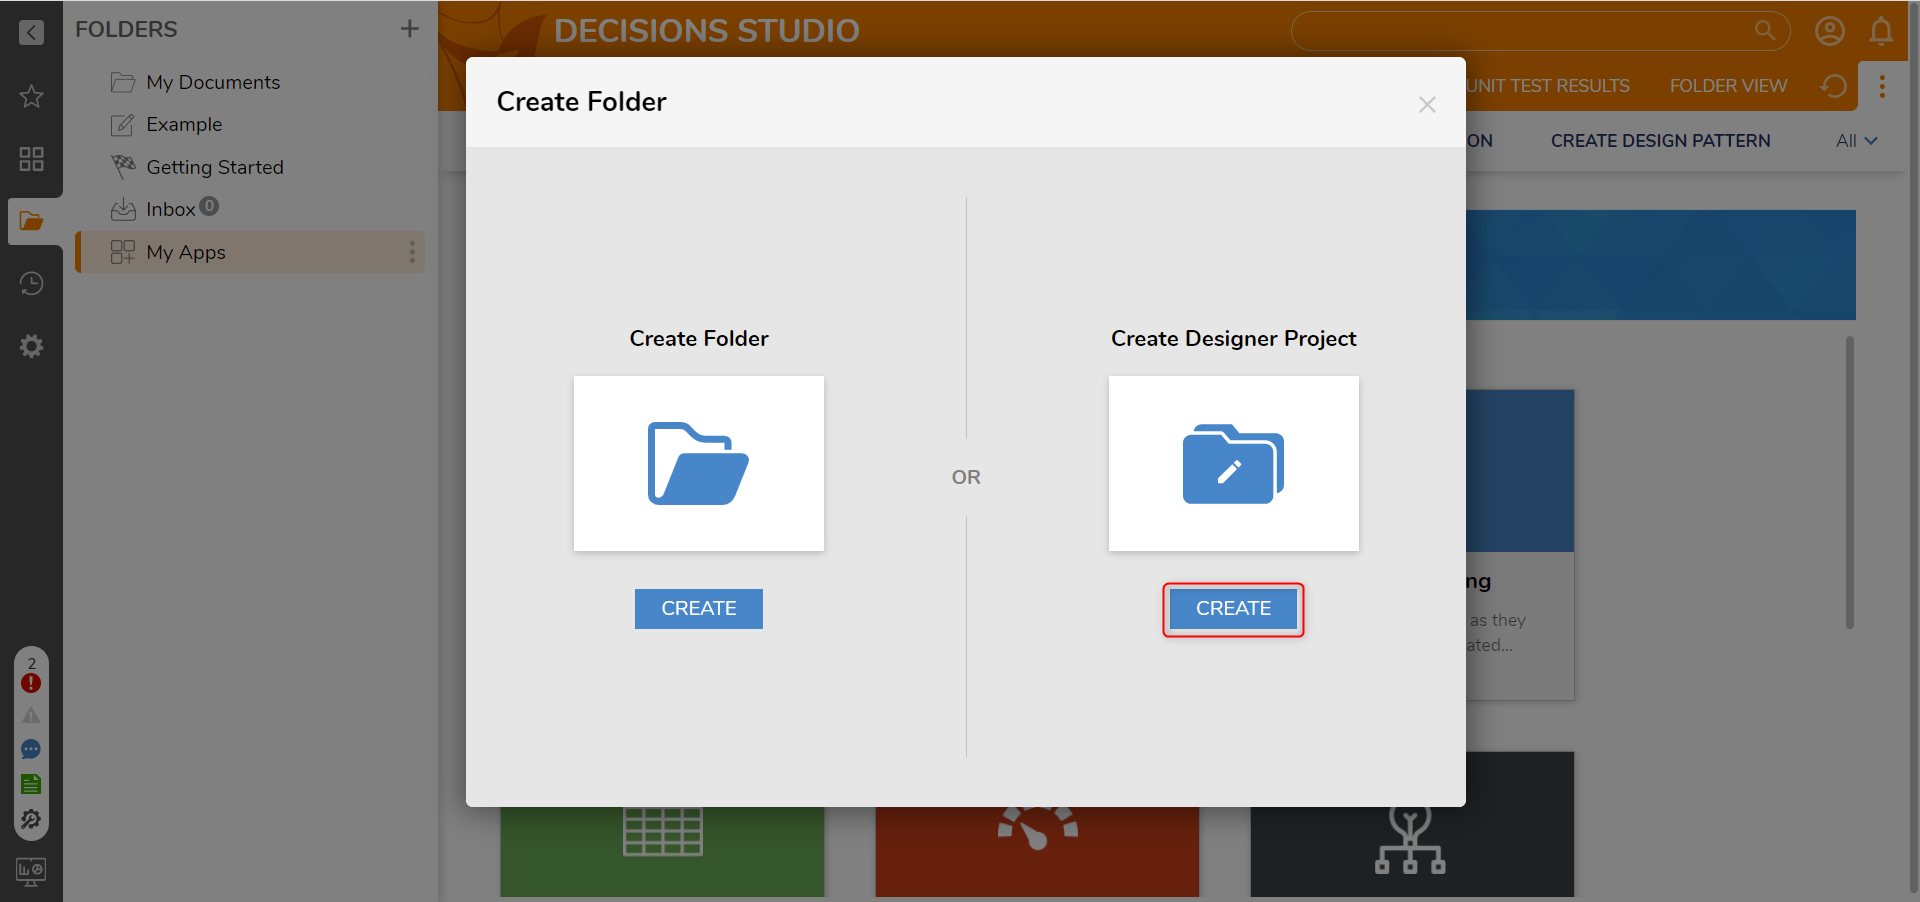
- In the Studio, right-click an existing Designer Project (ex: My Apps) in the Folder Tree. From the Action Menu options, select Create Folder.

- In the Create Folder window, click CREATE under Create Designer Project.
- In the Create Designer Project panel, declare a Name (ex: New Designer Folder).
To place the new Designer Folder at the root of the Studio Folder Tree, check the At Root option. Leaving it unchecked will place it inside the existing Folder.
To prevent users from creating root folders, disable the Show Add Root Folder Button in the Root Folder section of the Portal Settings.
Click CREATE to finalize.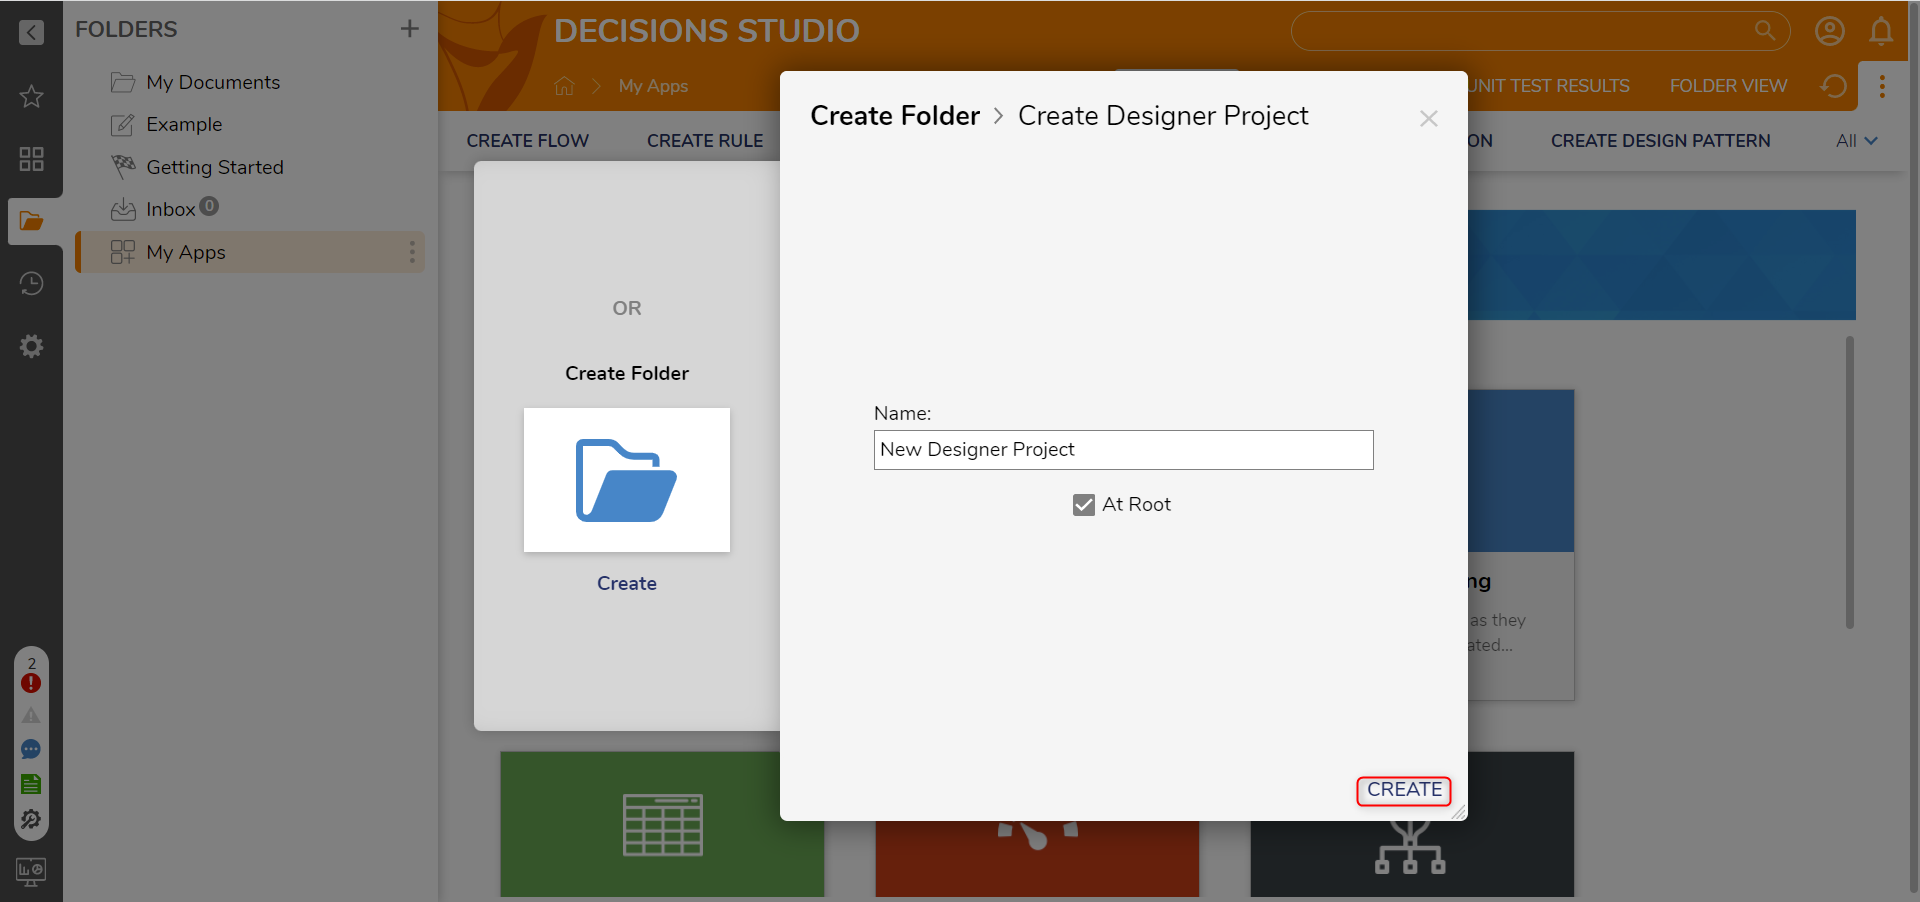
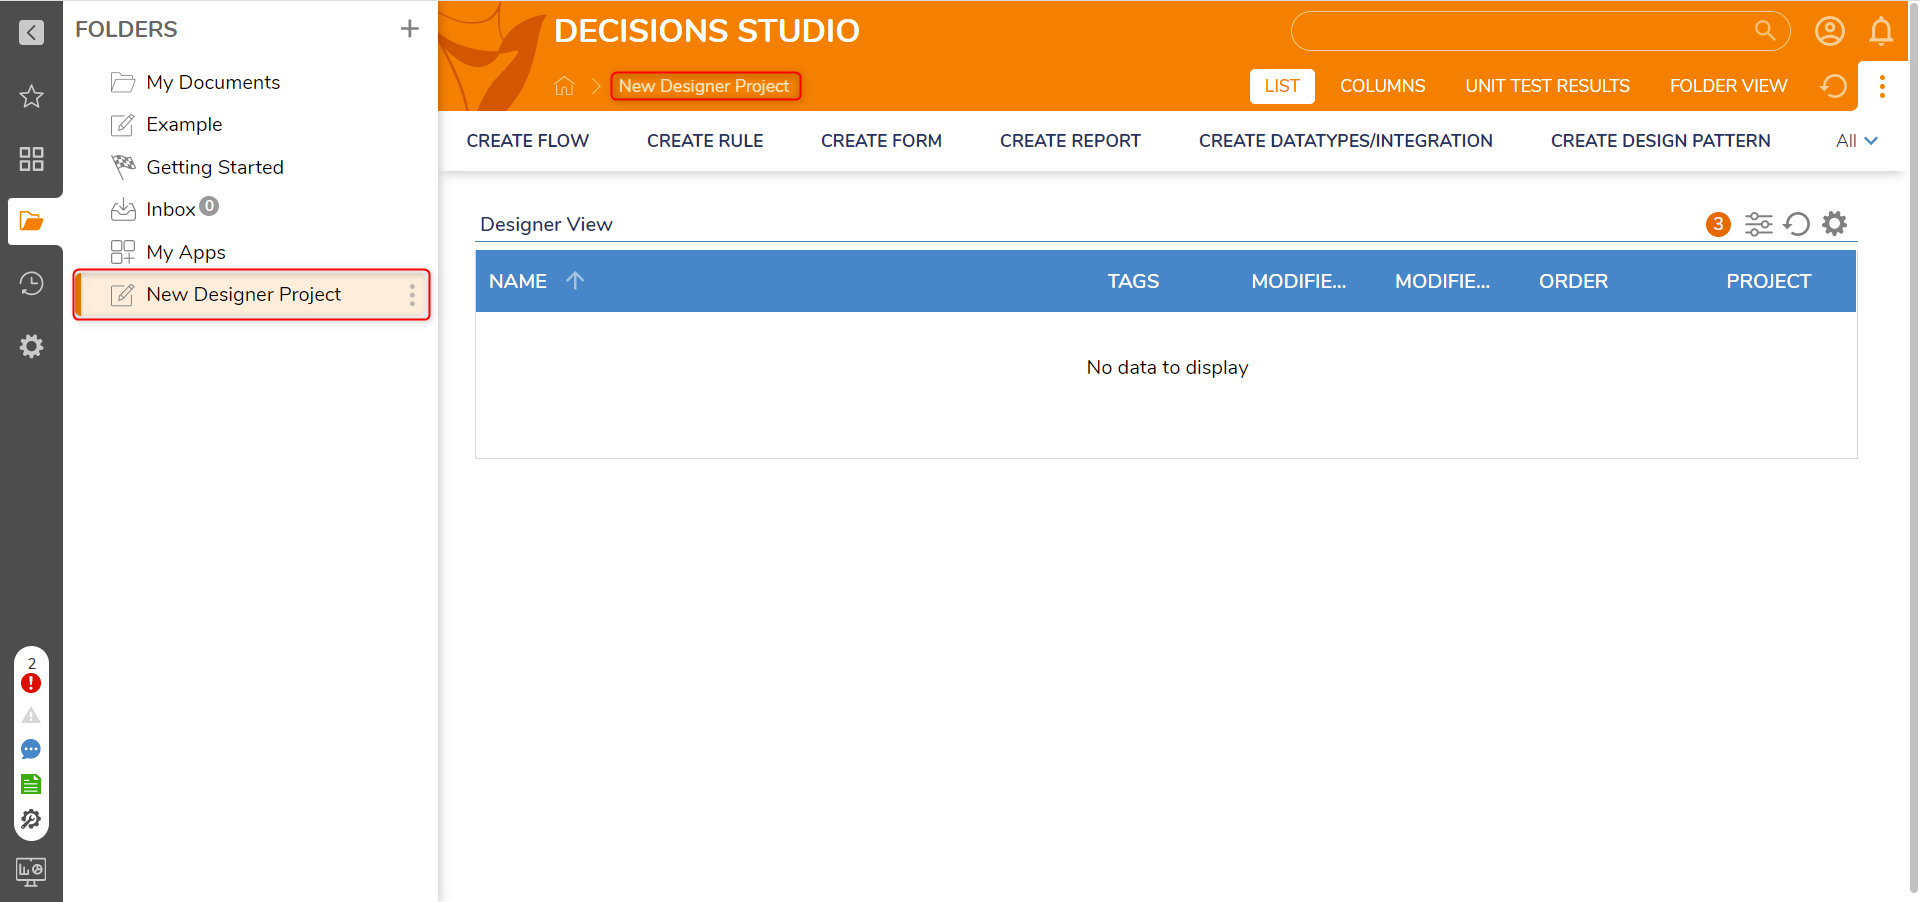
- The new Designer Project will be displayed in the specified location.
Copy a Designer Project
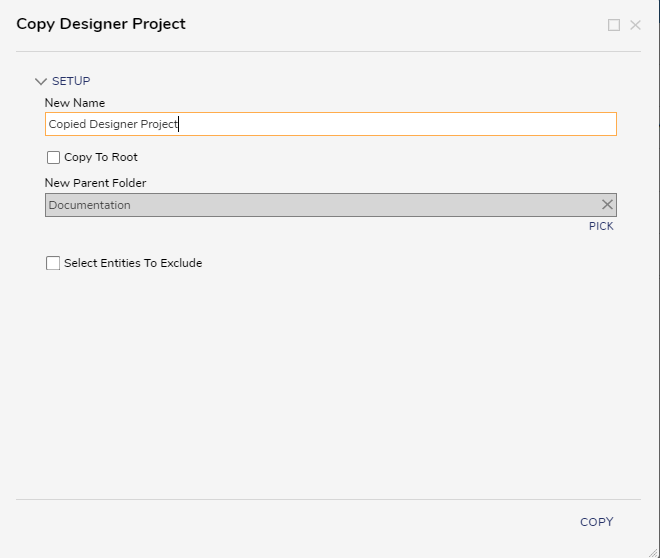
- Right-click any Designer Project from the Folder Tree. When the Action Menu appears, navigate to Manage > Copy Designer Project.

- The Copy Designer Project window appears with several configuration options. At the very minimum, a new name must be provided for the copy.
Select COPY once all desired configurations are made.Setting Name Description New Name Name of the new copy Designer Project Copy To Root Toggles placing the copy Designer Project at the root level in the Folder Tree. New Parent Folder Allows selection of the copy Designer Project's new Folder it will reside within. Select Entities To Exclude Toggles excluding specific items from the copy Designer Project. Exclude Items Allows selection of which item(s) the copy Designer Project will not retain. - A copy of the original Designer Project is then created at the desired location. The copied Designer Folder and all its copied contents are their own entities with their own unique IDs.
Deleting a Designer Project
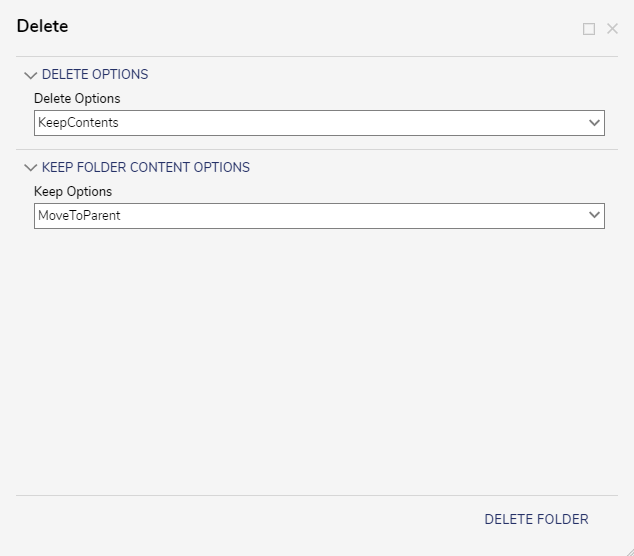
Deleting a Designer Project prompts selection between two different methods of deletion.
- Complete - Deletes both the Designer Project and all of its items. Deleted items are not visible in the default Folder Report, but are recoverable.
- Keep Contents - Deletes just the Designer Project. When selected, its items relocate either to a parent Designer Project or a specified Designer Project in the instance.
Best Practices
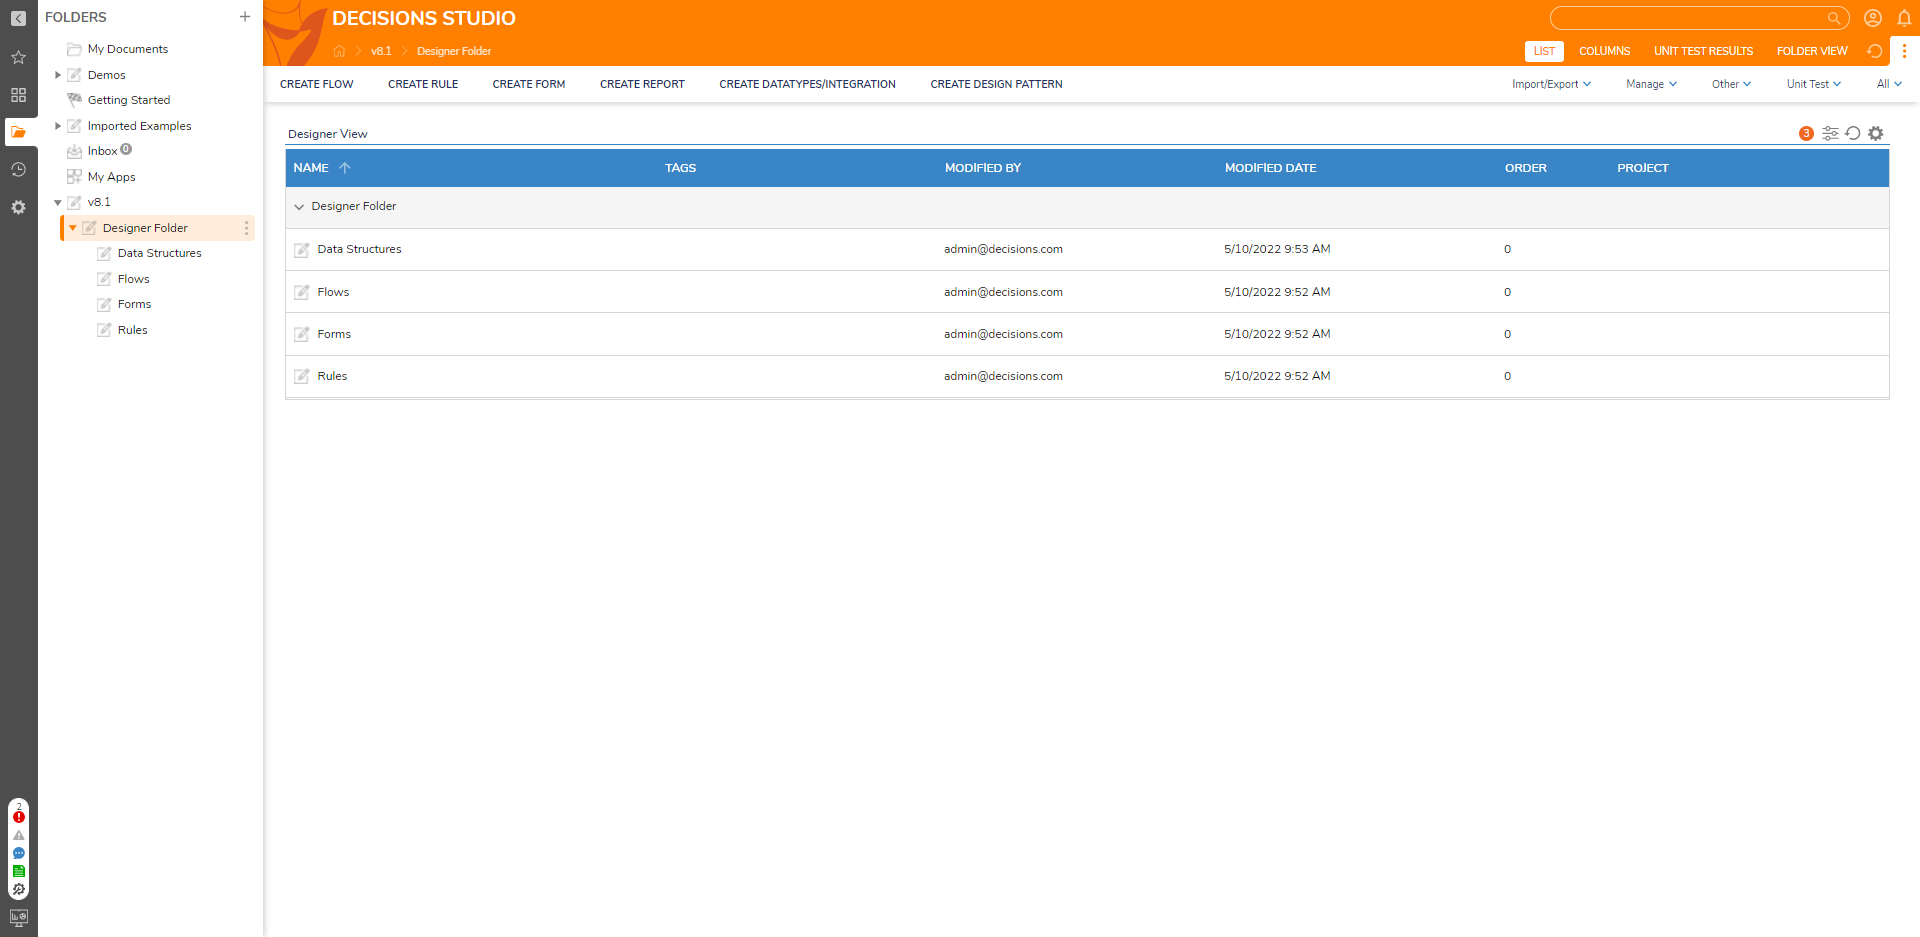
Within a Designer Project, it is a best practice to populate it with child Designer Projects for each Designer Element.
For example, a parent Designer Project may contain Designer Projects for each Designer Element the process intends to use with names such as 'Data Structures' 'Flows', 'Forms', and 'Rules'.