Overview
The Date Range Filter is a feature that allows custom Date ranges to be applied in real-time by the viewer of a Report in Decisions. A user applies this filter from a Report Viewer Page Component at runtime, allowing them to change the data displayed via Date. The following document demonstrates applying and utilizing a Date Range Filter on Pages in Decisions.
Example
- CREATE a Page that contains a Report Viewer Control.
- From the Properties of the Report Viewer, select PICK OR CREATE DEFAULT REPORT, then CREATE a new Report.
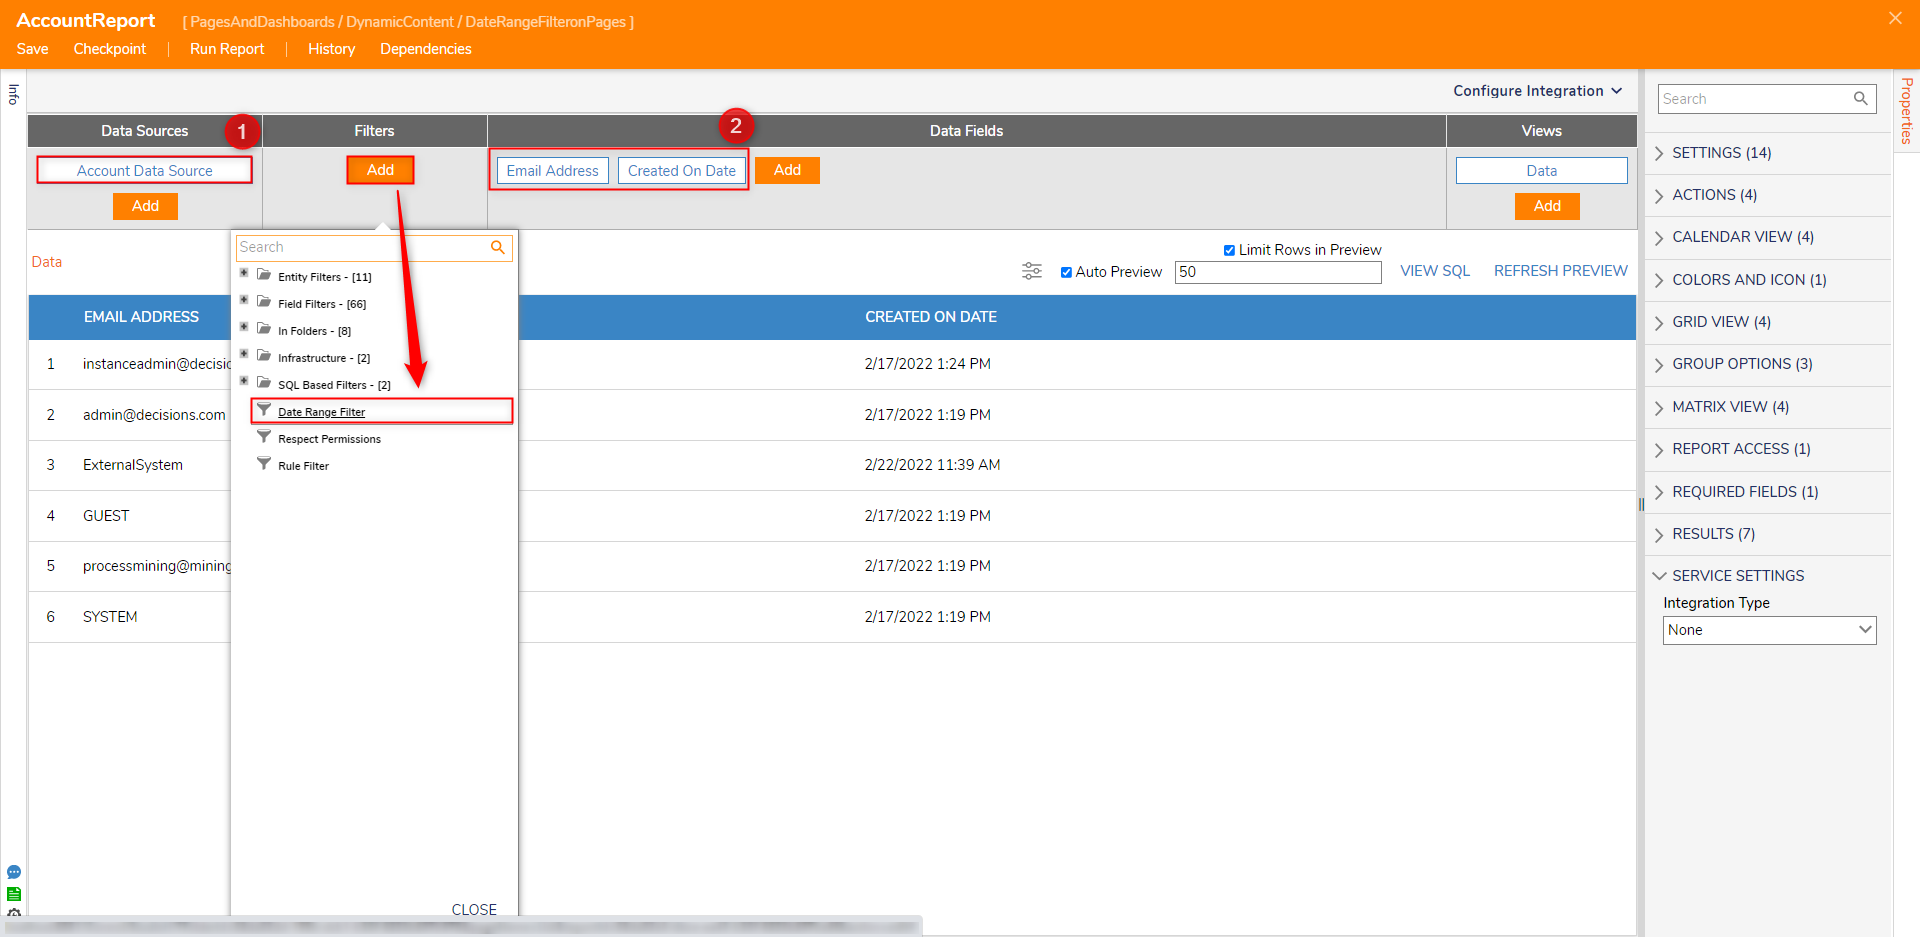
- From the Report Designer, design a Report that utilizes the Account Data Source.
- Under Data Fields, Add Email Address and Created On Date. Then, under Filters, Add a Date Range Filter.
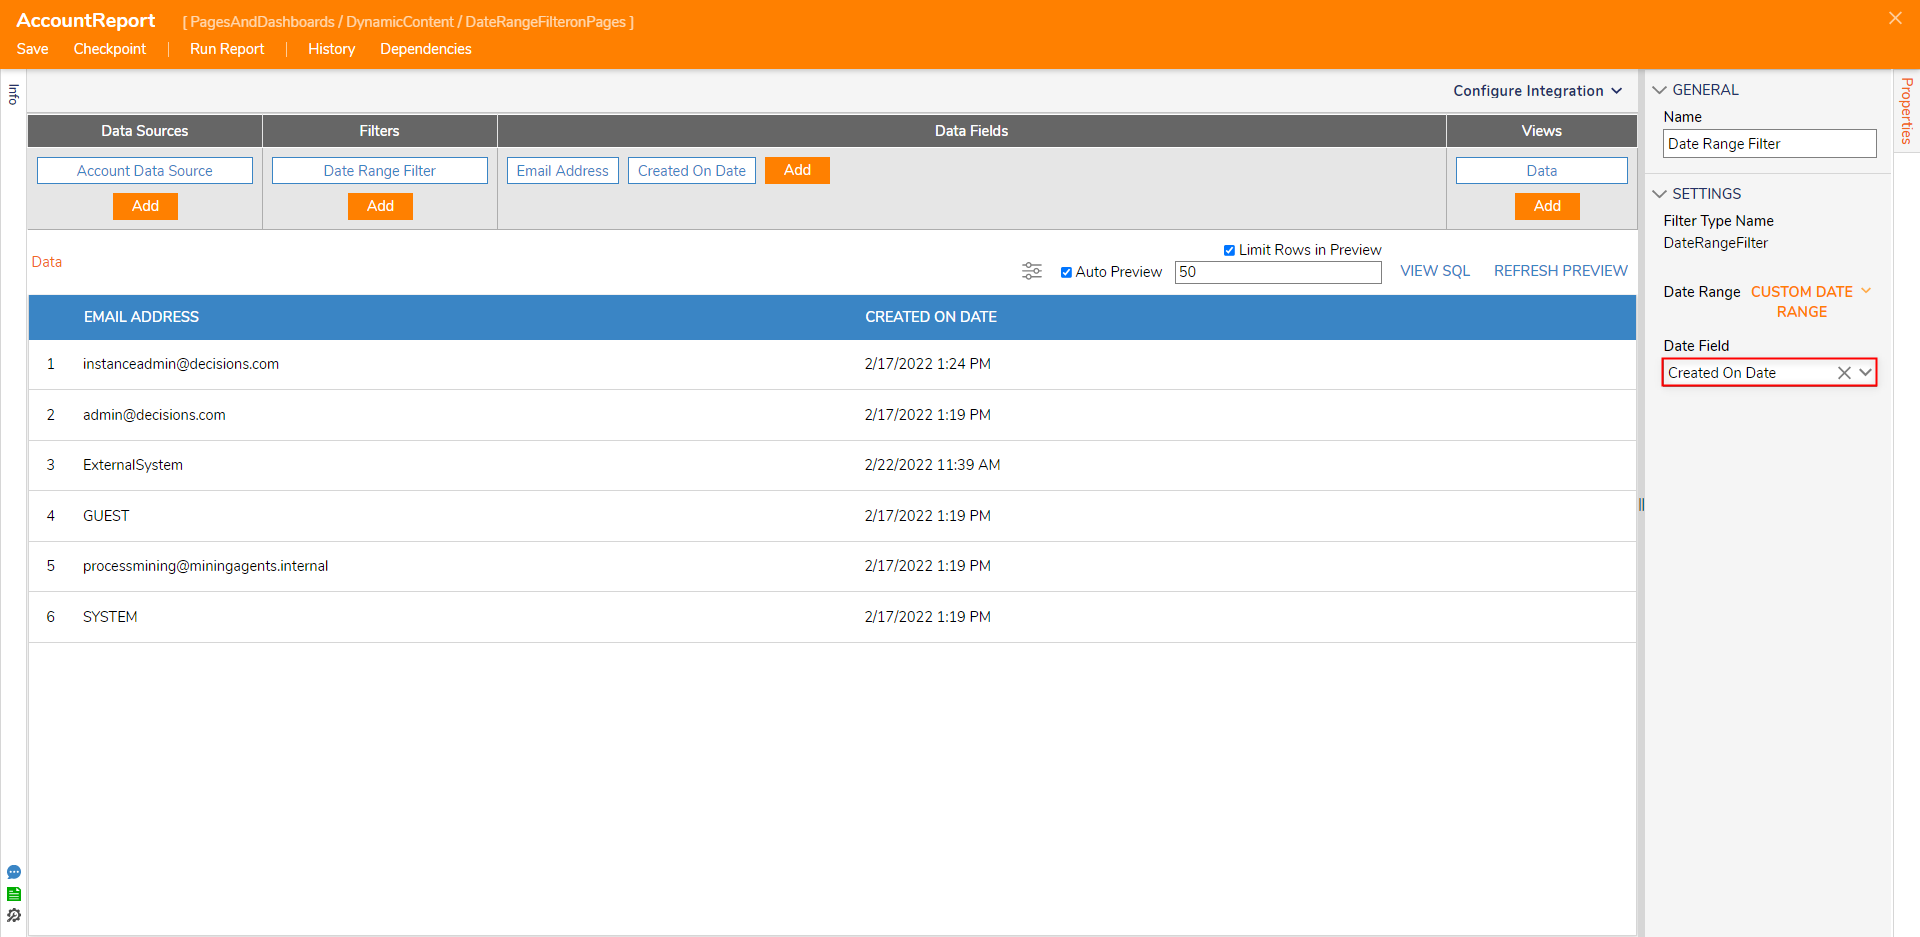
- In the Properties of the Date Range Filter, change THIS YEAR to CUSTOM under SETTINGS > Date Range. Then, click APPLY.

- Under SETTINGS > Date Field, select Create on Date from the drop-down; Save and close the Report Designer and the Page Designer.
- From the Decisions Studio, Add the Page to a Designer Project.
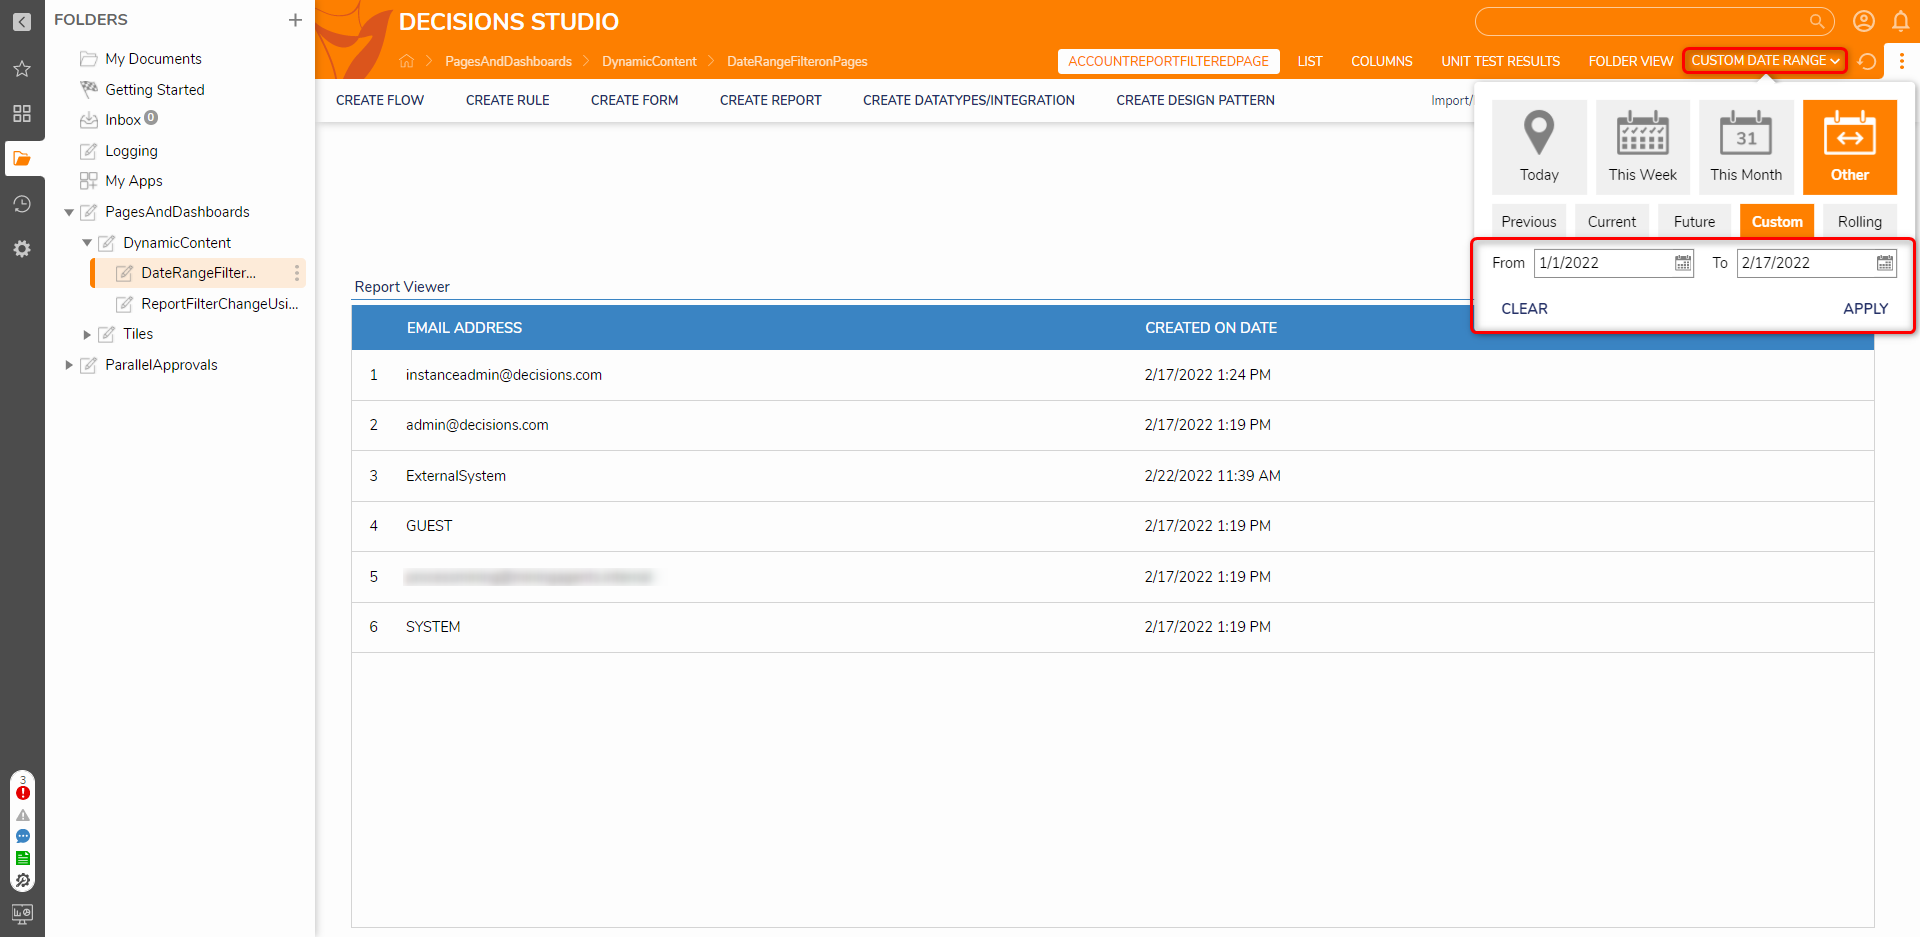
- Navigate to the added Page via the tabs at the top of the Page. Then, via the CUSTOM DATE RANGE drop-down, set a Date Range by establishing a From and To Date, and click APPLY.
- Verify that the Report is displaying entries within the defined Date Range.
For further information on Pages, visit the Decisions Forum.