Overview
Forms provide an interactive interface for displaying information to end users, collecting user input, and creating assignment tasks. Forms are created in the Form Designer and can be added from Templates, from the Designer Folder, or from a Flow.
When creating a Form, select a Form template, provide a name and description, and then use the Form Designer to add and configure controls. Form controls can be added from the Toolbox, named, resized, and arranged in the workspace.
Follow the next Steps to create a Form in the Decisions Platform.
- Start creating a Form by doing one of the following:
- Use a Form template available in the Normal Form section. See the table below for more information about each template.
- In a Project, go into any Designer Folder and click CREATE FORM from the Global Action Bar to go directly to the Form Designer.
- Use the Show Form step in the Flow Designer and click PICK or CREATE FORM on the Properties panel.
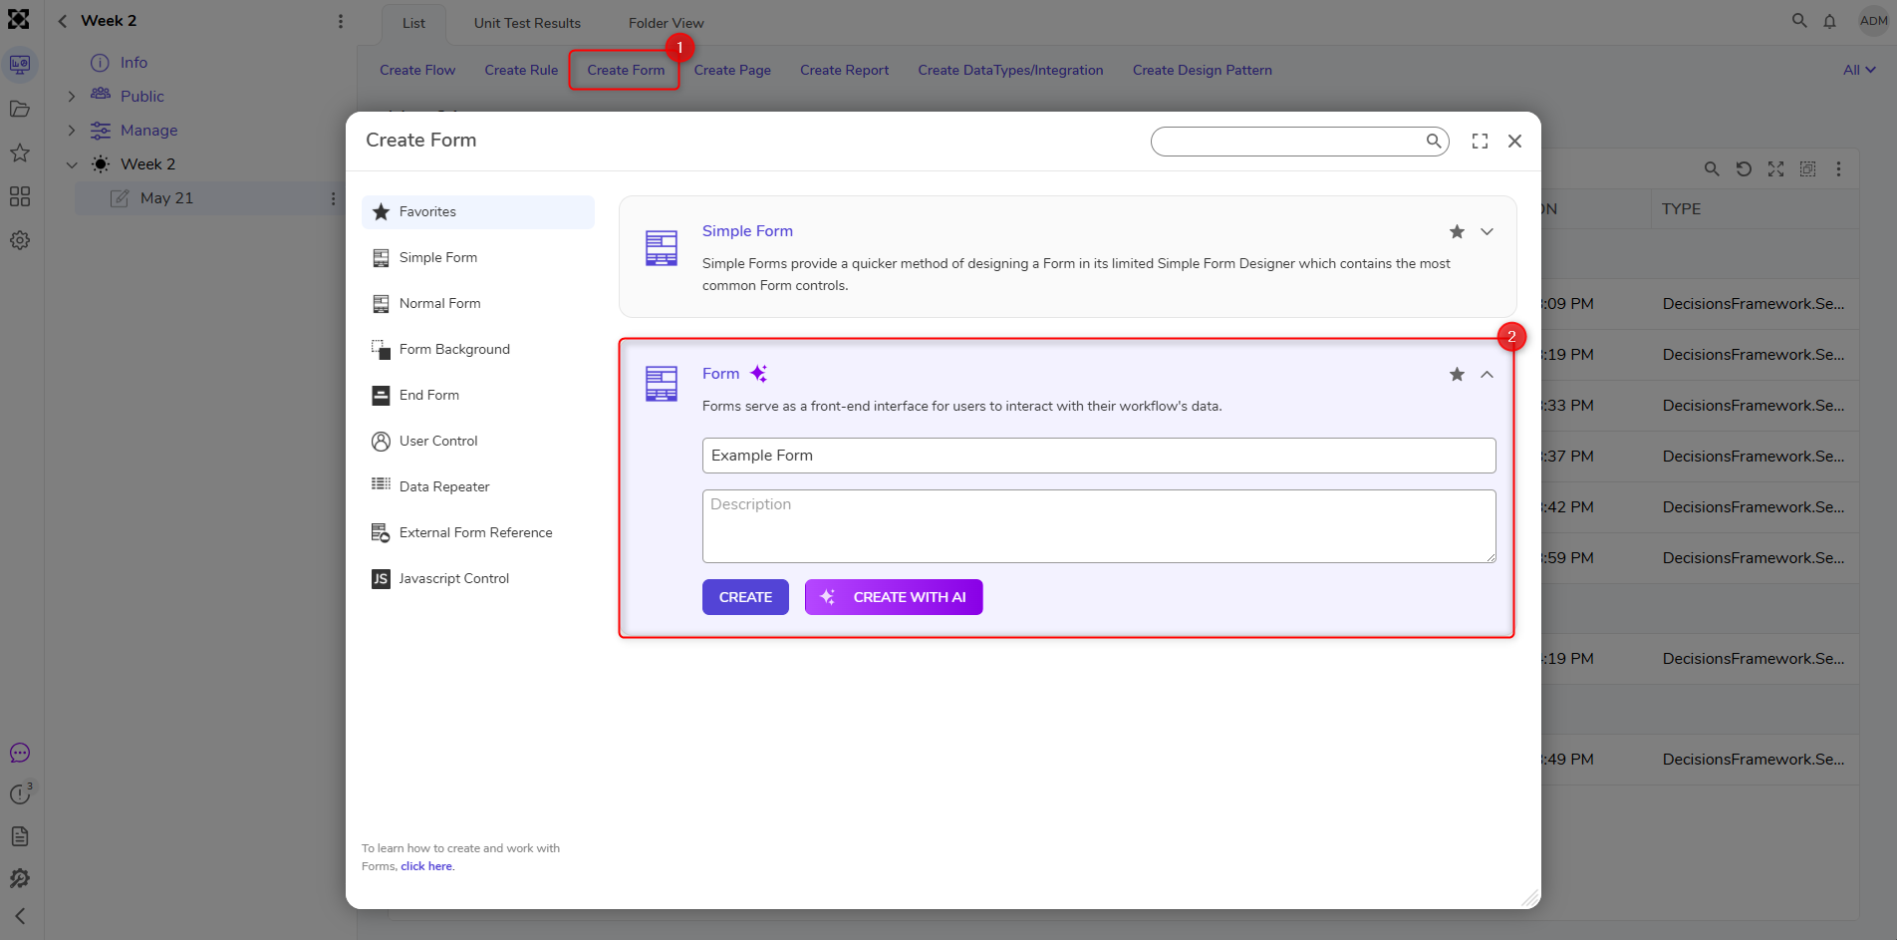
- Use a Form template available in the Normal Form section. See the table below for more information about each template.
- From the Favorites section, name and describe the Form and select Create. For example, the Normal Form template displays as follows:
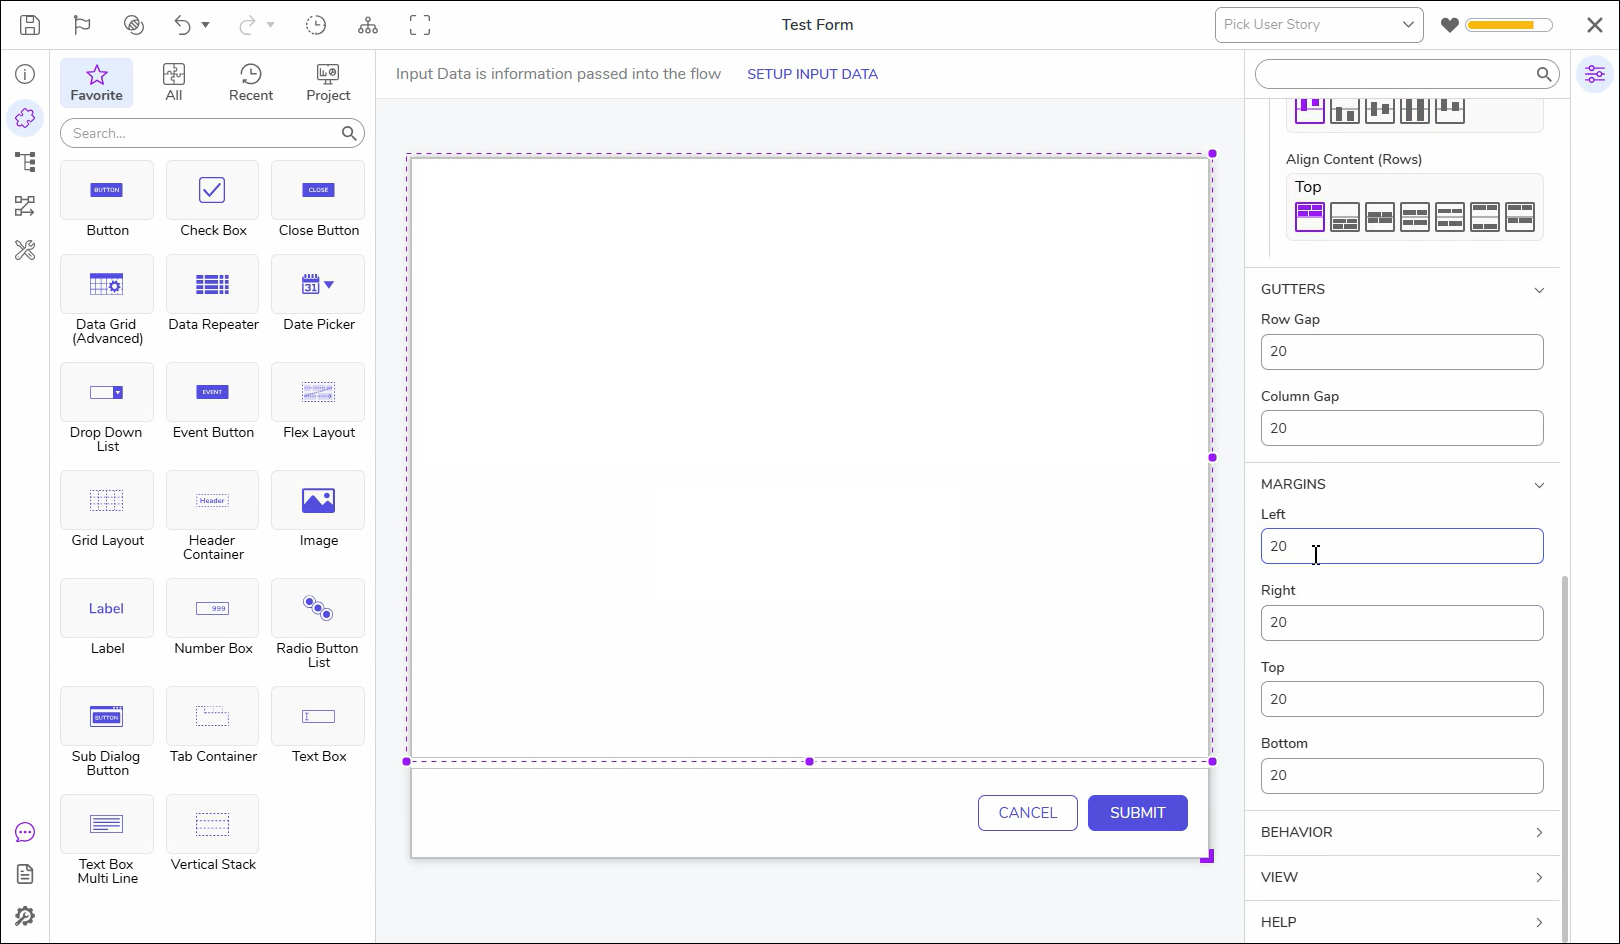
- In the Form Designer, the Toolbox panel contains all the Form Controls that can be added to the Form workspace. Click and drag a Form control and place it on the Form.
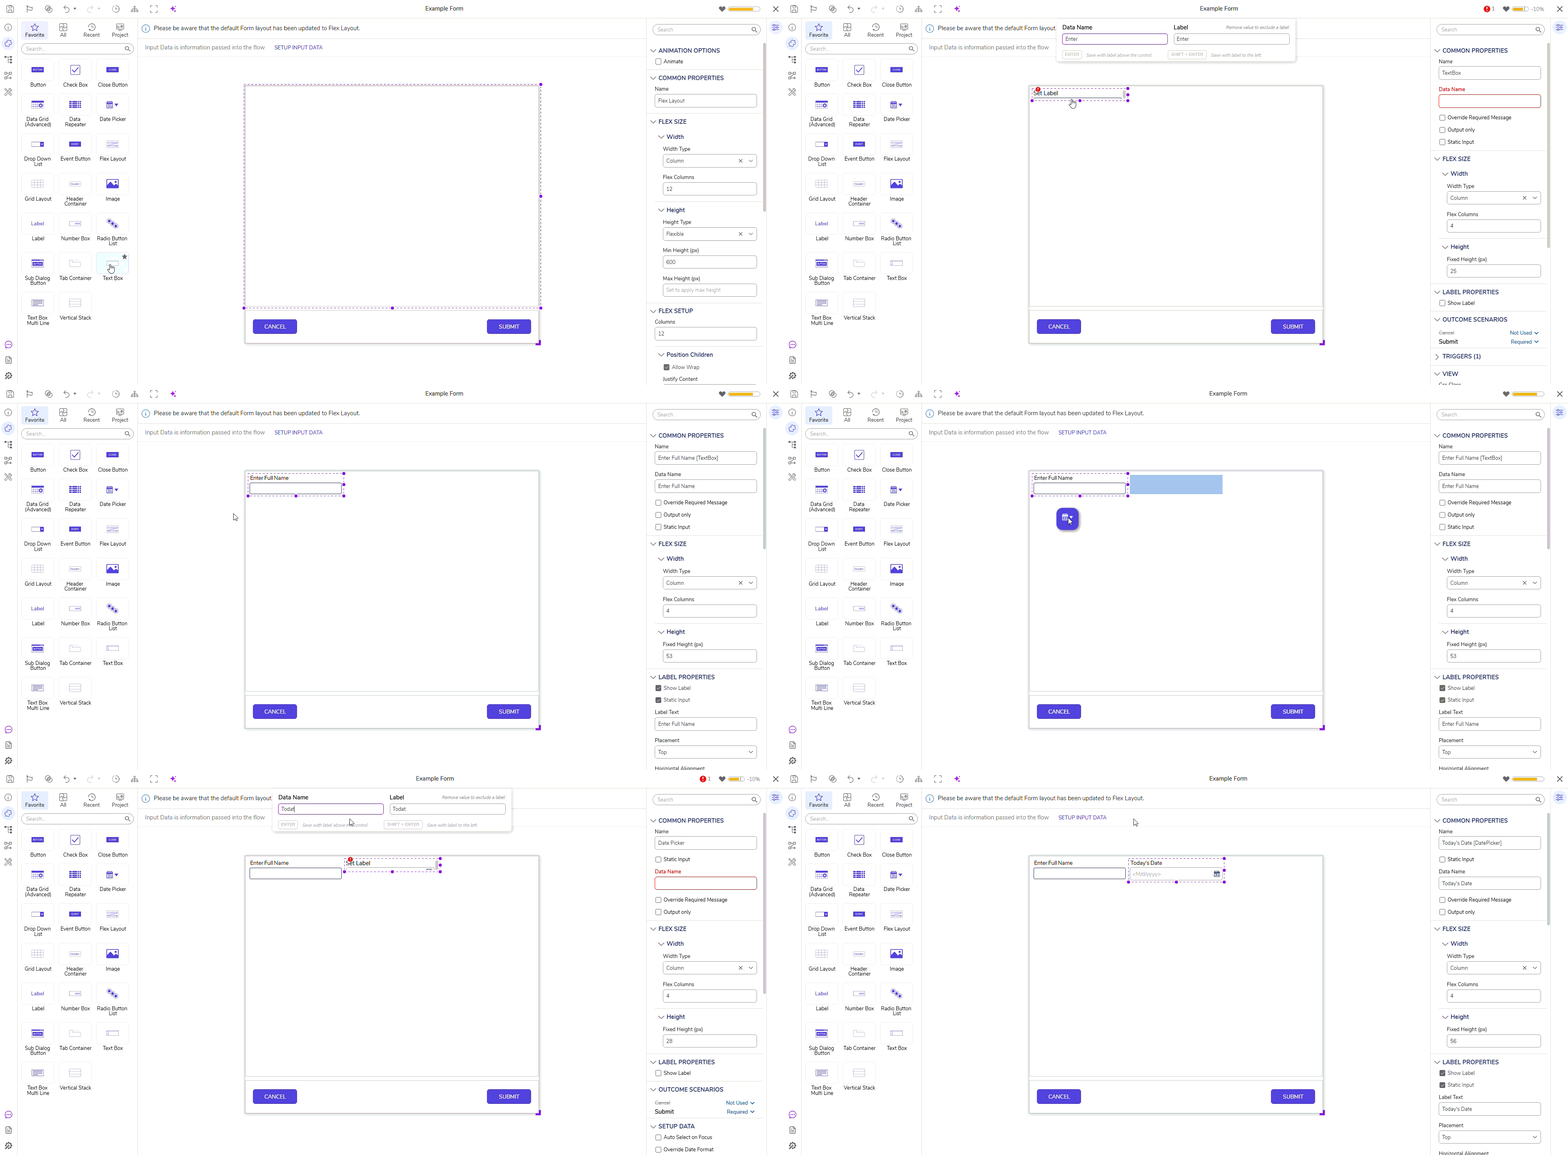
- When adding a control to the Form workspace, enter a name for the control and press Enter to set the name.
- Form Controls can be resized using the resize handles on the edges or corners. Resizing into objects is not allowed and will cancel the resize.
- The Form can be resized and configured to display a different layout. The default layout for the Form is the Flex Layout which adjusts component positioning and size based on content and screen size.
- After the Form has been configured. Click Save to save changes to the Form and close the Form Designer.
Feature Changes
| Description | Version | Release | Developer Task |
|---|---|---|---|
The Default Form has been updated with the following changes:
| 10.1 | August 2026 | [DT-048075] |