Overview
This tutorial demonstrates how a Systems Administrator can restrict designers from using certain fields in a Data Structure by adding a Data Rule. Data Rules look like a typical Rule, but the Data Rule is added by navigating to Manage in Designer Folders and set up. After the Data Rule is set up, it will appear in the Flow Designer when the user searches in All Steps using the search bar.
What changed from V8 to V9?
Version 8 | Version 9 |
|---|---|
Data Rules were configured at the System level and were visible across the platform. | Data Rules are now Project-level and are visible only within the Project. |
Example
This example will demonstrate applying a Data Rule that restricts what a user can see to an Account Data Type. Start by adding a Data Rule that will exclude data fields that start with "a" under Account Data Type.
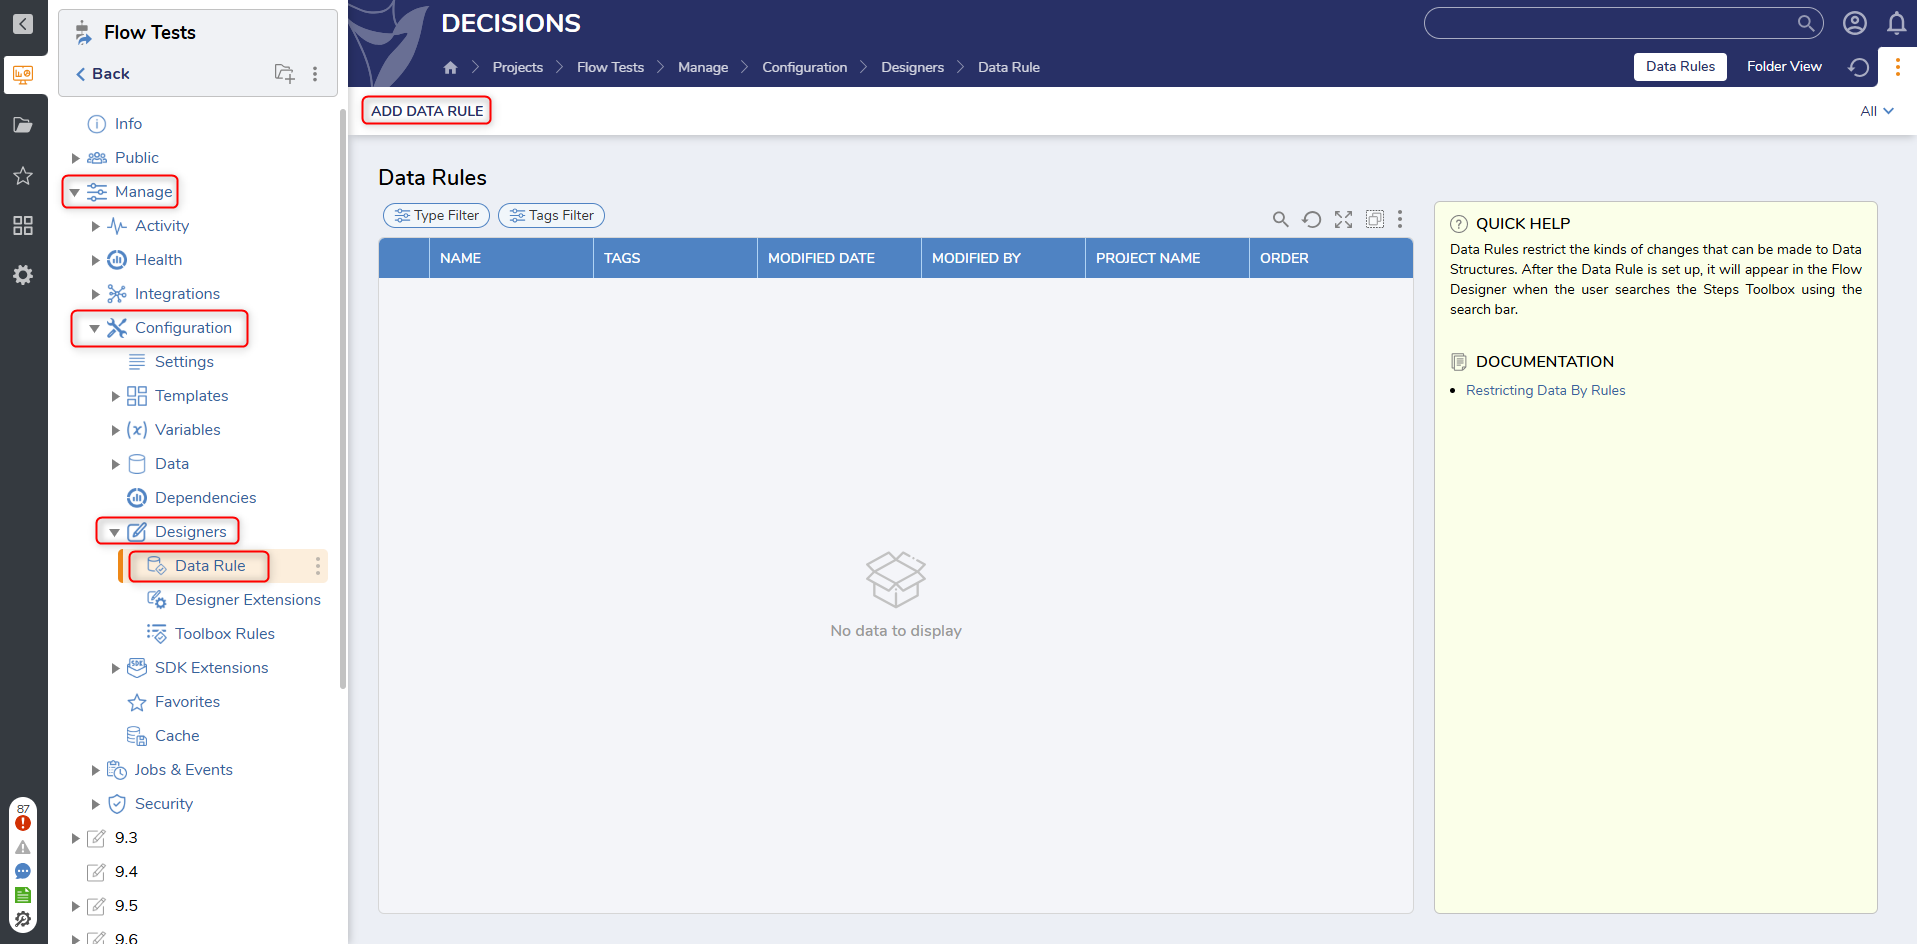
- From the desired Designer Folder, navigate to Manage > Configuration > Designers > Data Rules.
- Click ADD DATA RULE on the top Action bar.
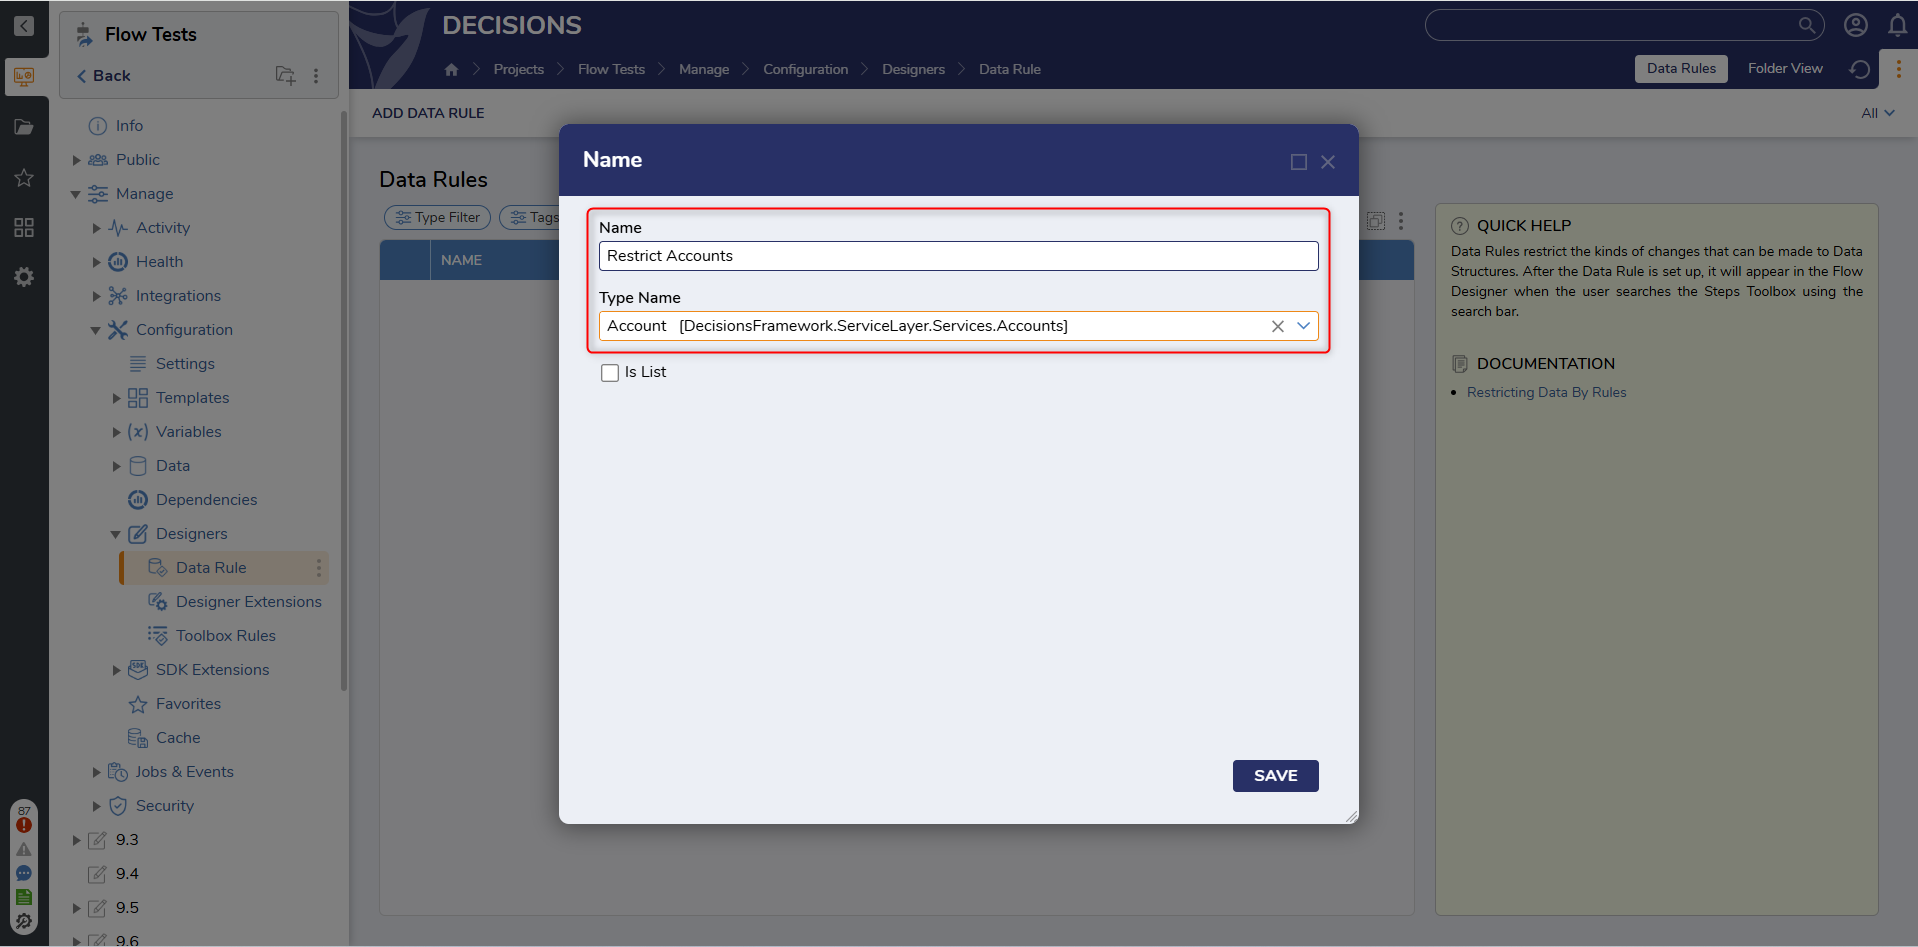
- Name the Data Rule, then select the Data Type via the Type Name drop-down menu. Click SAVE.
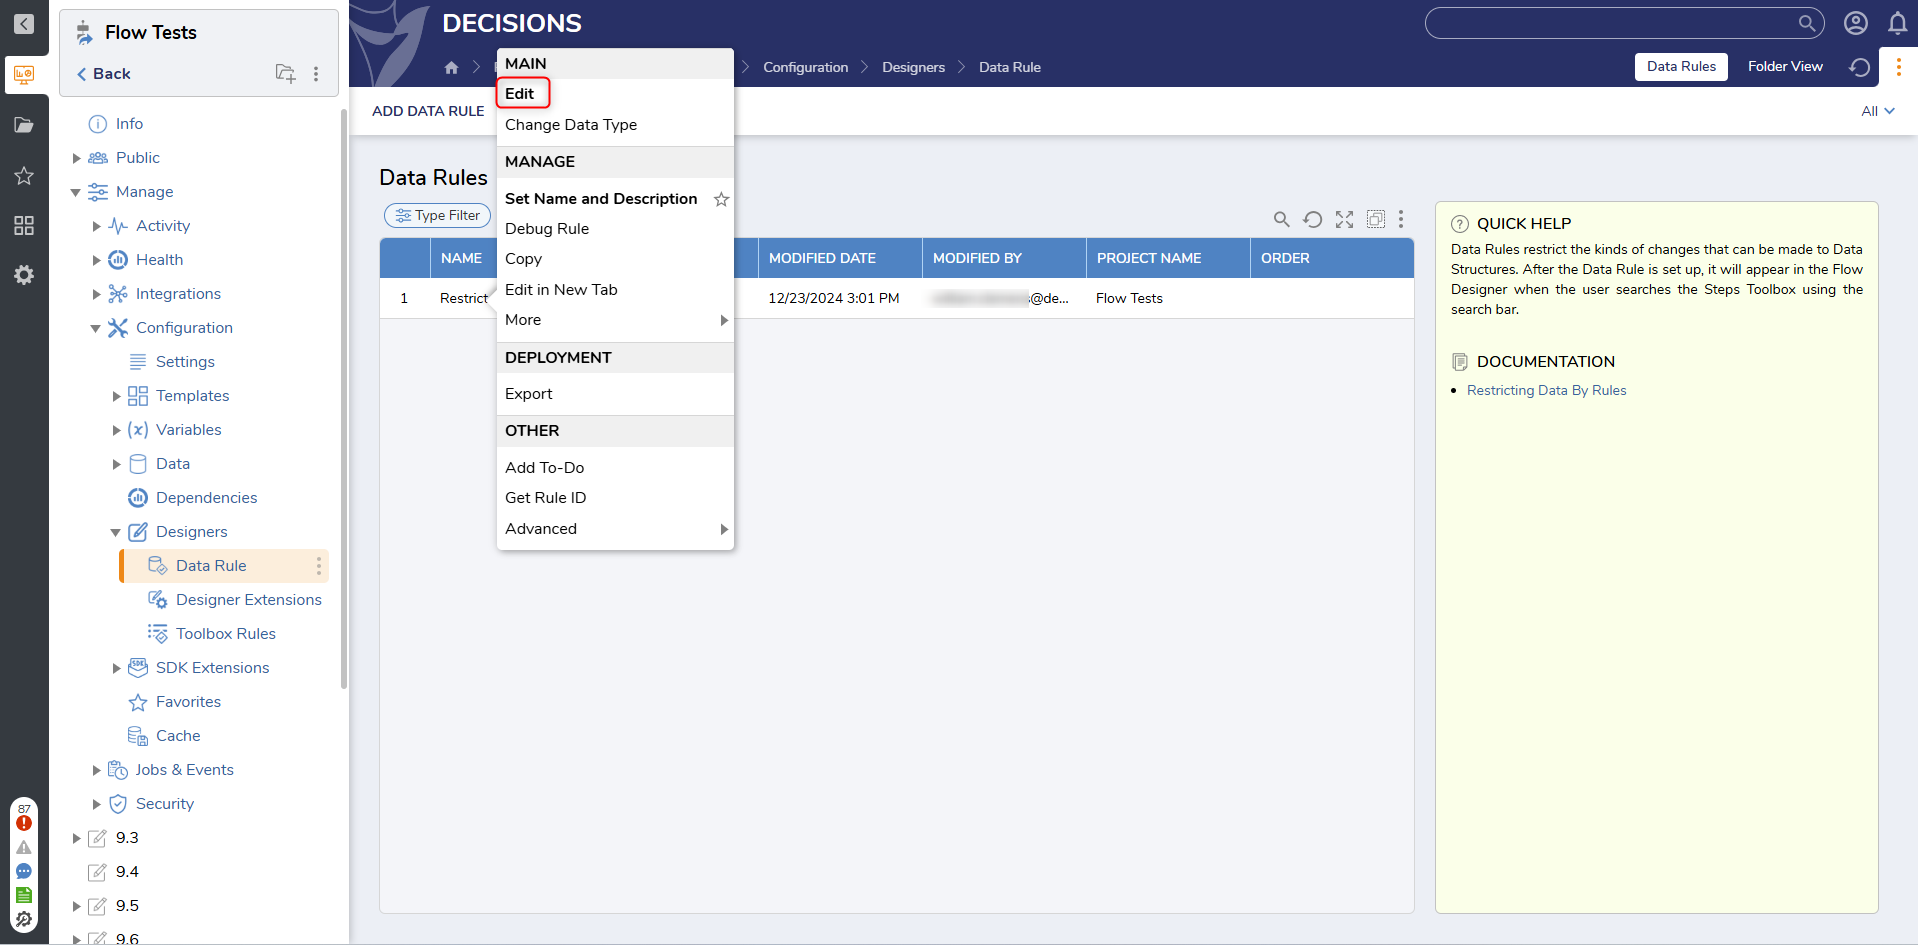
- Right-click the newly created Data Rule from the Data Rules Folder and select Edit.
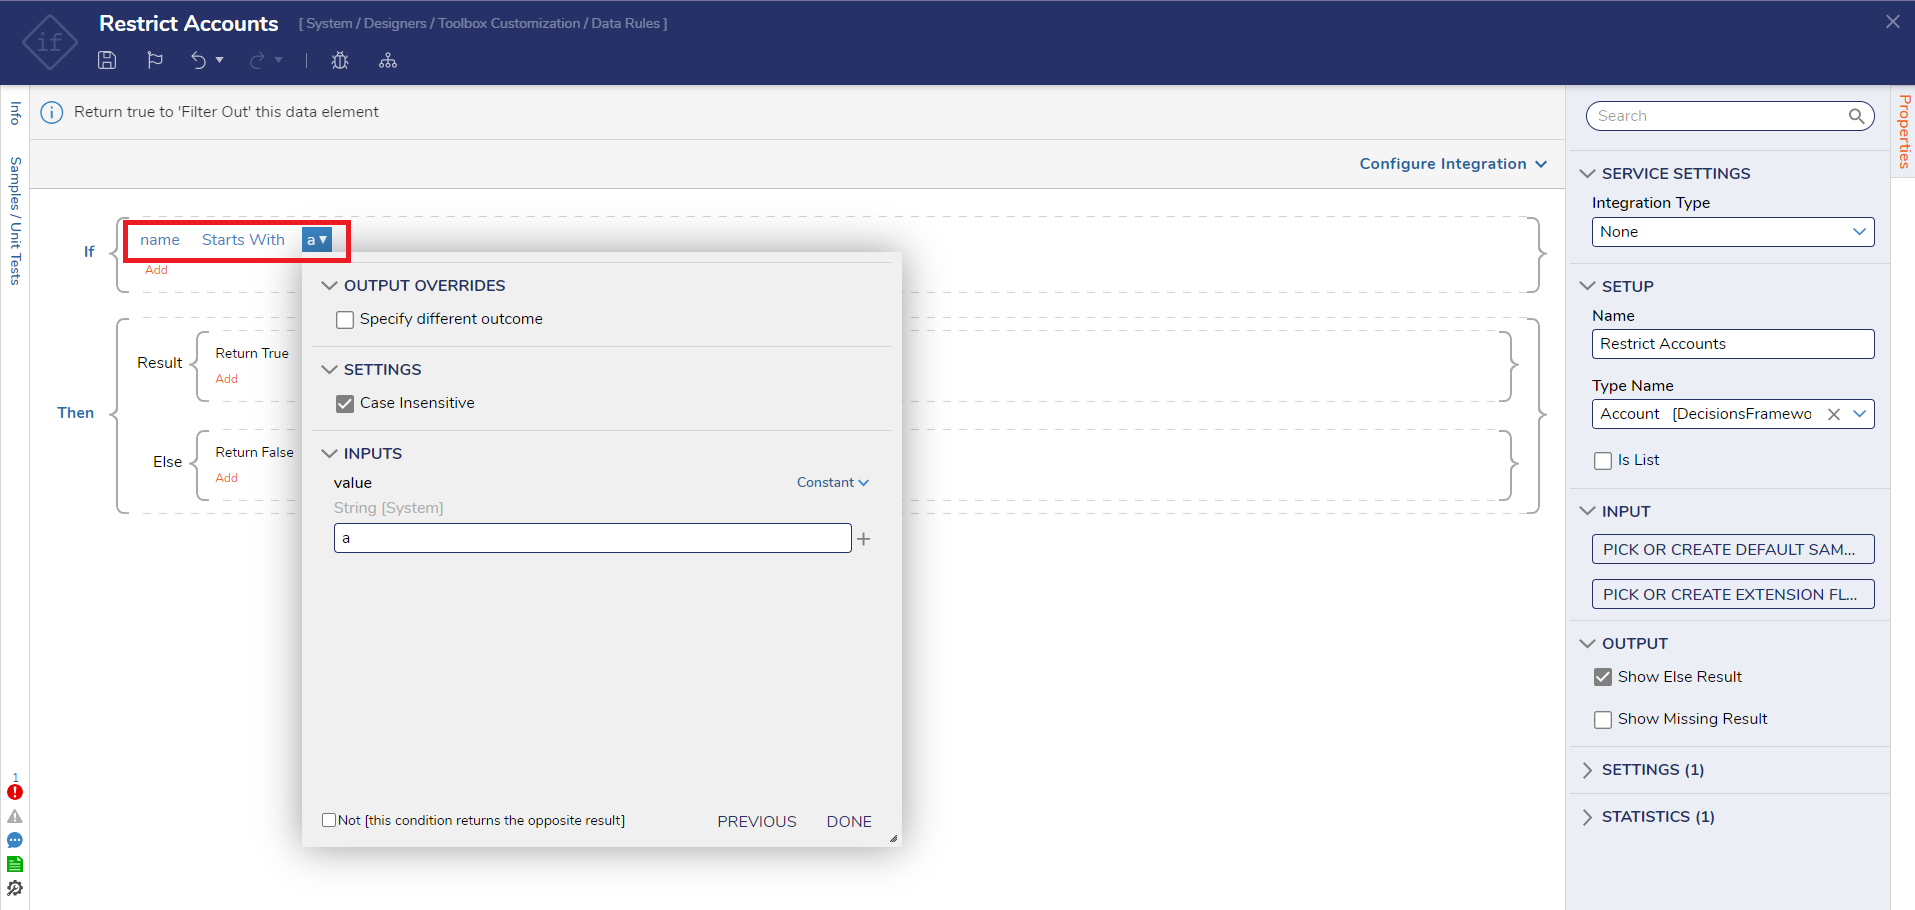
- Design a Rule stating If the name Starts With 'A.' Save the Rule, then close with X in the top right corner.This Rule evaluates whether or not the name of a property on the Account Data Type starts with the letter 'a'. The Rule Input represents a name Data Field within the Composite Type of Account.