Using Swim Lanes
- 08 Apr 2021
- 4 Minutes to read
- Print
- DarkLight
Using Swim Lanes
- Updated on 08 Apr 2021
- 4 Minutes to read
- Print
- DarkLight
Article Summary
Share feedback
Thanks for sharing your feedback!
Overview
A Swimlane is a visual element used in Process Flow Diagrams or Flowcharts that visually distinguish job sharing and responsibilities for Sub-Processes of a Business Process. The Swim Lane Flowchart differs from other Flowcharts in that Processes and decisions are grouped visually by placing them in Lanes. Parallel lines divide the chart into lanes, with one lane for each person, Group, or Subprocess. Lanes are labeled to show how the chart is organized. This tutorial demonstrates how to use the Swim Lane component in the Flow Designer.
Example Section A: Adding Swimlanes
In this example, create a simple Approval Process Flow. This Approval Process has 3 participants: a Sales Group member who submits an order, a Legal Group member who either approves or rejects the order, and a member of the Fulfillment Group that will be notified when an order is ready to ship. Swim Lane components are useful in this workflow to visually separate the steps for each participant.
- From a Designer Project click CREATE FLOW on the top Action bar.
- Select Flow, provide a Name, then click CREATE.
- Navigate to the ADVANCED > Swimlanes in the Properties tab, and select Vertical from the Swimlanes Type dropdown.
- Select the Swimlane component in the workspace then select the Edit (pencil) icon next to Lane 1 under Swimlanes.
- Change the Header Label to "Sales", change the Size to 250, then click OK.Swimlanes can be edited to represent the different stages of a procedure. In this case, this Swimlane is used to represent the Customer level of the process.
If desired, change the Background color by selecting the edit icon and selecting a color (PICK) from the Pick Color window.
Note: Though users may alter the width of a Lane via the Size setting, users may also freely adjust the size by clicking and dragging the lane out by the orange points displayed when a Lane is selected.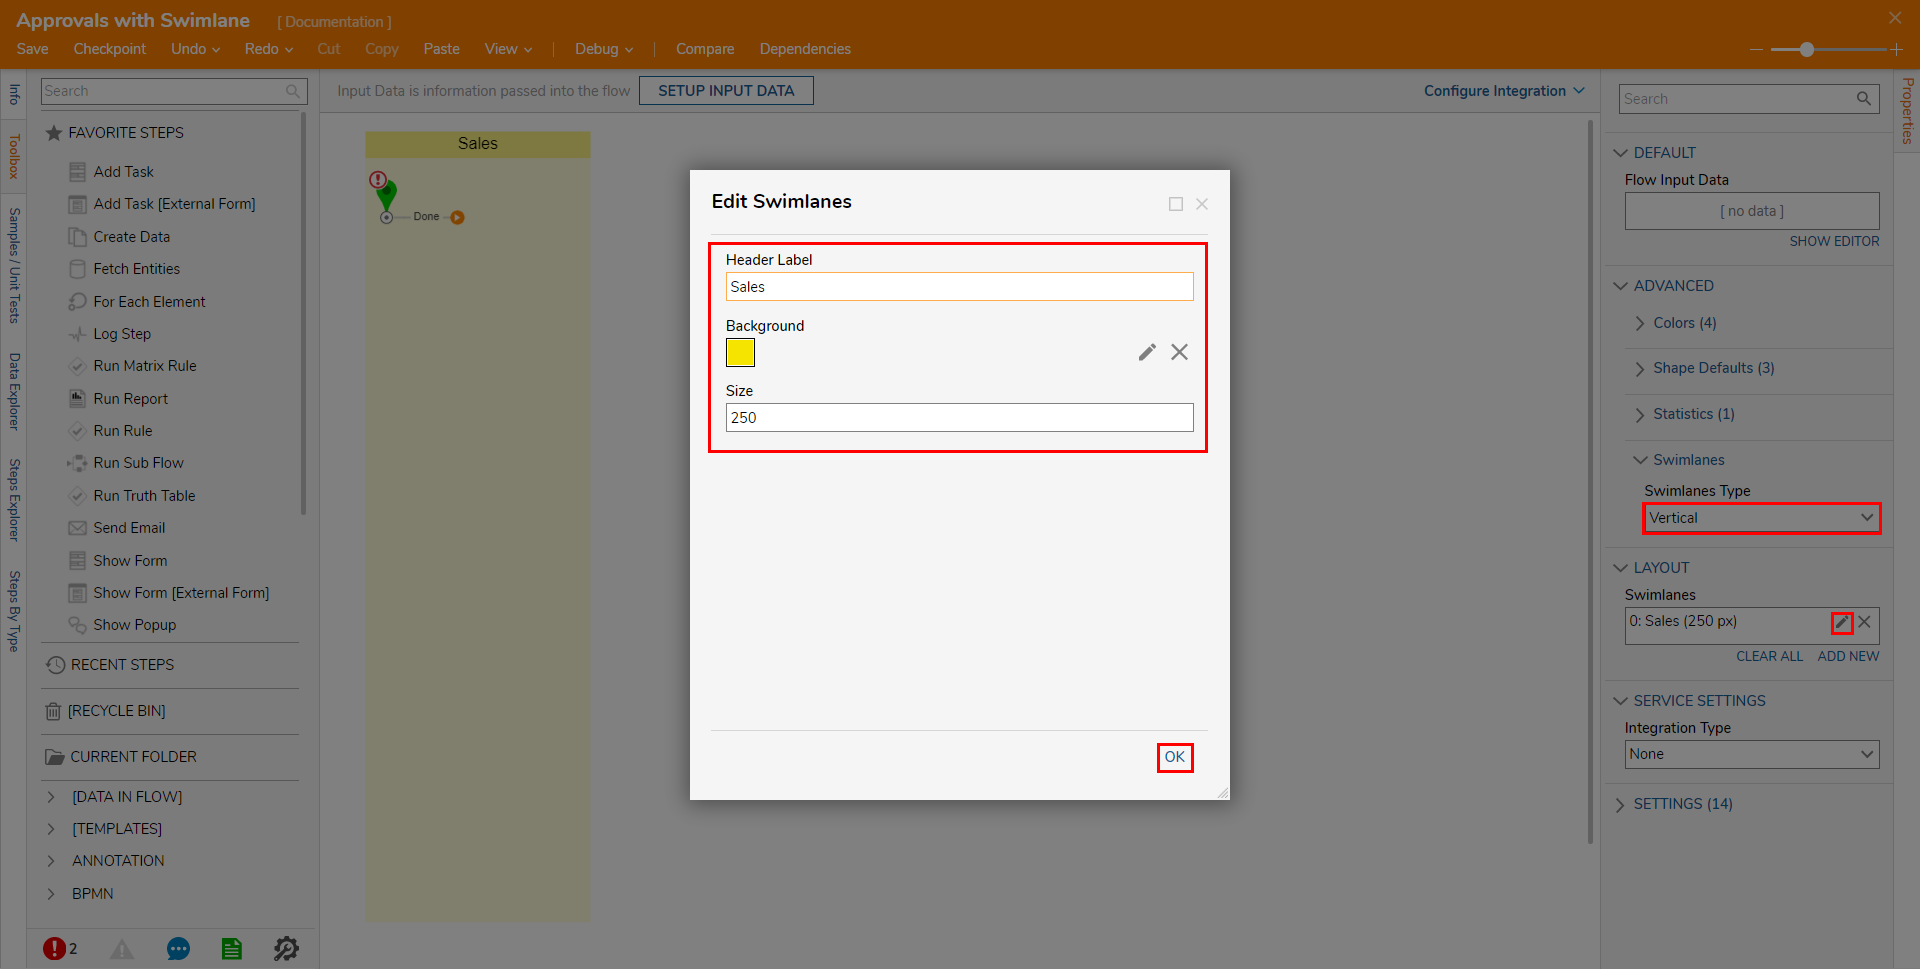
- Change the Header Label to "Sales", change the Size to 250, then click OK.
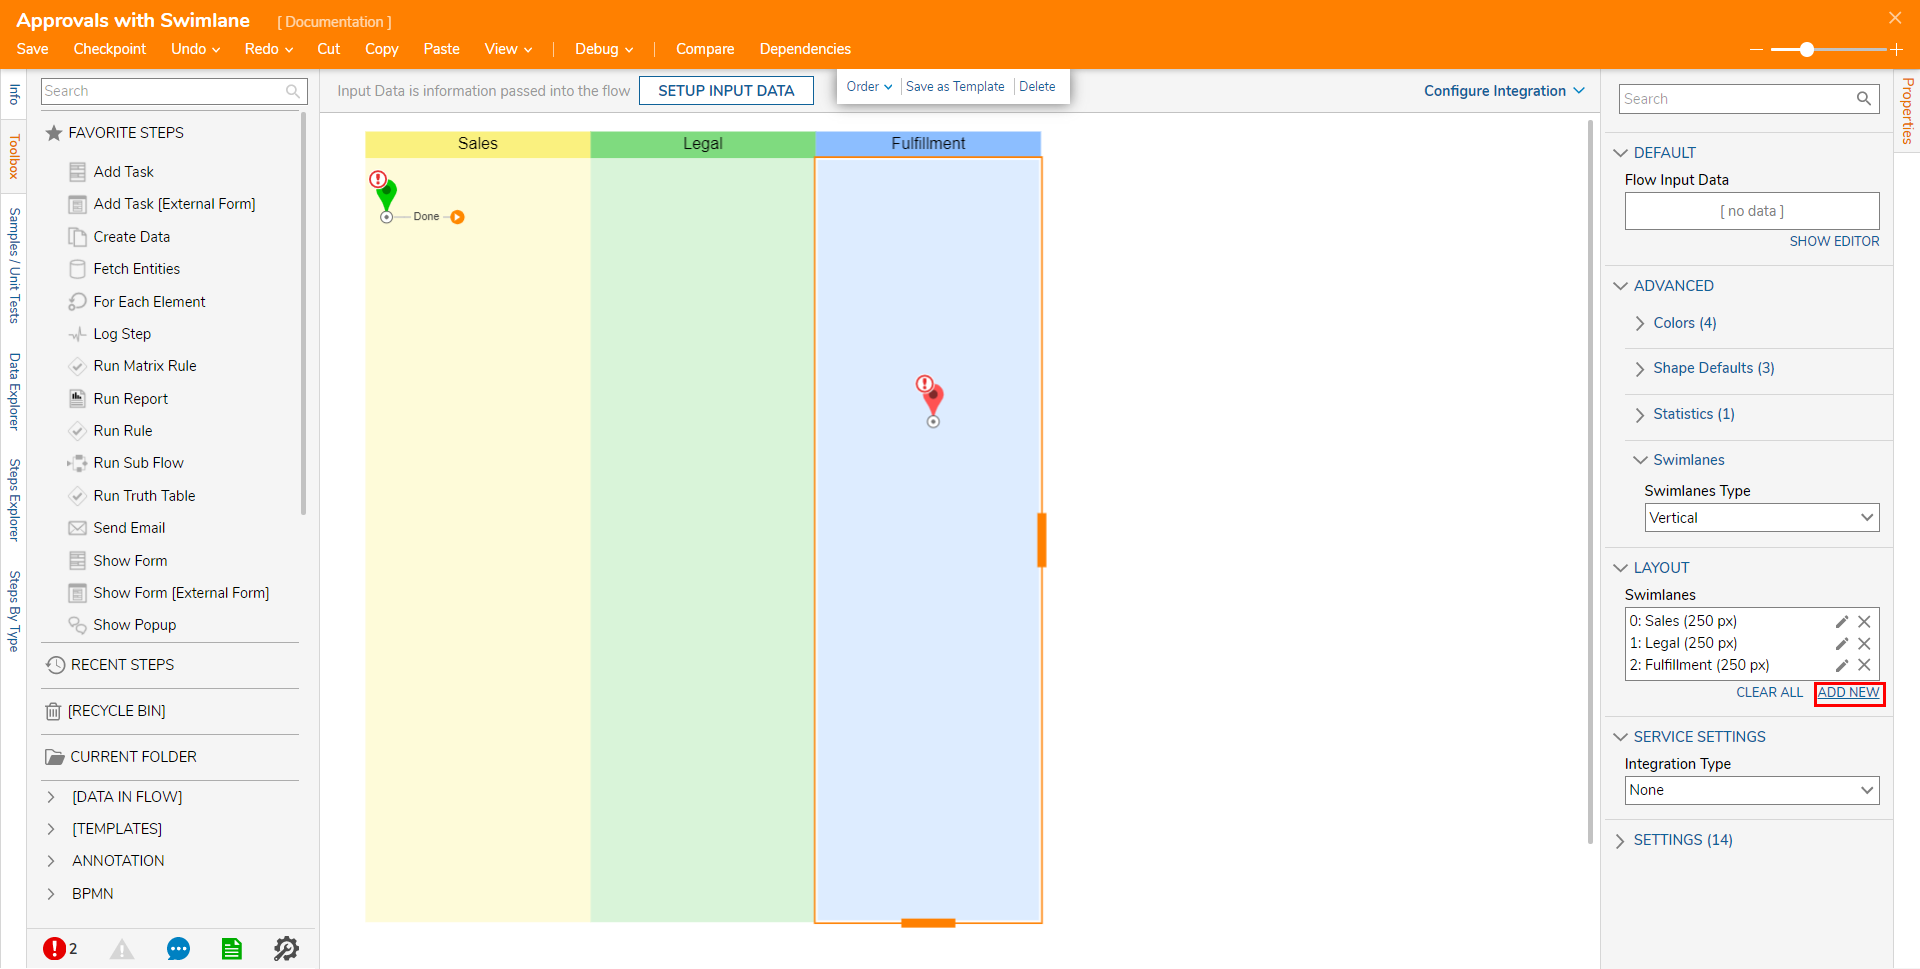
Navigate back to Properties > LAYOUT and under Swimlanes, click ADD NEW.
Provide the Header Label "Legal" and set the Size to match the first Swimlane, then click OK.
Repeat the ADD NEW action, adding a Swimlane with the Header Label "Fulfillment".


Example Section B: Assignment Configuration
Next, begin configuring Assignments for each Swim Lane.
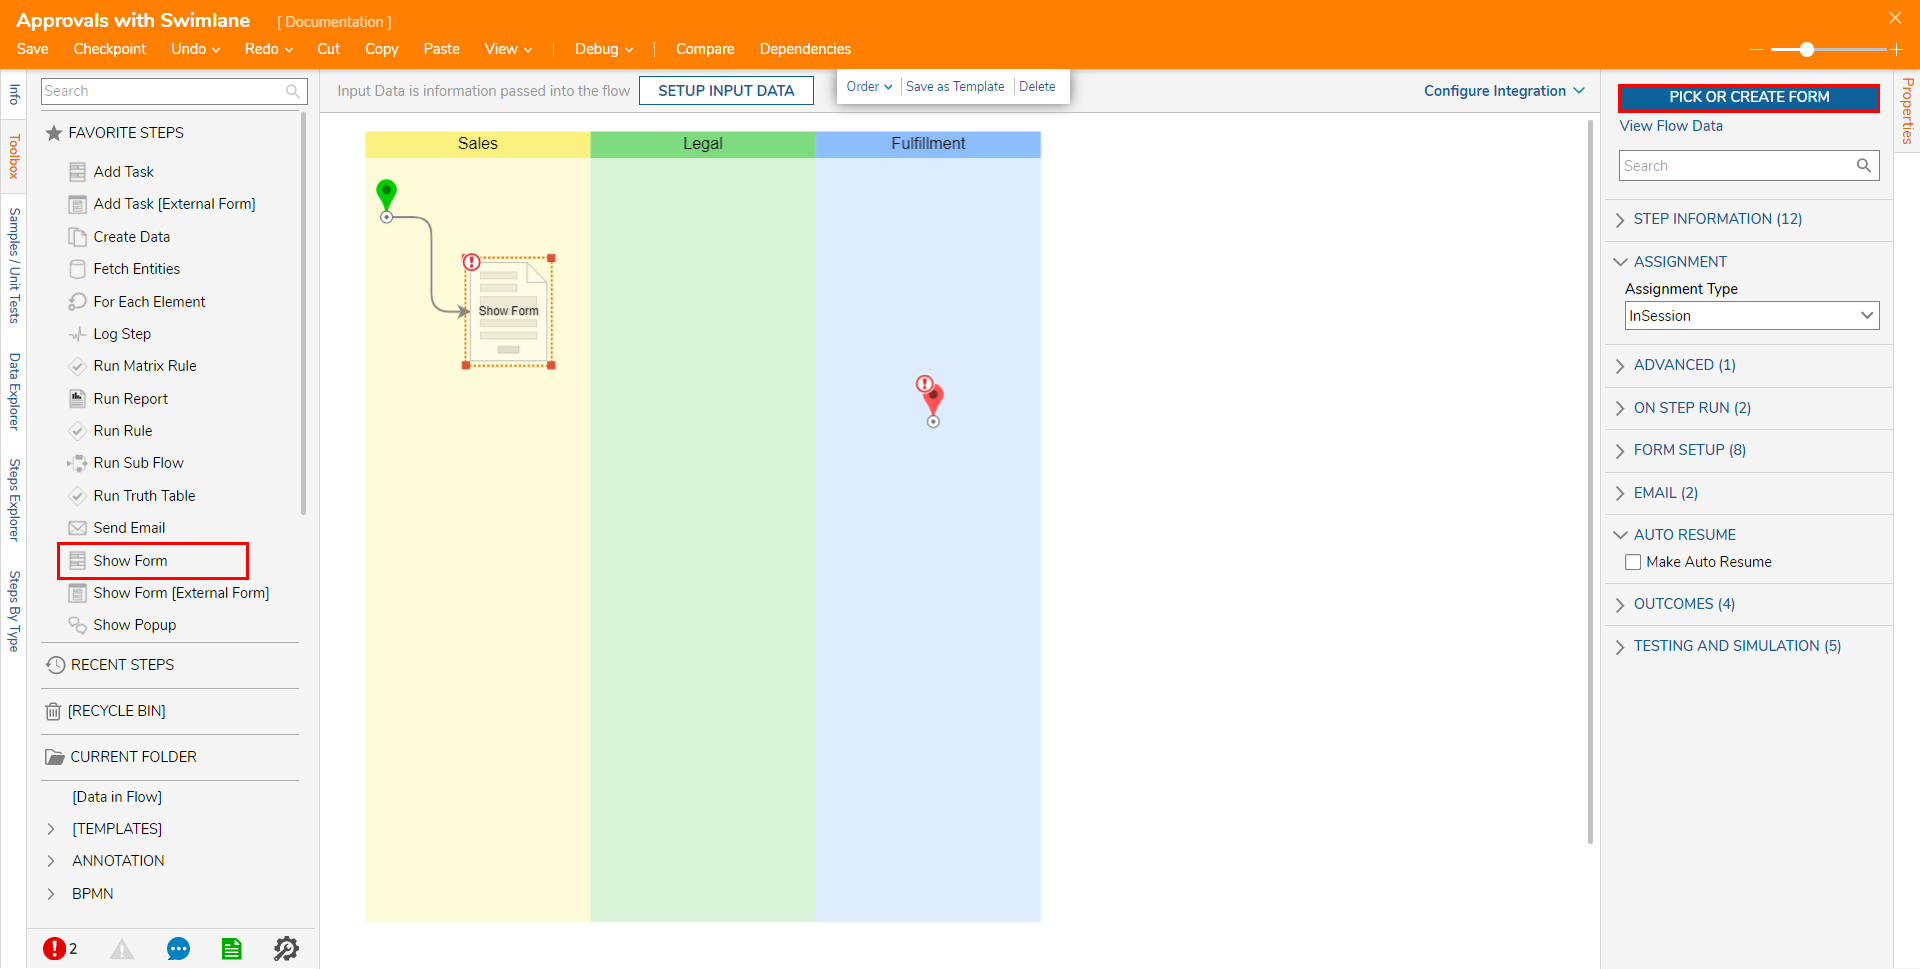
- Attach a Show Form step from the FAVORITE STEPS category of the Toolbox tab, to the Done path.
- Drag the Form step into the Sales Swimlane.
- Select the Show Form step to navigate to its Properties tab and select PICK OR CREATE FORM.
- CREATE a Form containing three Text Box components (Labeled First Name, Last Name, and Email Address respectively), a Text Box Multi Line component (Labeled Order Description) and a Button component (Labeled Submit) from the FAVORITES category in the Toolbox tab.This Form will act as a Form for a member of the Sales team to submit a sale.
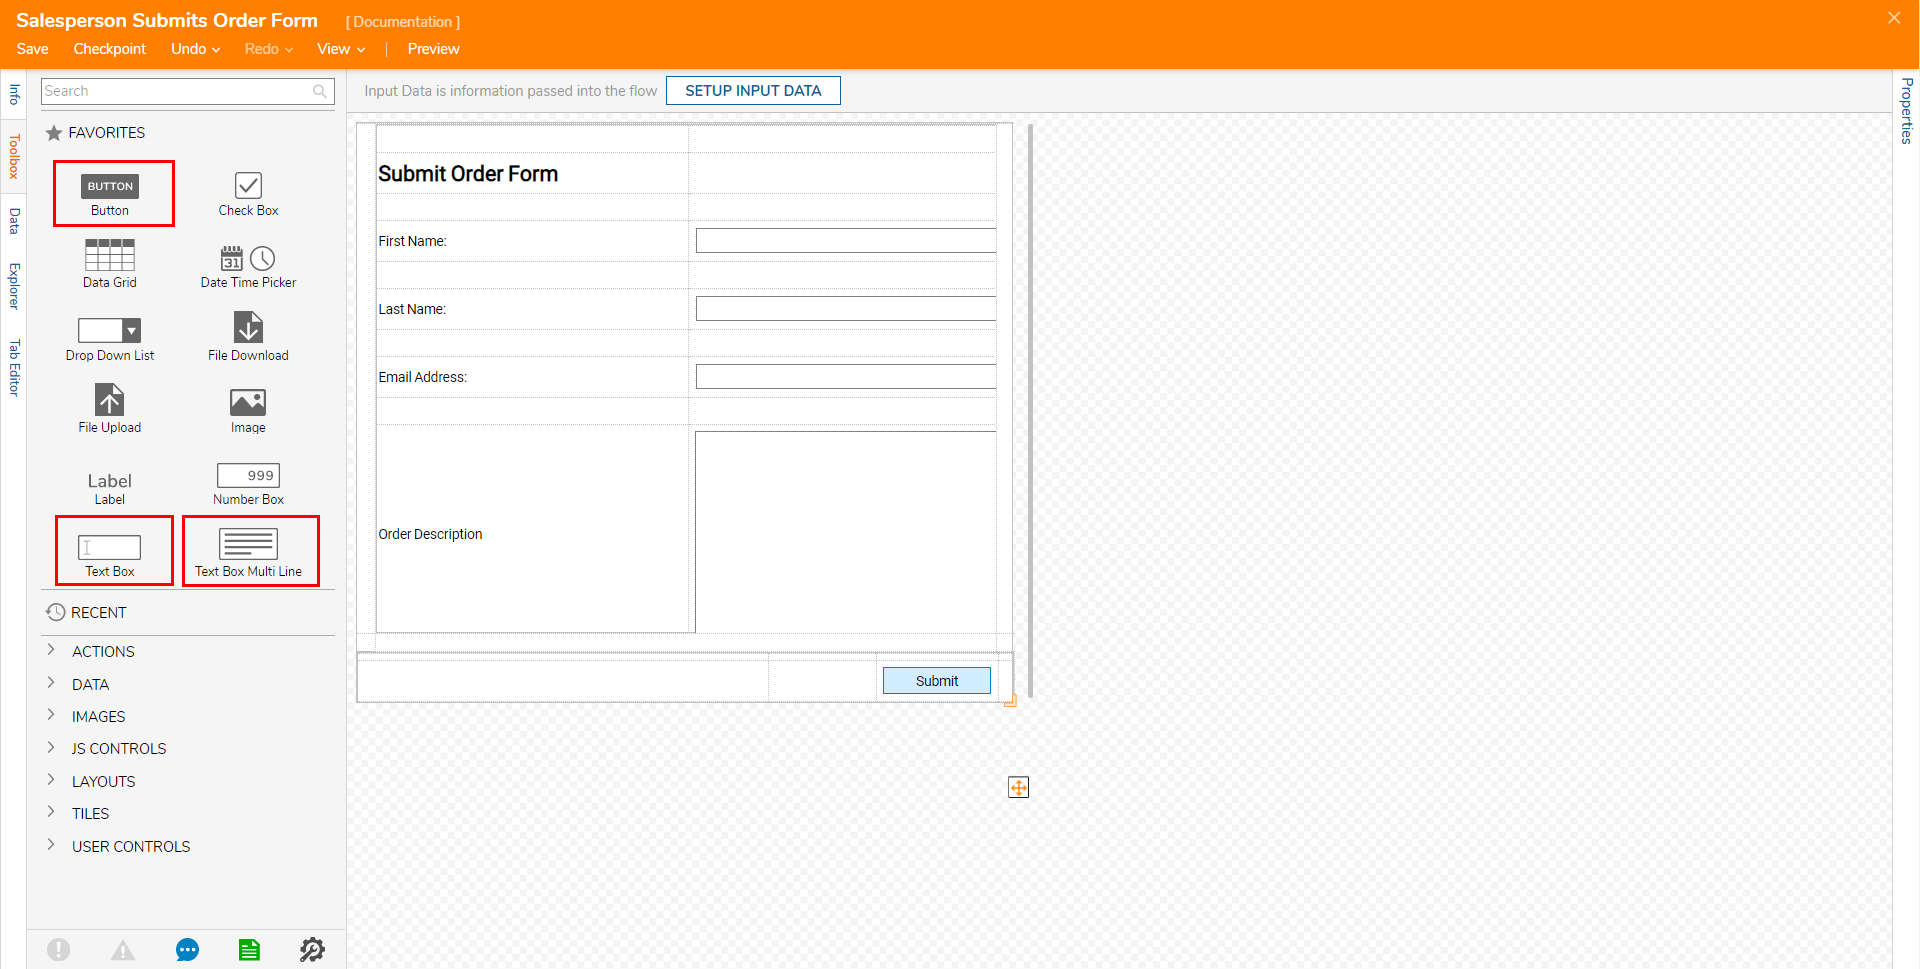
- Save the Form, then close with X.
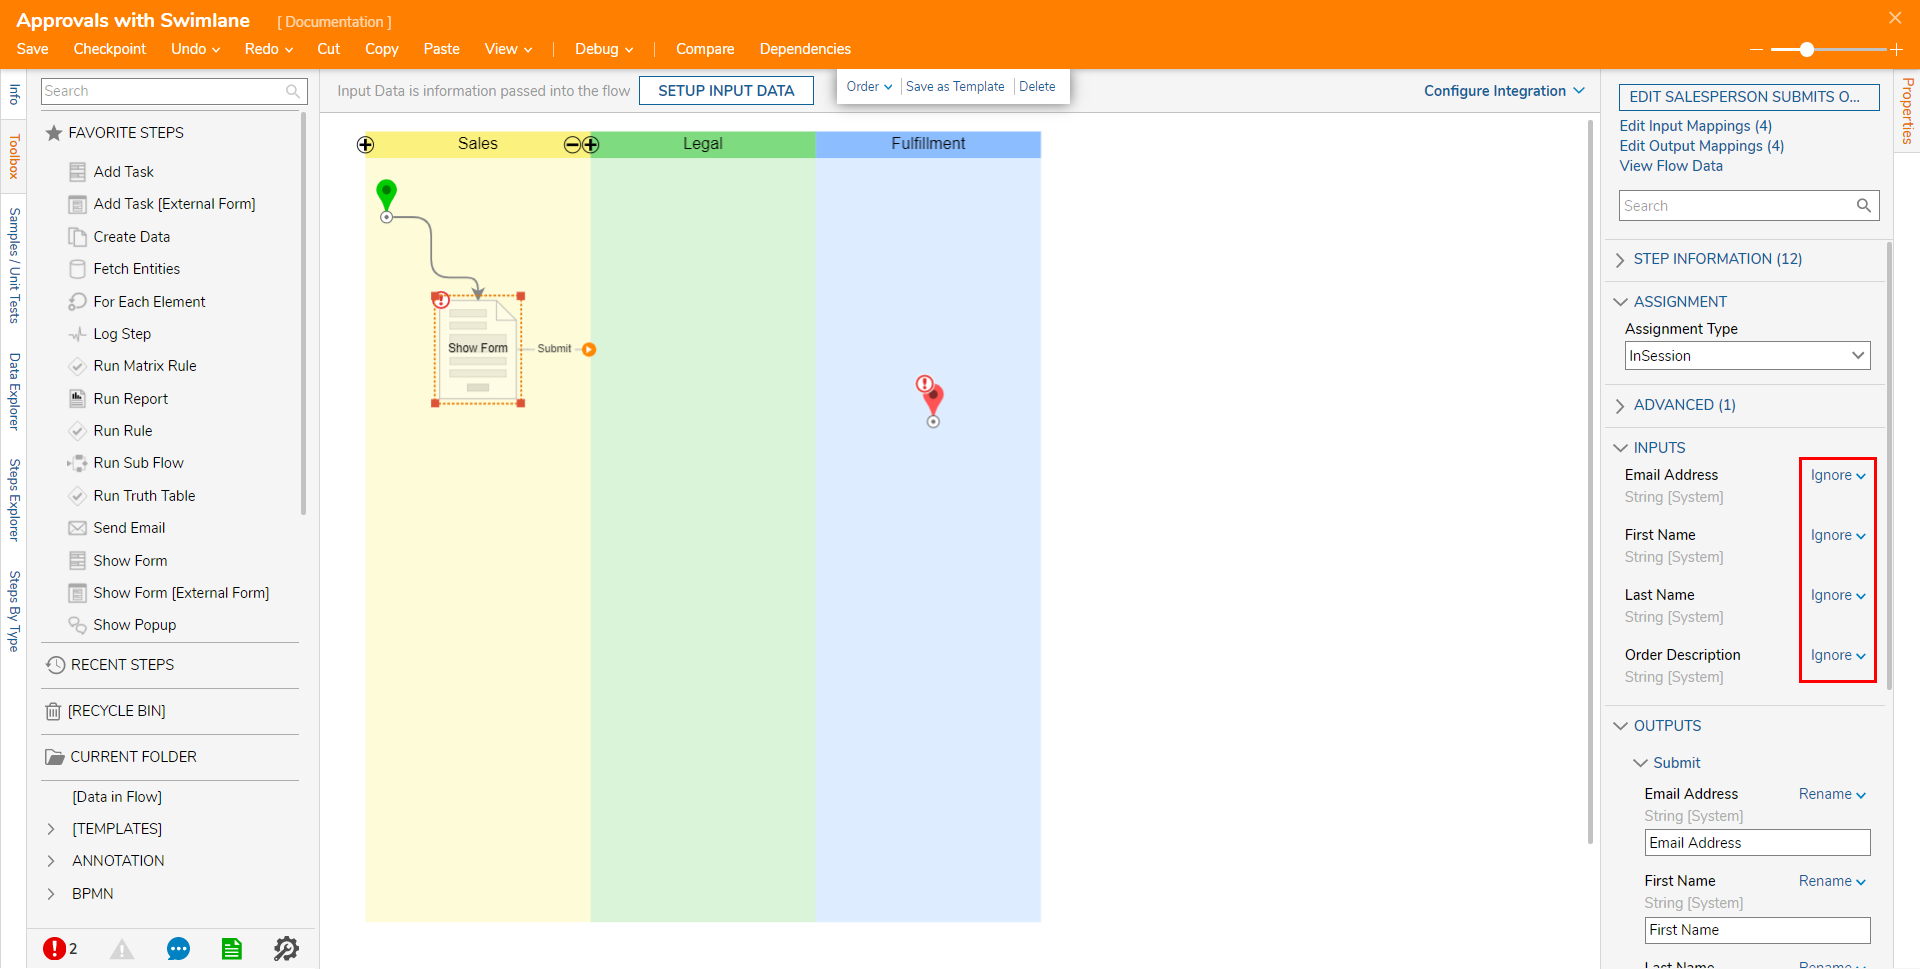
- Back in the Flow Designer, navigate to the Properties tab for the Sales Form and set each of the INPUTS to Ignore.Setting each Input to Ignore allows the user to Input their own values.
- Attach another Show Form step to the Submit path of the Sales Form; drag the Form out into the Legal Swimlane.
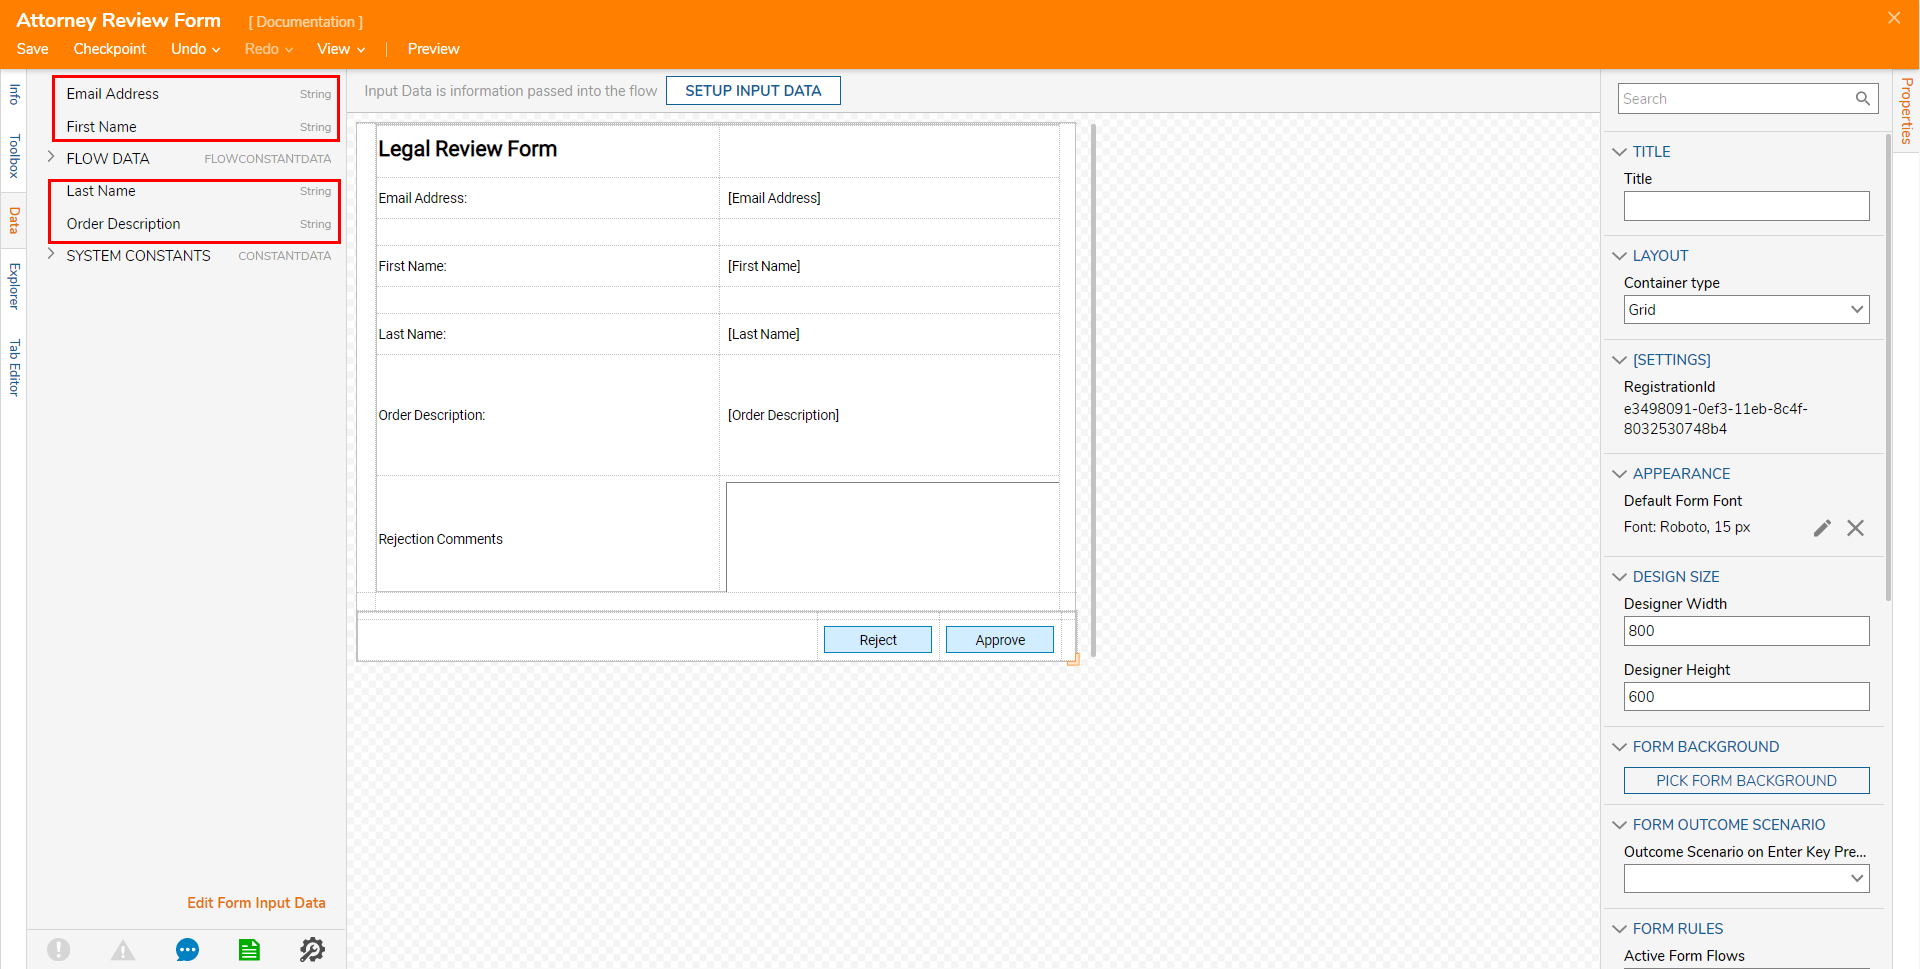
- CREATE a Form by utilizing the Data tab to populate the Form with the Email Address, First Name, Last Name, and Ordered Description Values. Label these accordingly.
- Add two Button components, one for "Reject" and one for "Approve".
- Add a Text Box Multi Line component Labeled "Rejection Comments". Select the component on the Form; under Required Outcome Scenarios check the Reject box, and under Not Used Outcome Scenarios check Approve.This Form acts as a review Form for the Legal team Group.
Selecting the Reject path will require the Group member to provide input for the Rejection Comments box.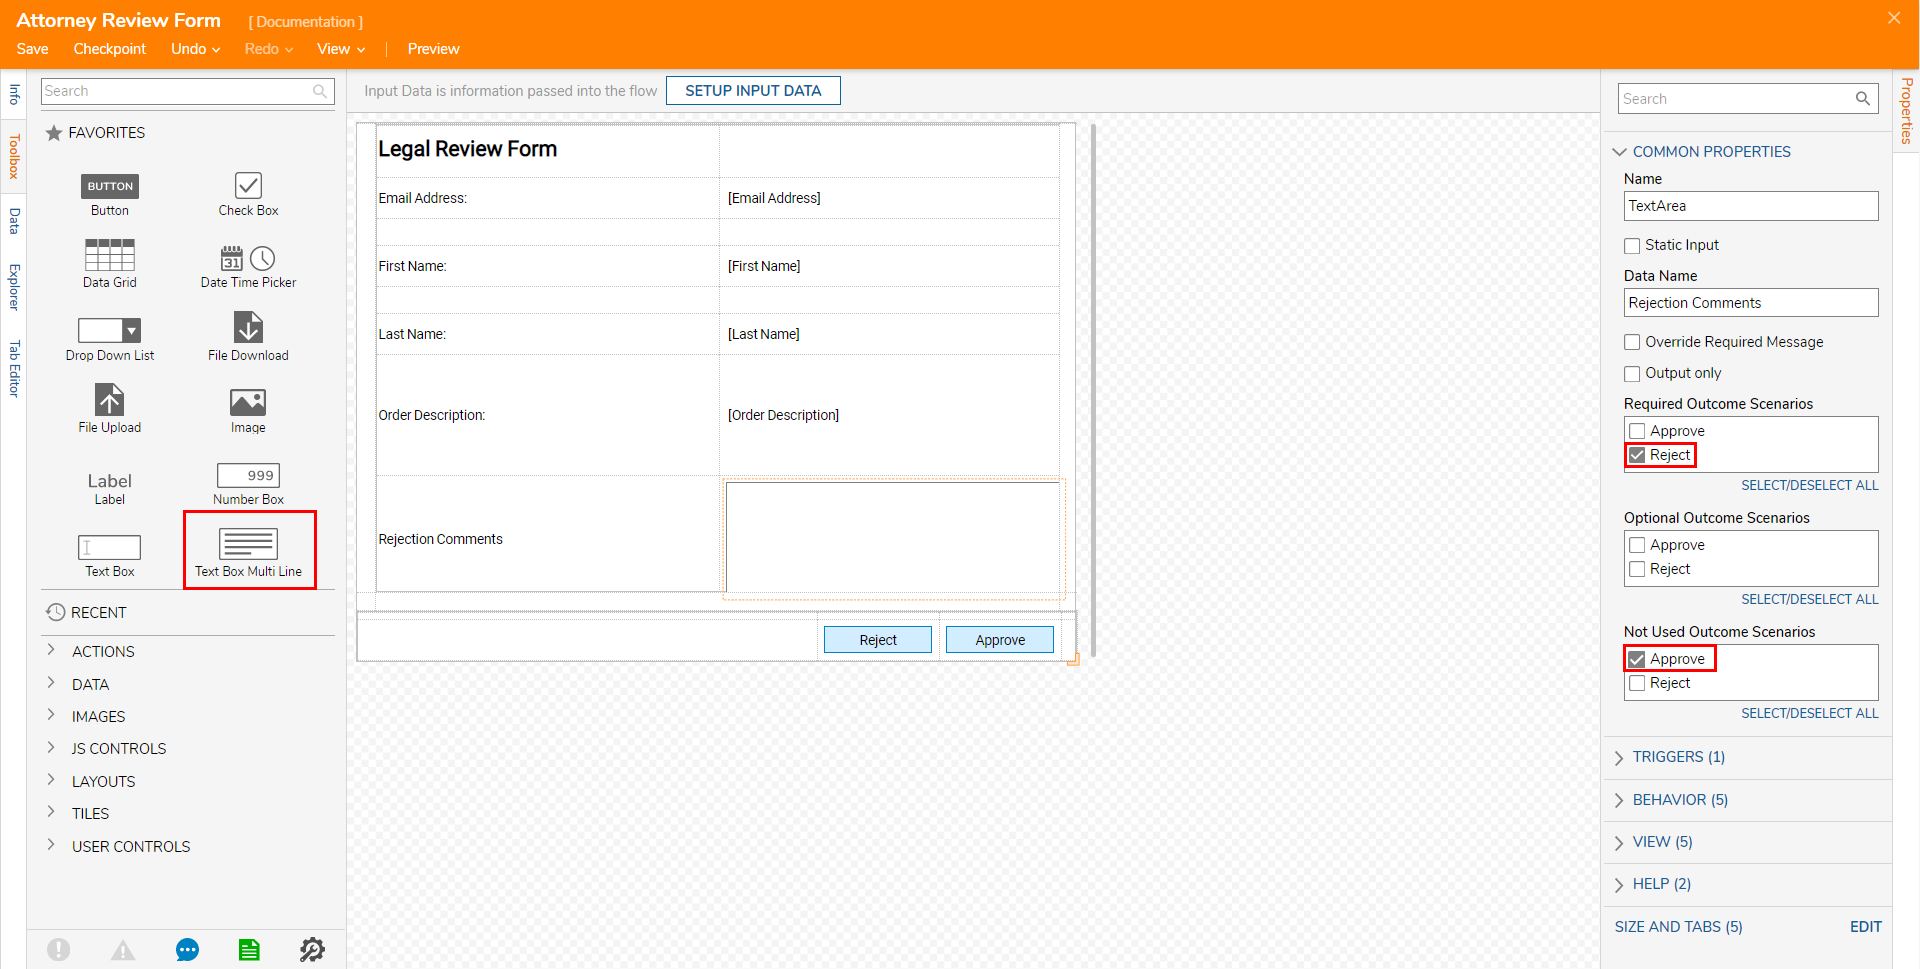
- Save and close the Form.
- Navigate to the Legal Team Form's Properties tab and set the Reject Comments INPUT to Ignore.
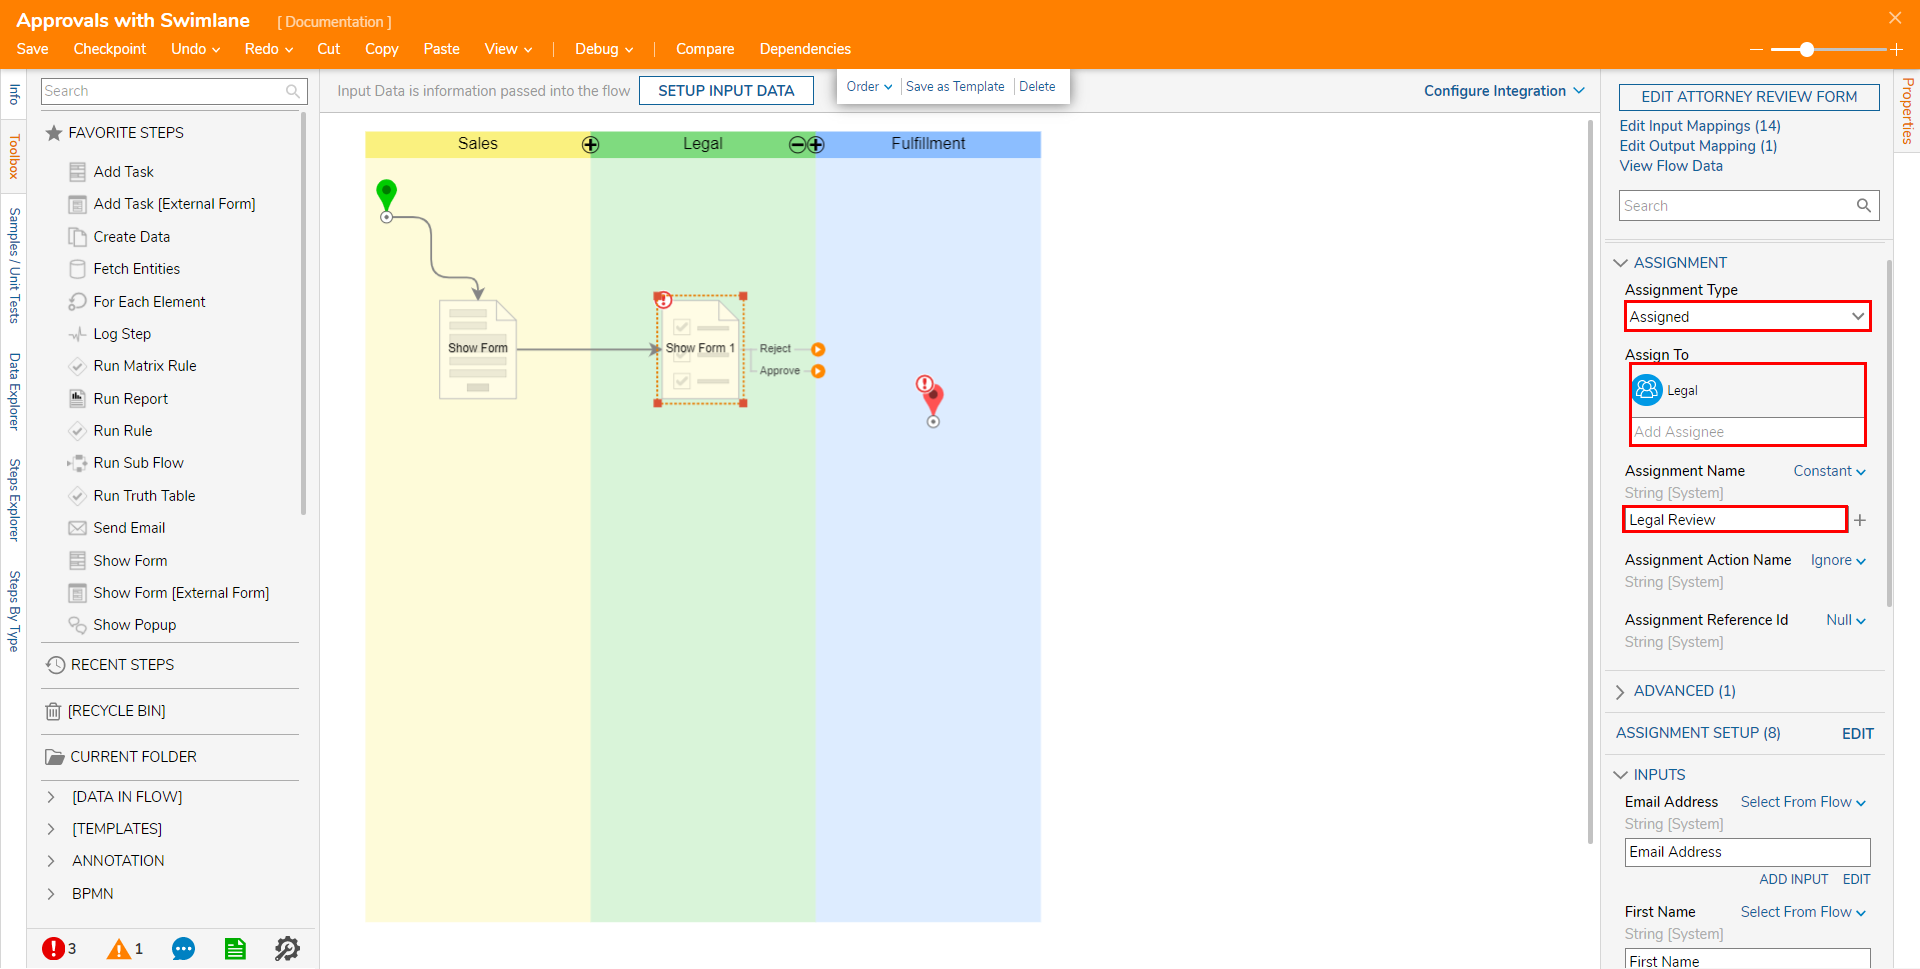
- From the Properties tab, under ASSIGNMENT > Assignment Type, select Assigned from the dropdown menu. Then, Constant map an Assignment Name.
- Add a Send Notification To Accounts and Groups step from the Toolbox > NOTIFICATION, into the Fulfillment Swimlane and attach it to the Approve path.
- Navigate to the Send Notification step's Properties tab under NotifyGroup, click ADD NEW, and PICK the Fulfillment Group.
- Constant map a Subject then select Merge Plain Text for Message; click SHOW EDITOR.
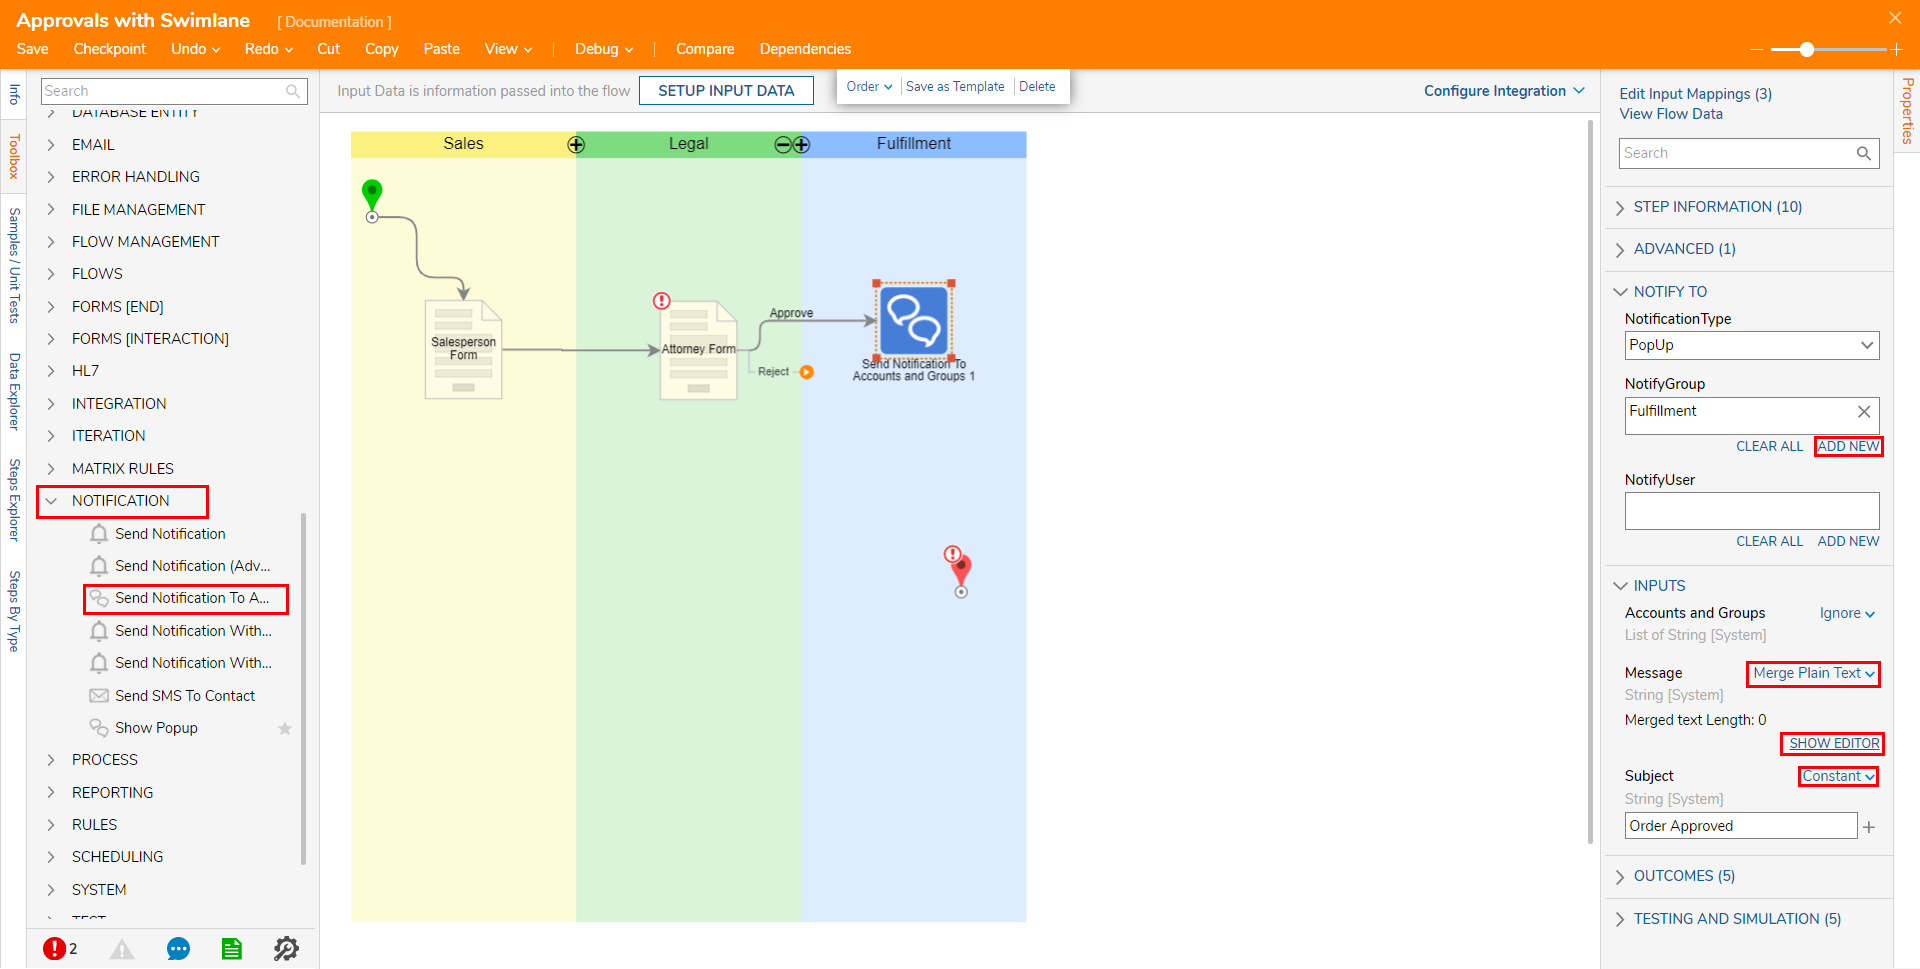
- Constant map a Subject then select Merge Plain Text for Message; click SHOW EDITOR.
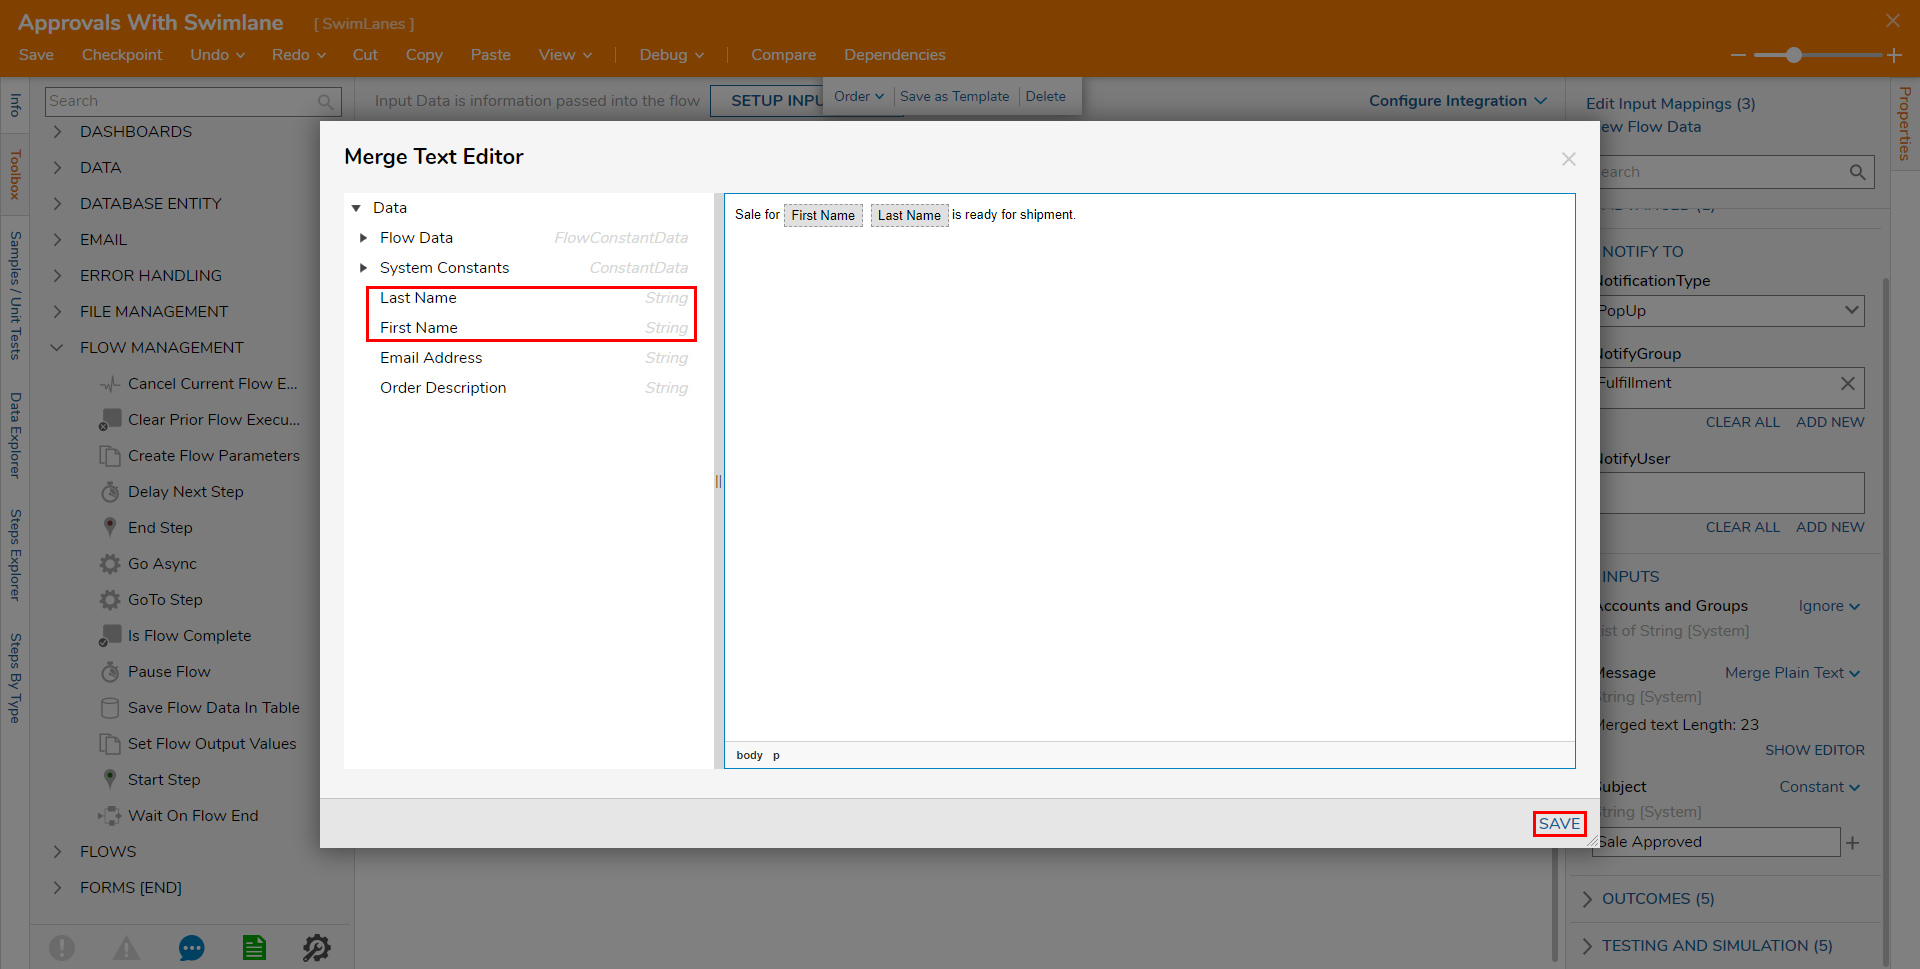
- Using the Data column on the left, configure the message "Order for First Name Last Name is ready for shipment." Then, click SAVE.
- Connect the Done path of the Notification step to the End step.
- Add another Send Notification To Accounts and Groups step, then drag it into the Sales Swimlane, then attach the Reject path.
- Navigate to the Properties tab and ADD the Sales Group.
- Configure the Message by Constant mapping a Subject, and selecting Merge Plain Text for Message. Then, click SHOW EDITOR.
- Configure the Message to say "Order for First Name Last Name is canceled because Rejection Comments." then SAVE.
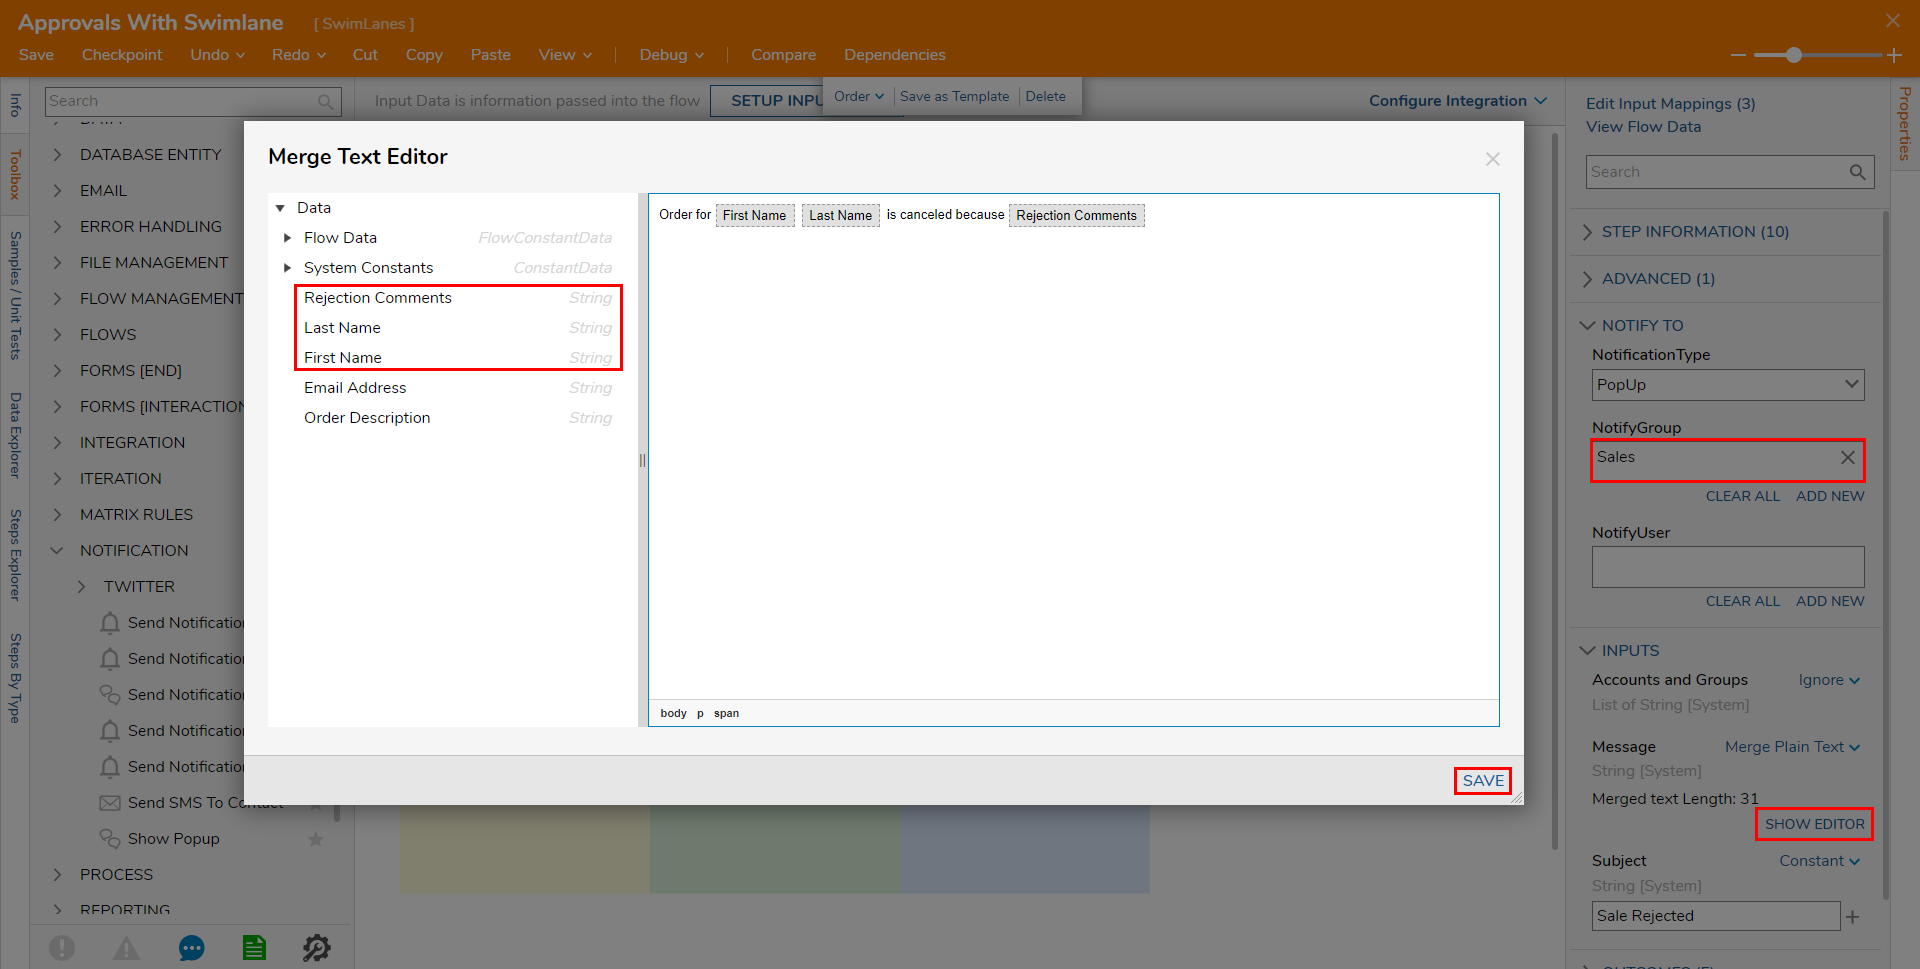
- Configure the Message to say "Order for First Name Last Name is canceled because Rejection Comments." then SAVE.
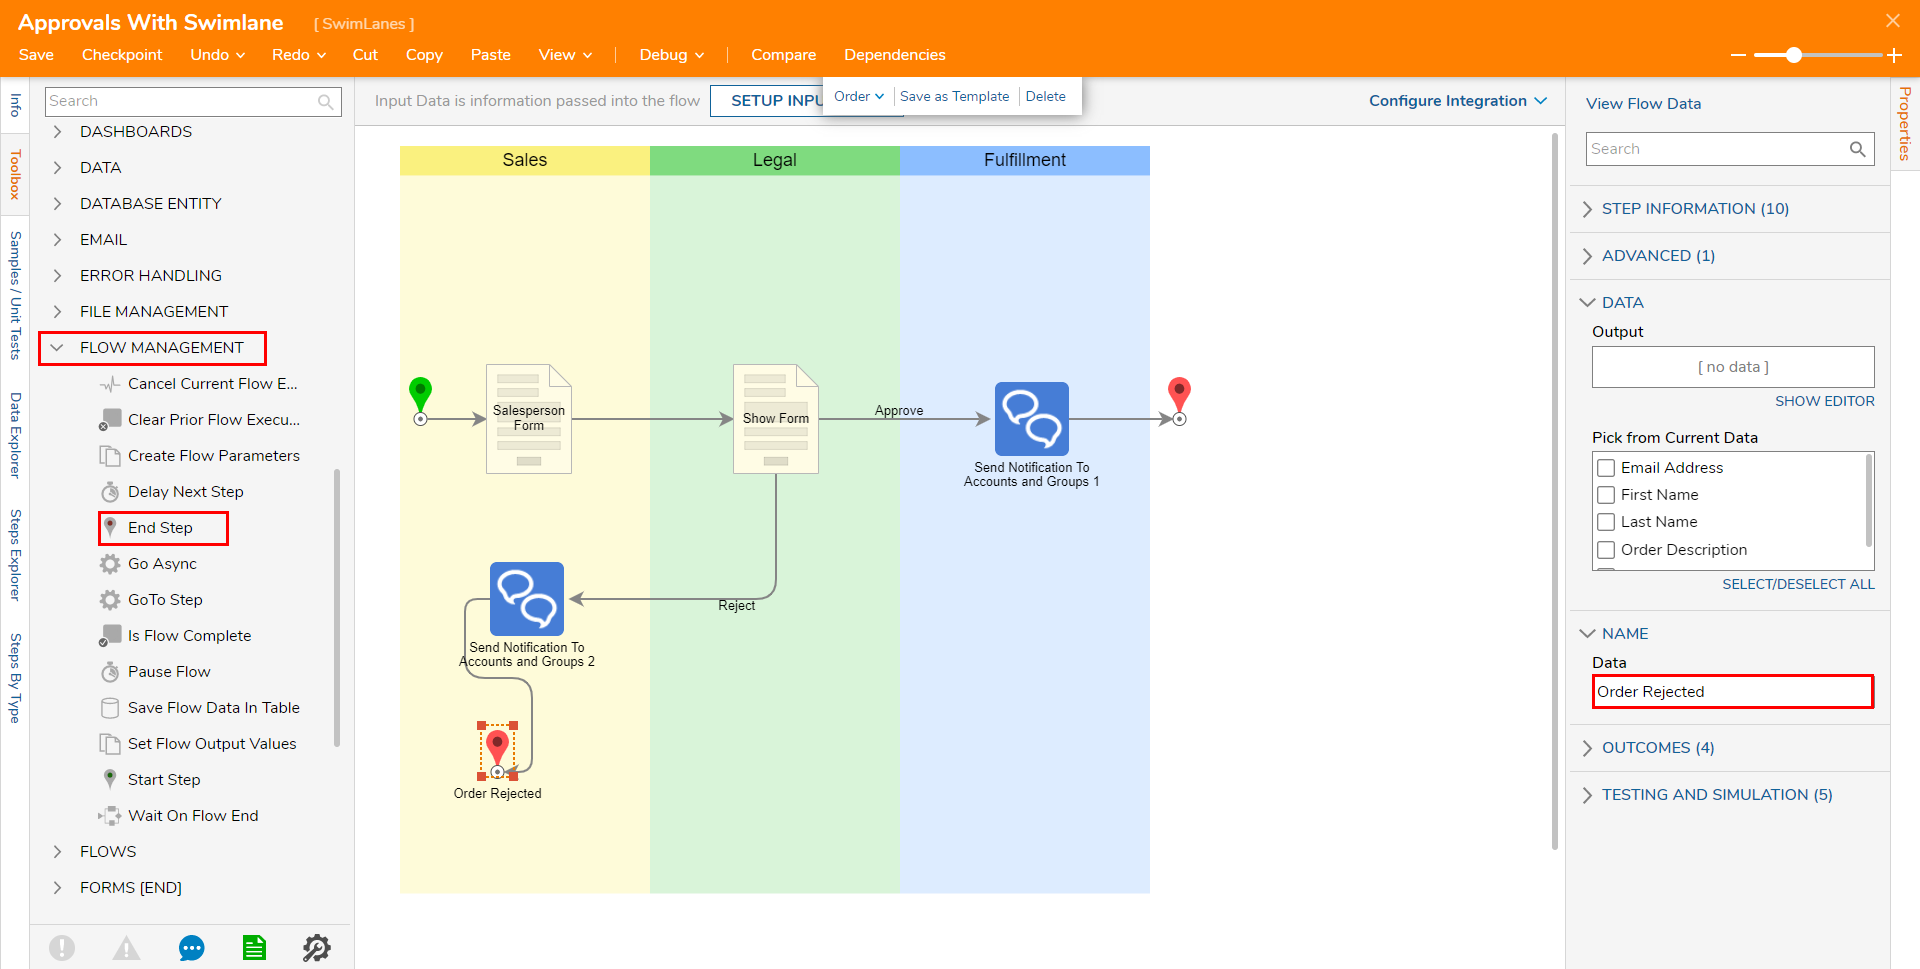
- Attach an End step from the FLOW MANAGEMENT category of the Toolbox tab to the Done path of the Send Notification step.
- From its Properties tab under NAME > Data, input Order Rejected; repeat the process on the End step for the Approval path and input a Data Name of "Order Shipped".
- Save the Flow, then close if desired.


Debug
- From the Flow Designer, select Debug from the top Action bar.
- Click START DEBUGGING.
- Fill out the Form and continue through the Flow two times, once for an Approval path, and the other for the Rejection path. Upon completing each iteration of the Flow, watch how the Flow continues through each Swimlane in the Process.
Approval Path
Rejection Path


Was this article helpful?