Using Simple Flows
- 17 Dec 2021
- 6 Minutes to read
- Print
- DarkLight
Using Simple Flows
- Updated on 17 Dec 2021
- 6 Minutes to read
- Print
- DarkLight
Article Summary
Share feedback
Thanks for sharing your feedback!
Overview
Simple Workflows are helpful tools for allowing select users to access functions to complete a task without giving them access to any other tools. This could be applied in many settings such as a marketing team being assigned by a manager to send a sales email to customers.
The following document demonstrates how to create a Simple Workflow built for an End User. This Simple Workflow has been designed to Send an Email, Wait a defined amount of Time, Send a Reminder, then Send a final Email. The time and email content can be easily adjusted by the End User giving them the ability to edit the task as needed.
Simple Workflow Example
- Create a Designer Project called "Marketing Email Campaign" that contains two additional Designer Projects; one called "Simple Flow Steps", and one with the "NameSimple Flows".
- From the "Simple Flows" Designer Project, click the CREATE FLOW button on the top Action bar.
- Select Simple Flow, provide a Name, and click CREATE.

- Select Simple Flow, provide a Name, and click CREATE.
- Select the Start step to navigate to its Properties tab.
- Select SHOW EDITOR and define an Account Type Input, then CLOSE to return to the Flow Designer.
.png)
- Save the Flow, then close via X.

.png)
Create Simple Flow Send Email
Next, create the Simple Flow Steps that will be used within the Simple Flow.
- From the "Simple Workflow Steps" Designer Project, click CREATE FLOW.
- Navigate to Simple > Simple Flow Step, provide a Name, then click CREATE.
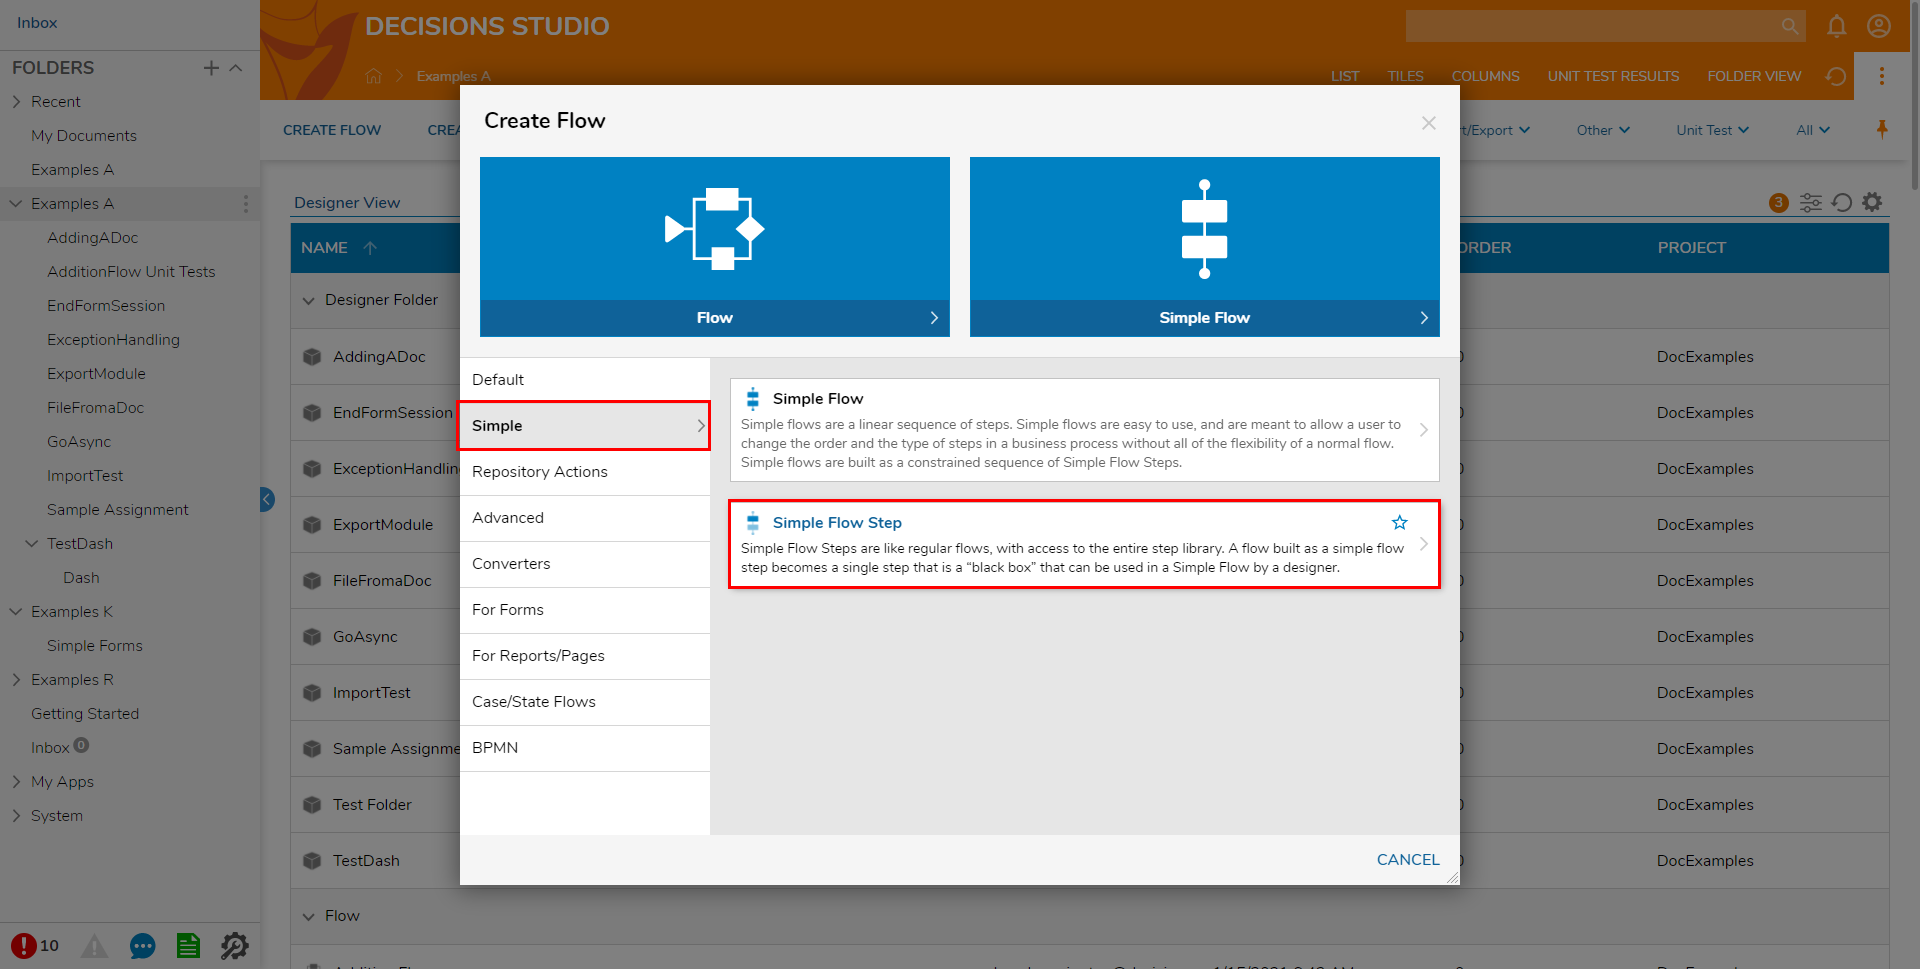
- Navigate to Simple > Simple Flow Step, provide a Name, then click CREATE.
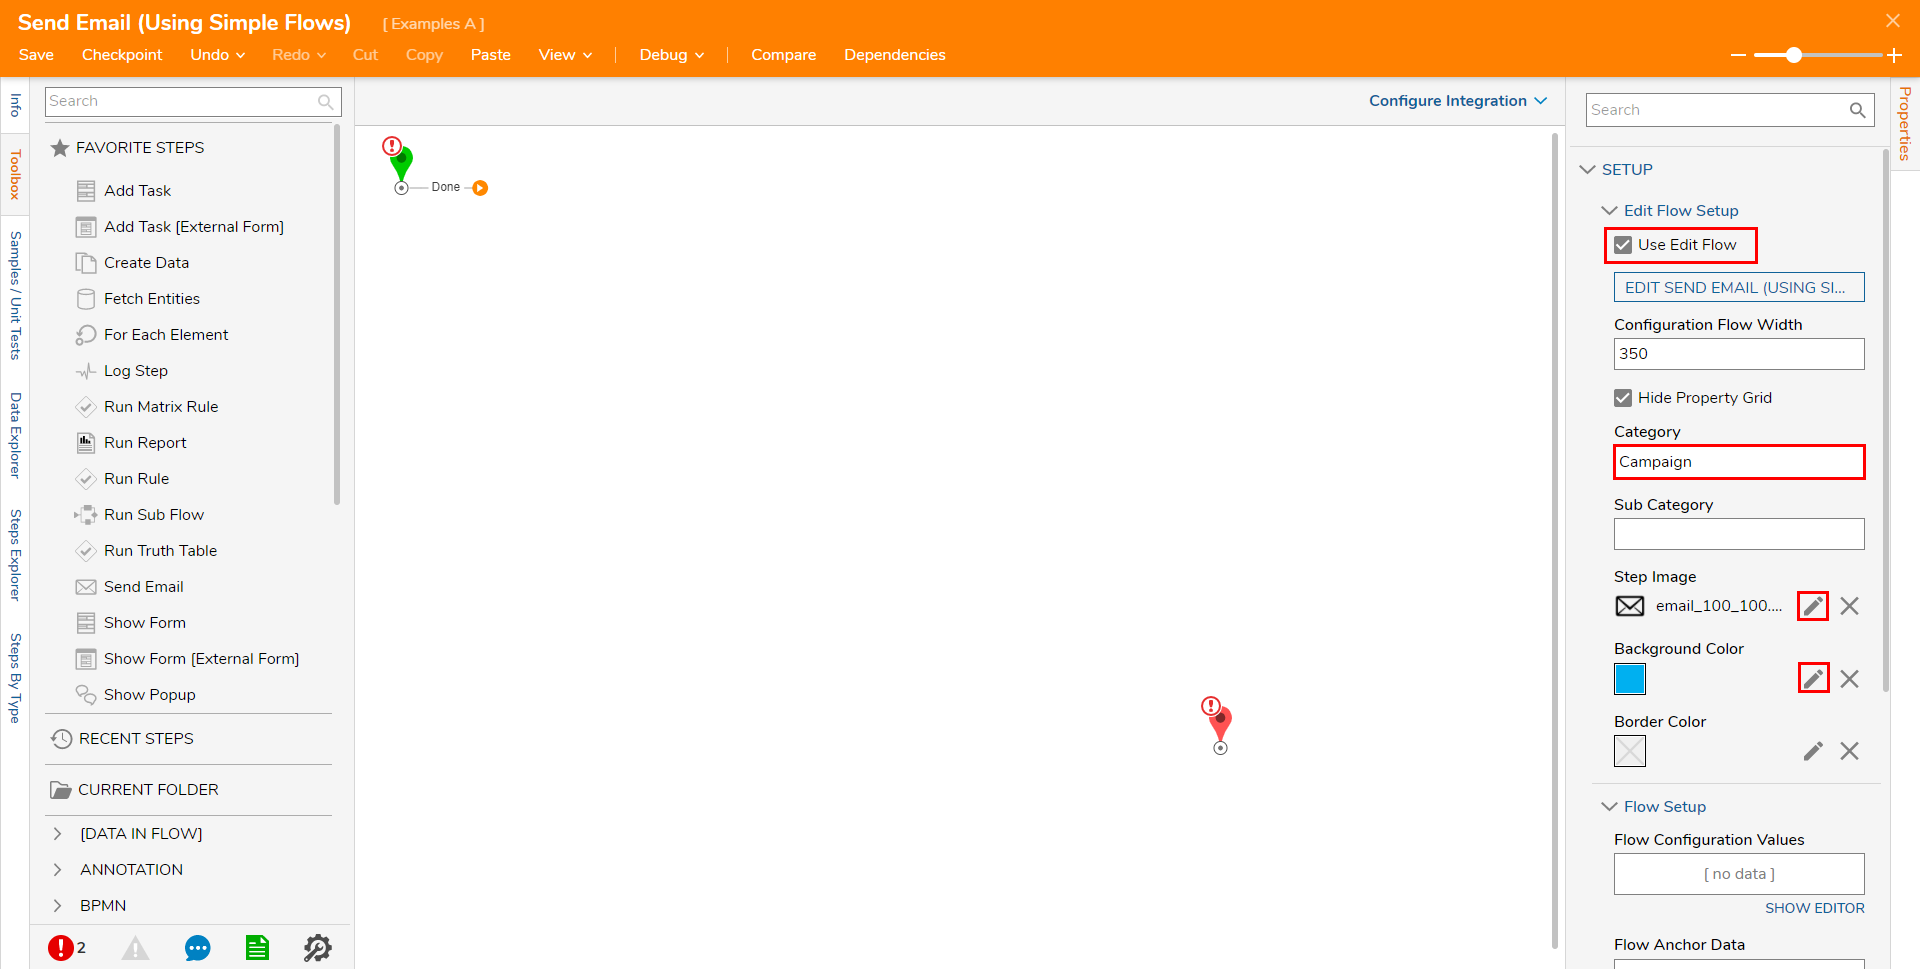
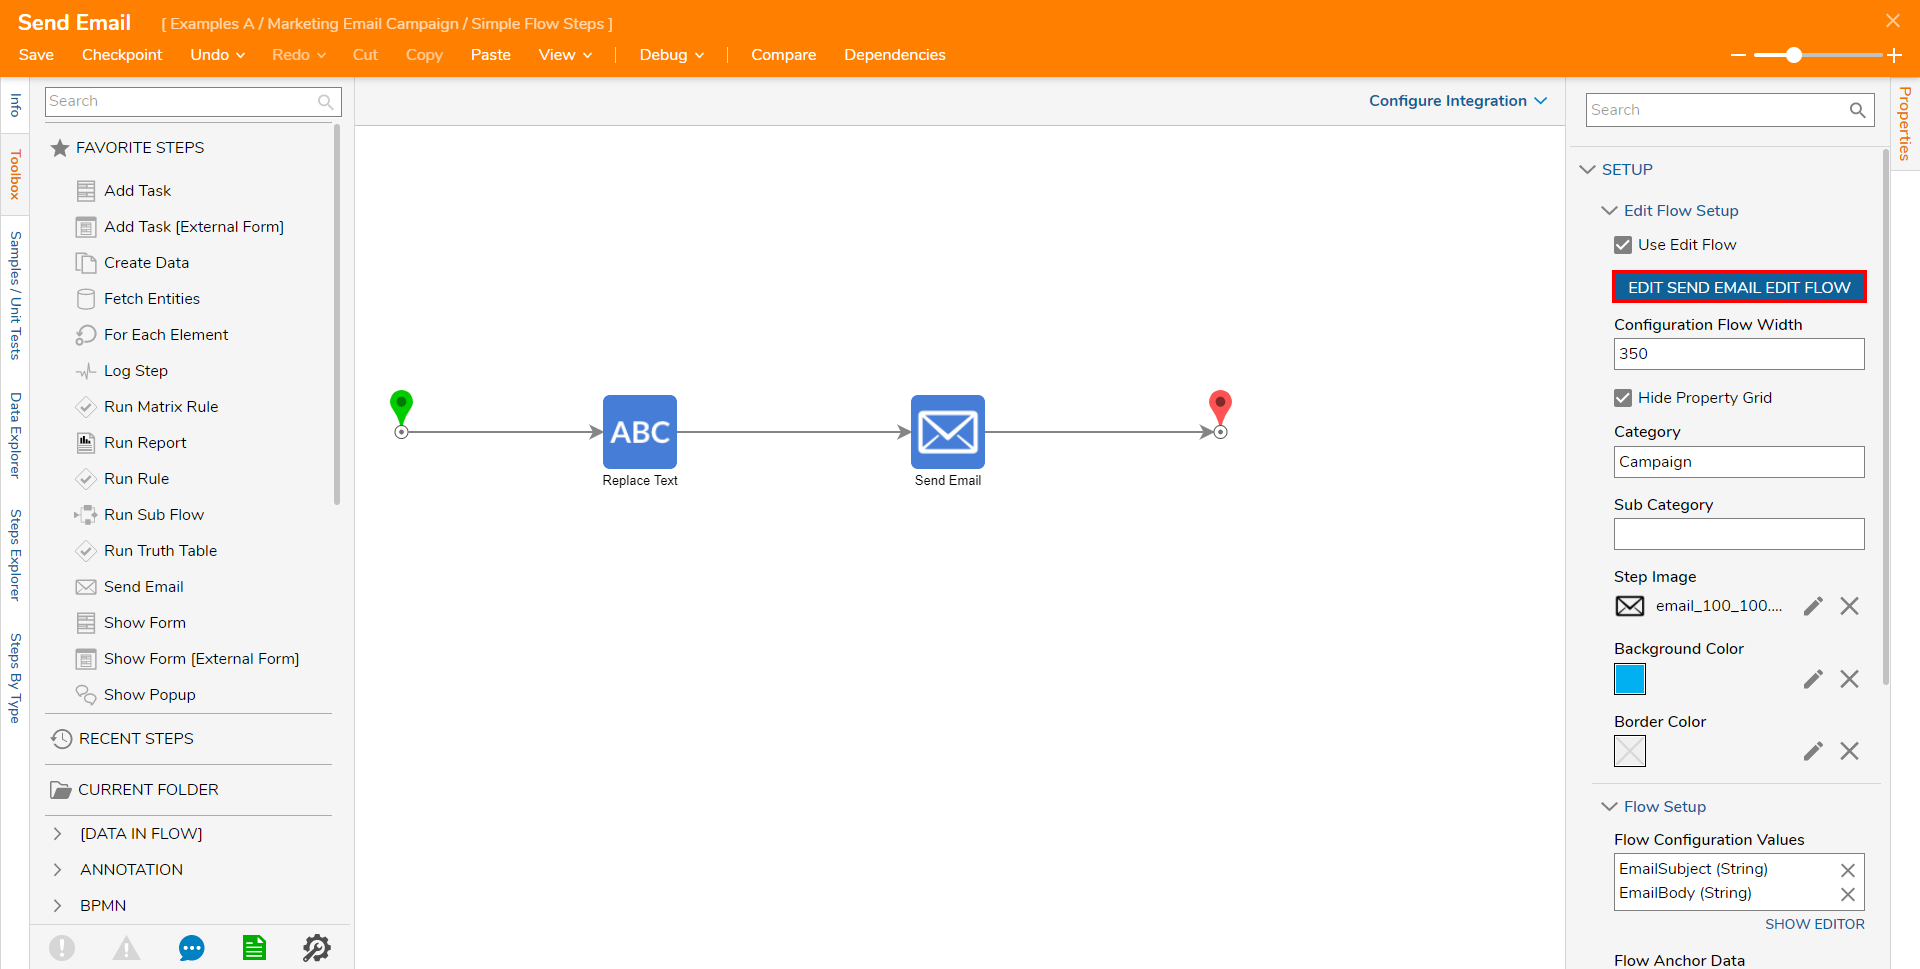
- Navigate to the Properties panel and define the SETUP properties, define Category as Campaign.
- Click the Pencil icon beside Step Image and search for and PICK an Email Icon.
- Select the Pencil icon beside Background Color and PICK a color. Then, check the Use Edit Flow button.
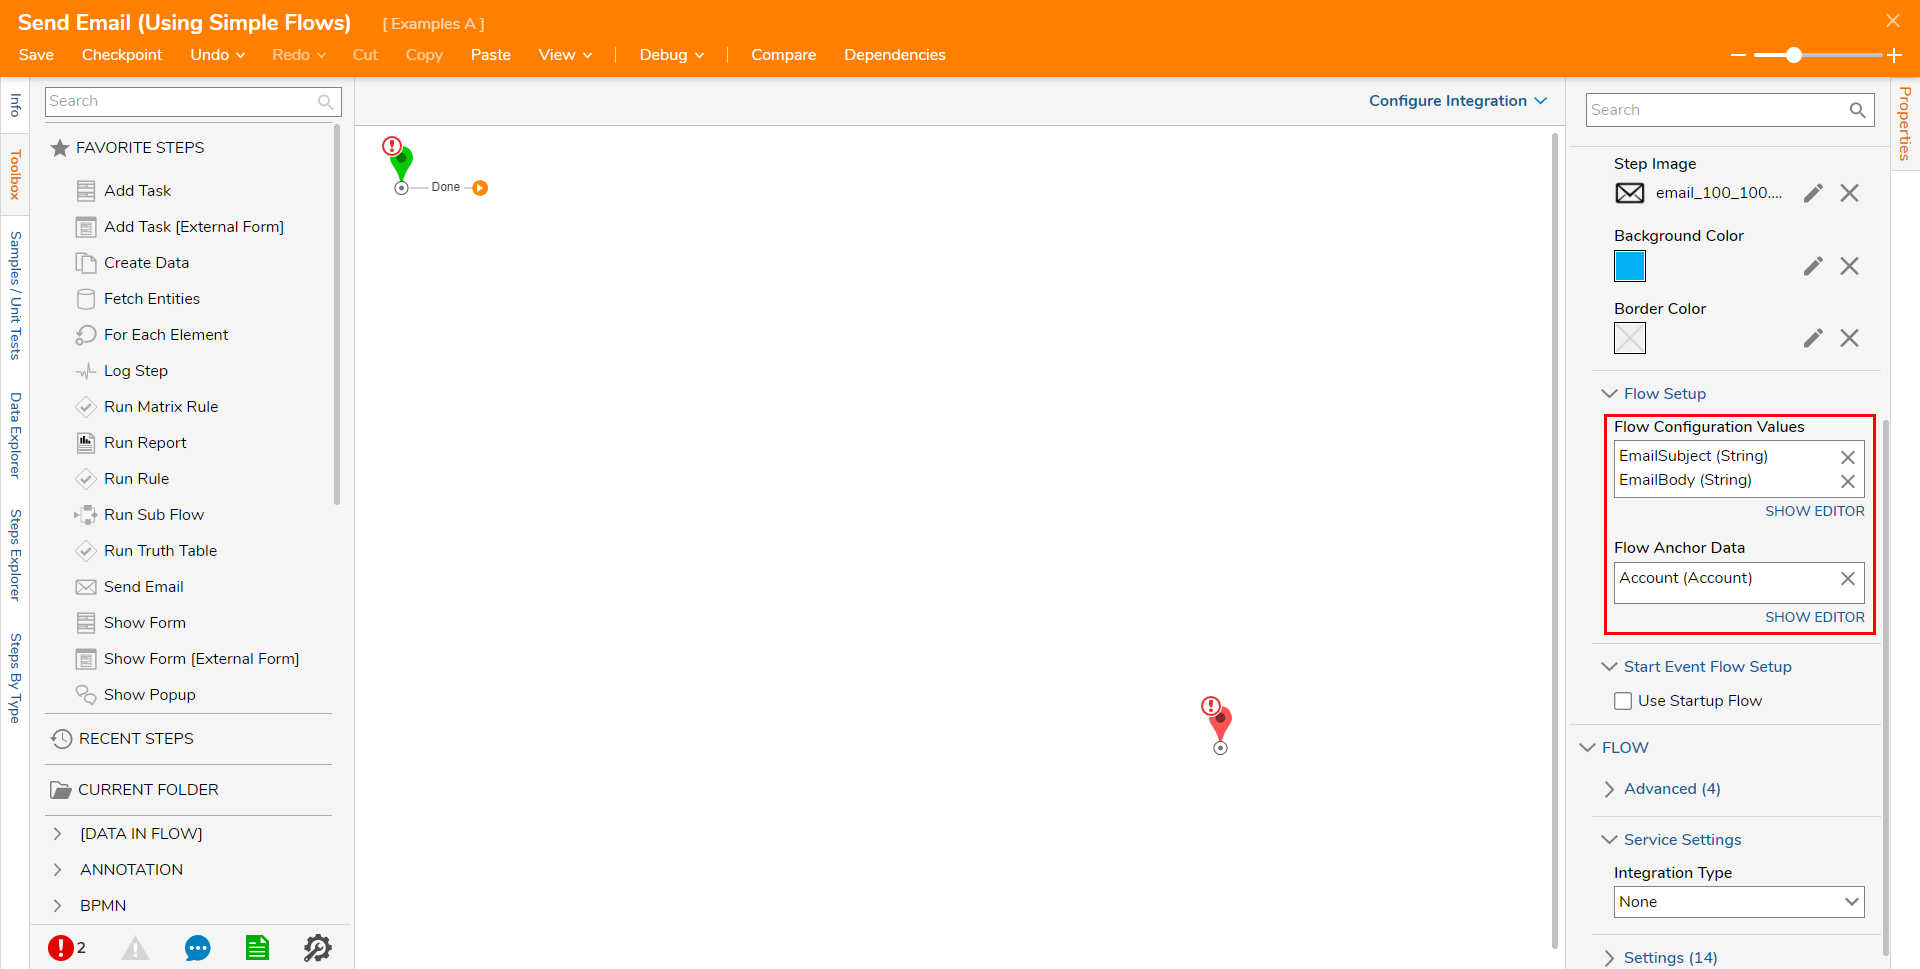
- Under Flow Setup, click SHOW EDITOR beside Flow Configuration Values and create two pieces of Data called "EmailSubject" and "EmailBody" as String Types. About Flow Configuration ValuesThese pieces of Data can be edited by the Process Expert.
- 5 Under FlowAnchor Data, click SHOW EDITOR and create a Data Definition called Account with Account as a Data Type. About Flow Anchor DataFlow Anchor Data is any data that should will be passed to the Flow.
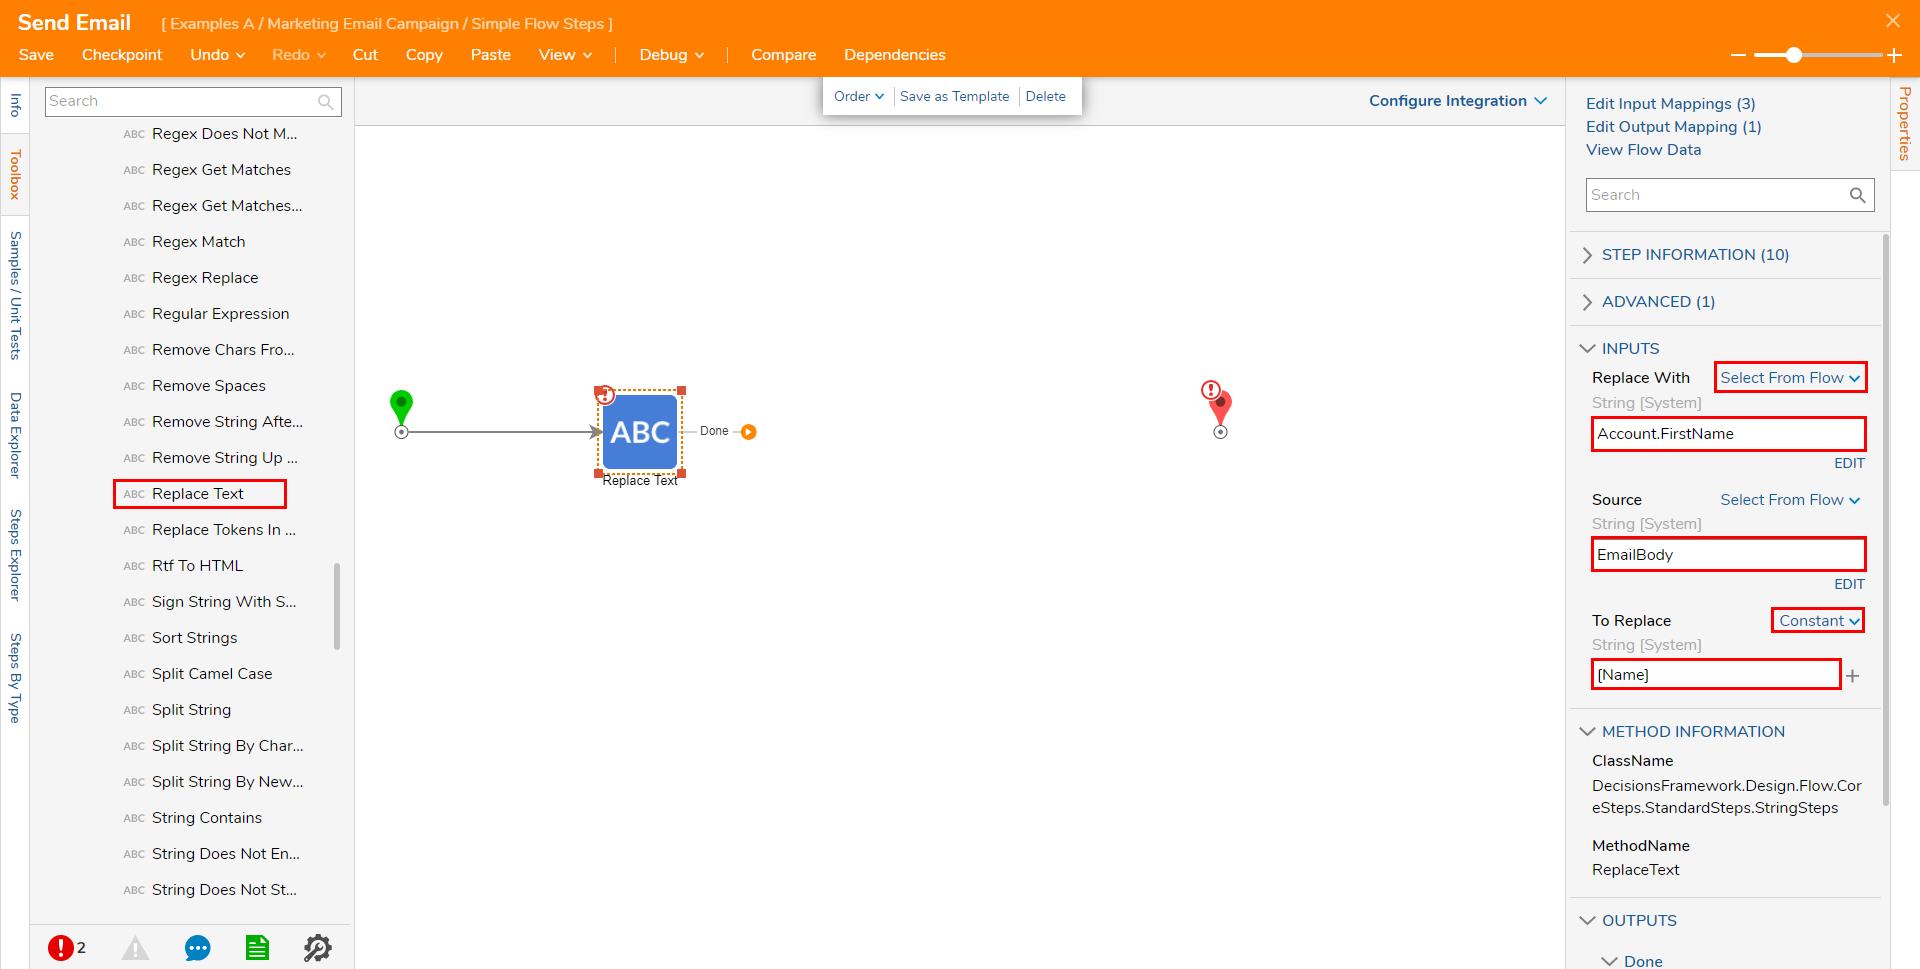
Add a Replace Text step from DATA > TEXT in the Toolbox tab and attach it to the Done path of the Start step.
Select the Replace Text step to navigate to its Properties tab.
Under INPUTS, Select From Flow map Account .FirstName to Replace With, then Map EmailBody to Source, and Constant map "[Name]" to the To Replace Input.
Attach a Send Email step from the FAVORITE STEPS category in the Toolbox, to the Done path of the Replace Text step and to the End step.
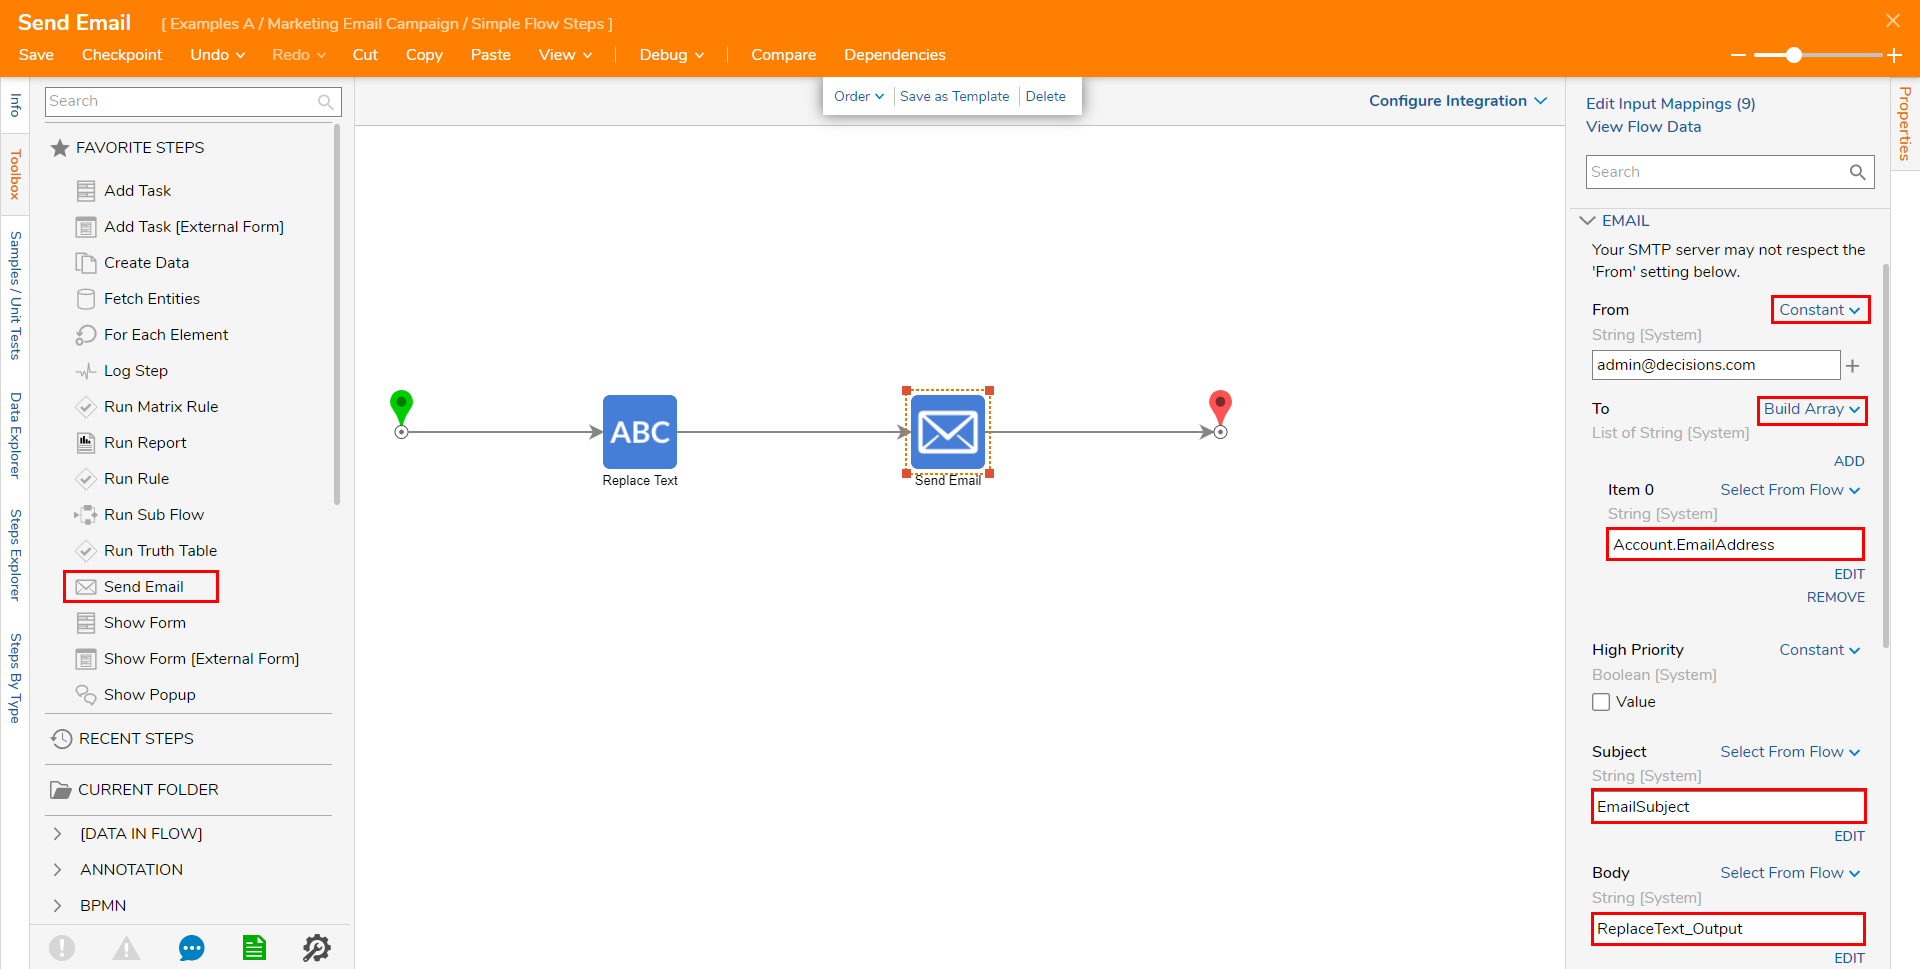
Select the Send Email step and in its Properties tab, Constant map an email in the From value.
Under the To value, use a BuildArray mapping, and map Account.EmailAddress to Item 0.
Map EmailSubject to Subject and ReplaceText1_Output to Body.
Navigate back to the Properties tab for the Flow and click the EDIT [FLOW NAME] button.
- From the Flow Designer, attach Show Form step from the FAVORITE STEPS Category of the Toolbox tab to the Done path of the Start step.
- Select the Form step then from its Properties tab, click PICK OR CREATE FORM.
- Select CREATE, then Form, Name the Form "Send Email Form", then click CREATE.
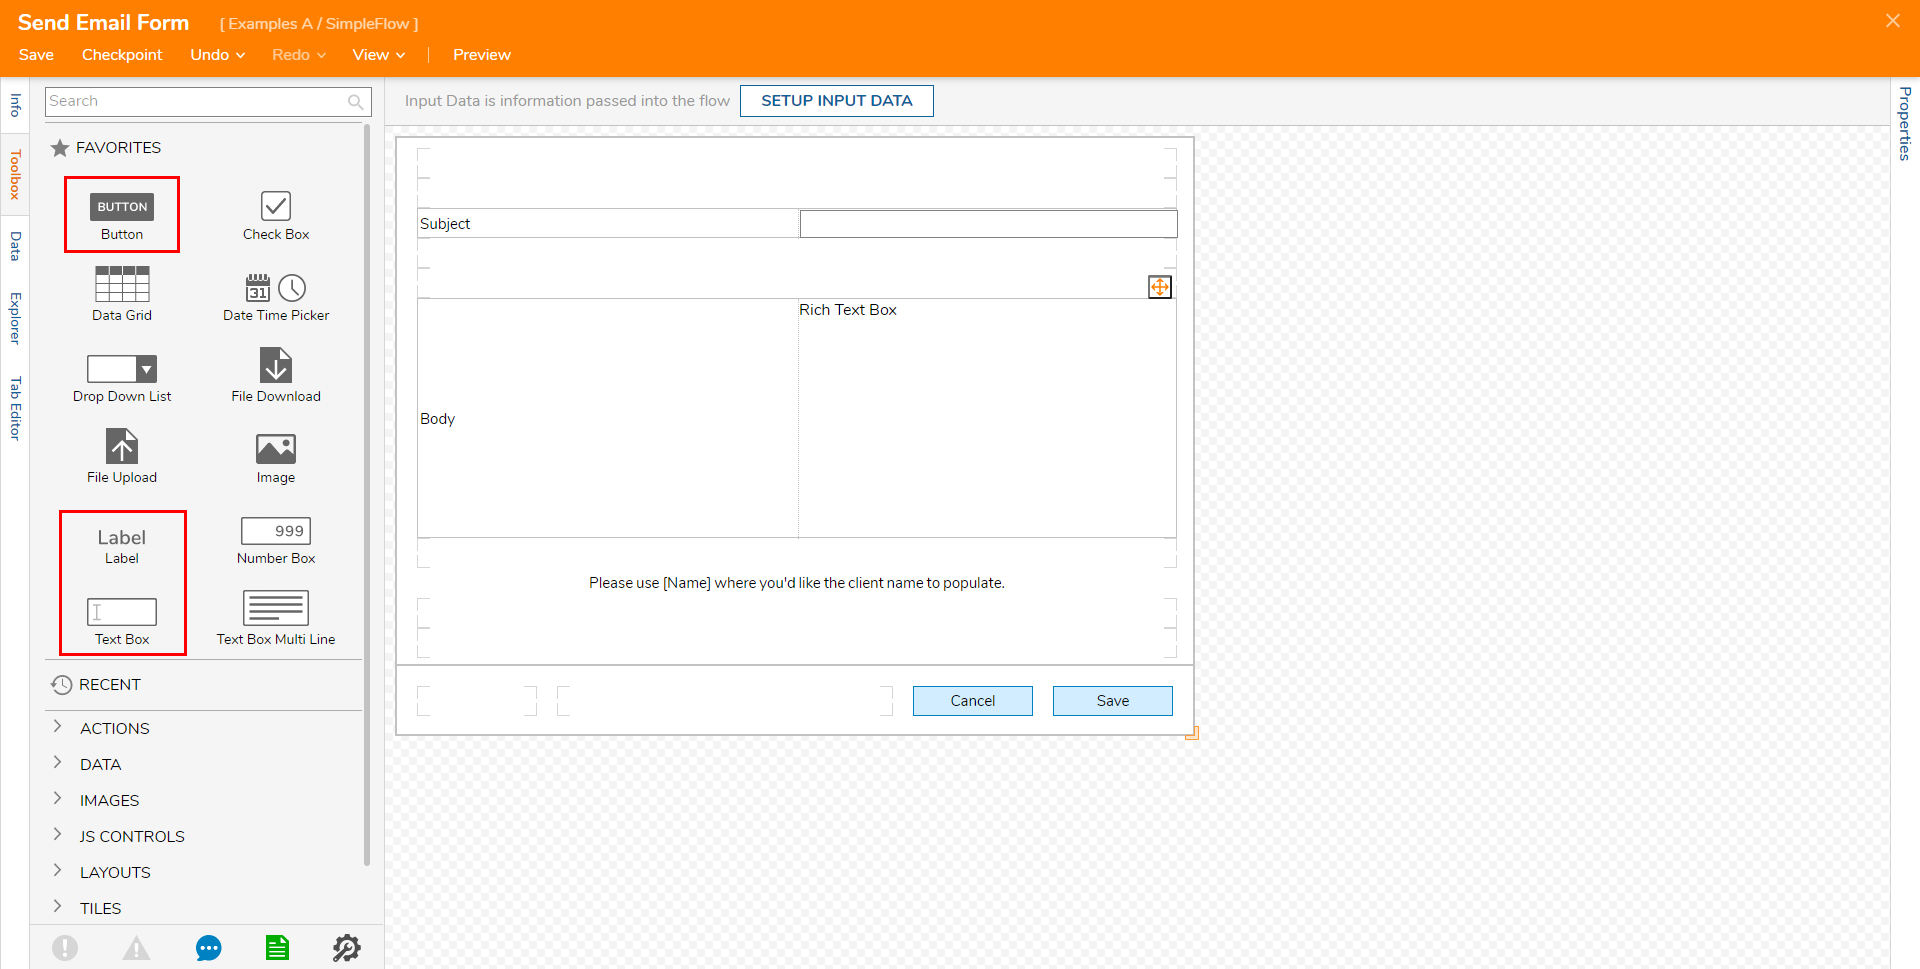
- Design the Form by adding a Text Box labeled "Subject", a Rich Text Box labeled "Body", two Buttons (one for "Save" and one for "Cancel") from the Toolbox tab, and a Label that reads "Please use [Name] where you'd like the client name to populate." About [Name] ParameterThe [Name] value is used to define a location for value Output by the Replace Text step.
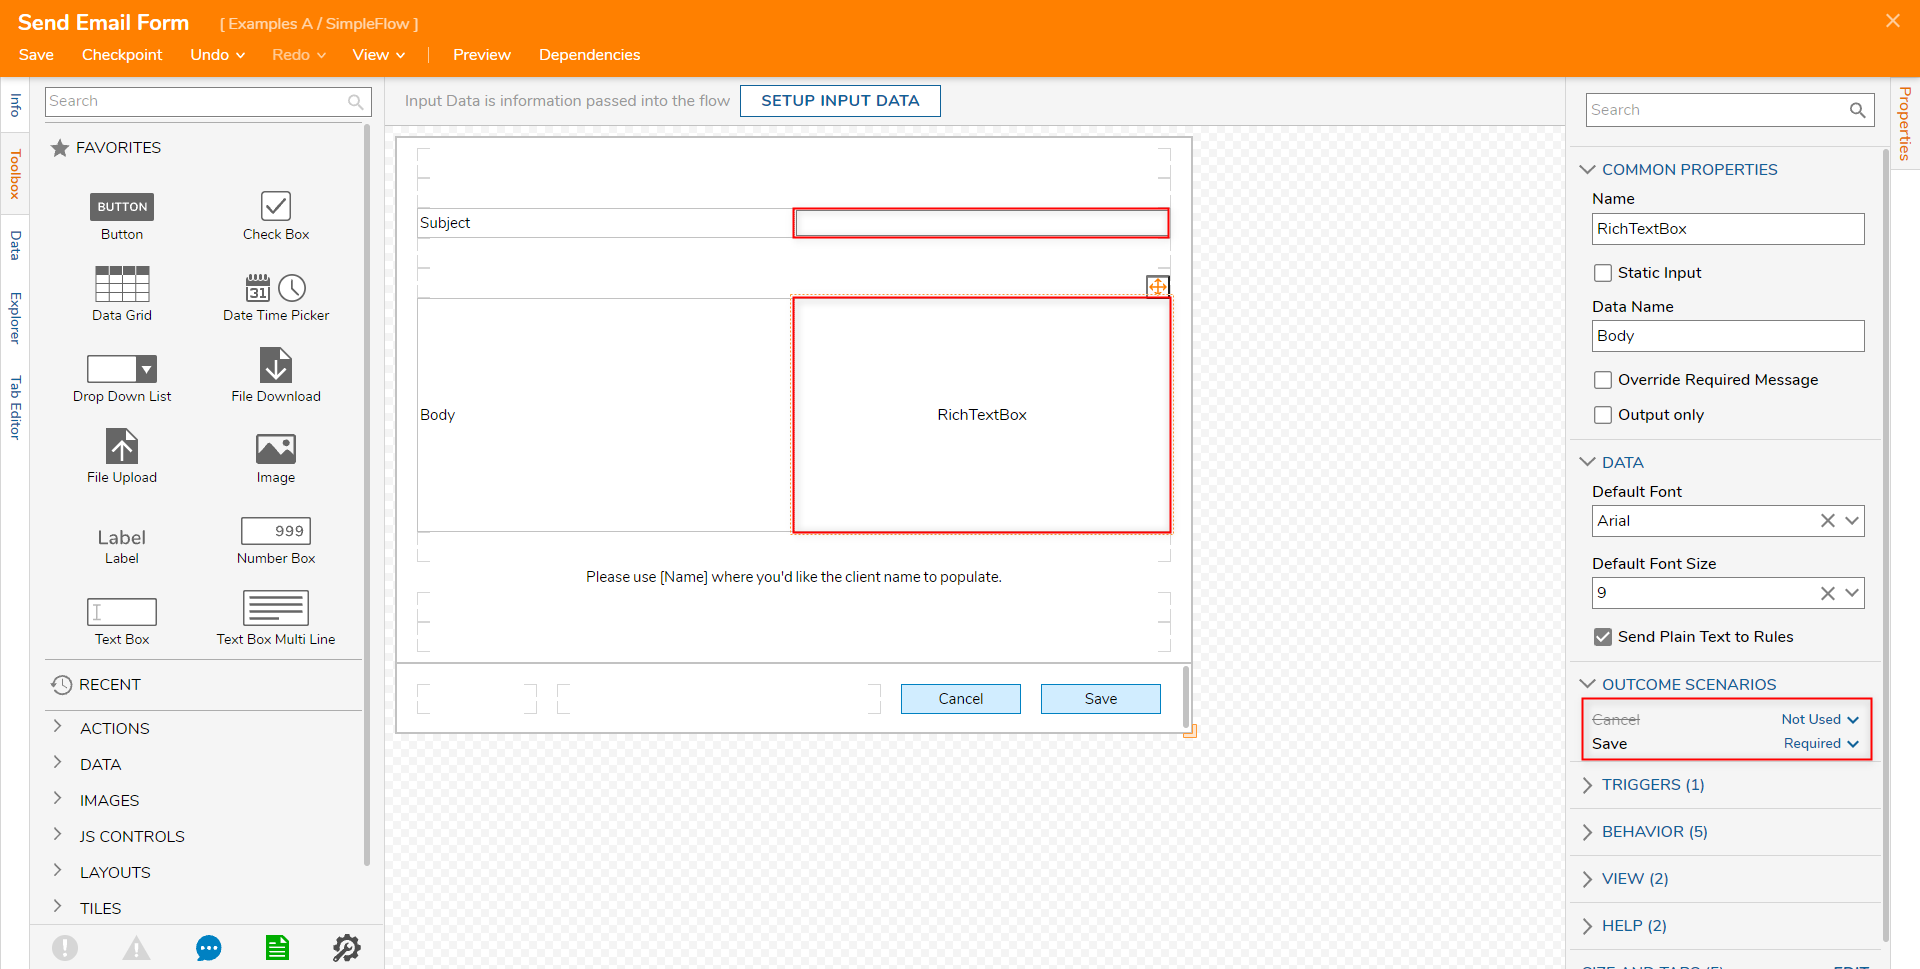
Select the Text Box; under Properties > OUTCOME SCENARIOS, set Save to either Optional or Required, then set Cancel to Not Used. Repeat this action for the Rich Text Box.
- Save and close the Form Designer.
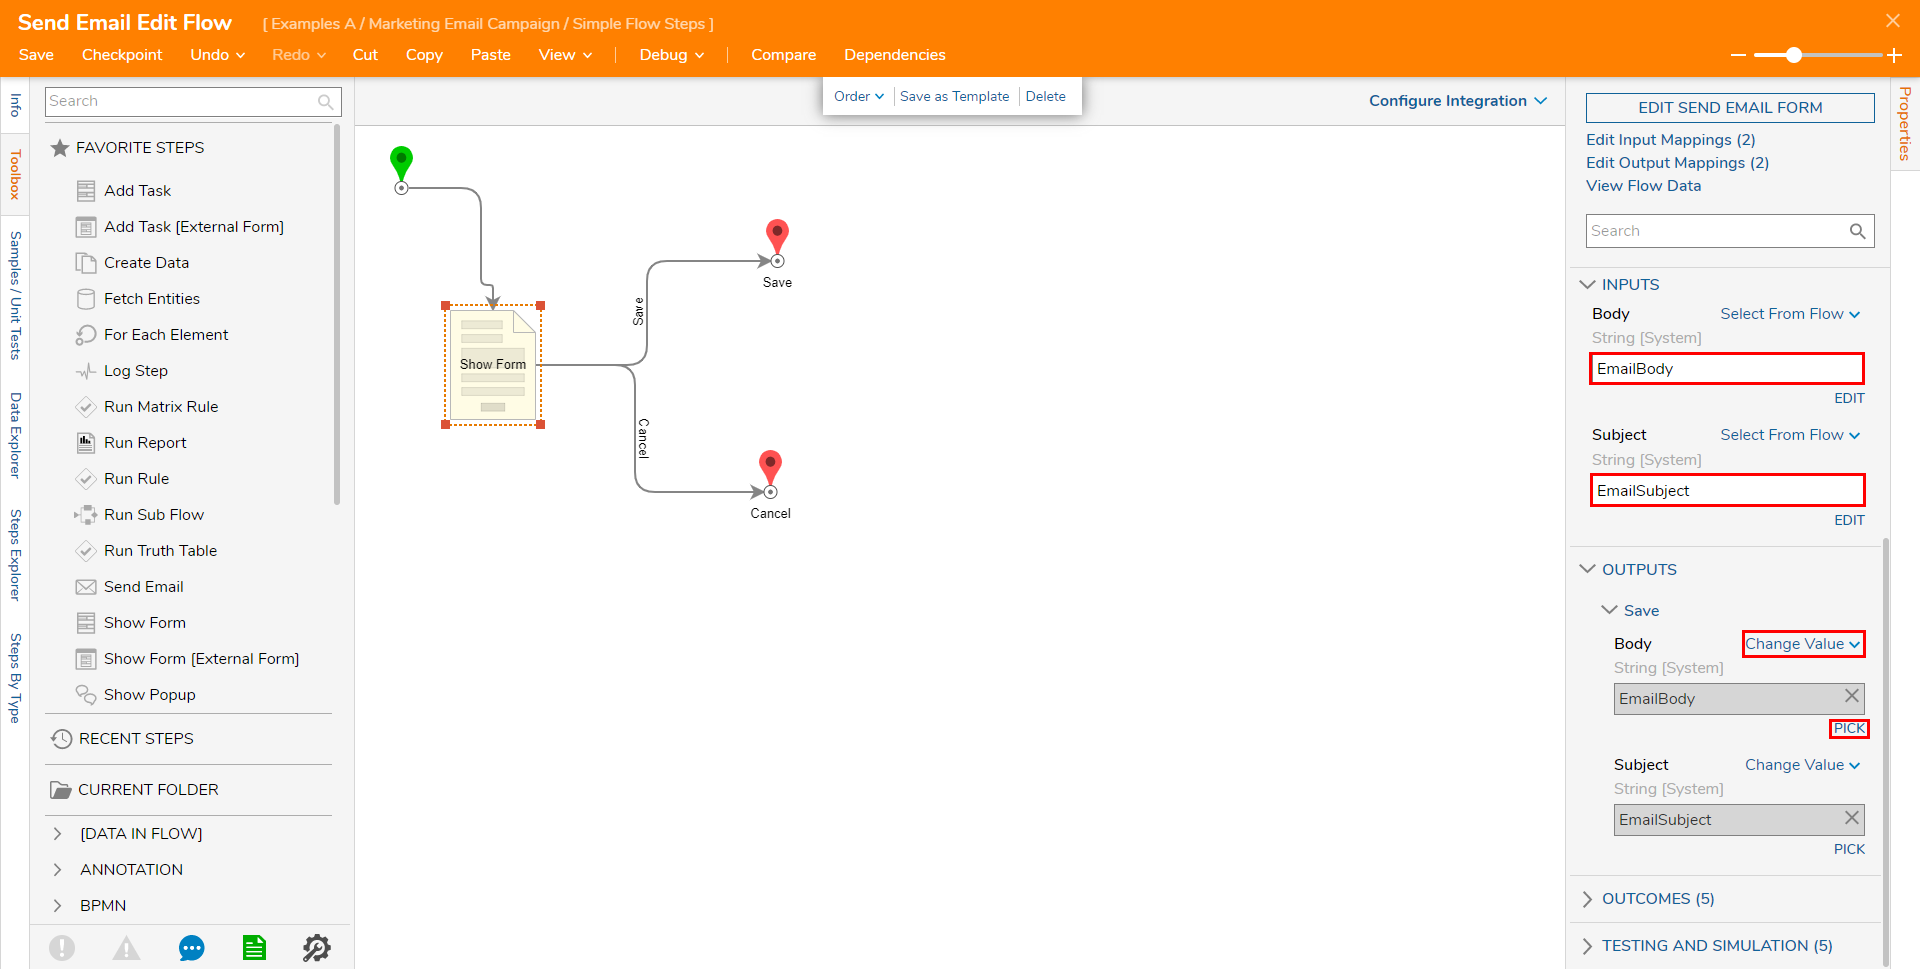
- Back in the Flow Designer, select the Show Form step, then under INPUTS, map EmailSubject to Subject, and EmailBody to Body.
- Under OUTPUTS, set the mapping for Body and Subject to Change Value. For Body, PICK EmailBody, and for Subject PICK EmailSubject.
- Connect the Cancel path to the Cancel step, and Save to the Save step.
- Save and close the Flow Designer.
- Save and close the Send Email Simple Flow Step.


Create the Simple Flow Step Wait In Minutes
- In the Simple Flow Steps Designer Project, CREATE another Simple Flow Step.
- Configure its Properties and define its Category as Campaign, provide a Step Image, and Background Color.
- Under Flow Configuration Values define a piece of Data called Time with an Int32 Type.
- Check the Use Edit Flow box.

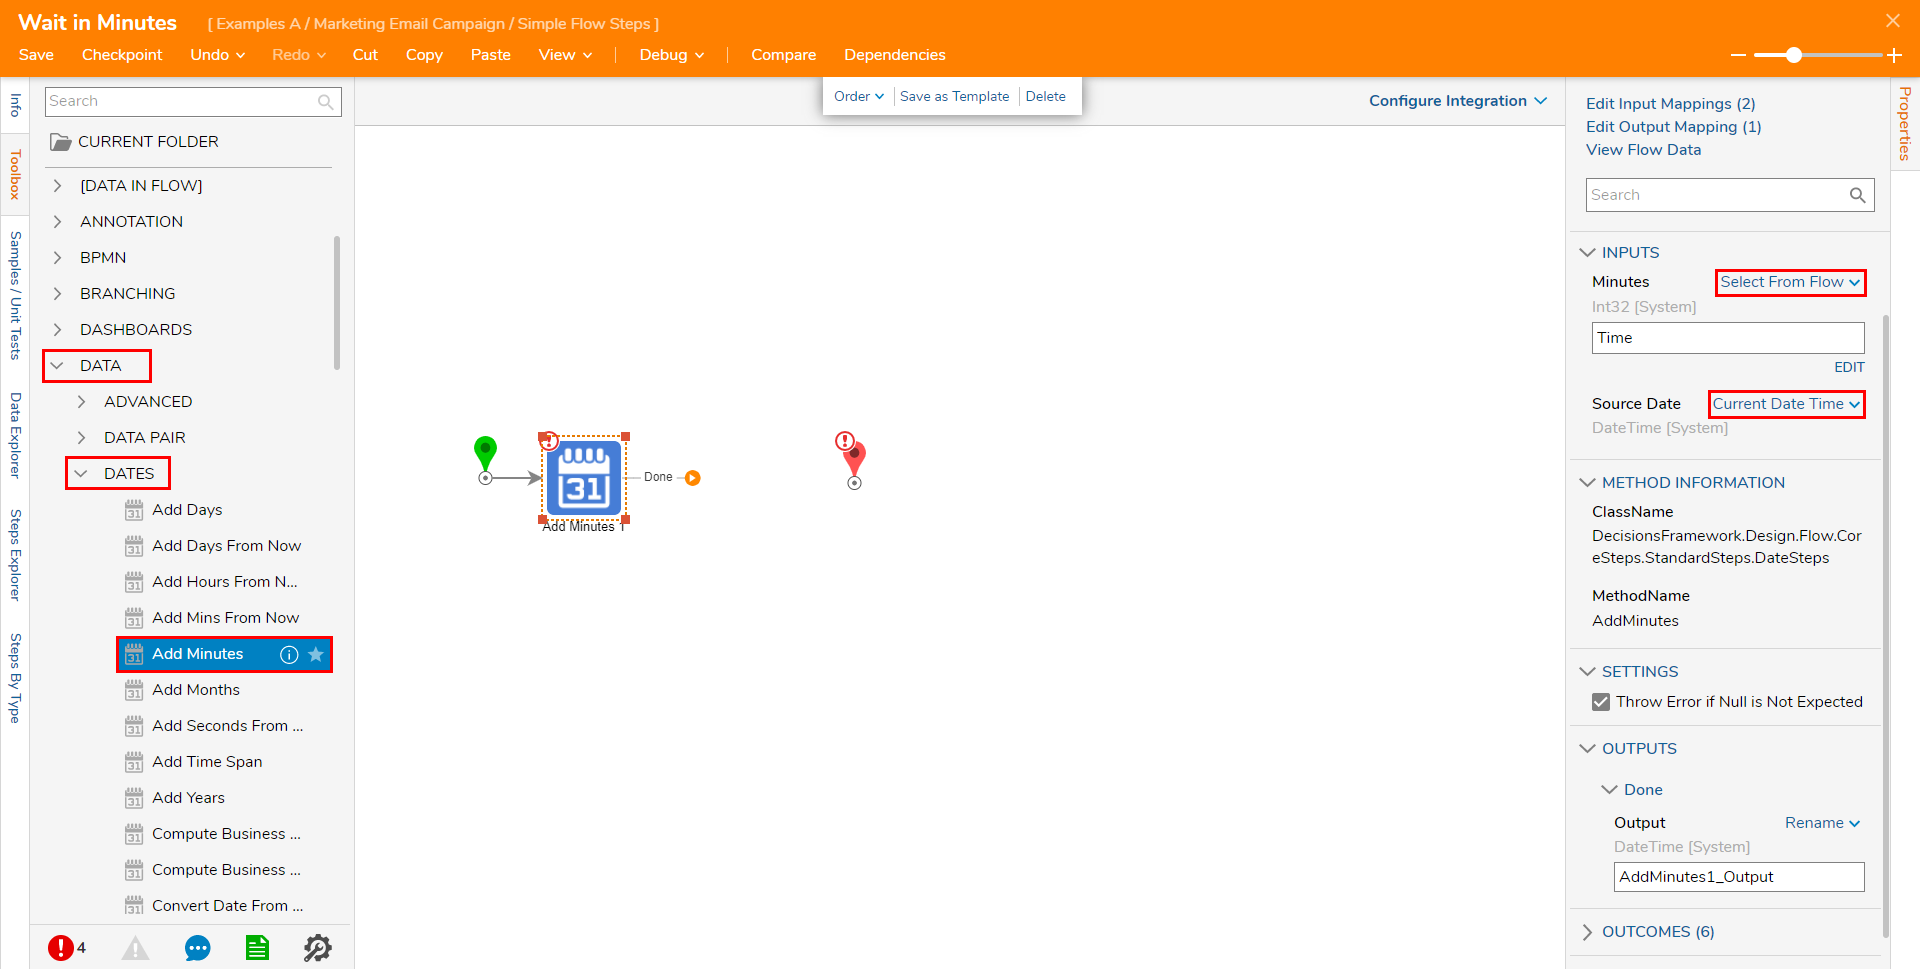
- Attach an Add Minutes step from the Toolbox tab under DATA > DATES to the Start step.
- Select the Add Minutes step, Select From Flow map Time to Minutes, and map Current Date Time to Source Date.
- Attach a Pause Flow step from the FLOW MANAGEMENT Category in the Toolbox tab, to the Add Minutes step and the End step.
- Select the Pause Flow step and map AddMinutes_Output to the Resume When INPUT.

- Navigate back to the Properties tab for the Flow and click the EDIT [NAME OF FLOW] button.
- Attach a Show Form step to the Start step then click PICK OR CREATE FORM and CREATE a new Form, with the Name Wait in Minutes Form.
- Design the Form by adding two Button components (for "Save" and "Cancel") and a Number Box labeled Time.
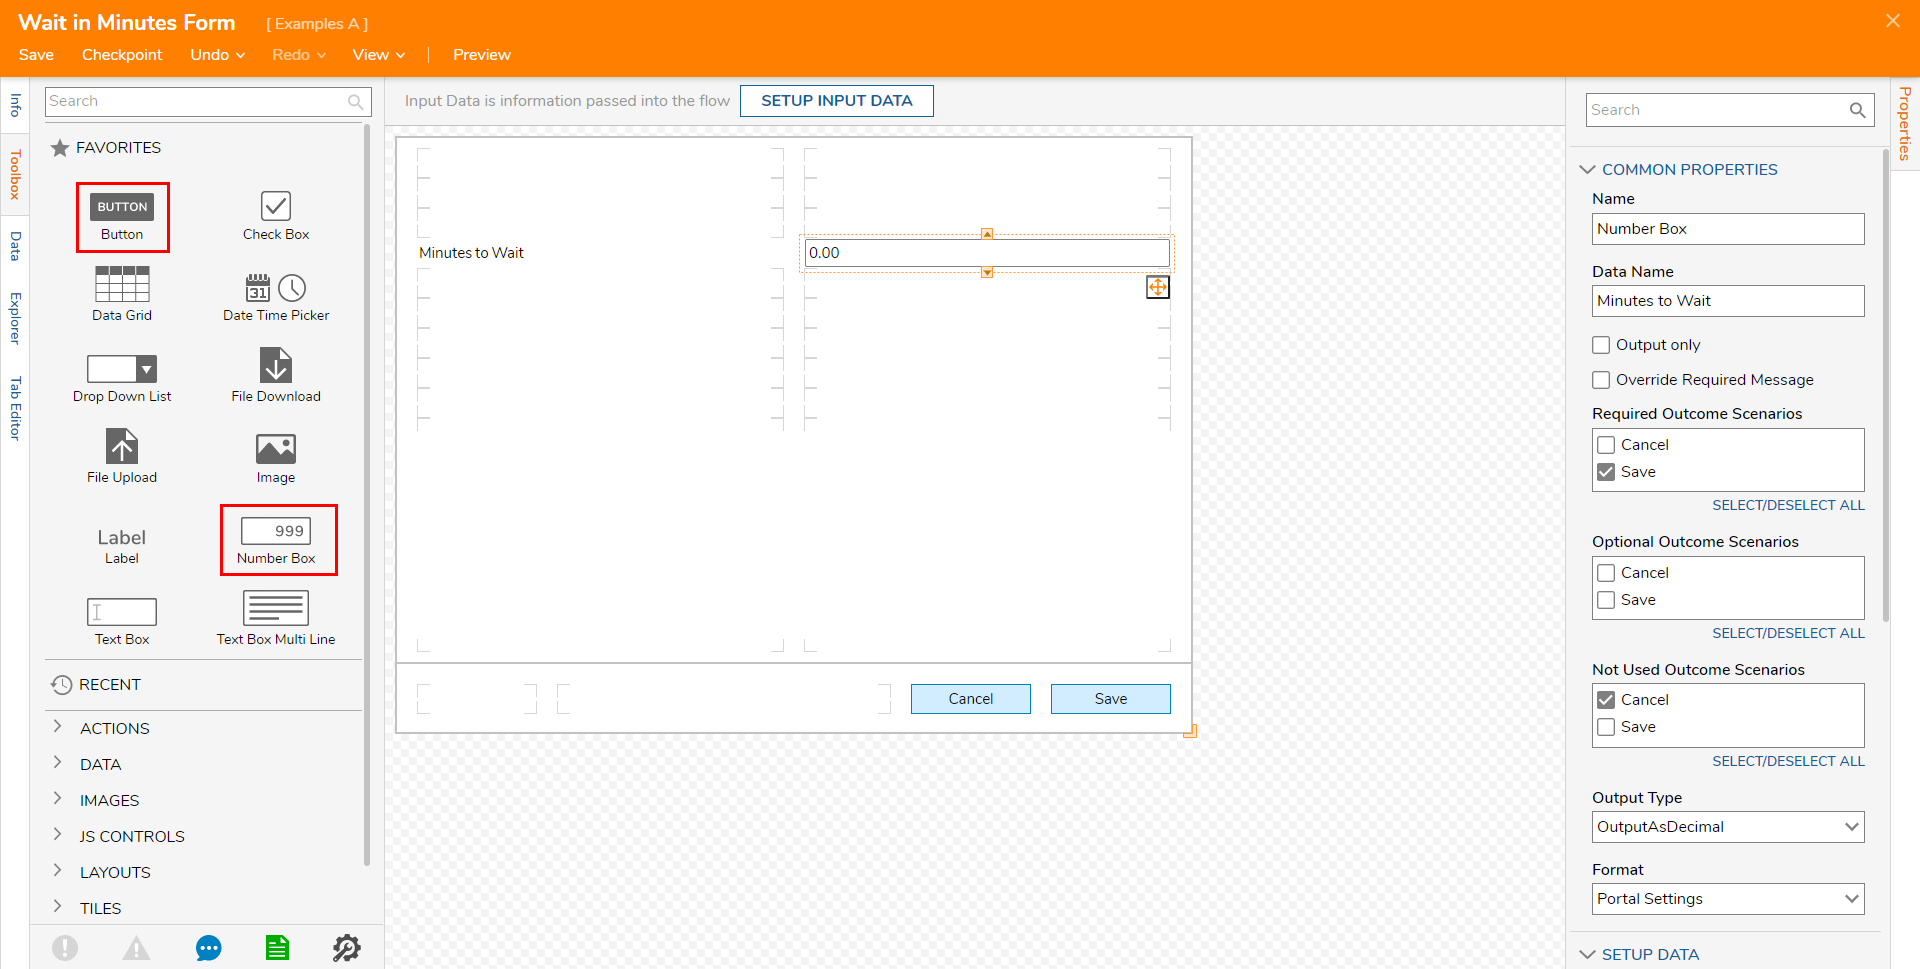
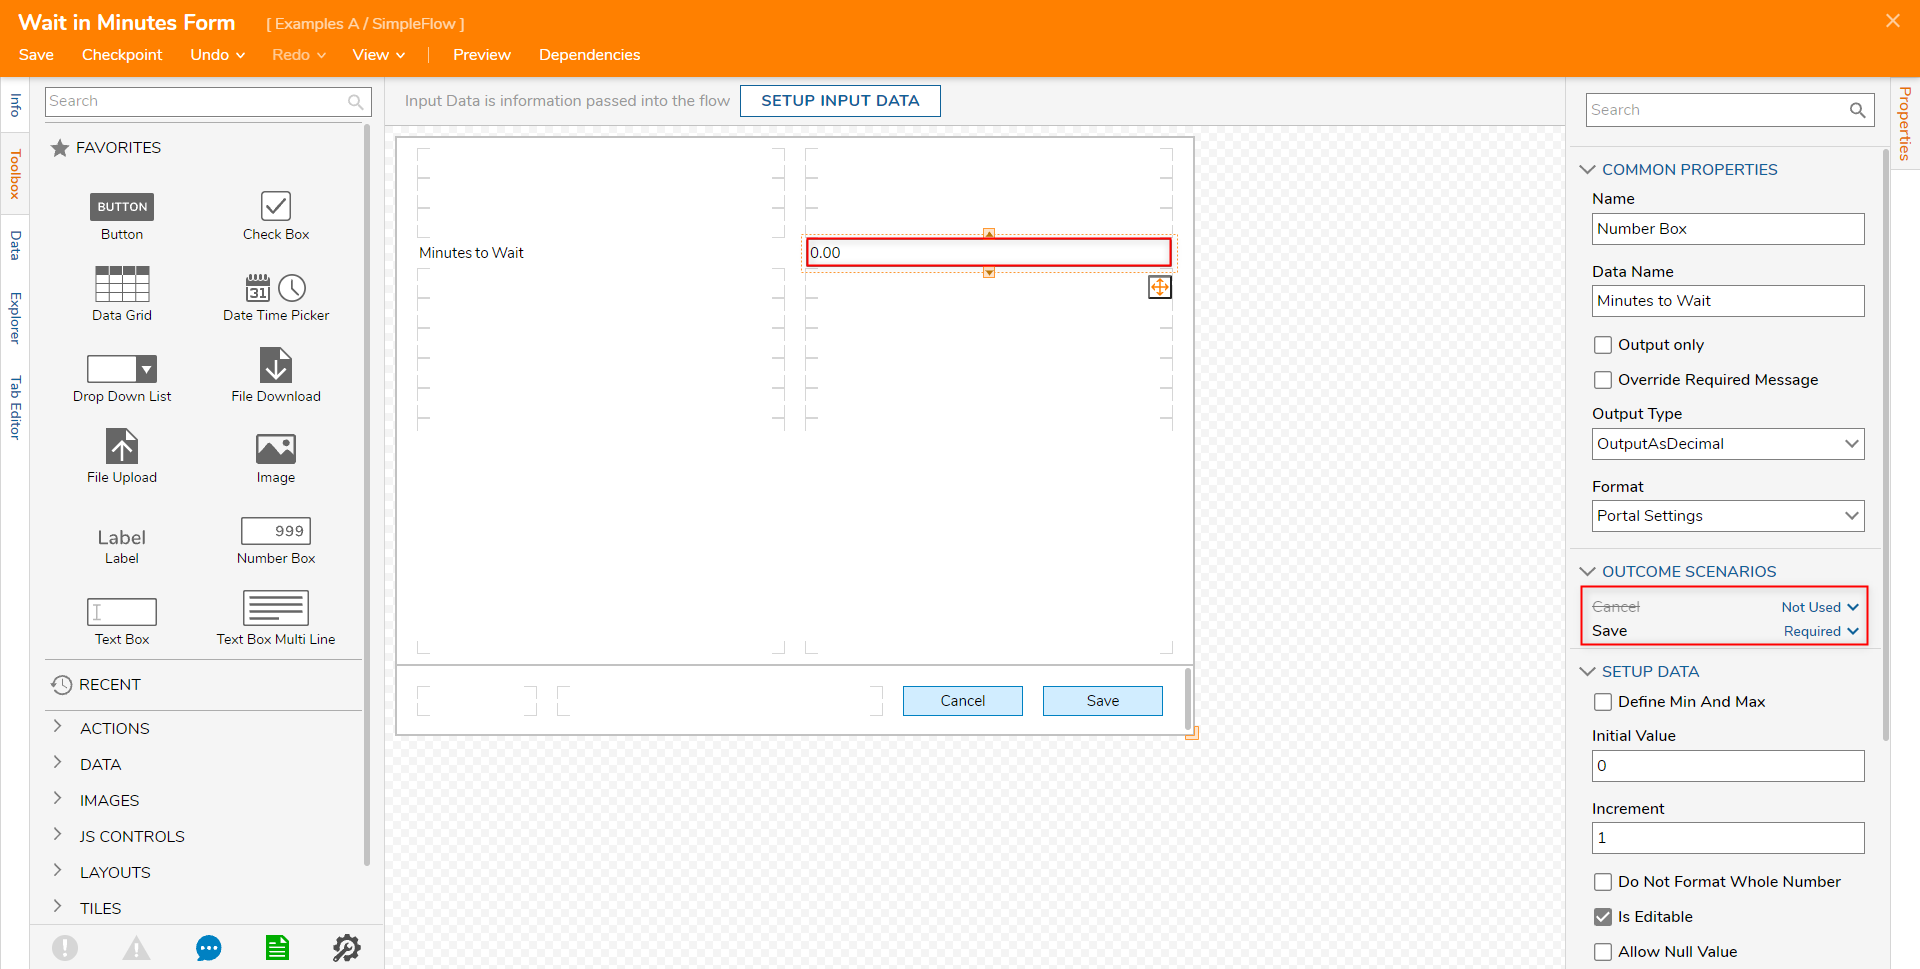
- Navigate to the Properties for the Number Box component; under OUTCOME SCENARIOS, set Save to either Required or Optional, and set Cancel to Not Used.
- Save and close the Form Designer with X.
- Attach the Save path to the Save step and the Cancel path to the Cancel step.
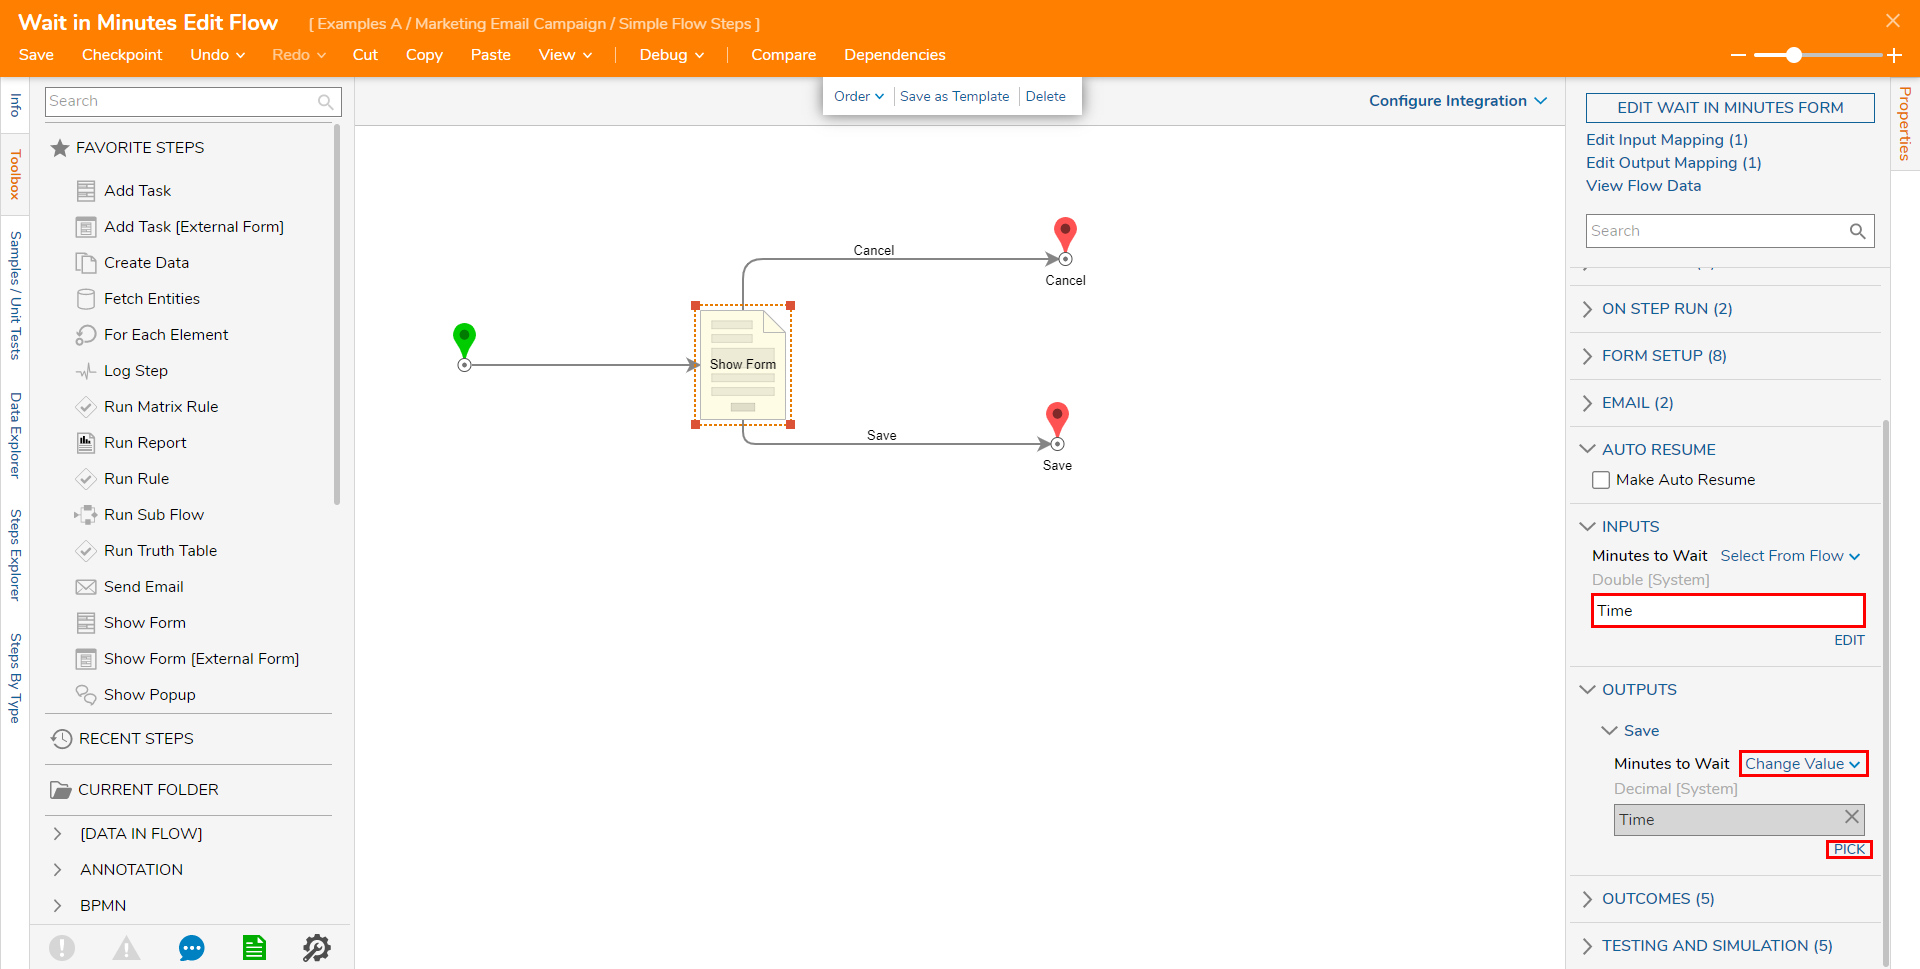
- Select the Show Form step and map Minutes to Wait to Time.
- Select Change Value, then PICK Time to Minutes to Wait under OUTPUTS.
- Save the Flow then Close with X.
- Save and close the Wait in Minutes Simple Flow Step.


Add New User
Note
The following example requires the Designer to create an Account and add it to two different Groups. To learn more about how to create Accounts navigate to Adding a User Account and Adding A Group.
This example requires new users to fully display the limited access and functionality of this feature.
- Navigate to System > Security > Accounts > CREATE ACCOUNT.
- Provide the Account with an Email and a Password
- Scroll down to SELECT GROUP and add the new Account to the Designers and Marketing Groups via the ADD NEW link.
.png)
- SAVE the Account, then navigate to the Marketing Email Campaign Designer Project.
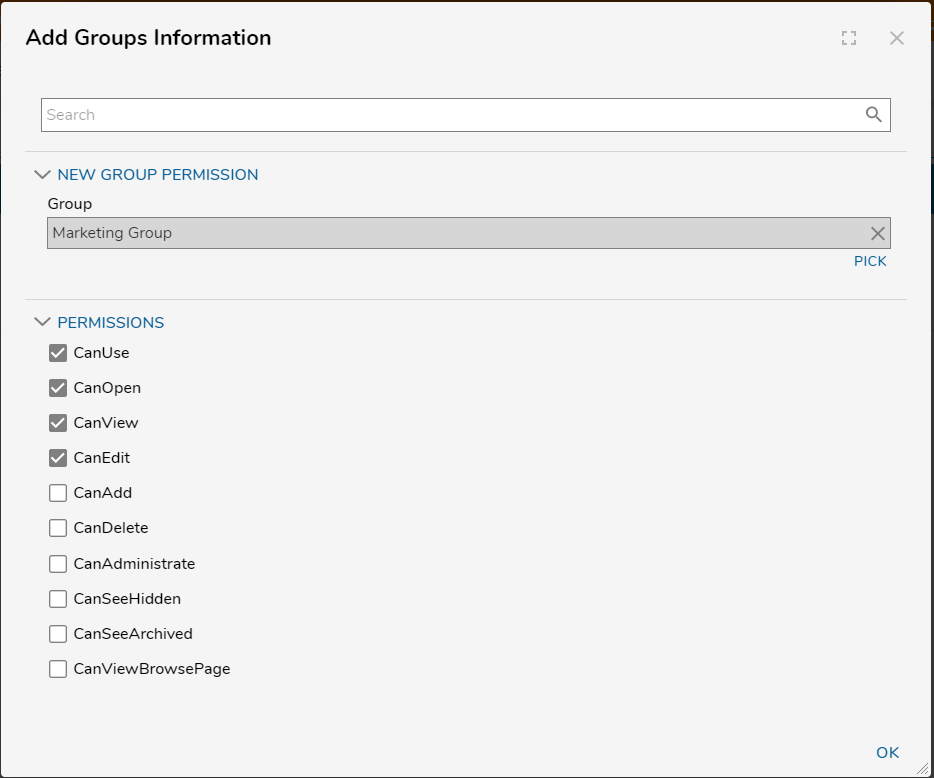
- Right-click the Designer Project and select Manage > Manage Permissions; ADD the Marketing Group under GROUPS, check the box for CanUse, then click OK and SAVE PERMISSIONS.
.png)
- Navigate to the Simple Flows Designer Project and enable and SAVE the following Permissions for the Marketing Group:
- CanUse
- CanOpen
- CanView
- CanEdit
.png)
.png)

Configure Simple Flow Under New Account
- In an incognito browser, login to the newly created Account.
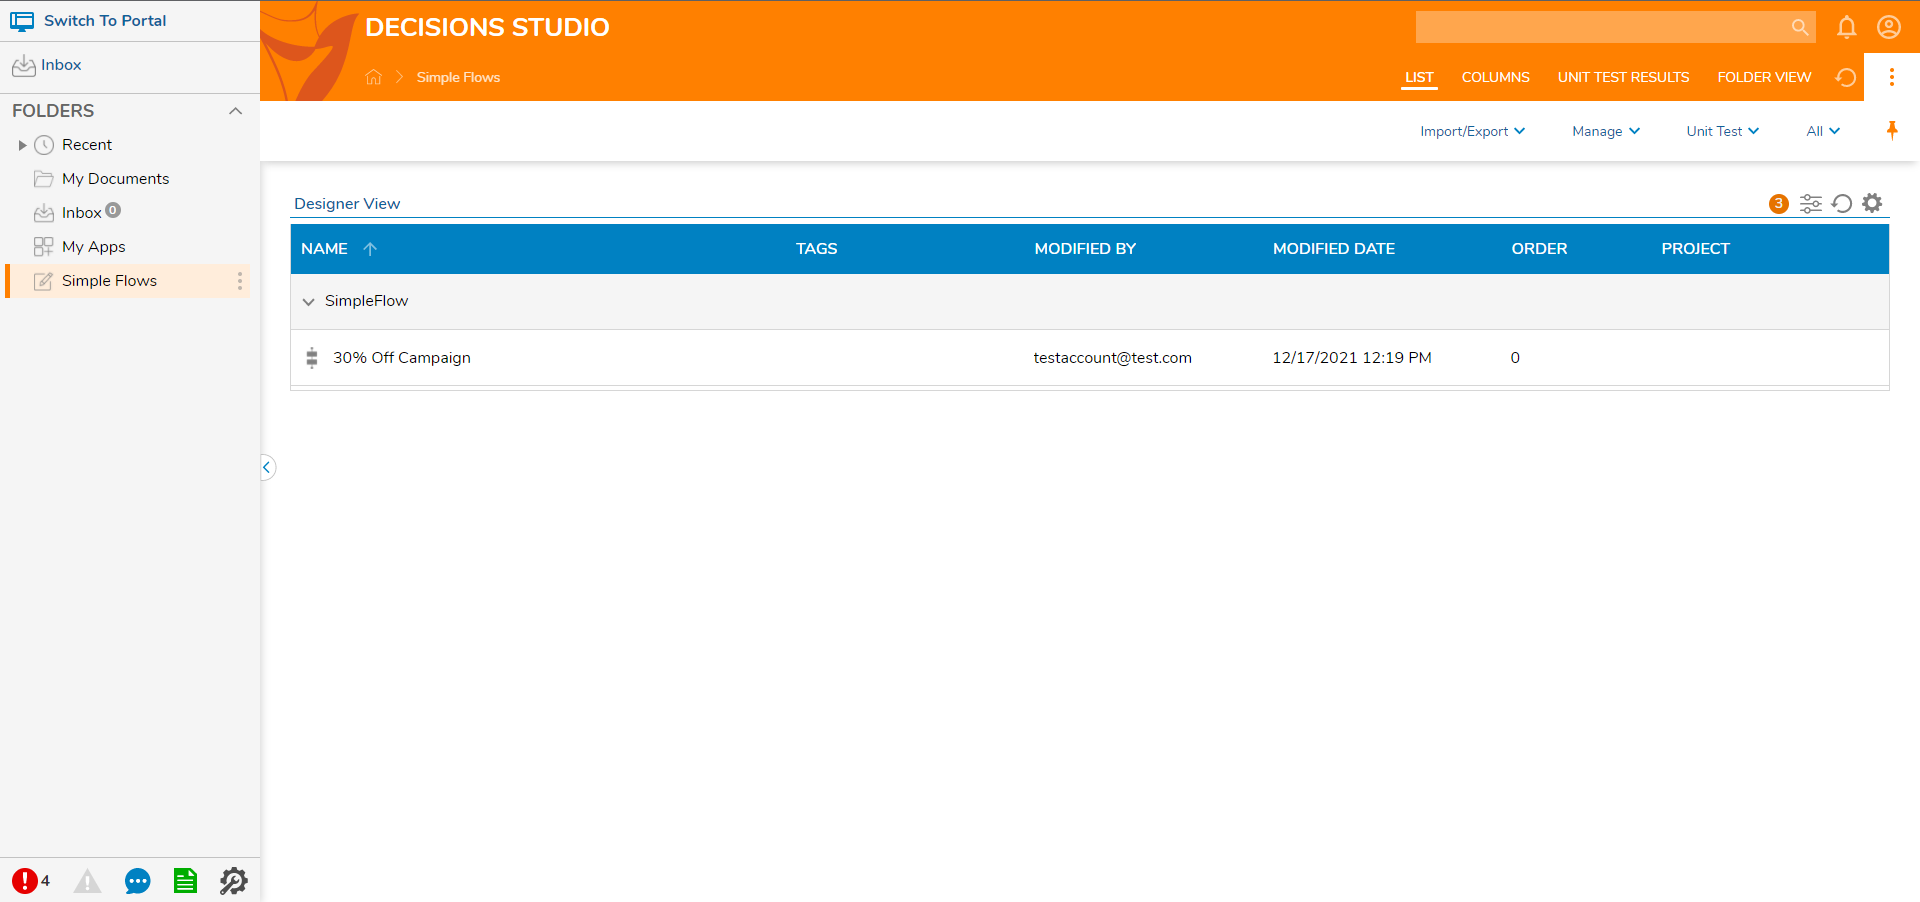
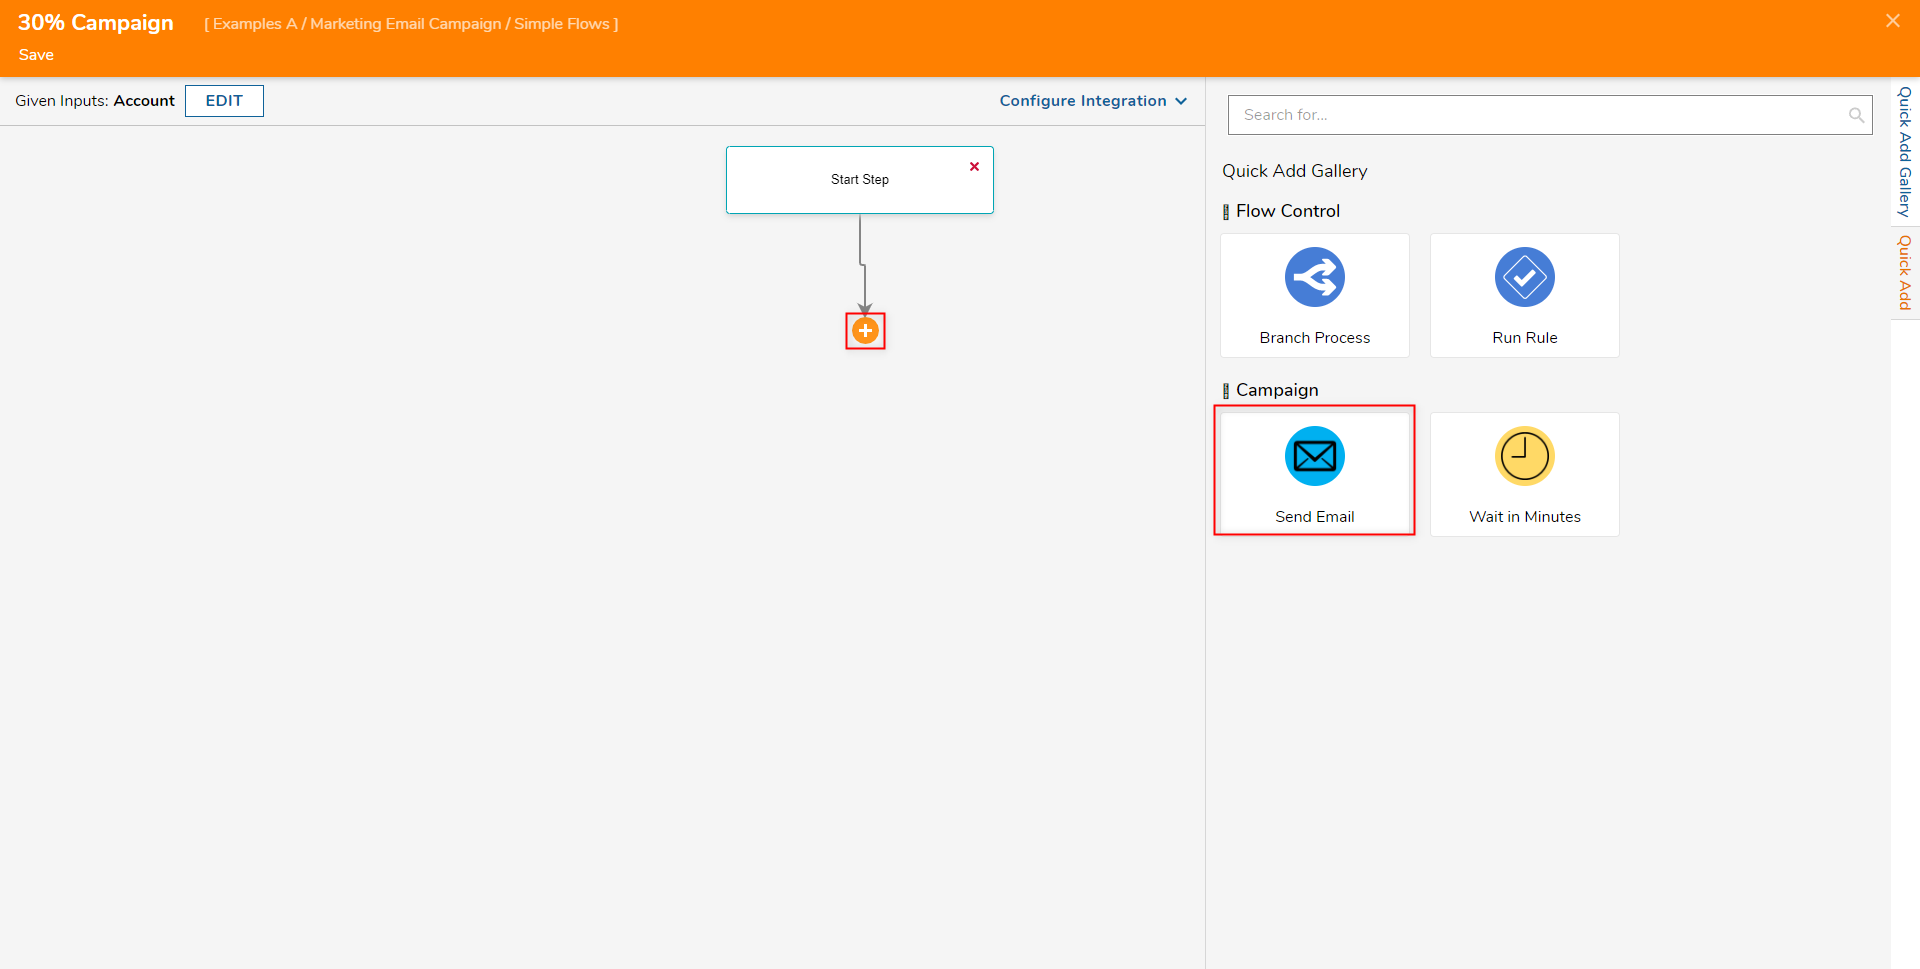
- Navigate to and open, Simple Flows > 30% Off Campaign. Note that the Simple Flow Designer displays a limited number of Actions and contains no Properties panel.
- Add the Send Email step by clicking the Plus sign and selecting the step.
- Configure the Simple Flow Step by filling in the Subject and Body fields, then select Save. Use the Body field to define a message conveying a sale and utilize [Name] to act as a place for the Replace Text value.
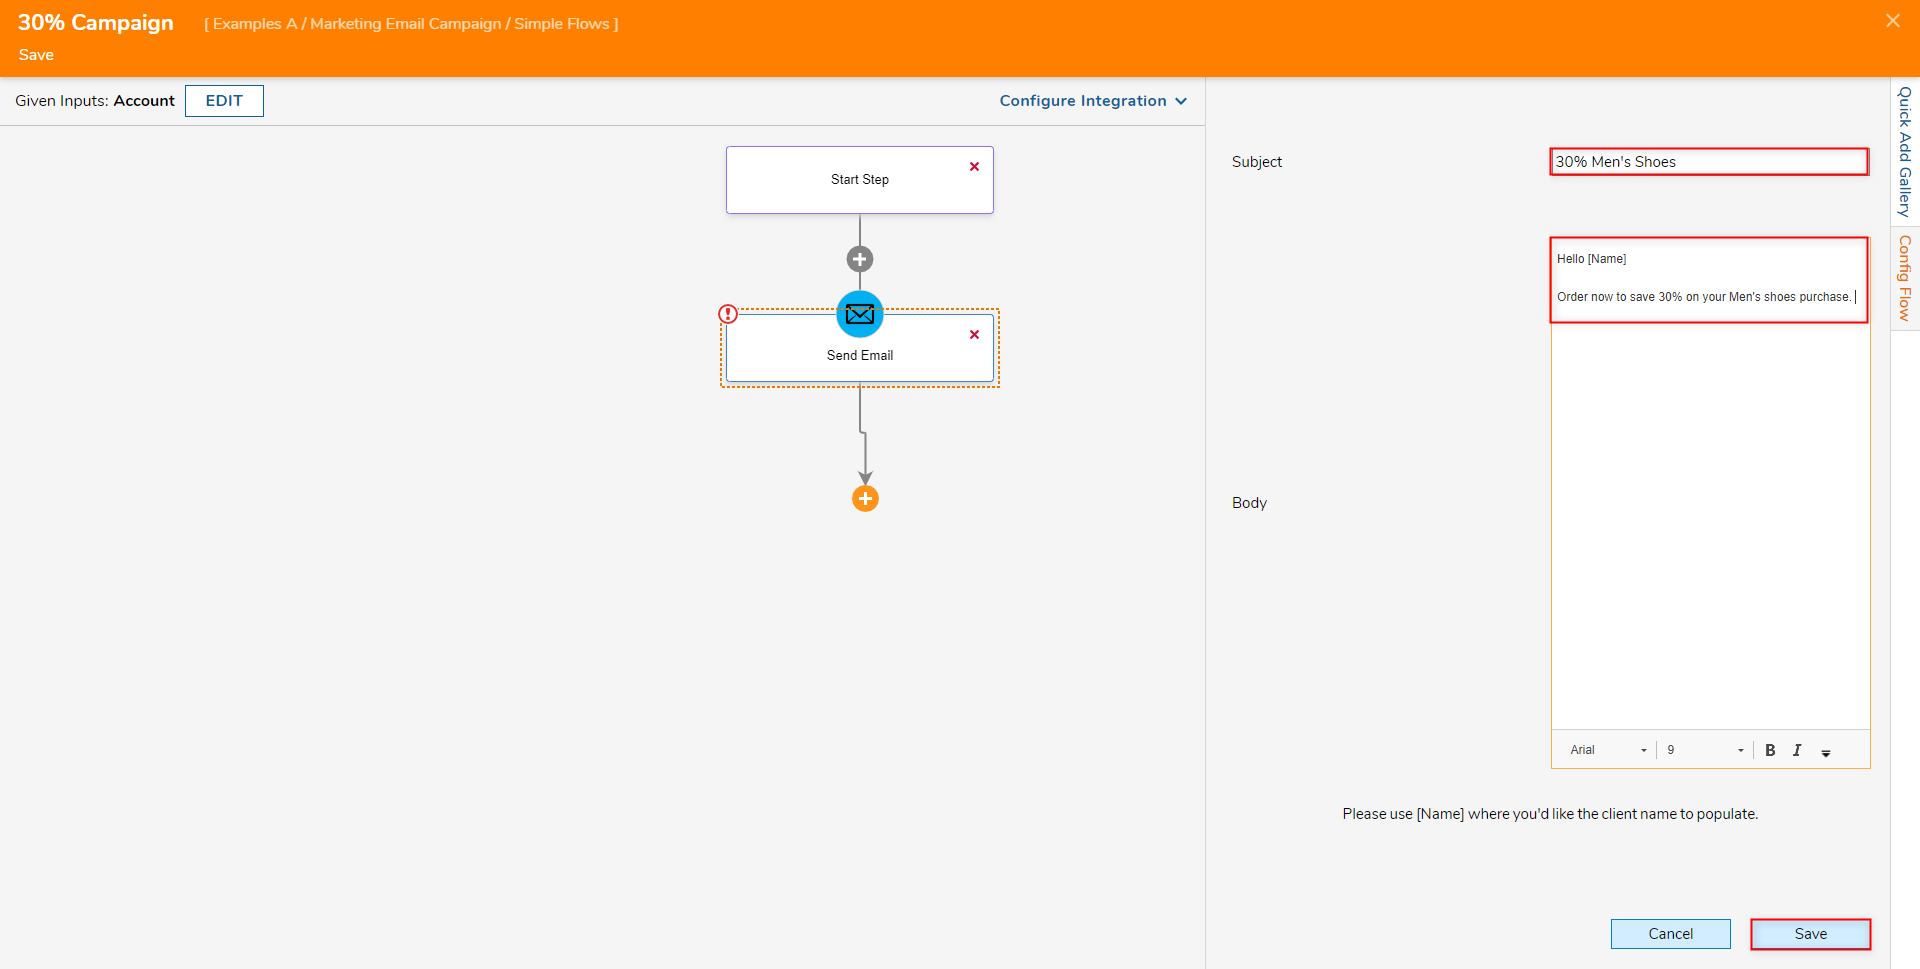
- Configure the Simple Flow Step by filling in the Subject and Body fields, then select Save.
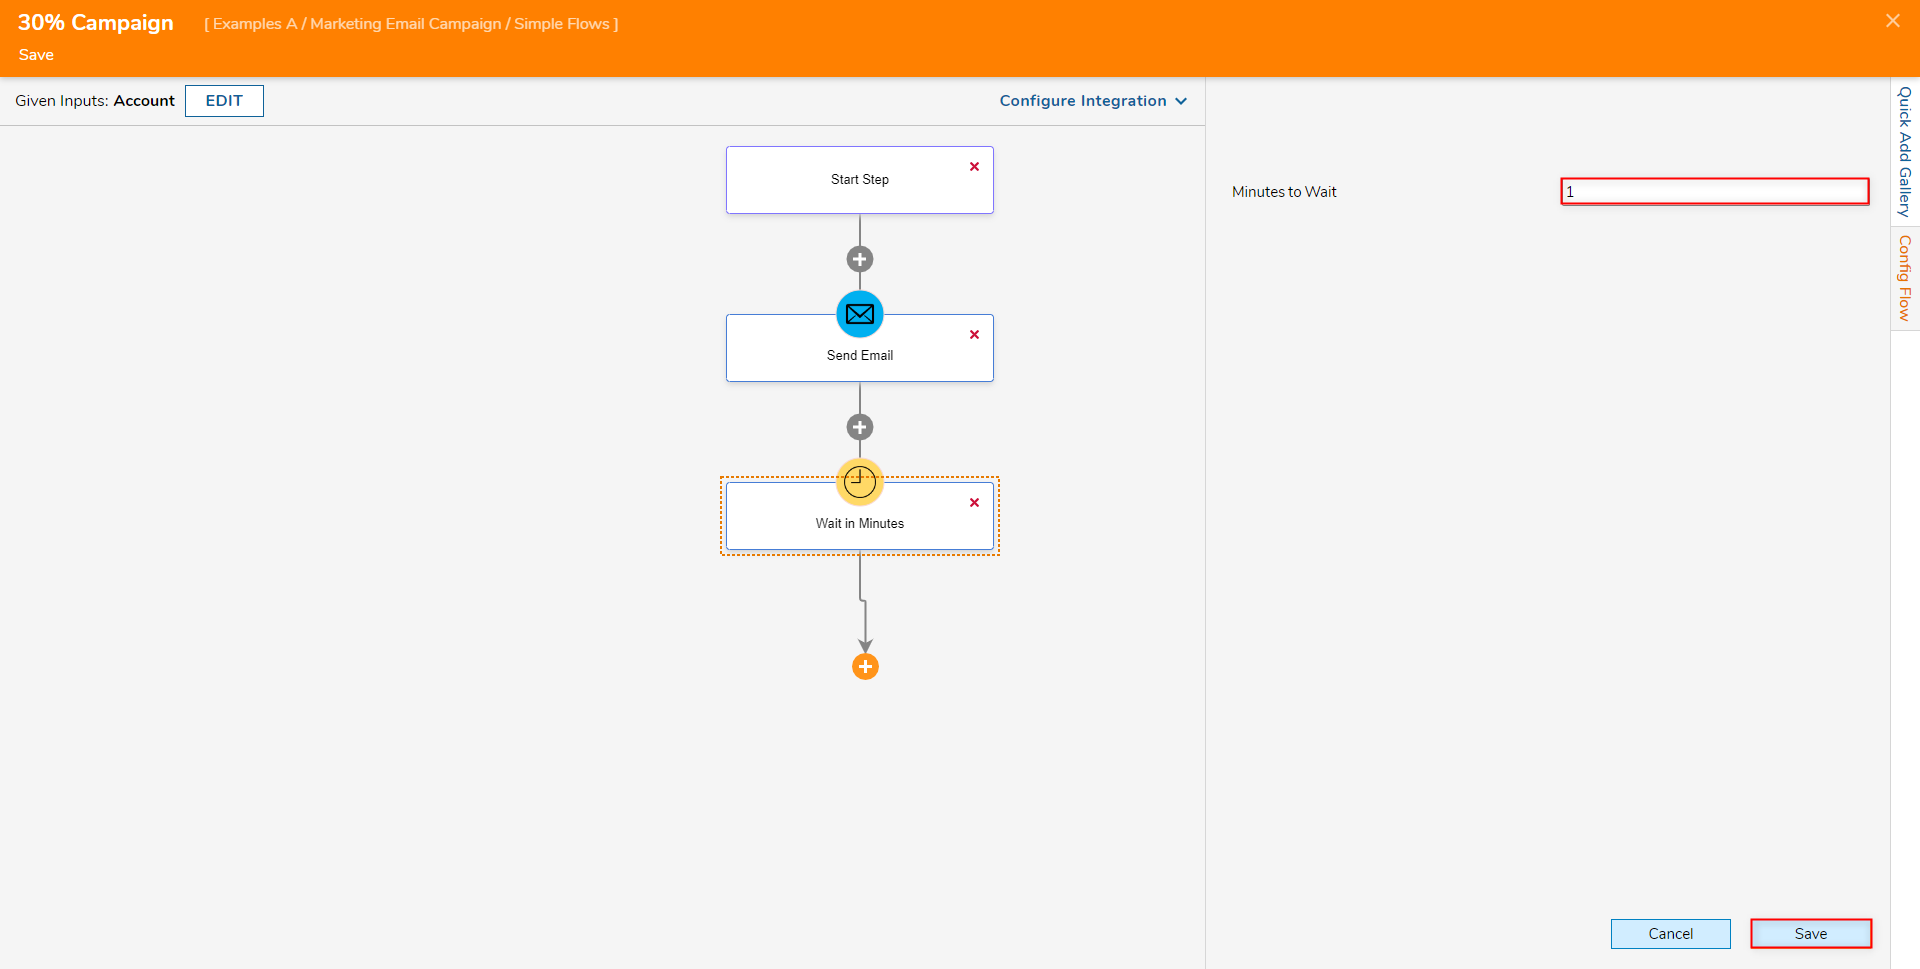
- Add the Wait in Minutes step, define the Minutes to Wait box as "1", then click Save.
- Add one more Send Email step, define the Subject and Body, then click Save. This time, define the Subject and Body in a way that conveys that the sale is ending soon.

- Save and close the Simple Flow with X.


Debug
- Navigate to the Simple Workflow from the Admin account, right-click it, then navigate to Run [Advanced] > Debugging > Debug Flow.
- Select the the edit icon next to Account and DEFINE an Account; define an Email Address under [SETTINGS], and a First Name value under PERSON INFO.
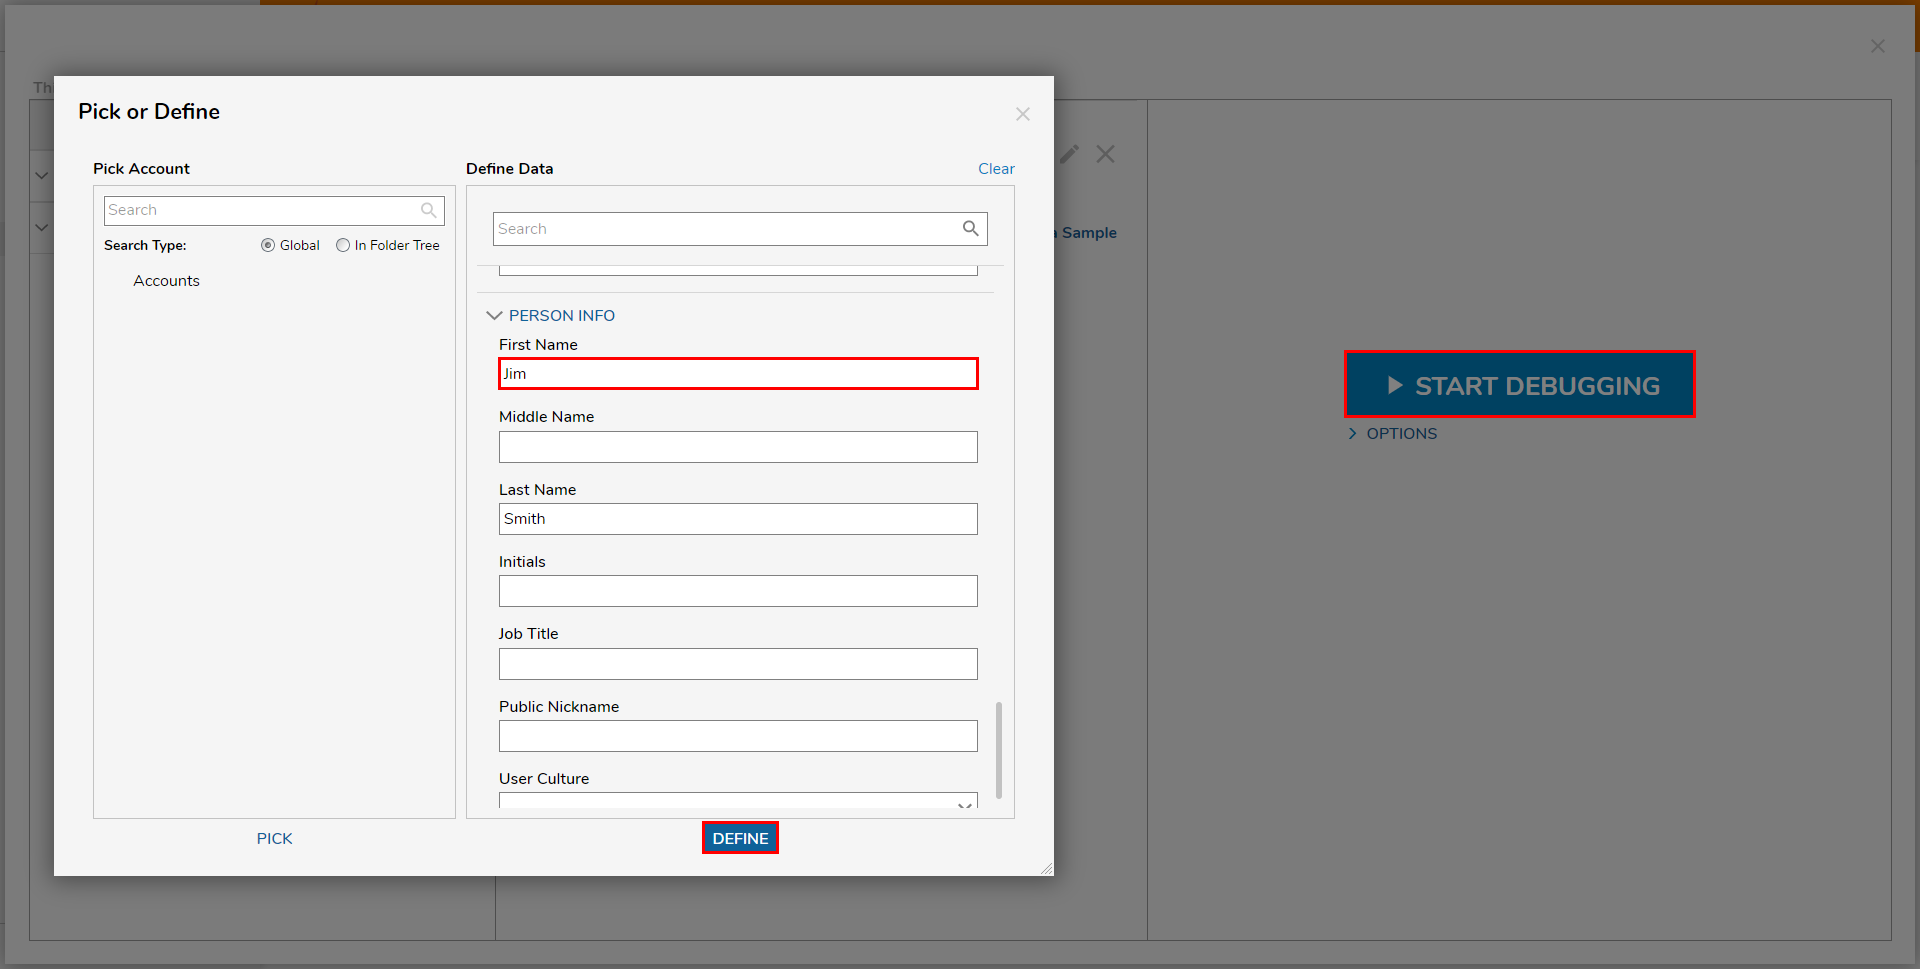
- Click START DEBUGGING.
- After the Flow runs, check the recipient's Email Account to verify that the Emails were received and properly configured.
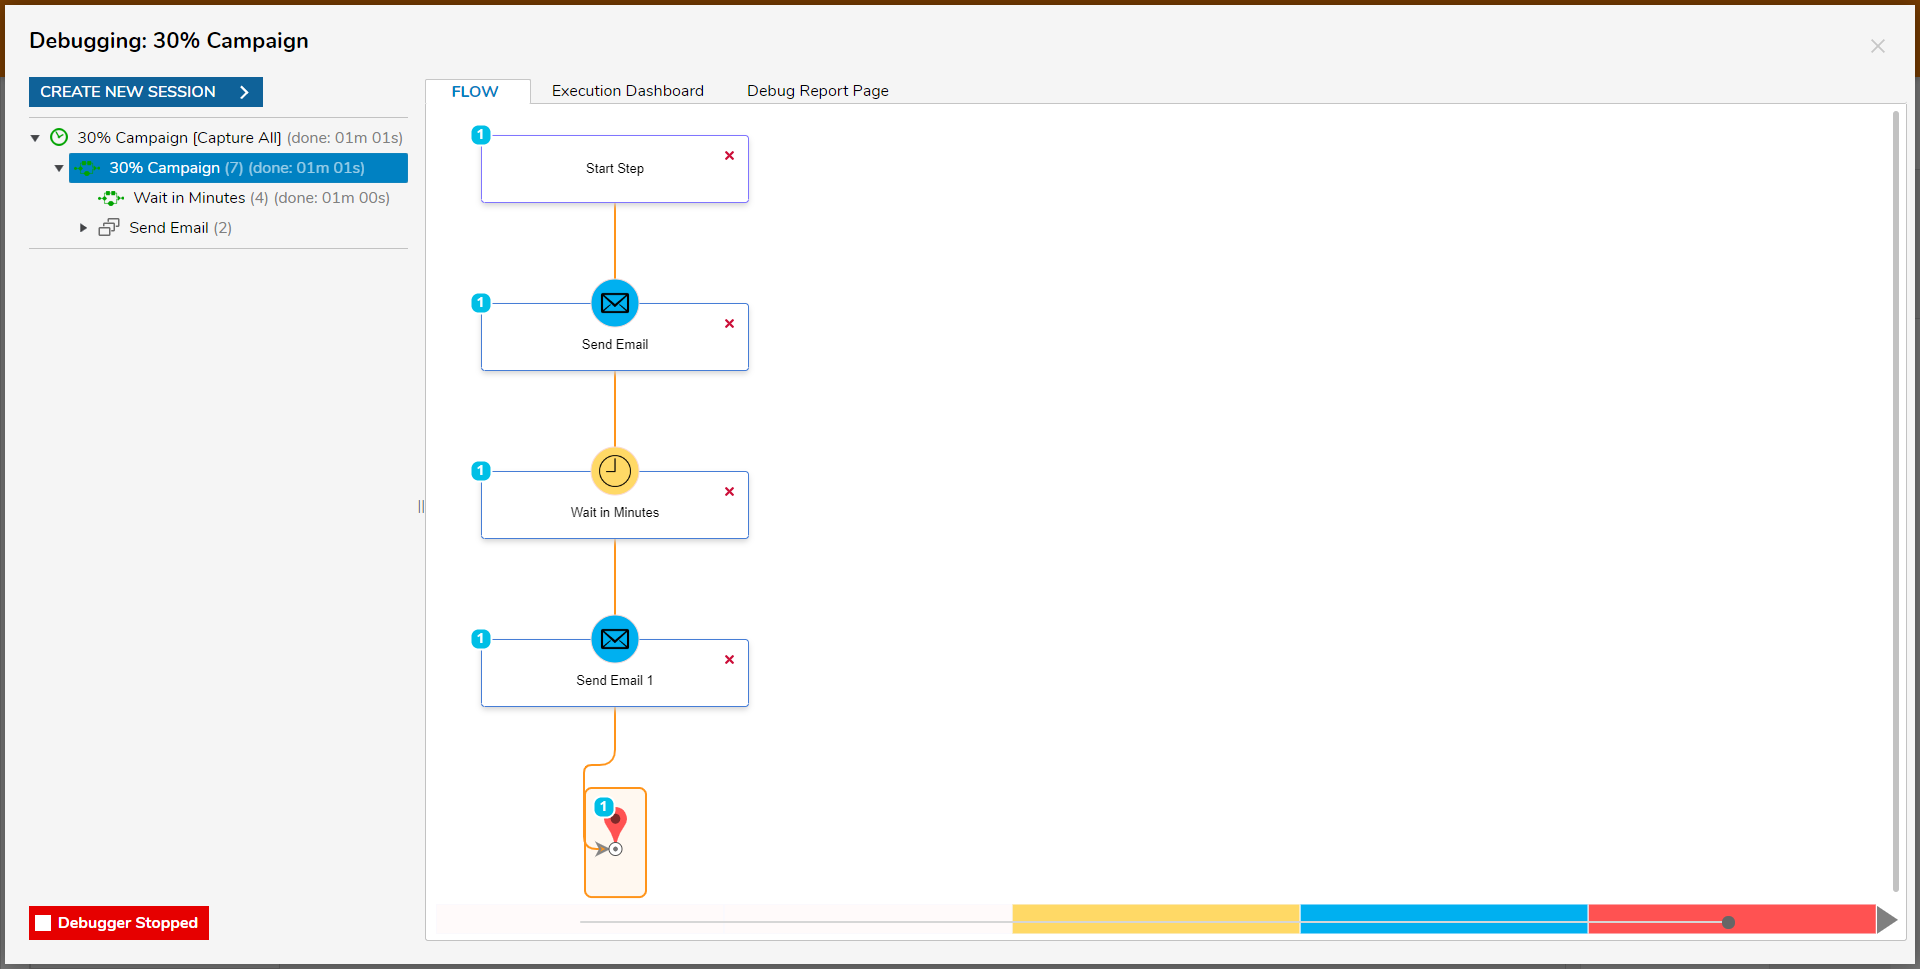

 Additional Information on DebugWhen utilizing the Debugger, to view the process for each individual step in a Simple Flow, users may select the step's Name from the Folder Tree on the left.
This is particularly helpful for identifying any issues with the Flow that may be caused by individual steps, and also provides a look into the makeup of the process overall.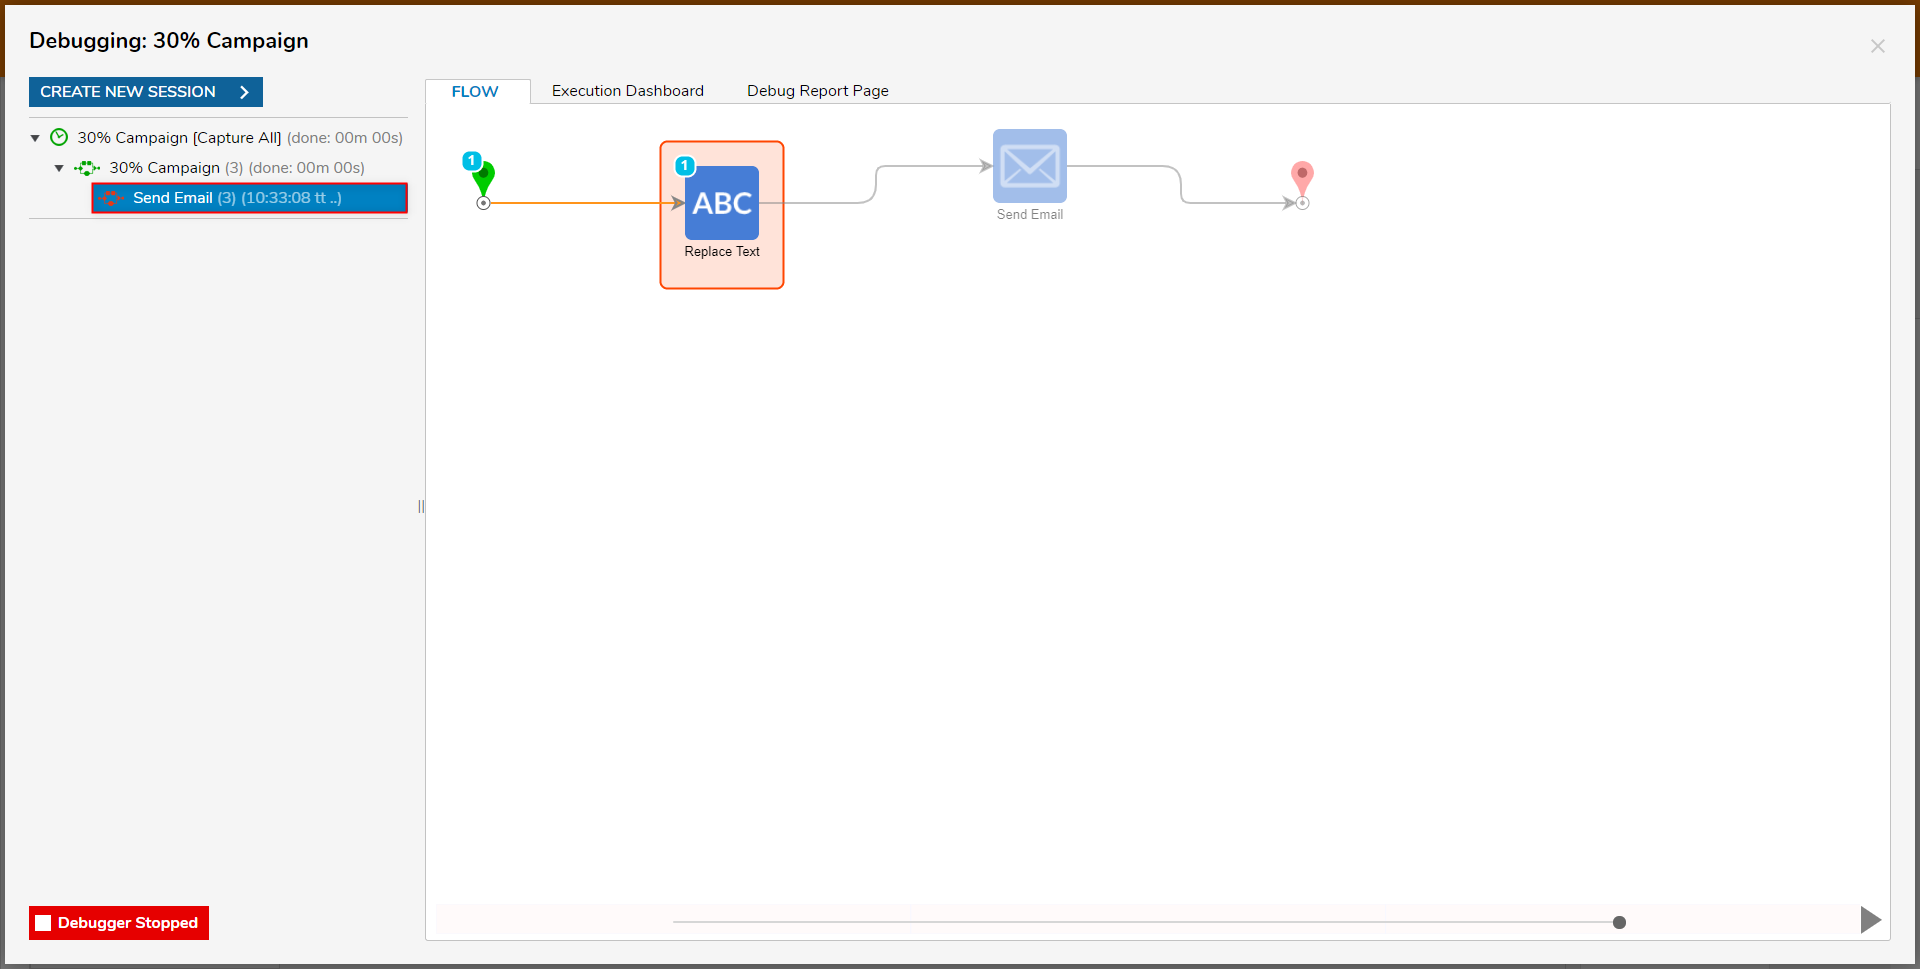


Was this article helpful?