Using Placeholder Steps to Sketch Out Flow Structure
- 02 Feb 2021
- 2 Minutes to read
- Print
- DarkLight
Using Placeholder Steps to Sketch Out Flow Structure
- Updated on 02 Feb 2021
- 2 Minutes to read
- Print
- DarkLight
Article Summary
Share feedback
Thanks for sharing your feedback!
Overview
The Placeholder Step component simulates a working component by providing simulated Outcomes or objects. It has no function except to describe a component that will be inserted at a later date. Use a Placeholder step while designing a Flow structure to provide information about additional steps needed in the Flow.
To add a Placeholder to a Flow, in the Toolbox panel, under the category Data, drag a Placeholder Step component to the workspace.
Example
This example Flow will describe a component that tries to retrieve patient information. If successful it will send a String to an End step called EndWithPatientInfo. If it fails, it will direct the Flow to an end step called NoData.
- From the Flow Designer for a new Flow, attach Placeholder Step step from the ANNOTATION category of the Toolbox tab to the Start step.
- Select the Placeholder step to navigate to its Properties tab and click the Edit (pencil) icon beside Done, under OUTCOME DEFINITION > Outcomes.

- From the Edit Outcomes window, under OutputData, input GotInfo in the Path box, then click ADD NEW.
- Define Name as GotPatientInfo and select String [Text] as the Type, then click OK,and OK once more.If a user were sketching the functionality for a production Flow, they might use any of the complex data structures available in the platform, but for this simple example, set the Placeholder Step 1 output as a String called "GotPatientInfo."
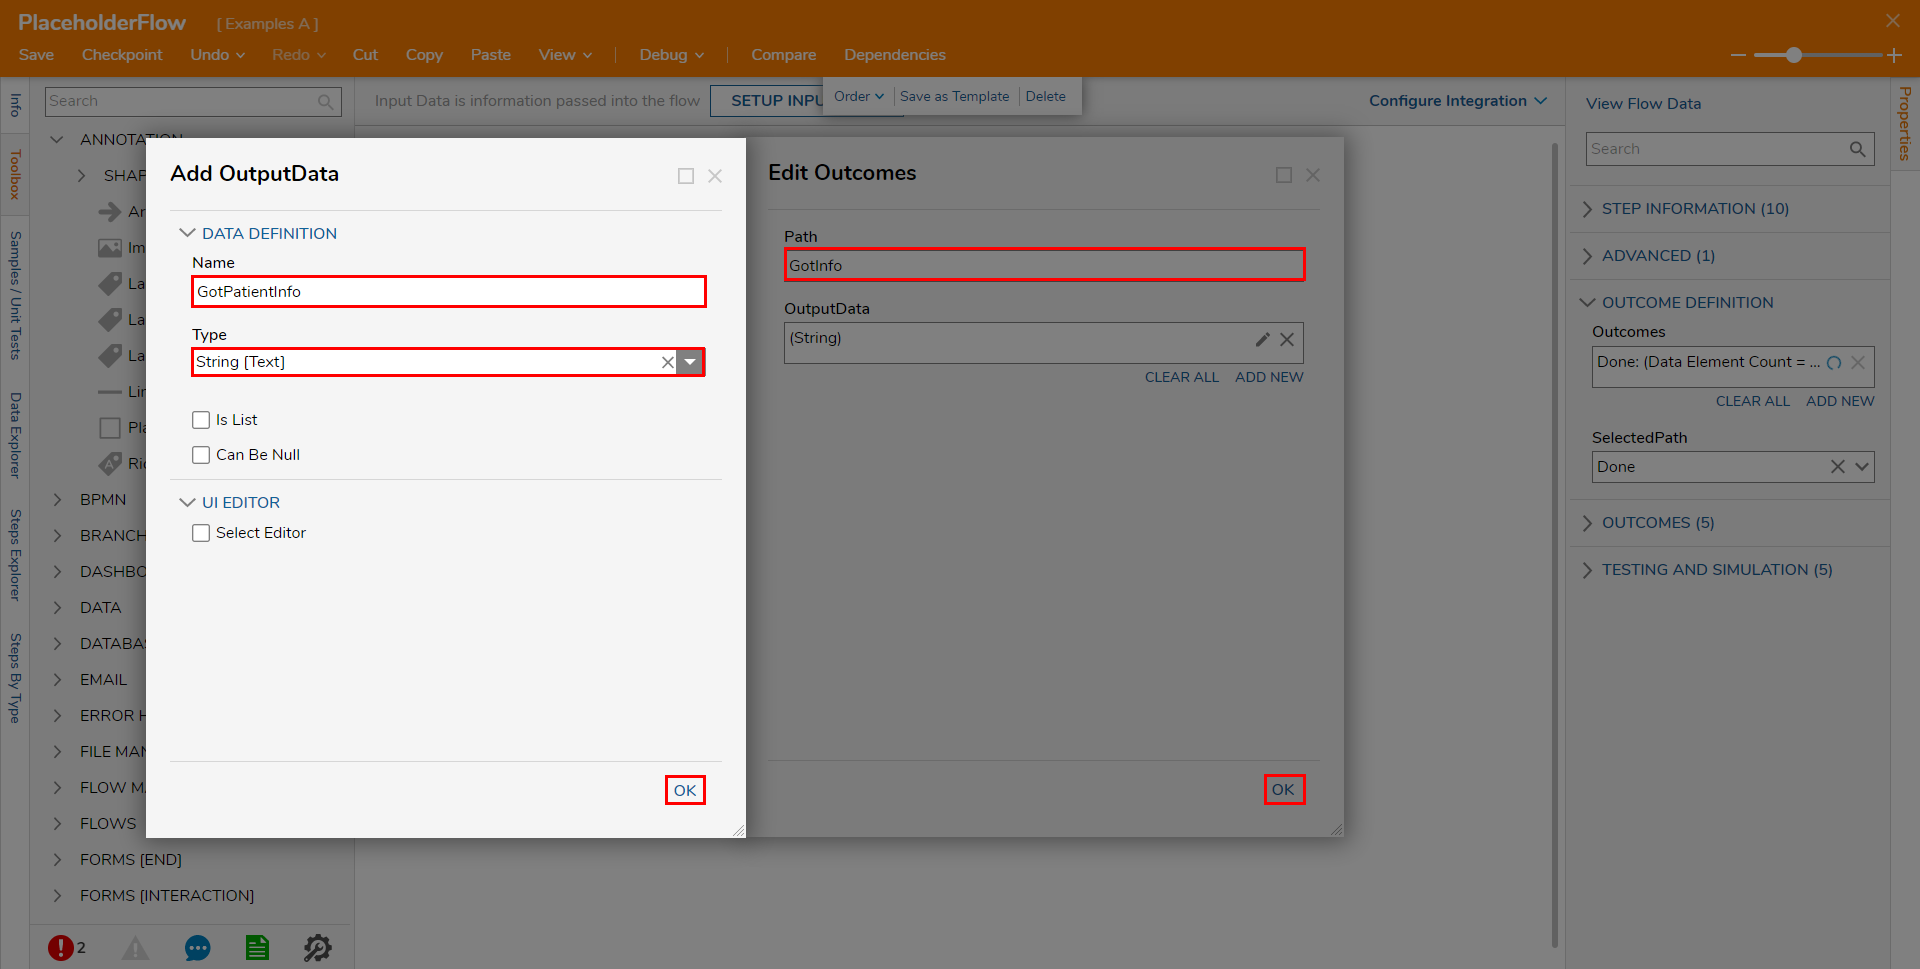
- Define Name as GotPatientInfo and select String [Text] as the Type, then click OK,and OK once more.
Navigate back to the Properties tab for the Placeholder step.
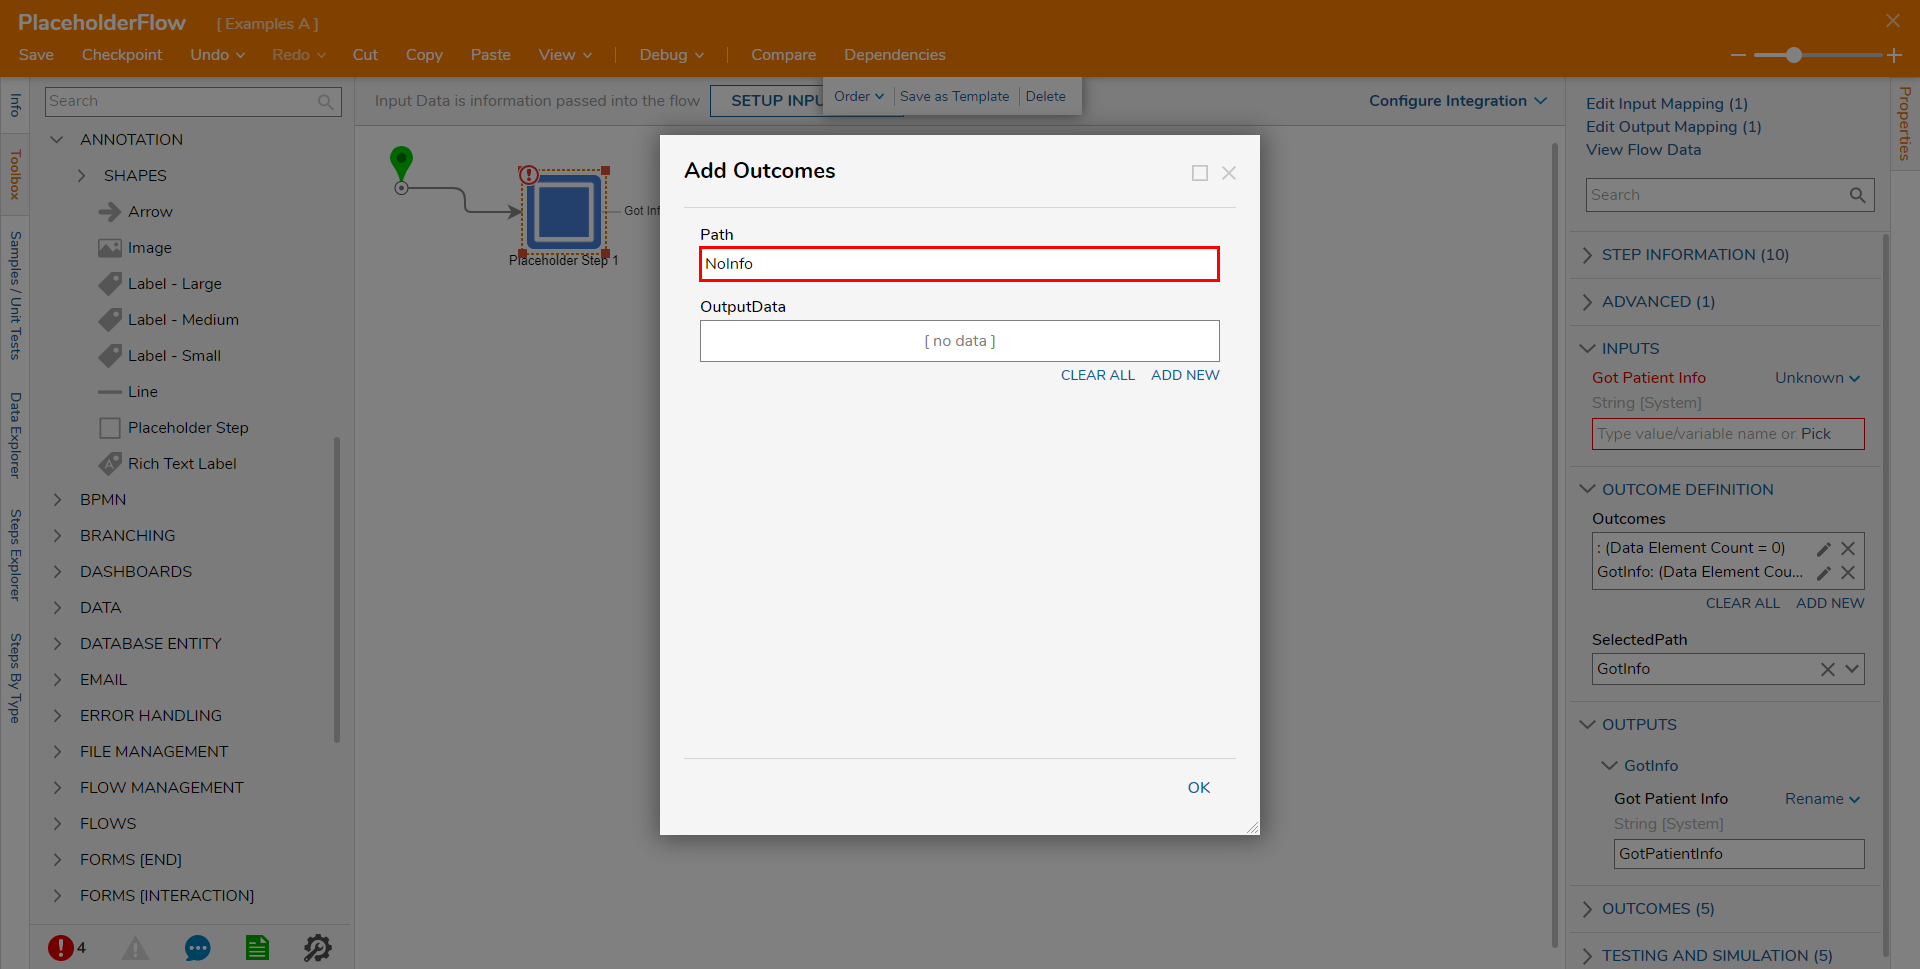
Under OUTCOME DEFINITION > Outcomes, click ADD NEW.
The previous defined Outcome will appear in Outcomes box; this Outcome represents when the Patient's info is successfully obtained.
The next Outcome path will be for events wherein information is unsuccessfully obtained.Define the Path as NoInfo, then click OK.
Delete the pre-existing End step.
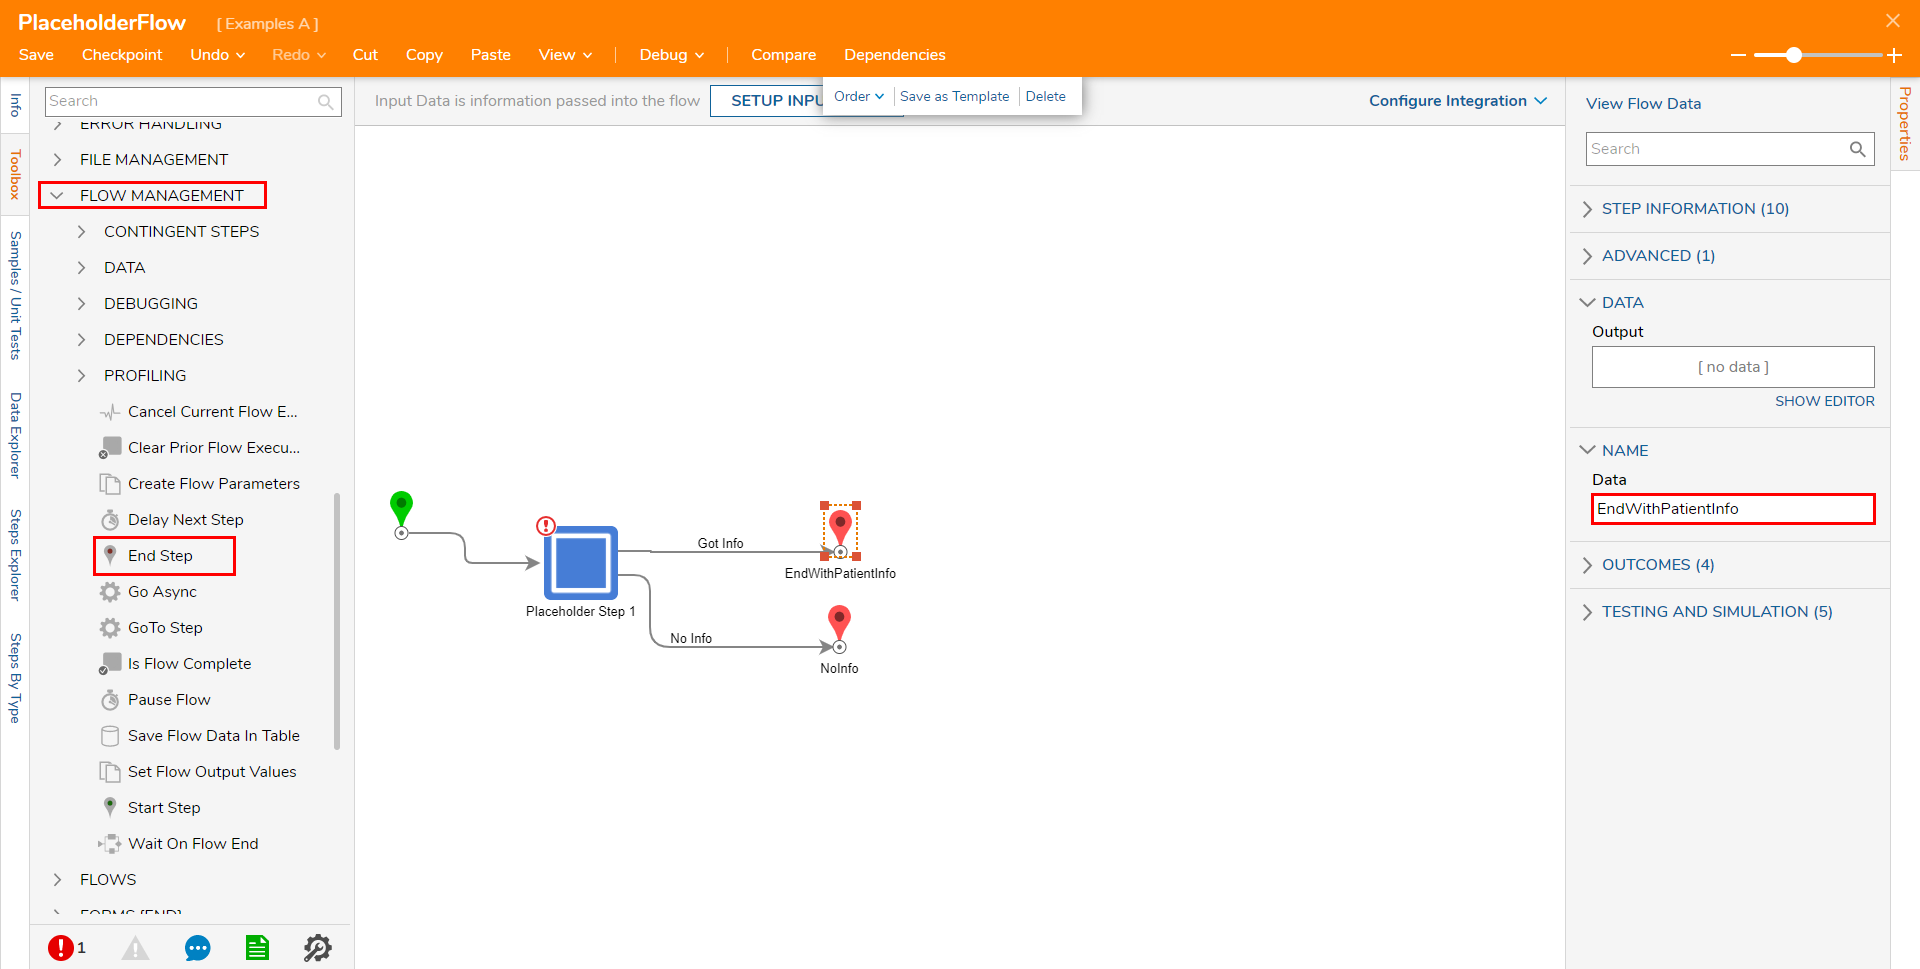
Add two End steps from Toolbox > FLOW MANAGEMENT, then connect one to the Got Info path, and one to the No Info path.
Navigate to the Properties tab for each End step and adjust each NAME > Data value.
- For the GotInfo path step, name the End step "EndWithPatientInfo"
- For the No Info path, name the End step "NoInfo"
Select the Placeholder step and set Got Patient Info to Ignore.
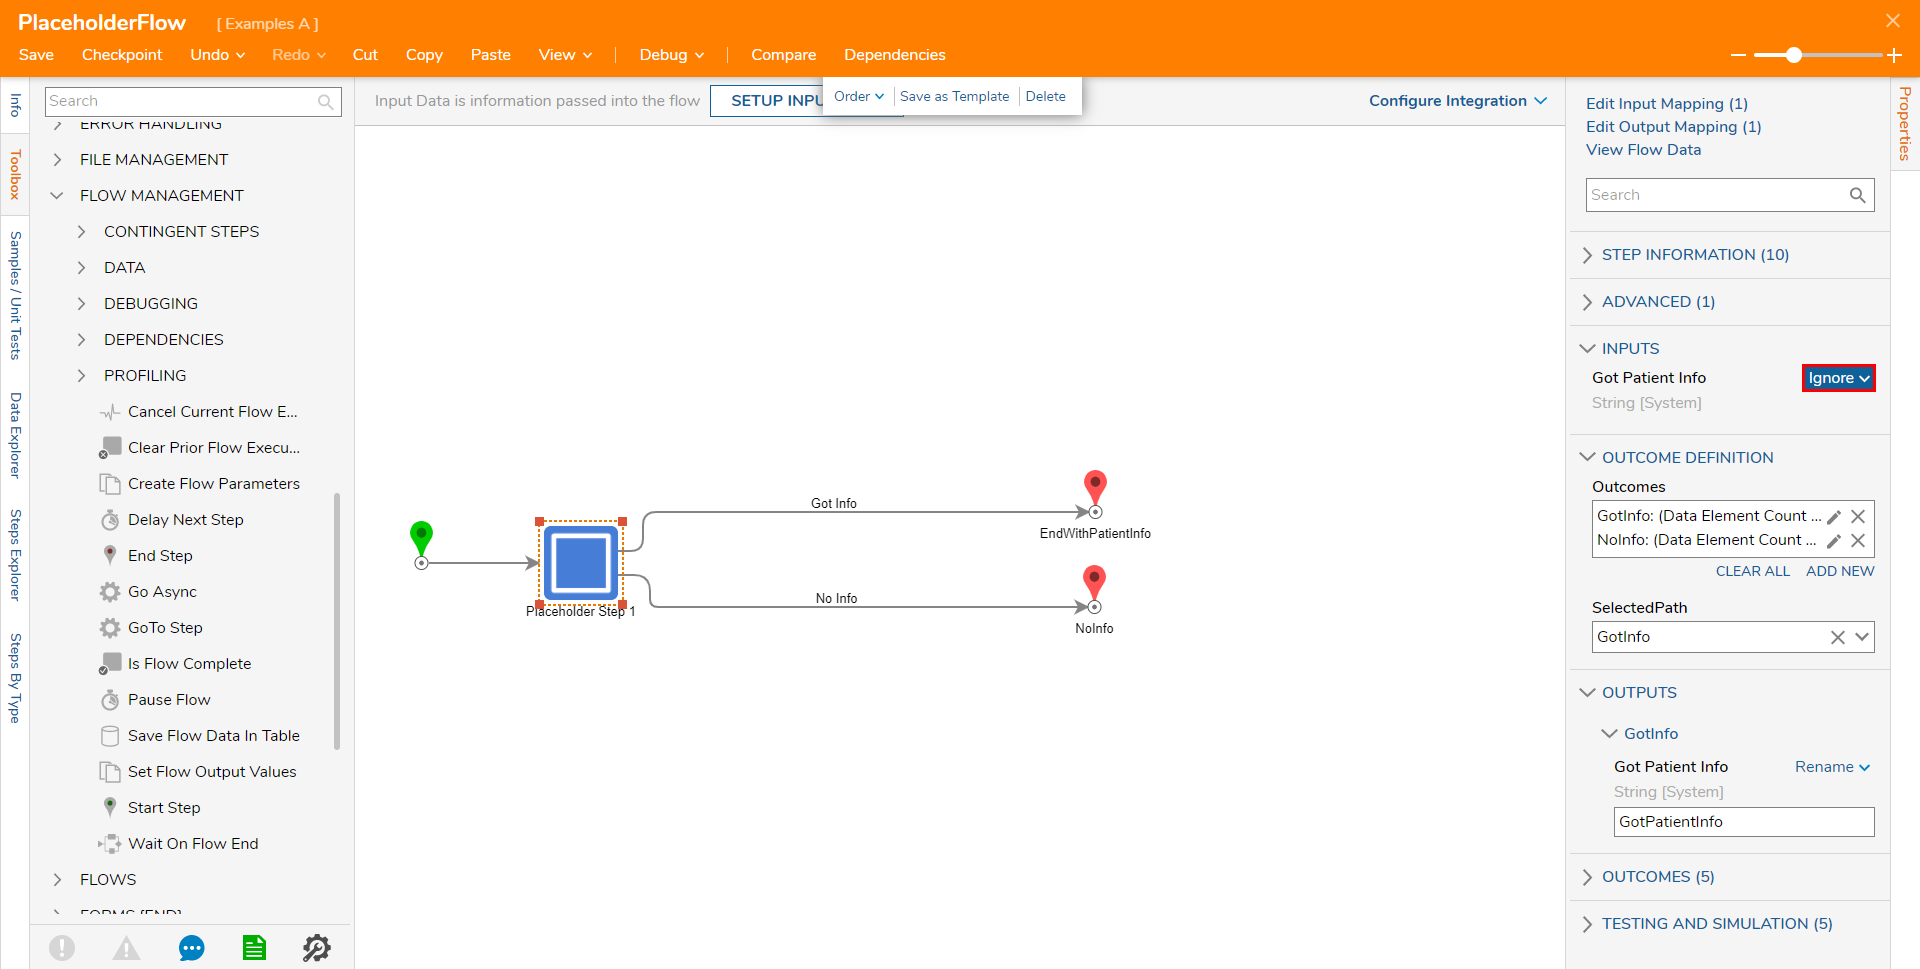
Save the Flow, then close with X if desired.
This completes the example Flow; If a user were to task someone with creating a component that gets patient information, they could be given this Flow as a requirements document. From it, they would be able to understand quickly what would be the expected outcomes, outputs and inputs (though there are no inputs illustrated in this example) of the new component.


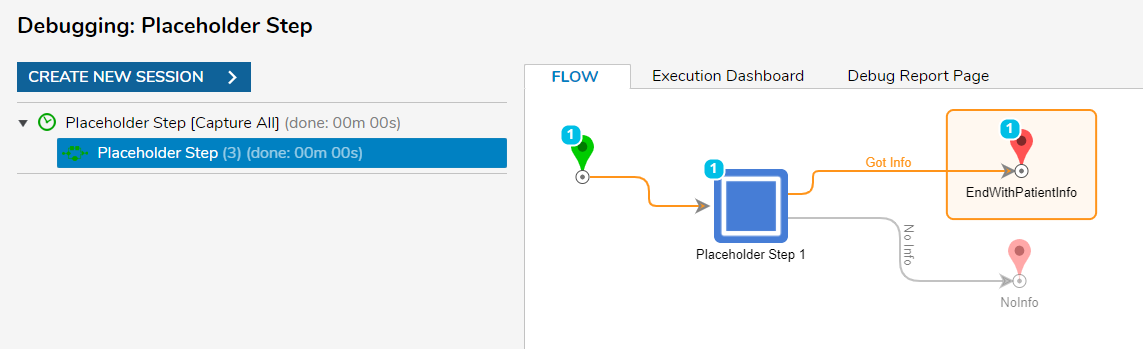
Debug
- From the Flow Designer, select Debug from the top Action bar.
- Click START DEBUGGING.When ran successfully, the Flow will complete and follow the Got Info path to the EndWithPatientInfo End step,

Was this article helpful?