Using CSS in a Page
- 07 Nov 2022
- 2 Minutes to read
- Print
- DarkLight
Using CSS in a Page
- Updated on 07 Nov 2022
- 2 Minutes to read
- Print
- DarkLight
Article Summary
Share feedback
Thanks for sharing your feedback!
Overview
Decisions can implement custom CSS into Page components in multiple different ways. Existing CSS documents can be uploaded and the custom-defined classes would then be mapped to each Page element. CSS can also be written with predefined classes from Decisions, which will automatically be mapped to the respective components if there are no errors in the code. Once the file is uploaded successfully, the component aesthetic can be updated once the CSS is applied to the Page in the Page Designer.
CSS styling in Decisions
For more information on how to upload a CSS file, please refer to the CSS Styling article. Please note that in Decisions versions older than 6.10, changing the name of a CSS document in Decisions will cause the styling to be removed from the component. This happens because a document name change in Decisions does not reflect on the file system source. In later versions of Decisions, the platform can recognize this name change once the Form is edited so that the component can refresh. It is recommended that CSS is assigned by ID as opposed to the naming convention.
Example
In this example, a CSS document will be uploaded and applied to a Page.
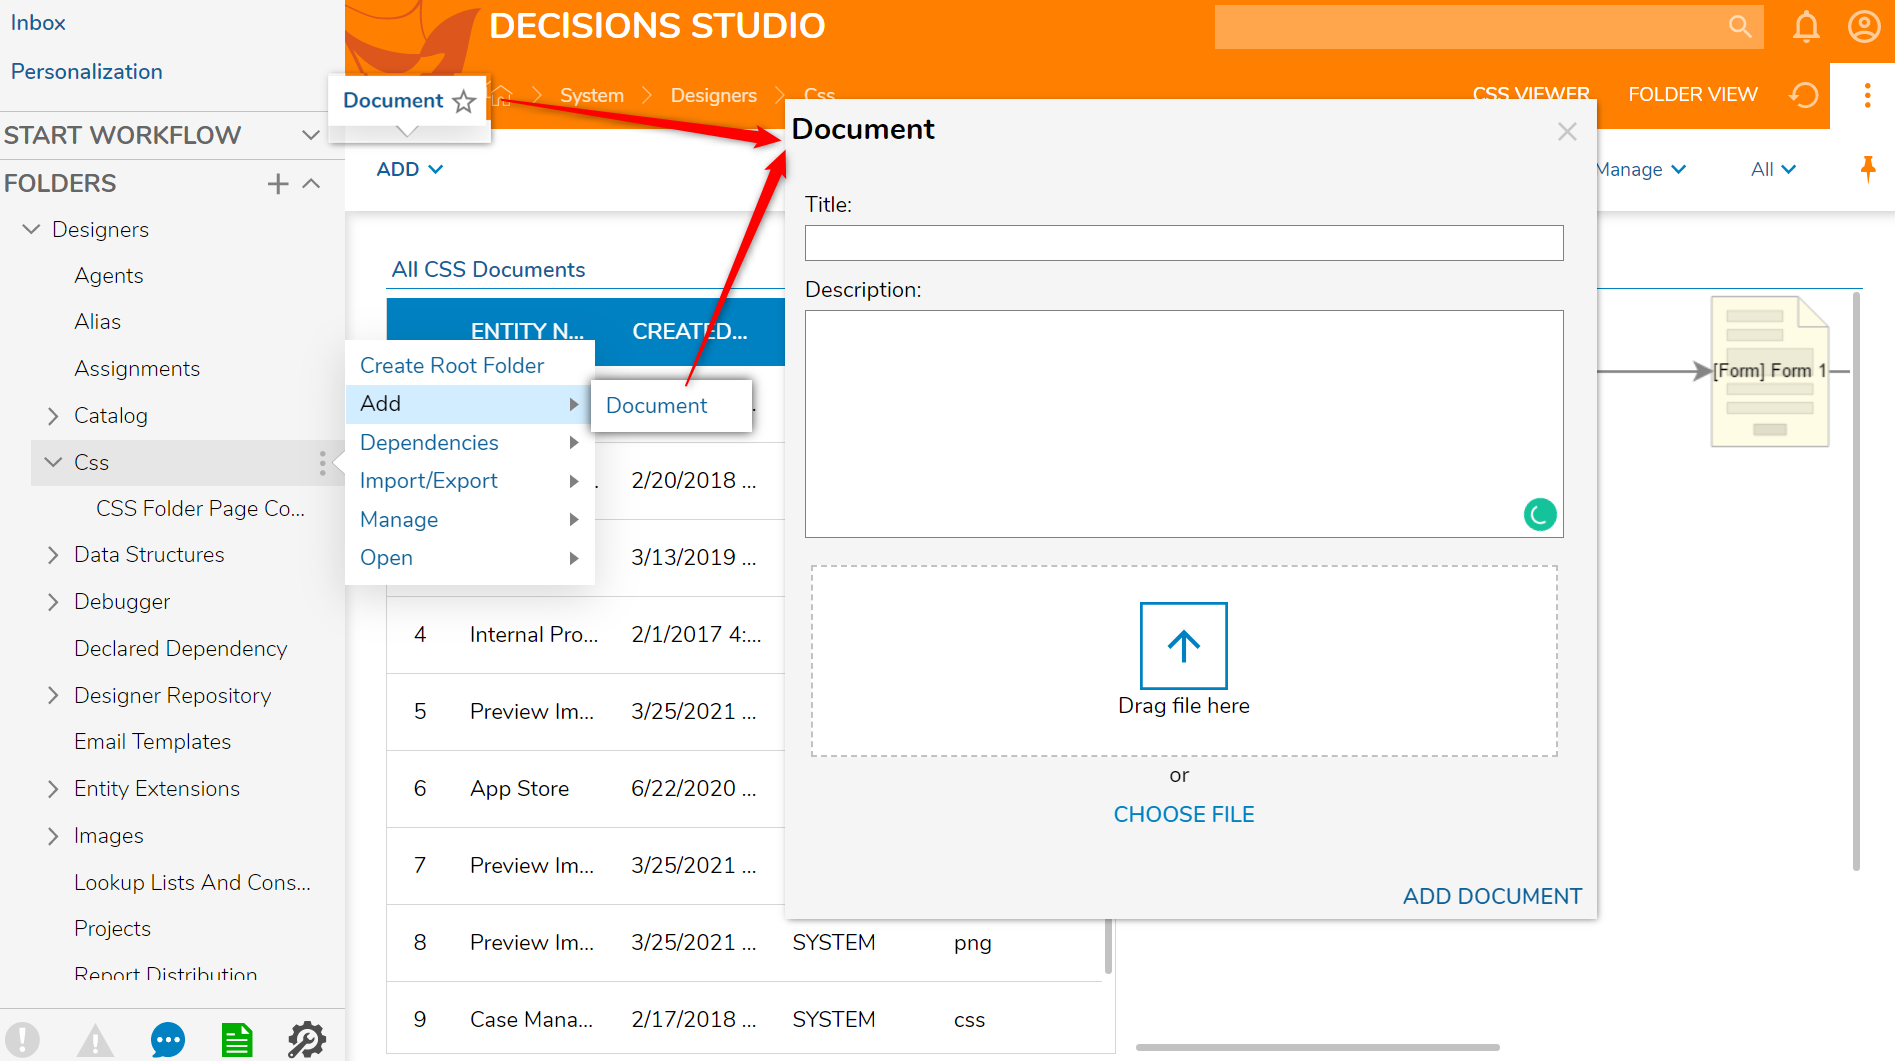
- Begin in the Decisions Studio and navigate to System > Designers > Css.
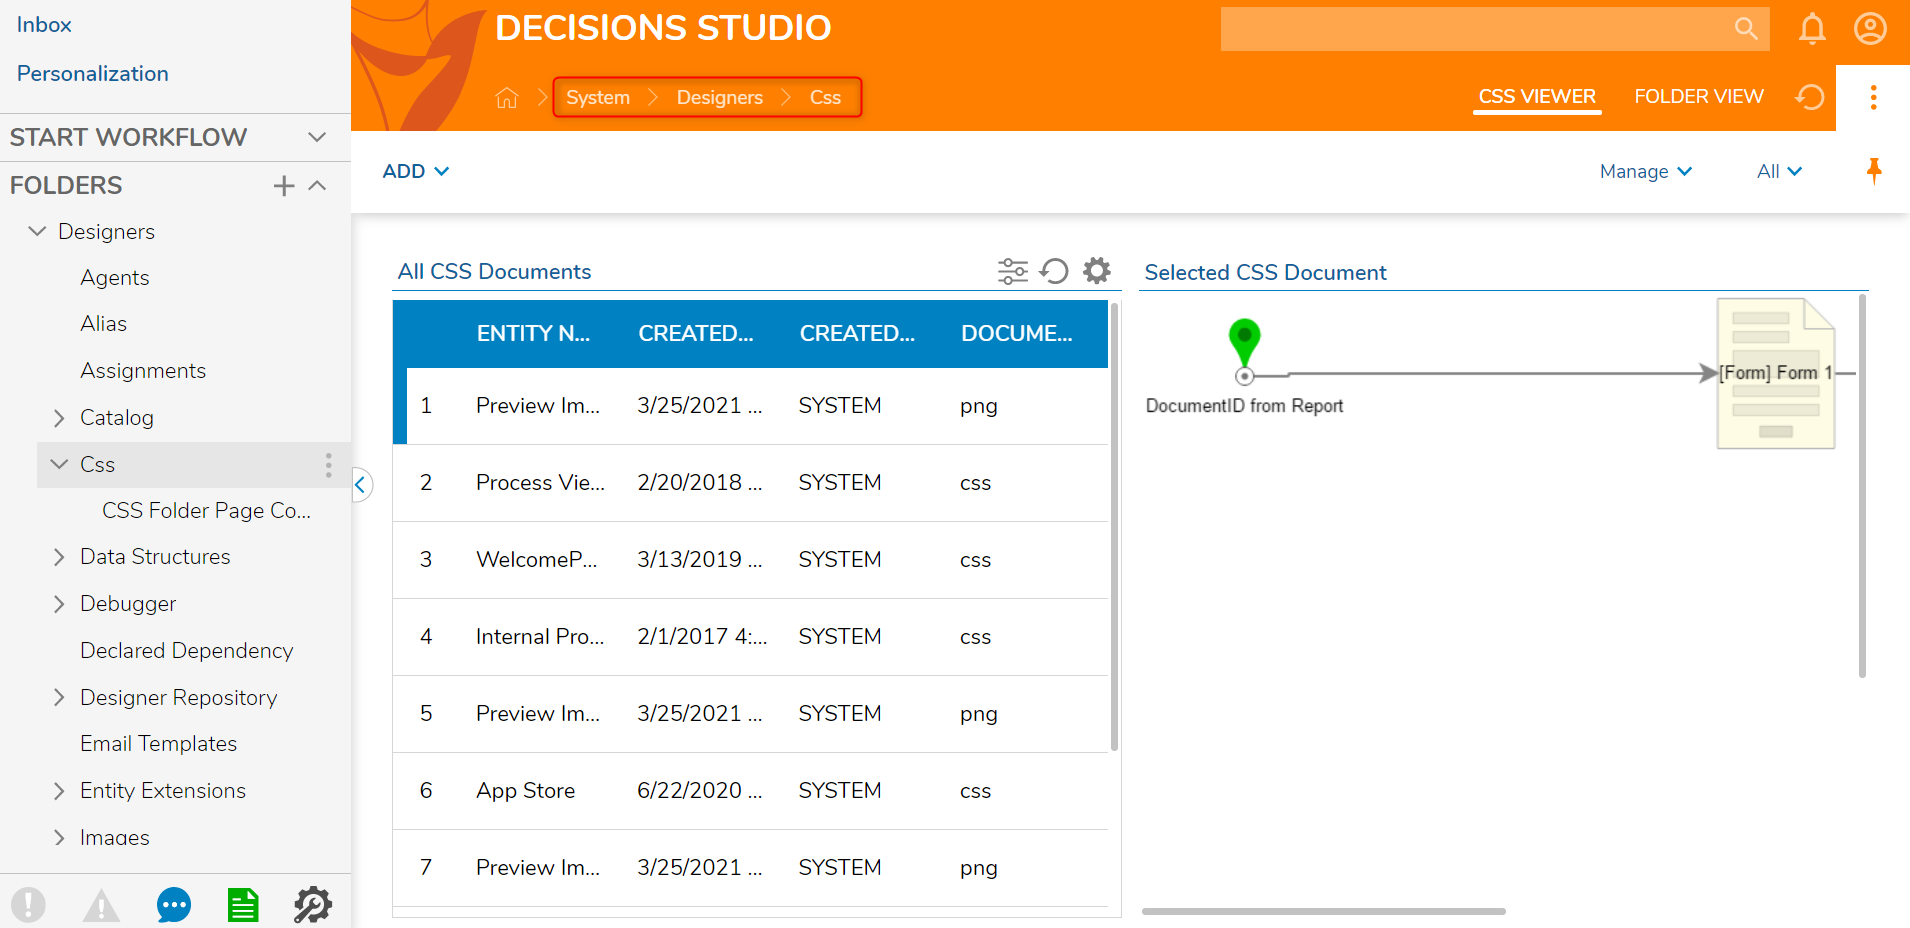
- In Decisions Version 7, there are two ways to add a CSS document: right-clicking on the Css Folder in the Folder Tree and navigating to Add > Document and selecting ADD > Document from the Global Action Bar. Navigate as desired.
- In the Document window, name and upload a CSS document.
- Click ADD DOCUMENT.
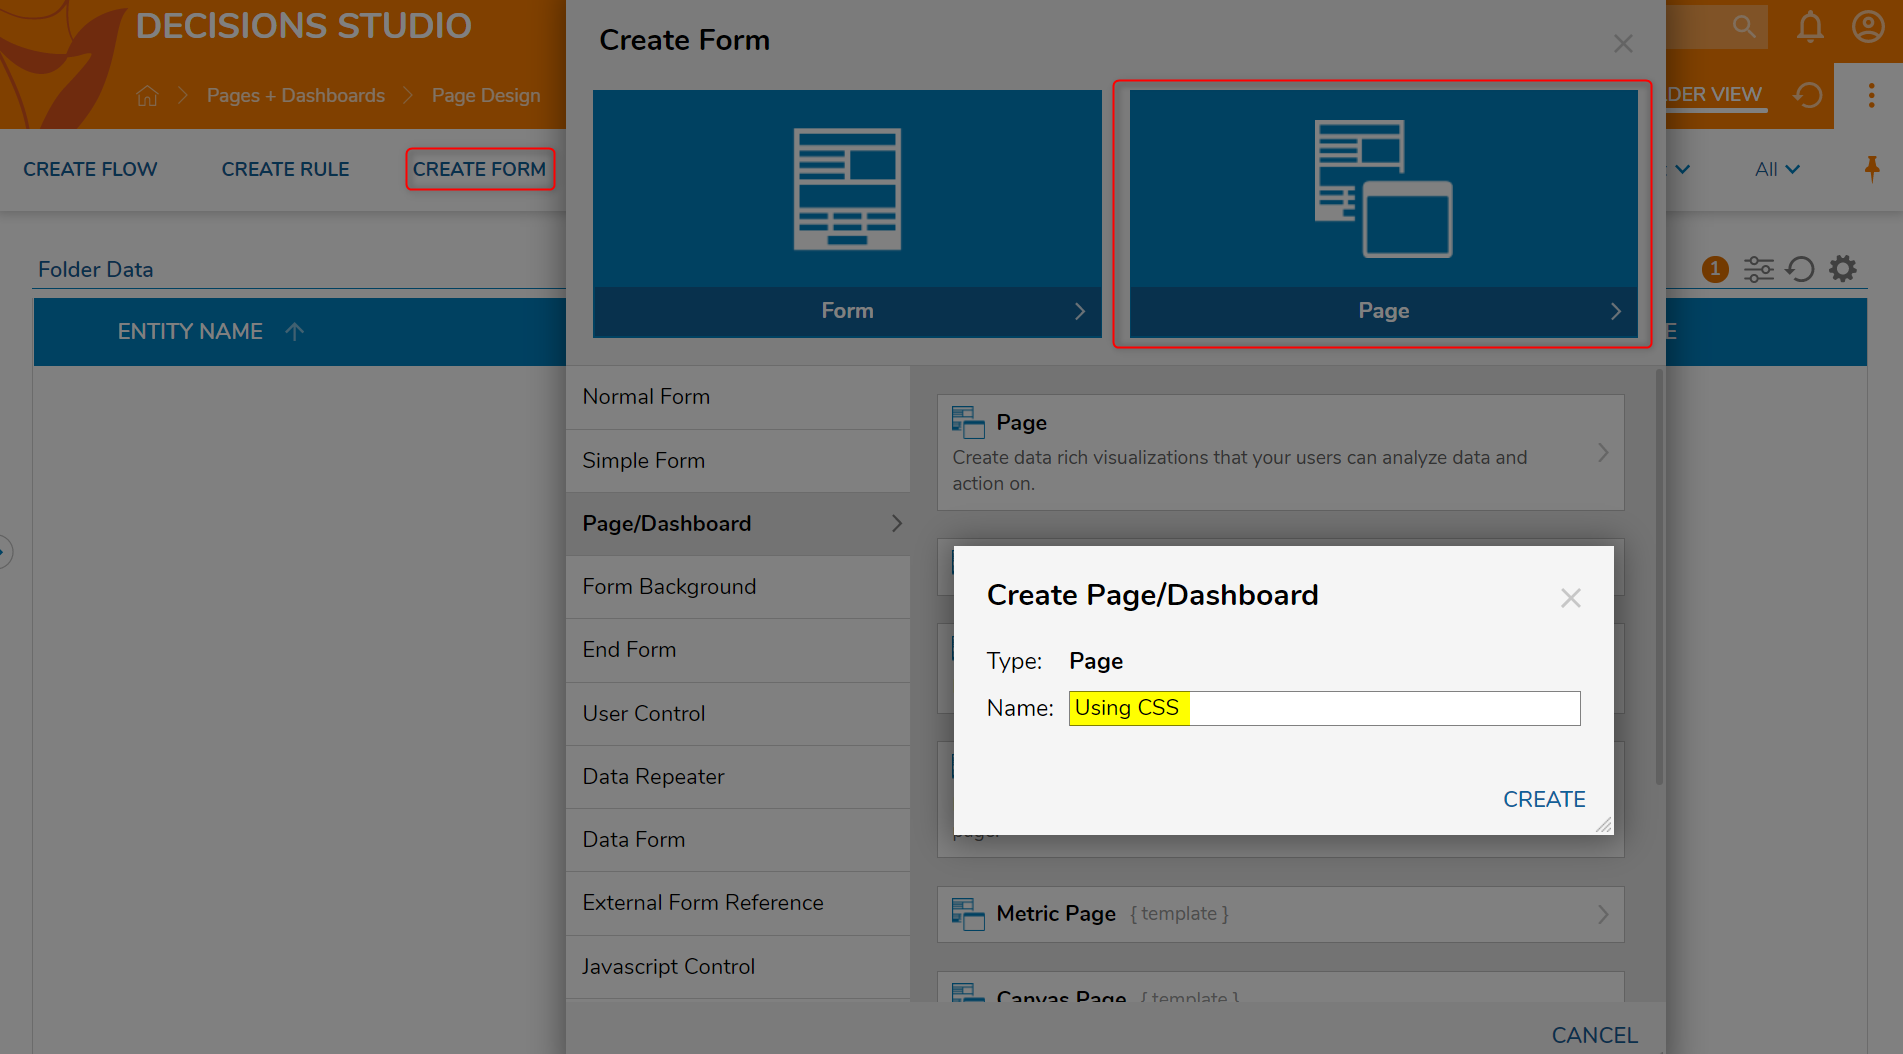
- Once the CSS file is uploaded, navigate to a Designer Folder and select CREATE FORM.
- In the resulting Create Form window, select and name the default Page [Using CSS]. Click CREATE.
- In the Page Designer, navigate to the Properties panel > STYLE > Style Sheets section and select the newly uploaded Style Sheet.In this example, the name of the new CSS style is Bright and Youthful.

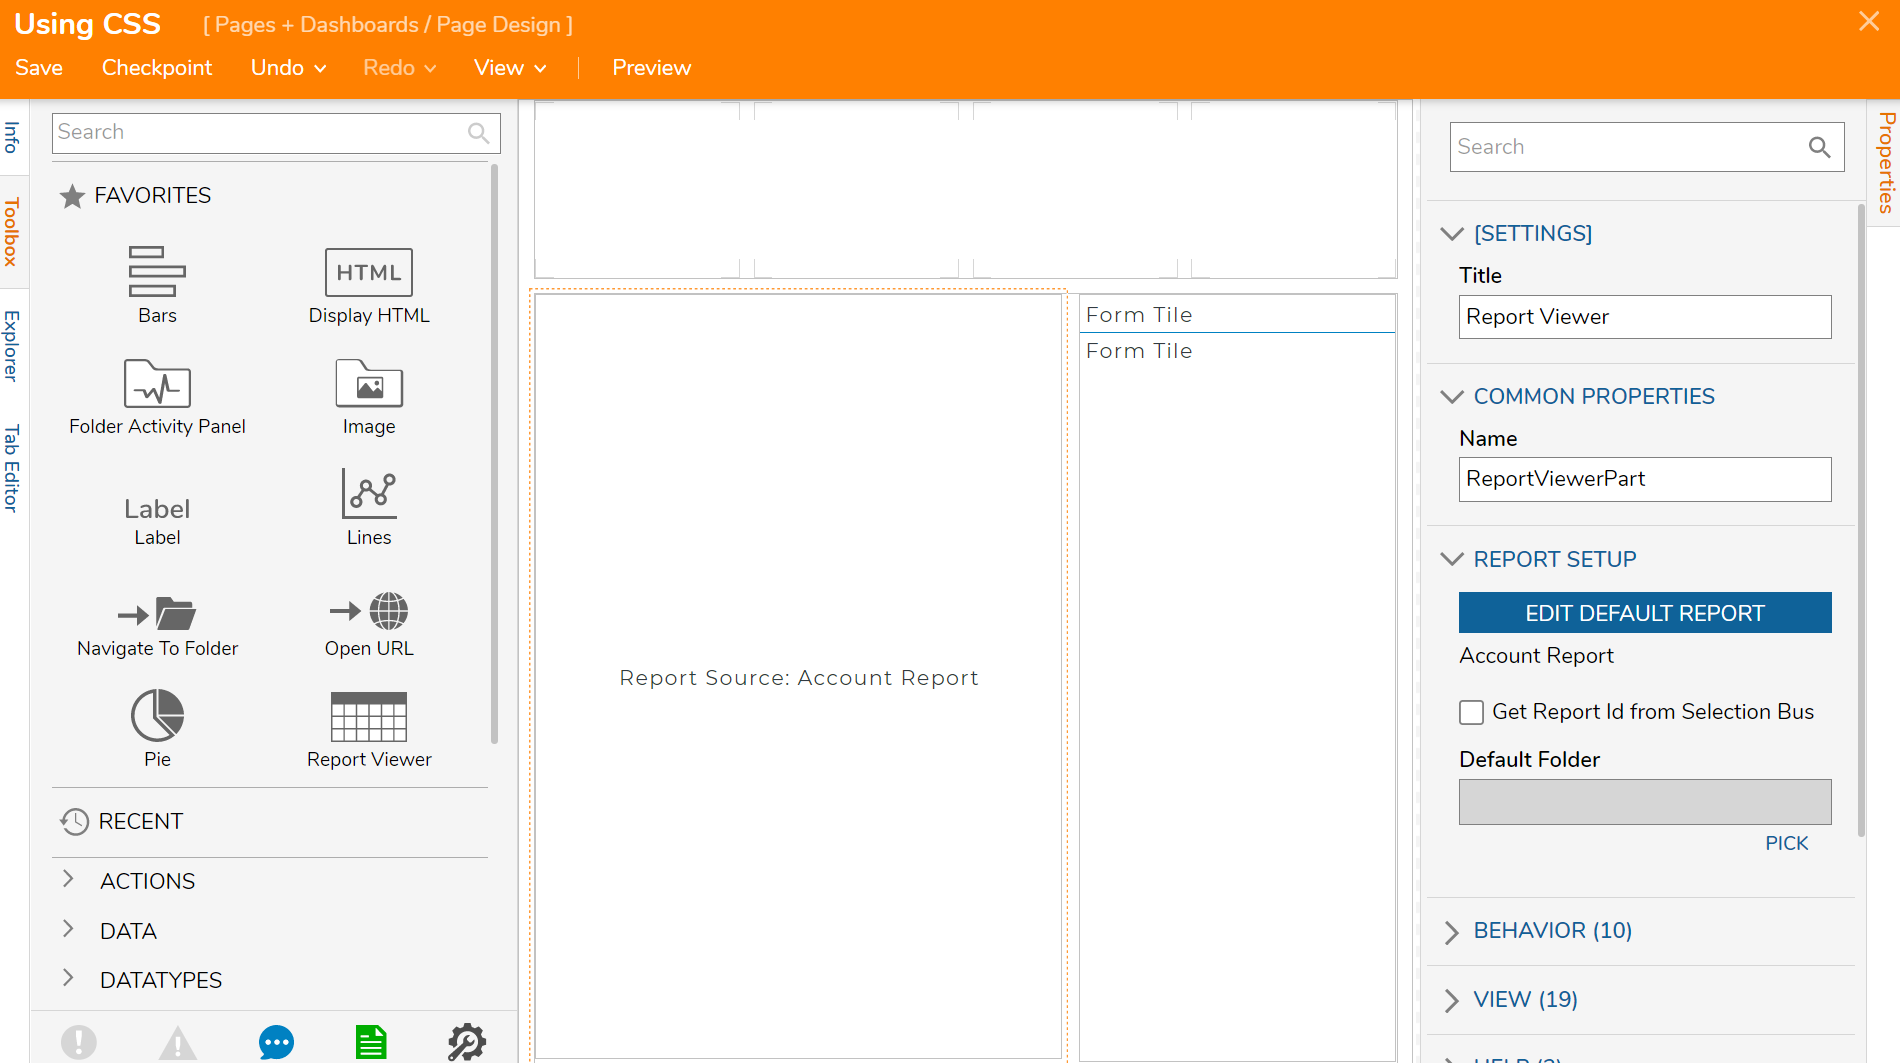
- From the Toolbox > FAVORITES section, drag and drop a Report Viewer component to the Page.
- In the Properties panel > REPORT SETUP section, add a pre-existing Report. Please navigate to Create a Report for more information on how to create a Report.
- In the Properties panel > REPORT SETUP section, add a pre-existing Report.
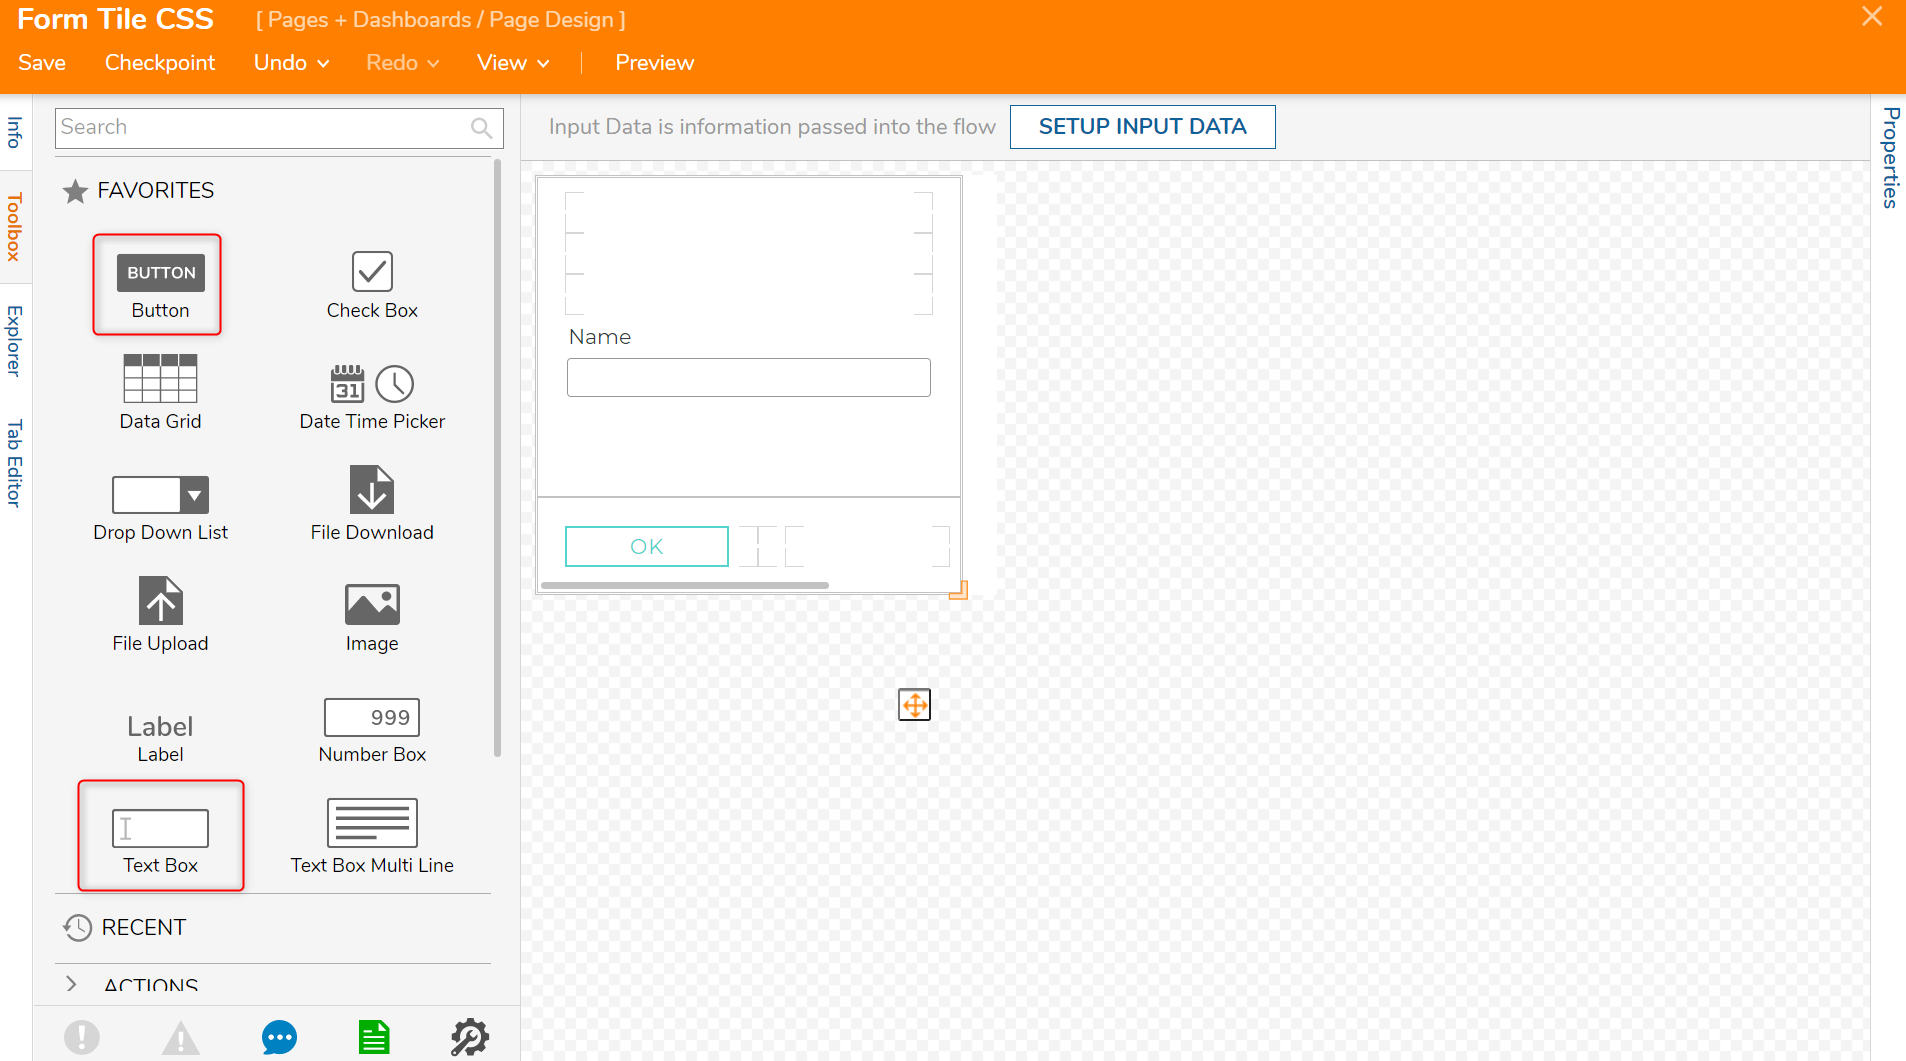
- Next, add a Form Tile component from the Toolbox > TILES section.
- Configure the Form Tile by navigating to INPUT > PICK TILE FORM.
- In the Form Tile Flow Designer, add a Button [OK] and a Text Box [Name] component.
- Save and Close.
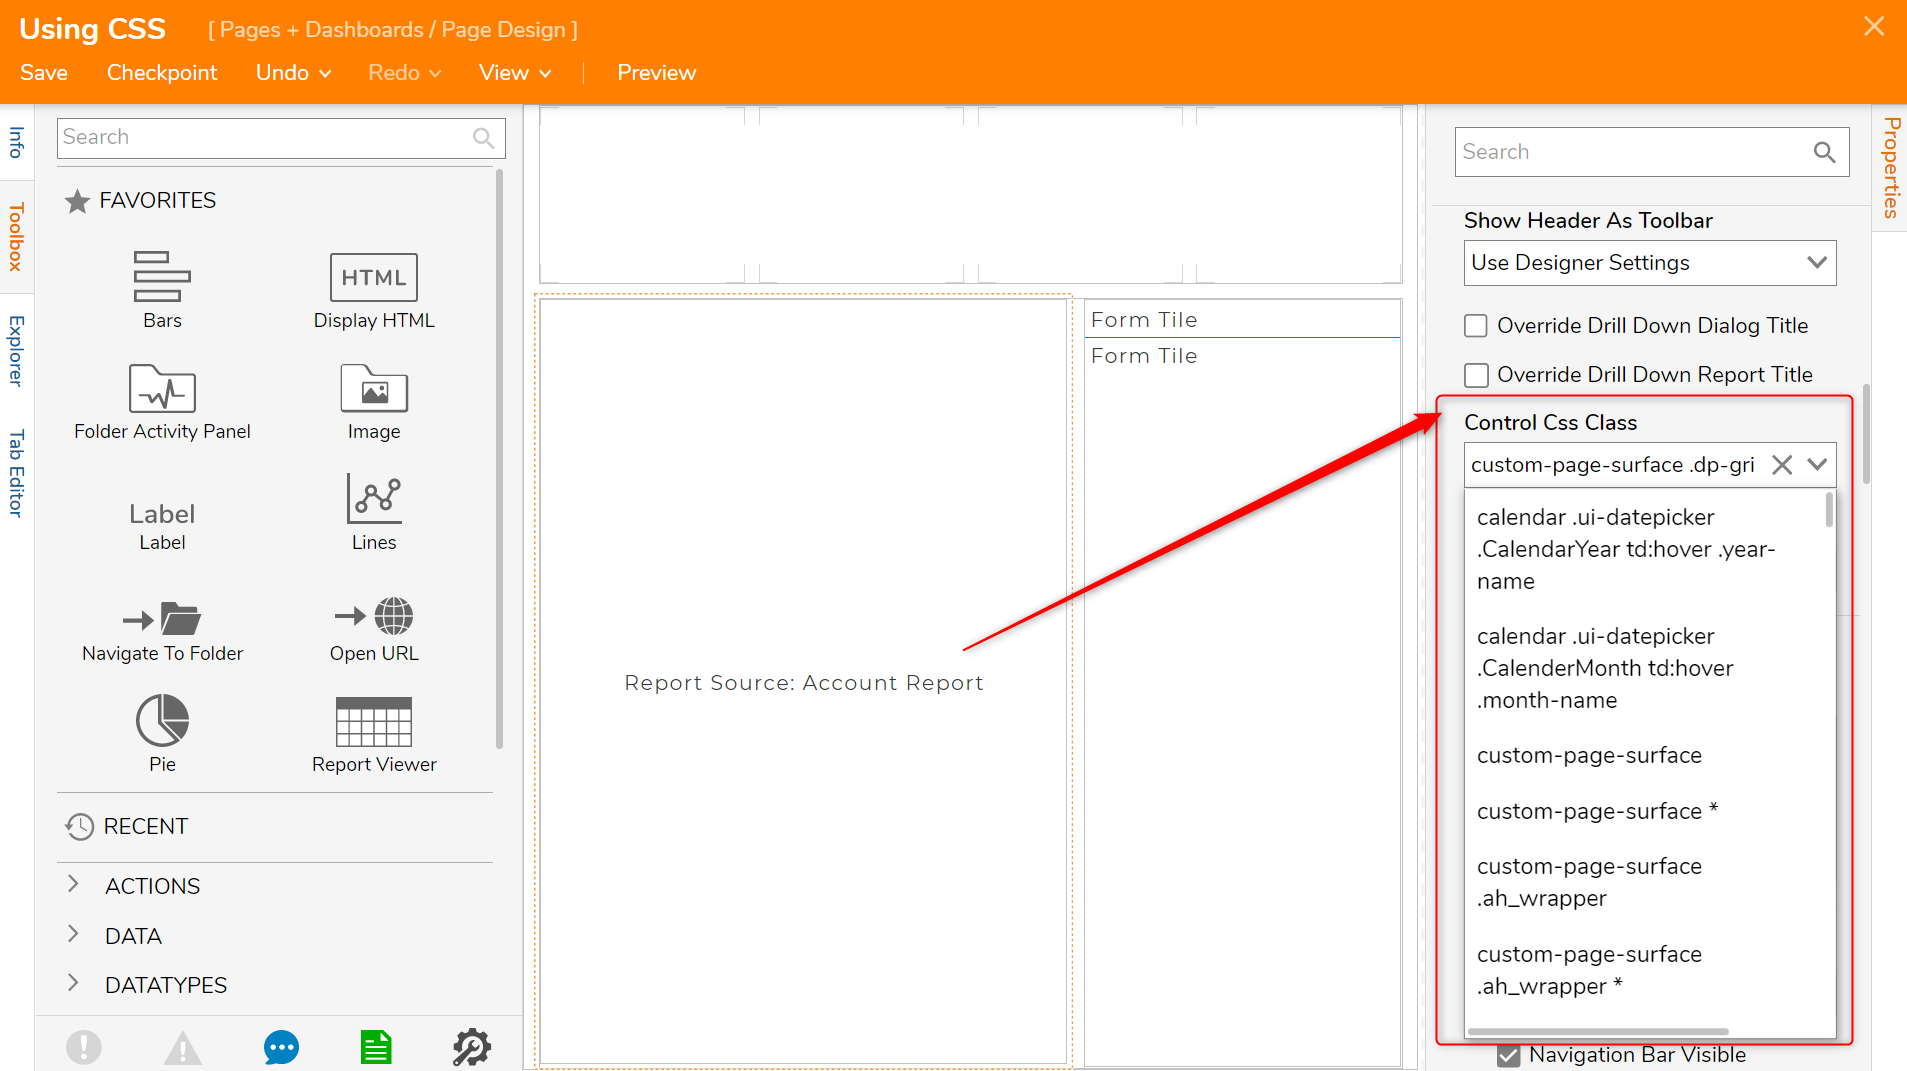
- Navigate to the Properties panel > VIEW > Control CSS Classdrop down to assign a CSS Class to any component on the Page.In this example, the Report Viewer component will be selected.
- Save and Close the Page Designer.
- Navigate to the Designer Folder that the new Page was created in, right-click and navigate to Manage > Page/Dashboard > Add Page/Dashboard.
- In the resulting Add Page/Dashboard window, select PICK PAGE.
- In the resulting Create or Pick Page window, select PICK, then navigate to the new Page.
- Click PICK, then SAVE.

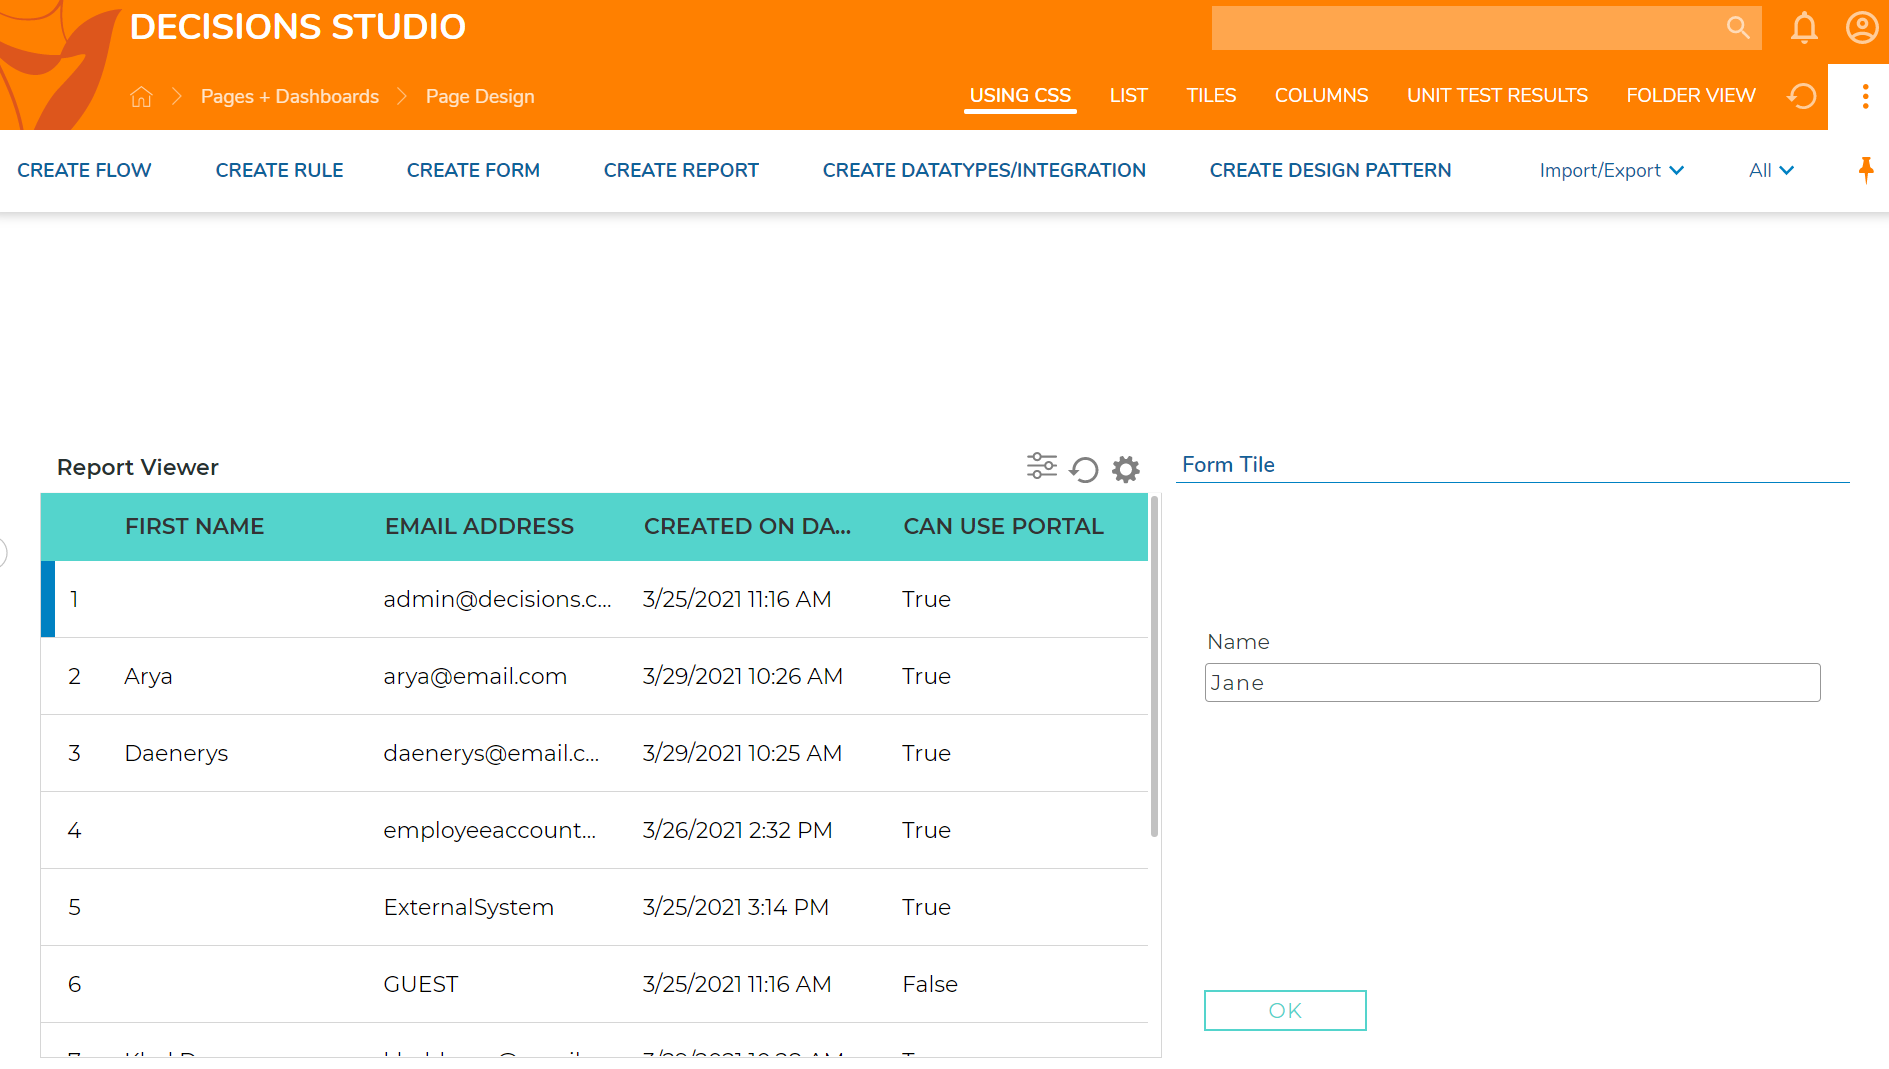
- The new Page has been added as a Portal Page in the Top Bar. Select the Page.
- The new Page with CSS Styling on the Form Tile and Report Viewer components will display.


Was this article helpful?