Tree View Form Control
- 28 Jul 2022
- 1 Minute to read
- Print
- DarkLight
Tree View Form Control
- Updated on 28 Jul 2022
- 1 Minute to read
- Print
- DarkLight
Article Summary
Share feedback
Thanks for sharing your feedback!
Overview
The Tree View Form Control element is used to form a hierarchy view of data. The Tree View Form Control allows users to display a list of Strings in a tree-like structure and outputs the selected String. For instance, users can use this element for Inventory Management. This allows users to see the Parent Location followed by all the sub-sections underneath it, and they can select one of them. This organizes data in a hierarchical view for better management. This document discusses how to set up a Tree View Form Contol.
Example
In this example, a Form will be displayed to the user to select the person they need to contact for a specific department.
- Add a Form to a Flow. To learn how to do this, please navigate to the Create a Form article.
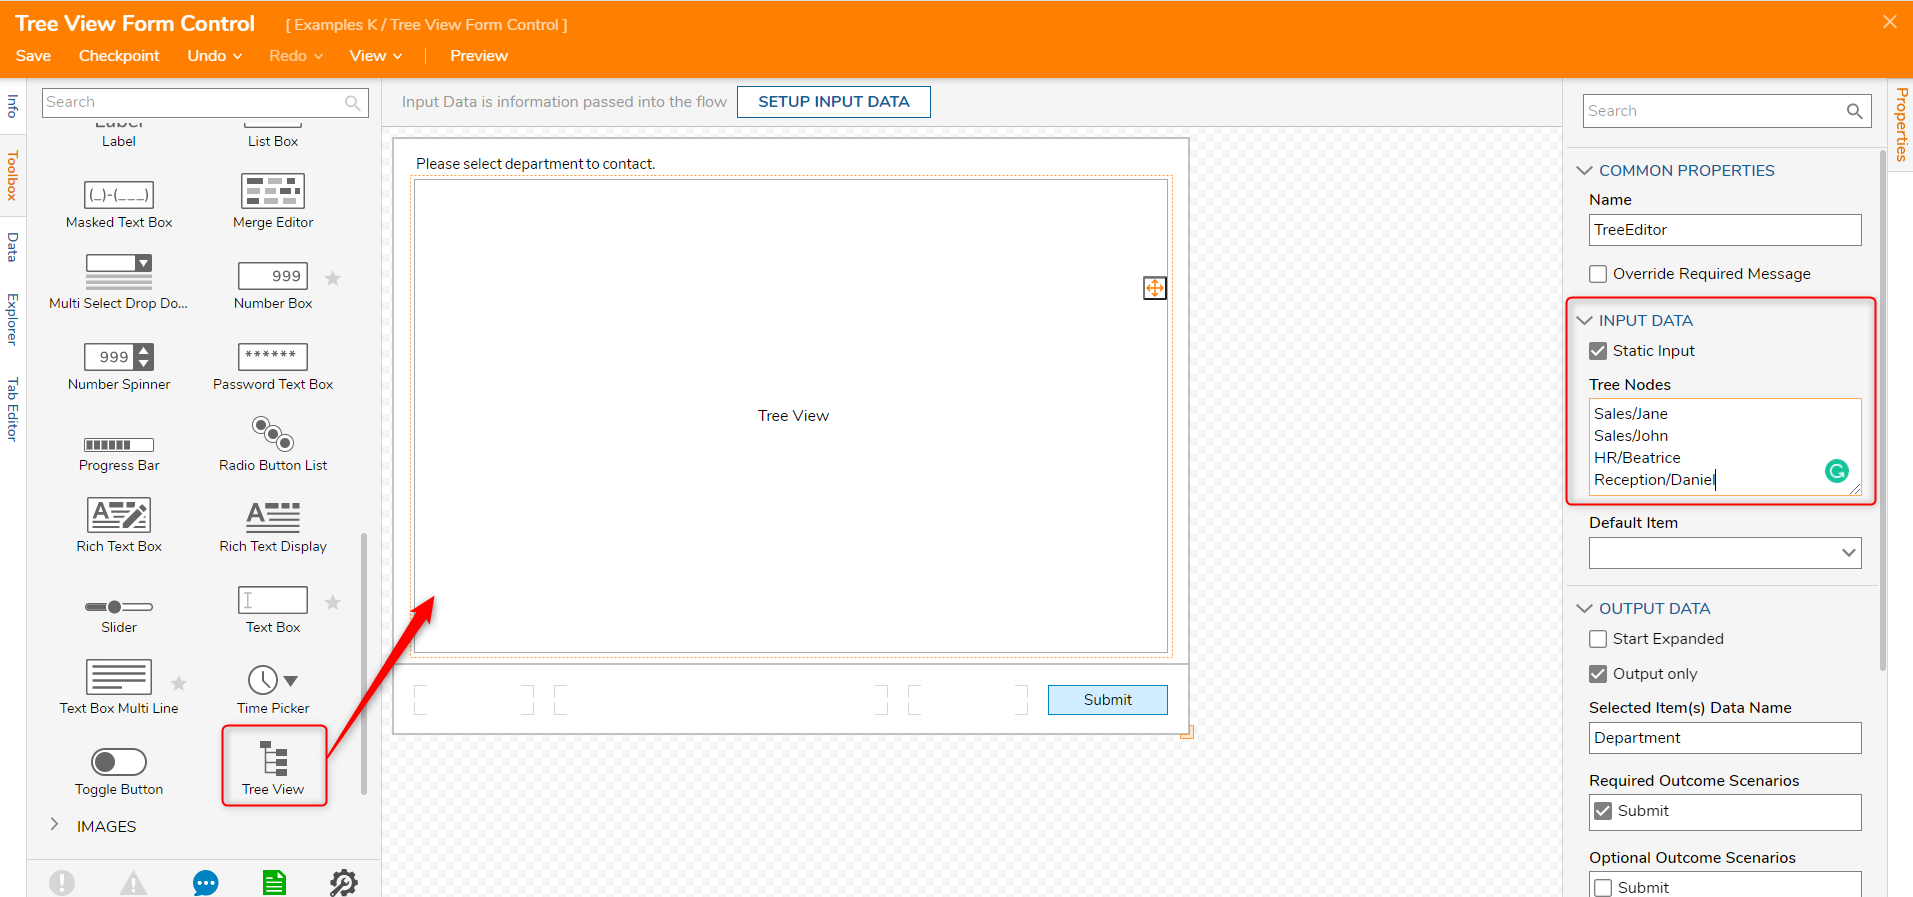
- In the Form Designer, in the Toolbox panel, expand Data, drag, and drop the Tree View control onto the Form.
- With the Tree View selected, navigate to the Properties panel. Add parent and child Tree Nodes; use "/" as the separator between the parent and child node.
- Select the Static Input Checkbox under the Properties tab. This will display an area to provide the static inputs.
- A Default Item can be provided by selecting an item from the drop-down list under the Default Item section.

Debug
- In the Flow Designer, select Debug in the top action panel. Select START DEBUGGING.
- The Form displays the tree view, and each parent node can be expanded to show the child nodes. Select a child node and select Submit. The selection will be available to use throughout the Flow.

Was this article helpful?