Search by Tags
- 19 Jul 2022
- 1 Minute to read
- Print
- DarkLight
Search by Tags
- Updated on 19 Jul 2022
- 1 Minute to read
- Print
- DarkLight
Article Summary
Share feedback
Thanks for sharing your feedback!
Overview
After a Tag is created and applied to an object in Decisions, the Tag can be utilized to search for objects with that Tag at the Folder-level. In addition, the AllTagData property of an object can be referenced to retrieve the Tags associated with that object.
For more information on Tags, please visit the About Tags article.
Designer Project
Tags can be searched in the Global Search Bar in the Decisions Studio.
However, only the TagList object (the Tag itself) will appear. To find objects by their Tag, the search must happen from within the Designer Project that is containing them.
Once a Tag is applied to an object, the name of the Tag will appear in the Tags column of the Report while in the LIST view of a Designer Project.
Use the Search bar of a Designer Project to filter objects by Tags.

When an object is assigned a Tag, the AllTagsData property of that object can be referenced to show the Tag Data assigned based on the value of that object selected.
Search via Flow
The following example demonstrates how to use a Flow to find an Account object's Tags.
To recreate the Flow:
To recreate the Flow:
- From System > Security > Accounts, right-click the desired Account and select Add > Setup > Manage Tags.
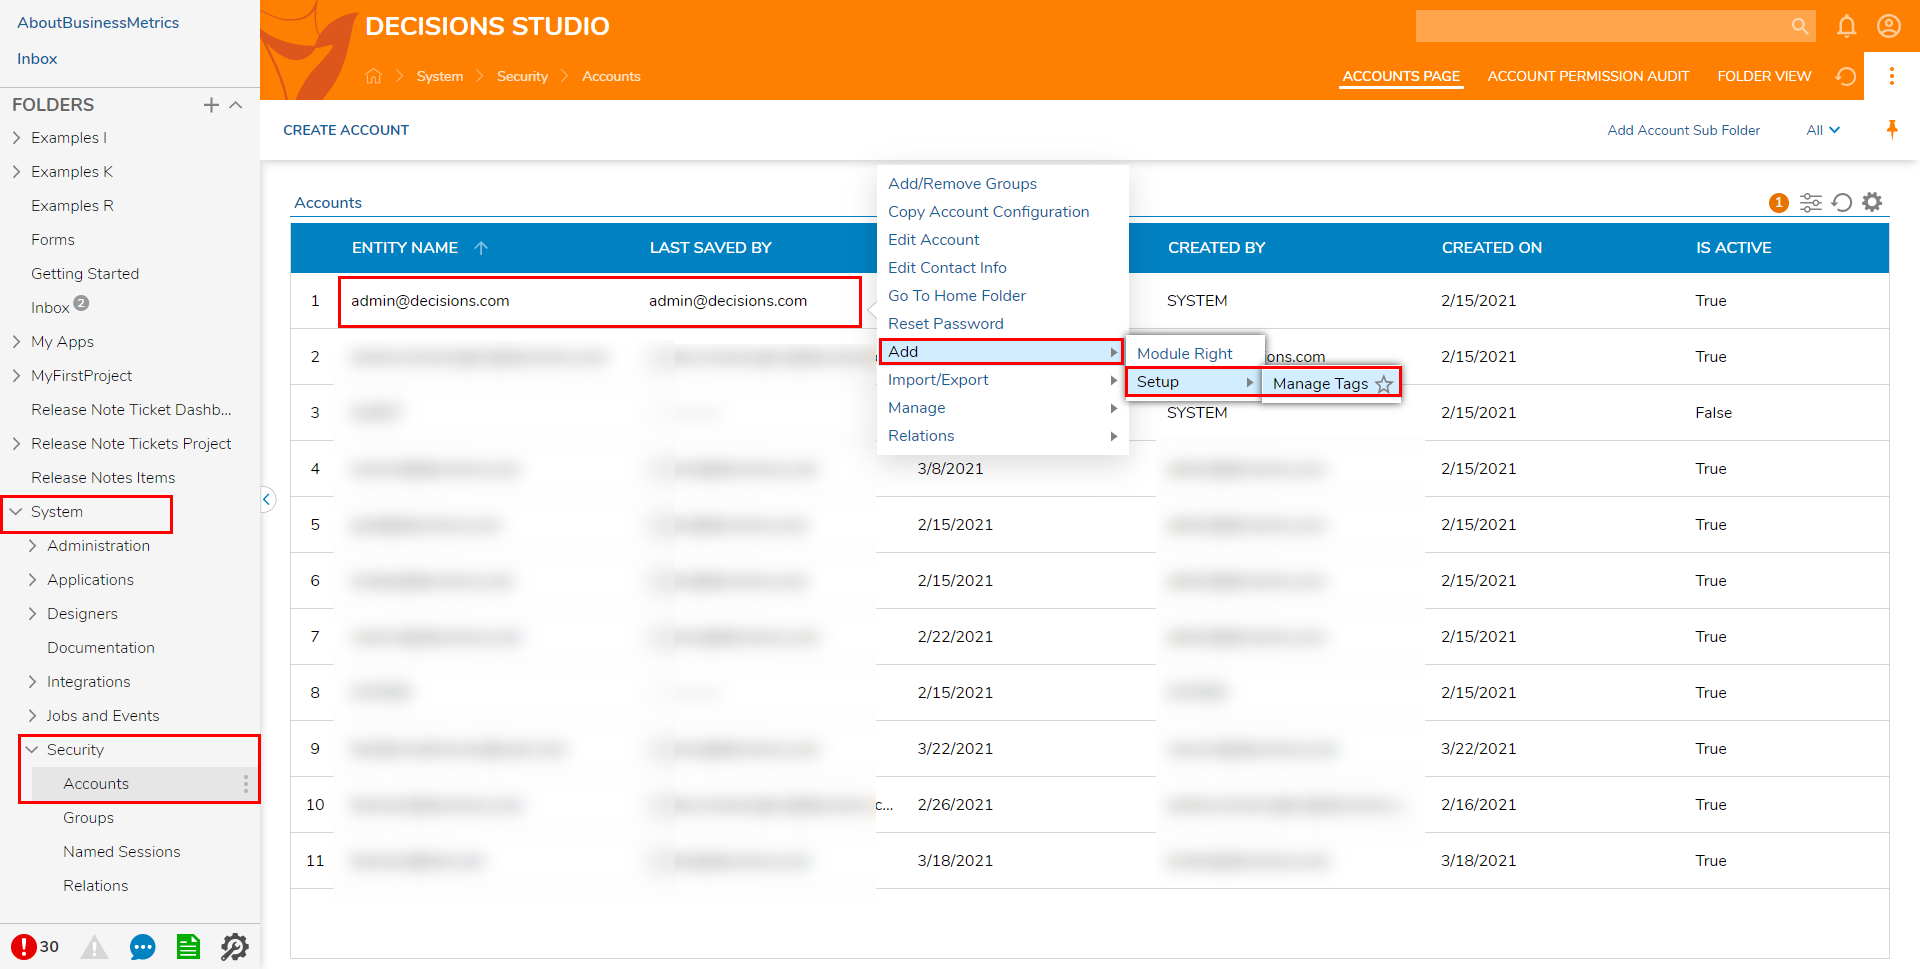
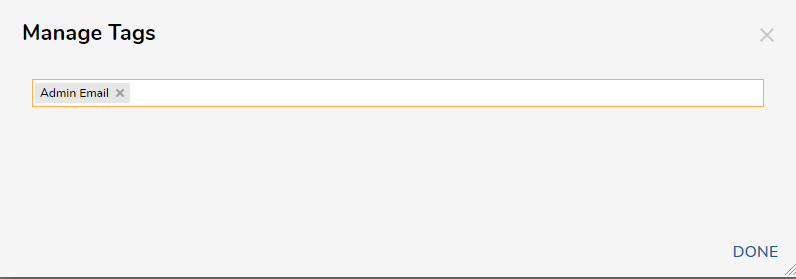
- Add the Tag "Admin Email", then click DONE.
- From a Designer Project, select CREATE FLOW from the Global Action Bar, select Flow, provide a Name, then click CREATE.
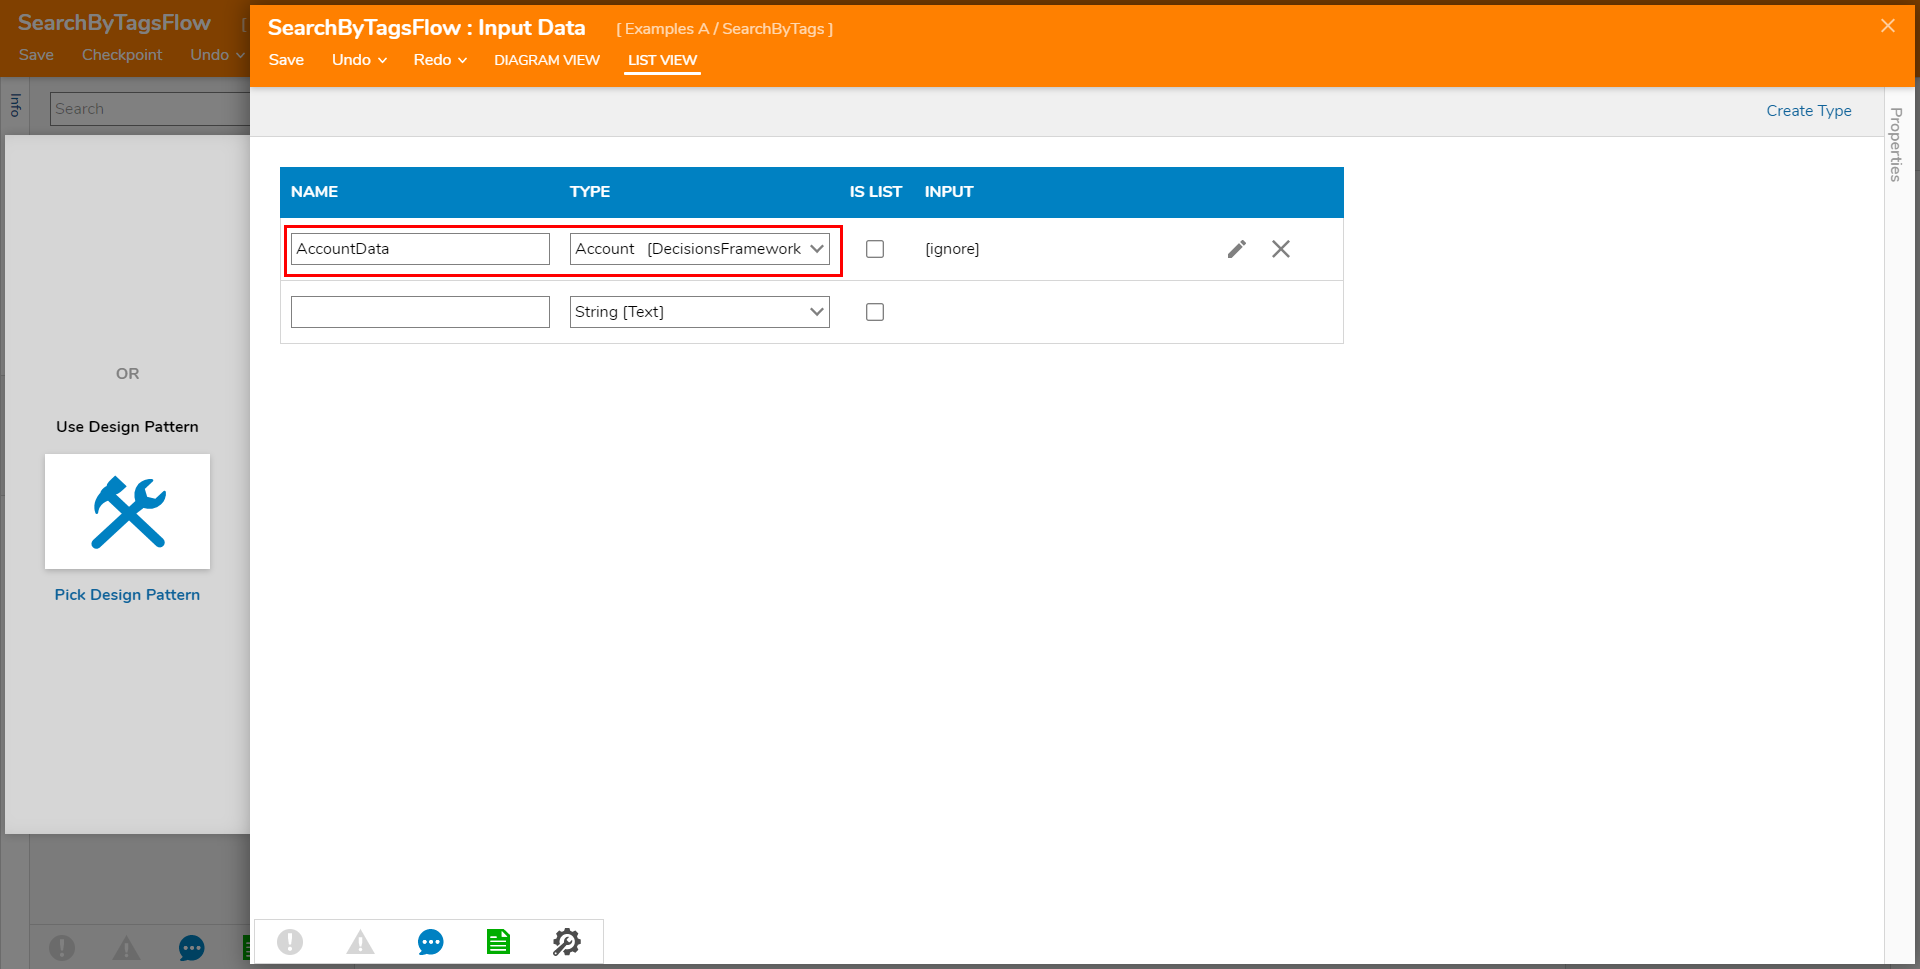
- From the Flow Designer, click SETUP INPUT DATA.
- Define the Input Data by providing a NAME and selecting Account from the TYPE dropdown. Save and close the window.
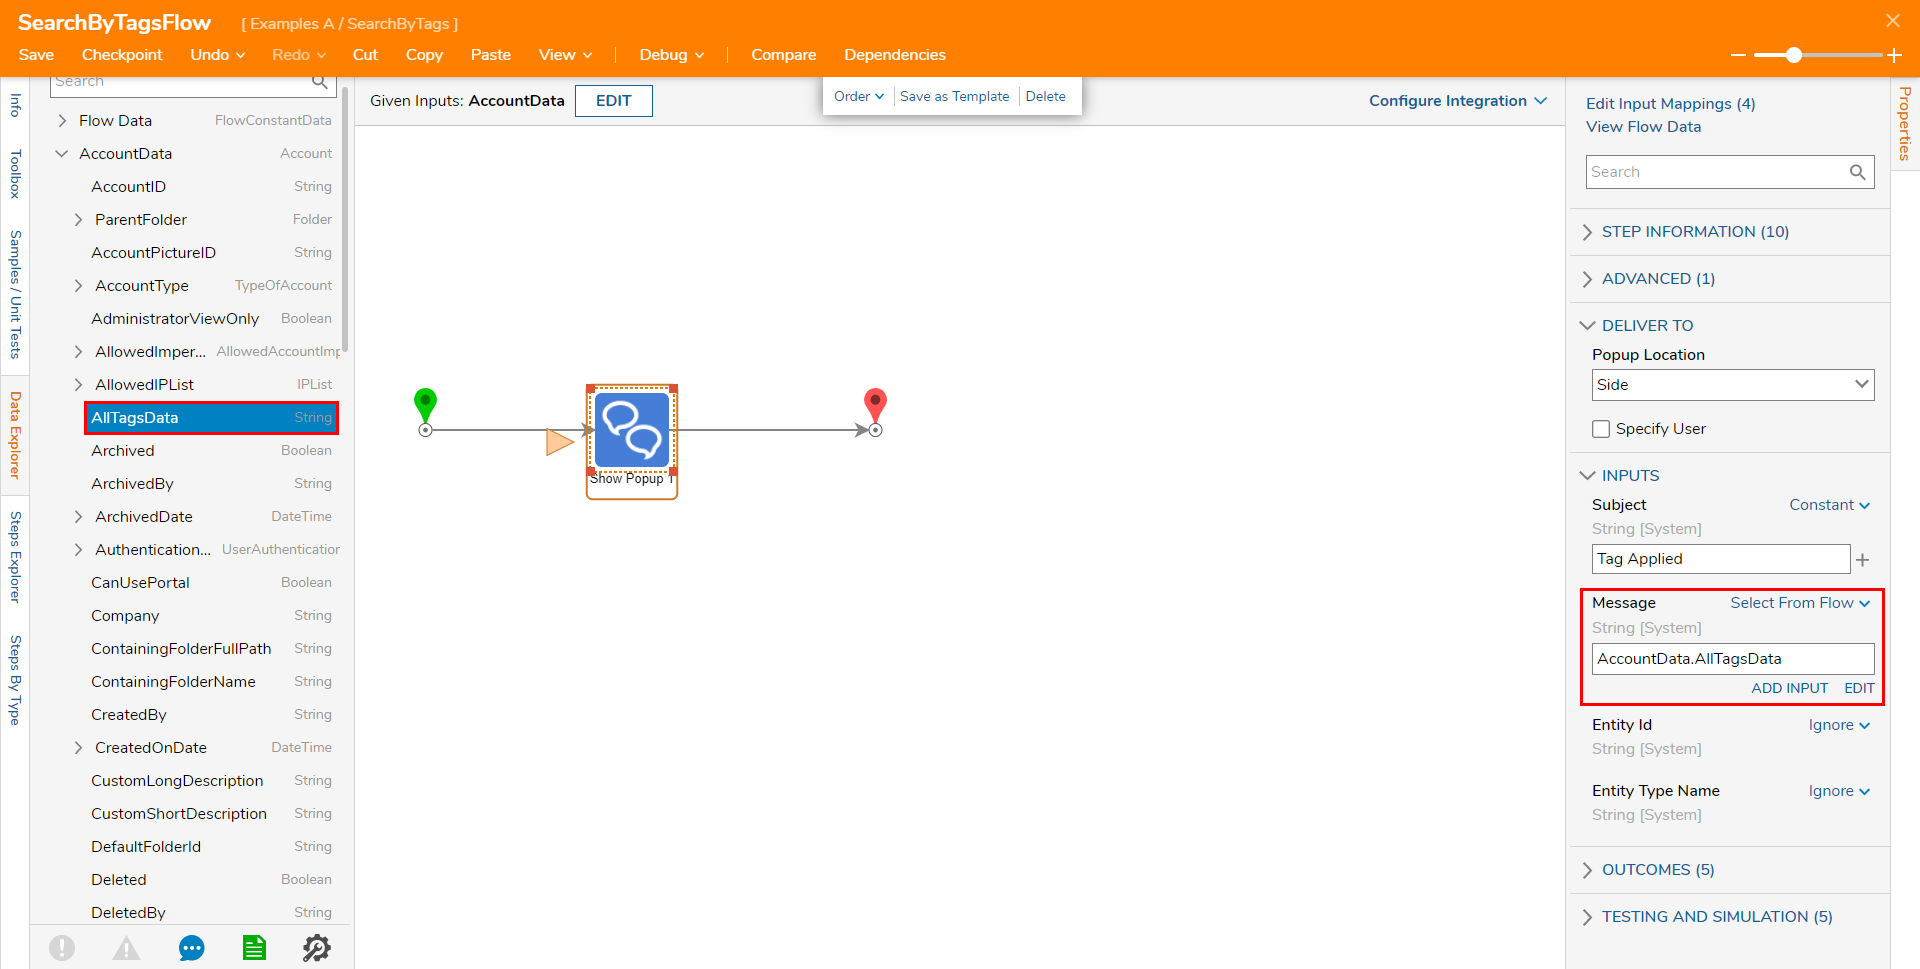
- From the FAVORITE STEPS category of the Toolbox tab, connect a Show Popup step to both the Start and End steps. From the Properties tab of the Show Popup step, Constant map the Subject, "Tag Applied". Then, map AccountData.AllTagsData to Message.
- Save the Flow, then if desired, close via X.


Debug
- From the Flow Designer click the Debug link on the top action bar.
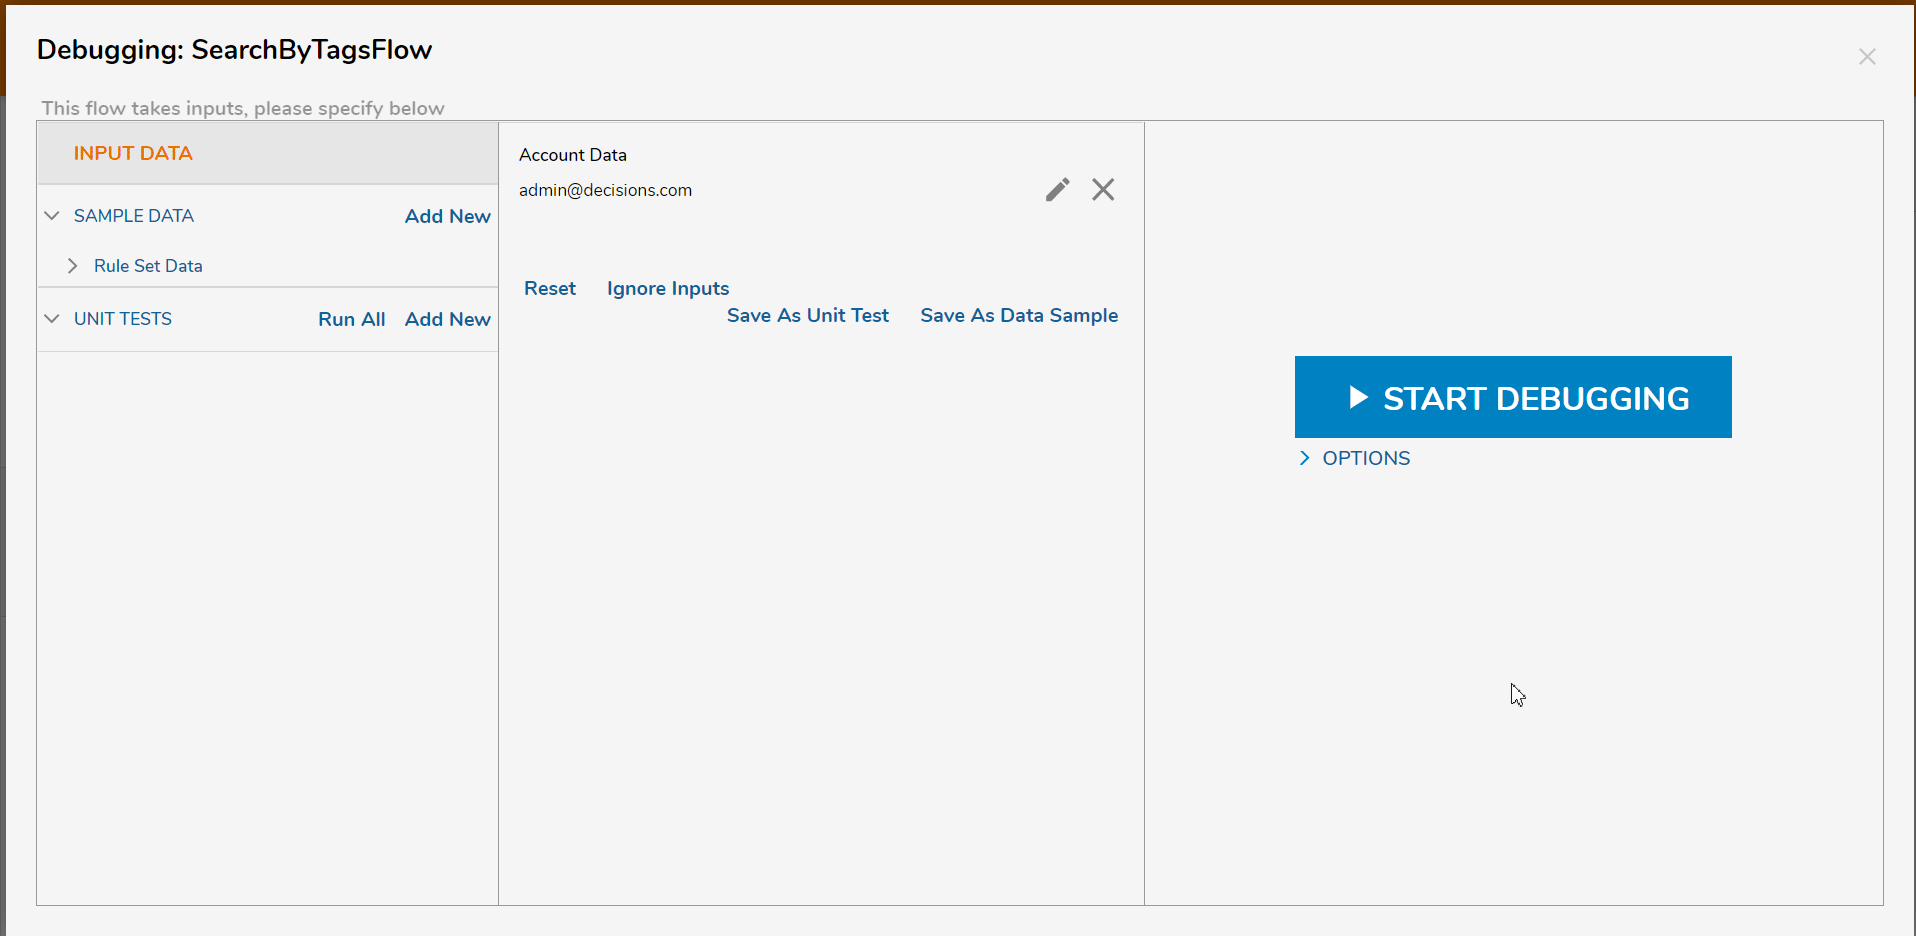
- Select the Edit Icon and PICK the Account that contains the added Tag.
- Click START DEBUGGING.
When the Flow is Debugged, the Account with the assigned "Admin Email" tag is called as the Popup Message's content. This demonstrates how the AllTagsData property String value and can be applied to an Input definition.

Was this article helpful?