Overview
Module Details | |
| Core Module | |
| Restart Required | No |
| Step Location | Integrations > SalesForce |
| Settings Location | System > Settings Salesforce |
| Prerequisites |
|
The Salesforce Module allows users to integrate with Salesforce to automate their sales processes through pre-built Flow steps.
Sales teams can create and manage accounts, campaigns, contacts, sales leads, and contracts.
Salesforce uses two primary API systems for developers to interact with Salesforce data: SOAP and REST.
The Salesforce Module uses the REST API because the Salesforce SOAP API is unique for each customer.
Integrating with Salesforce
The Salesforce Module has pre-built steps that use the Salesforce REST API and OAuth for security to communicate with Salesforce. The following data types can be found, accessed, edited, and saved using the pre-built steps.
| Account | Case | Lead | Product |
| Asset | Contact | Opportunity | Quote |
| Campaign | Contract | OpportunityProduct | User |
| CampaignMember | Idea | PriceBookEntry | Task |
Using any of the pre-built Salesforce Steps requires setting up an OAuth Provider and an OAuth token. OAuth is a standard mechanism for providing security to communicate with a web service.
The information to complete the required fields for Salesforce can be located by navigating to SETUP > Apps > Connected Apps > Manage Connected Apps in the Salesforce platform. Click Edit next to the desired connected app.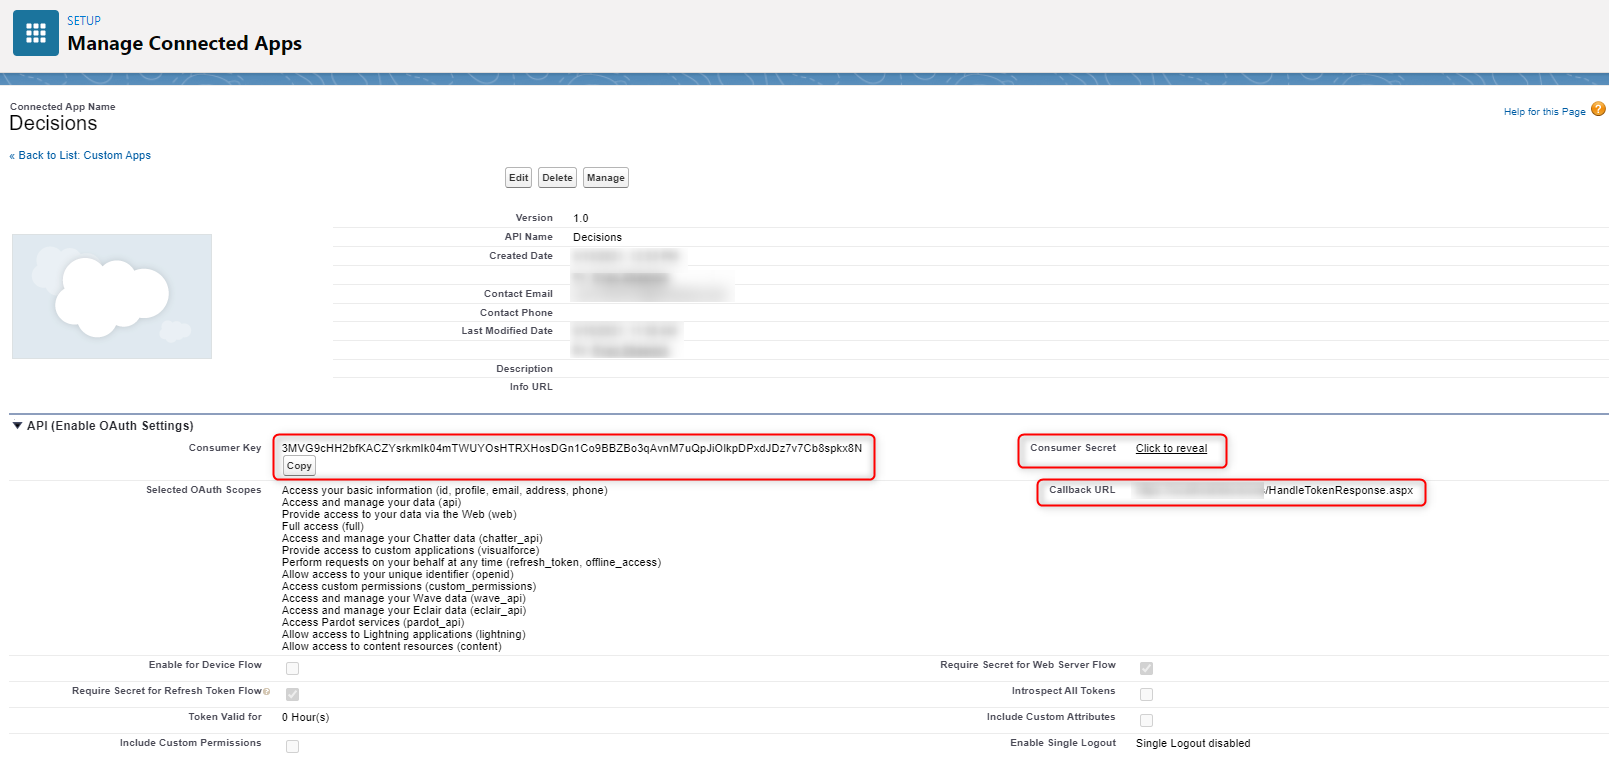
OAuth Tokens for Salesforce
In Decisions, a user must also establish an OAuth token, which represents a user who will be used to run the REST API and interact with the data in Salesforce. There are two types of tokens for interacting with Salesforce: Authorization Token and Access Token.
| Token | Description |
|---|---|
| Authorization | This token can be set up once and requires communication between Decisions and Salesforce, with a user signing into the Salesforce page and retrieving a token to store in Decisions. Once it is set up, the authorization token should not expire. |
| Access | The access token is created using the authorization token, but it will expire periodically and needs to be refreshed. This can be done automatically in Flows using Flow steps. |
Configuration
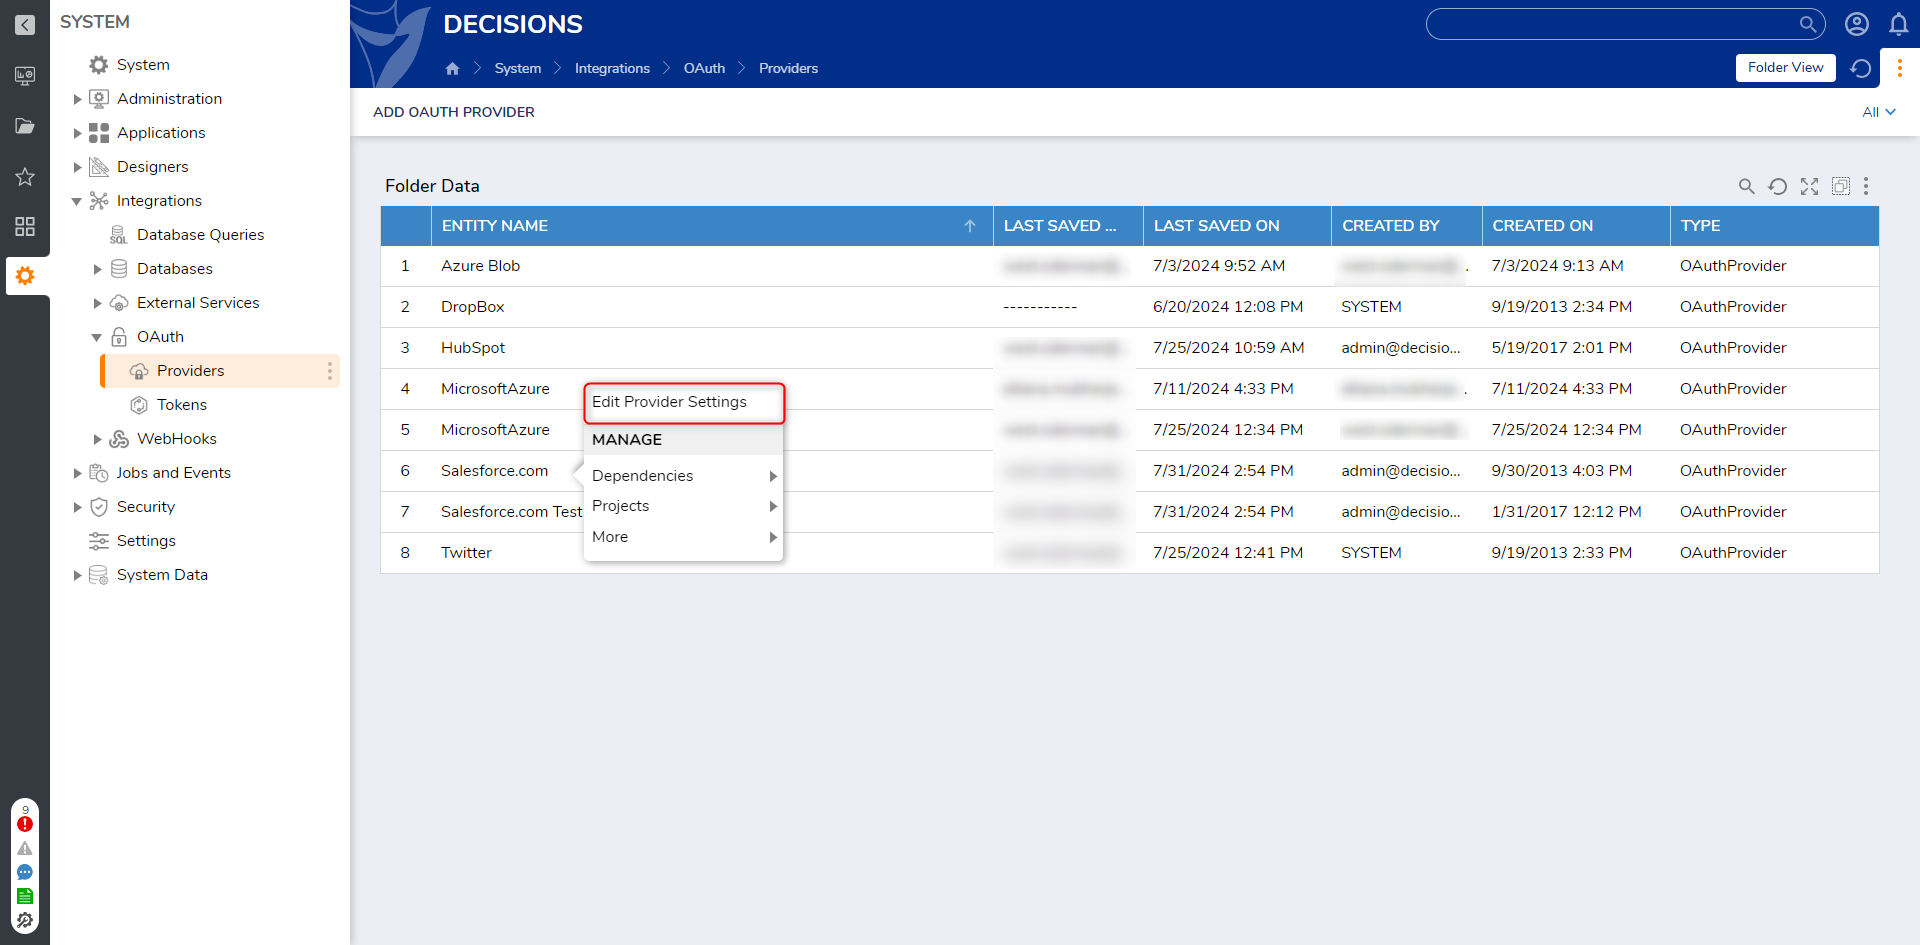
- Navigate to System > Integrations > OAuth > Providers. Right-click on Salesforce.com and select Edit Provider Settings.The OAuth Providers contain provider configurations. Create an application in Salesforce to customize the application definition for the Decisions installation and Salesforce then modify the provider data.
- Enter the correct configuration parameters and enter the Consumer Key and Consumer Secret Key, Token Request URL, Authorize URL, and Callback URL. Then, click SAVE.
Below are the values for the Token Request, Authorize, and Callback URLs that need configuring.URL Example Token Request URL Test/Sandbox: https://test.salesforce.com/services/oauth2/token
Prod: https://login.salesforce.com/services/oauth2/tokenAuthorize URL https://[Domain Name for SF].my.salesforce.com/services/oauth2/authorize Callback URL https://[BasePortalURL]/HandleTokenResponse 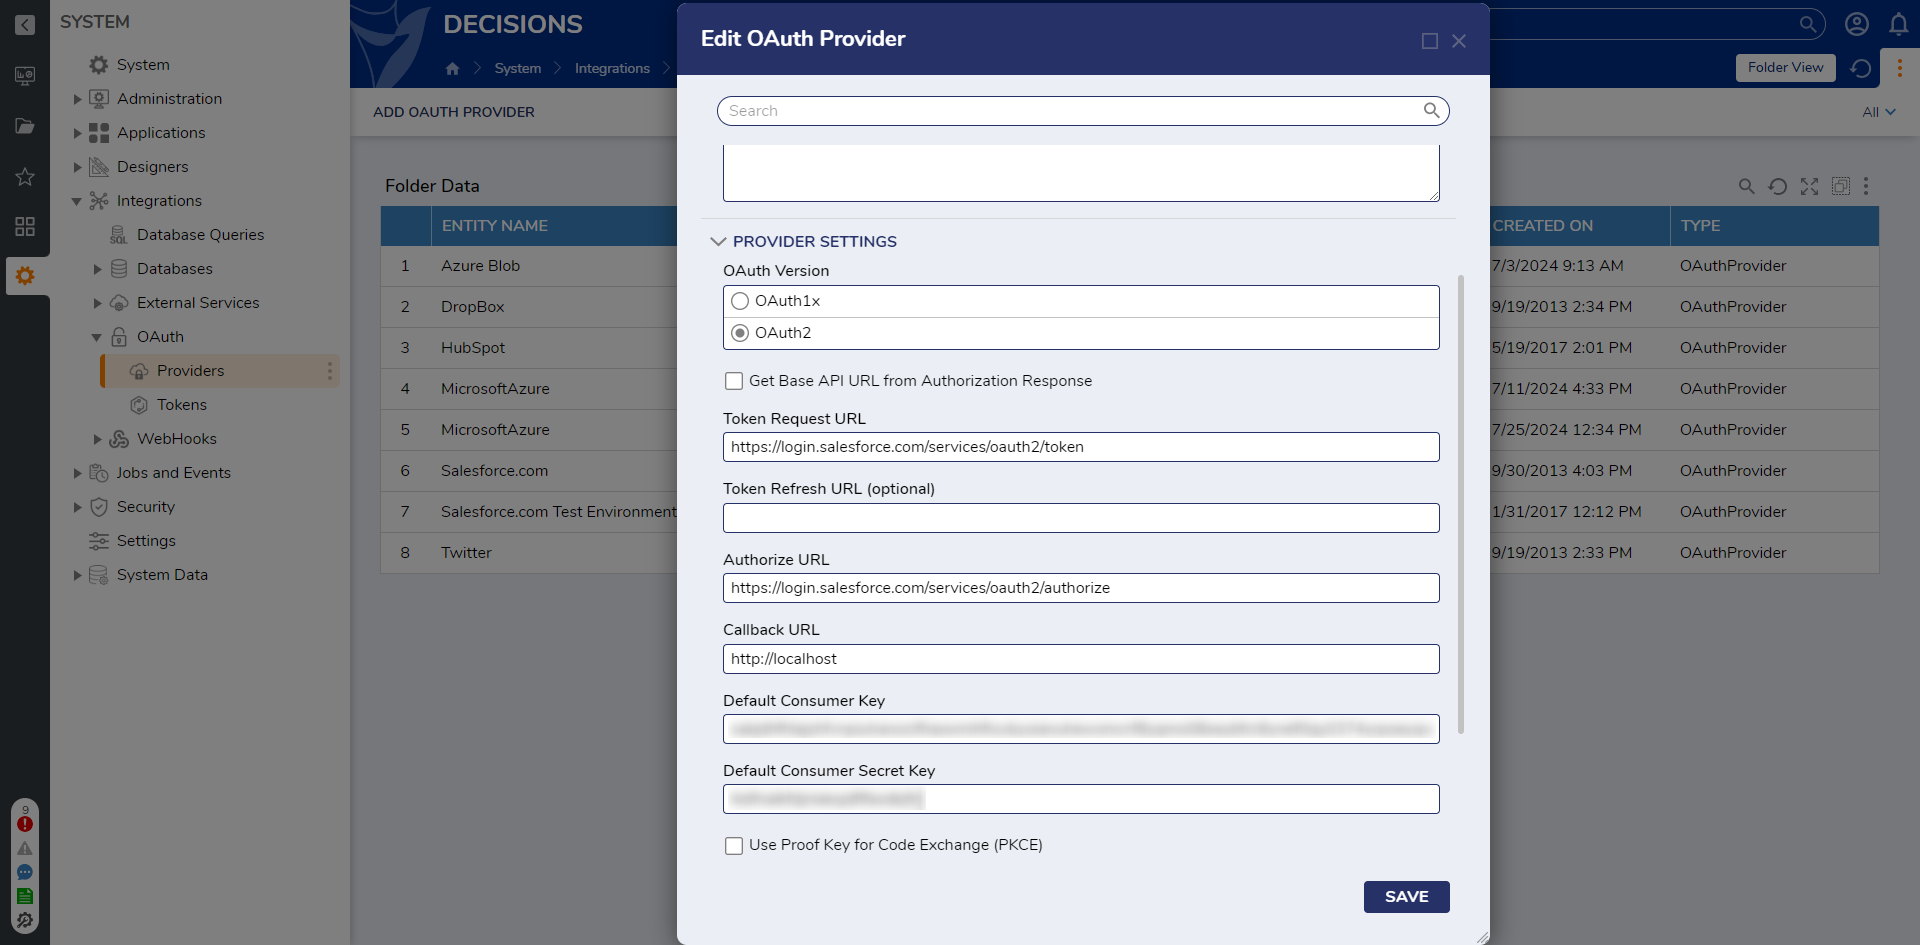
- Navigate to System > Integrations > OAuth > Tokens. Click CREATE TOKEN. Provide a name for the Token and select Salesforce.com from the Providers dropdown list. Under OAuth Flow, click the dropdown list and select Password. Enter the User Name and Password and click Request Token. If successful, the Status message will display Authorization Received. Click OK to close the dialog window.Clicking CREATE TOKEN may display a warning if the BaseURLToPortal is not configured to an externally addressable IP or FQDN in the settings.xml. This will NOT prevent token creation, but will have a manual step because Salesforce will not be able to redirect traffic back to the Decisions installation. This warning can safely be ignored.
Option Description Access Token Step Refresh Data Steps Token Name Desired Name of Token that will be used in the Flow to select N/A N/A Provider OAuth Provider N/A N/A OAuth Flow Authentication Code Requires interaction by the Resource Owner. A browser window takes the user to authenticate with the Authorization Server, after which the browser returns a HandleTokenResponse endpoint with a code. The server then exchanges the code for a token at the token endpoint. The Flow returns a token and refreshes data. Refresh Access Token Manually needs to be reset Password The username and password entered into the platform are sent to the Authorization Server to get a token. Since the username and password are saved, no user interaction is required, making it possible to obtain new tokens in a Decisions Flow automatically. The Flow returns a token only. Refresh Access Token Reset Password Grant Token Client Credentials Similar to a Password OAuth Flow, except this uses the client ID (consumer key) and client secret (consumer secret key) instead of username and password. It also does not require user interaction and returns a token only. Refresh Access Token Reset Client Credentials Token OIDC Hybrid Uses parts of the OpenID Connect protocol to obtain a token. It can be configured to return only a token or refresh data. Refresh Access Token Manually needs to be reset User Name Email/username used to log into chosen OAuth provider N/A N/A Password Password and Token (from Salesforce) N/A N/A If refresh data is provided to the user, use the Authentication Code. 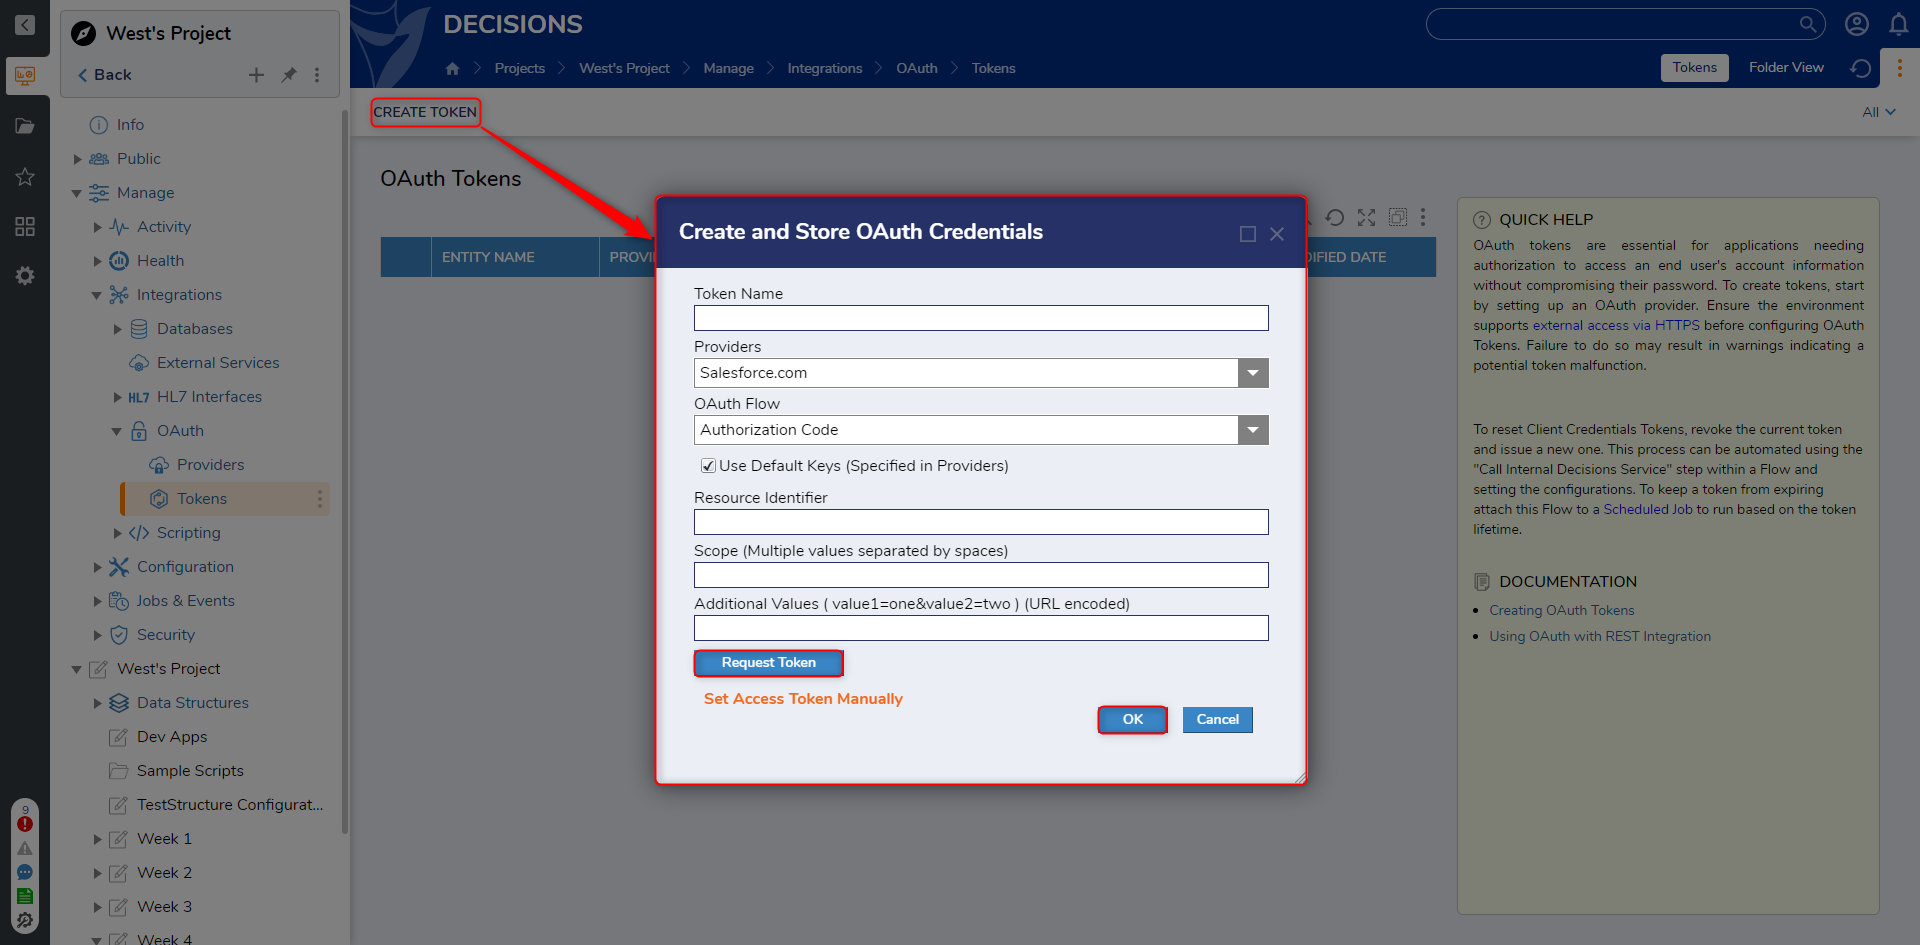
Using the Steps
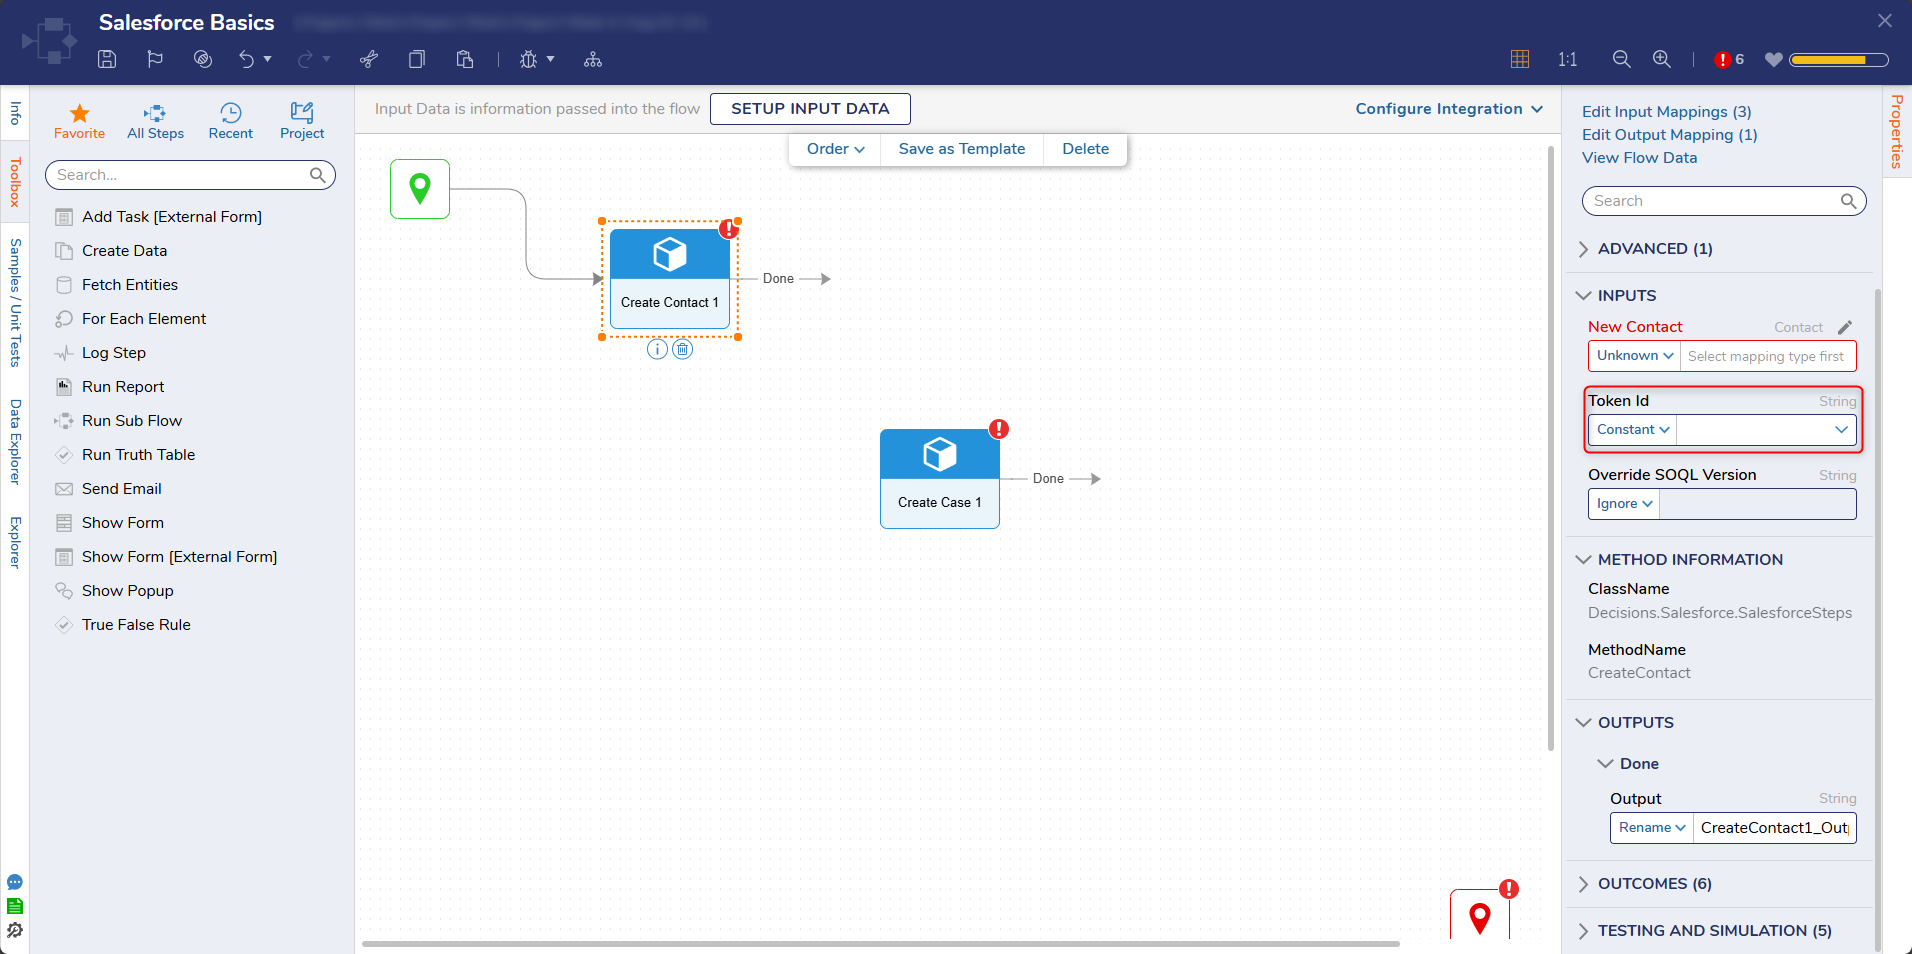
Using the Salesforce steps is like using any other step in Decisions. One of the properties in all Salesforce steps provided is the Token ID. Changing the input mapping to Constant will display a dropdown list of tokens that have been configured.
Mapping Data with Custom Fields
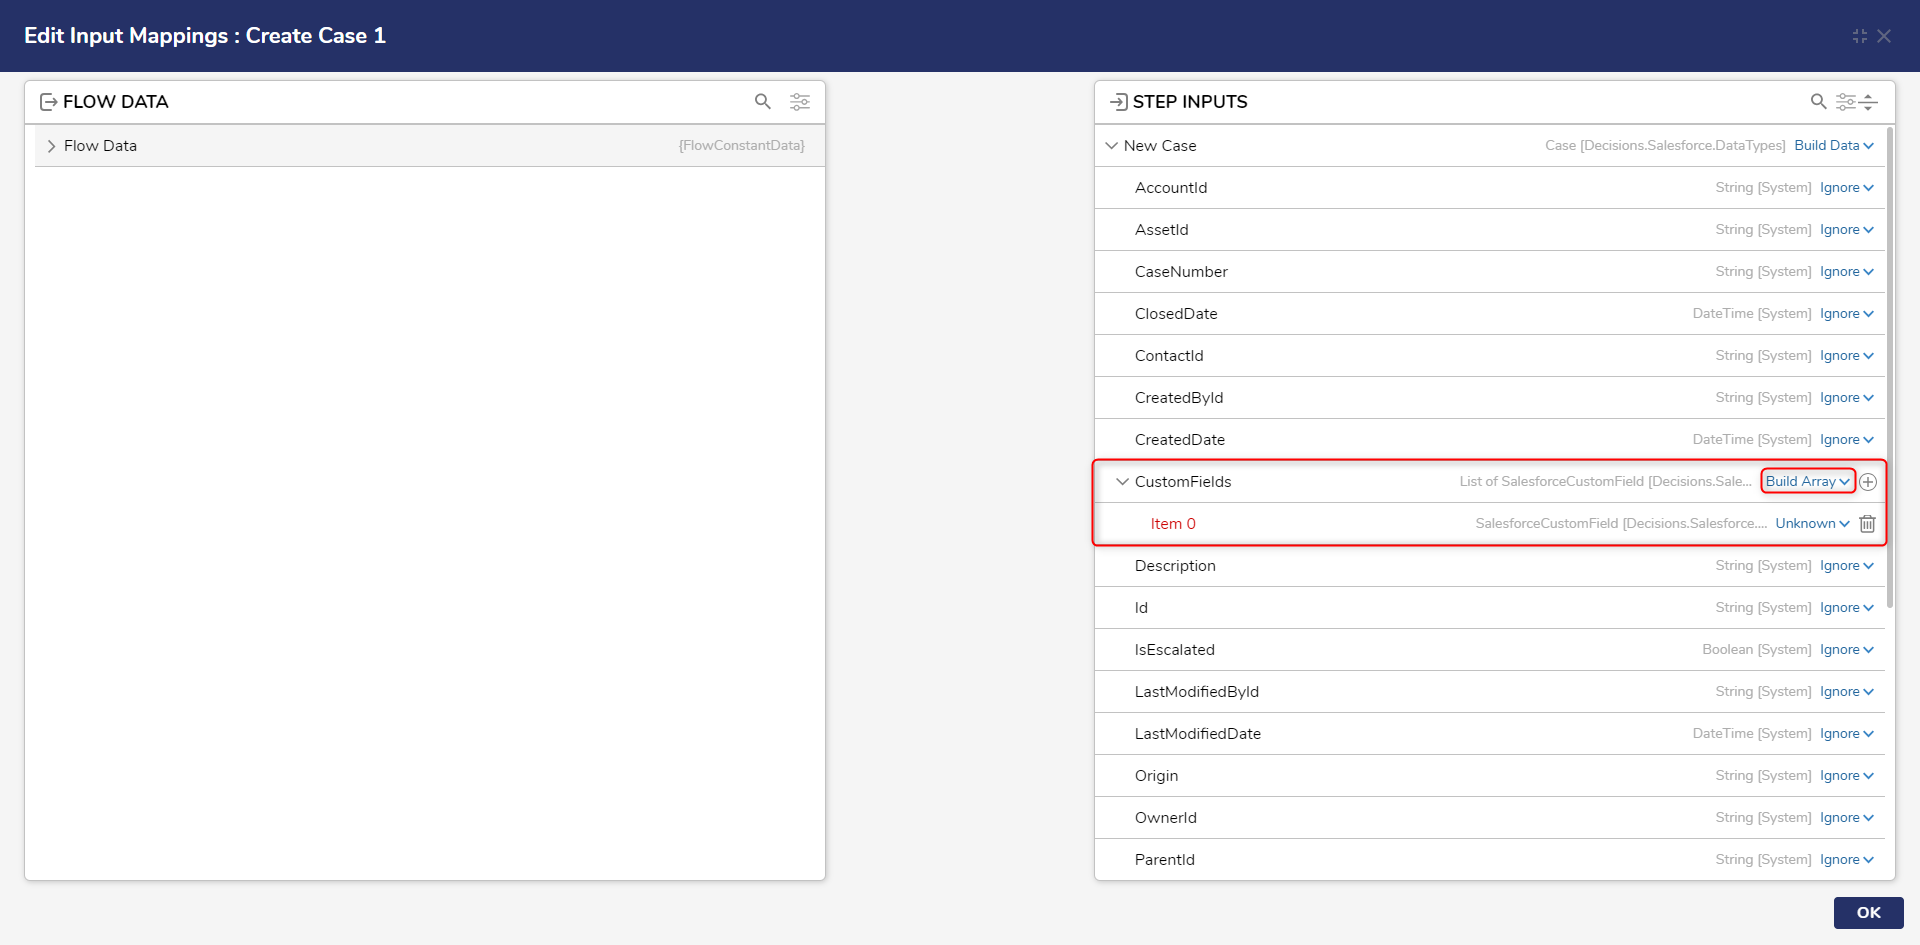
The Salesforce data types provided by Decisions have simple properties that users can map data into or specify. For custom fields, there is a property called CustomFields, which is an array of custom fields.
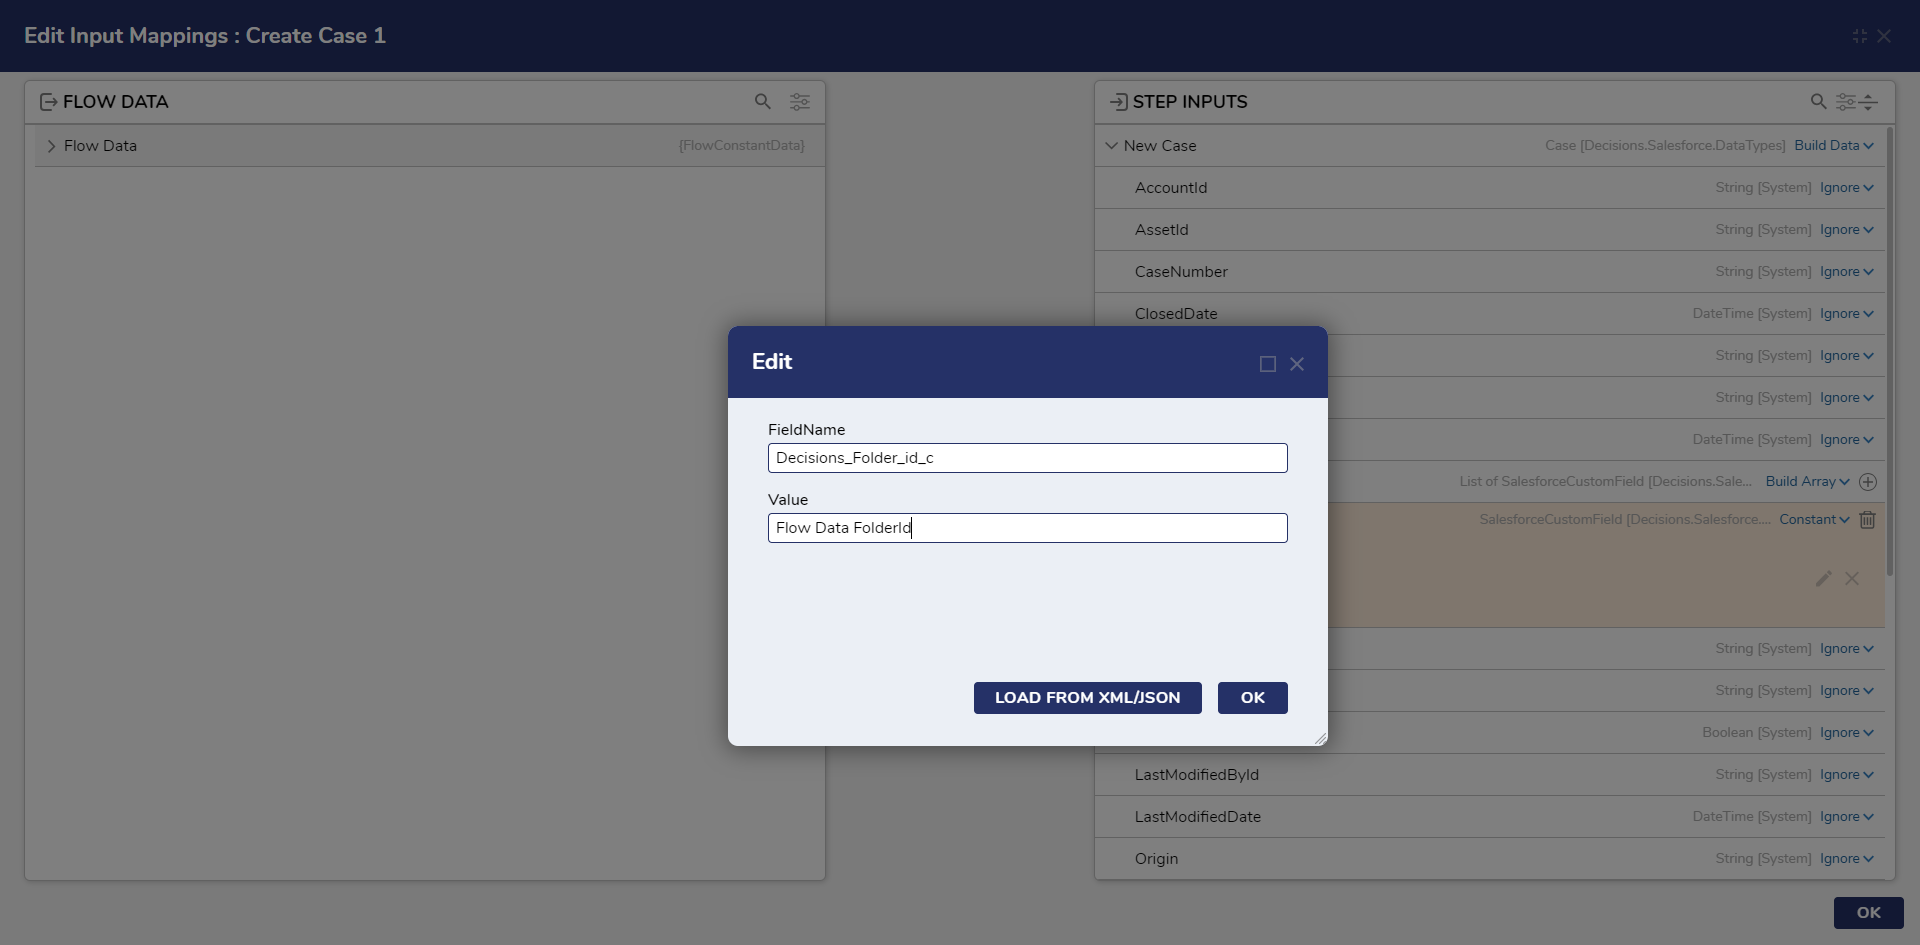
The screenshot below opens the Mapping Editor for a Create Case step. The CustomFields property is set to Build Array, which lets the user create a new custom field array to send to Salesforce. In Salesforce, a custom field can be used for the value by inputting the Salesforce API name for the custom field.
Finding Salesforce API Field Name
The Develop Menu in Salesforce lists all data types. Selecting a data type will display the custom fields with the API name of the field. Below, the Decisions Folder Id field label is given the Salesforce API Name of Decisions_Folder_Id__c. This will be used in Decisions when editing or setting the custom field.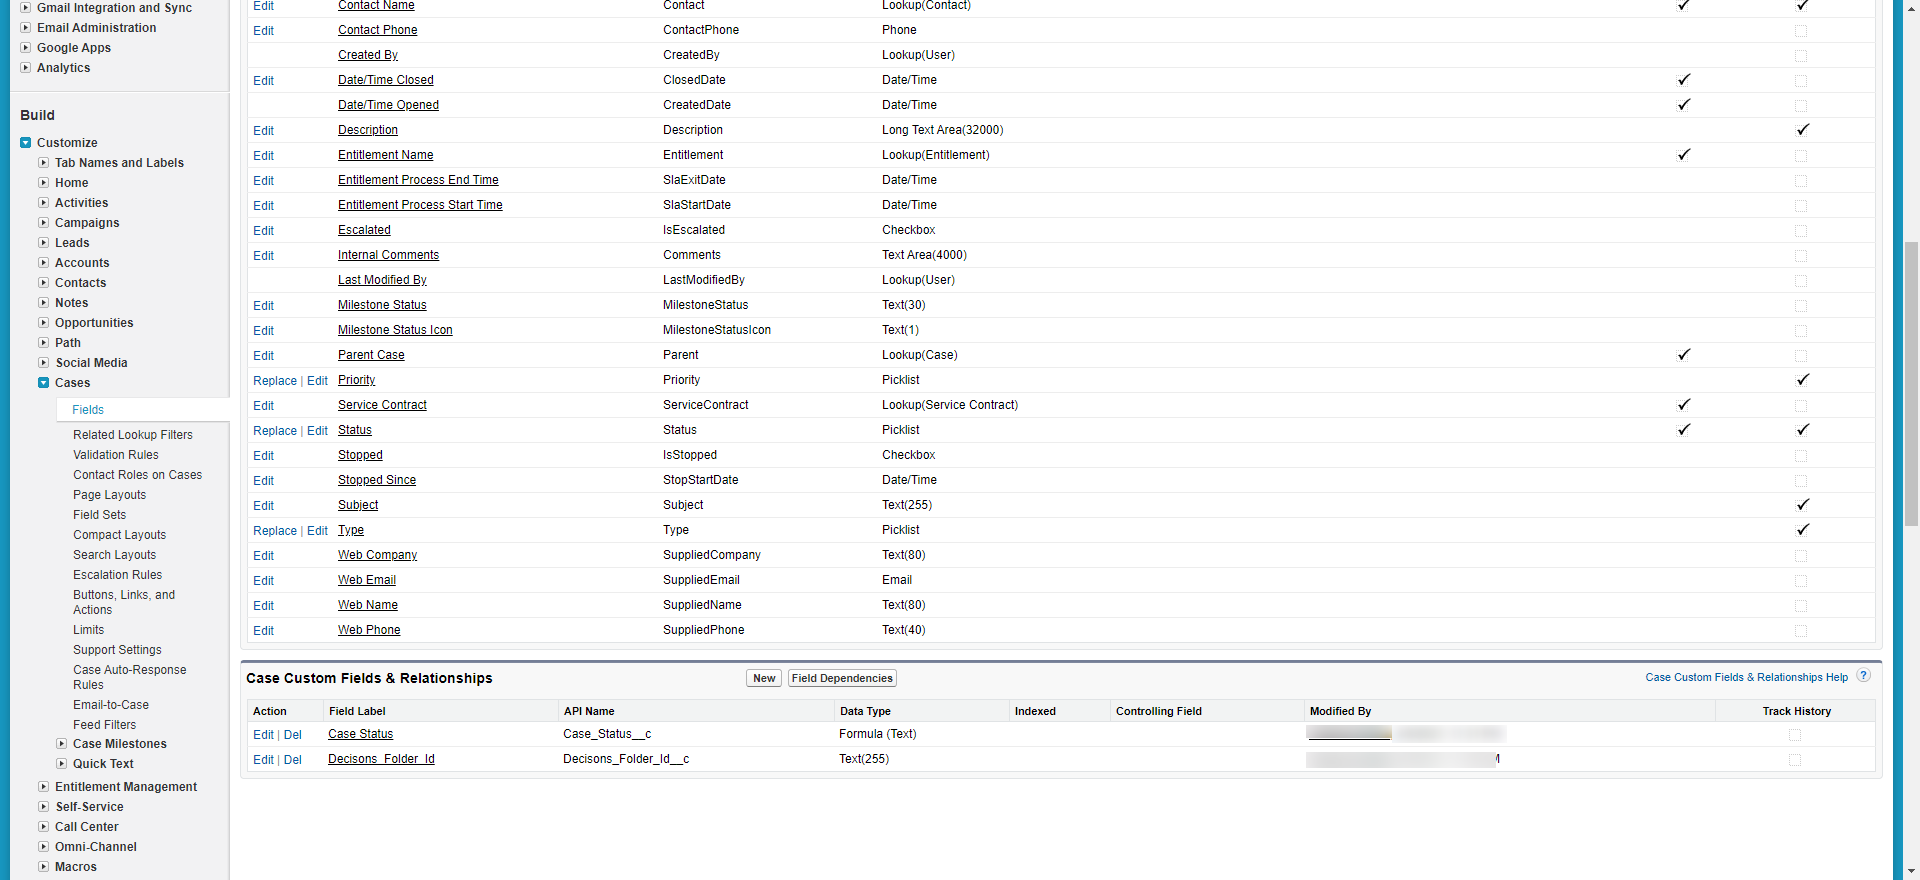
Below is the mapping in the Decisions Mapping Editor for the custom field.