Module Details | |
| Installation Location | Core module |
| Step Location | Integration > Powershell |
| Settings Location | N/A |
| Prerequisites | PowerShell Module Installed Project Dependency created |
Overview
The PowerShell Module allows the execution of PowerShell scripts from Flows.
PowerShell supports numerous plugins for integrating with system software and enterprise applications. PowerShell can only run via a remote connection.
Considerations
Run PowerShell Remotely
All PowerShell steps run remotely. This exposes new inputs to specify which machine to remotely run the script and uses "WS-Management-based Windows PowerShell remoting". Users must add the IP of the VM to the TrustedHosts list during configuration by entering the following command:
Set-Item WSMan:\localhost\Client\TrustedHosts -Value (IP Address)
To verify that the command works, use the following PowerShell command:
Get-Item WSMan:\localhost\Client\TrustedHostsThis will allow PowerShell to be run remotely as described in this article: Computer Trusted Hosts.
Troubleshooting - Enabling PowerShell Remoting
While not required for the PowerShell module or for enabling remote connection, Administrators experiencing difficulties with the above option may instead enable Powershell Remoting.
This method enables remote PowerShell connections by calling the server itself remotely.
By default, WS-Man and PowerShell remoting use ports 5985 and 5986 for connections over HTTP and HTTPS, respectively.
Open PowerShell as an Administrator to enable remoting and run the following command.
Enable-PSRemoting -Force The following response should be returned: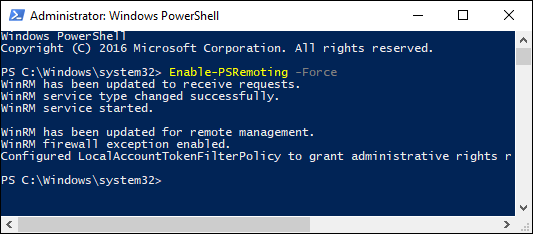
Example
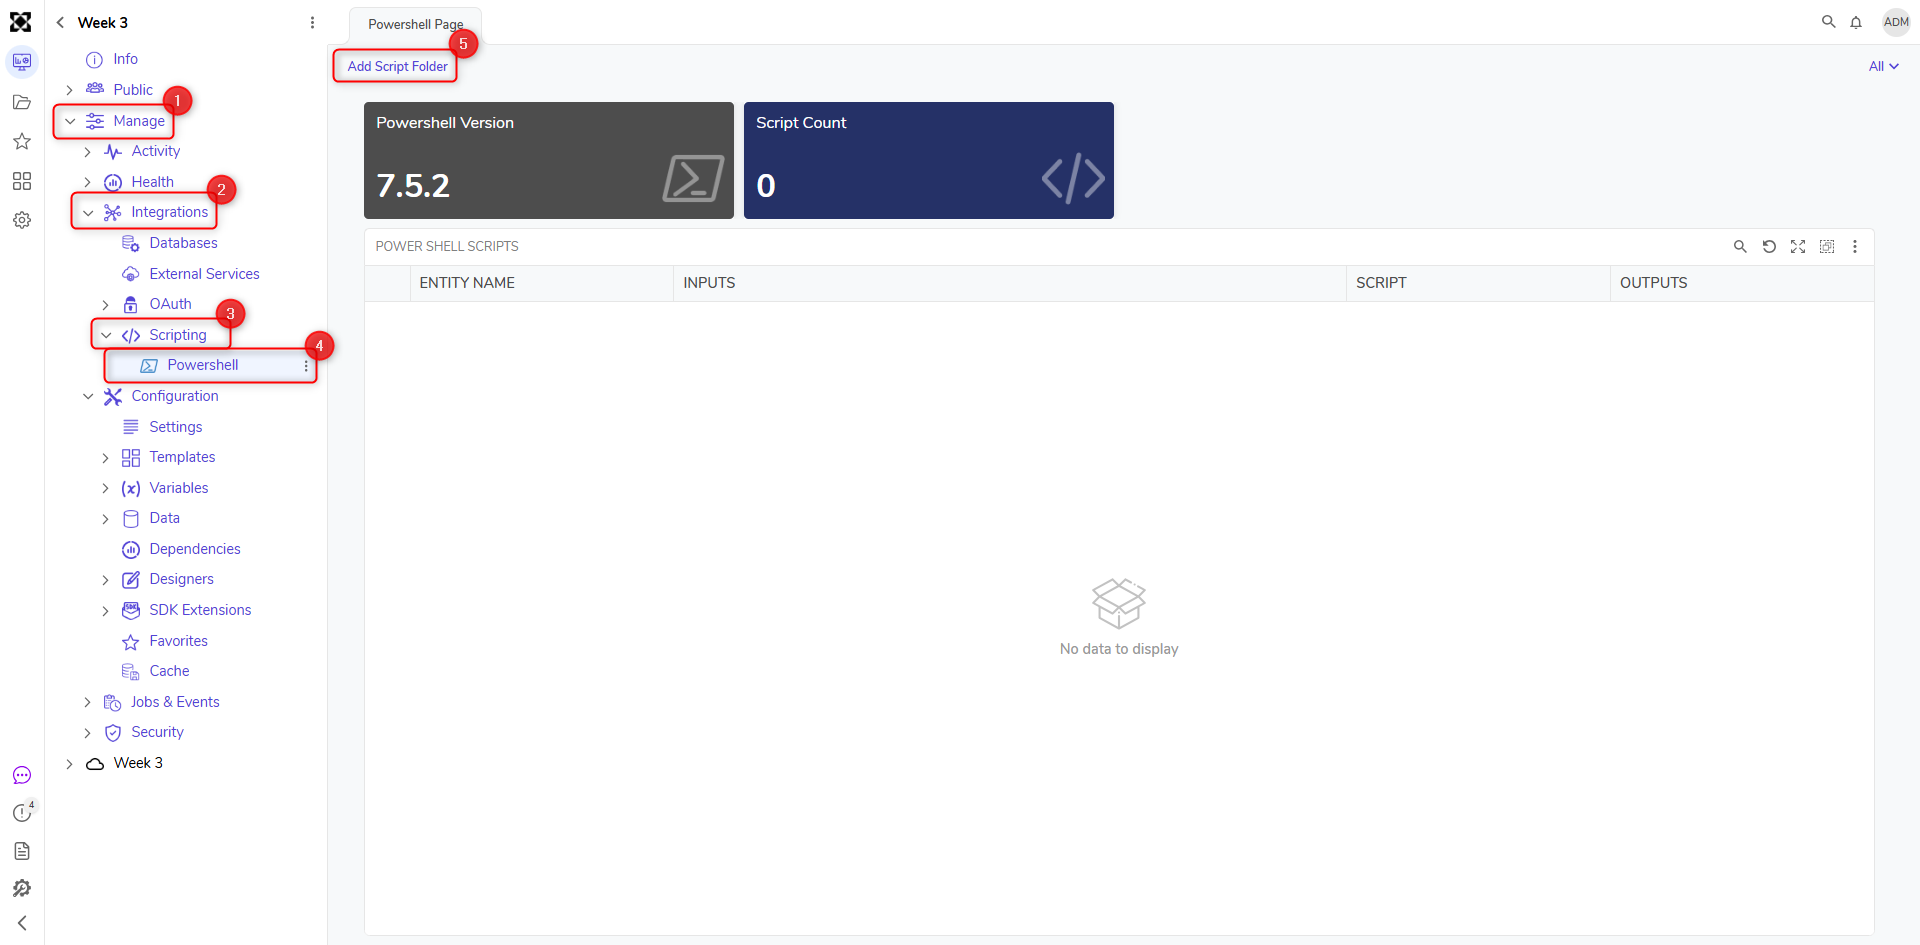
- In a Project, navigate to [Project Name]> Manage > Integrations > Scripting> Powershell. Right-click Powershell Script Projects and click Add Script Folder.
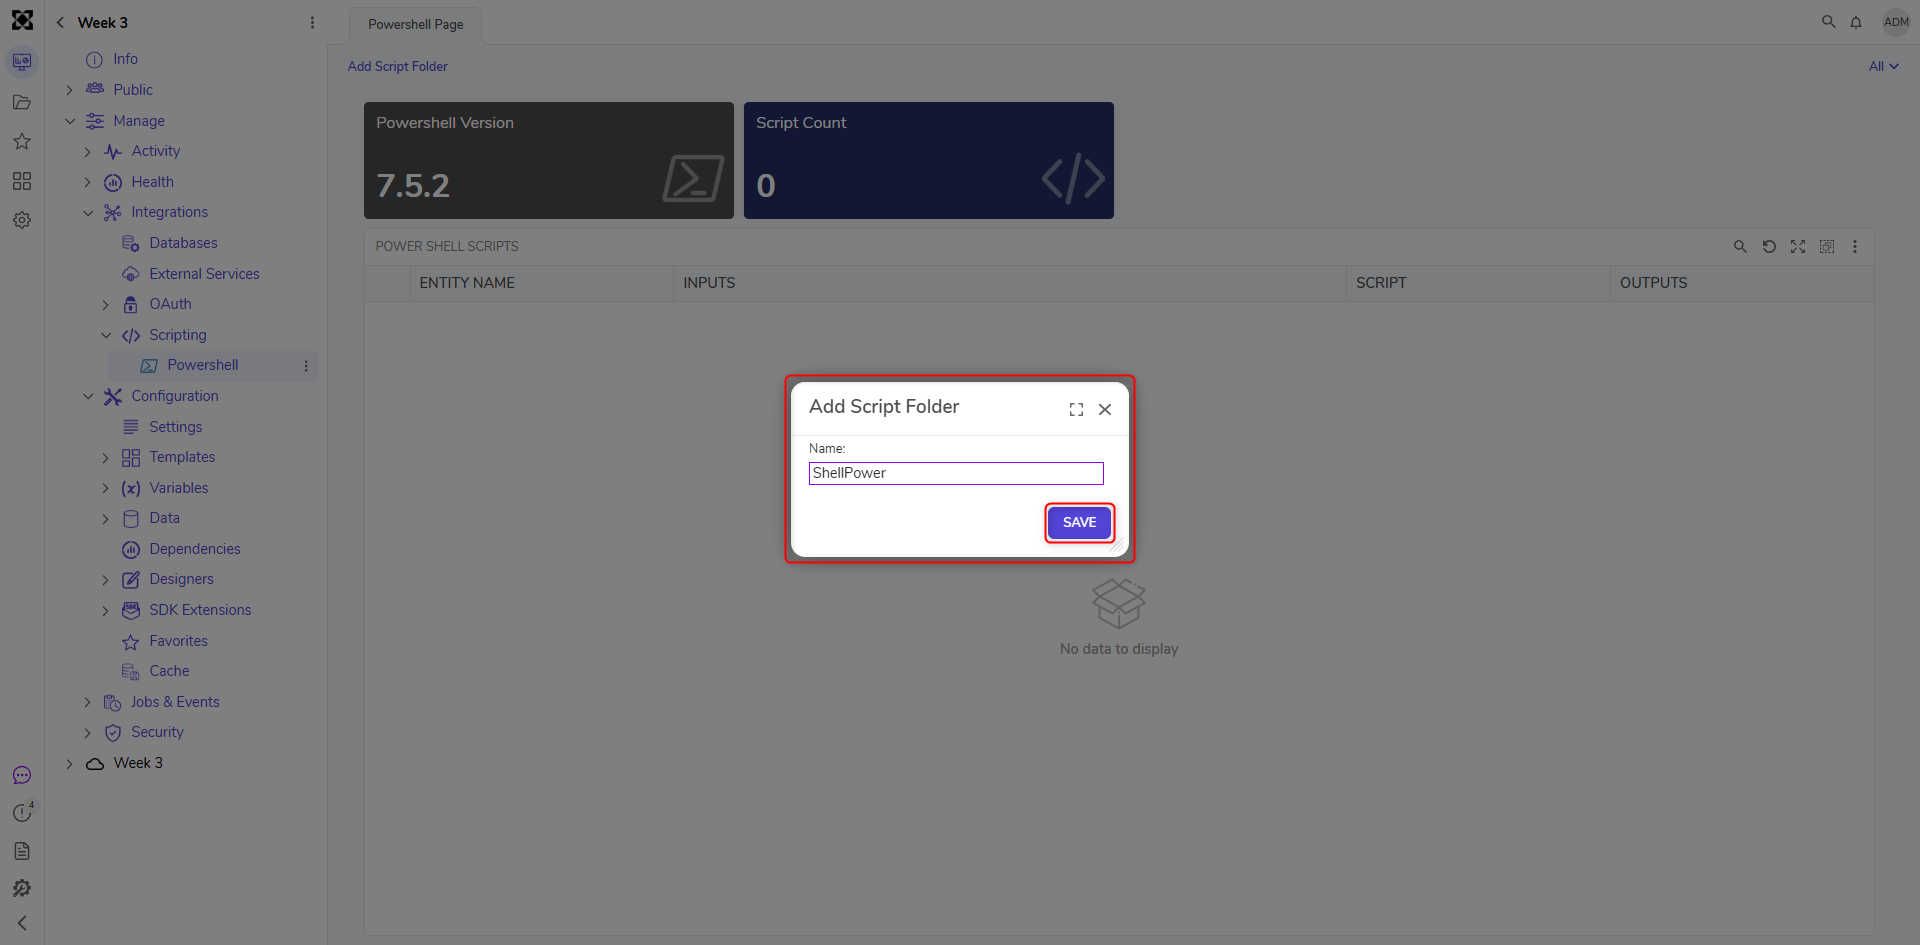
- On the Add Script Project window, enter a name for the Script Project that will be used and click SAVE. This name will be used as a category in the Flow Designer to group PowerShell steps.
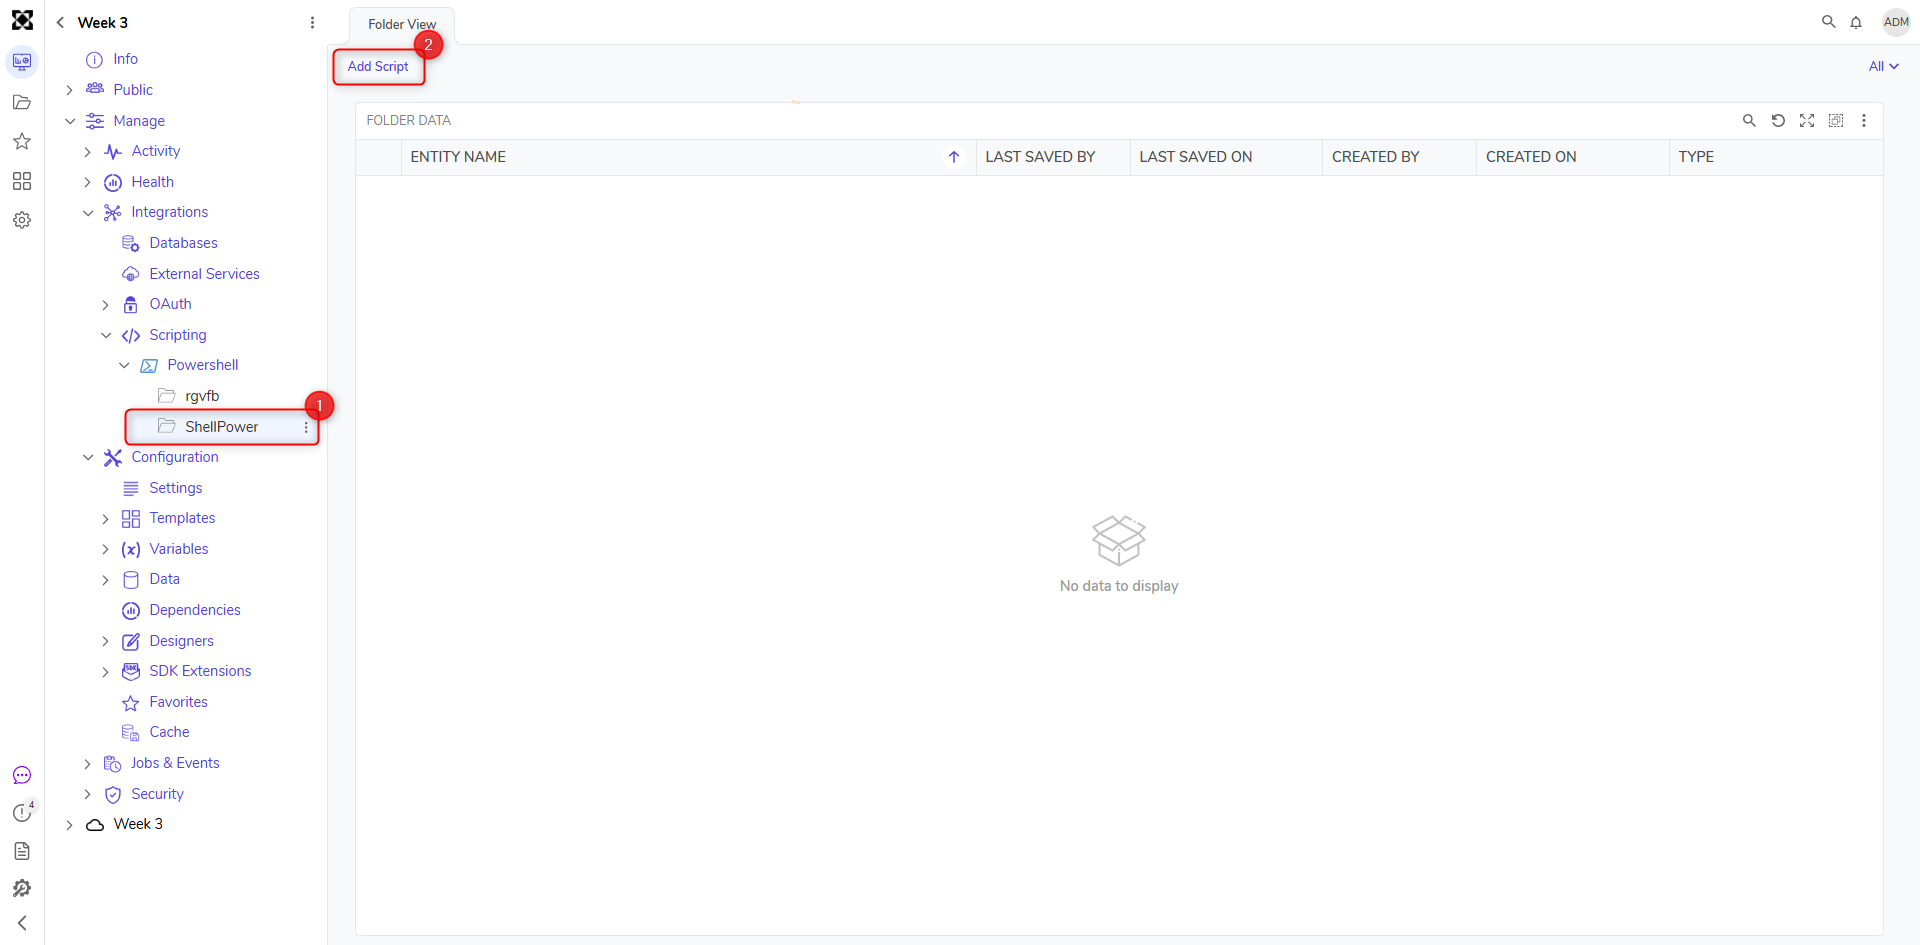
- Right-click on the new PowerShell Script Project and click Add Script. There is also an Add Script action towards the top of the folder. In v9.6 and above, script folders can be deleted by right-clicking the folder, then selecting Manage | More > Delete.
- On the Add Script window, enter a name for the script under ScriptName and the code under Script. If applicable, add input and output values.
Input values must be strings, match the PowerShell token name minus the dollar $ symbol, and allow array input via a comma-separated list to mimic PowerShell console behavior.
Output values cannot return structured data; however, a script returning an object can specify its data members to return as string arrays. For further information, refer to the "Process Class" article in Microsoft's documentation.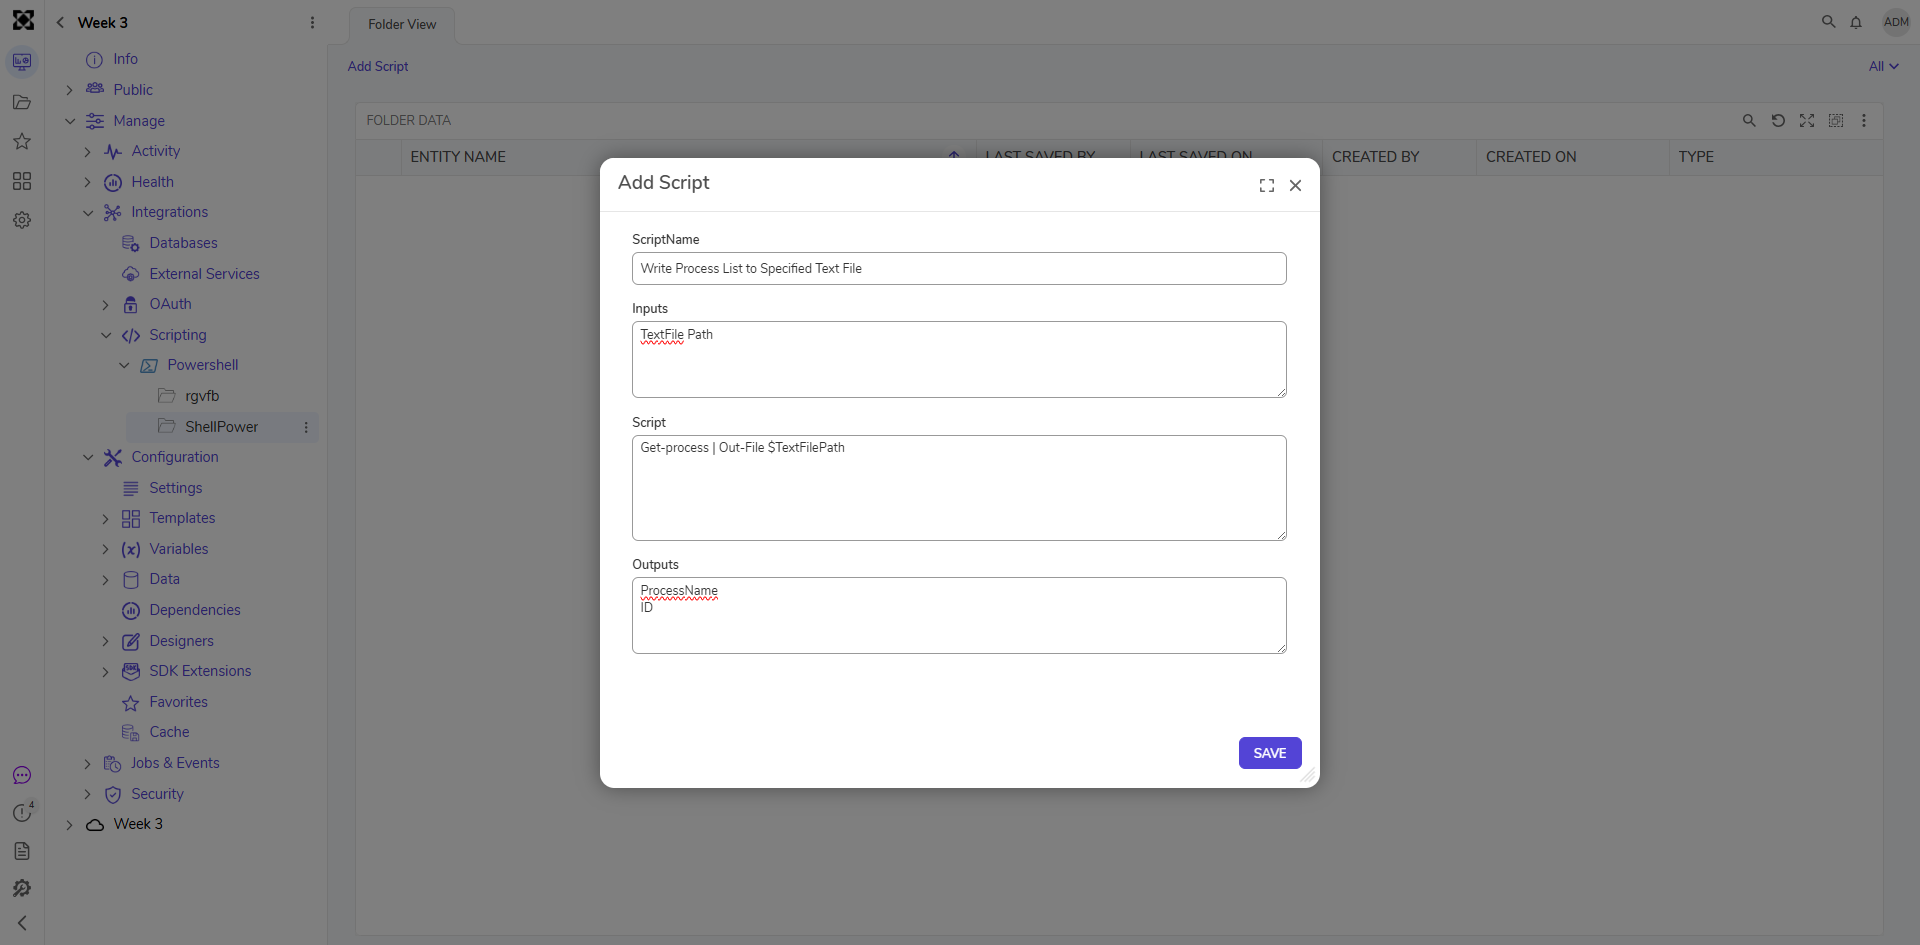
- Click SAVE to return to the PowerShell Script Project.
- In a Flow Designer, navigate to Integration > PowerShell> [Script Project Name]. Add the script step to the workspace. The values entered for the Input and Output categories should appear on the step.
System Level
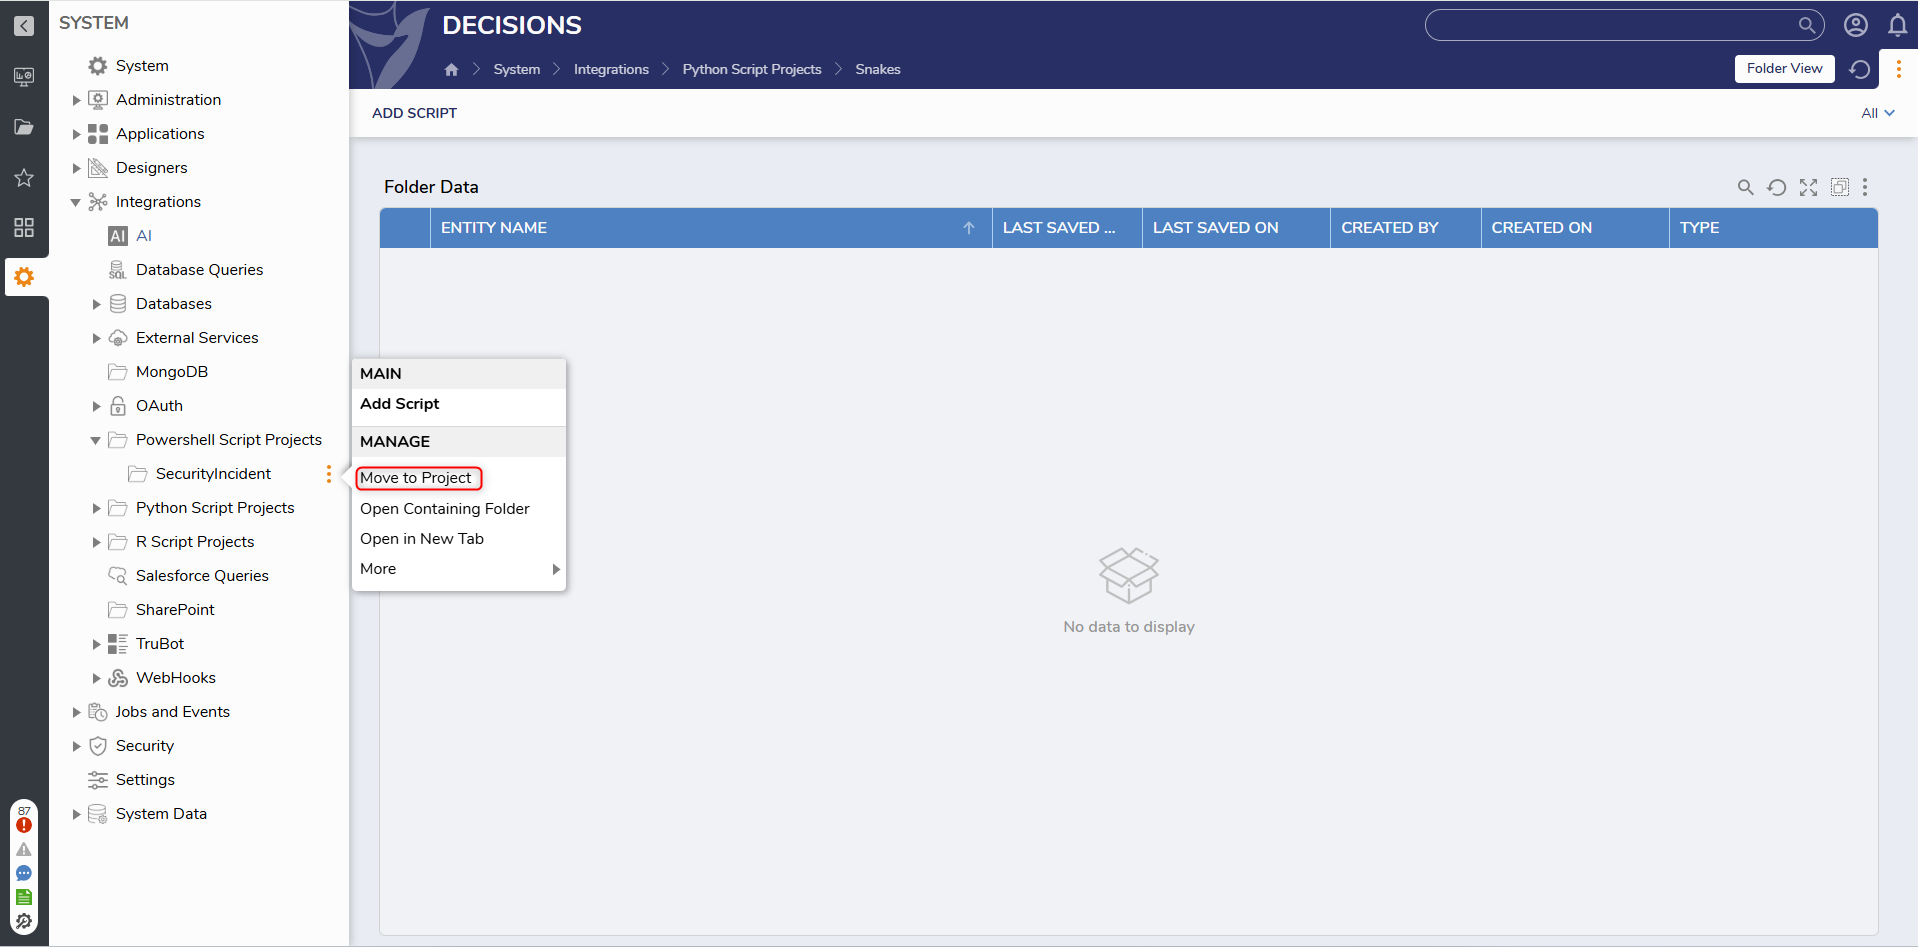
Starting in Version 10, Scripts can only be created at the Project level. However, if migrating from earlier versions (such as Version 8 or Version 9) to Version 10, previously created Scripts can still be found at the System level. For more information, please refer to: Projects Conversion. The screenshot below depicts how a Script folder can be moved to a specific Project. Right-click the folder and select Manage > Move to Project.
Feature Changes
| Description | Version | Release Date | Developer Task |
|---|---|---|---|
| ADD SCRIPT FOLDER action is now available in the main PowerShell folder. | 9.2 | August 2024 | [DT-041378] |
| Script folders now have a delete action. | 9.6 | January 2025 | [DT-042782] |
| Script folders at the System level can be moved to the Project level. | 9.6 | January 2025 | [DT-042781] |