Calling a Flow as a REST Service
- 02 Jun 2022
- 2 Minutes to read
- Print
- DarkLight
Calling a Flow as a REST Service
- Updated on 02 Jun 2022
- 2 Minutes to read
- Print
- DarkLight
Article Summary
Share feedback
Thanks for sharing your feedback!
Overview
A Flow can be made into a REST Web Service that supports either HTTP GET or POST methods. Calling a Flow as a REST Service allows external applications to send data into Decisions for use in a Flow. The new data can then be returned once acted upon or evaluated in a Flow. REST calls to a Flow require either a valid User Session ID or a valid User Authentication ID. The REST Service API shows instructions for calling the Flow, as well as the Output. The actions menu for the Flow provides REST service call URLs that are already populated with the necessary parameters.
Prerequisites
- Configuration of Designer Elements (Flows, Rules, Reports, etc) to allow integrations. For more information, see View Integration Details
Example
In this example, a POST method will be used to pass data into a Flow using the REST service call.
- From a Designer Project, click CREATE FLOW from the Global Action Bar.
- Select the Start step on the workspace. On the Properties panel, click SHOW EDITOR under the FLOW INPUTS category.
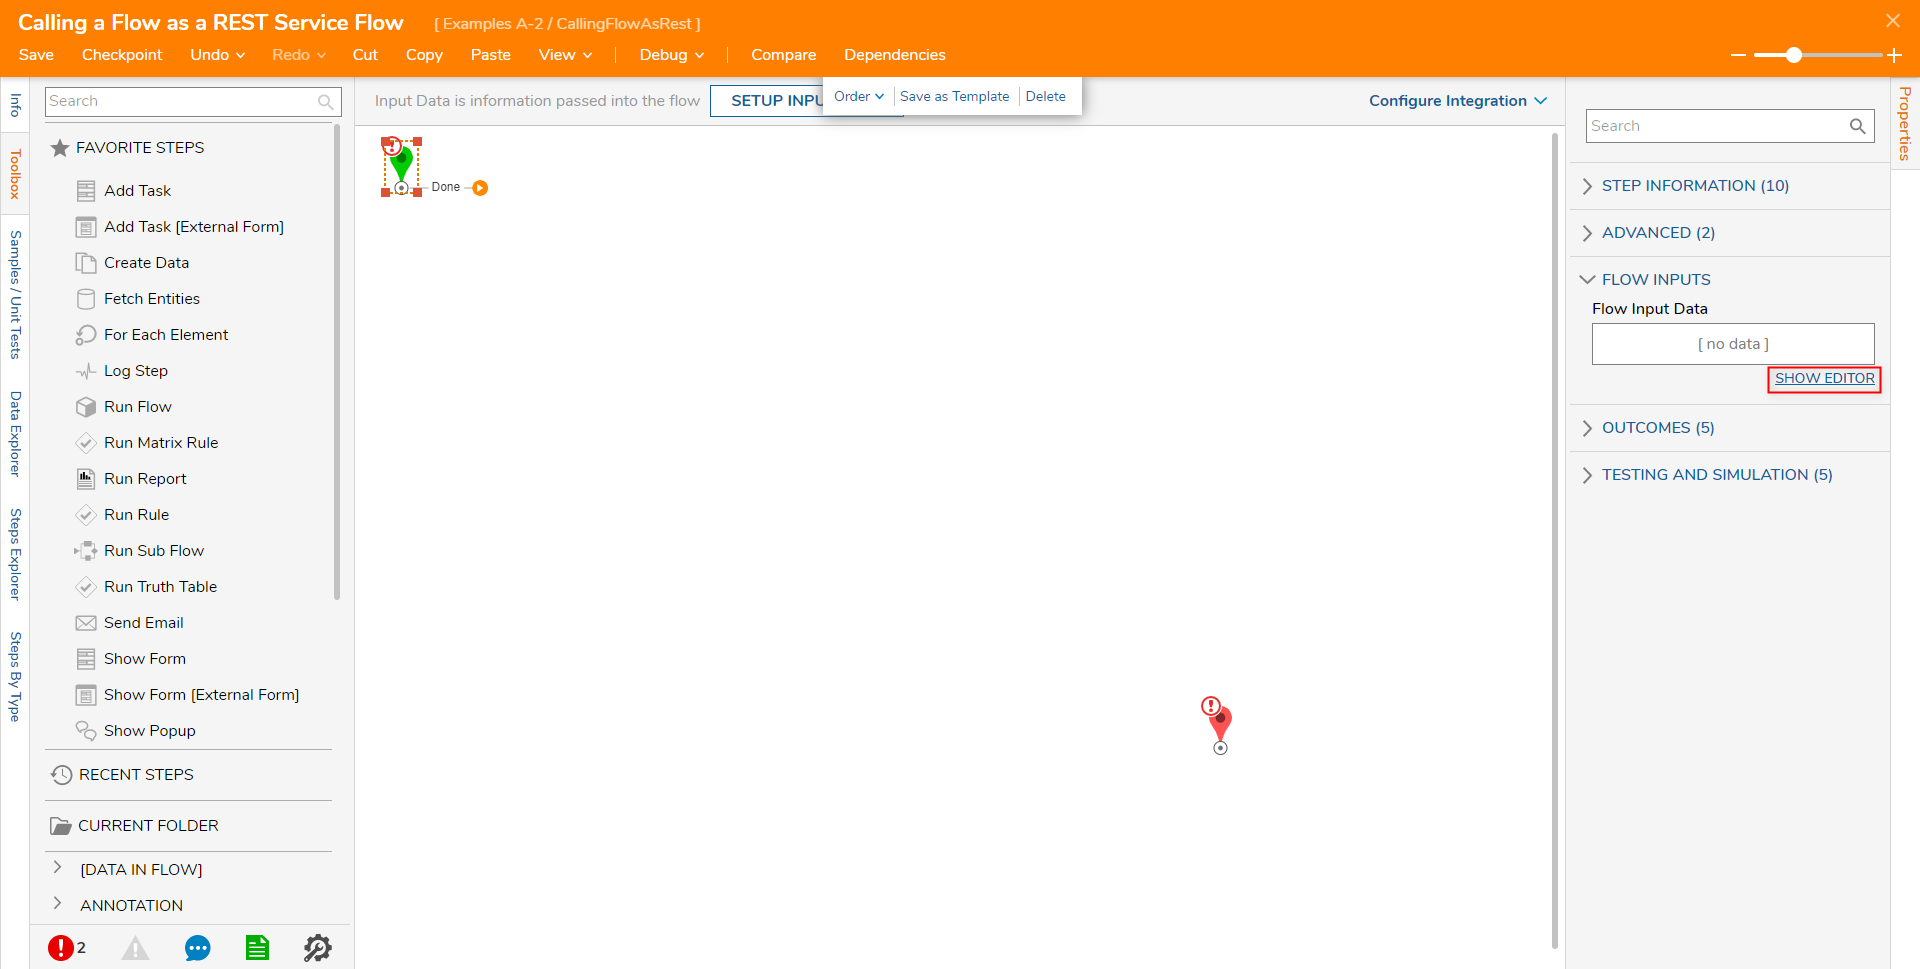
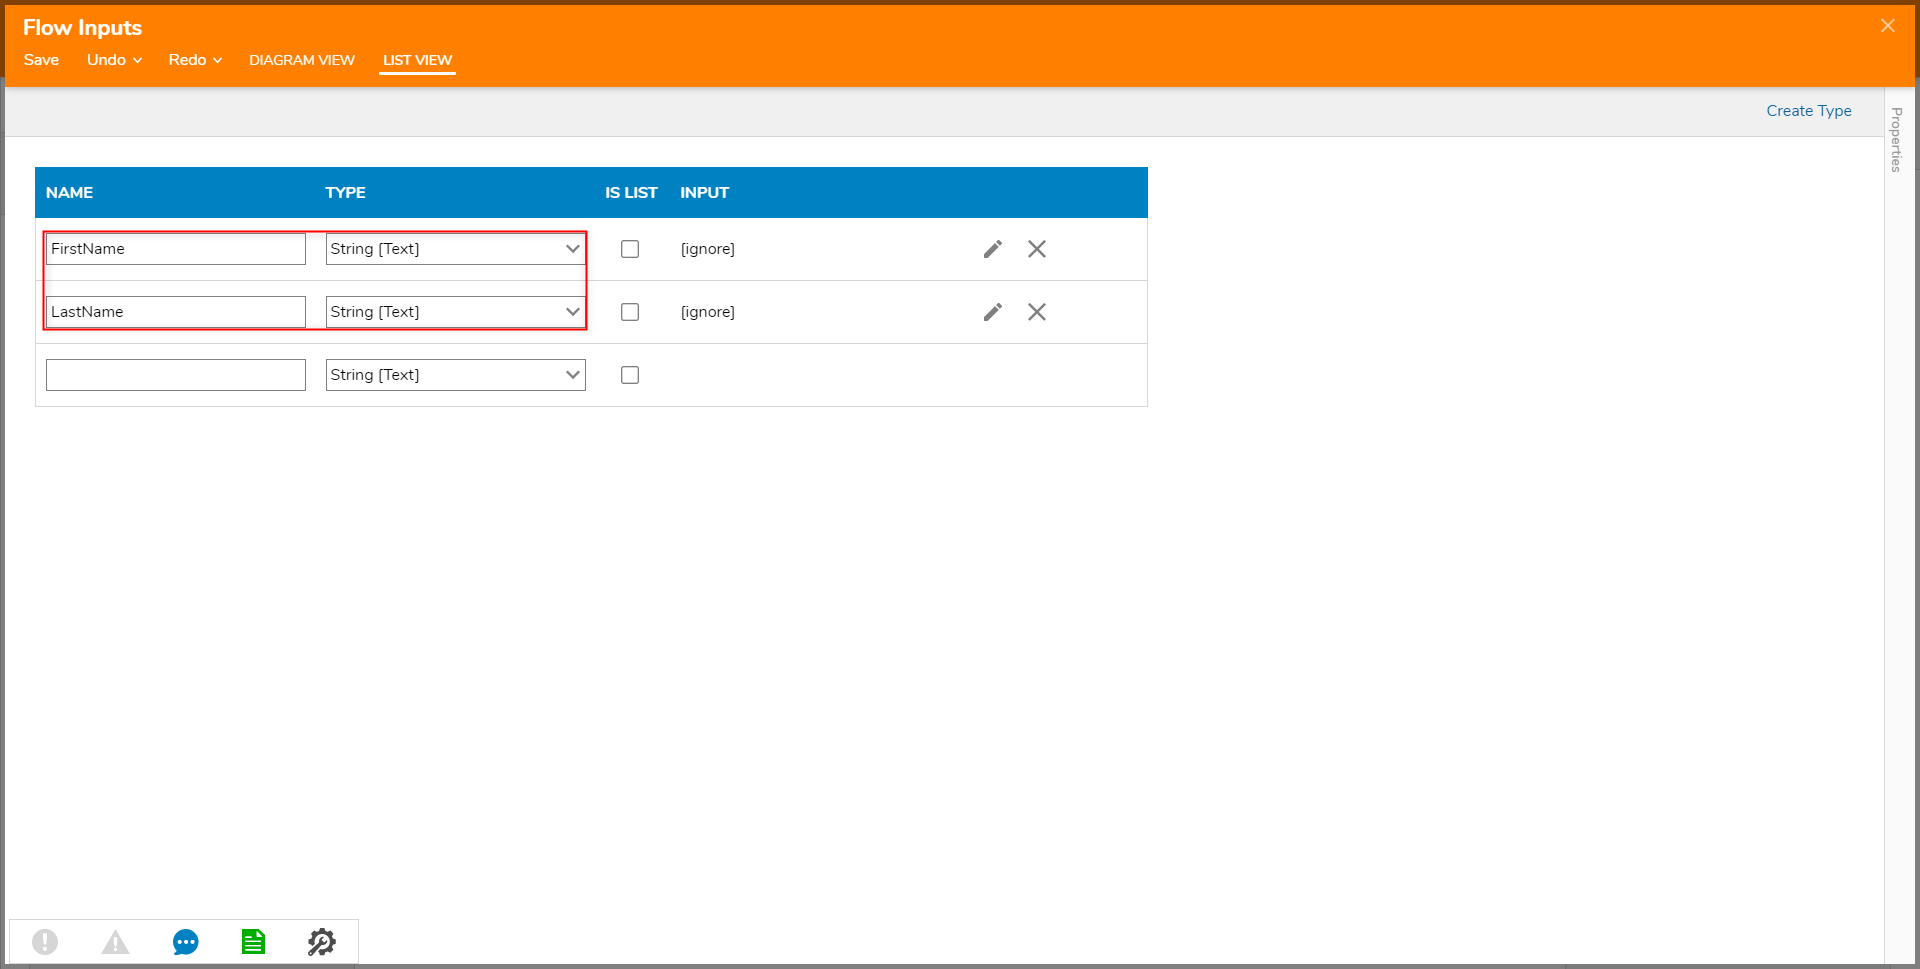
- Under NAME enter "FirstName" and "LastName" as String [Text] Types. Click Save and close the window.
- In the workspace, connect the Start step to the End step. Select the End step, then under Output, click SHOW EDITOR. Create a String Type named "Output".
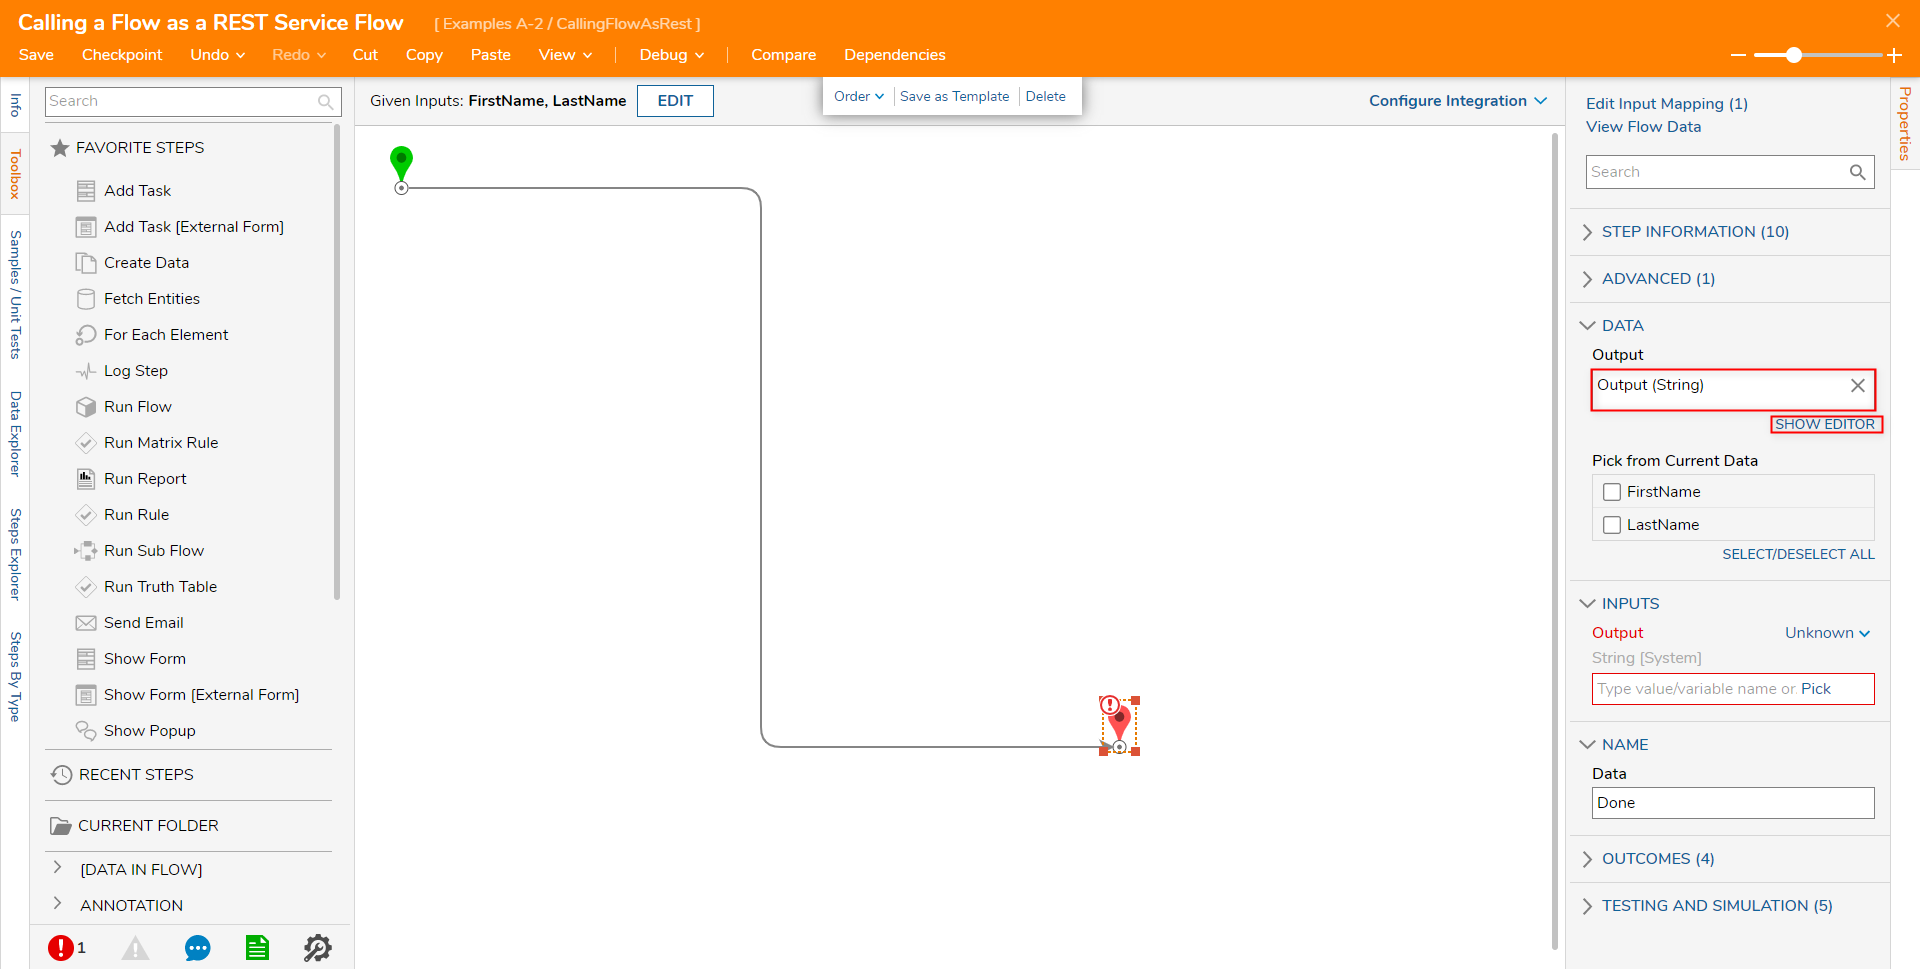
Under Properties > INPUTS > Output, change the mapping from Unknown to Merge Plain Text. Click SHOW EDITOR.
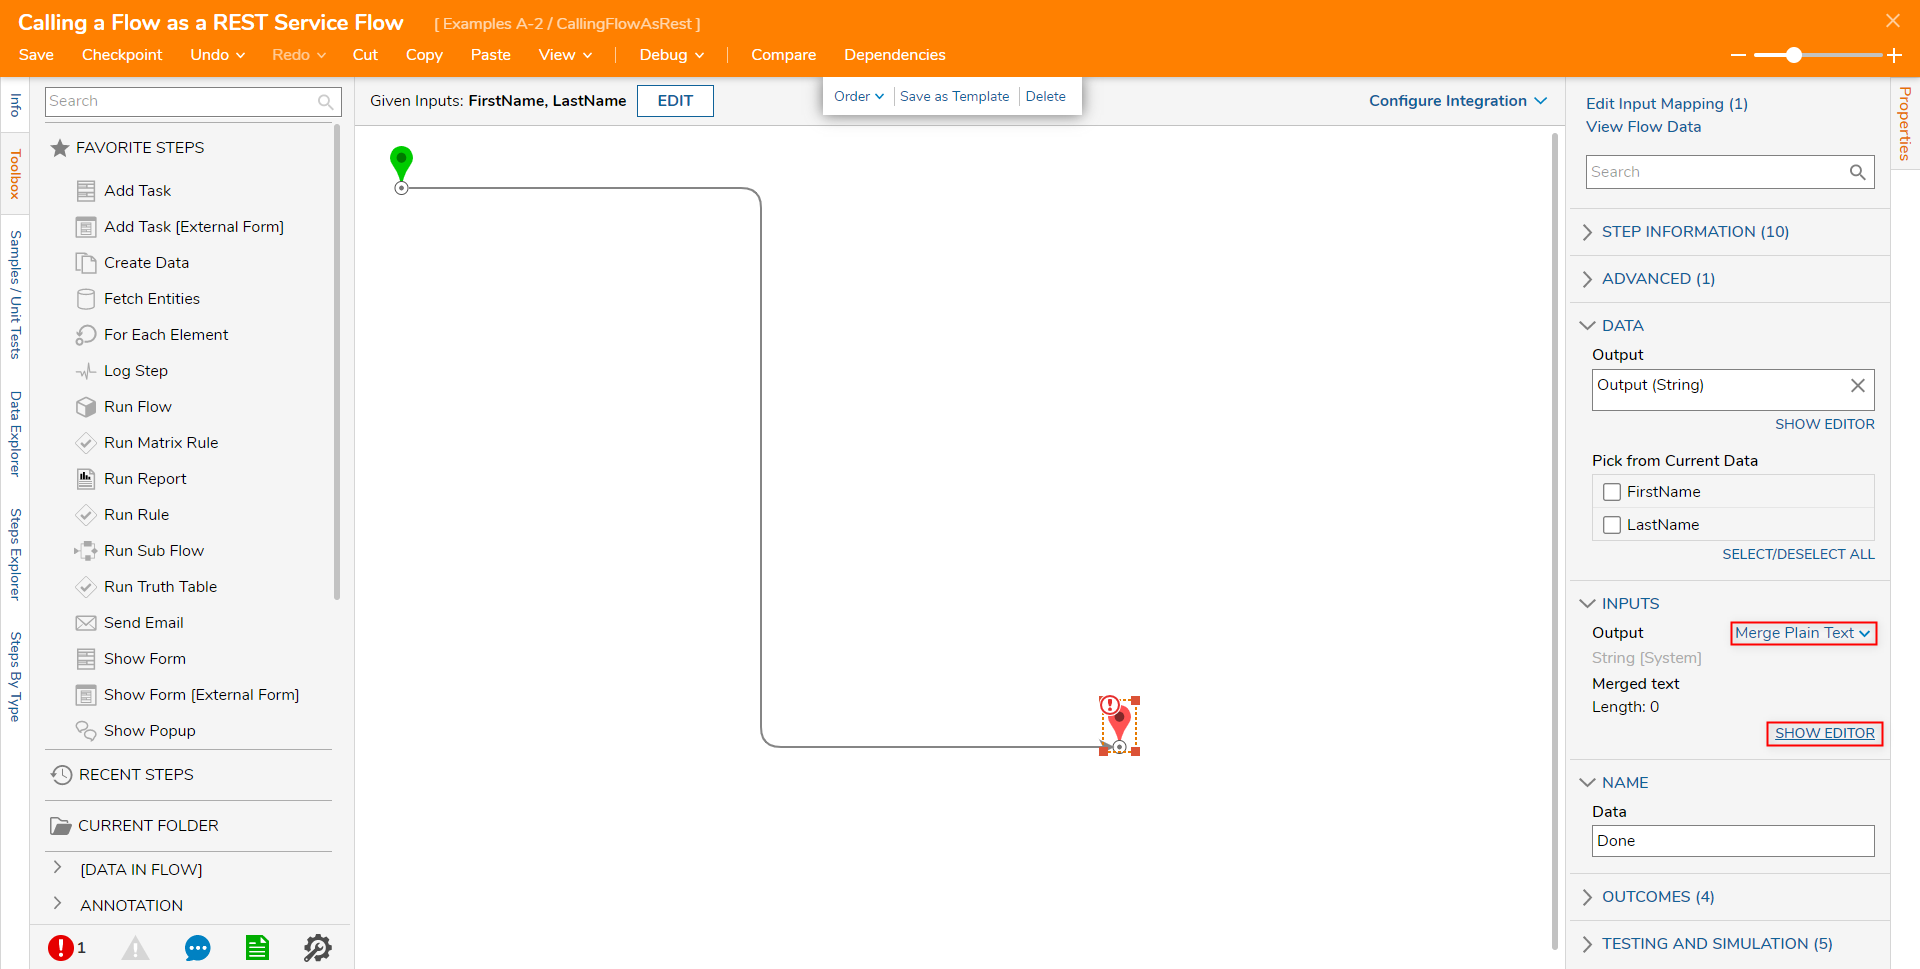
From the Merge Text Editor window, enter "Data was posted to Flow" on the first line. On the third line enter "First Name:" hover over the First Name in the Data section and click the plus sign. Enter "Last Name:" on the next line and add LastName by selecting the plus sign next to it. Click SAVE.

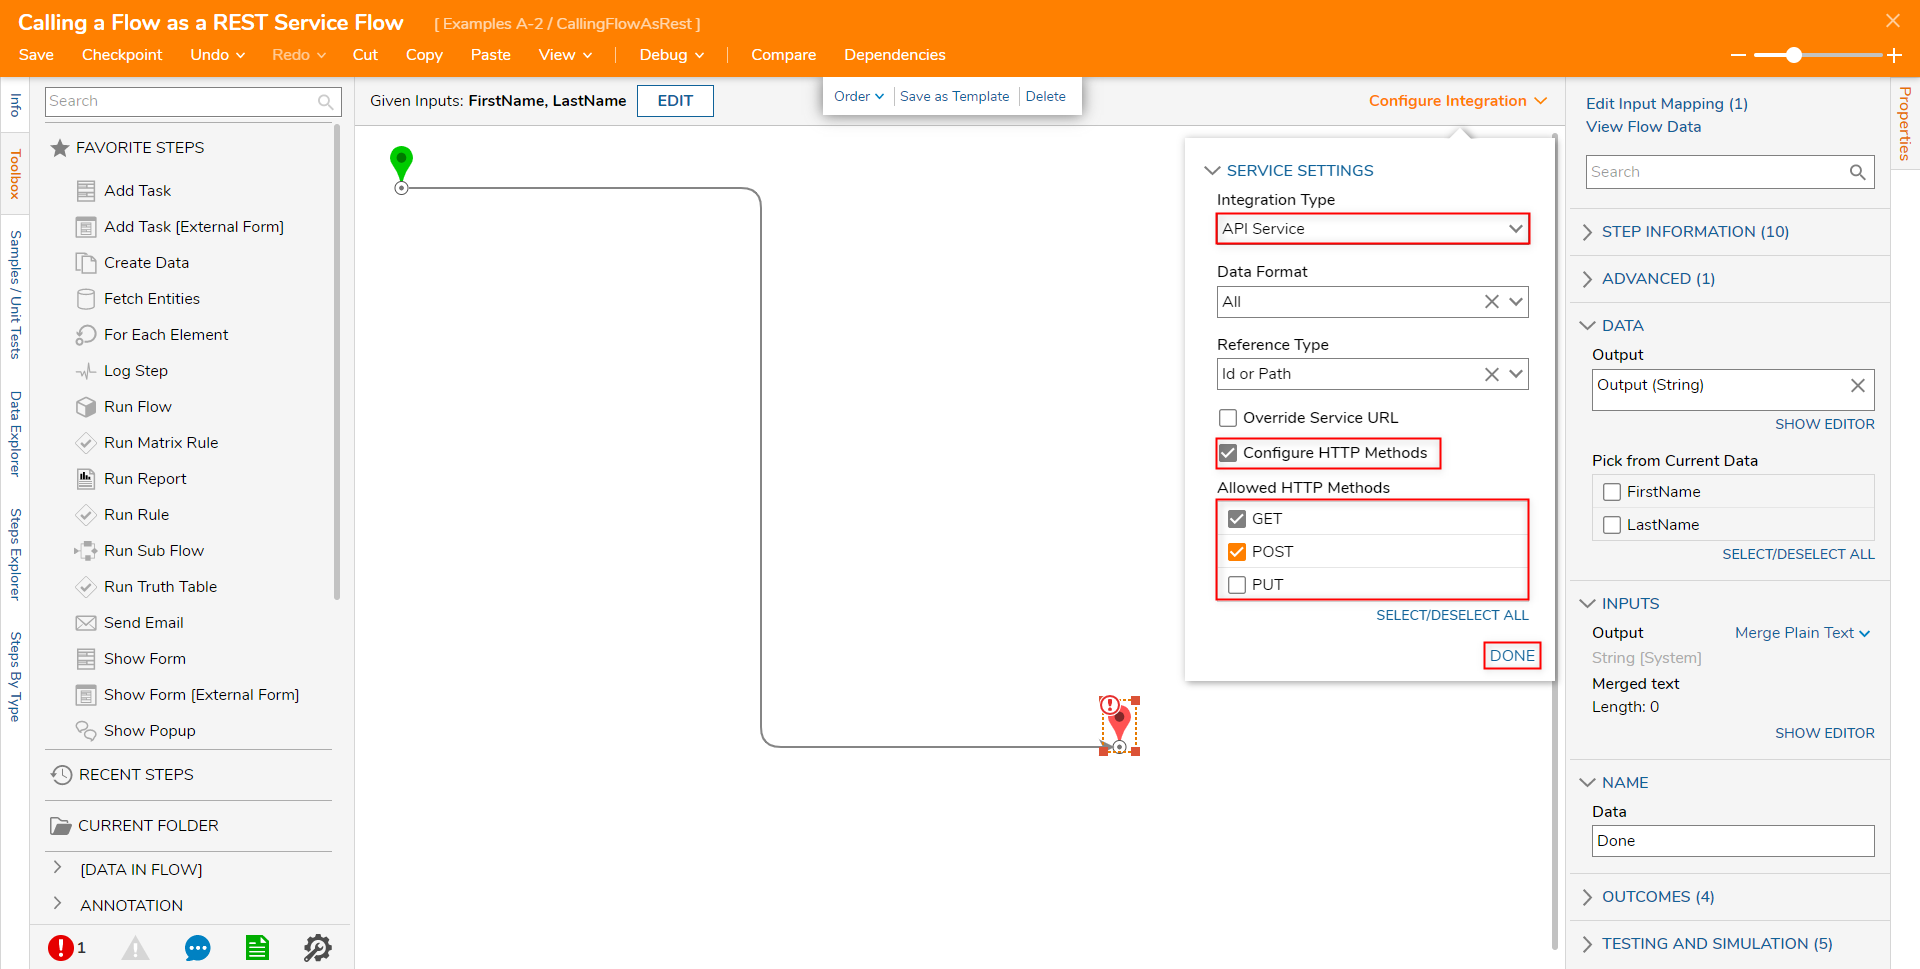
Click Configure Integration on the top right of the Designer. Under Integration Type, select API Service. Enable Configure HTTP Methods, select POST and GET from under Allowed HTTP Methods, and click DONE. Save and close the Flow.
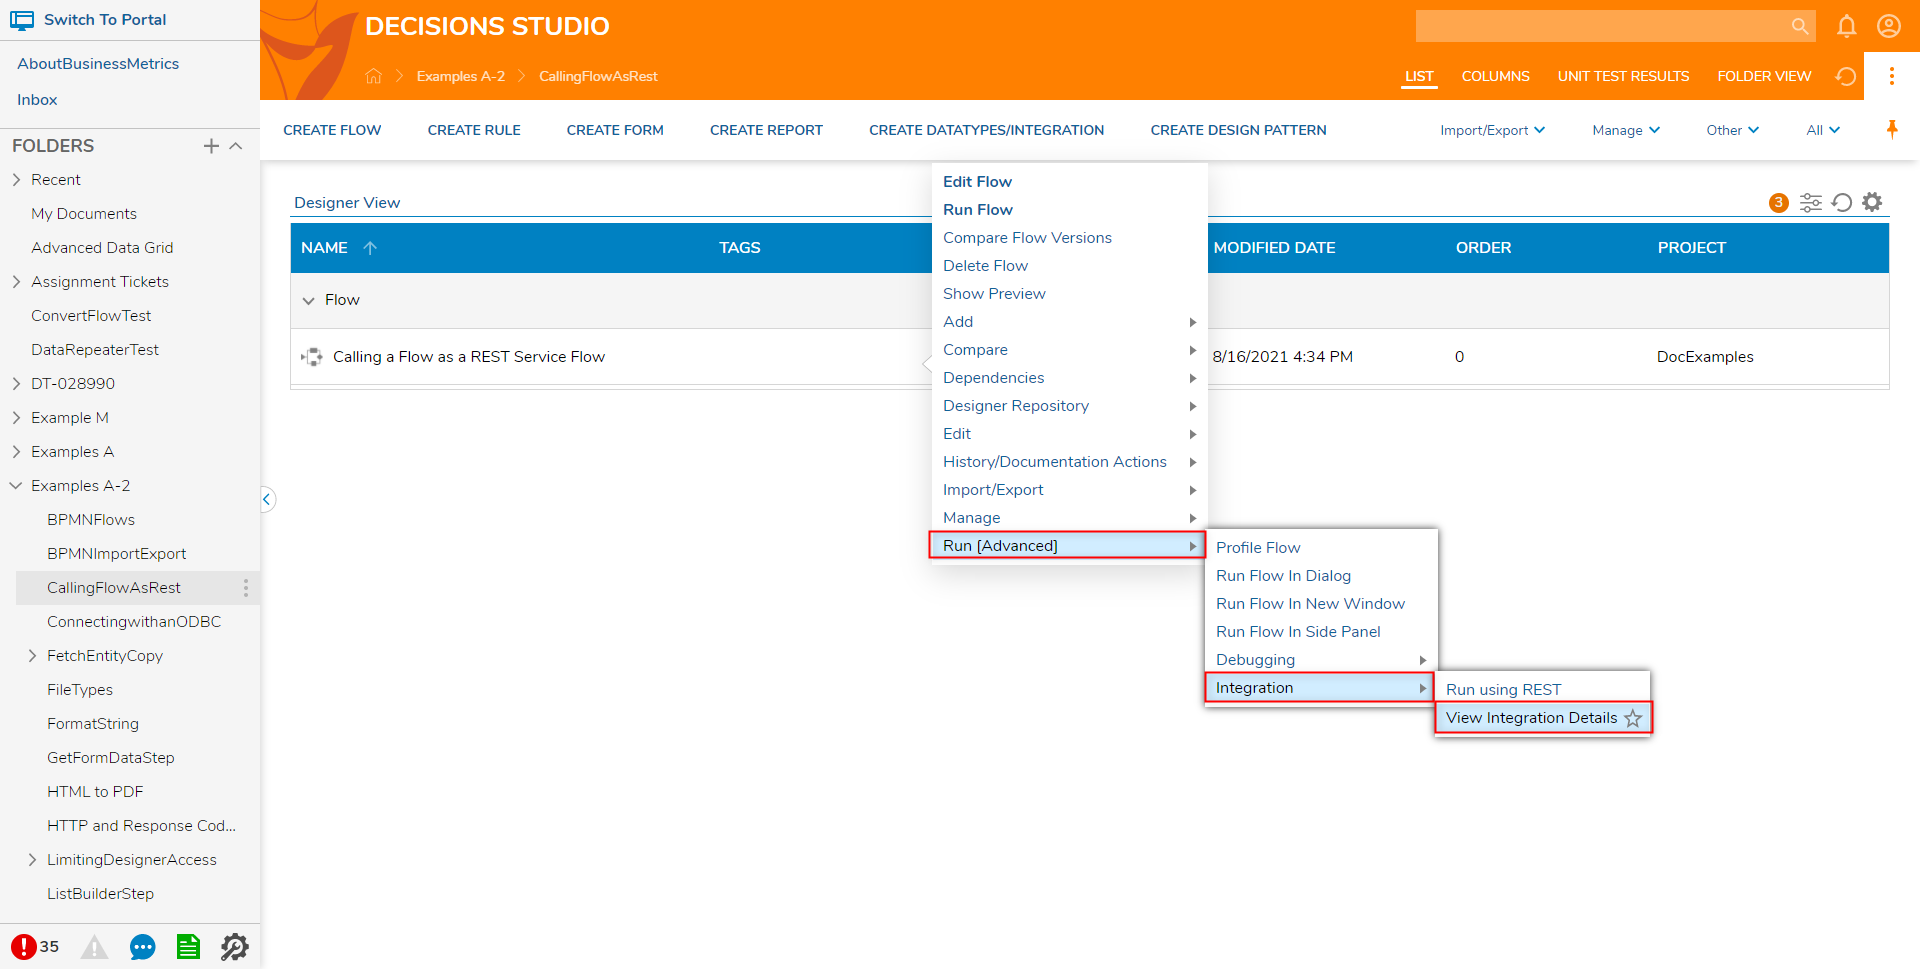
- Right-click and navigate to Run [Advanced] > Integration and click View Integration Details.
- The View Integration Details page will open. From this page, under Setup, select Use Current Session ID, and click Additional Options.
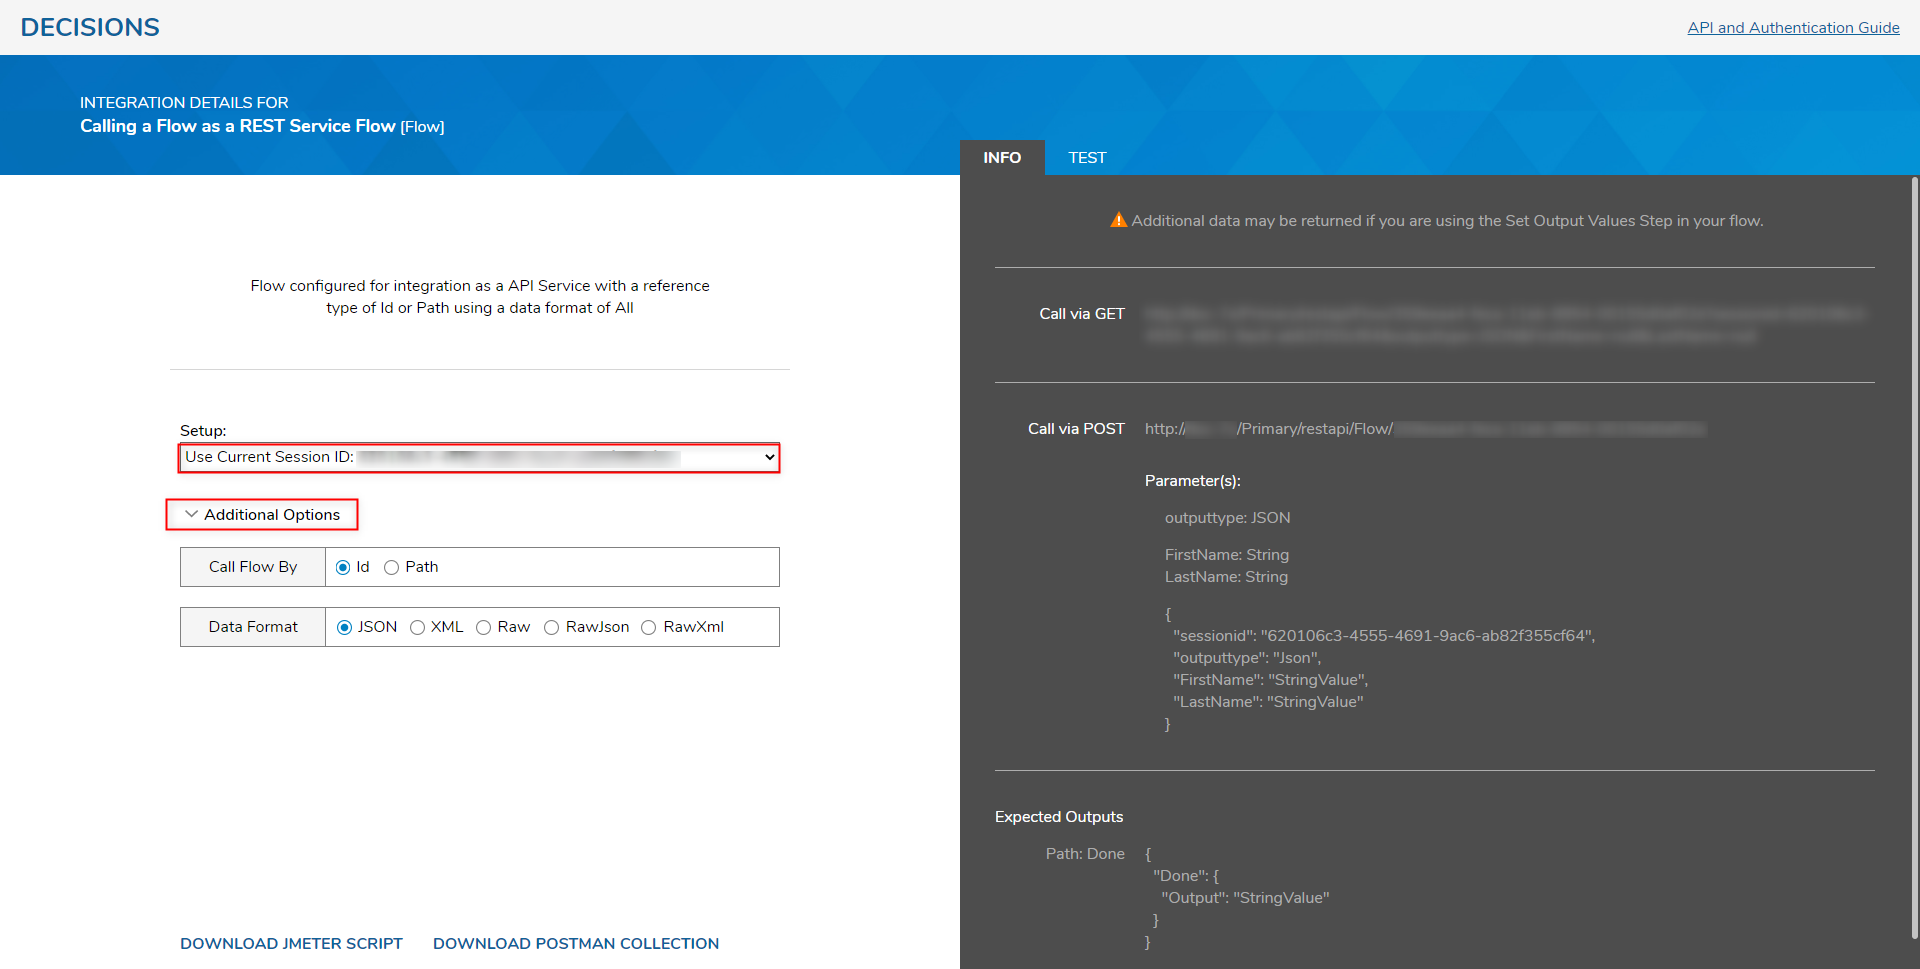
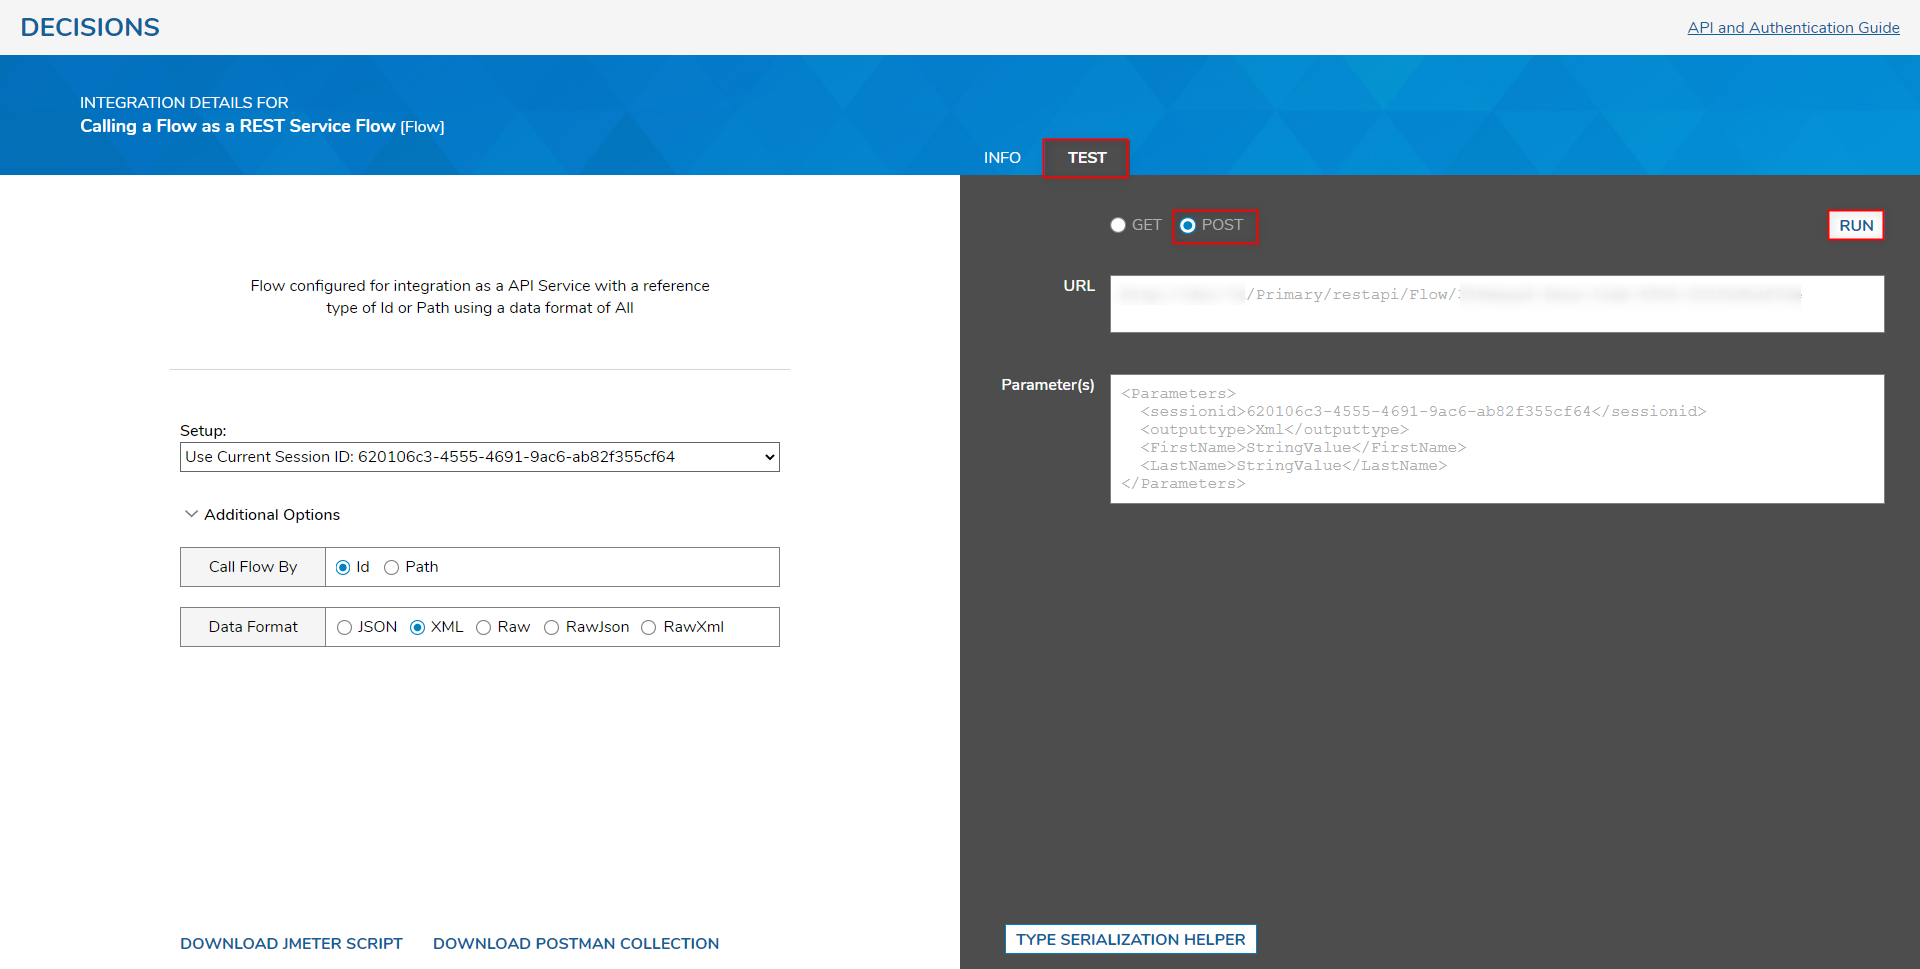
- Select set the Data Format to XML to allow for XML Serialized Input and set the Expected Output as XML as well.
Authentication Credentials Description Login This will present a Login screen to the user (not recommended for API) Guest A special Guest account that can be enabled and access to folders can be granted to this account. SessionId/Named Session The recommended approach for API calls. To learn more, see Create Named Session. Specify User Credentials Defines the username and password of the user 
- Copy the Parameters under Call via POST into the desired REST Service software to set up a POST Call.

- Without leaving the Integration Details window, navigate to the TEST tab, select POST, then click RUN to test the call.


For further information on Integrations, visit the Decisions Forum.
Was this article helpful?