Creating Drop Down List Options from Flow Output
- 09 Jul 2021
- 2 Minutes to read
- Print
- DarkLight
Creating Drop Down List Options from Flow Output
- Updated on 09 Jul 2021
- 2 Minutes to read
- Print
- DarkLight
Article Summary
Share feedback
Thanks for sharing your feedback!
Overview
In a Form, drop-down list options can be created from several sources. These sources include populated data from workflows, specifying a static list directly in the Form Designer, or running a workflow to populate a list of choices. The following example will show how to configure drop-down options from a Flow to output the required information for the drop-down options.
Example
The example Flow will display a Form containing a drop-down list and a button. In the drop-down list, users will be able to select from a list of all available accounts. A Flow will populate this drop-down list. Another Flow will be created to display the Form.
Begin the example by creating the Flow, which will retrieve a list of system accounts.
- In the Designer Project, select the Create Flow button.
- Select Flow, name the Flow, then select CREATE
- Select the Done outcome path of the Start step.
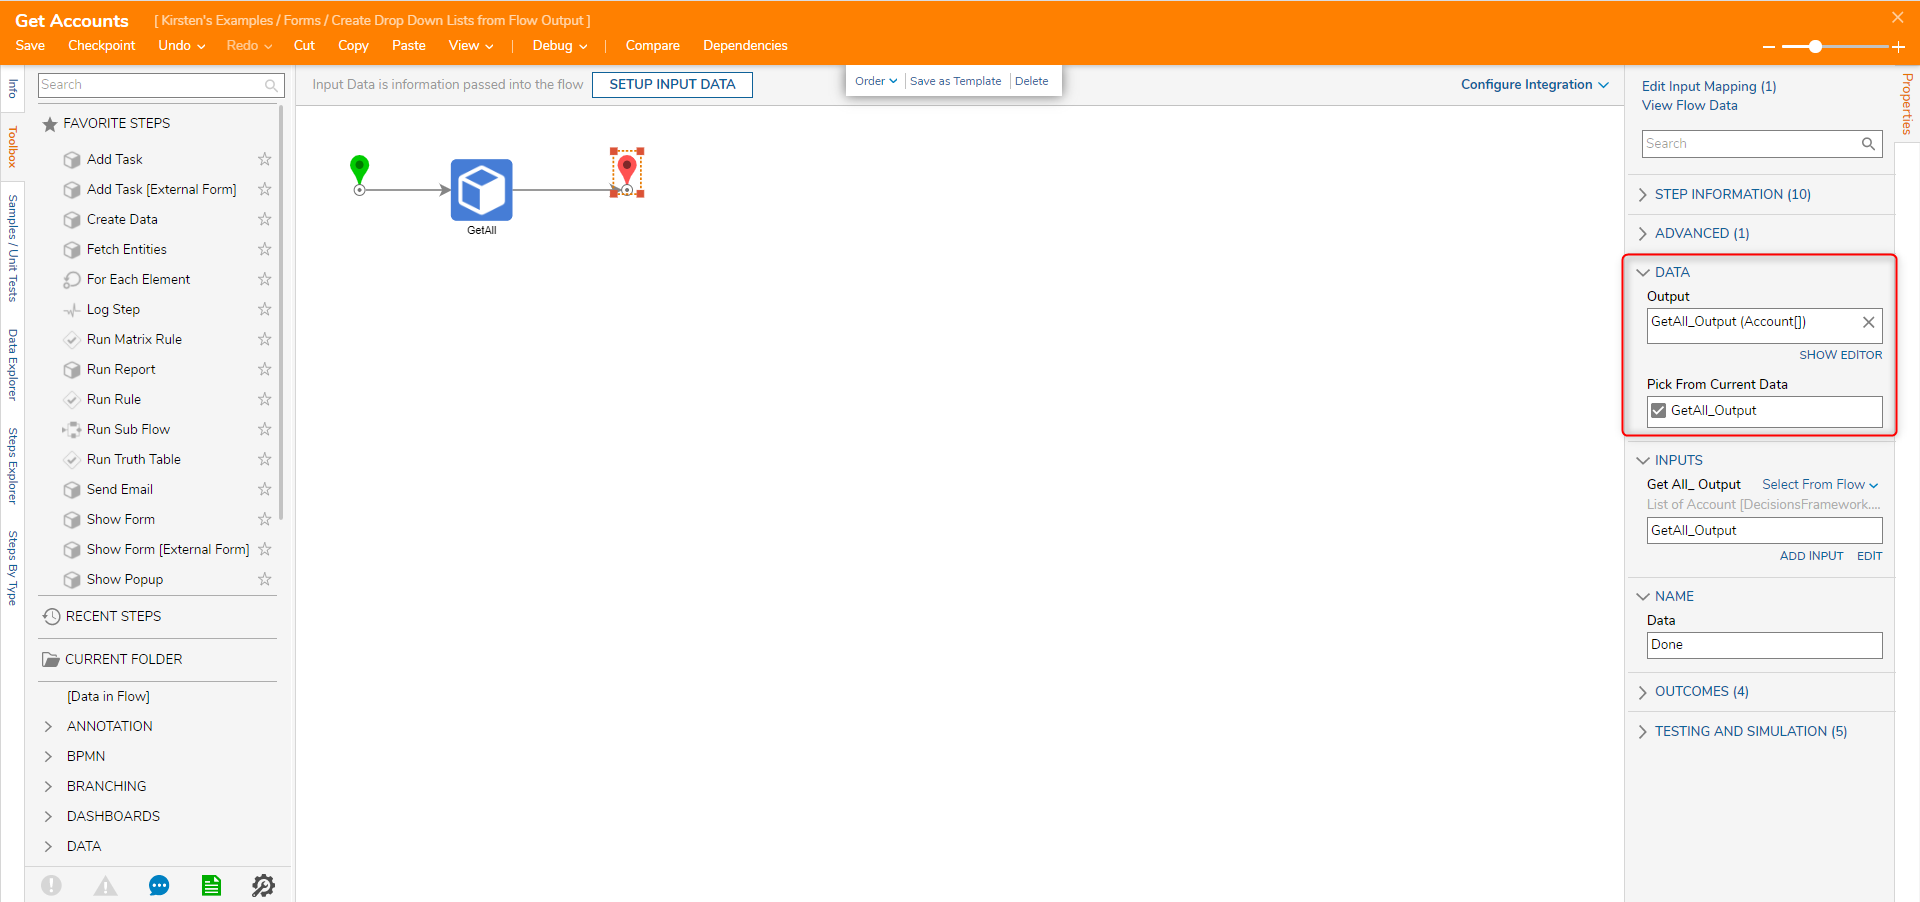
- In the Add After dialog, expand Integrations > All Integrations > Internal Services > Account Service, select the GetAll step.
- Select ADD.
- Select ADD.
- Connect the GetAll step to the End step.
- Select the End step. In the Properties panel, under Data > Pick From Current Data, select GetAll_Output.
- This completes the first Flow, save and close the Flow Designer.


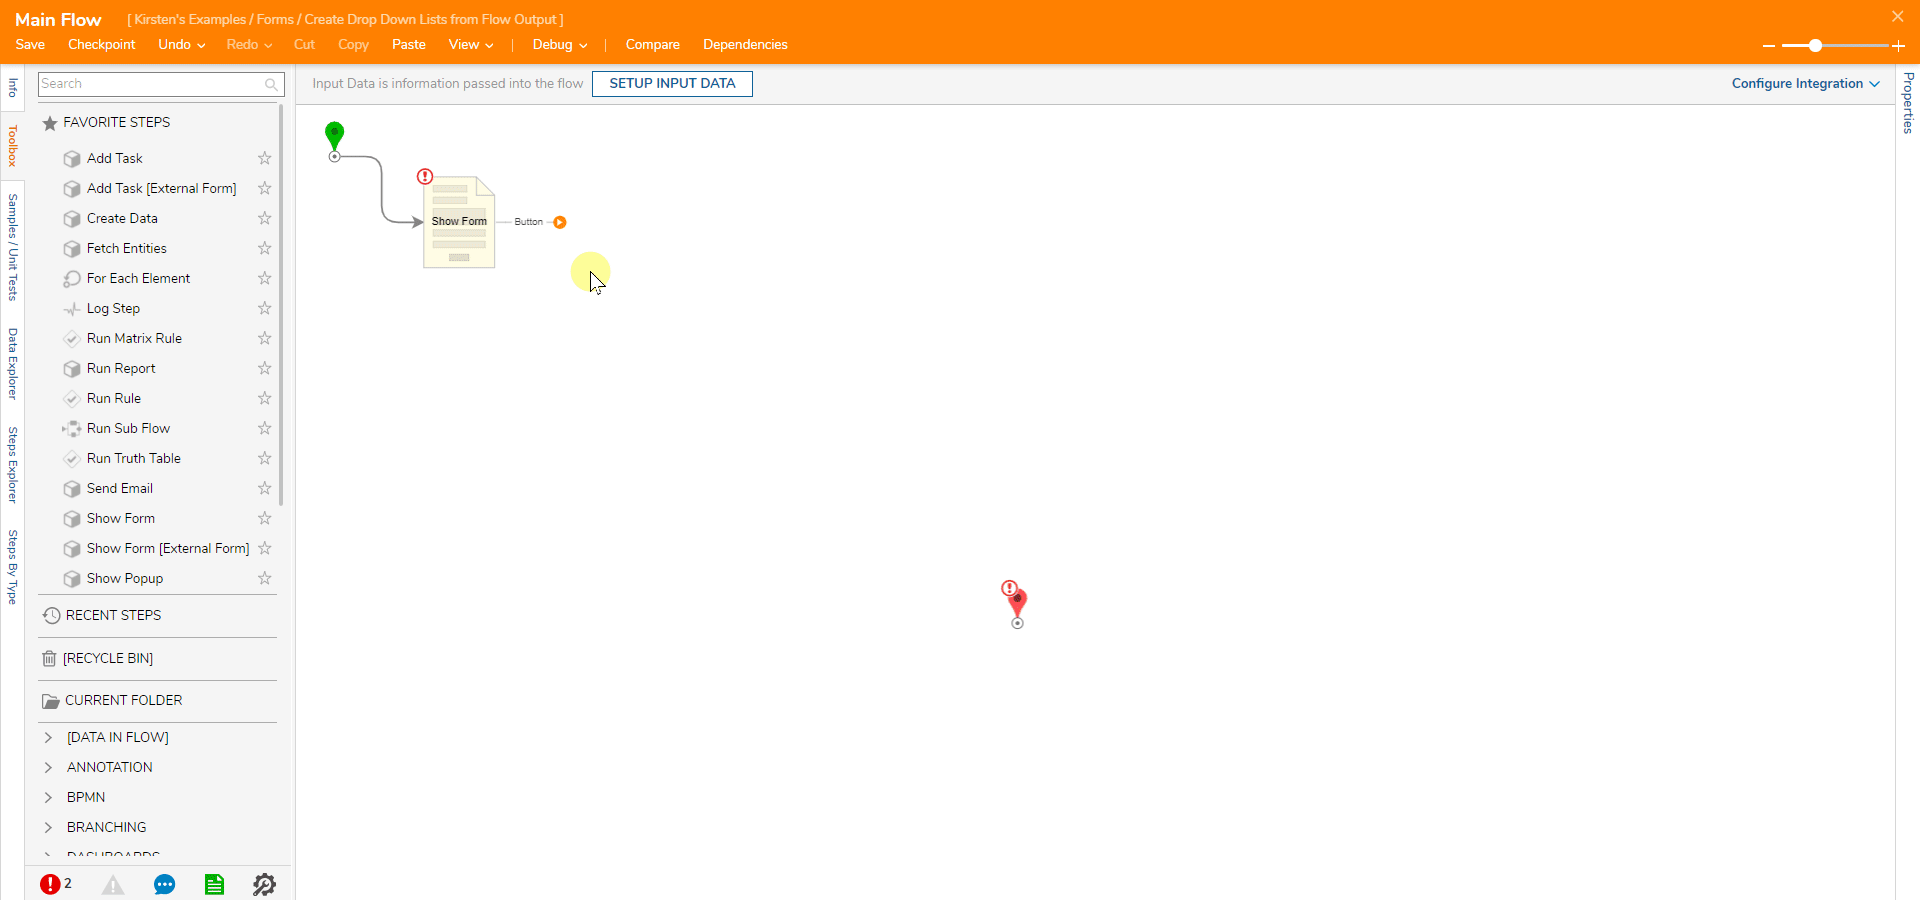
Build the Main Flow
- In the Designer Folder, select the Create Flow button.
- Select Flow, name the Flow, then select CREATE
- Select the Done outcome path of the Start step.
- In the Add After dialog, select the Show Form step in the Favorite Steps category.
- Select ADD.
- With the Show Form step selected, in the Properties panel, select PICK OR CREATE FORM.
- Select CREATE under Create New.
- Choose Form.
- Name the Form.
- Select CREATE.
- In the Form Designer, drag and drop a Button and the Drop Down List onto the Form.
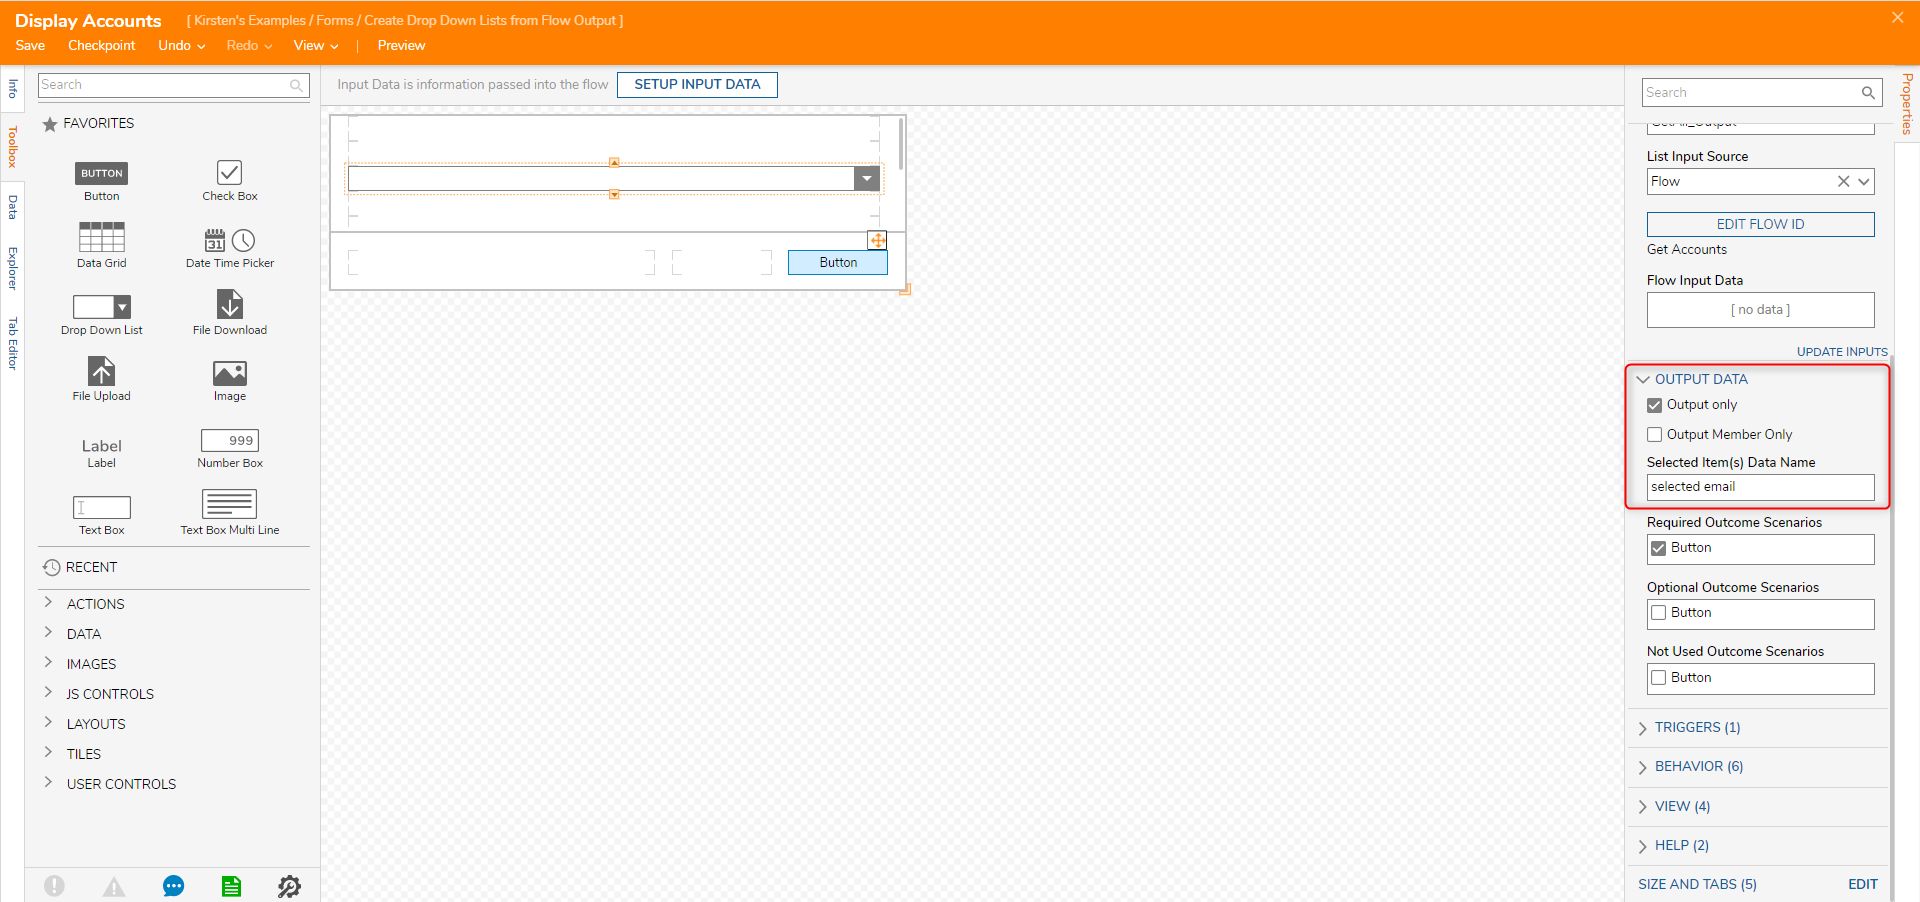
- Select the Drop-Down List, in the Properties > Input Data section, under the Type selector—search for and select Account.
- Under Display Field, specify EmailAddress.
- Change the List Input Source to Flow.
- Select PICK FLOW ID
- In the Create or Pick Flow dialog, select PICK under Pick Existing.
- Choose the Get Accounts Flow, then select PICK.
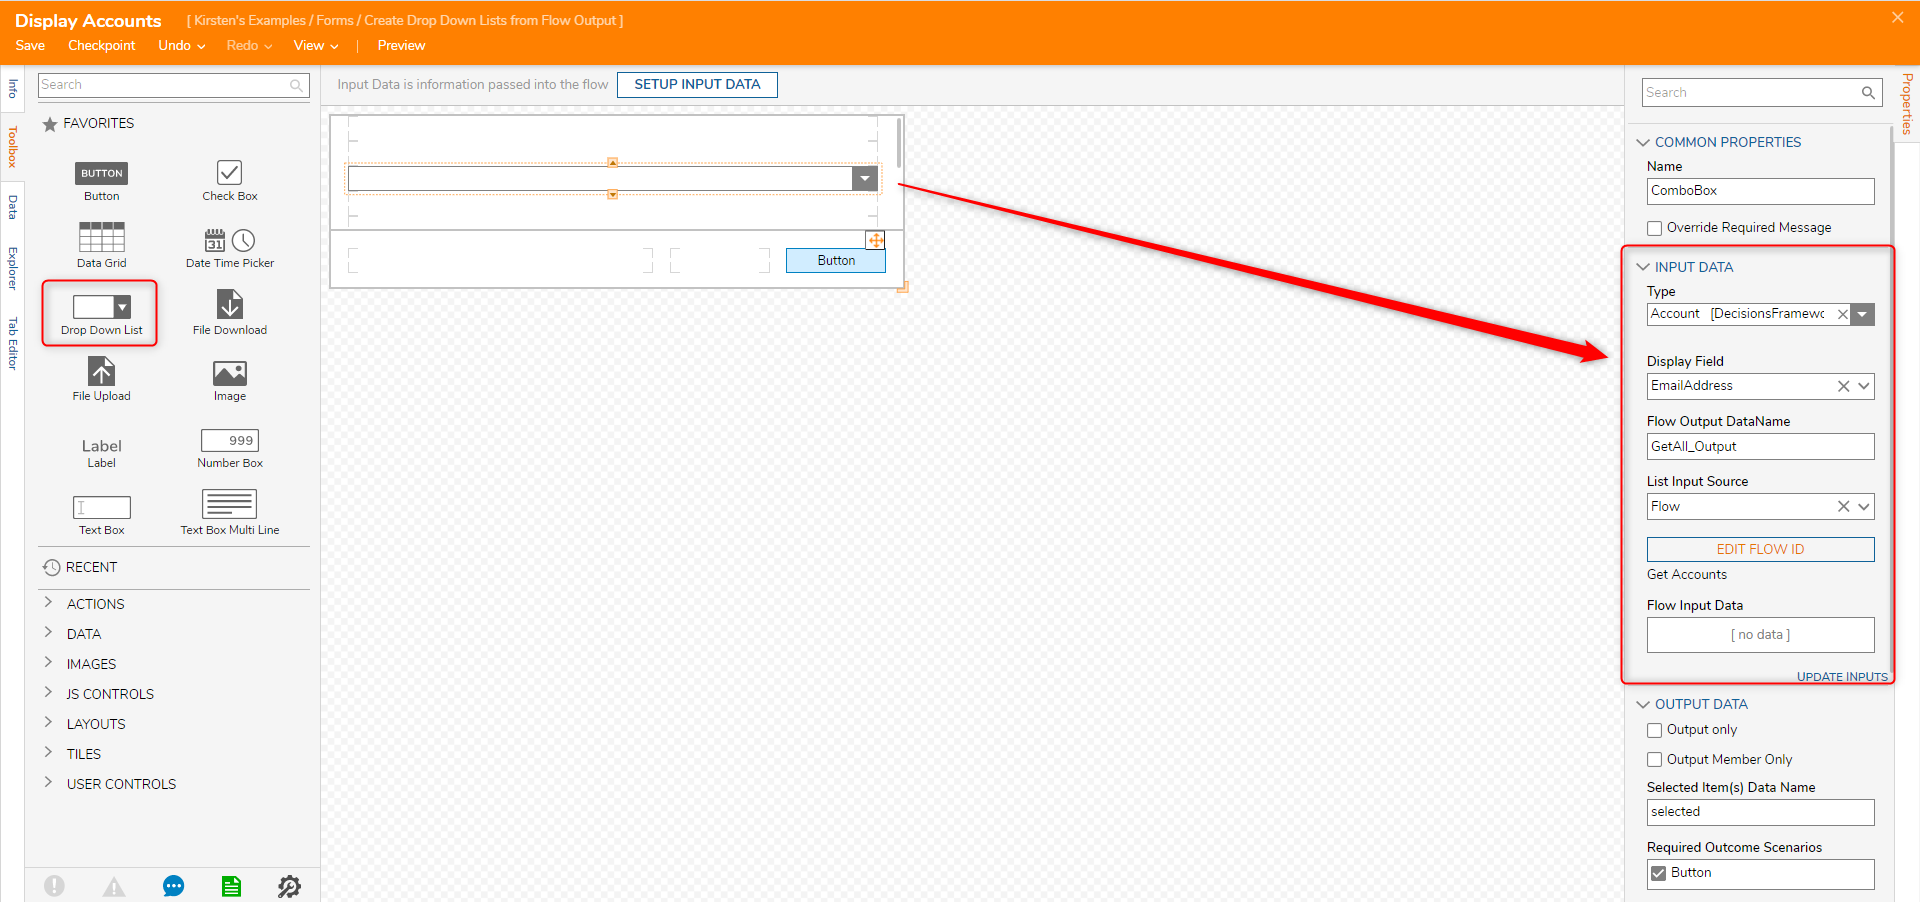
- In the Output Data section, select Output only.
- Rename Selected Item(s) Data Name to "Selected Email".
- Save and Close the Form Designer.
- Select the Done outcome path of the Show Form step.
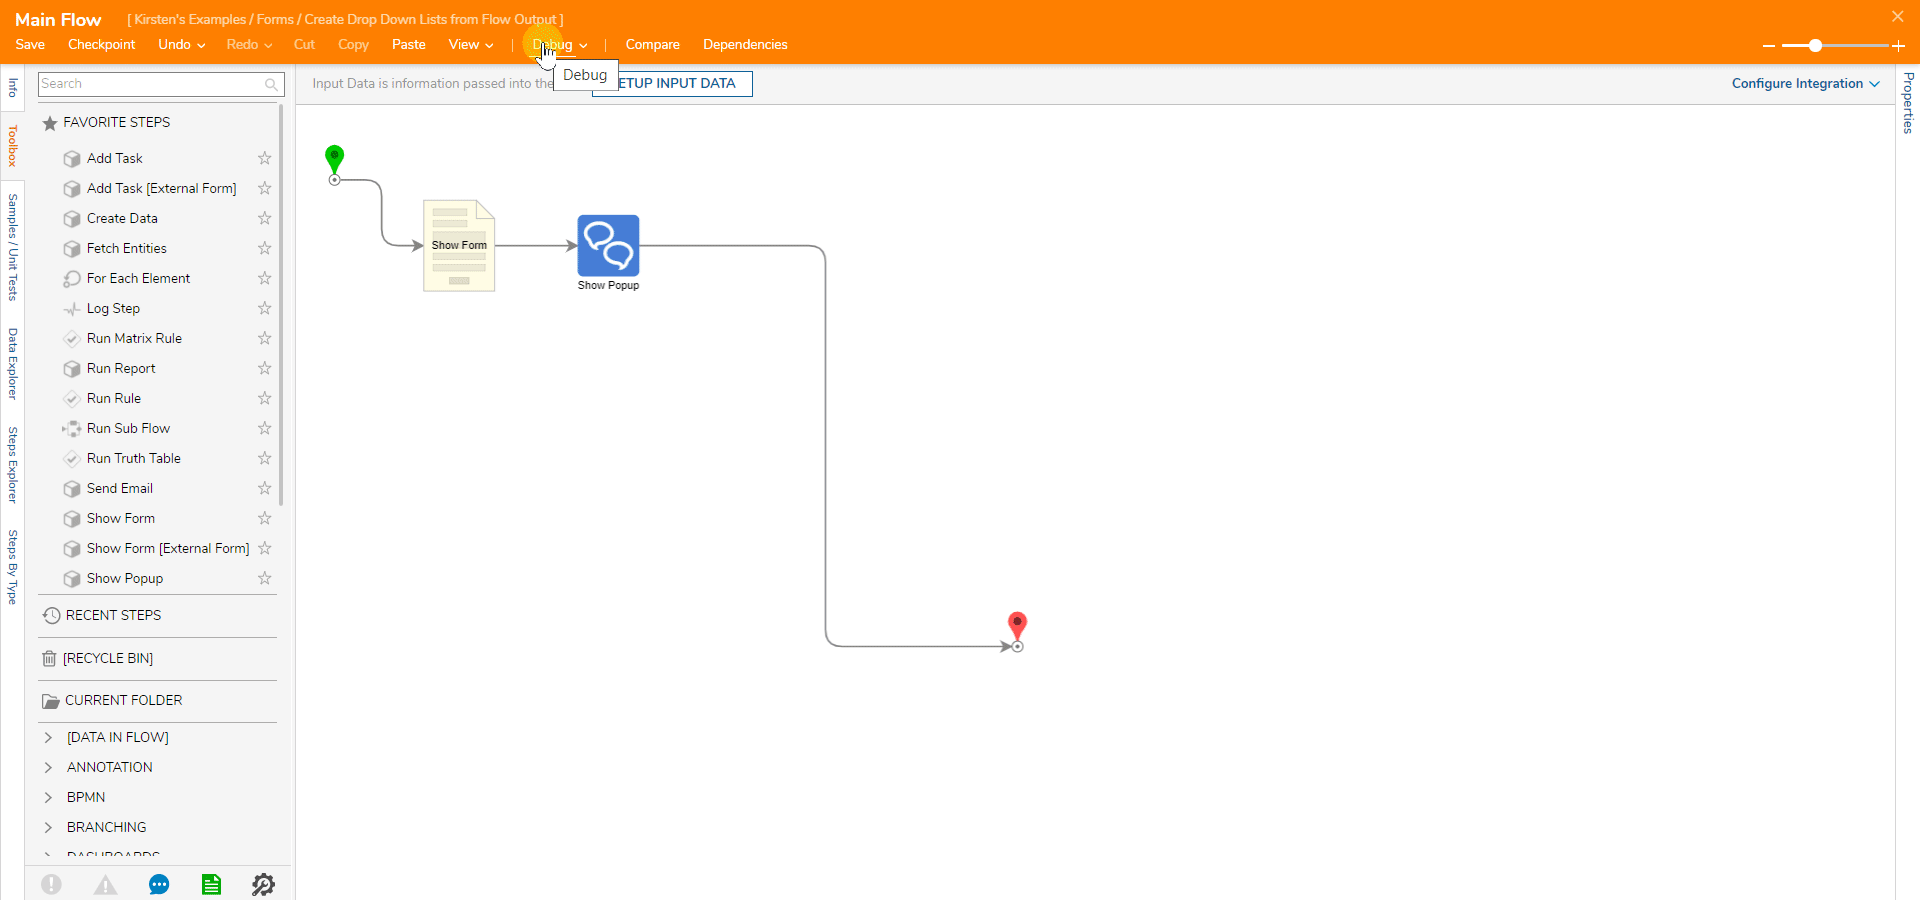
- In the Add After dialog, select the Show Popup step in the Favorite Steps category.
- Select ADD.
- This is to show the selected item from the drop-down menu is available to use in the Flow.
- Navigate to the Show Popup step Properties
- Under Inputs > Subject, change the mapping type to Constant and type "Selected Email".
- Under Inputs > Message, select Pick, and choose Selected Email from the Pick Data For Input dialog.
- Connect the Done path to the End step.


Debug
- Select the Debug link located in the top toolbar.
- Select Start Debugging.
- The Form that holds the Drop Down List is displayed.
- Select an account email and click the Button to apply the changes.
- The Popup will display in the upper right corner, showing which account was chosen.
This is just an example of creating a drop-down list and showing that the selected data is available to use in the flow. Please use this information to help create business logic that fits your needs.
Was this article helpful?