Create Excel Data from Object Data
- 12 Apr 2023
- 4 Minutes to read
- Print
- DarkLight
Create Excel Data from Object Data
- Updated on 12 Apr 2023
- 4 Minutes to read
- Print
- DarkLight
Article Summary
Share feedback
Thanks for sharing your feedback!
Overview
Data objects can be exported to CSV format within a Flow by using the Custom Merge [NVelocity] and Create Text File components.
The following examples demonstrate how to create data for Excel and CSV via Flow, as well as how to export Data Objects to CSV and Excel Format via the Custom Merge [NVelocity] and Create Text File steps in the Toolbox.
Example
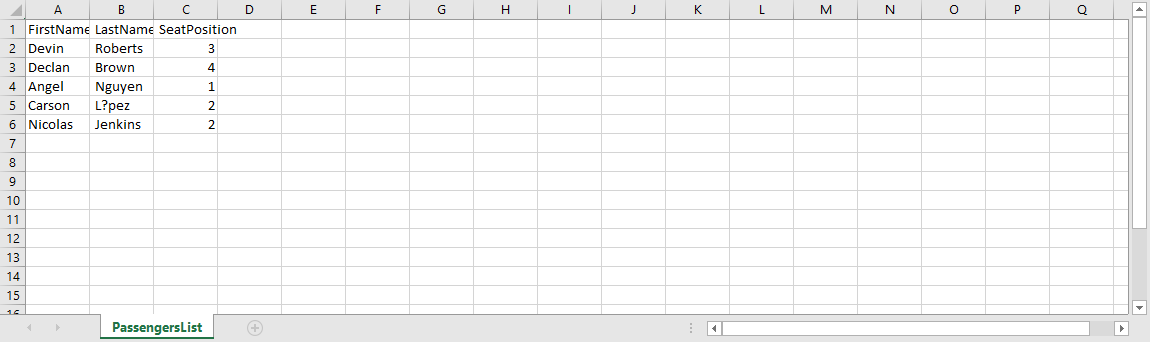
In this example, create Vehicle Passenger objects from the created spreadsheet. The spreadsheet will contain the Vehicle Passenger objects that are stored in a Folder and contain three columns: First Name, Last Name, and Seat Position. This Flow is going to generate the data that will be used for the Excel and CSV spreadsheet.
Download and Import the following example here:
Generate Data for Example
Create Flow Execution Extension
- From a Designer Project, select CREATE DATATYPES/INTEGRATION from the Global Action Bar and choose Flow Exceution Extension.
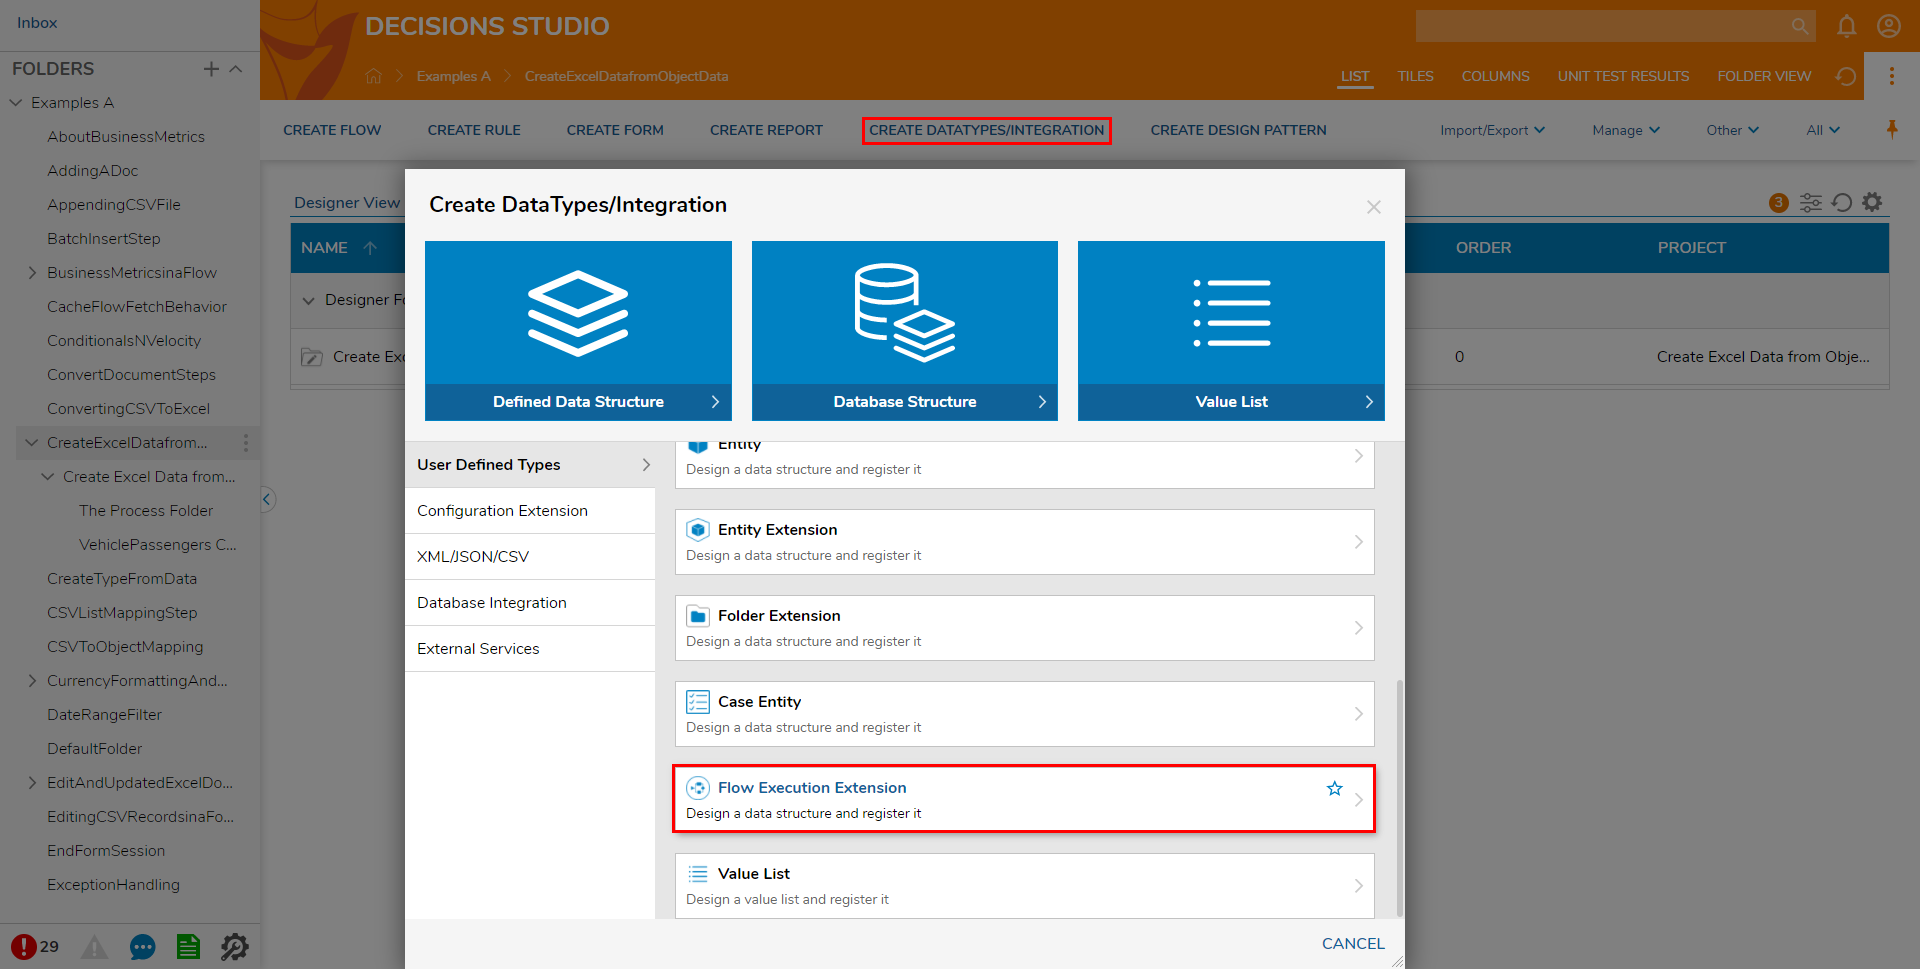
- From the Flow Execution Extension window, set the Structure Type Name to "VehiclePassengers"; include three String [Text] Types named "FirstName, LastName and SeatPosition." Click SAVE to create and save the Data Structure.


Create Folder
This Folder is serves as a Process Folder and storage for data involved in this Process.
- Right-click the Designer Project created for this Project, and select Create Folder.
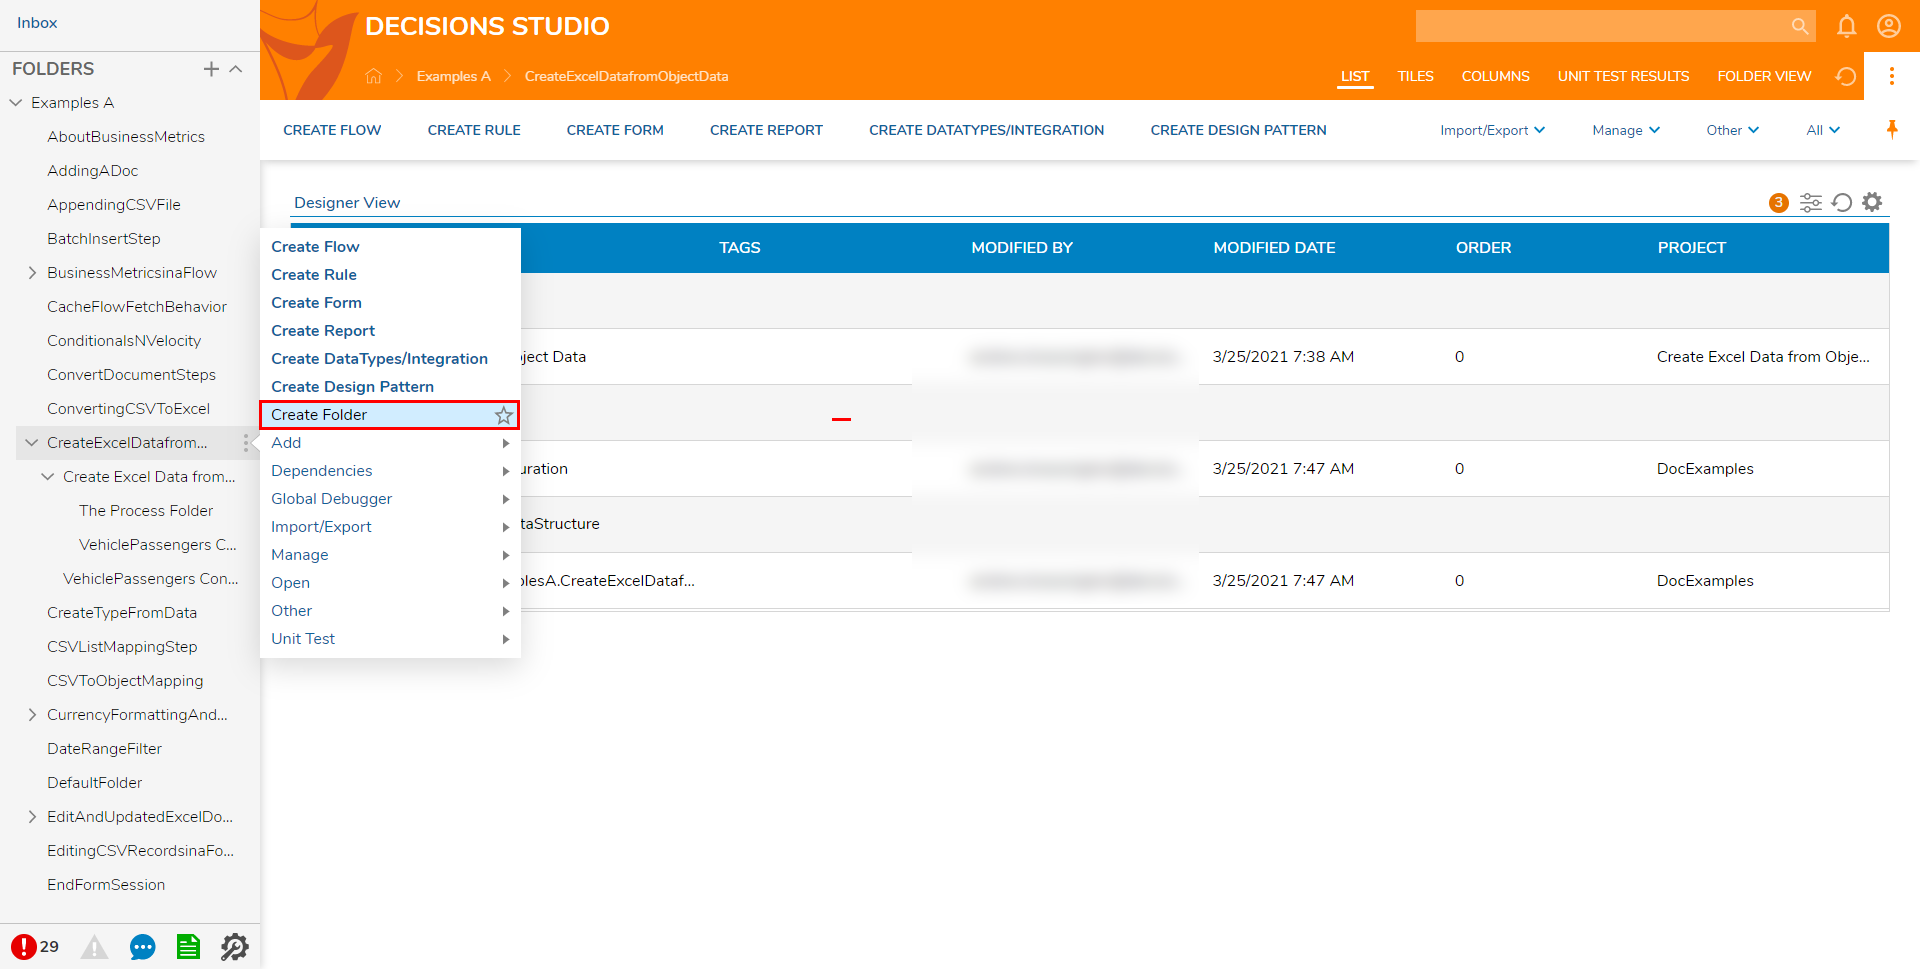
- Under Create Folder, click CREATE, Name it "Process Folder", then click CREATE.


Create Flow
The following explains how to create Flow that generates data for a CSV Spreadsheet.
- From the same Designer Project, select the CREATE FLOW button on the Global Action Bar; select Flow, provide a Name, then click CREATE.
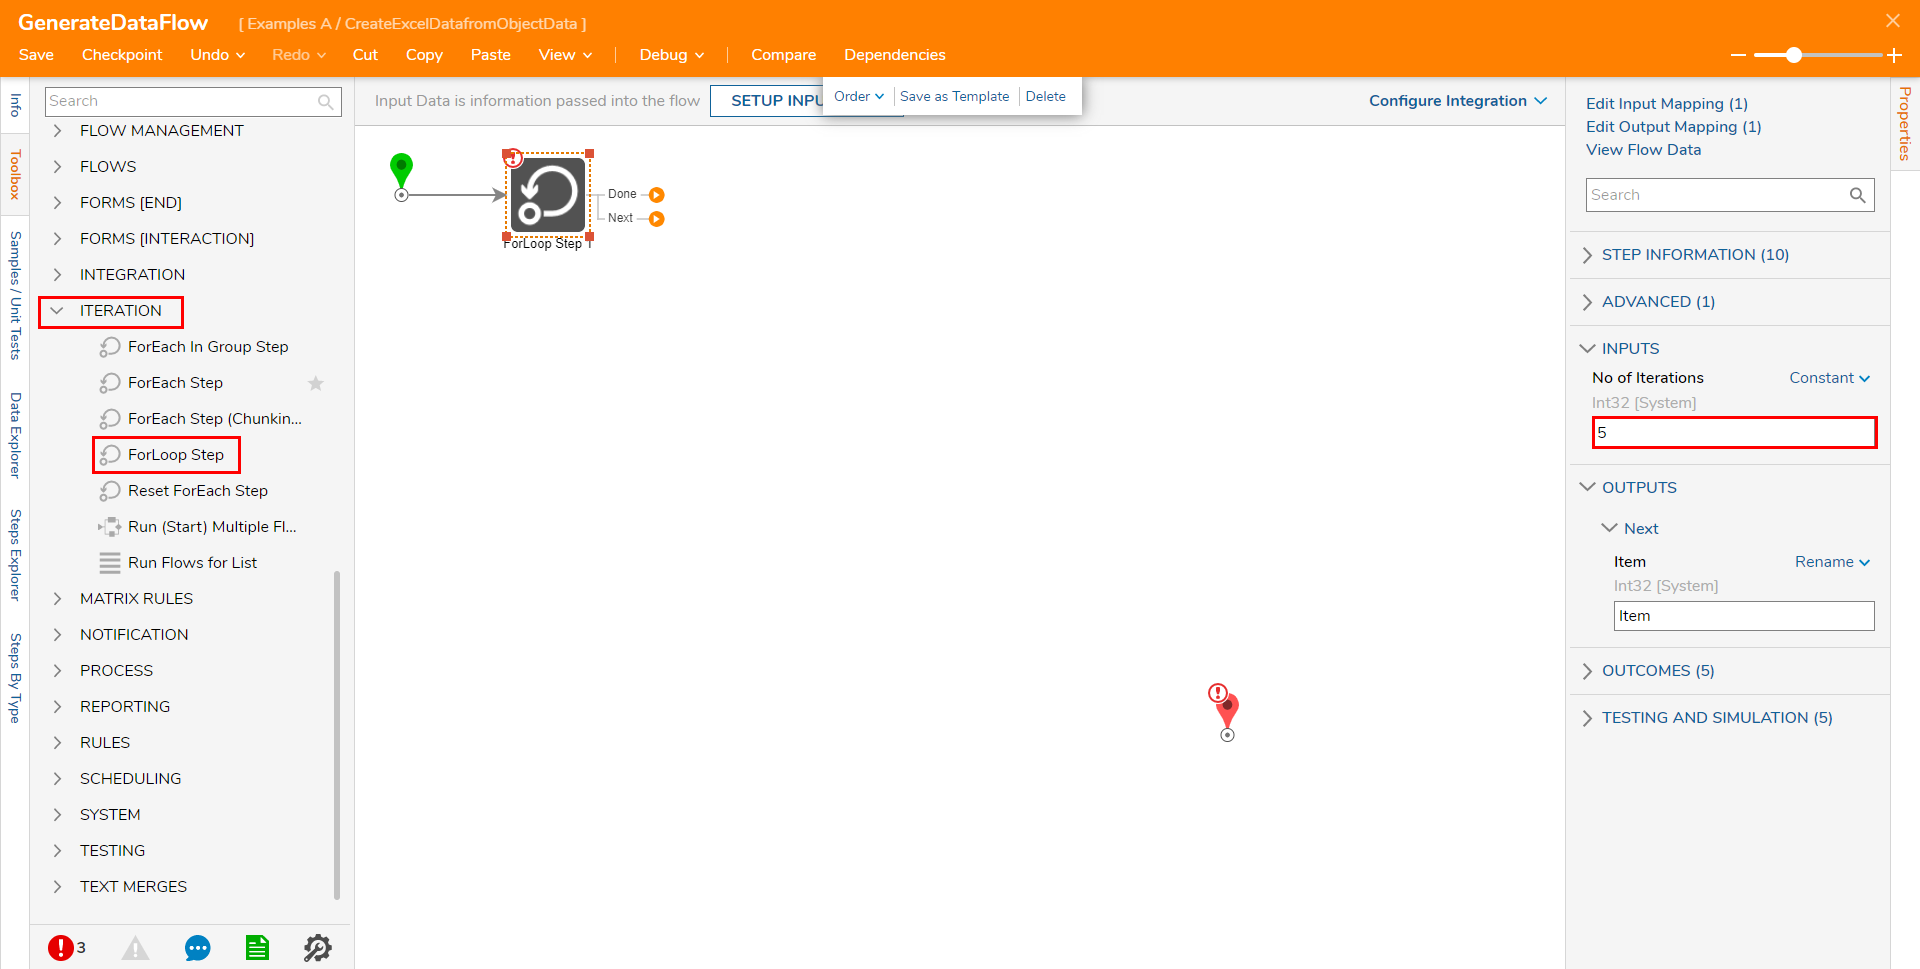
- From the Flow Designer, under Toolbox > ITERATION, attach a ForLoop Step to the Start step.
- From the Properties tab for the ForLoop step, constant map "5" under INPUTS > No of Iterations.
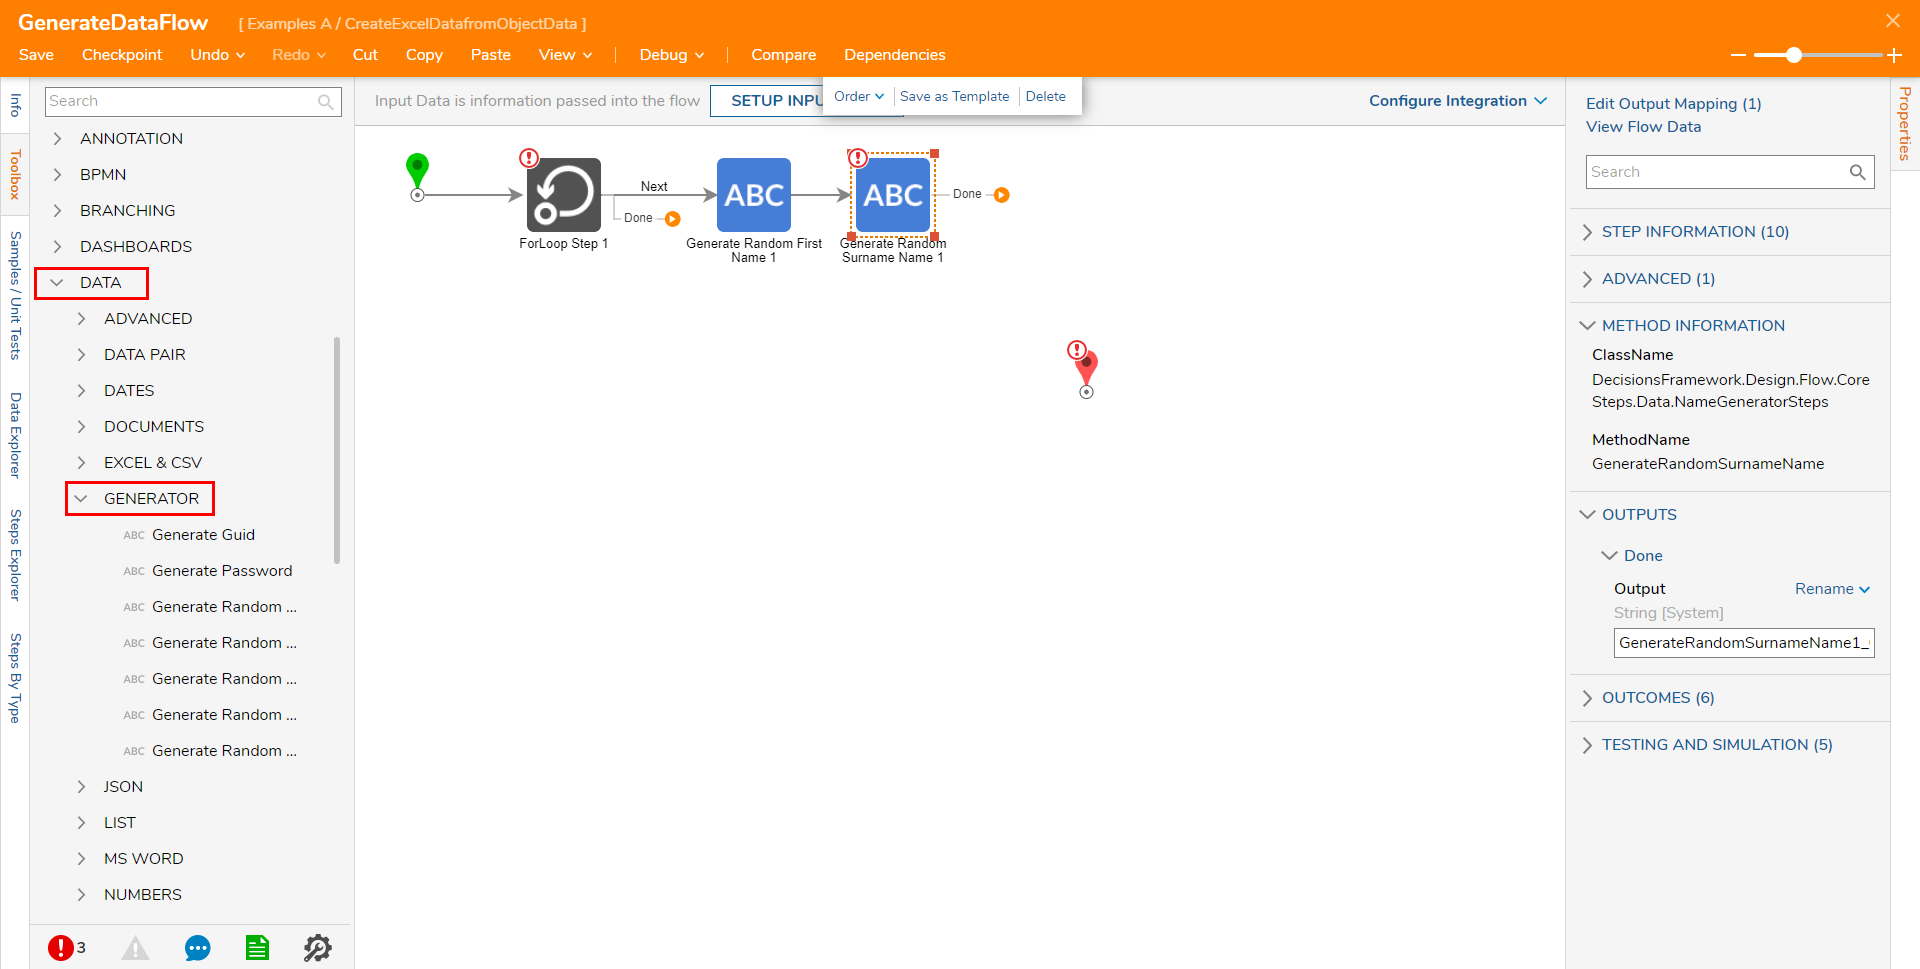
- Attach a Generate Random First Name step from Toolbox > DATA > GENERATOR, to the ForLoop Step's Next path.
- From the same category, attach a Generate Random Surname step to the Generate Random Name step.
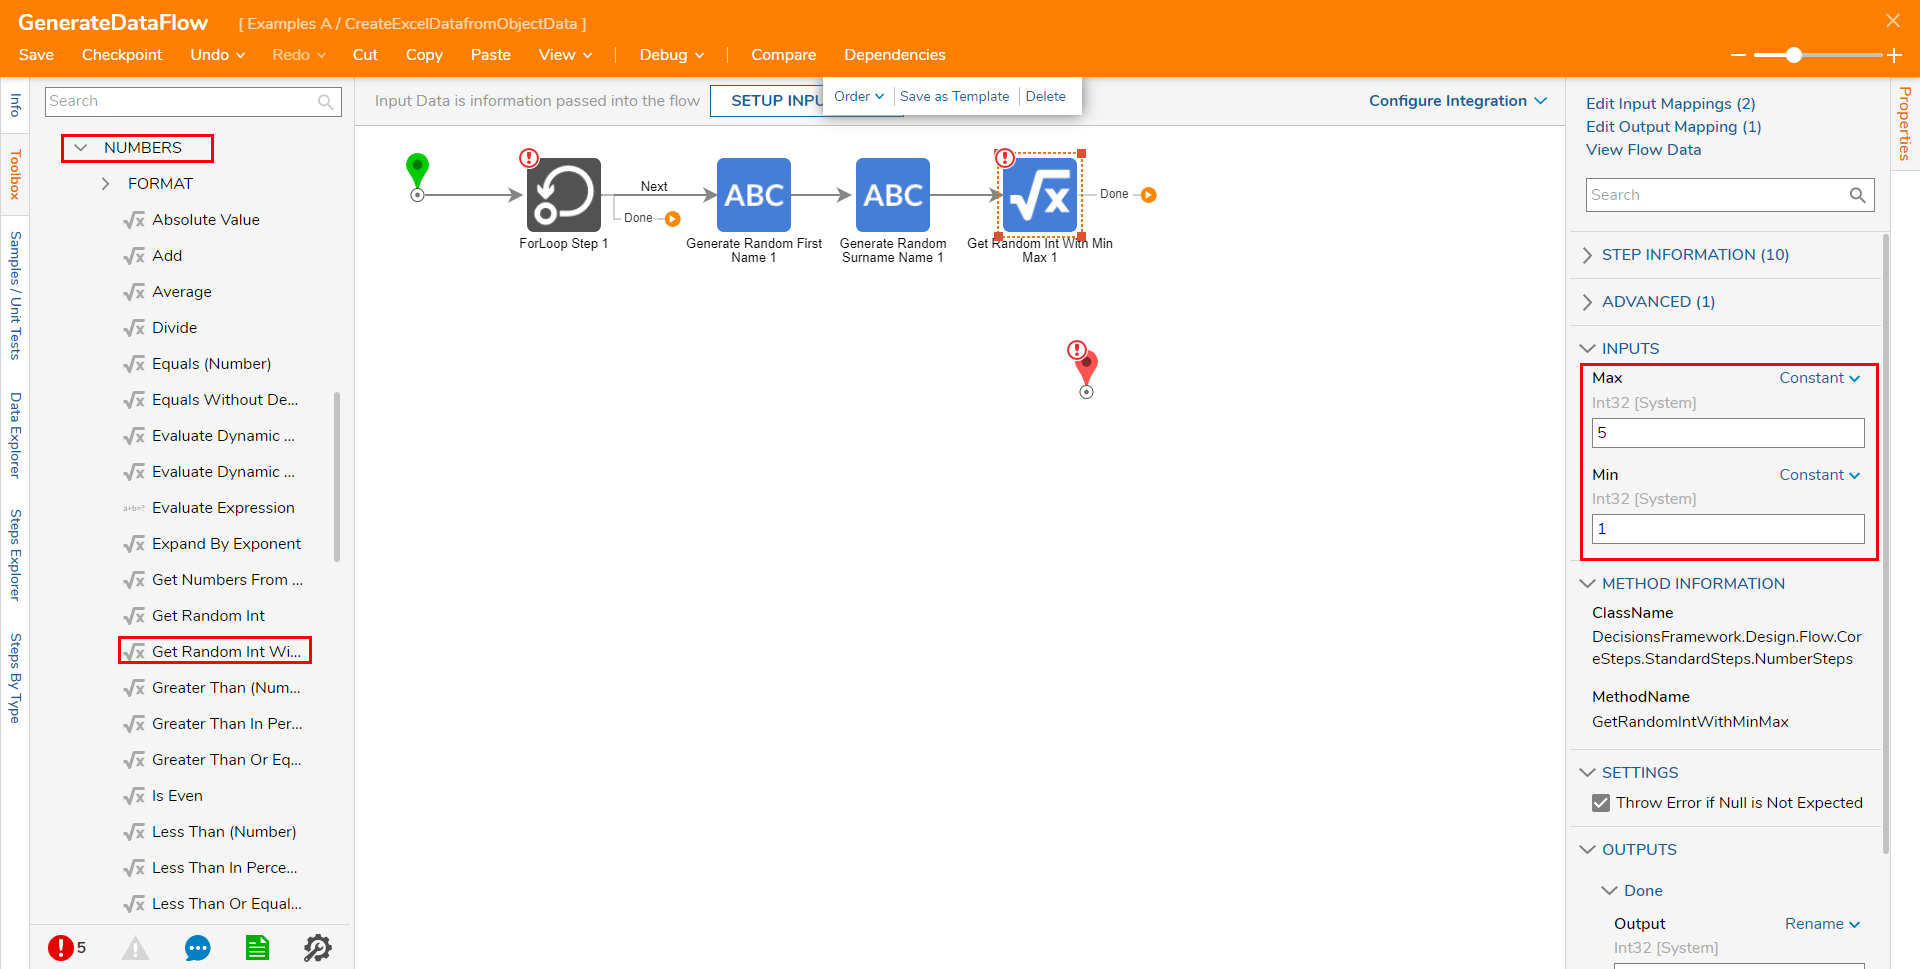
- Under Toolbox > DATA > NUMBERS, attach a Get Random Int with Min-Maxstep to the Generate Random Surname step. From the step's Properties tab, Constant map "5" to Max and "1" to Min. This step will be used to generate random seat positions with random integers between 1 and 5.
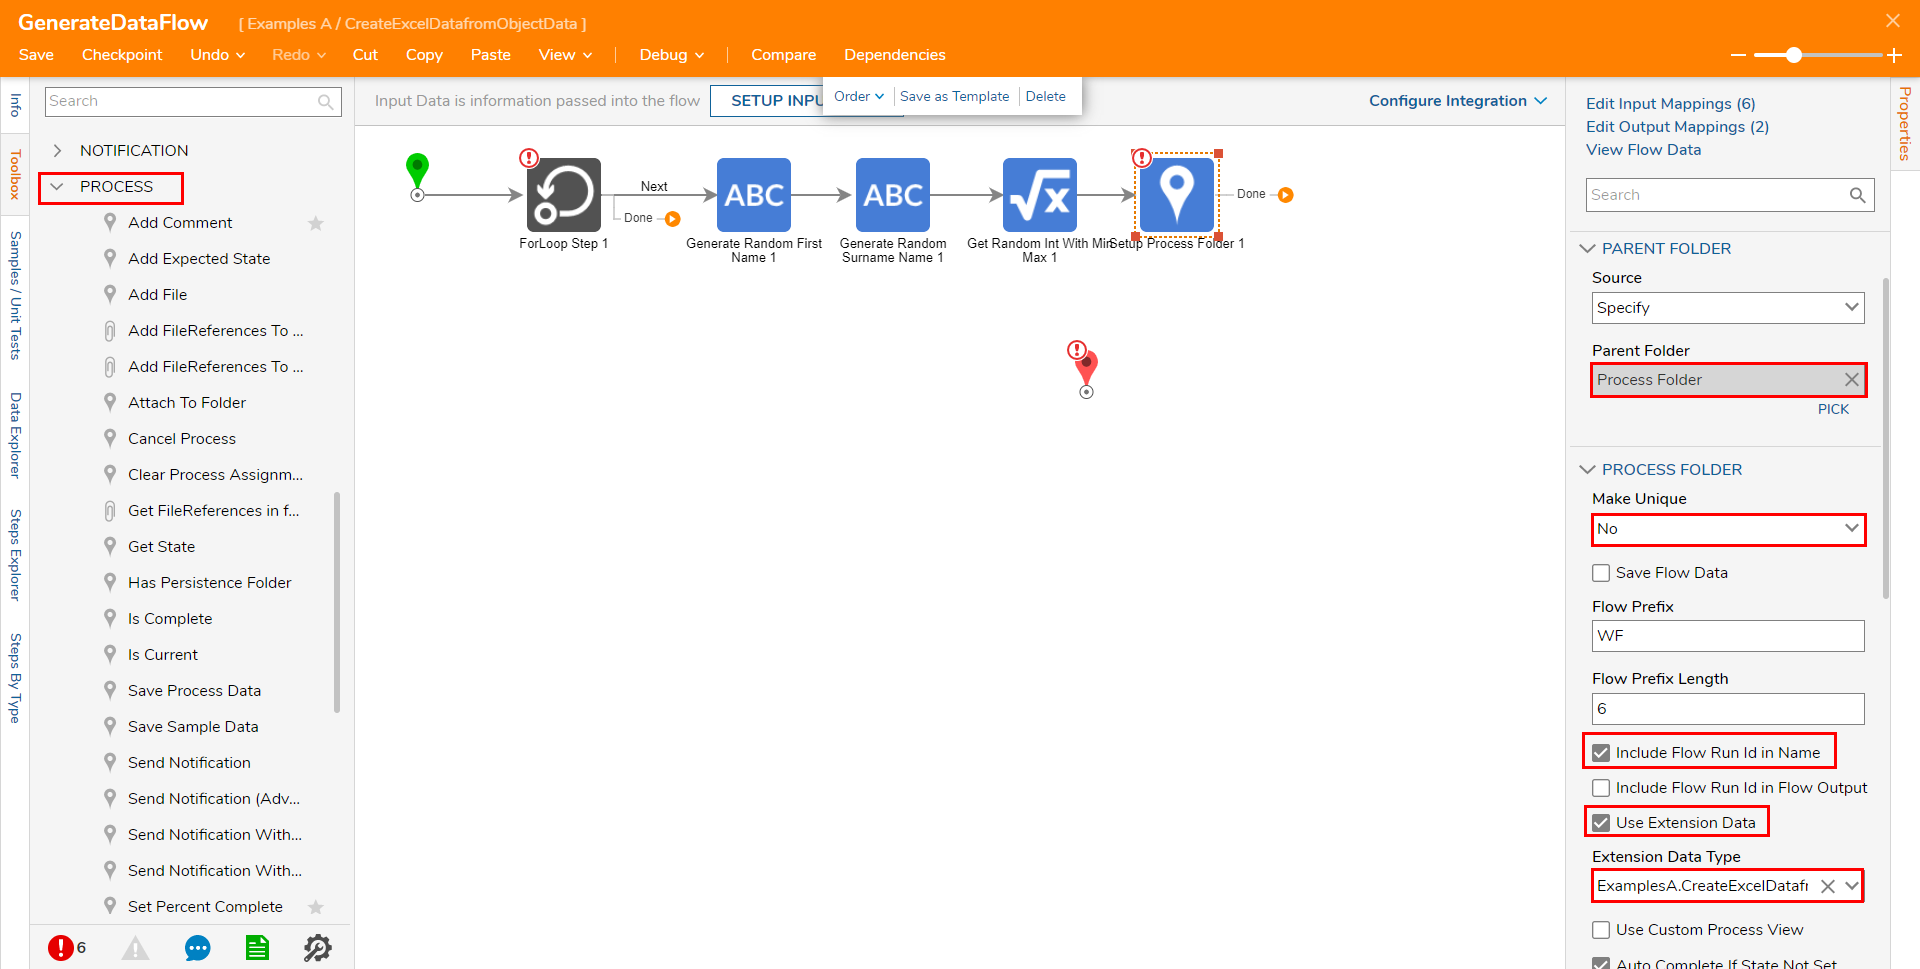
From Toolbox > PROCESS, attach a Setup Process Folder step to the Get Random Int With Min Max step.
This step will generate the Process data that will be stored in the previously created Folder.Select the newly added step, under Properties > PARENT FOLDER > Parent Folder, PICK the previously created Process Folder.
Under PROCESS > Make Unique select No from the dropdown menu. Under Flow Prefix check Include Flow Run Id in the Name and Use Extension Data, then select VehiclePassengers from the Extension Data Type menu.
Note on Flow PrefixEnsure that when defining the Flow Prefix, to utilize a unique value. Using a duplicate Flow Prefix from another Flow will throw a validation error.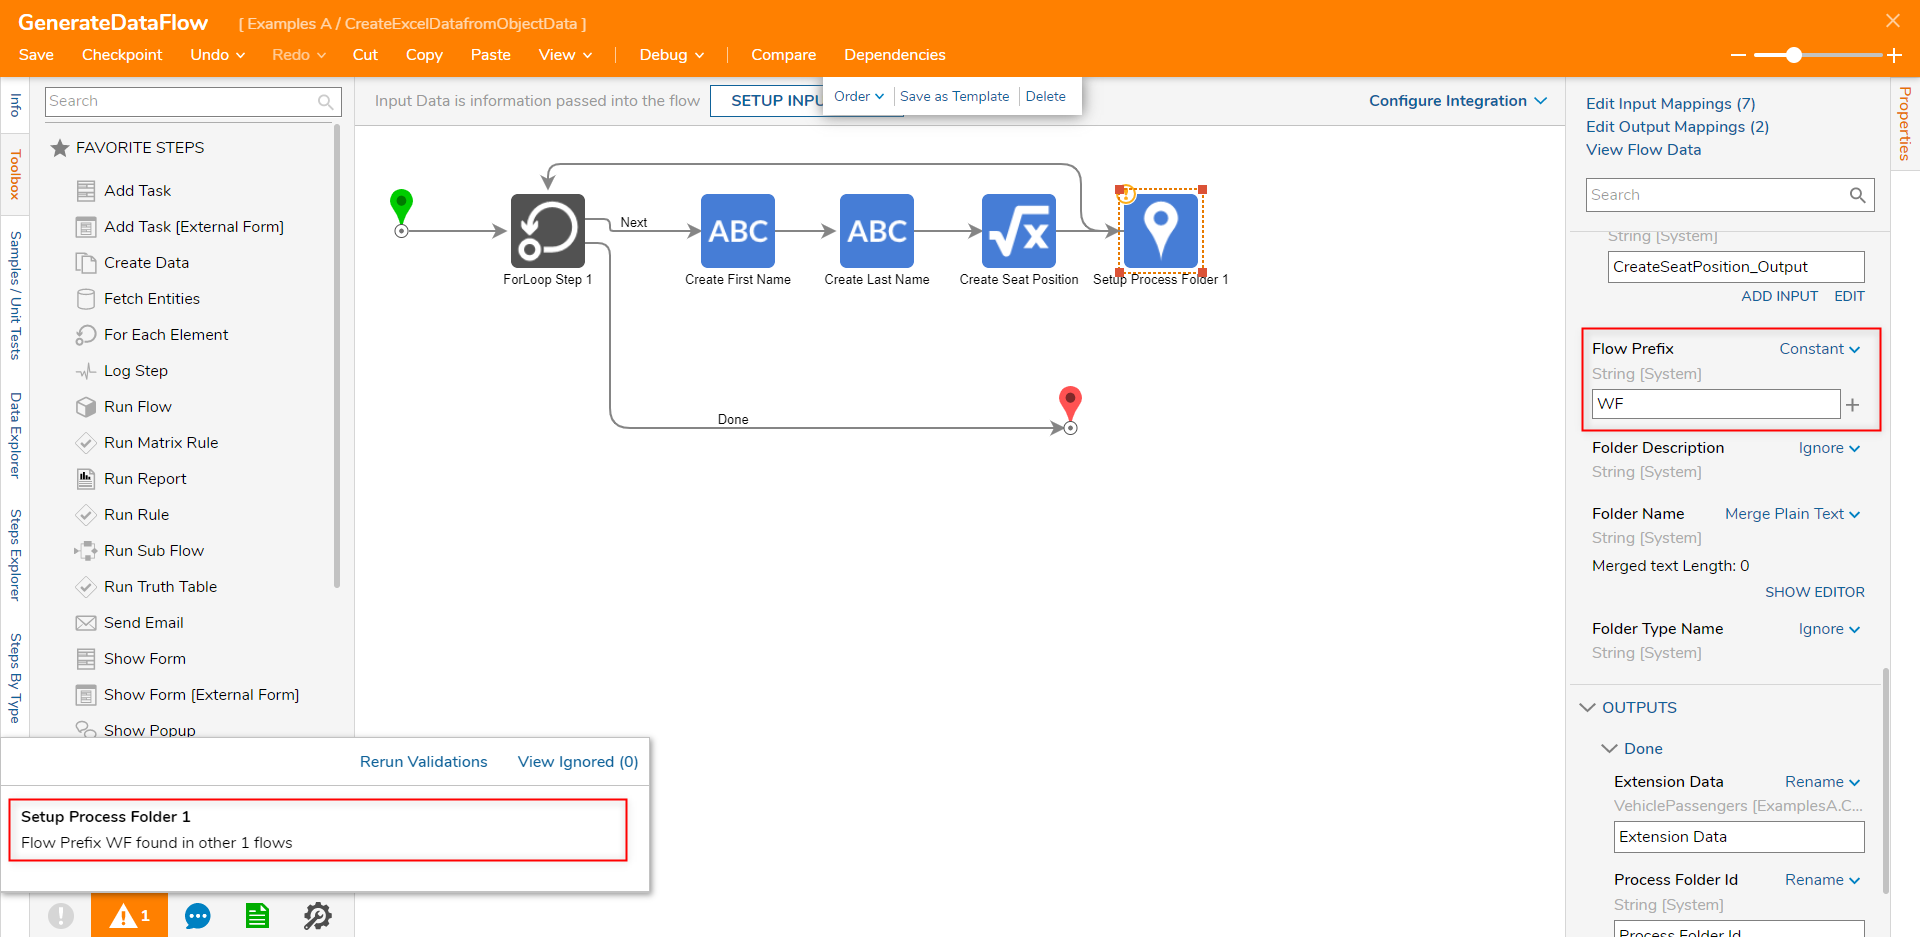
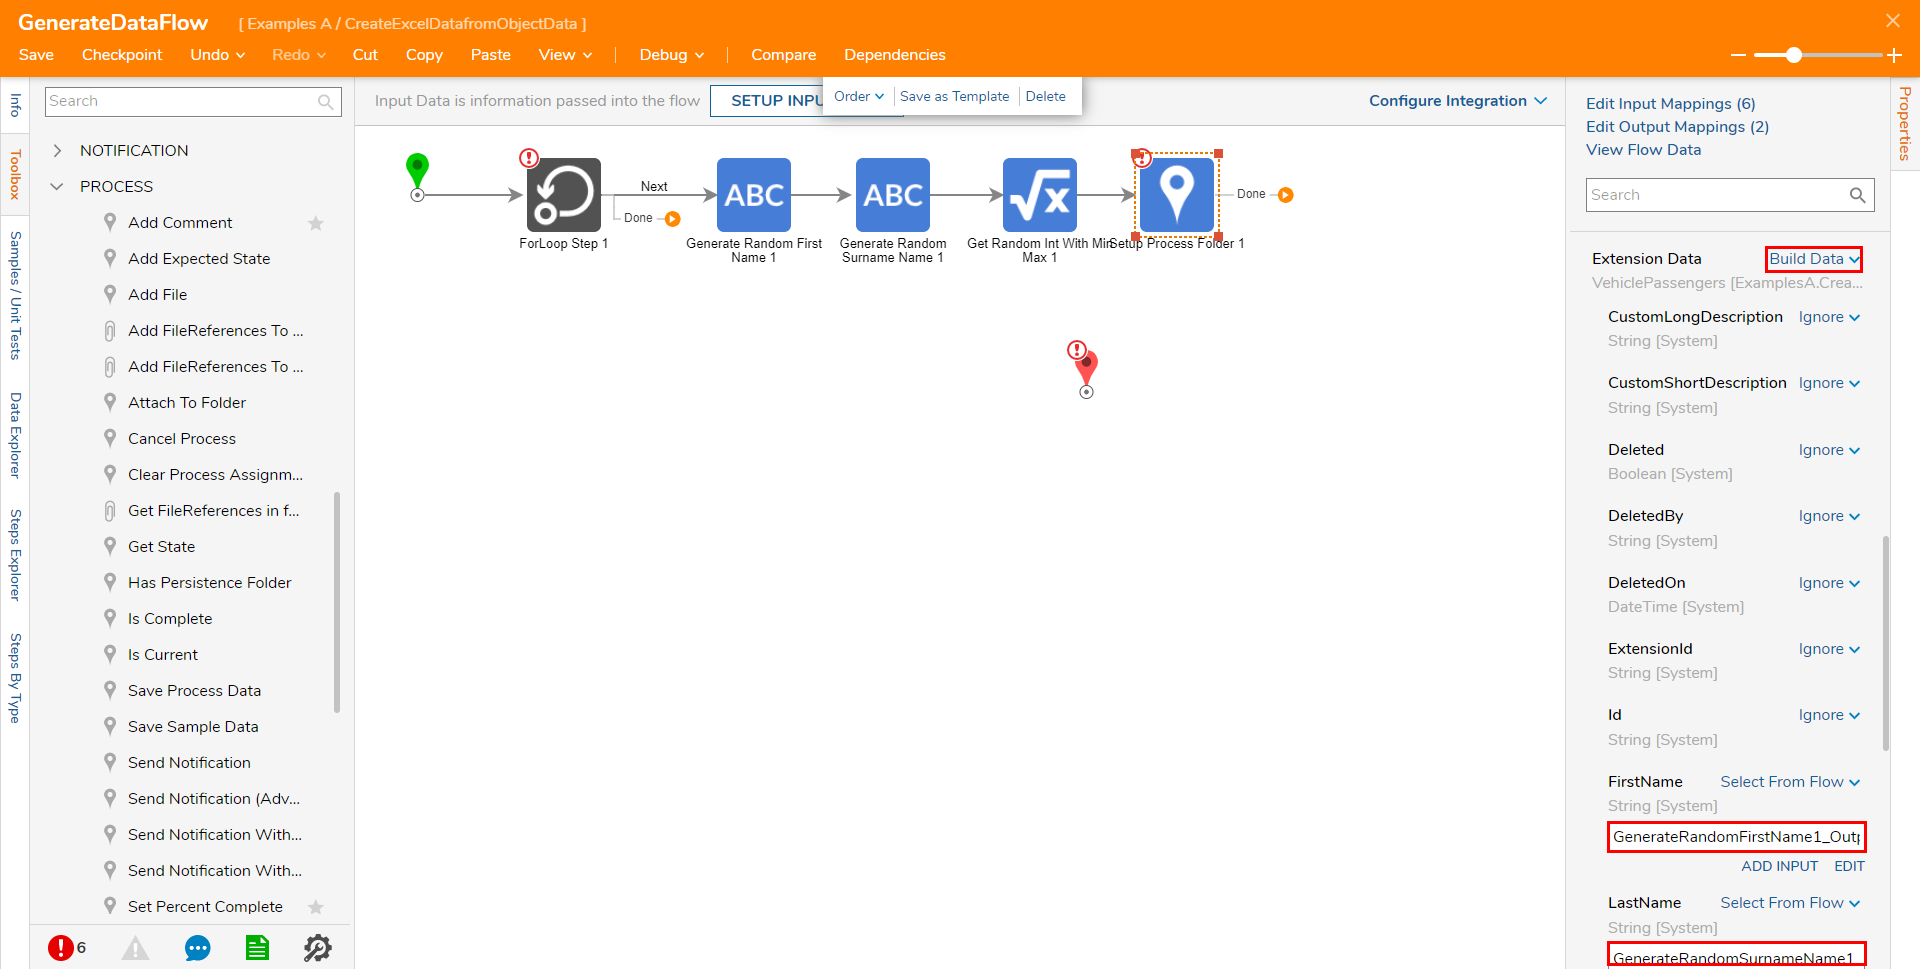
Scroll to INPUTS, and change the mapping for Extension Data to Build Data; map FirstName, LastName, and SeatPosition to their respective INPUTS.
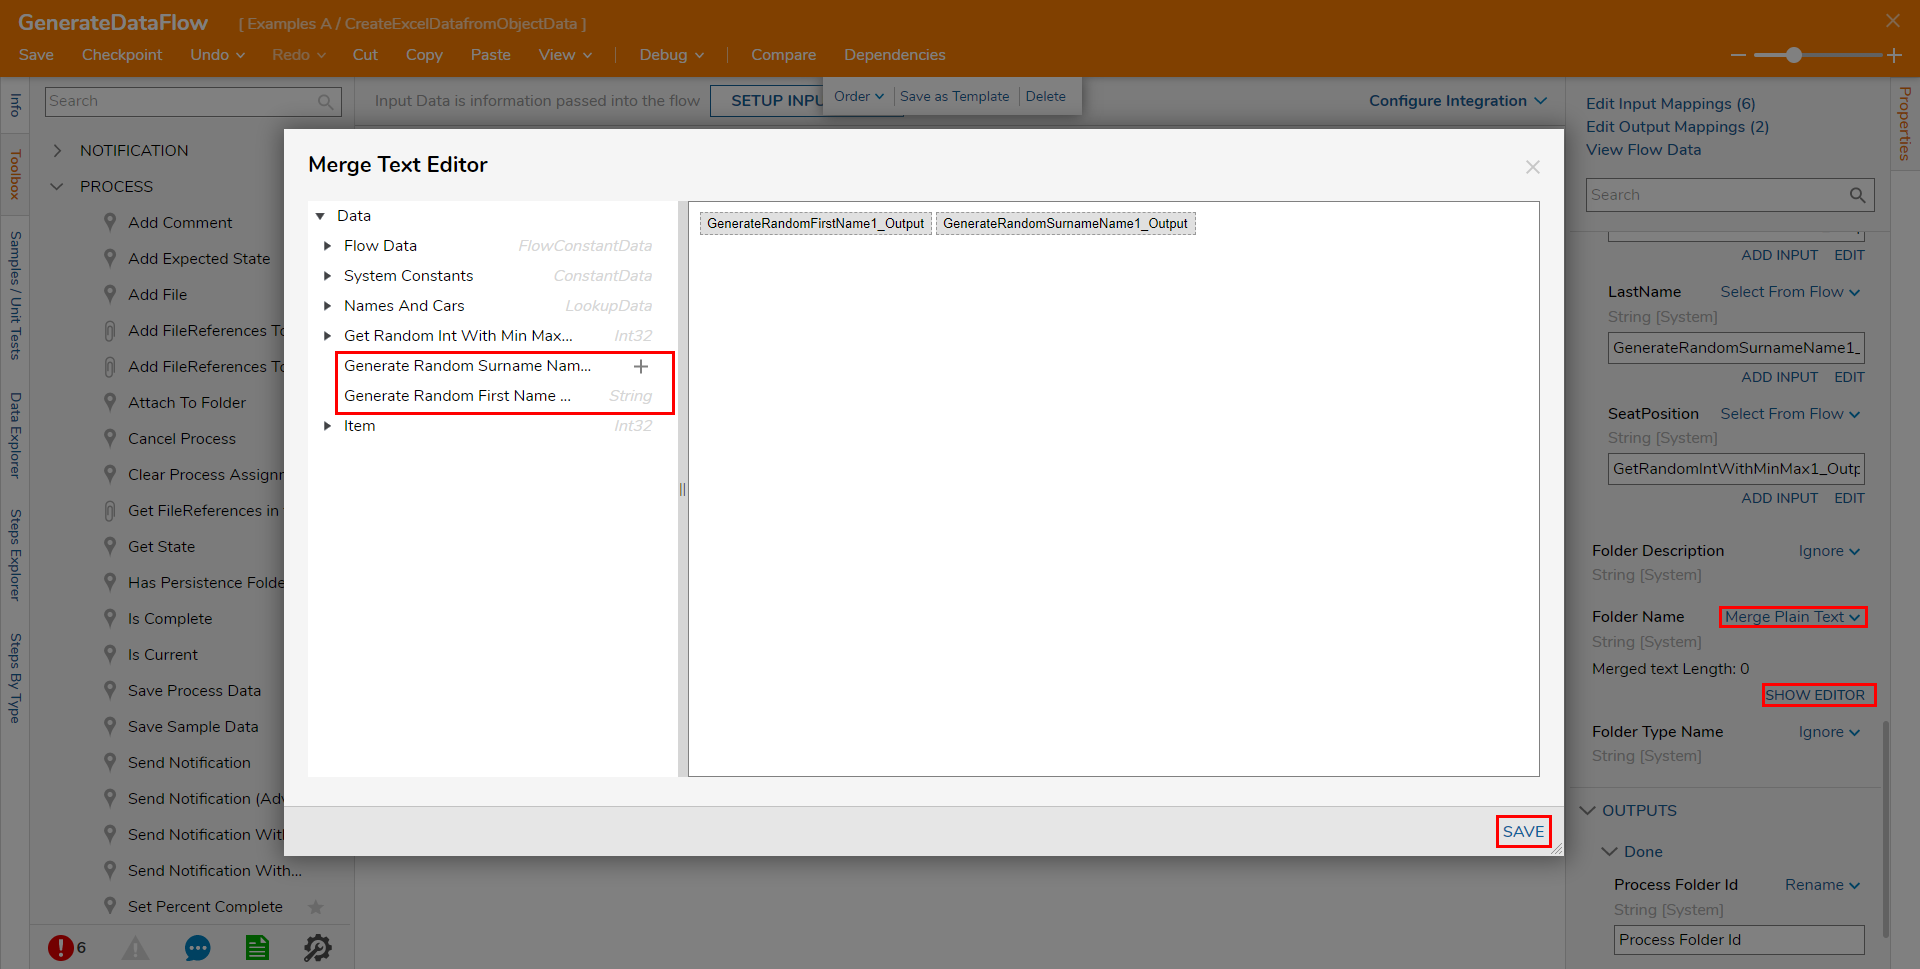
Set INPUTS > Folder Name to Merge Plain Text, then click SHOW EDITOR; define the Folder Name by adding GenerateRandomFirstName1_Output and GenerateRandomSurnameName1_Output, then click SAVE. Set Folder Description if desired, or change mapping to Ignore.
Connect the Done path of the Setup Process Folder step to the ForLoop Step, then connect the ForLoop Step to the End step.
Save the Flow then close via X.


Debug: Generate Data for Example
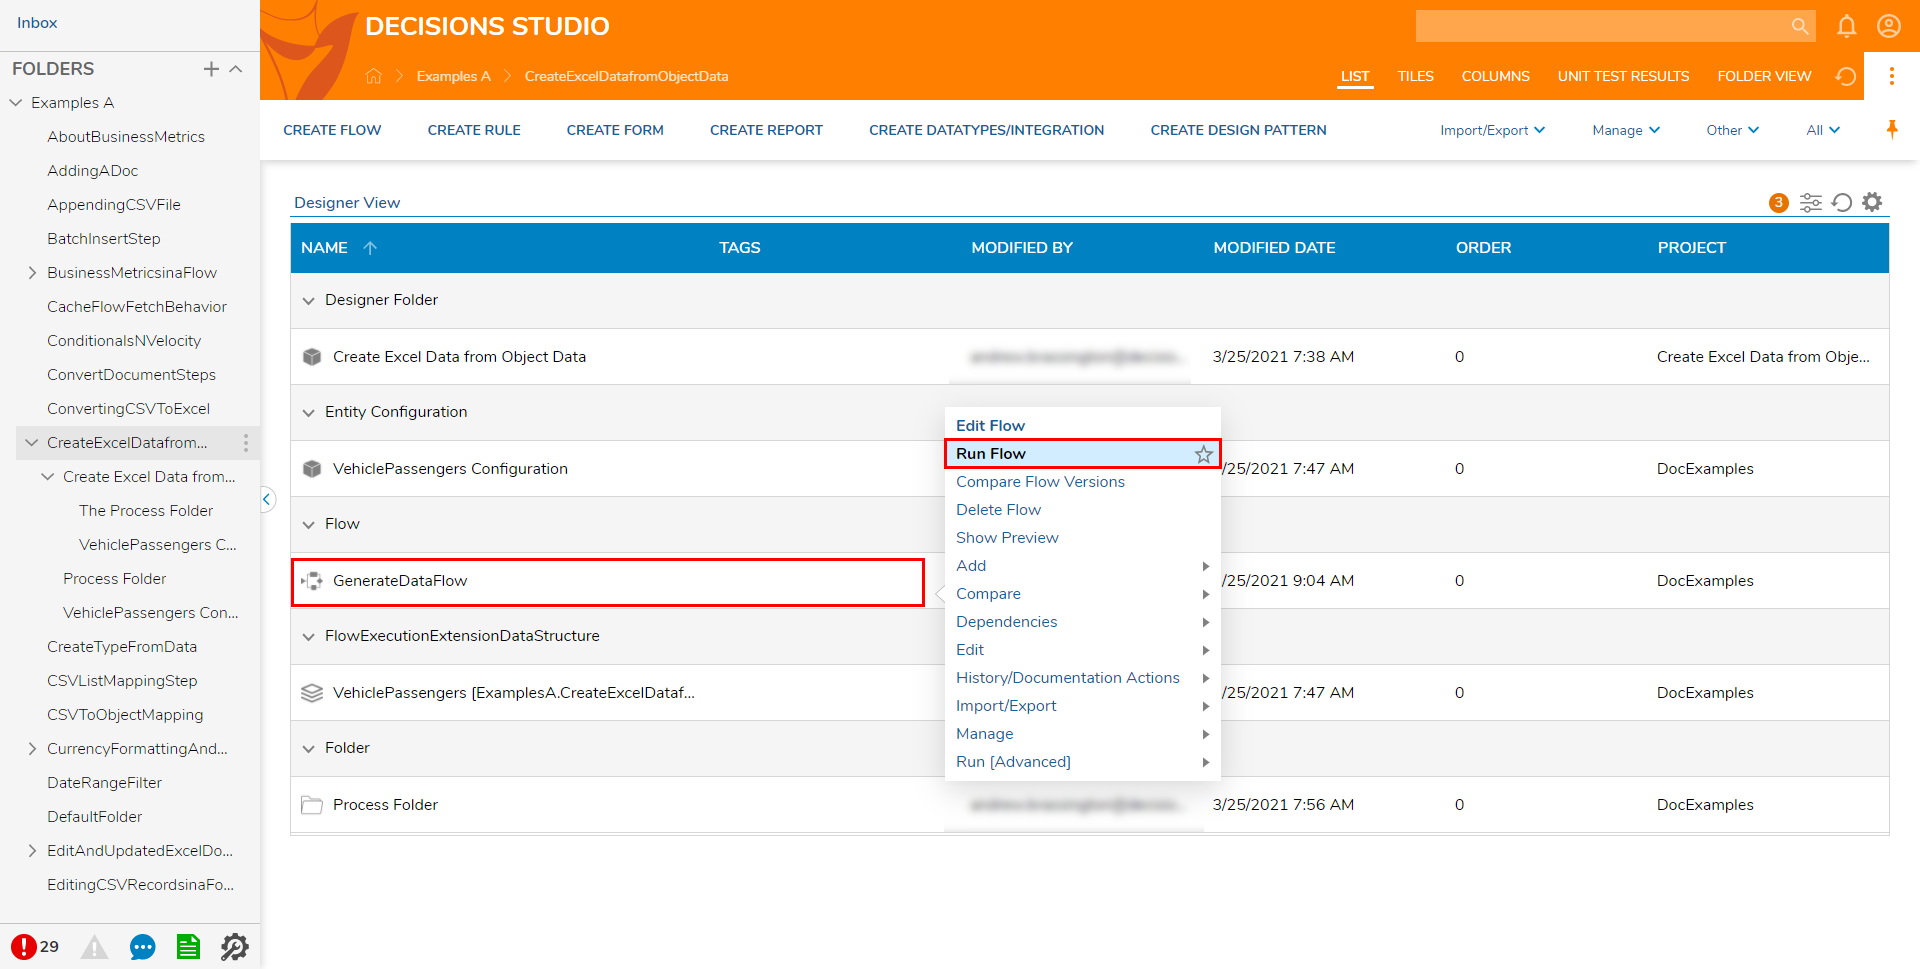
- From the Designer Project containing the example Flow, right-click the Flow and select Run Flow.
- After the Flow runs, navigate to the Process Folder. The Folder now contains 5 separate Folders that contain data that may be used as Input for a CSV file.


Create Data Objects from Excel Data
The following details how to create a Flow that utilizes the generated Process Data as data on a CSV spreadsheet.
- From the same Designer Project, CREATE a new Flow.
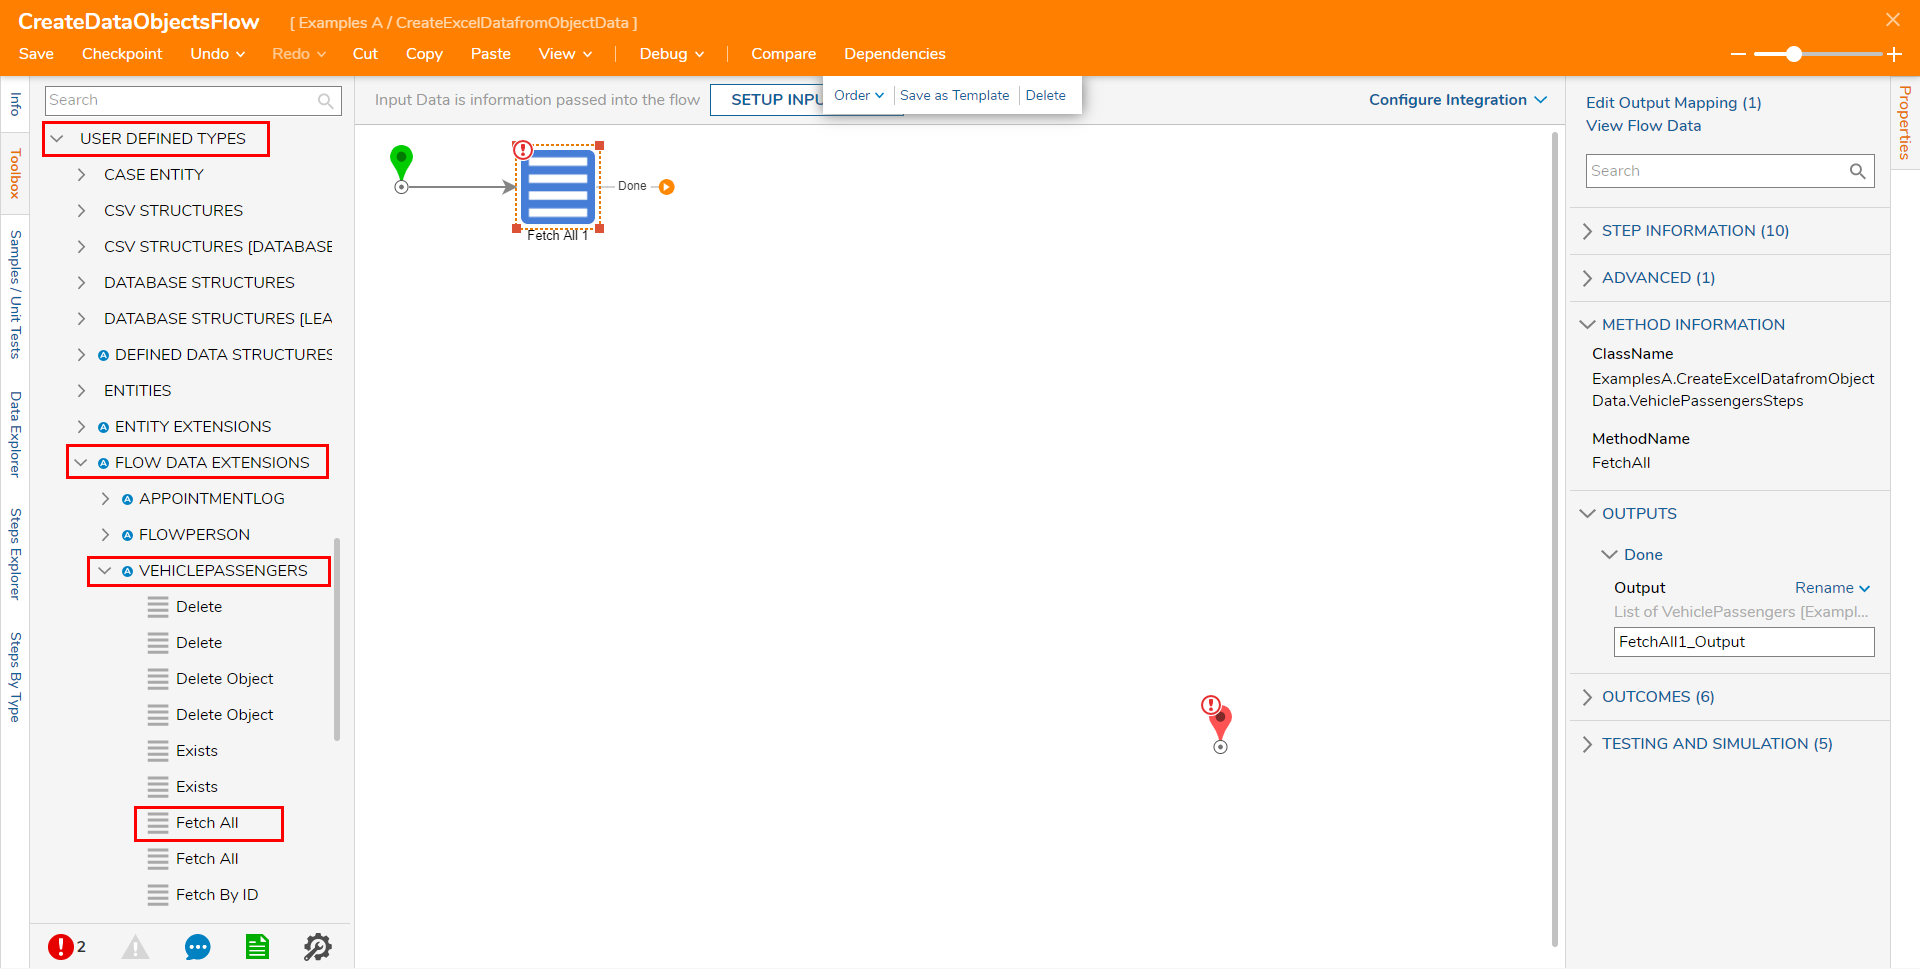
- From Toolbox > USER DEFINED TYPES > FLOW DATA EXTENSIONS > VEHICLEPASSENGERS, attach a Fetch All step to the Start step.
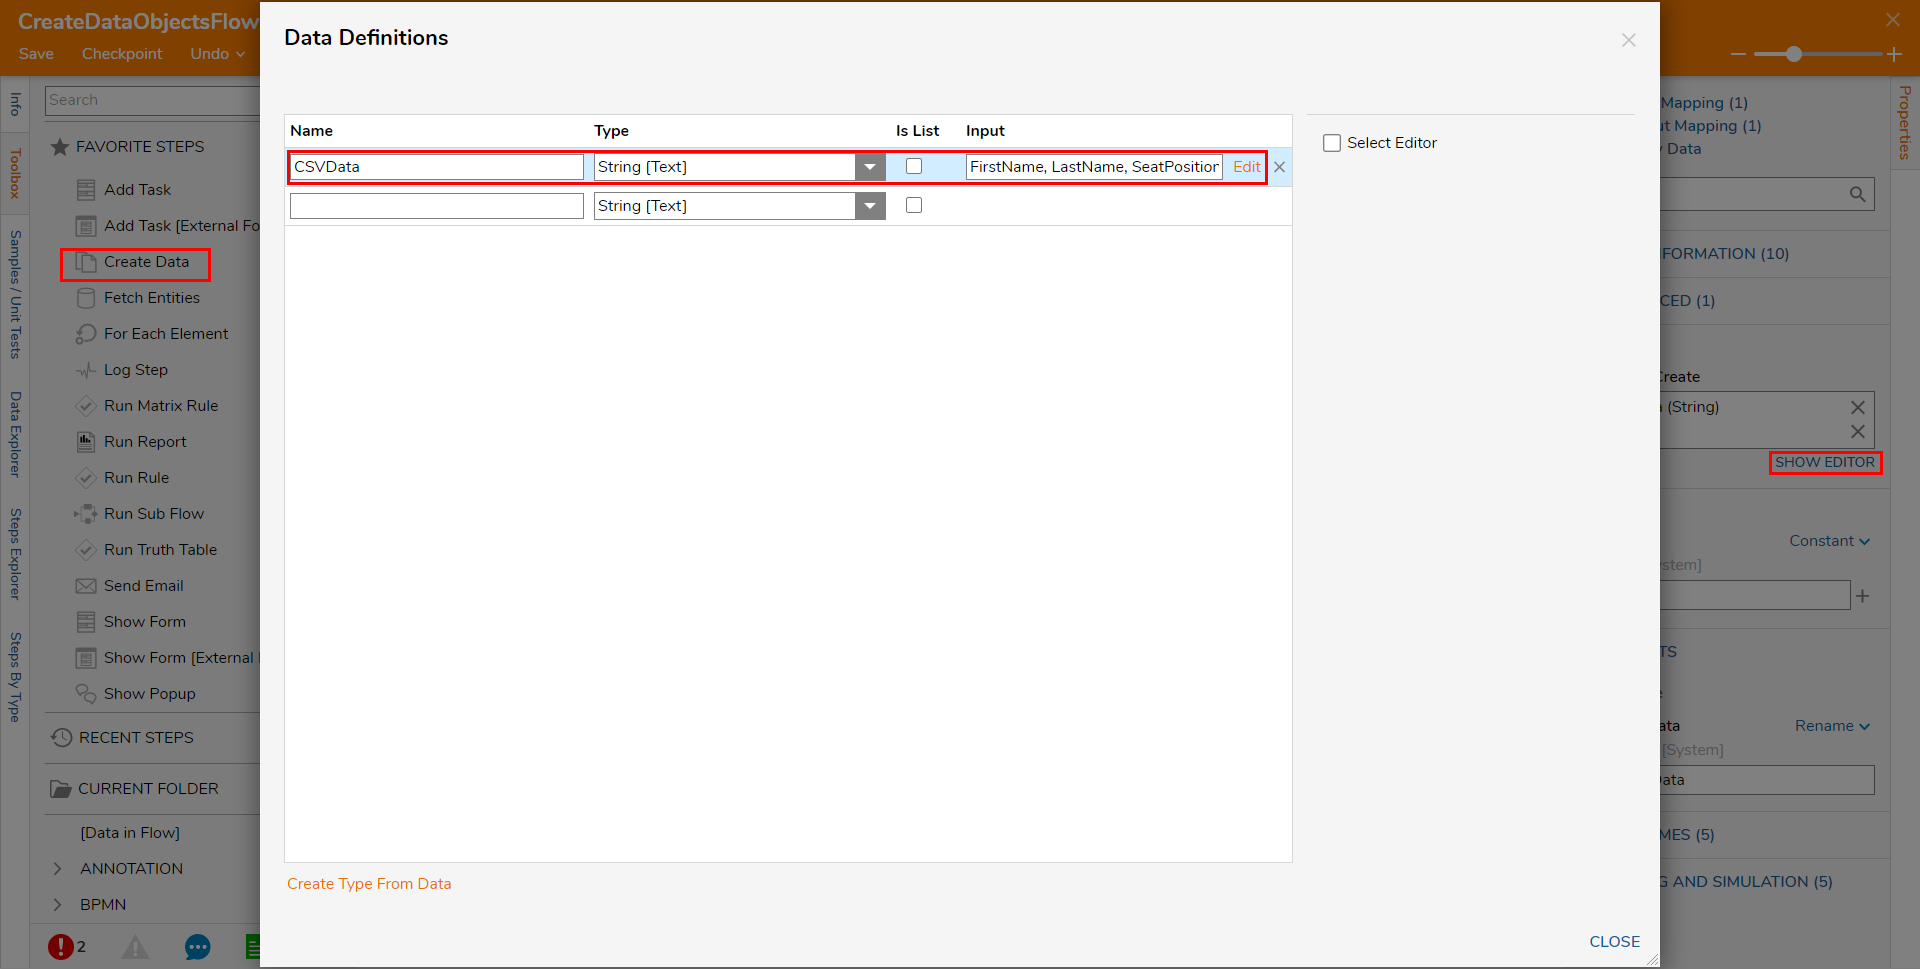
- From Toolbox > FAVORITE STEPS, attach a Create Data step to the Fetch All step; from its Properties tab, click SHOW EDITOR. Name the Data Definition "CSVData" and Constant map "FirstName, LastName, SeatPosition" to the Input. Click CLOSE to save the configuration.
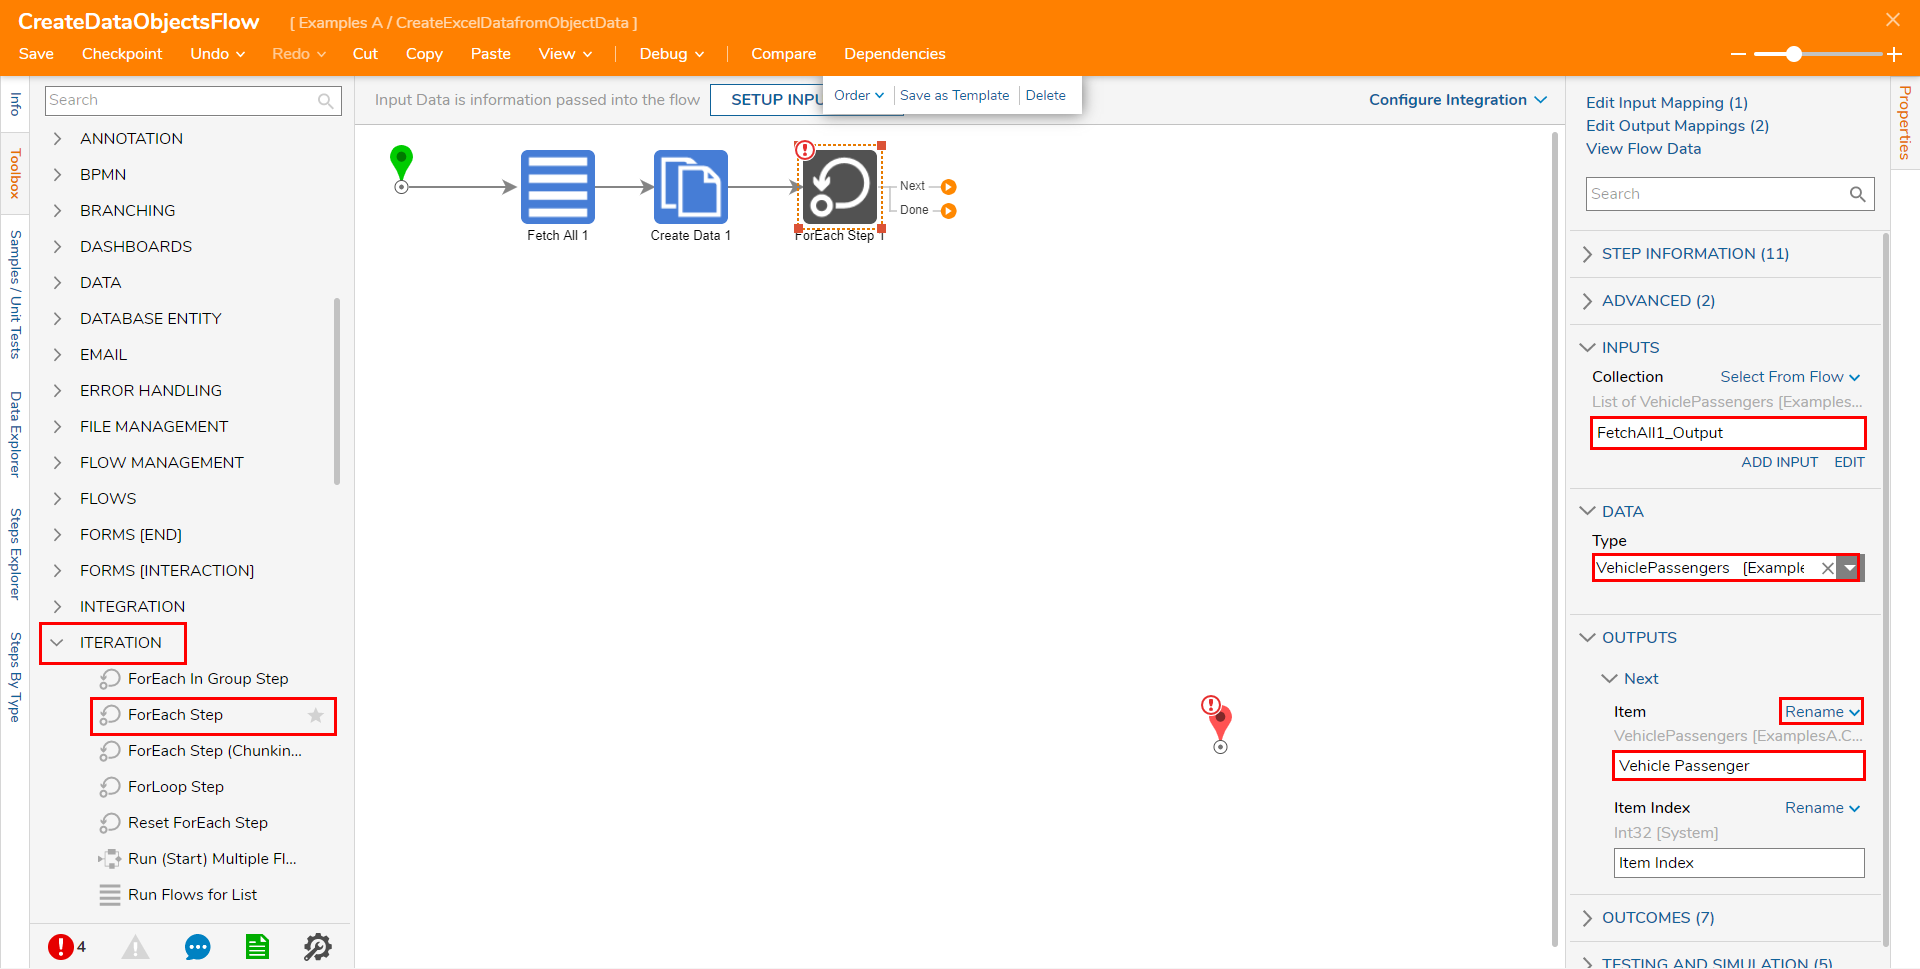
- Under Toolbox > ITERATION, attach a ForEach Step to the Create Data step. From the ForEach Step's Properties, map FetchAll1_Output to Collection; then, under DATA > Type, select VehiclePassengers. Under OUTPUTS > Next, Rename the Item to "Vehicle Passenger".
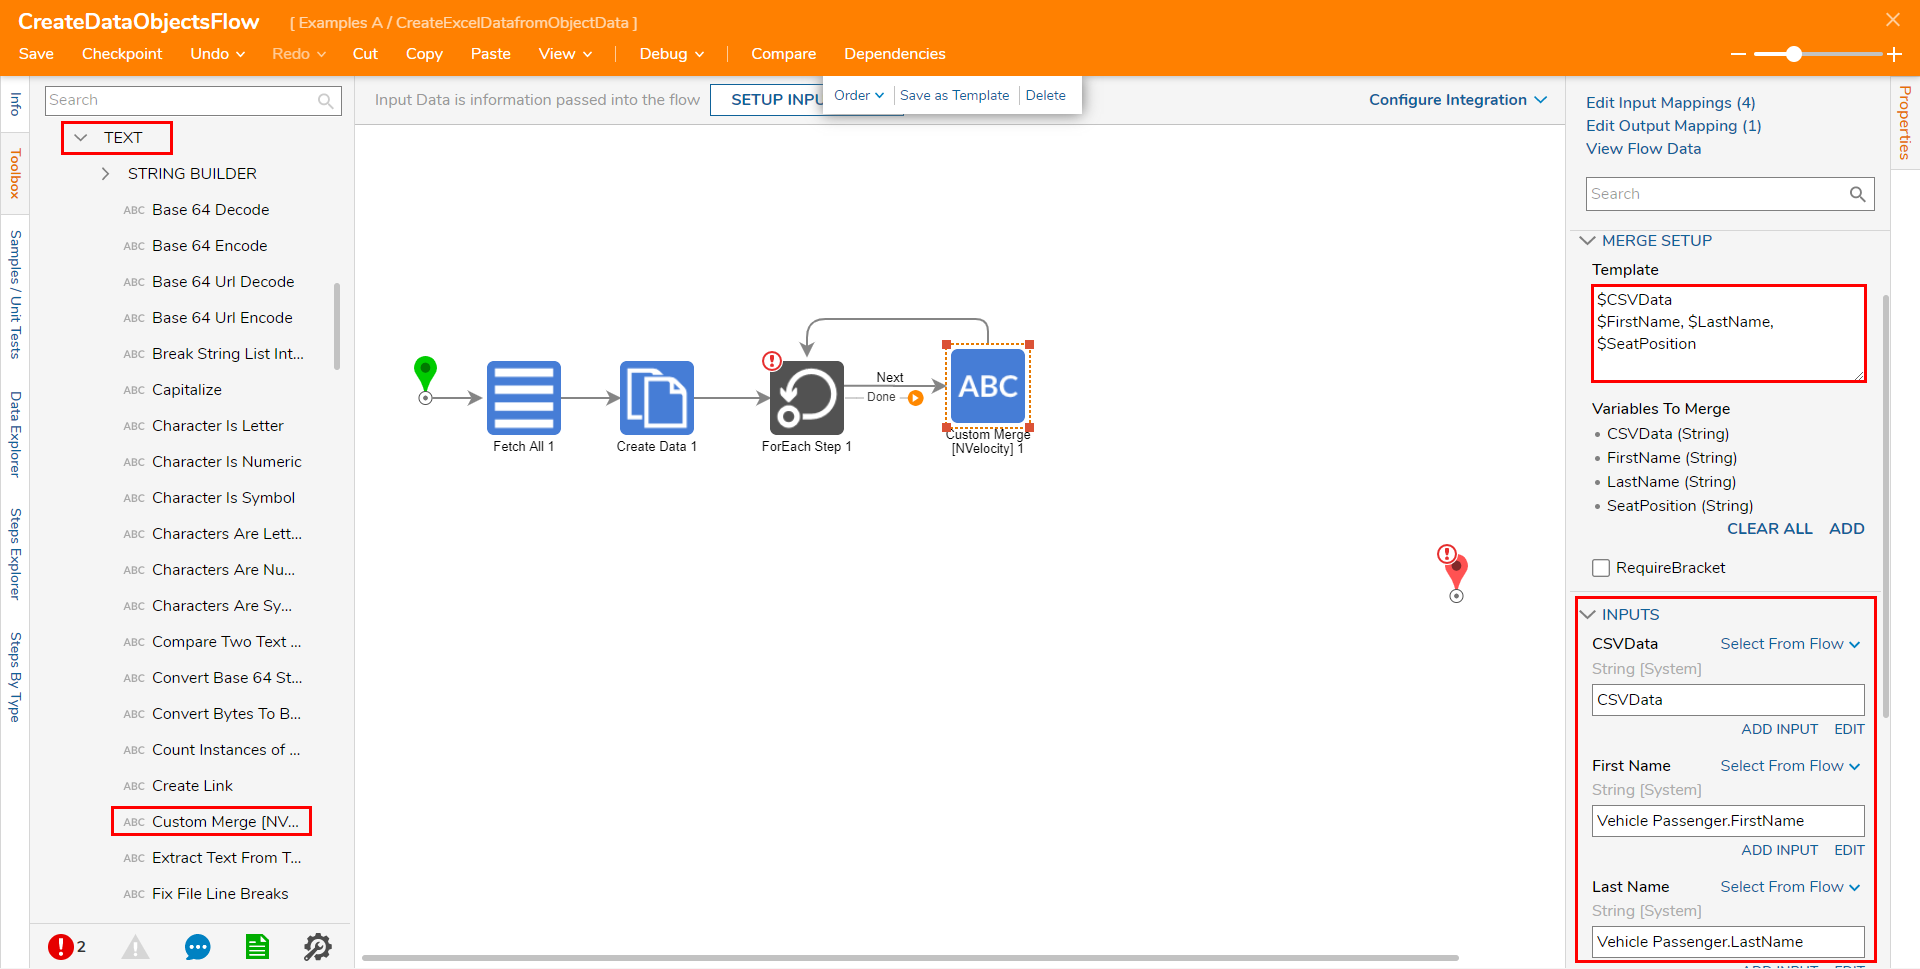
- Attach a Custom Merge [NVelocity] step from the DATA > TEXT category of the Toolbox tab, to the Next path of the ForEach Step.
- From the Custom Merge step's Properties, under MERGE SETUP > Template, define custom variables, using $ to make each item dynamic; create items for CSVData, FirstName, LastName, and SeatPosition.
- Map CSVData to its respective INPUT, then map Vehicle Passenger.FirstName to First Name, Vehicle Passenger.LastName to Last Name, and Vehicle Passenger.SeatPosition to Seat Position. Connect the Done path of the Custom Merge step to the ForEach Step.
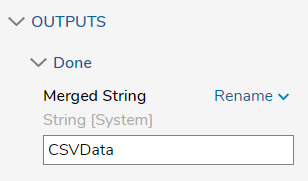
- Without leaving the Custom Merge step's Properties, Rename the value for OUTPUTS > Done > Merged String, "CSVData".
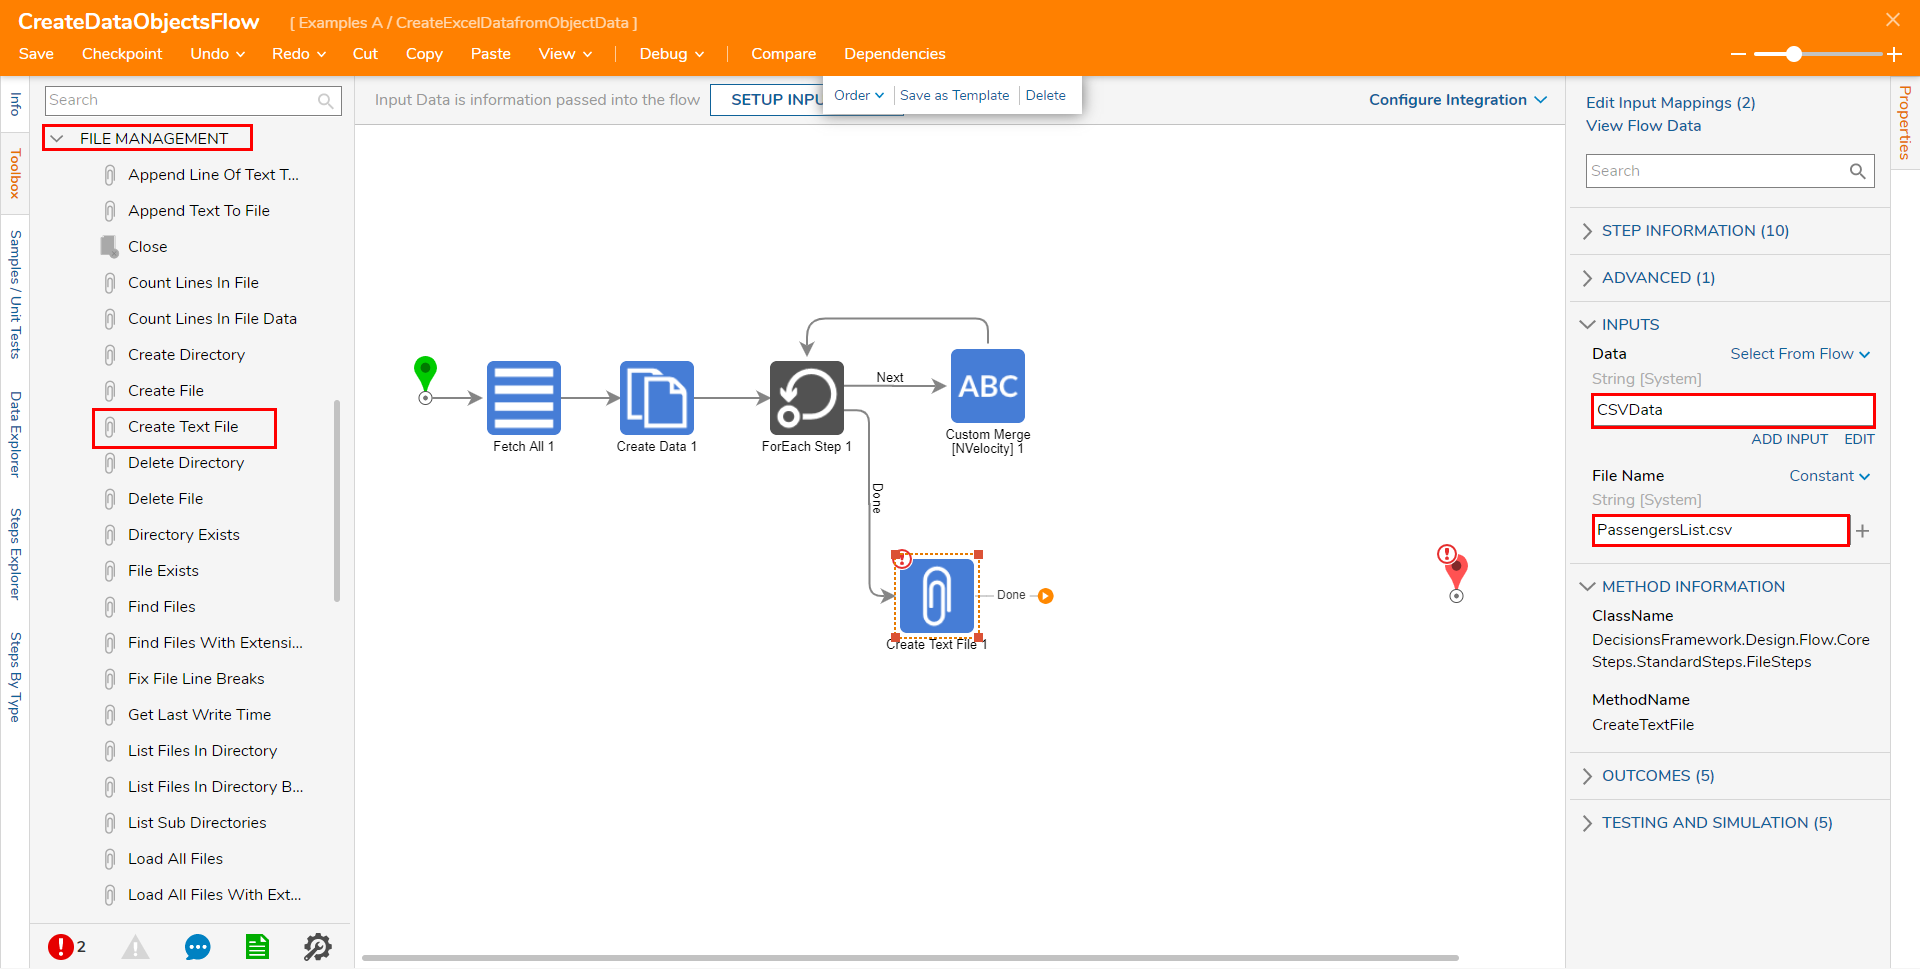
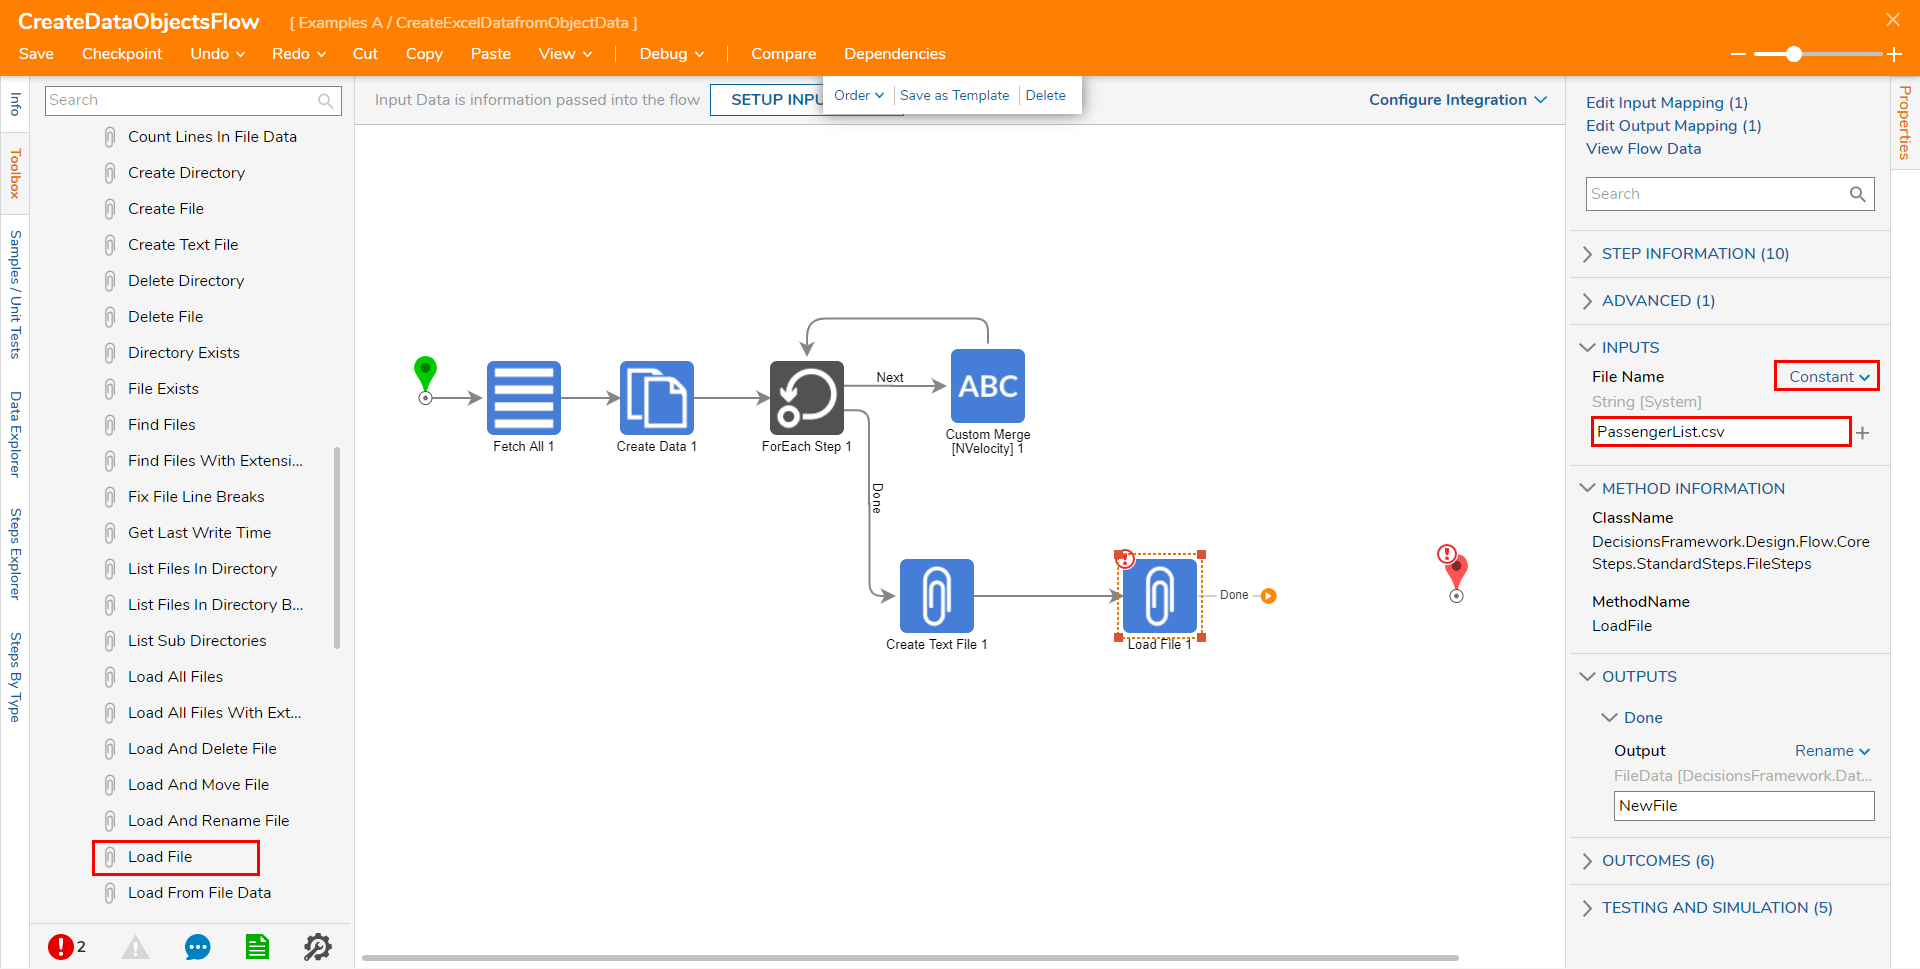
- From Toolbox > FILE MANAGEMENT attach a Create Text File step to the Done path of the ForEach Step. From the newly added step's Properties, map CSVData to Data and Constant map "PassengersList.csv" to File Name.
- From the same Toolbox category, attach a Load File step to the Create Text File step. Constant map the same File Name used in the previous step. Rename the Output, "NewFile".
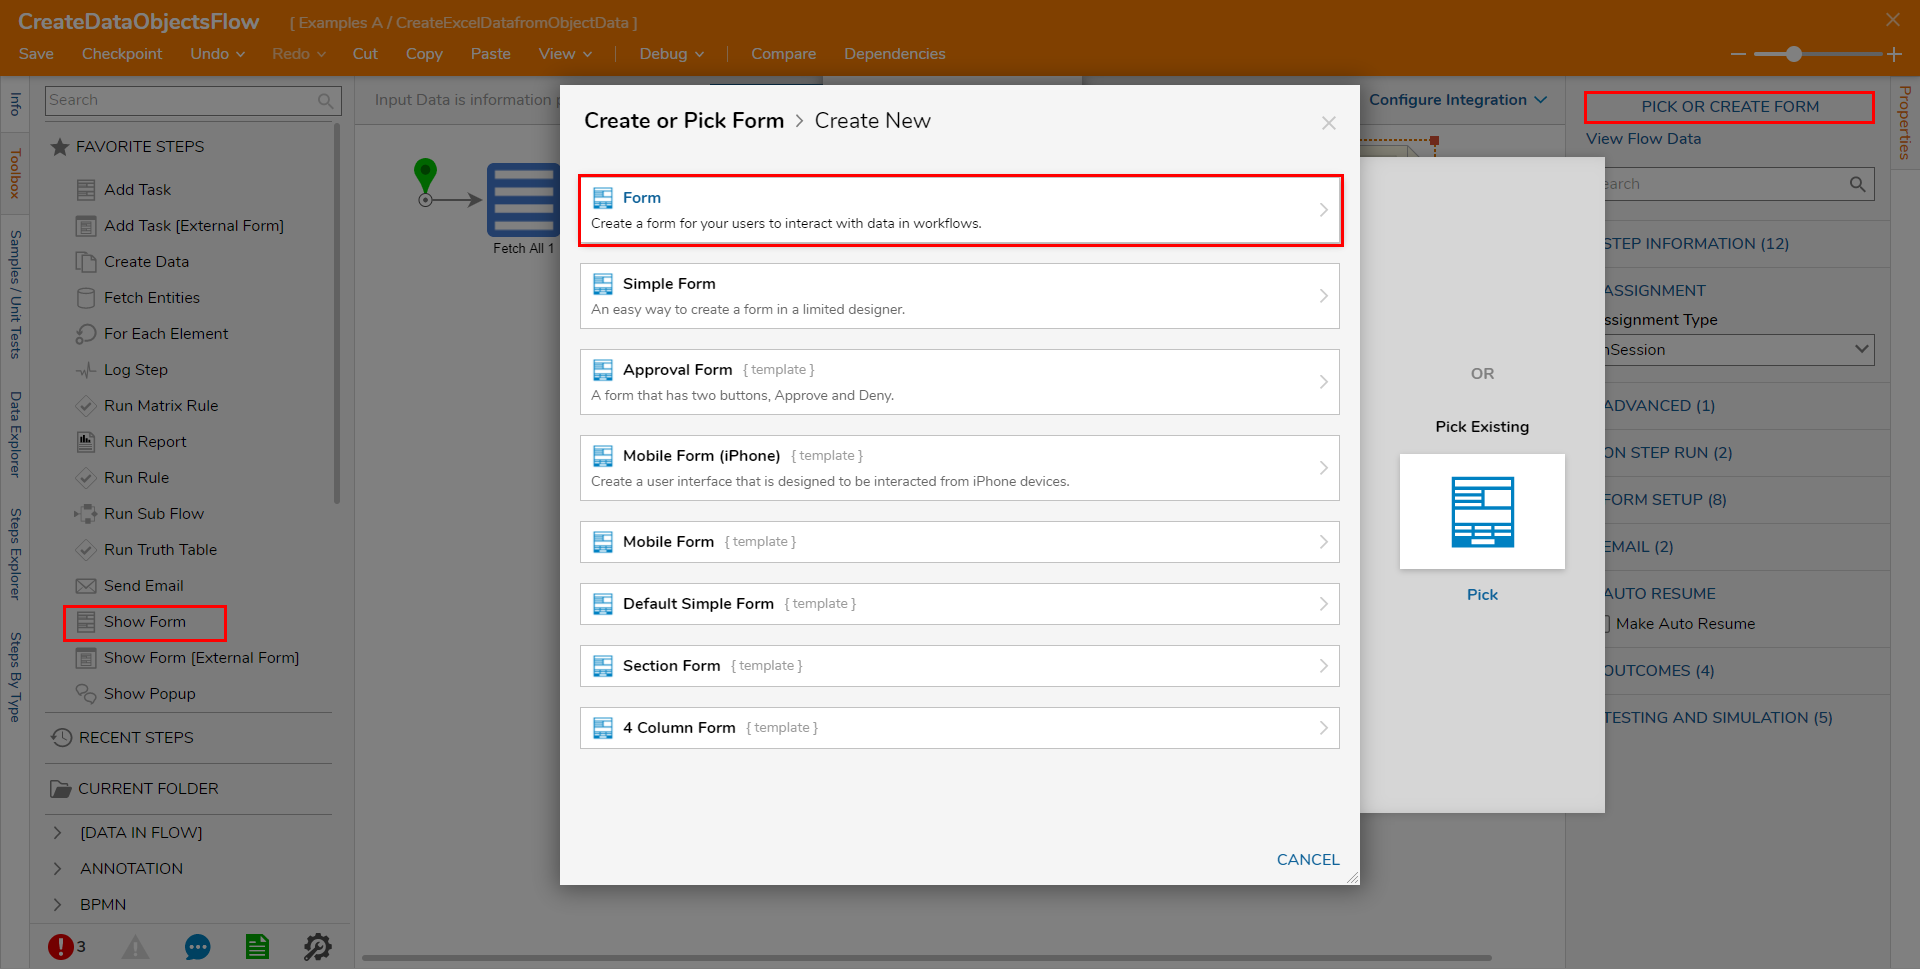
- Attach a Show Form step from the FAVORITE STEPS category to the Load File step, then click PICK OR CREATE FORM and CREATE a new Form.
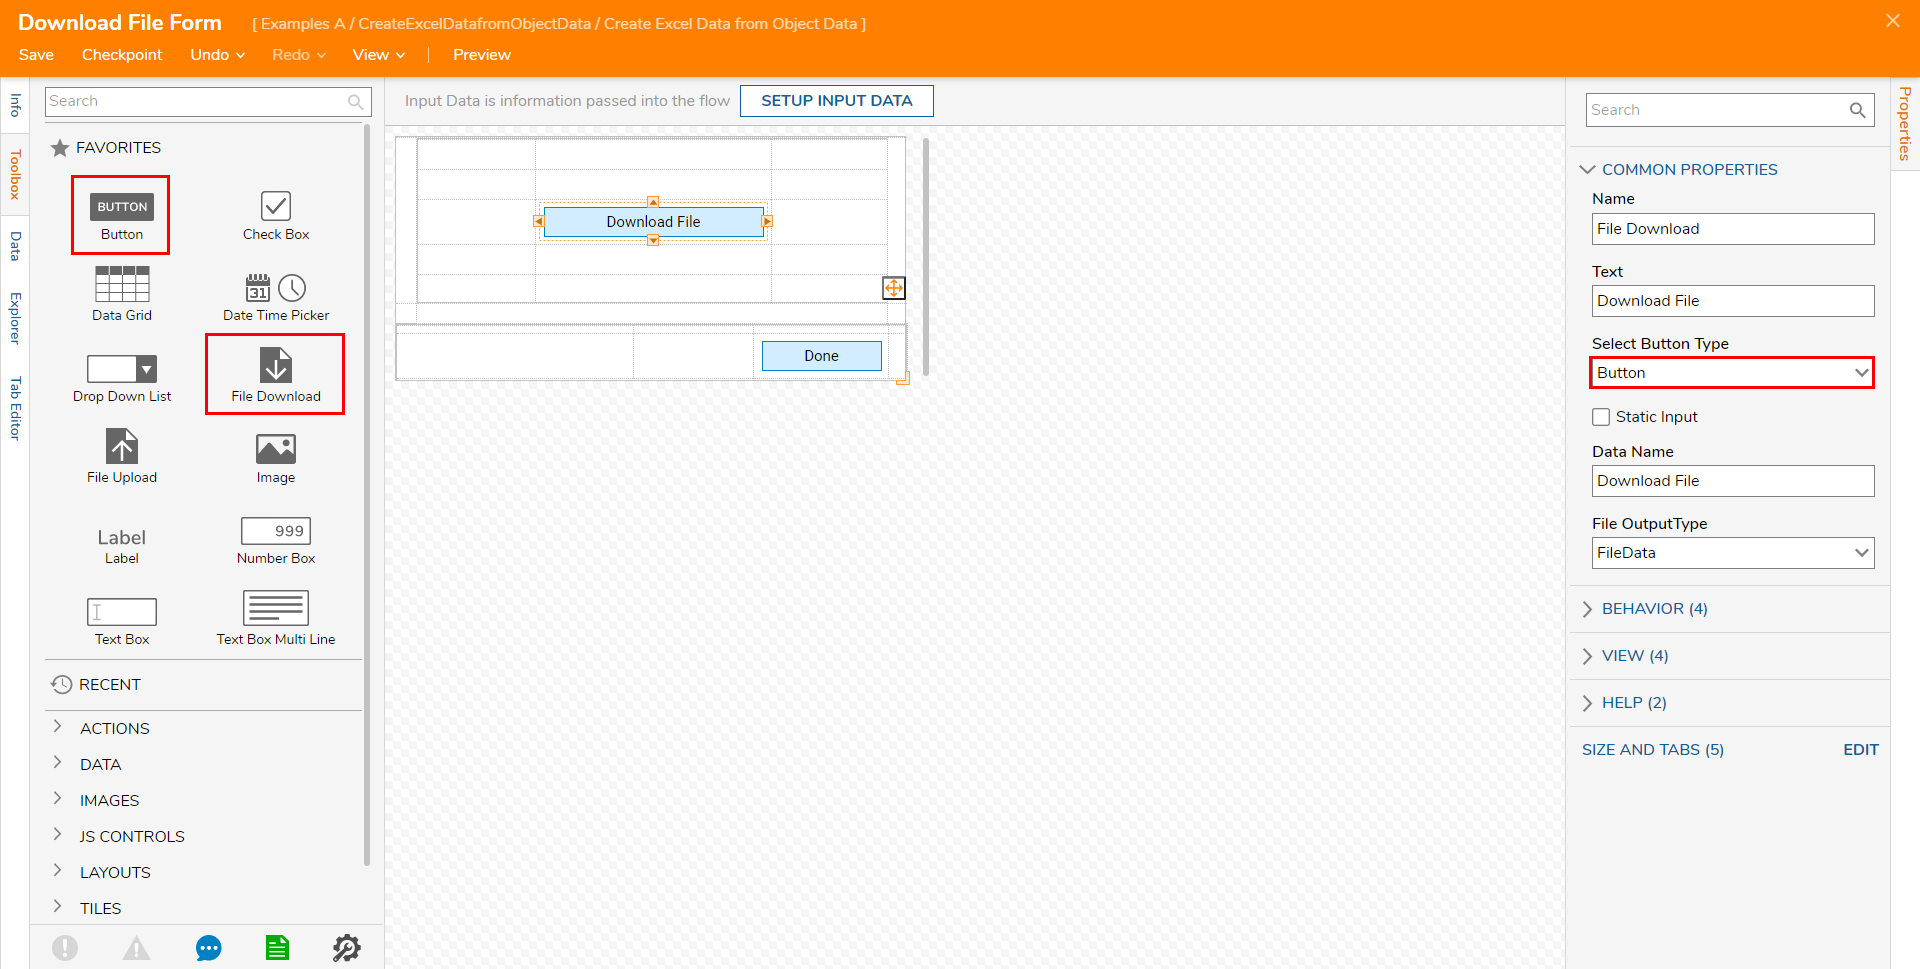
- From the Form Designer design a Form using a single Button, and a File Download component from the FAVORITES category. Navigate to the File Download component's Properties tab; under COMMON PROPERTIES > Select Button Type, select Button from the dropdown. Save and close the Form.
- Back in the Flow Designer, map New File to INPUTS > Download File on the Show Form step. Connect the Done path to the End step.
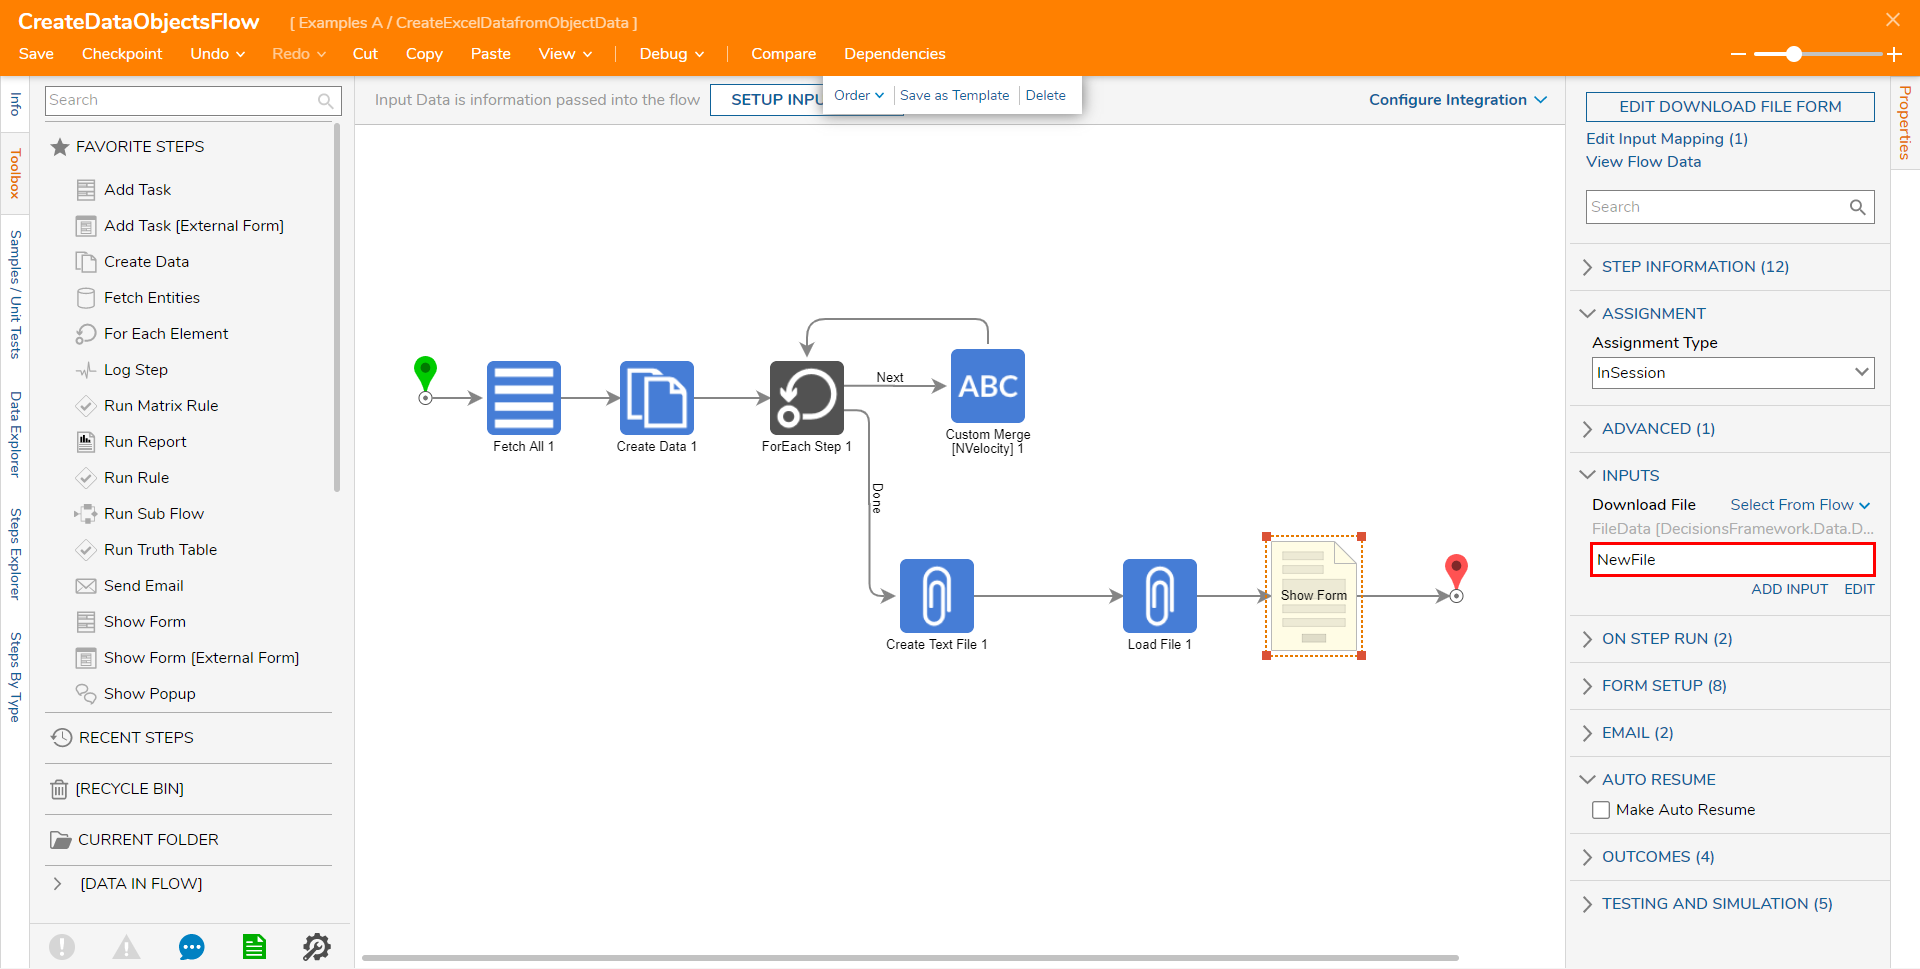
- Save the Flow, then if desired close via X.


Debug: Create Data Objects from Excel/CSV Data
- From the Flow Designer, select the Debug link from the top action bar.
- Click START DEBUGGING.
- When the Flow reaches the Form, click Download File.

- Open the downloaded Excel file to verify that it has correctly mapped the values from the Process Folder to the spreadsheet.


Was this article helpful?