Adding Outside Values to a Drop Down List
- 16 Feb 2022
- 2 Minutes to read
- Print
- DarkLight
Adding Outside Values to a Drop Down List
- Updated on 16 Feb 2022
- 2 Minutes to read
- Print
- DarkLight
Article Summary
Share feedback
Thanks for sharing your feedback!
Overview
In some instances, new/external string values may need to be added to a drop-down list. In a Form, drop-down list options can be created from several sources; these sources include populated data from workflows, specifying a static list directly in the Form Designer, or running a workflow to populate a list of choices. The following example will demonstrate how to add string values to a drop-down list.
Example
External Values not supported in Mobile Forms
Browser Forms only support this feature.
- Begin by navigating to a Designer Project, click CREATE FLOW from the Global Action Bar.
- In the Create Flow window, select and name the default Flow, then click CREATE.

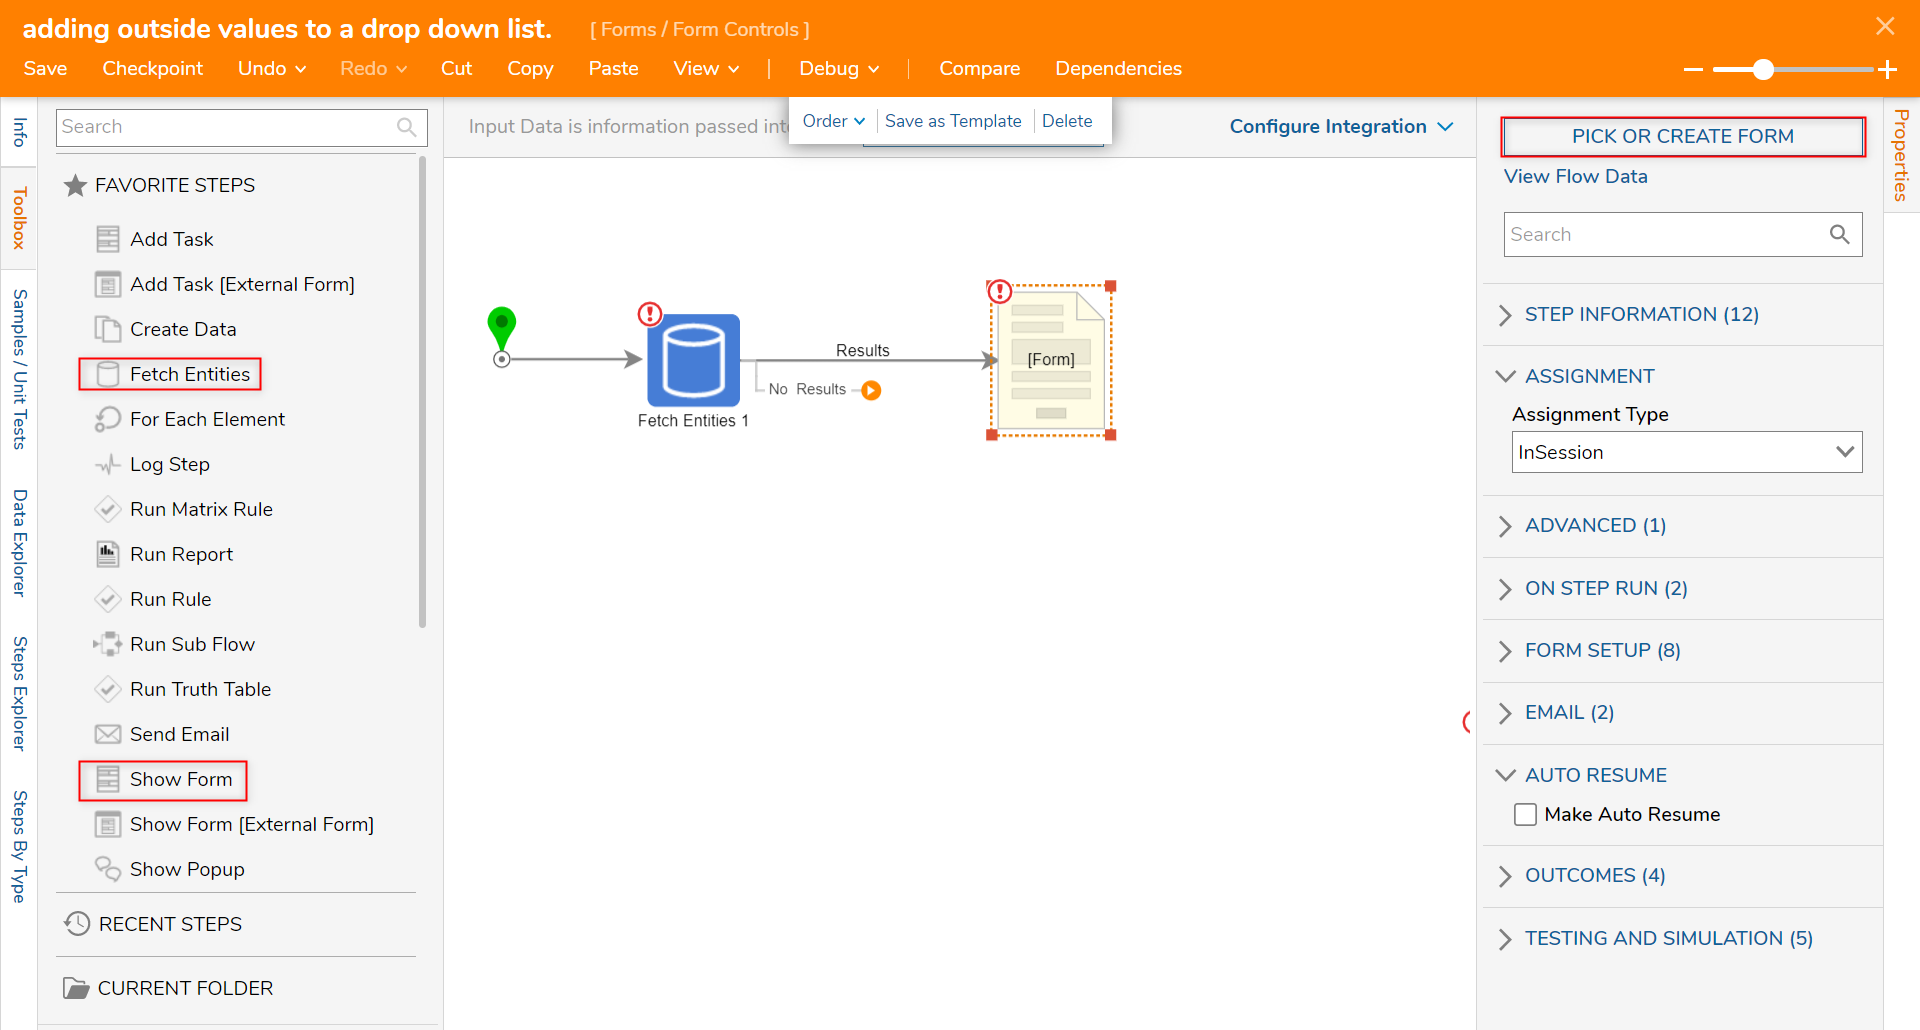
- In the Flow Designer, from the Toolbox > FAVORITE STEPS section, drag and connect a Fetch Entities step to the Start step.
- Next, connect the Results outcome of the Fetch Entities step to a Show Form step.
- In the Properties panel of the Show Form step, select PICK OR CREATE FORM.
- In the Create or Pick Form window, under Create New click CREATE.
- In the resulting window, name the Form, then click CREATE.
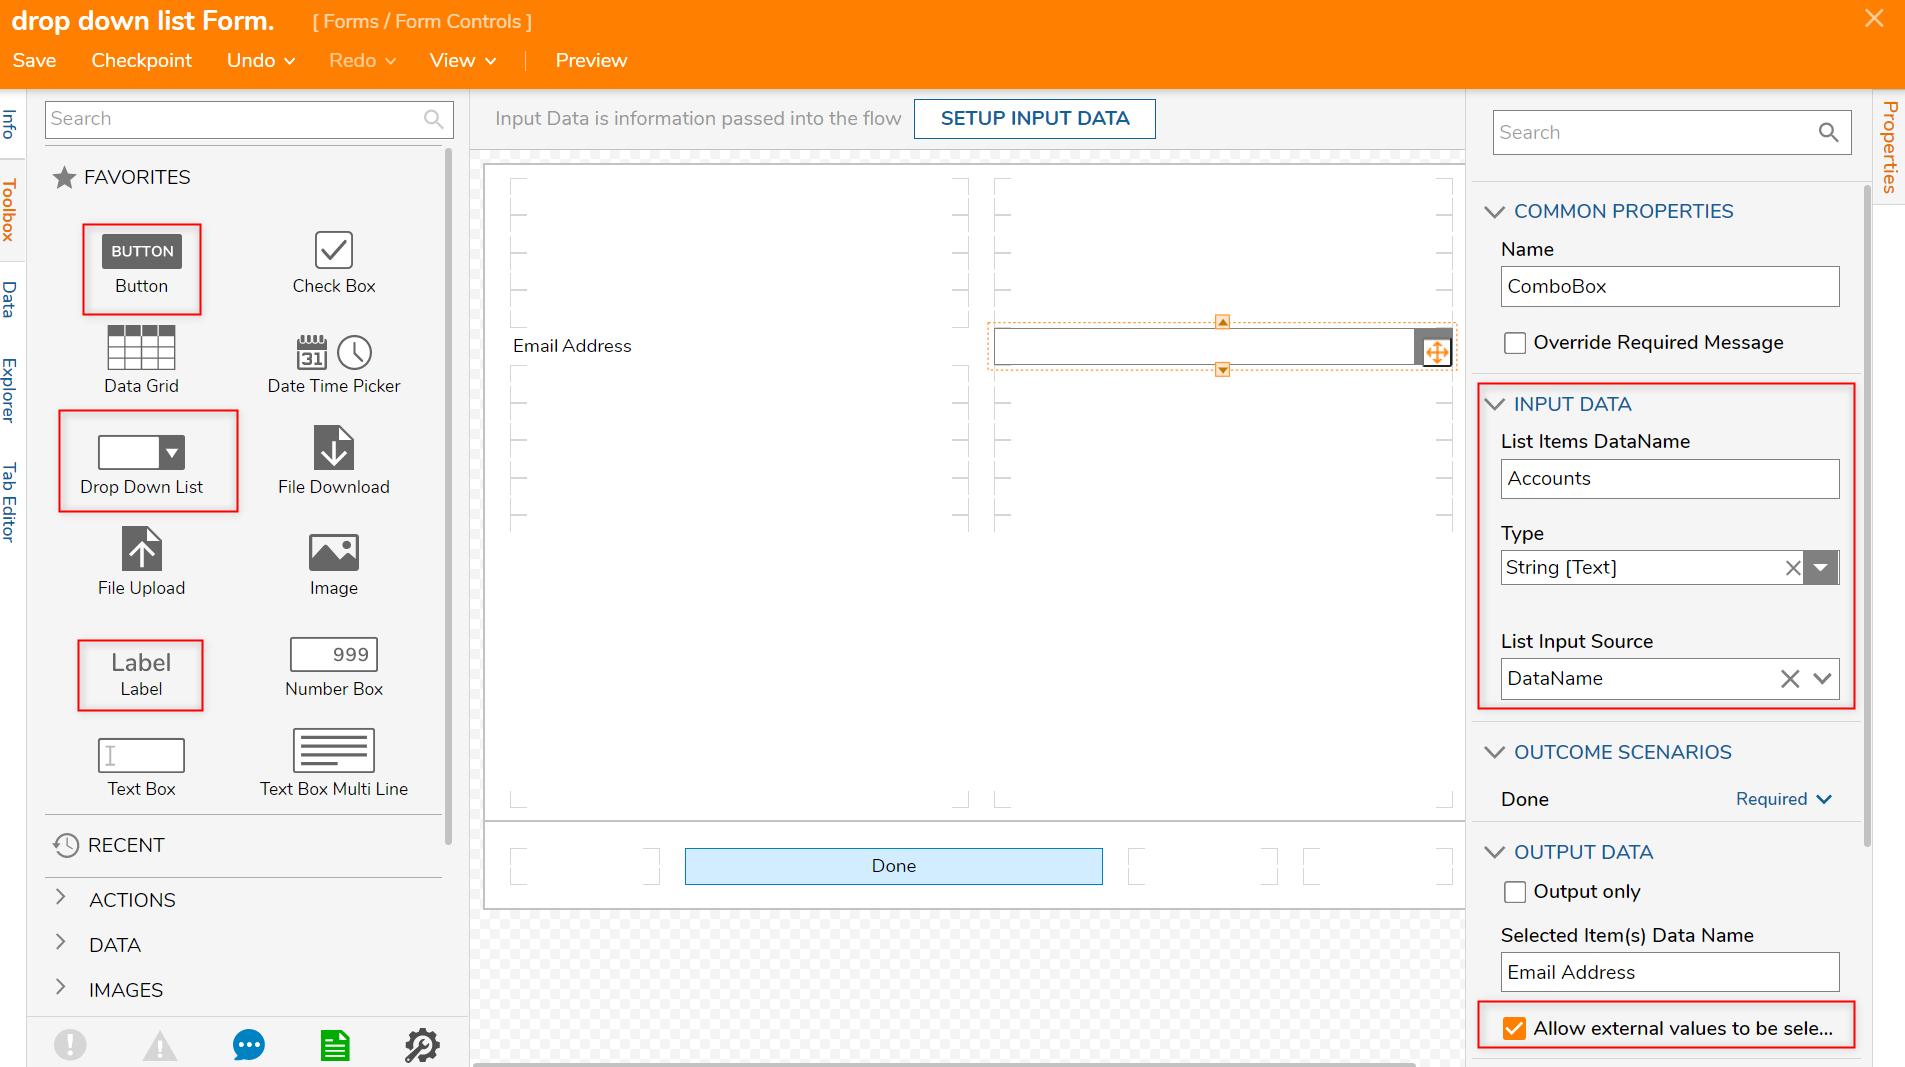
- In the Form Designer, add a Button [Done], Label [Email Address], and a corresponding Drop Down List component from the Toolbox > FAVORITES section.
- With the Drop Down List component selected, navigate to the Properties panel > INPUT DATA > Type menu and change the type to String [Text].The option to add external values is only supported for String lists, not complex types (e.g. data structures).
- Locate the List Input Source menu and select DataName.
- Once the List Items DataName field appears, enter a name for the items in the drop-down list.
- Enable the Allow external values to be selected boolean.
- Save and close the Form Designer.
- In the Flow Designer, select the Fetch Entities step and set Type Name under Entity Fetch Definition to Account.
- Select the Show Form step and set the list of String Accounts to a Select From Flow input mapping and select the AllAccounts.All EmailAddress in the resulting window.The Entity Results outcome in this example has been renamed to AllAccounts for clarity.
- Set the Email Address input to Ignore.

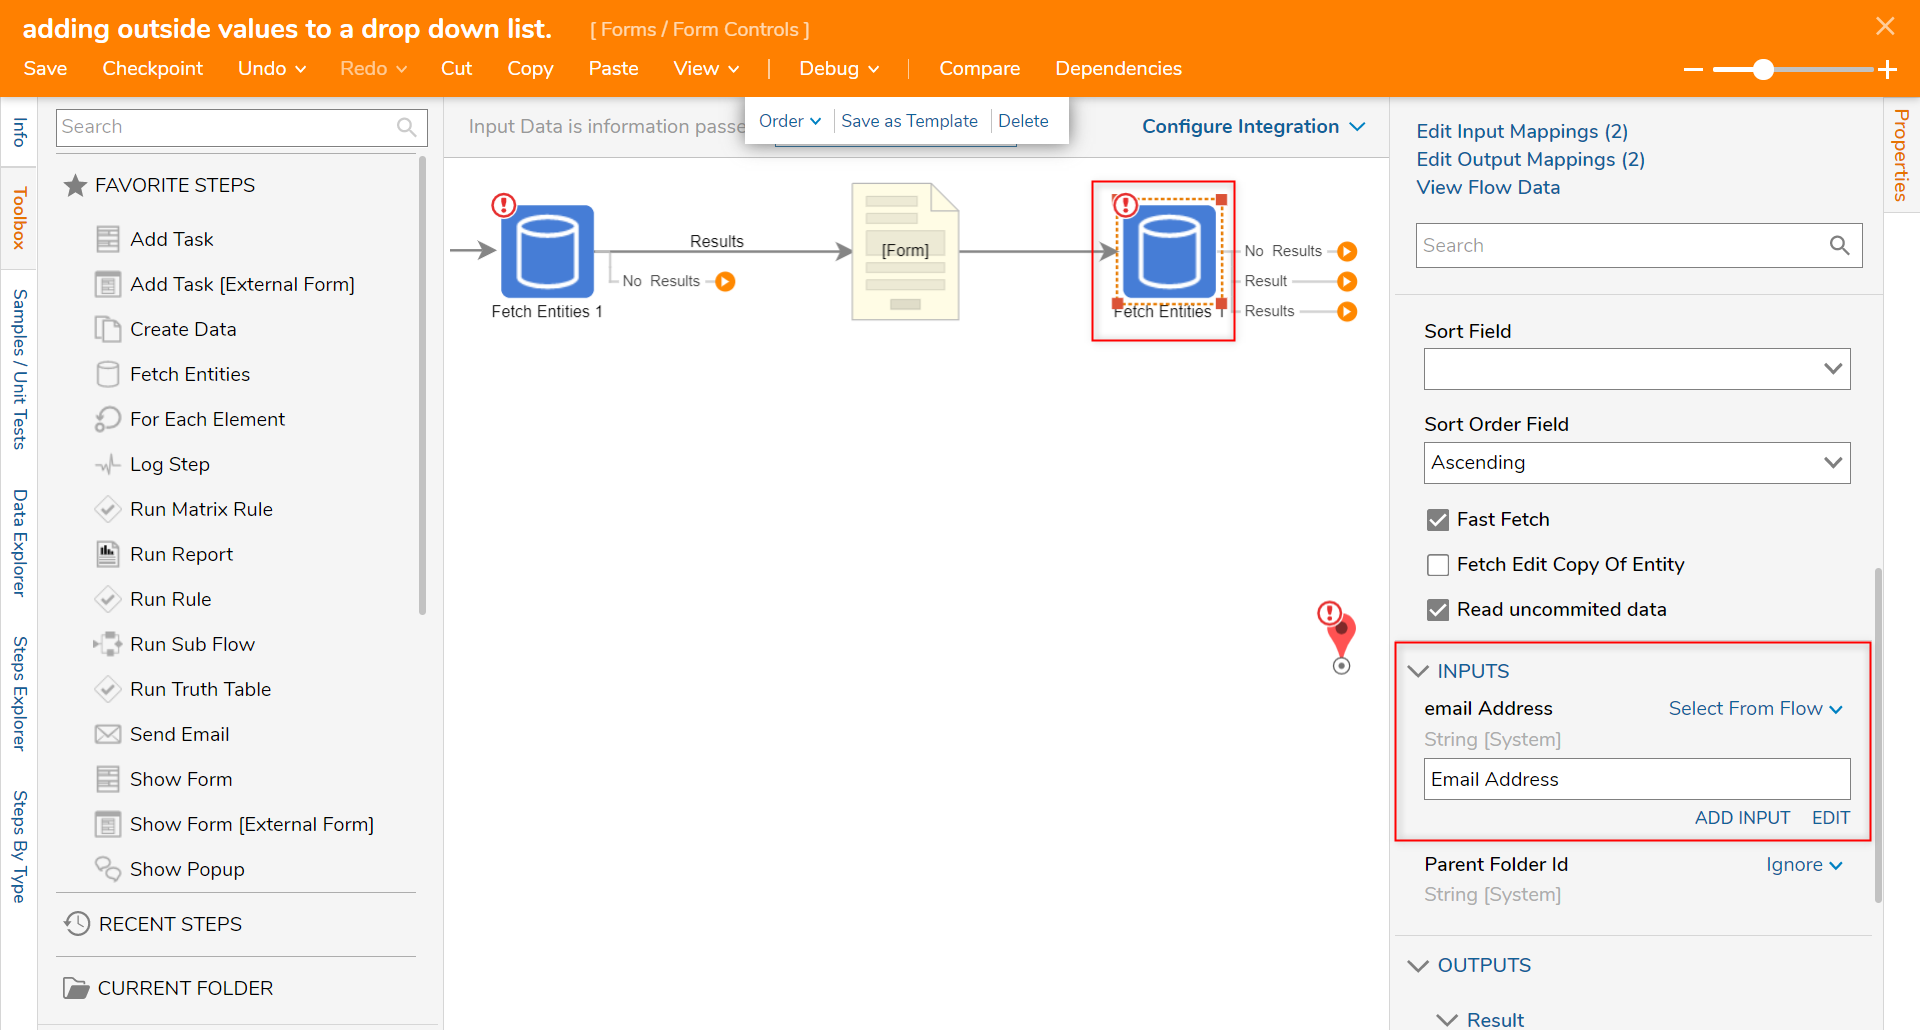
- Next, add another Fetch Entities step configured with Account as the Type Name.
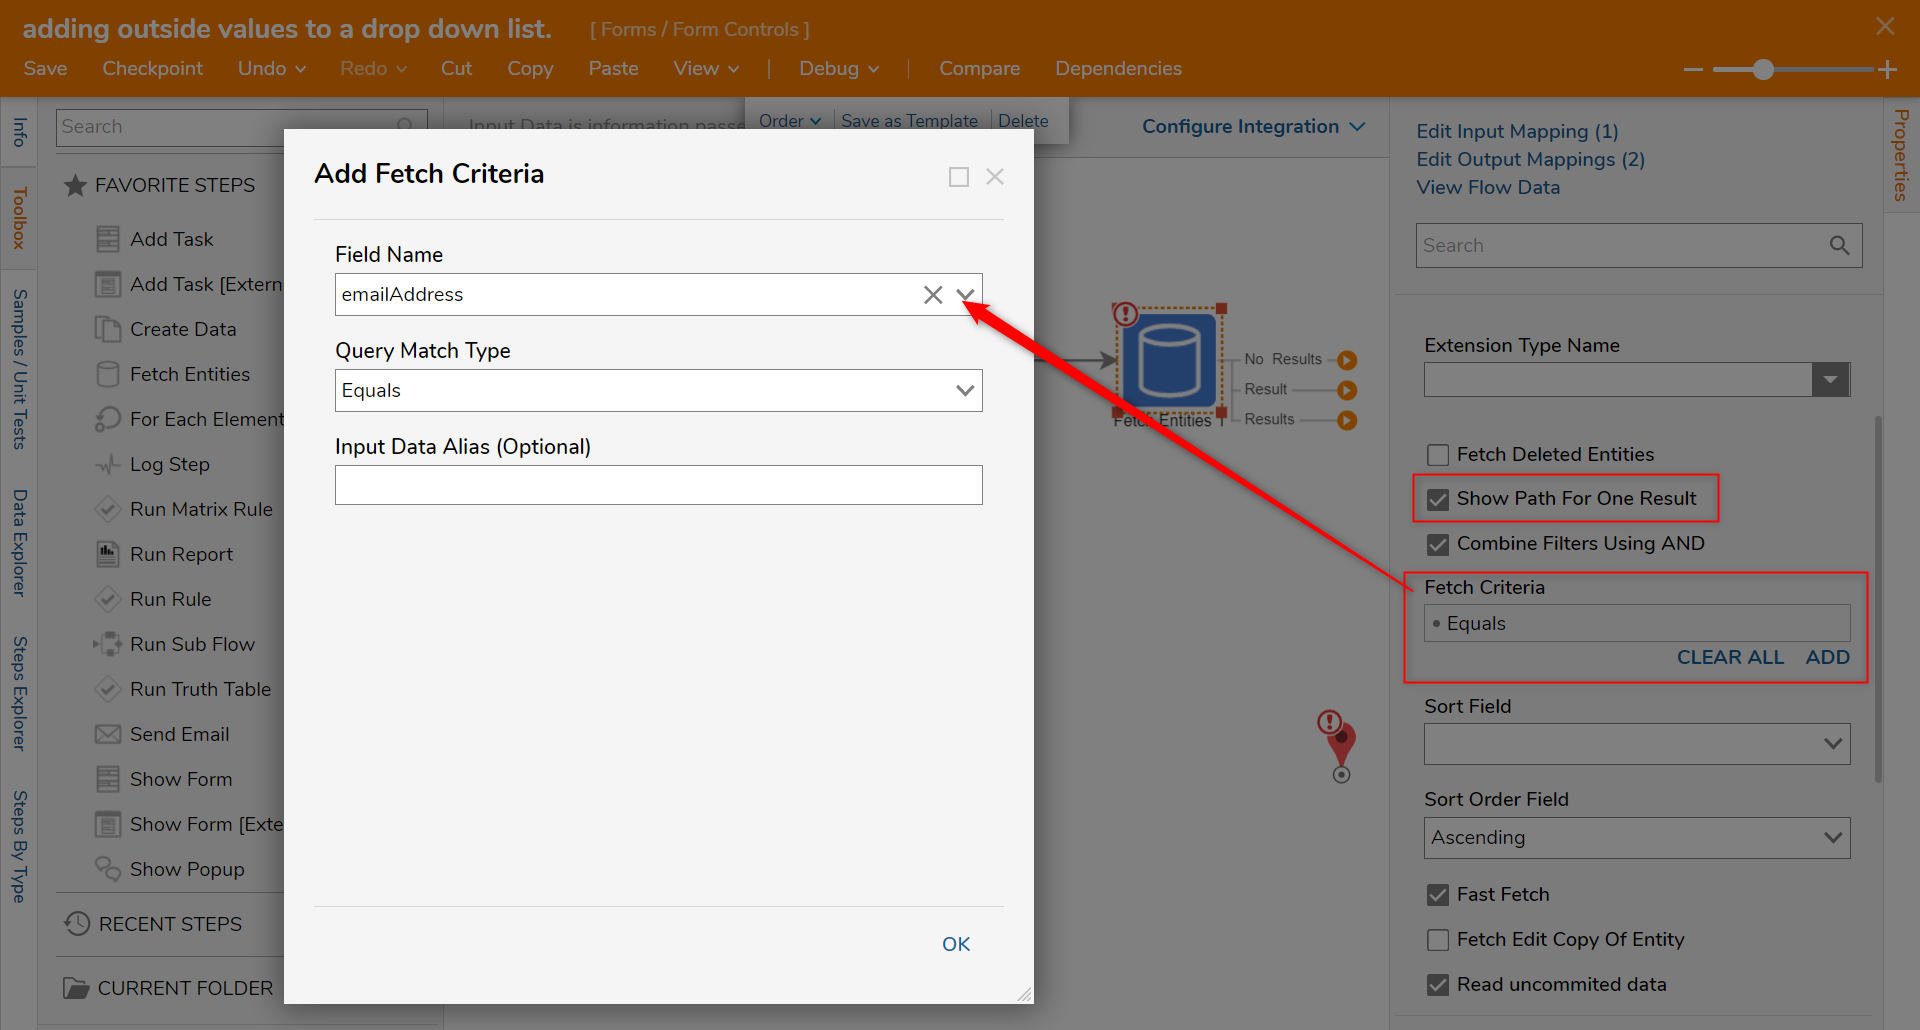
- Enable the Show Path For One Result boolean.
- Locate the Fetch Criteria selector then click ADD.
- In the Add Fetch Criteria window, select emailAddress from the Field Name menu. Click OK.
- Navigate to INPUTS > email Address and change the mapping to Select From Flow then select Email Address.
- Next, add two Create Data steps to the workspace and connect one to the single Result path from the Fetch Entities step.
- In the Properties panel of this Create Data step, locate DATA > Data to Create click SHOW EDITOR.
- In the Data to Create window, add SelectedAccount with an Account type. Click SAVE, then close.
- Next, change the input mapping on the Selected Account input to Select From Flow and select EntityResult.
- Then, connect the second Create Data step to the No Results path of the second Fetch Entities step.
- In the Properties panel > INPUTS > Selected Account, change the input mapping to Build Data.
- When the Properties option appears, click the pencil icon and locate and select EmailAddress. Click OK.
.png)
- Then, change the EmailAddress input mapping to Select From Flow and select the Email Address string.
- Then, connect the Create Data outcomes to the End step.


.png)
Debug
- Click Debug in the top bar; this will automatically save the Flow.
- In the Debugger, click START DEBUGGING.
- Select an existing email address and observe the Flow run successfully.
- Create a new session and attempt to add a new drop-down list value and after the Flow completes, click View Inputs and Outputs on the Create Data step and notice the new input information.

Was this article helpful?